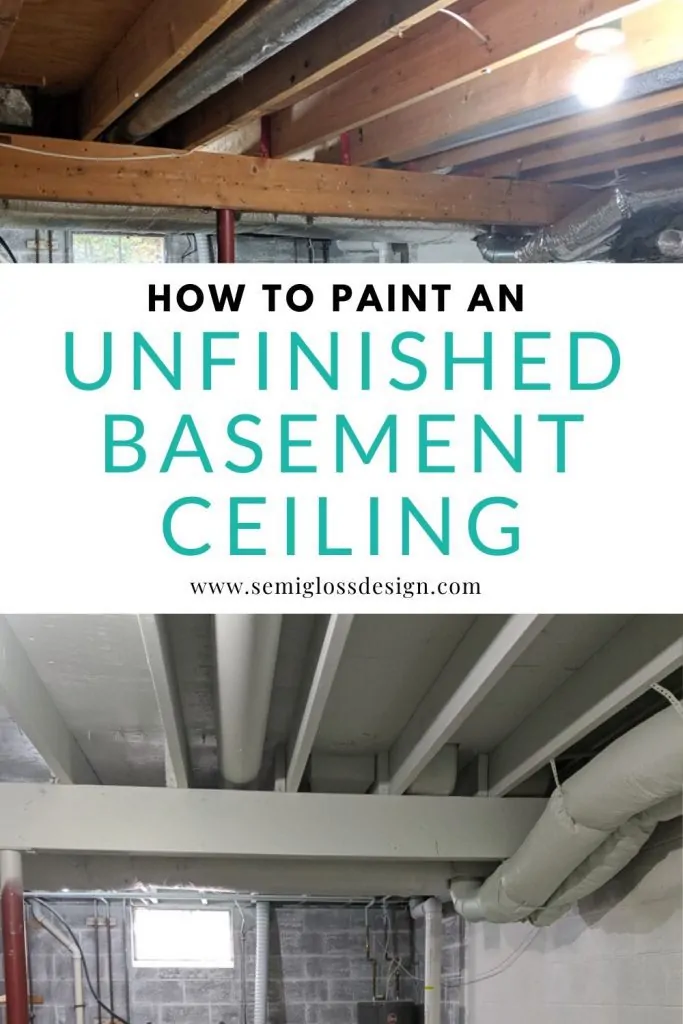
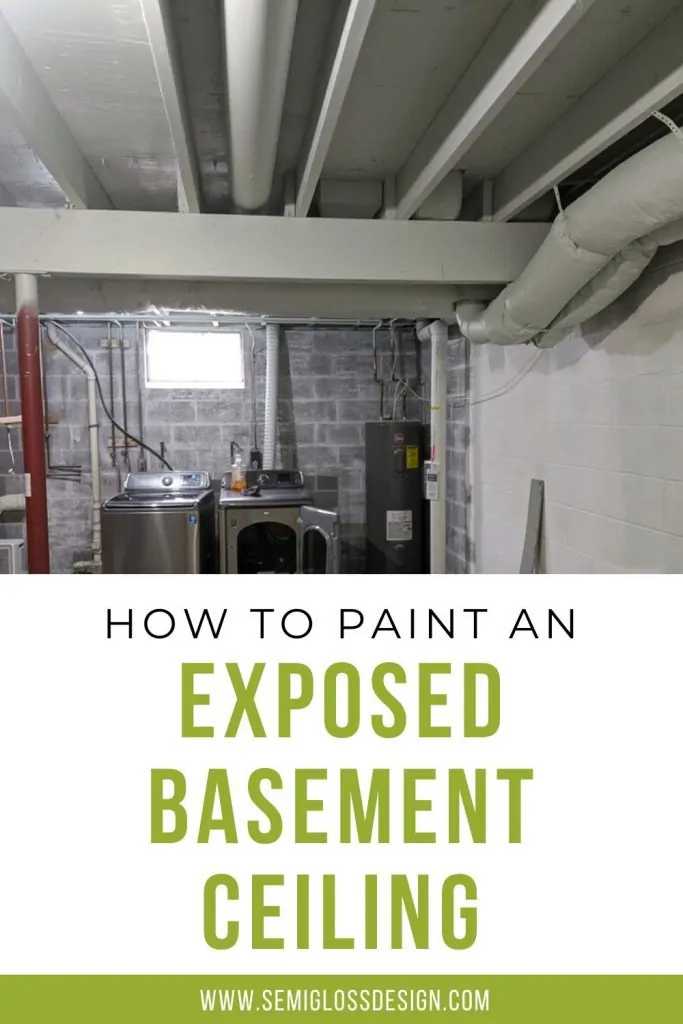
How to Paint an Unfinished Basement Ceiling
Painting an unfinished basement ceiling is a great way to make a short ceiling look higher! Learn how to paint an unfinished basement ceiling.
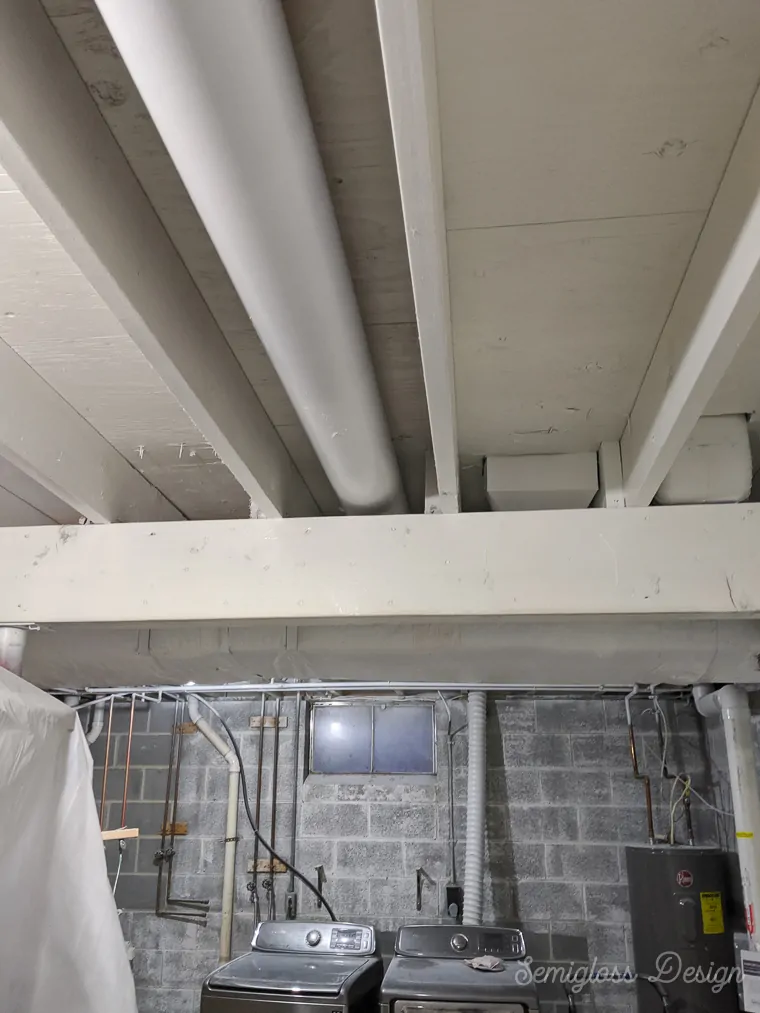
Over the weekend, we painted the basement ceiling of my soon-to-be studio space. I’m so excited to share how it turned out! Visually, we gained about a foot of space.
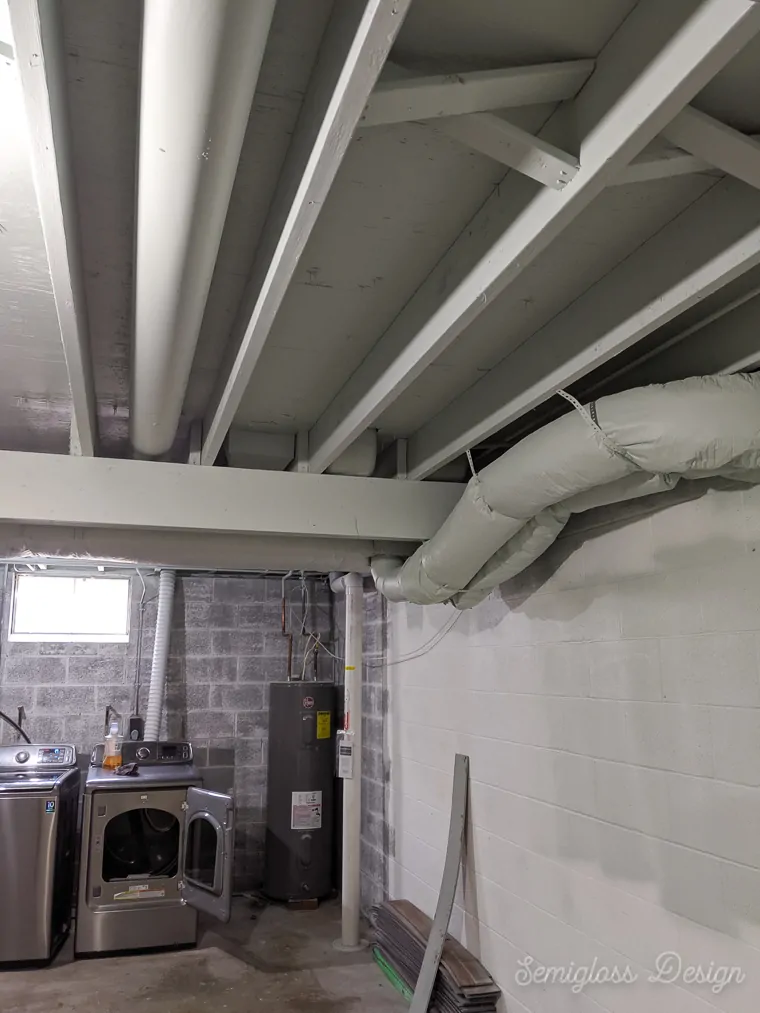
Even though I doubted that paint could make the mismatched pipes and ductwork look good, everything looks amazing.
This post contains affiliate links. By purchasing an item through an affiliate link, I earn a small commission at no extra cost to you. As an Amazon Associate I earn from qualifying purchases.
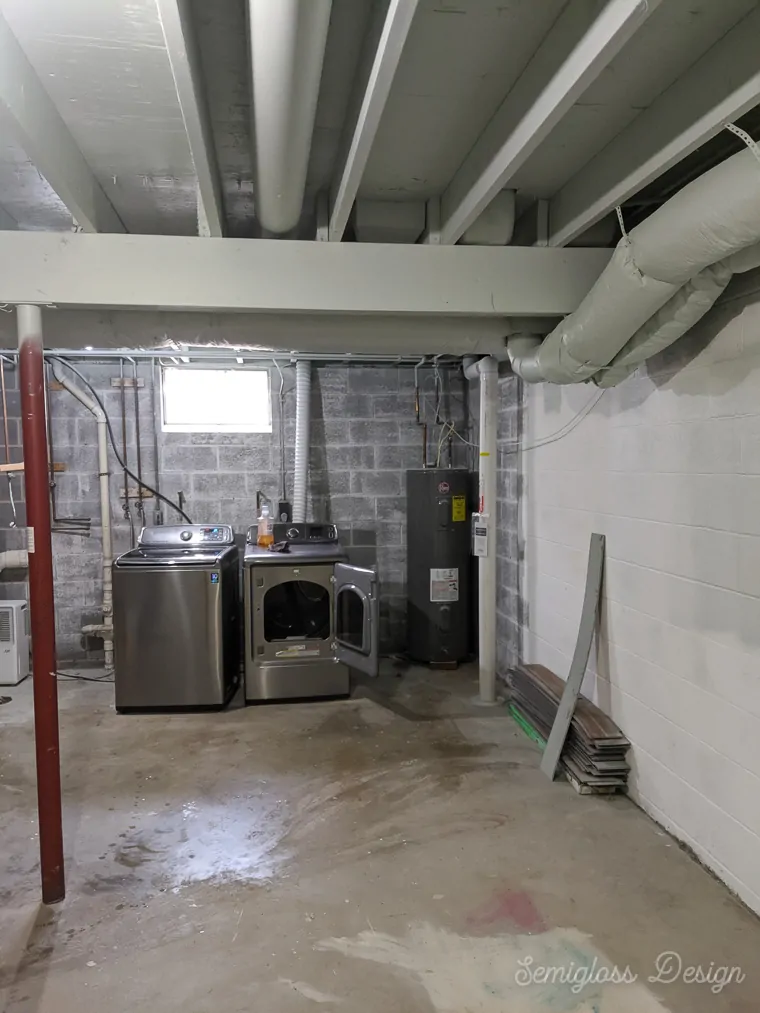
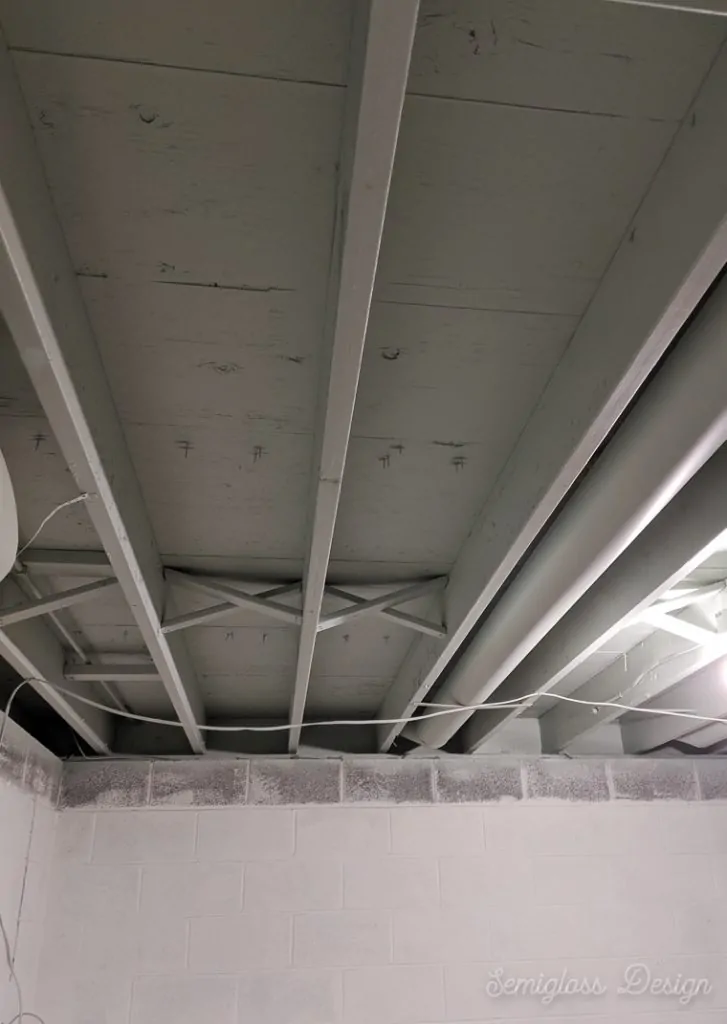
Painting a basement ceiling is a budget-friendly way to disguise pipes and wires. It has a cool, industrial feel and can make your basement feel cleaner and more inviting.
Basement Ceiling Painting FAQs
Why should you paint a basement ceiling?
- It is much faster than drywall. The entire ceiling was painted with a sprayer in about 3 hours (with breaks to let the paint dry). Drywall would have taken days to finish. Plus, drywalling a ceiling involves a lot more work and a lot more neck aches.
- To leave access to pipes. We know we’re not finished with the house, and future pipework will need to be installed. Plus, we have hard water, so we will inevitably need to fix pipes in the future. An exposed ceiling allows us access to those pipes.
- Budget. To be fair, drywall is pretty inexpensive to DIY, but so is painting. If you already own a sprayer, you only need paint and primer.
- Keep away unwanted guests. In my post, I detailed our pest problem about removing insulation, but it was also a consideration when deciding to spray the ceiling. Exposed rafters leave nowhere for pests to live.
- Looks cool. I like how the exposed beams and pipes give the space a slightly industrial feel.
- Gain visual height. Our basement walls are 8′ high, which is standard, but the open basement ceiling makes them feel much higher.
What colors should you use to paint a basement ceiling?
You’re only limited by your imagination, really. Most images show white, black, or gray ceilings, but I chose a grayish aqua instead.
Black ceilings are great for hiding everything—it all disappears. But black can make the ceiling feel lower.
White ceilings can make a room feel brighter, but they require more coats of paint and a special primer to prevent knots from turning yellow over time.
Gray seemed like a good compromise. It’s lighter but still hides a lot of the details. Plus, gray covers better than any other color.
And then I came across this article and knew I needed a grayed-out aqua color for my basement ceiling.
I chose Sherwin Williams Sea Salt. If you try to find it in the paint rack, it’s with the gray section, not the aqua or green section.
Having trouble picking a paint color? Get paint samples mailed to you instead of trying to pick them out in the store!
Keep Track of Your Paint Colors!
What kind of paint should you use on an exposed basement ceiling?
Latex paint is great for painting a ceiling. Since we painted the wood a lighter color, we started with a primer.
This ensures the paint adheres well to various surfaces, such as ductwork, wooden rafters, pipes, and wires.
We chose an eggshell finish, but flat would work as well. Paint with a higher sheen will show every flaw on the surface, and believe me, there are a ton of flaws.
The exact paint we used was the Sherwin-Williams HGTV paint from Lowe’s. We used the Showcase line. It’s my favorite inexpensive paint.
How much does it cost to paint an exposed basement ceiling?
We spent about $575 total to paint our basement ceiling. Here’s a detailed list of what we bought and spent:
- Paint sprayer: $300**
- Primer: $84*
- Paint: $150
- Drop cloths: $12
- Paint respirator: $30
*Buying paint and primer in 5-gallon buckets saved money and time. Plus, we still have some left for future projects.
**The sprayer will also be used for future projects.
Although we already own a smaller sprayer, we bought a bigger one to tackle the ceiling. Holding a bucket of paint above our heads didn’t sound fun, and neither did having to refill it every few minutes.
The bigger sprayer was worth every penny.
Looking for places to order paint from your home?
Can you paint pipes and ductwork in a basement?
Yes! Painting pipes and ductwork in a basement is a great way to make them disappear visually. Make sure you use a primer so the paint sticks.
We had a variety of materials: copper pipes, PVC pipes, softer pipes, ducts, and metal ductwork. And the paint covered all the surfaces, making the whole space look better.
See the finished craft room here!
How to Paint an Unfinished Basement Ceiling
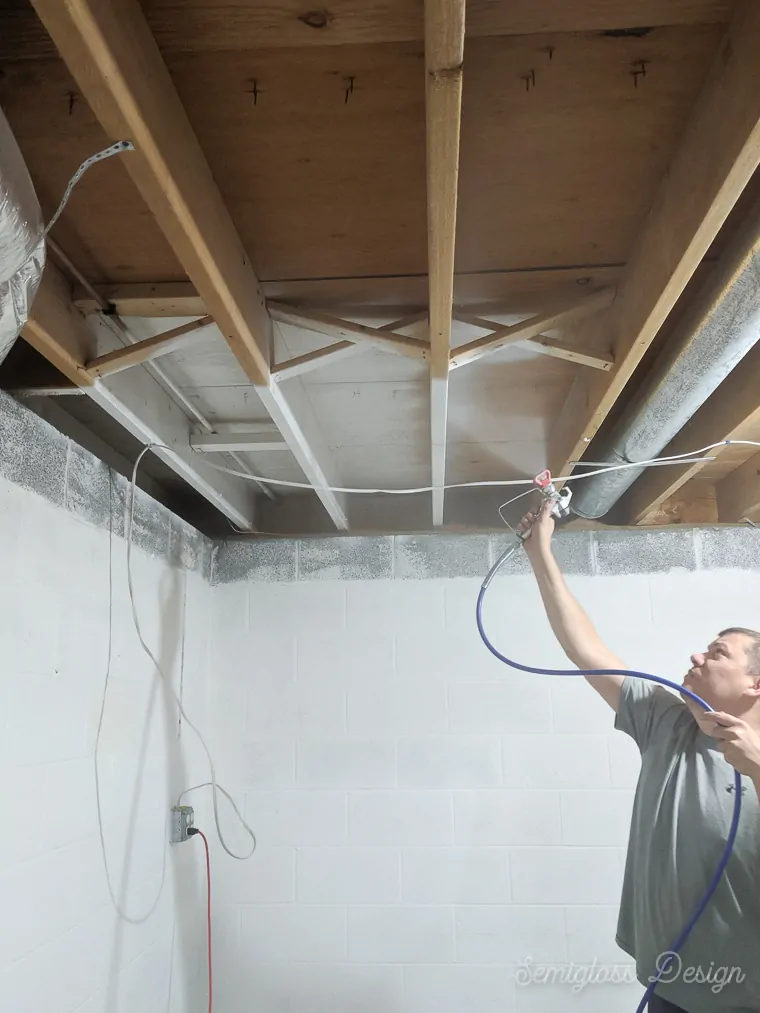
Full disclosure: my husband did 100% of the work on this because, as it turns out, spraying is a one-person job. We typically work together, but there was not much to help him with.
Supplies Needed:
- Paint sprayer
- Primer
- Paint (we chose an eggshell finish)
- Plastic drop cloths
- Painter’s tape
- Protection (painter’s coveralls, goggles, gloves, respirator)
Prep Basement Ceiling for Paint
We had already removed the insulation from the ceiling in preparation for this project, but we still had to clean it and protect everything from paint overspray.
Cleaning a Basement Ceiling
- Start by cleaning the ceiling with a broom or brush. This is a good time to find any hidden insulation you missed.
- You can also use a ShopVac. I often use a vacuum to clean cobwebs, and it works wonders.
- Another option is to use an air compressor with a blow sprayer attachment to spray away the dust. This worked the best, but it made a huge mess. It really worked well for cleaning the spaces above the cinder block walls.
- Sweep up all the debris and dispose of it. (I always clean as I go, despite knowing that we will be making more mess. It makes my life – and anxiety – better.)

Get my DIY freebies
All of My DIY Printables in One Place
Sign up for my newsletter and get access to my library of free printable resources and building plans.
Protecting Everything from Overspray
Now comes the part that makes spraying sound super hard and time-intensive.
Well, guess what? We did it half-assed, and it still worked, so don’t stress too much here. Besides, paint overspray is pretty easy to clean up.
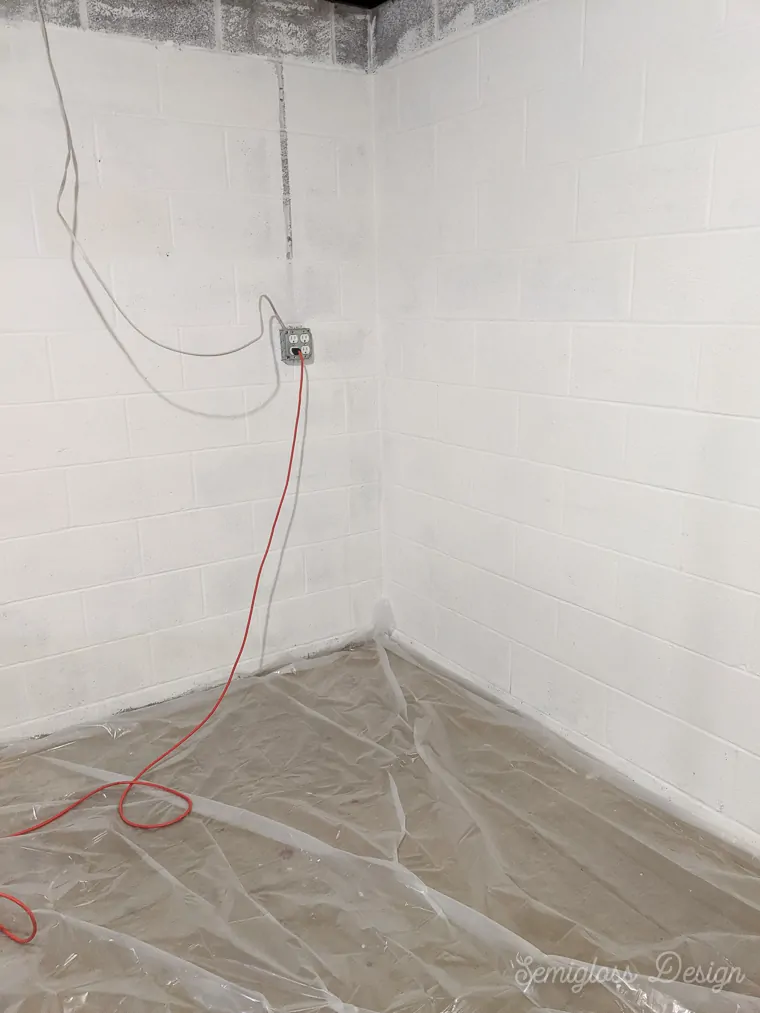
- Remove everything unnecessary from the room.
- Tarp everything you can’t remove from the room.
- Tarp the floor. If you’re worried about slipping, you could also use contractor’s paper. This is probably a good idea if you have nice flooring.
- Use tape to secure tarps if you need to. (We haven’t finished our walls yet, so we didn’t worry about overspray on the walls. Protect your walls if they’re finished.)
- Be sure to tarp off the window and shut all the doors in the room.
- You might also want to wrap turned-off lights in plastic bags. (You will need external lighting…) We plan on removing these lights and installing more, so we sprayed around them for now.
Protecting Yourself from Overspray
We are not always the best at using safety equipment (do as we say, not as we do), but it was necessary to paint a ceiling because of GRAVITY.
At a minimum, you need goggles and probably someone to clean them for you occasionally.
We also used a respirator because breathing in paint droplets is probably not deadly, but it’s probably not great for you either. Plus, the primer smelled much stronger than the paint.
You also need gloves to protect your hands because they will end up COVERED in paint.
Wear painter’s coveralls to protect your clothes. It also makes it easy to take them off between coats of paint, so you’re not walking around naked.
We didn’t buy the shoe protectors, but I wish we had. If you don’t buy them either, at least wear shoes that are easy to slip on and off. Even the dried paint gets tracked around on the bottom of your shoes.
Priming the Basement Rafters
Note: this isn’t a full guide to using this sprayer. That deserves its own post.
Primer is necessary to make the paint stick to all the different surfaces on a basement ceiling, like wood, pipes, and ductwork. It also helps you get the dark wood to a lighter color faster.
If you are painting your ceiling white, you will need to seal the wood using a stronger primer. Shellac-based primer is the only primer that works for sealing wood tannins.
Without it, the knots will show through, as will the yellow tannins from the pinewood used to frame a ceiling. You need ammonia for clean-up.
I would still prime everything for a black ceiling, but tint the primer gray for better coverage.
We sprayed the primer on it, and it was immediately brighter and cleaner. Move quickly as you spray. If you stay in one place too long, you get drips.
We sprayed three coats of primer on the ceiling to make sure that we got full coverage.
Let the paint dry between each coat.
Painting an Exposed Basement Ceiling
After priming, it’s time to paint. The wood rafters and beams soaked up a lot of the primer, so this part requires much less paint.
Spray in the same manner as before. We used three coats of paint, but it probably wasn’t necessary.
I need to return with a paintbrush and get the spots around the lights when we remove them.
Tips for Spraying Your Basement Ceiling
- Your first coat may be drippy, but it gets better with practice. You might want to go behind with a paintbrush to smooth the drips.
- Spray at full throttle to go fast or lower the spray to go slower.
- When you spray, move your arm, not your wrist.
- To spray around the edges, you’ll need to stand on a step ladder and shove the sprayer into the small area.
- As you work, make sure that everything is still tarped off.
- You may need someone to wash your goggles for you as you go.
- A flexible hose will make the job less frustrating. The hose that came with the sprayer tends to tangle.
- Each coat took about 30 minutes to dry, and the drying time was about 1 hour for us (time may vary by location).
- You may want a wire brush to clean the sprayer nozzle. We also used one of these brushes to clean the nozzle’s smaller parts.
- Despite wearing protective gear, you’ll still be covered in paint freckles. A sugar scrub is nice for removing all the paint from your skin.
Here’s how it looks after installing the drywall.

Be sure to check out the finished craft room!
You might also like:
- Tips for Framing Walls
- How to Paint a Room for Beginners
- How to Stain Concrete
- How to Clean Dried Paint Brushes
- Choosing Lighting for a Basement
- How to Remove a Popcorn Ceiling
Pin for Later!

Emy is a vintage obsessed mama of 2 DIYer who loves sharing affordable solutions for common home problems. You don’t need a giant budget to create a lovely home. Read more…
What did you do for insulation after the painting was finished?
We removed the insulation and don’t plan on replacing it. I haven’t noticed a difference without it.
What square footage was your basement ceiling that you painted? Getting it done in just a weekend seems intriguing.
The room we painted in our basement was about 12′ x 25′. It went much faster than we thought.
What paint sprayer did you use? Do you by chance have a link to it?
It’s in the supply list near the top of the post.
I only see the small sprayer link not the larger one you said you bought. Can you please post the $300 one? Thanks!
Here’s a link: https://amzn.to/2PPTVHU (aff link)
What kind of paint did you use to cover both wood and the ducts, etc?
We painted everything with primer first. Primer helps paint stick. Then we used regular latex paint.
Can you not use paint with primer in it instead of primer alone then painting?
Hi Linda,
I use primer first because it’s much cheaper than paint, so it makes painting a large space less expensive in the long run. If you’re painting it white or another light color, white primer helps you cover the dark wood faster than paint alone would. I like to save money and time where I can when painting.
Hope that helps,
Emy
Did you paint over electrical cords in ceiling?
Yes, everything was painted over including electrical wires.
Did you have any concerns about labelling certain pipes or wires so as to distinguish between gas pipes and plain water pipes for instance?
I wasn’t concerned about labeling anything, but we don’t have gas lines. If we did, I would label them with a small tag. Do what makes you comfortable. 🙂
Thank you soooooo much showing us and telling us exactly what needs to be done in our basement! We removed all the nasty insulation that mice loved to make a nice home! Omg! Sooo gross, but now that we have gutted everything, I want to make sure everything is super clean before painting.
We do have a commercial paint sprayer and I’m glad that you said you painted over copper, pvc and electrical! What a relief.
Thanks again!
After reading this, my worries have subsided.
Can’t wait to get this done, we will have so much more room!
I’m glad you love it. After a few months of living with it, I love it just as much as I did when we first painted.
I have a very old house, and sometimes when the basement lights are on you can see the light from the rooms above. Did you have any issues with the spray spraying through gaps in the wood to the floor above?
We have a subfloor between the joists and the flooring, so the paint did not get through. I would be concerned about paint coming through those gaps. If there aren’t a lot of them, I would use painter’s tape to prevent the paint from coming through.
What color did you use for the walls? and what did you with flooring?
We painted the walls Sherwin Williams High Reflective white. The floors were resurfaced with fresh concrete and stained with a Kemiko acid stain.
Thanks for the great article! We did our basement gym and your tips were fantastic! We caught a break on the paint sprayer – Home Depot had one on weekly special, discounted down to $204. I was a little worried about the ductwork, but your tip to prime first worked great. So happy with how it turned out. Thank you!
Super excited and have saved your article. Just removed our drop ceiling today and wow what a difference. Love the idea of grey 🙂 then we can do white walls to keep it light – we have no windows in this room – tx again for the inspiration
Hi – what do you think about just priming the sealing? No paint afterwards. I did this with our gazebo outside and it looks great.
You might have to paint it at a later point. Sometimes primer yellows over time. Keep an eye on it. If it looks great, leave it. 🙂
We have an old basement that is too short to put a drywall ceiling on, so we were thinking about this idea. The problem is that the electrical wires are all over the place. I’m afraid it wouldn’t look good or that the paint might crack or peel and pieces would fall everywhere…
There are electrical wires in our basement ceiling as well. They don’t get touched or move on their own, so no cracking or peeling occurs. We also primed everything so that the paint sticks.
Thanks for this helpful post! You mentioned in another comment that your space was 12’x25′ – how many gallons of paint did you use to do you three coats?
We bought a 5-gallon bucket of paint and only used about 3 gallons.
It looks really good. I have a short basement myself. Looking to make the space more comfy for at least a small lounge spot. What’s the floor to ceiling height in your basement? Under the beam?
The basement has 8-foot ceilings. The height under the beam is about 7′ though. The other part of the basement has drop ceilings that feel really low. When I’m on the treadmill, it feels like I’m going to hit my head. The open ceiling makes it feel much taller and I can’t wait to remove the drop ceilings and paint it too.
Instead of using primer and top coats of paint, try using a water based dryfall paint. The advantage of this paint is that the overspray will be dry by the time it hits the floor, therefore making your clean up much easier. This paint can be tinted to light colors. Sherwin Williams sells dryfall paint in 5 gallon buckets. You will probably only get 75 sq ft/gallon from this paint but I think it is much easier to apply. In my life I have sprayed thousands of gallons of this material. I was a professional painter for 40 years. When figuring your sq footage you have to calculate the floor joists sq footage and add that to your floor footage. Also water based dryfall can be applied to all galvanized surfaces without using a primer.
Thank you so much for this information! We’re about to do the other side of our basement and this paint sounds like it will save us a lot of time cleaning up! I can’t wait to try it out.
For the dryfall paint would you still recommend the same spray gun that Emily suggested?
Hi Barbara,
He probably won’t answer this question because he doesn’t get notifications about this. I just bought this paint for the other side of my basement and plan on using my sprayer with it. I’ll write a whole post on it, but it probably won’t be until about March.
Thanks
Emy
Excellent work!
Question for you: what Sherwin-Williams paint did you use? I followed the link, and it shows the Sea Salt color swatch, but not the paint you chose, Cashmere, Superpaint, Emerald, etc. I assume since you don’t need abrasion resistance, you don’t need the most expensive formula. Thanks
We actually used the Sherwin Williams HGTV paint line at Lowes. We used the Showcase paint. It’s cheaper but really good quality.
How do you have no wires? We have tons of electrical wire on our basement ceiling. Can I paint that or would we have to rip it all down and re install?
There are wires in the back of the room towards the window. We redid all of the electrical in this room after painting it. If I had to do it again, I would do the electrical work first and then paint. The paint sticks to wires, conduit, pipes, and ducts just fine.
What were your total costs per square foot of ceiling?
It’s very possible my math is wrong, but I think it was about $0.77 a square foot. I didn’t count the purchase of the paint sprayer in that. I also didn’t account for only using about 2 gallons of paint out of the 5 gallon buckets of primer and paint (I counted the whole thing.)
Hi the link for the type of primer you used isn’t working. What primer did you use?
It’s called 123 Primer by Zinnser.
I am going to convert my basement to an apartment to rent out, maybe Airbnb , maybe long term. Is it okay to paint the insulation in the ceiling? I don’t have any pest issues. Or do I not need the insulation because it will be a finished space with heating and air now? What about sound absorption that insulation might provide? Thank you for this article and your thoughts!
I’m not sure about painting insulation. While you probably can paint it, I’m not sure that you should. I would be worried about trapping moisture and causing mold issues. Insulation helps with sound absorption, so unless your upstairs floors are carpeted, this might not be the best technique for you.
I see you spray painted what I call “plastic bag flexible ductwork.” Since the ducts are meant to be flexible, has the paint continued to adhere over time? I would like our laundry room ceiling painted with its assorted pipes and ductwork, but my husband says the “plastic bag flexible ductwork” cannot be painted.
Hi Karen,
We sold that house about a year ago, but at that time, there was no paint chipping or peeling away. We primed it, so it stuck really well. I’m not sure how much the vents actually move to cause any cracking, but I’m just a DIYer who likes to paint anything that sits still. I wish I had a better answer. For what it’s worth, I’m good friends with someone who owns an HVAC company and they weren’t horrified when they saw what we had done.