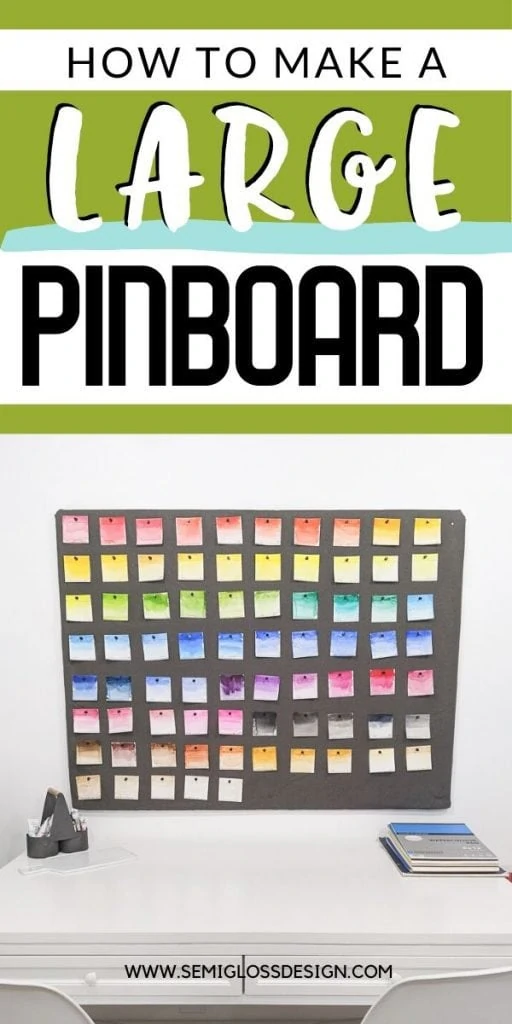
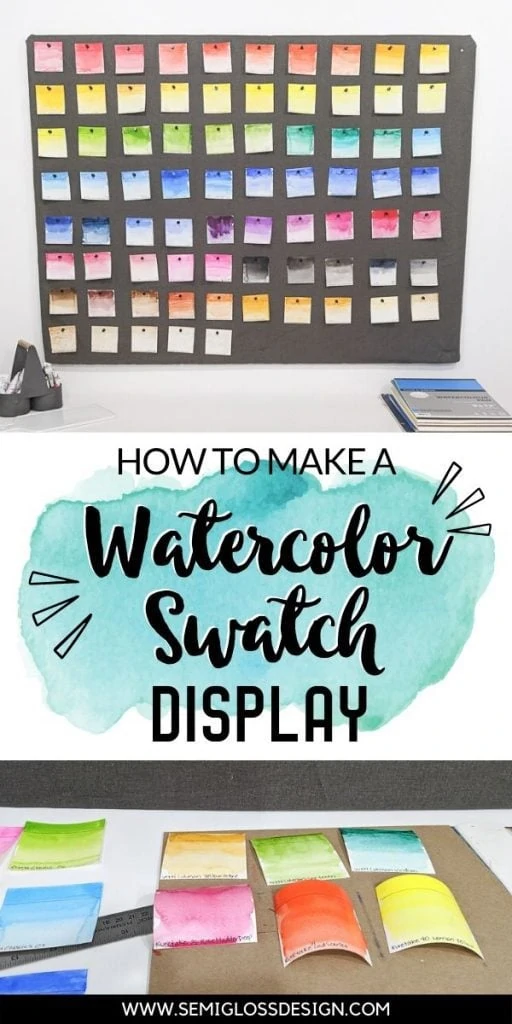
DIY Pinboard with Watercolor Swatches
This DIY pinboard is made from affordable foam board insulation, which comes in 4′ x 8′ sheets at hardware stores. It’s so easy to make a giant pinboard with this easy to find material. Plus, it’s so lightweight and easy to hang!
This post contains affiliate links. By purchasing an item through an affiliate link, I earn a small commission at no extra cost to you. As an Amazon Associate I earn from qualifying purchases.
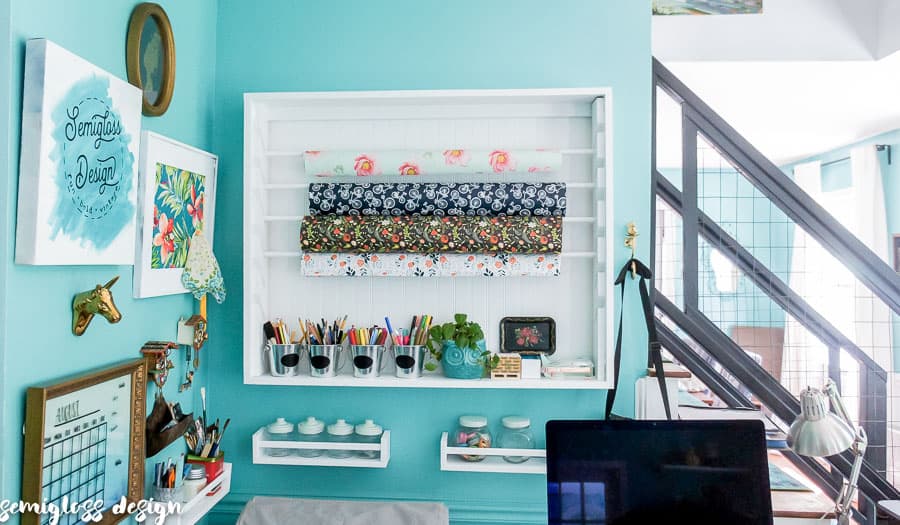
I’m in the finishing stages of my craft room and needed a focal point by my art desk. After a lot of thought, I came up with this concept which is also functional.
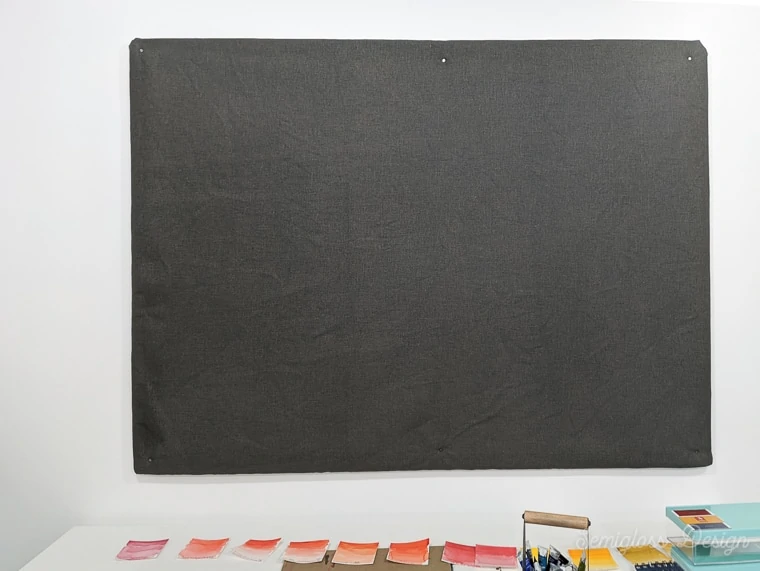
This pinboard is filled with my watercolor swatches, which allows me see all of my colors at a glance. It should help with future watercolor purchases because now I can see which colors I already own a ton of.
Best of all, my giant pinboard also serves as a large piece of art and I’m super excited to share it.
See the finished craft room here!
How to Make a DIY Pinboard
Supplies Needed:
- Insulation foam board
- Utility knife
- Fabric
- Staple gun
- Nails (make sure they’re longer than the insulation board is thick)
- Cut your insulation foam board to size using a utility knife.

- Iron your fabric.
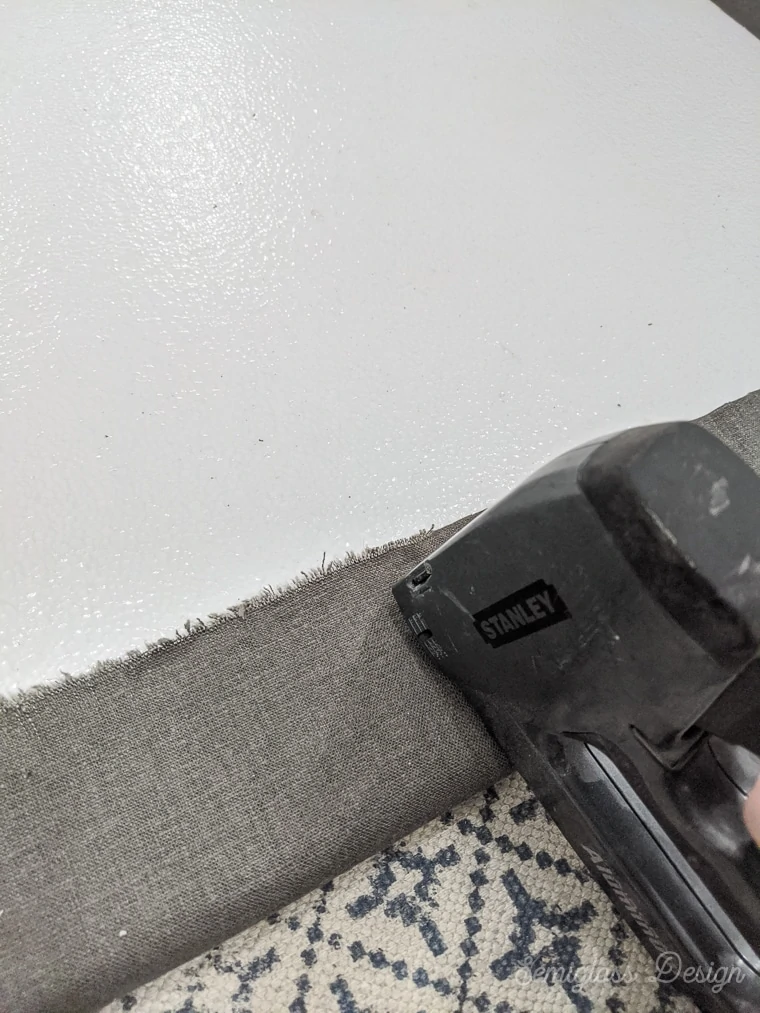
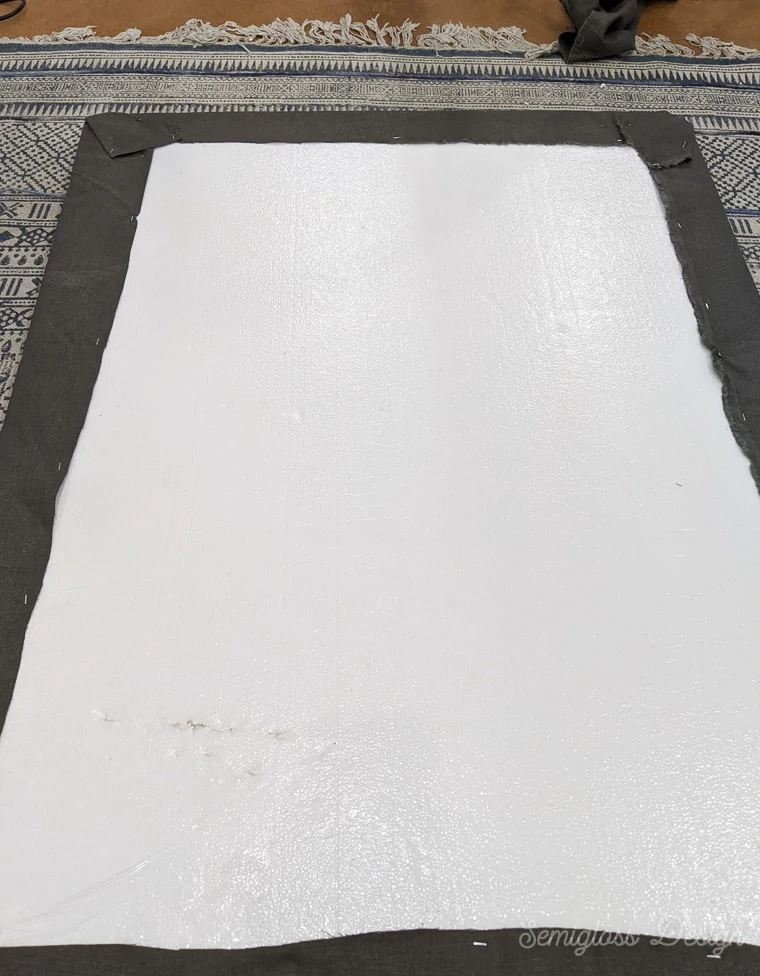
- Lay the fabric right side down.
- Place the insulation board on top of the fabric, leaving about 3″ extra to wrap around the edges.

- Cut away any excess fabric.
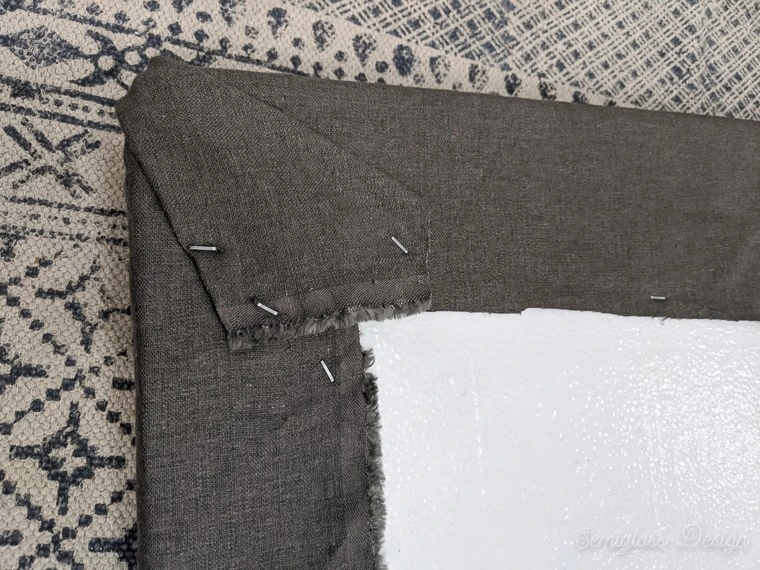
- Wrap fabric and staple, one on each edge, pulling the fabric taut.
- Continue stapling around the edges, keeping the fabric tight.

- Fold the fabric at the corners and staple.


Hanging the DIY Pinboard
Have someone help with this part, since it’s so big.
You don’t want to attach the pinboard with screws because the screws will twist up the fabric and ruin it.
If you plan on hanging heavier objects on the pin board, be sure to attach the pinboard to studs.
- Place the pinboard in place, making sure that it’s level.
- Use nails to attach the pinboard at each corner.
- Add more nails in the top and bottom centers.
How to Make Watercolor Swatches
Supplies Needed:
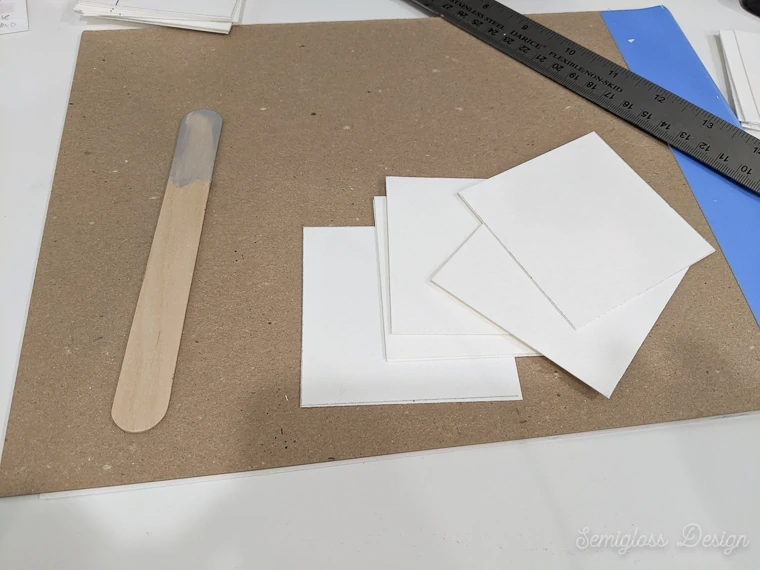
- Watercolor paper (9×12)
- Watercolor paints*
- Paint brush
- Paper cutter
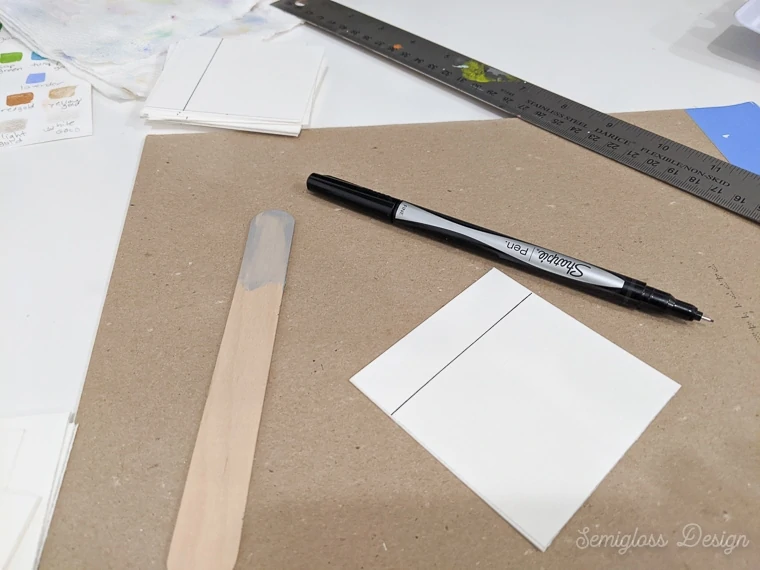
- Waterproof pen
- Tacks
*The whole purpose of this project was for me to be able to see my watercolor paint colors at a glance, so I didn’t buy paint for this project.
If you don’t have watercolors or other paints to use, I really like this set of watercolors. It’s affordable, but the colors are vibrant and beautiful.
Cheaper paints will give you chalky results when the paint dries, so it’s worth buying nicer paints, especially if you love painting.
For reference, I used these brands: Holbein, Windsor and Newton Cotman Series, Kuretake and Daniel Smith.
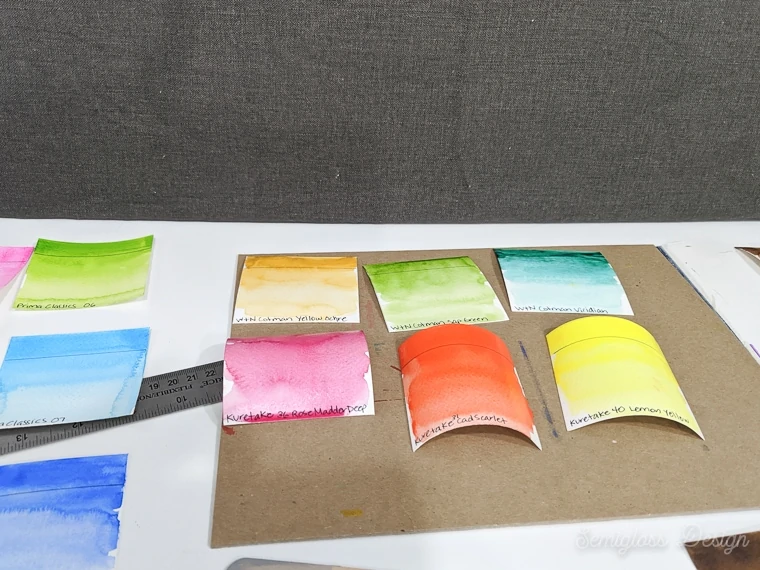
- Cut the watercolor into squares using a paper cutter. Since the paper was 9″ x 12″, I cut the paper into 3″ squares.
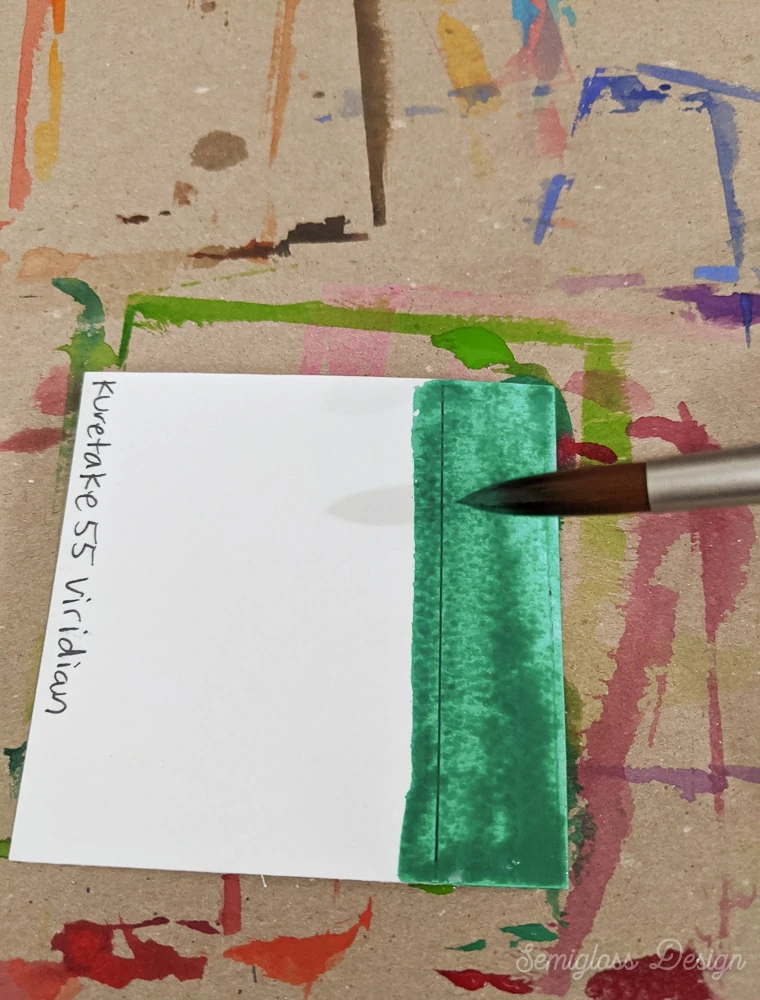
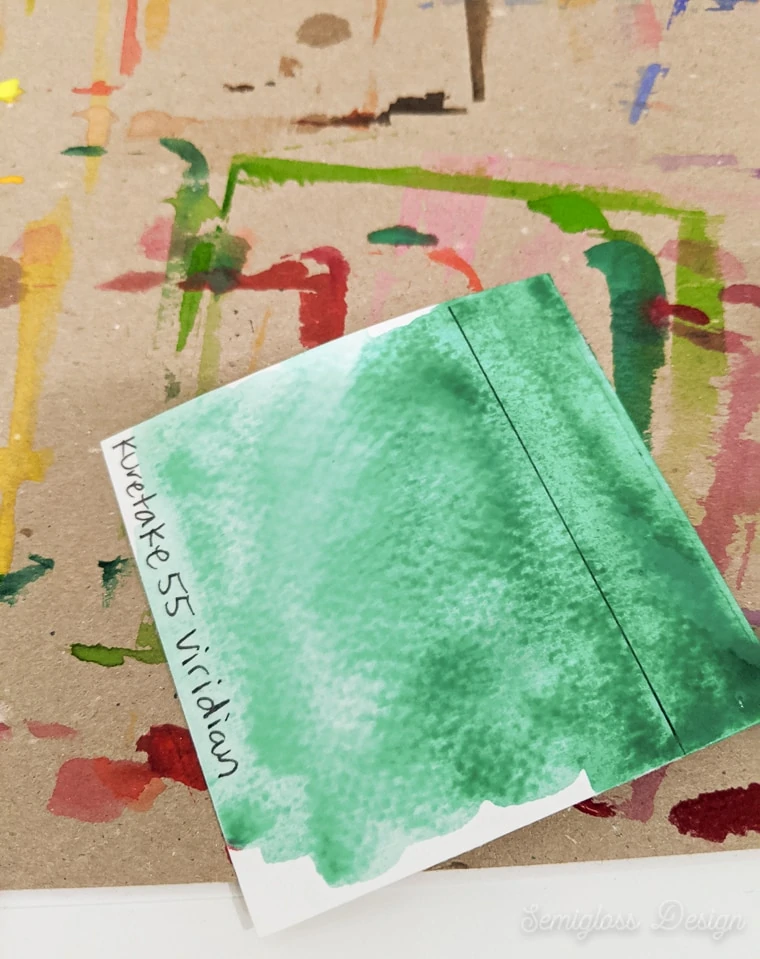
- Use a waterproof pen to draw about an inch from the top of each square. (I used the popsicle stick as a straight edge so I wouldn’t have to measure.) This is to show how transparent the watercolor paint is.
- Use the pen to write each watercolor paint name and brand on the paper. You can use the color codes if available. I also specified tube vs pans for brands that I have both versions.
- Add water to each color. If you’re using a pan set, give it a few minutes for the water to soak in.
- Use a brush to paint the color at the top at the brightest strength possible.

- Add a bit of water to the brush and paint some more, dragging color from the part you already painted.
- Add a bit more water to dilute the paint and fill the card.

- Let the cards dry.
- Use tacks to hang the watercolor swatches in place.


Watercolor Tips
- If you add too much water and it pools up, it can be removed by using a dry brush to soak up the excess paint.
- Mistakes can be removed with a clean paper towel.
- Some watercolor brands and types are brighter than others.
- If you only have a few colors, try mixing your own colors.
- If your paper curls up, let it dry and sit a few heavy books on top of it for a few hours.
You might also like:
Pin for Later!

Emy is a vintage obsessed mama of 2 DIYer who loves sharing affordable solutions for common home problems. You don’t need a giant budget to create a lovely home. Read more…