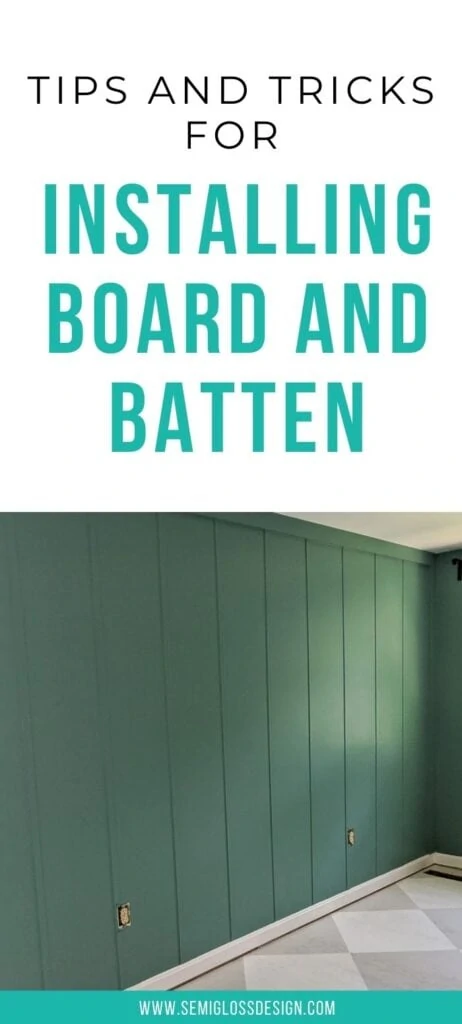
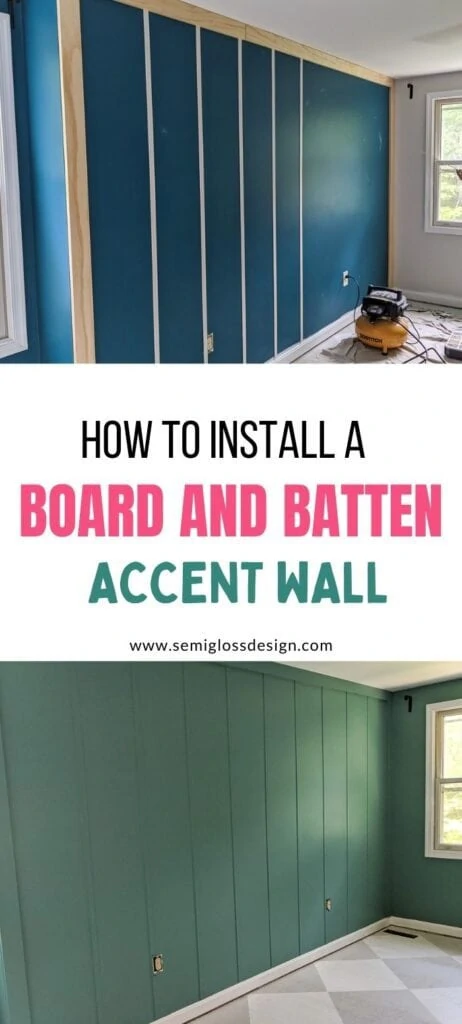
DIY Board and Batten Accent Wall
Learn how to install a DIY board and batten accent wall. Adding board and batten to walls is a simple home improvement project that adds detail to a boring wall.
You might also be interested in learning more about installing shiplap in a bathroom.
This post contains affiliate links. By purchasing an item through an affiliate link, I earn a small commission at no extra cost to you. As an Amazon Associate I earn from qualifying purchases.
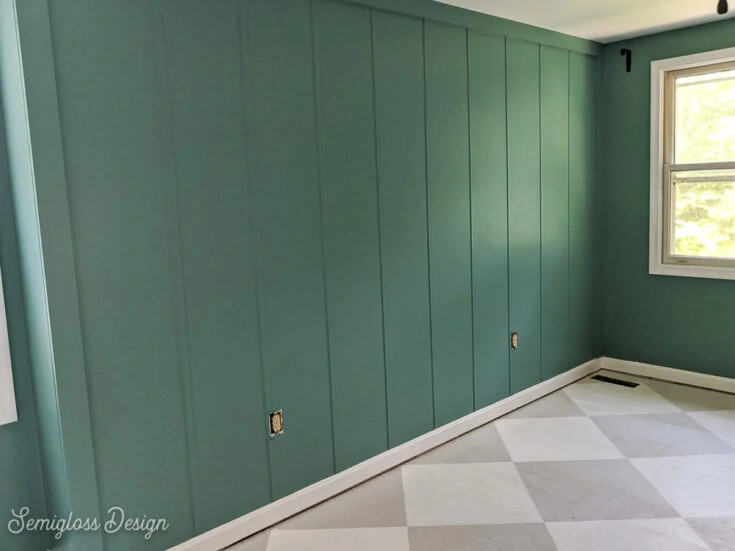
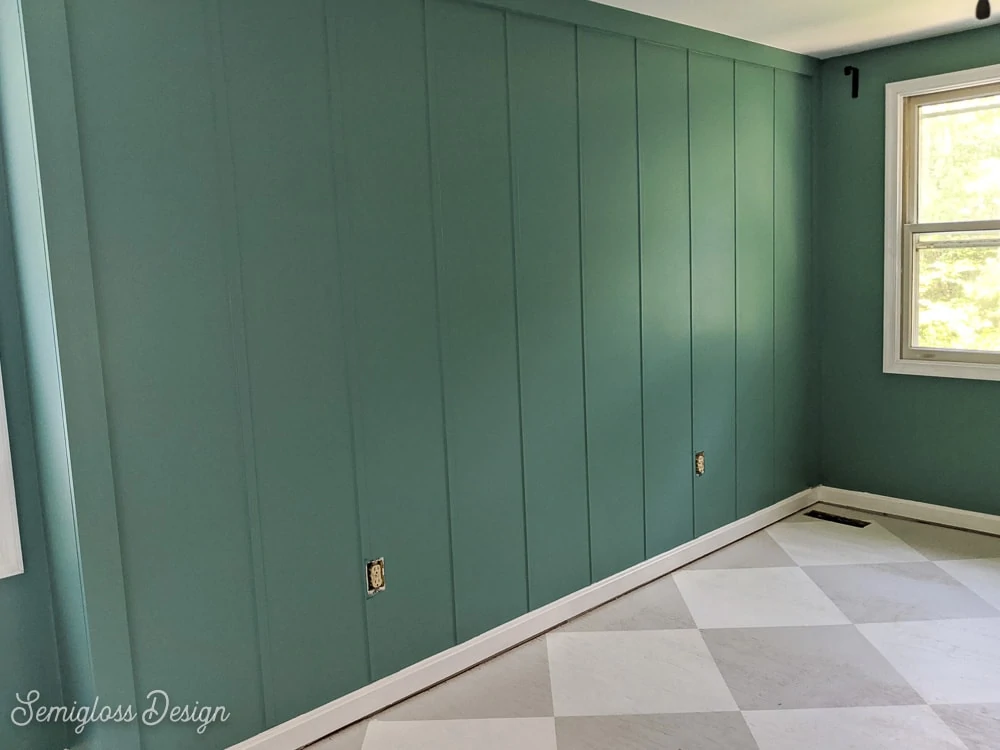
We’re working on a bedroom makeover and we decided to add a board and batten accent wall behind the bed. I made this decision for a few reasons:
- To add detail. This room doesn’t have any special architectural features, so adding trim to a wall helps it feel special.
- To add style. I wanted this room to feel more cozy and I knew that adding trim would help achieve that feeling.
- To add height to a very low ceiling. The vertical stripes on the wall are subtle, but they help draw the eye up, which makes the room feel taller.
Board and Batten FAQs
What is board and batten?
Board and batten is a style for woodwork that consists of vertical wood slats on the wall. Traditionally, a smooth sheet of wood is used behind the slats. DIY versions skip this step if smooth walls already exist.
If you have textured walls, add thin luan to the wall before adding the vertical strips of wood.
What wood do you use for board and batten?
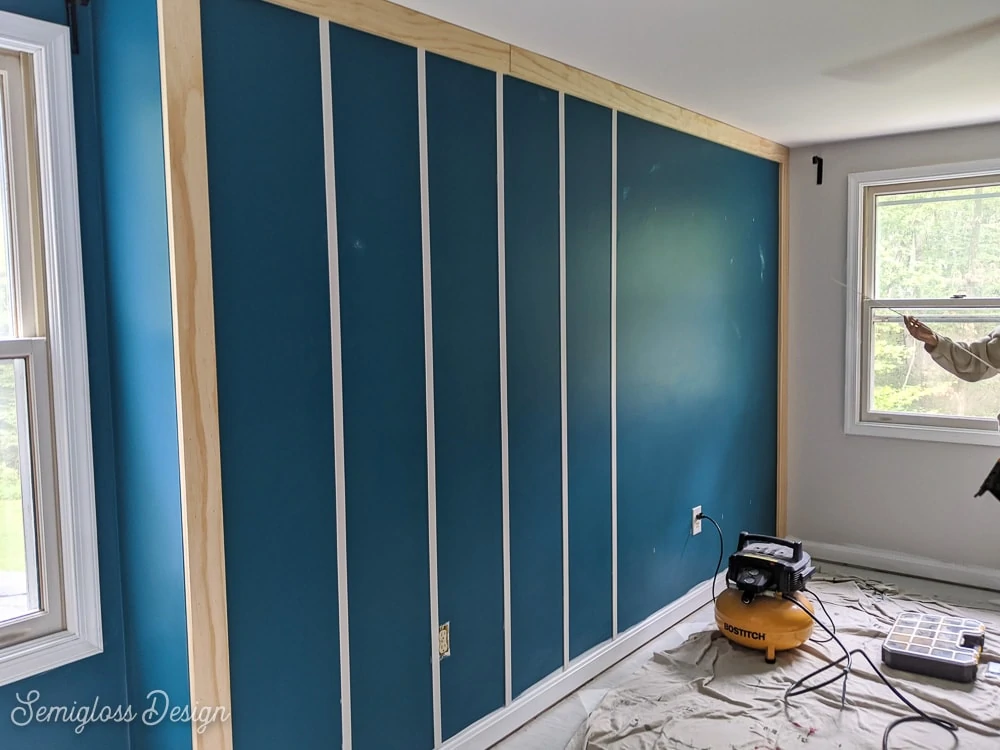
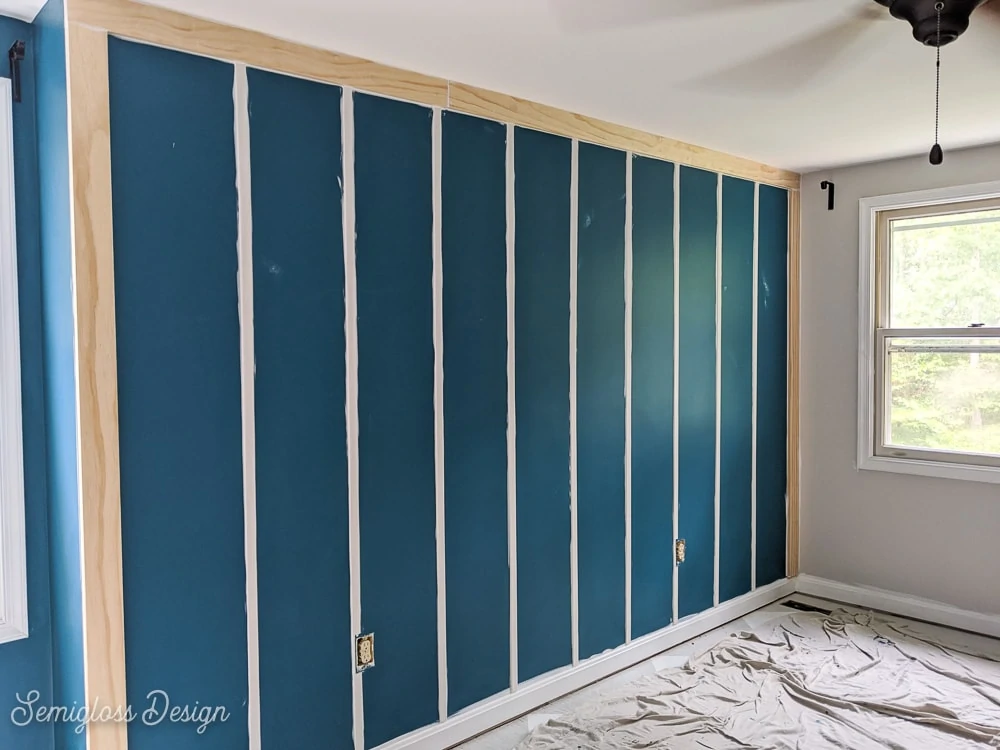
You can use any wood that you want. For this room, I used 1x6s along the sides and tops and used lattice trim for the vertical strips.
You can use MDF but only in rooms without water. I highly recommend against using MDF in a bathroom.
You can also use the cheaper PVC “wood” trim. It’s easier to cut and once it’s caulked and painted, you’ll never know the difference.
Can you use furring strips for DIY board and batten?
Yes, you can use furring strips for board and batten. However, you will need to spend a lot more time picking out furring strips that aren’t bowed. They also need a lot of sanding to be usable.
We used furring strips in our entryway and although they look great, we ended up buying a belt sander to make sanding them easier.
How far apart should board and batten be?
Board and batten can be spaced anywhere between 12″ and 24″. It really depends on your wall and how much math you want to do.
We measured our wall and then figured out an easy division number (is there a number that it can easily be divided by).
Then we used chalk to mark lines on the wall to indicate where we should install the boards.
Keep in mind the placement of electrical outlets. We didn’t and had to cut around the outlet cover to make space. Luckily this wall is behind the bed.
Pro Tip: If you’re bad at math, you can use technology to do the math for you. We had our Amazon Echo in the room to play music, so we asked Alexa to do the math for us.
Semigloss Design
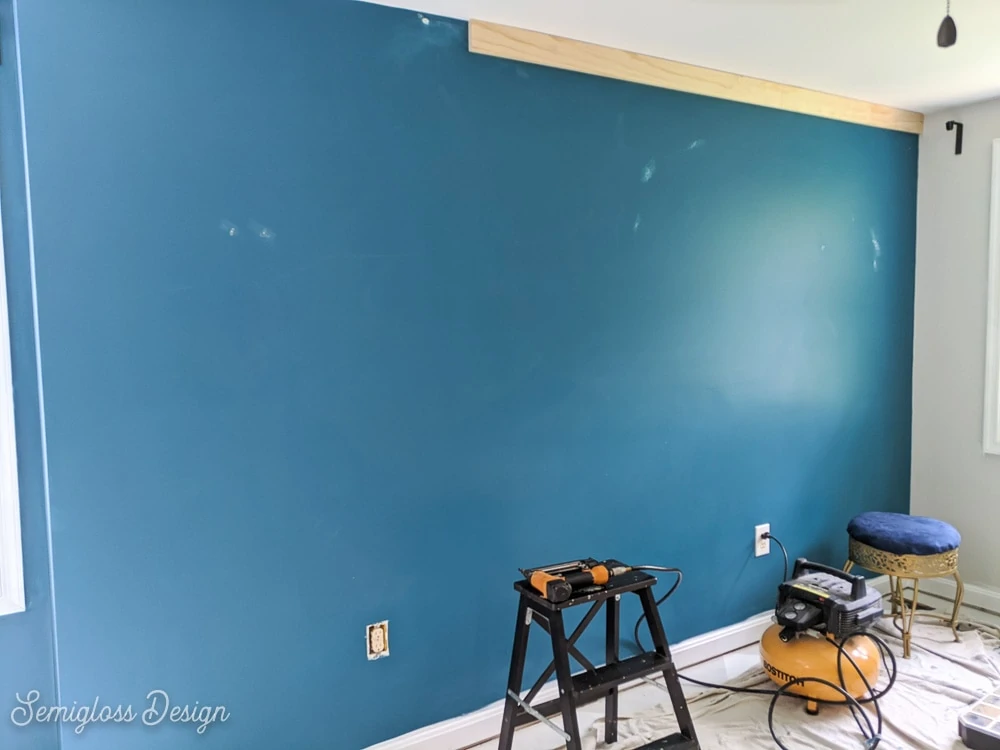
Should you paint the wall first and then install the board and batten or paint afterward?
I installed the board and batten first and then painted, but it was more difficult than it needed to be.
Next time I will paint the wall first and then install the wood. It will be much easier to touch up areas than trying to paint small corners.
How to Install Board and Batten
Supplies Needed:
- 1×6 Boards (for sides and top of the wall)
- Lattice trim (vertical strips)
- Nail gun and air compressor
- Miter Saw
- Spackle
- Paintable caulk
- Chalk
We rely on power tools for jobs like this because it makes the job so much easier. I’ve installed board and batten with just a miter box, saw, and a hammer before. It took an entire weekend to install everything without power tools.
Using power tools saves SO much time and this wall was installed in about an hour. (The caulking and spackling took much longer.)
DIY Board and Batten
This DIY board and batten wall is so easy to install. Add style and interest with this simple wall trim tutorial.
Materials
- 1x 6 boards
- Lattice trim
- Spackle
- Paintable Caulk
Tools
- Nail gun and air compressor
- Miter saw
- Measuring tape
Instructions
- Prep walls if needed. Fill any nail holes with spackle, sand, and prime.
- Remove all electrical outlet covers.
- Use a miter saw to cut the 1x6s to length. (We're using simple, straight butt joints.)
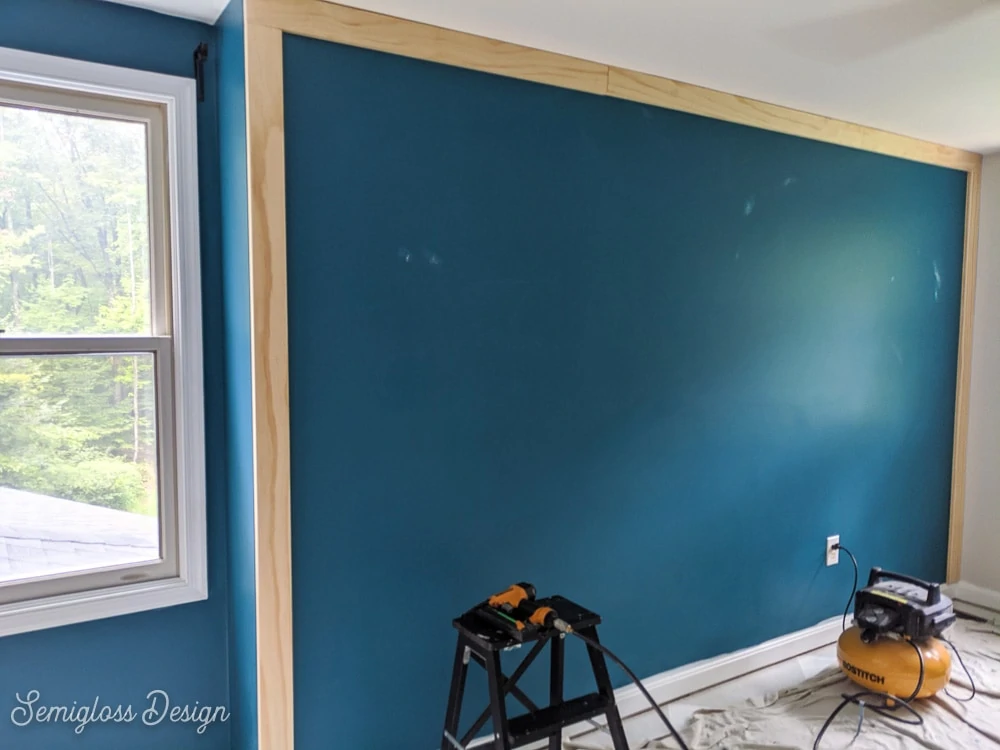
- Install the 1x6s at the top of the ceiling using a nail gun. You need nails about every 6". Be sure to hit the studs as well.

- Install the 1x6s on each side of the wall using the same technique.
- Measure the wall and figure out the placement of your vertical wood slats.
- Mark the spots with chalk at the tops and bottoms of the wall.

- Measure the height and cut the lattice trim boards to length.
- Use the nail gun to attach the lattice trim to the wall.
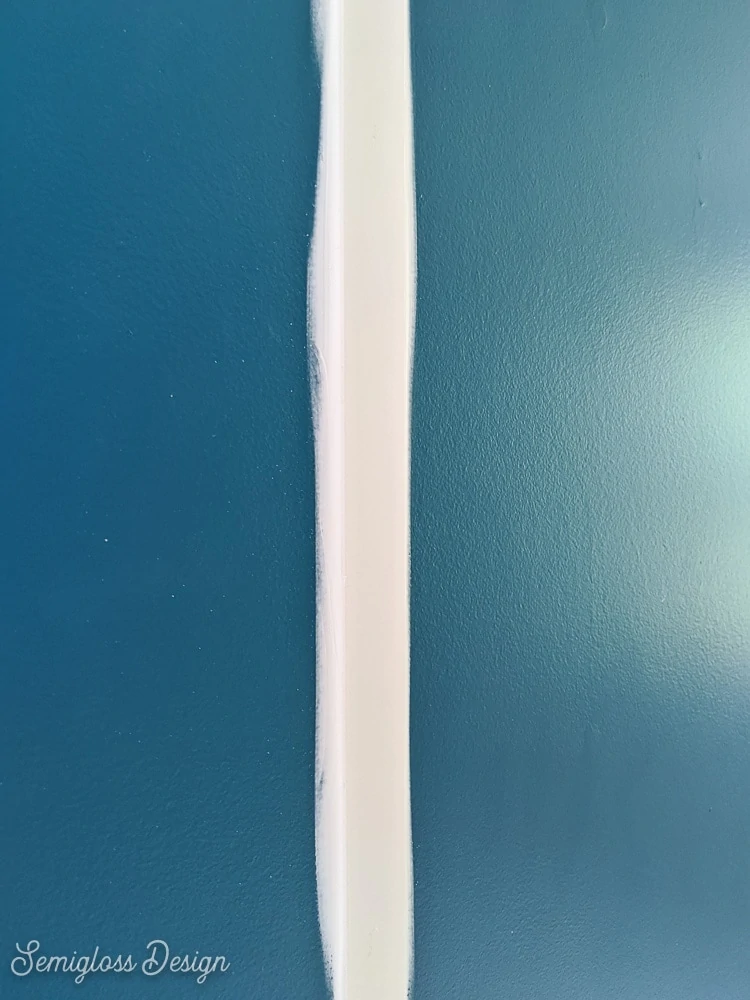
- Fill all the nail holes with spackle.
- If any boards meet in the middle, the crack can be filled with spackle as well.
- Let it dry and sand the spots gently until they're smooth.
- Use paintable caulk along every seam where the wood touches the wall. Smooth as you go because caulk is not sandable.

- Let the caulk dry.
- Paint as desired.
Notes
- Use a utility knife to cut the tip of the caulk open.
- The smaller the opening for the caulk, the easier it is to control. You also wastes less.
- If you're painting your walls white, the wood will need to be primed to prevent the pine from yellowing over time. I recommend sealing any knots with shellac. The wood can be primed using Zinnser BIN.
Recommended Products
As an Amazon Associate and member of other affiliate programs, I earn from qualifying purchases.


Be sure to read about the paint color and what I thought about mail order paint from Clare!
Other Tutorials for this Bedroom Makeover
- Bedroom Makeover Plans
- How to Remove Carpet
- Painting a Plywood Floor
- How to Paint a Checkerboard Floor
- Clare Paint Review
- IKEA Rast Hack
- Affordable Upholstered Beds
You might also like:
Pin for Later!

Emy is a vintage obsessed mama of 2 DIYer who loves sharing affordable solutions for common home problems. You don’t need a giant budget to create a lovely home. Read more…

it looks so fabulous, emy! and i LOOOVE the color.
Thanks! I love it too. It’s the perfect moody teal color.
Love this tutorial! I’ve been wanting to add a board and batten accent wall to my living room for months, and your step-by-step instructions made me feel confident to try it myself. The semigloss finish is especially beautiful – thanks for sharing!