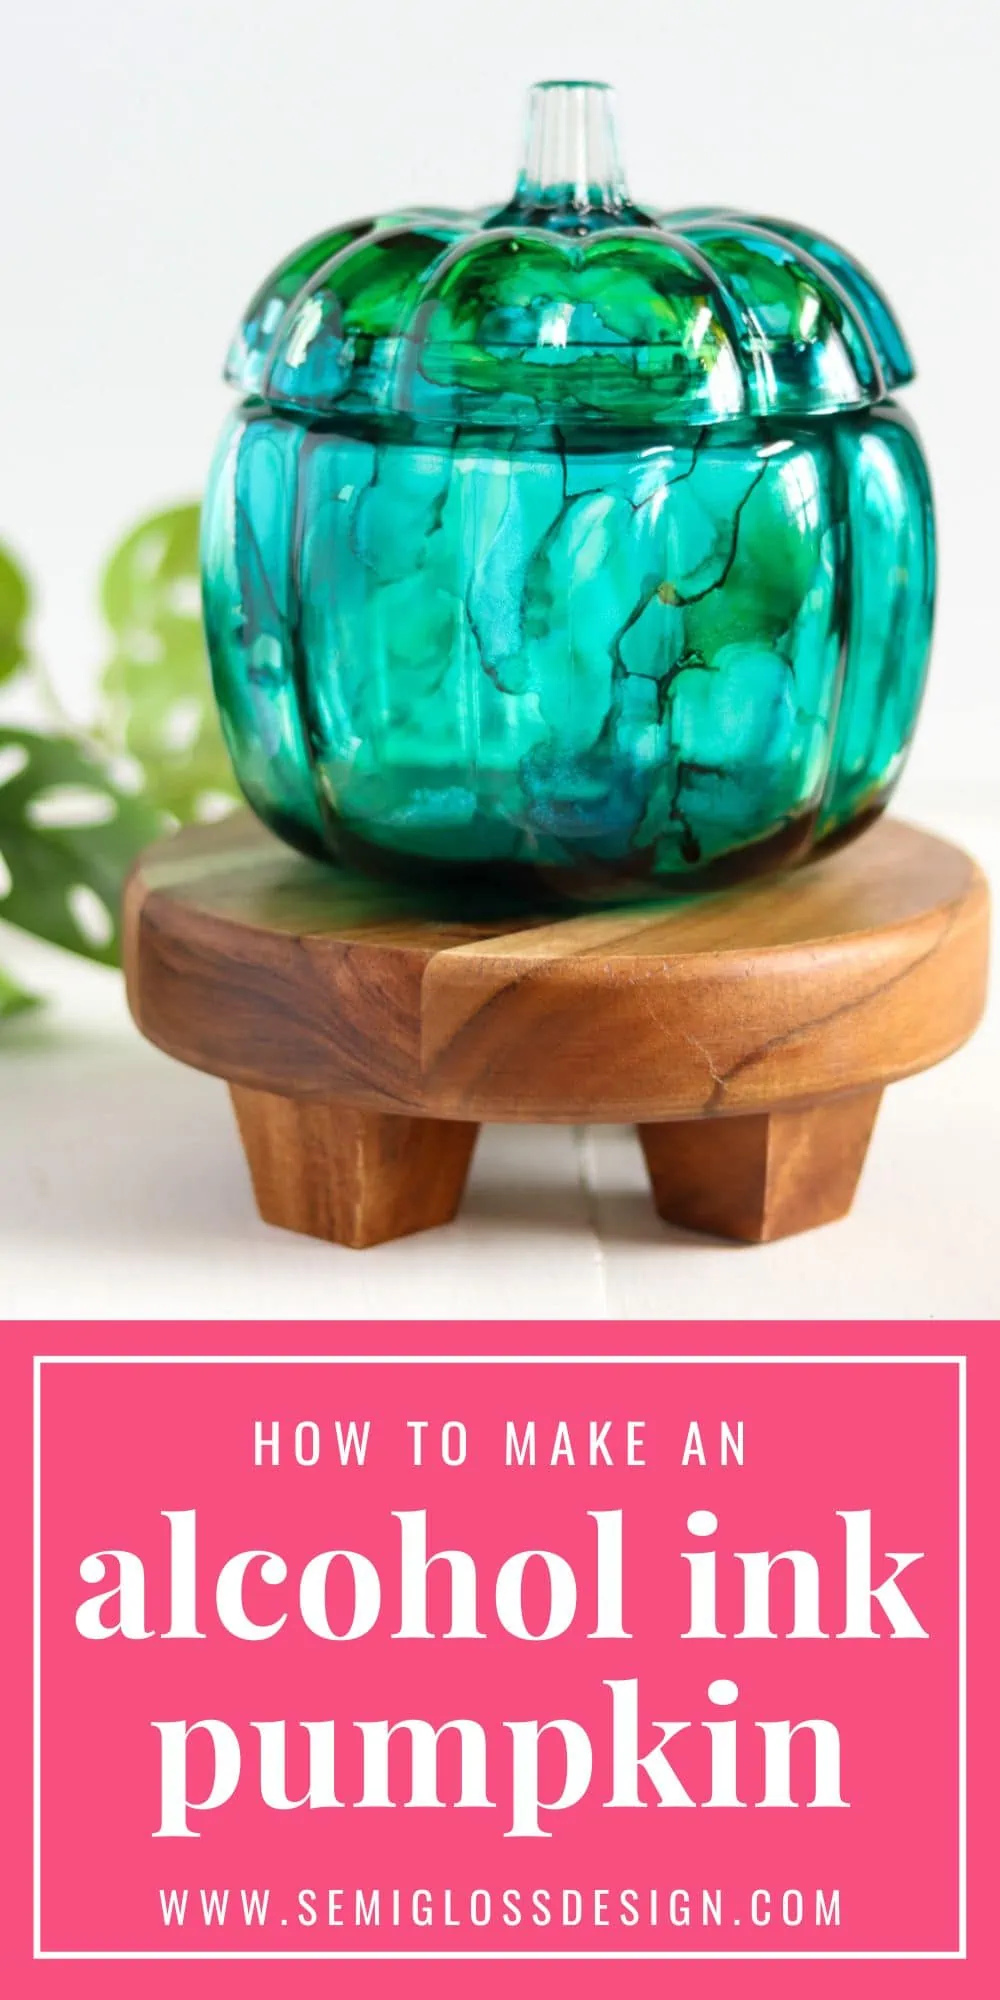
Make a DIY Alcohol Ink Pumpkin for Halloween
Create a beautiful DIY alcohol ink pumpkin to decorate for fall and Halloween. It’s so easy to make a watercolor look on a glass pumpkin. No artistic skills needed!
You might also like these metallic painted pumpkins.
This post contains affiliate links. By purchasing an item through an affiliate link, I earn a small commission at no extra cost to you. As an Amazon Associate I earn from qualifying purchases.
I love working with alcohol inks because they create a beautiful watercolor effect.
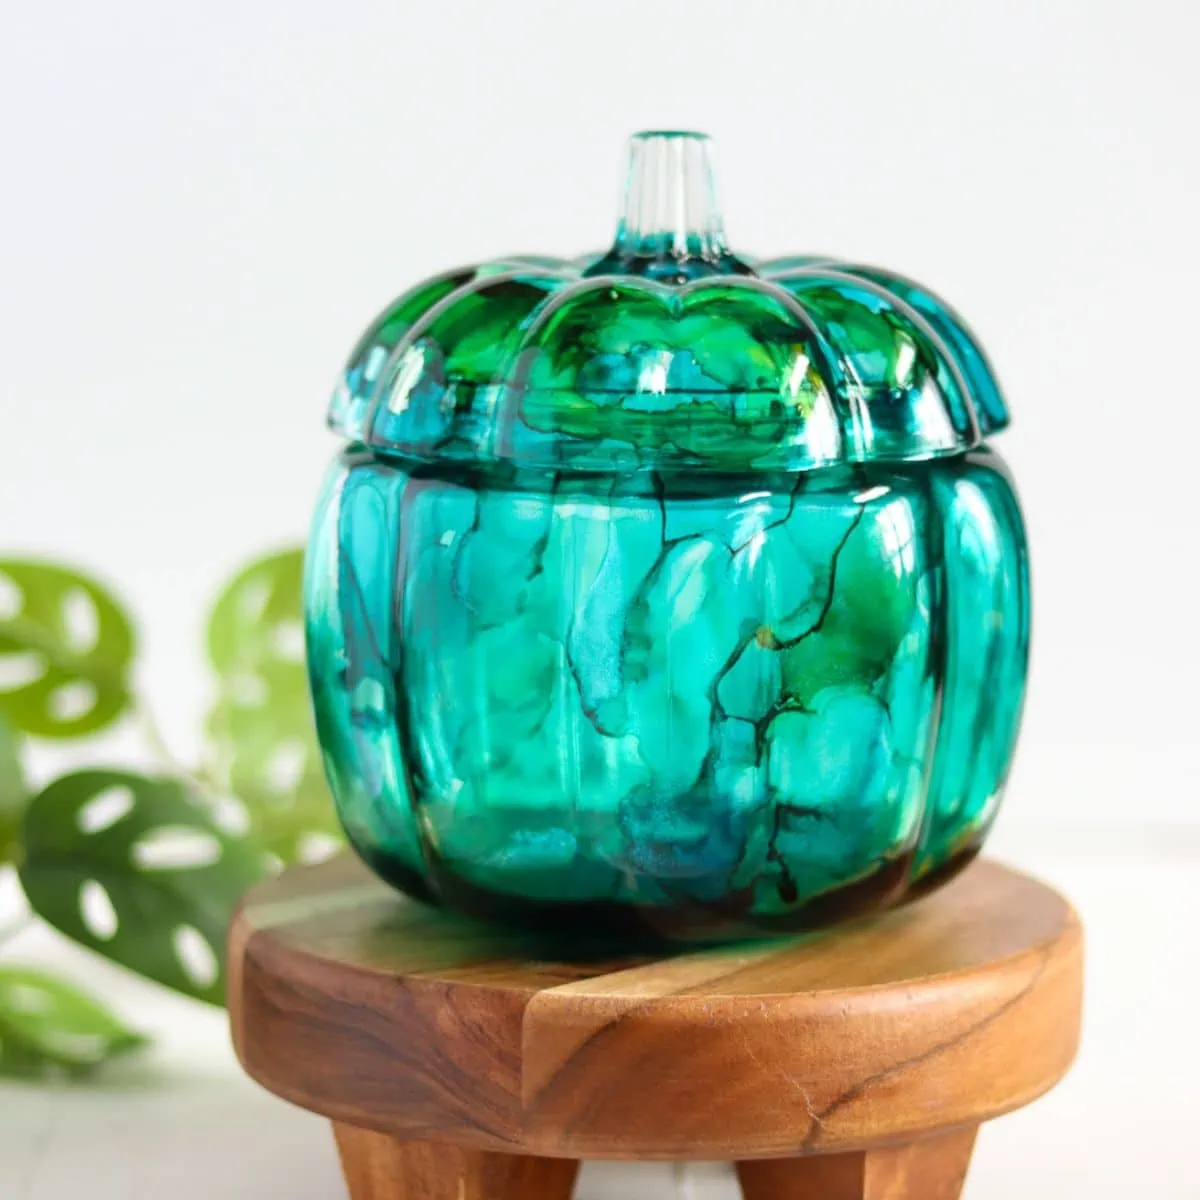
When I ran across a glass pumpkin at Target, I knew that I had to cover it in alcohol ink to make it pretty.
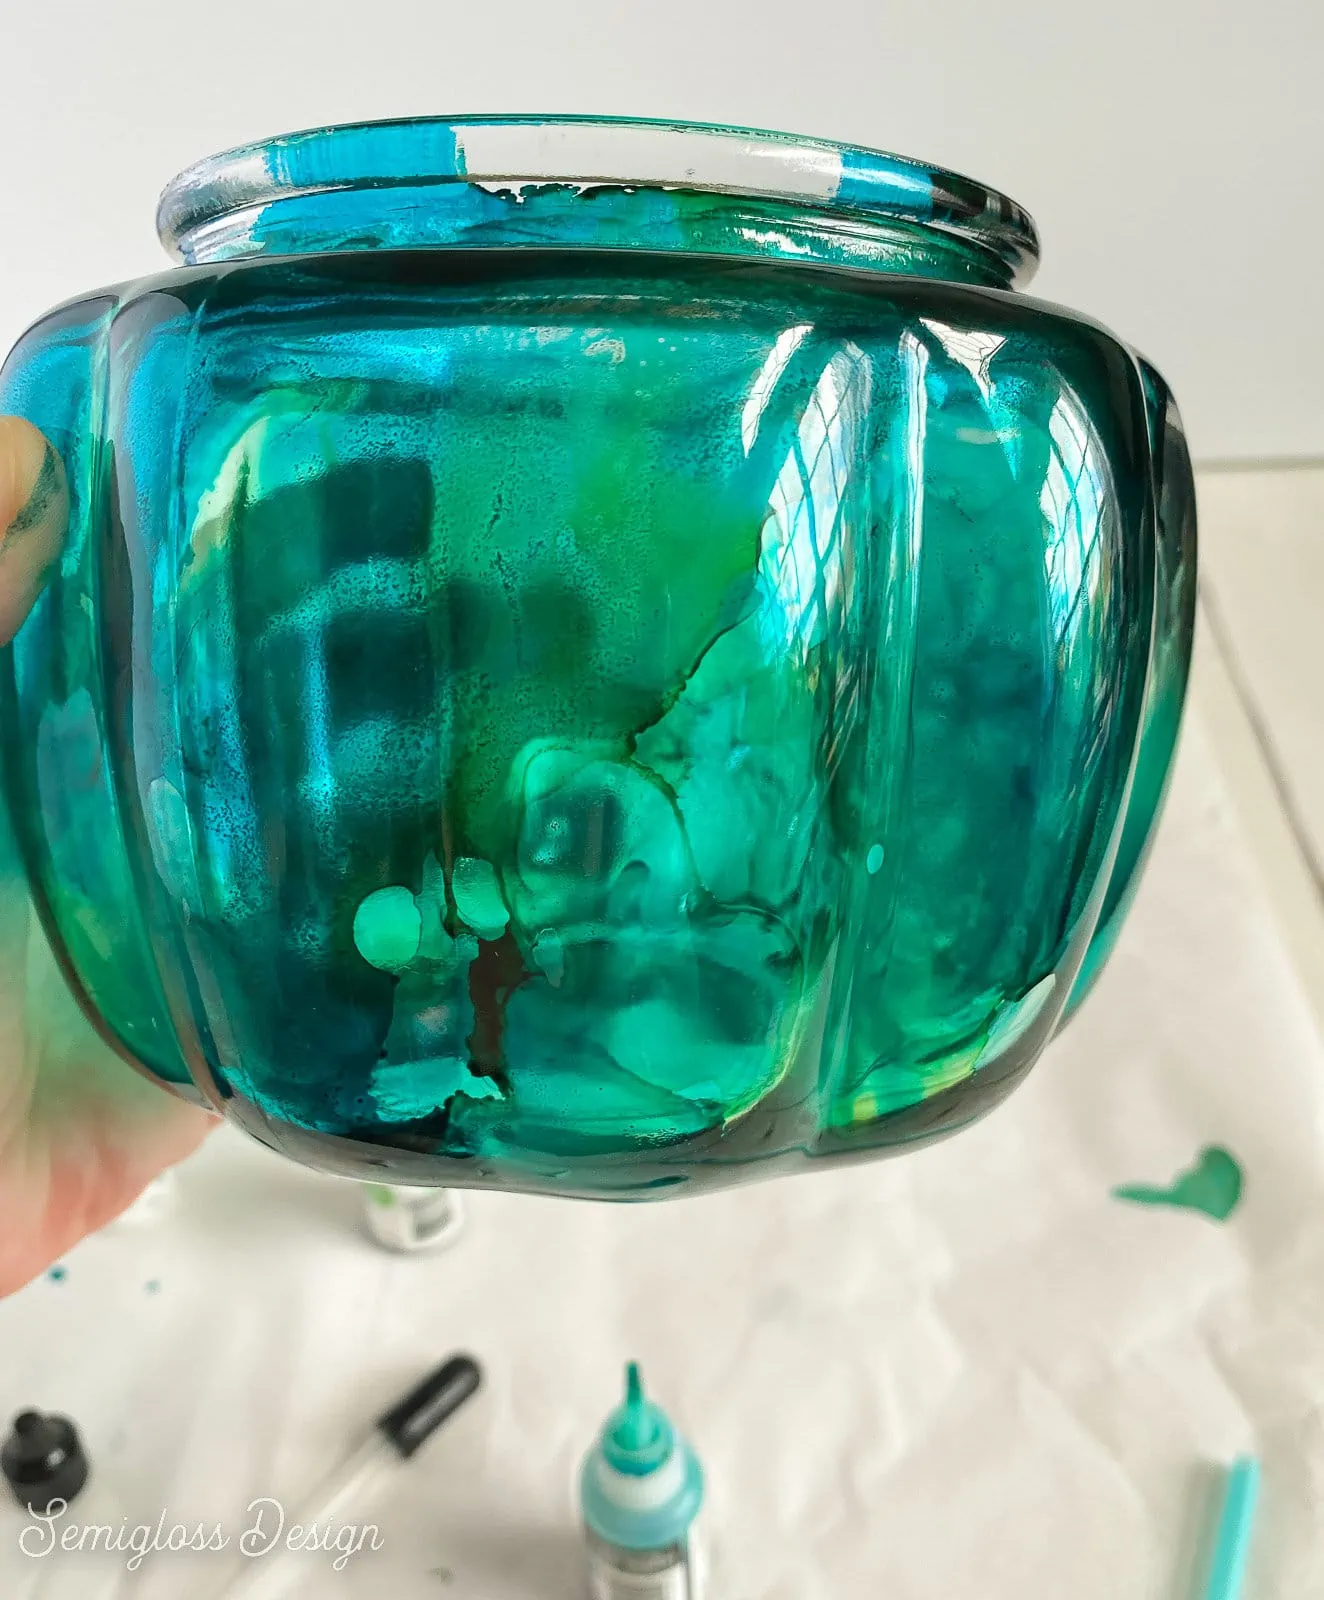
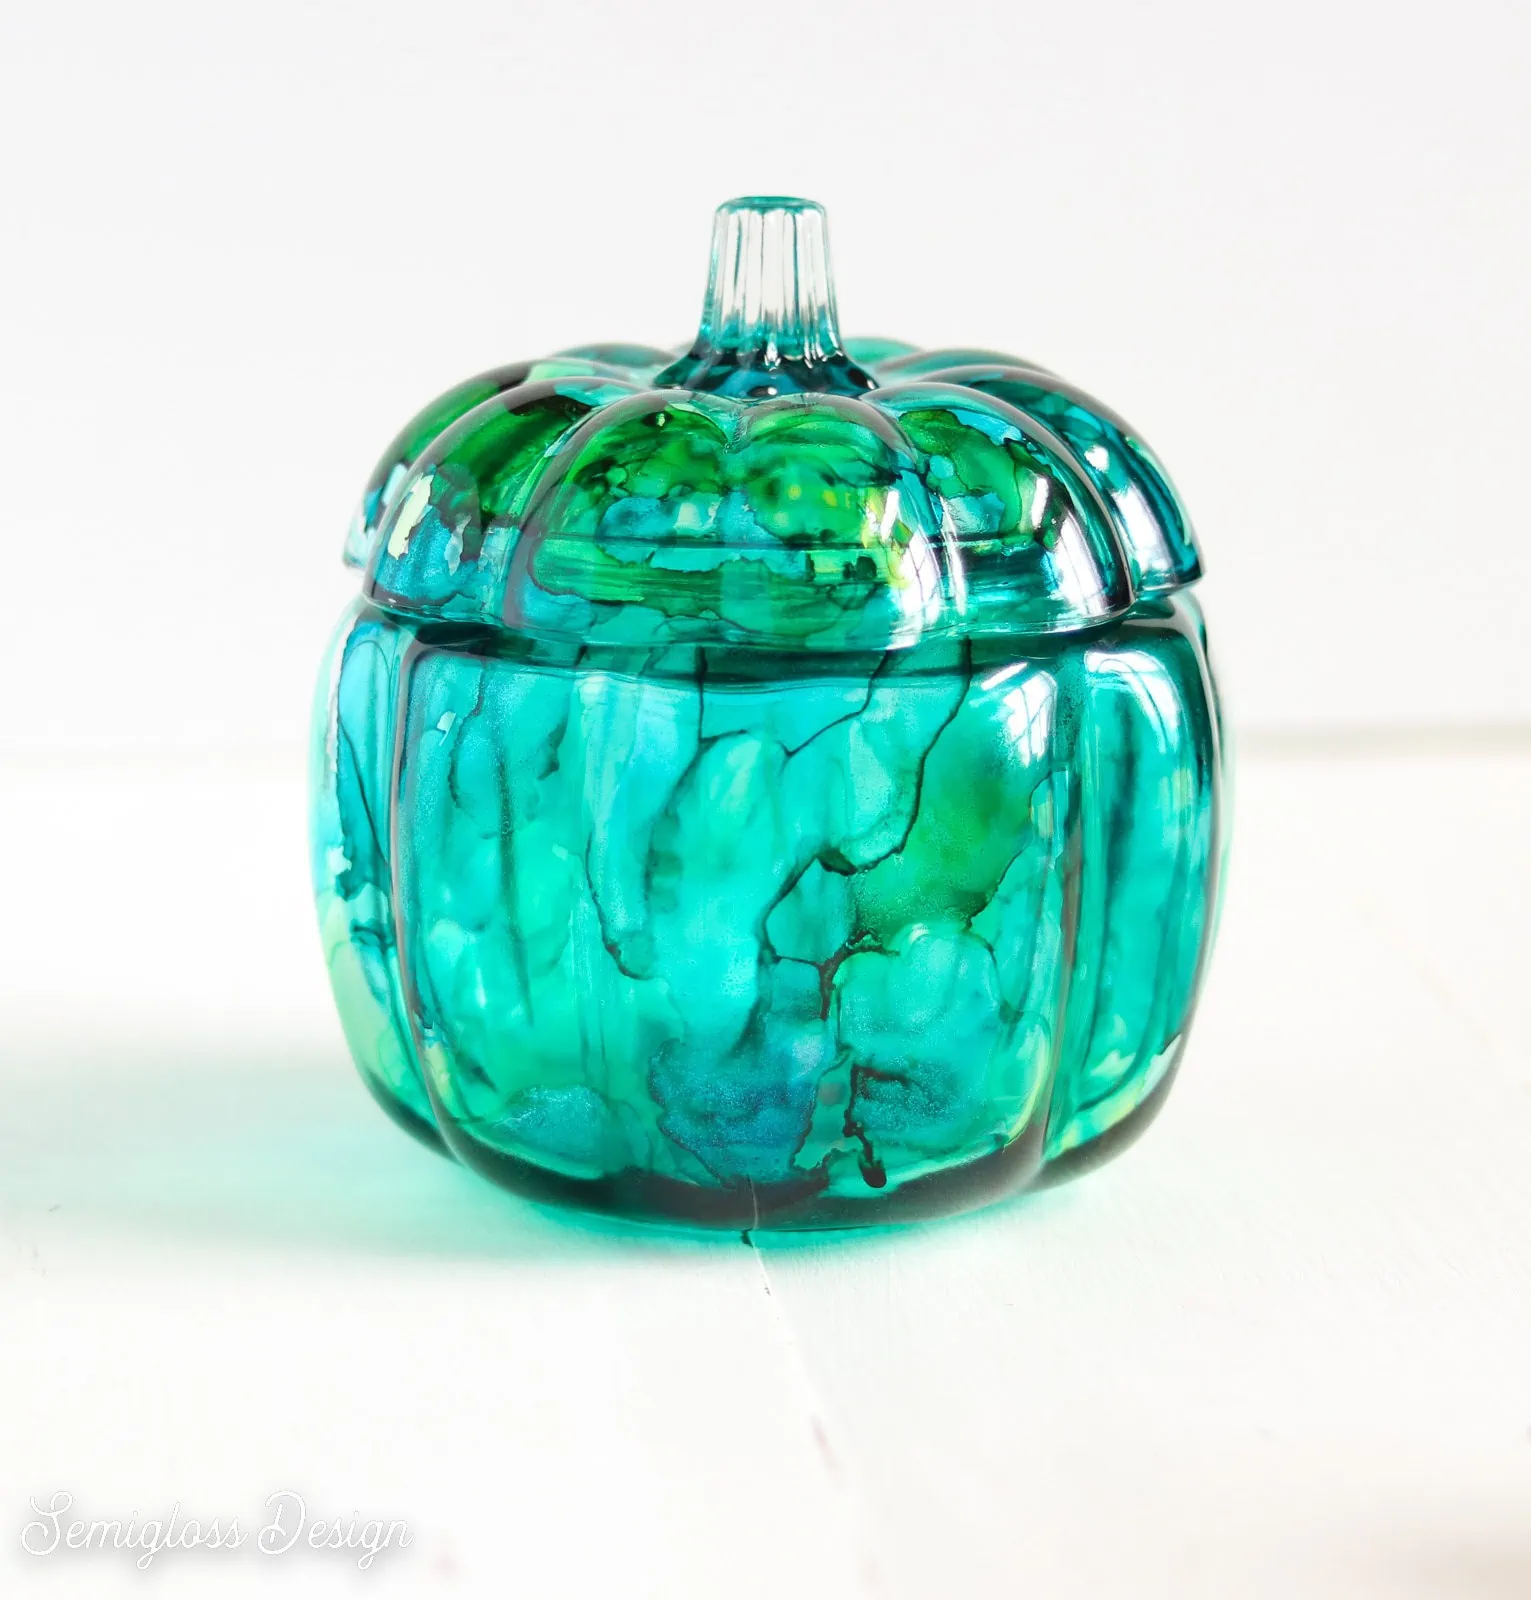
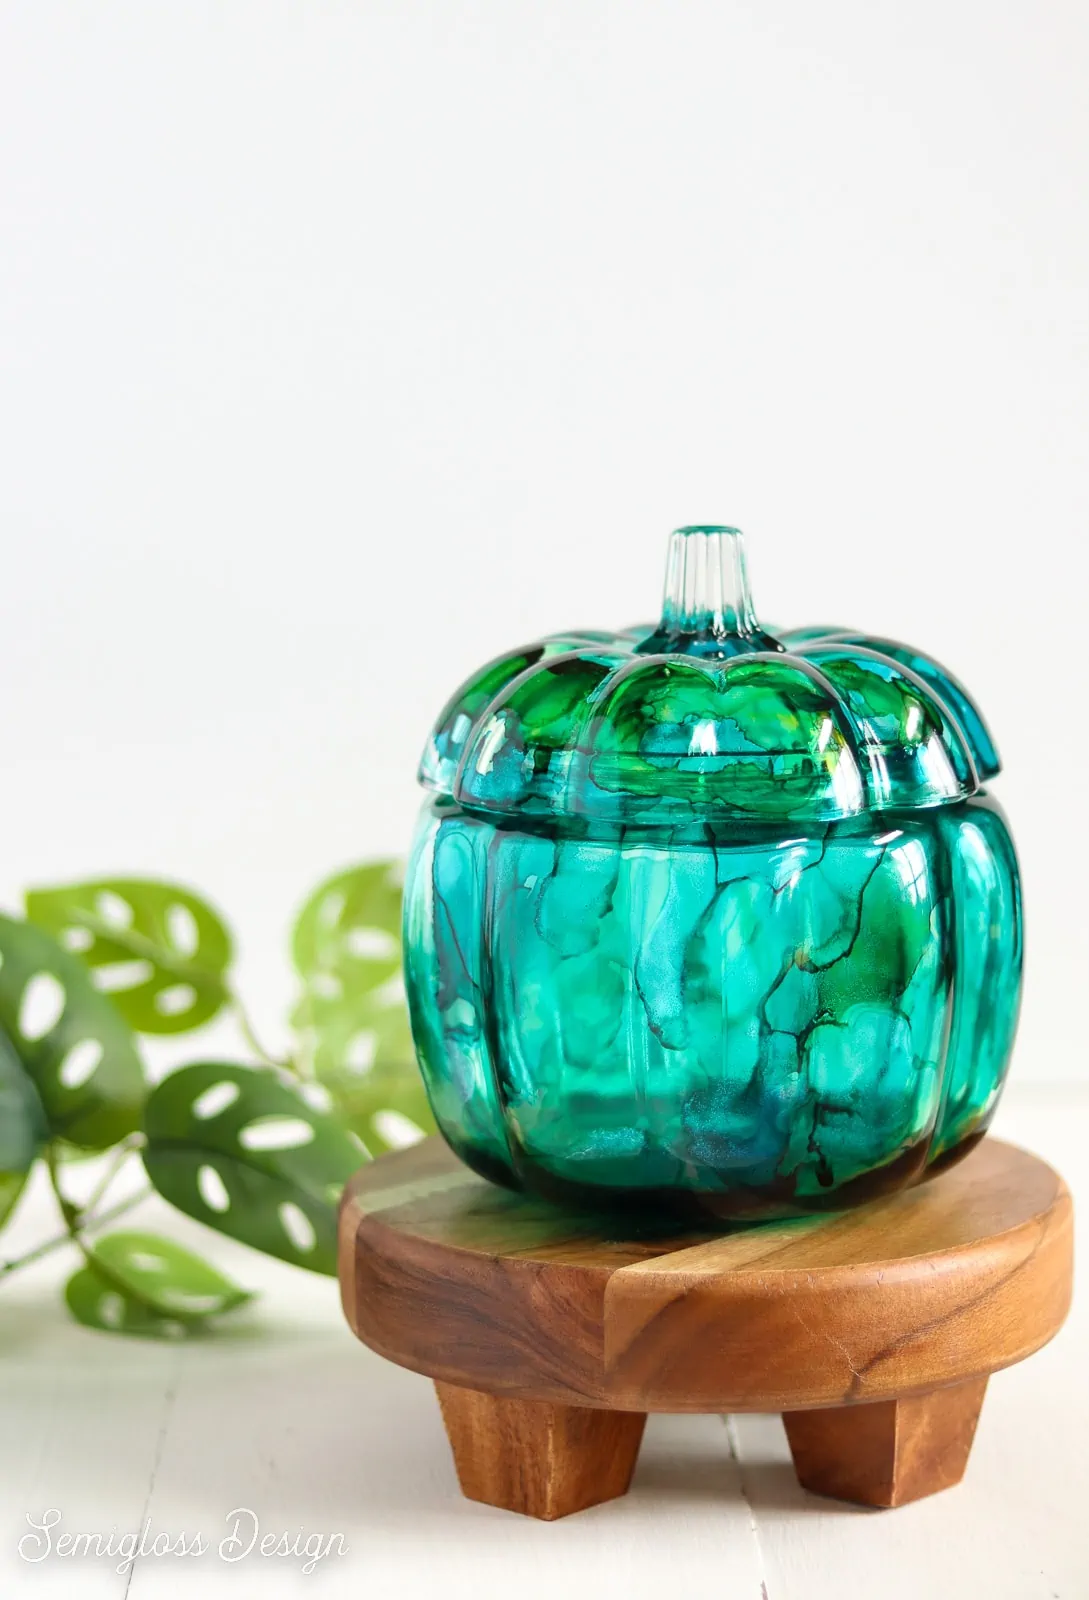
I love how it turned out. The light looks so pretty coming through it.
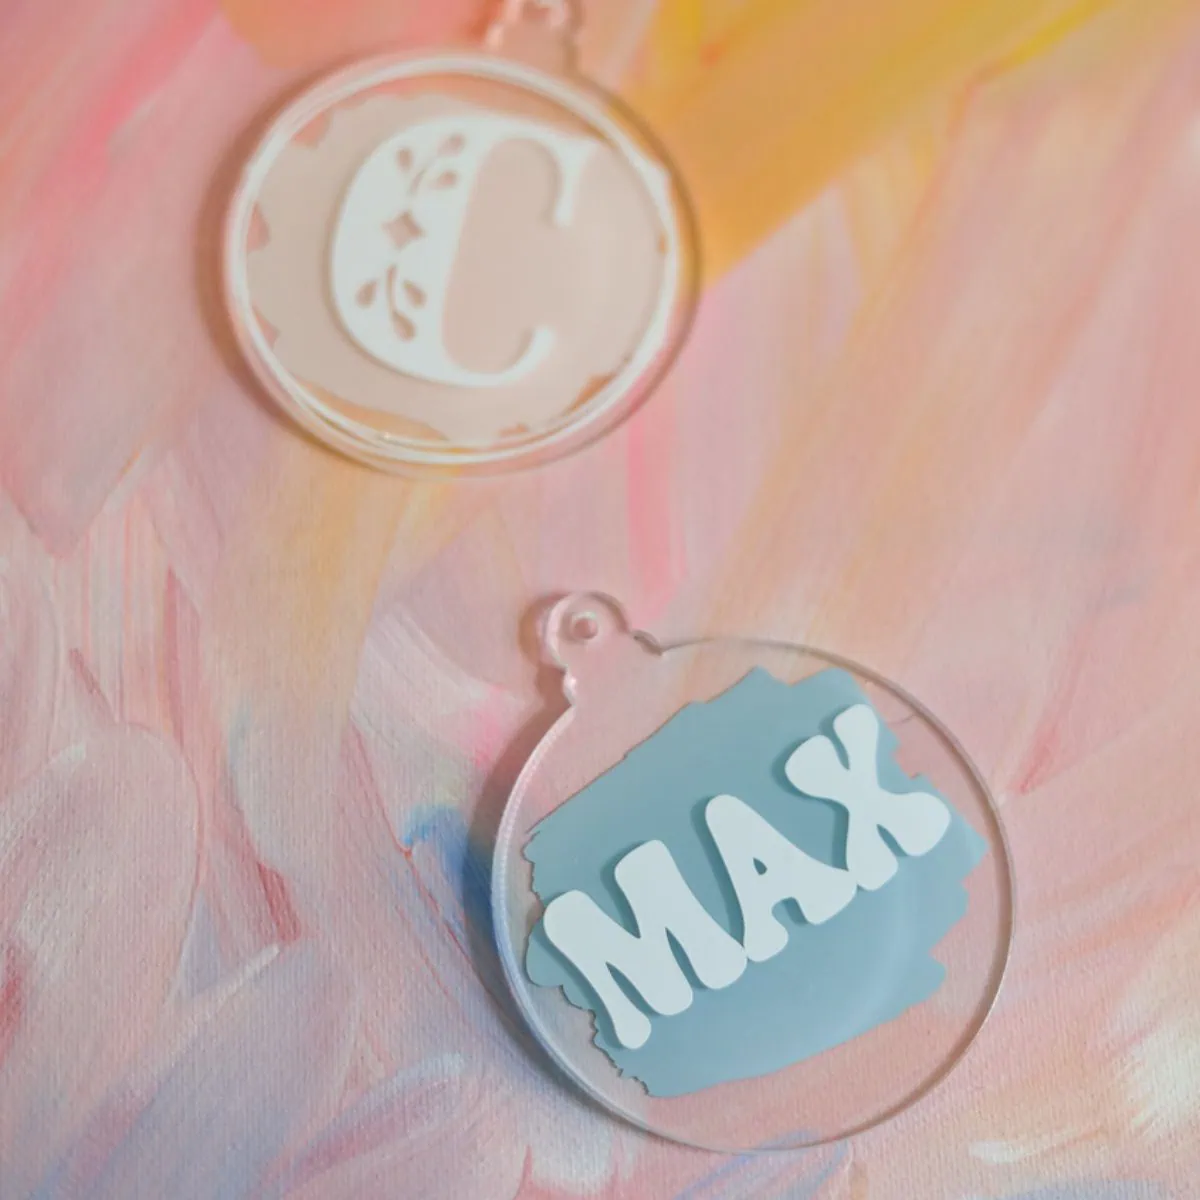
By the way, I also used alcohol ink to create these fun Christmas ornaments. Is anyone else already planning for Christmas crafting or is it just me?
DIY Alcohol Ink Pumpkin
Supplies Needed:
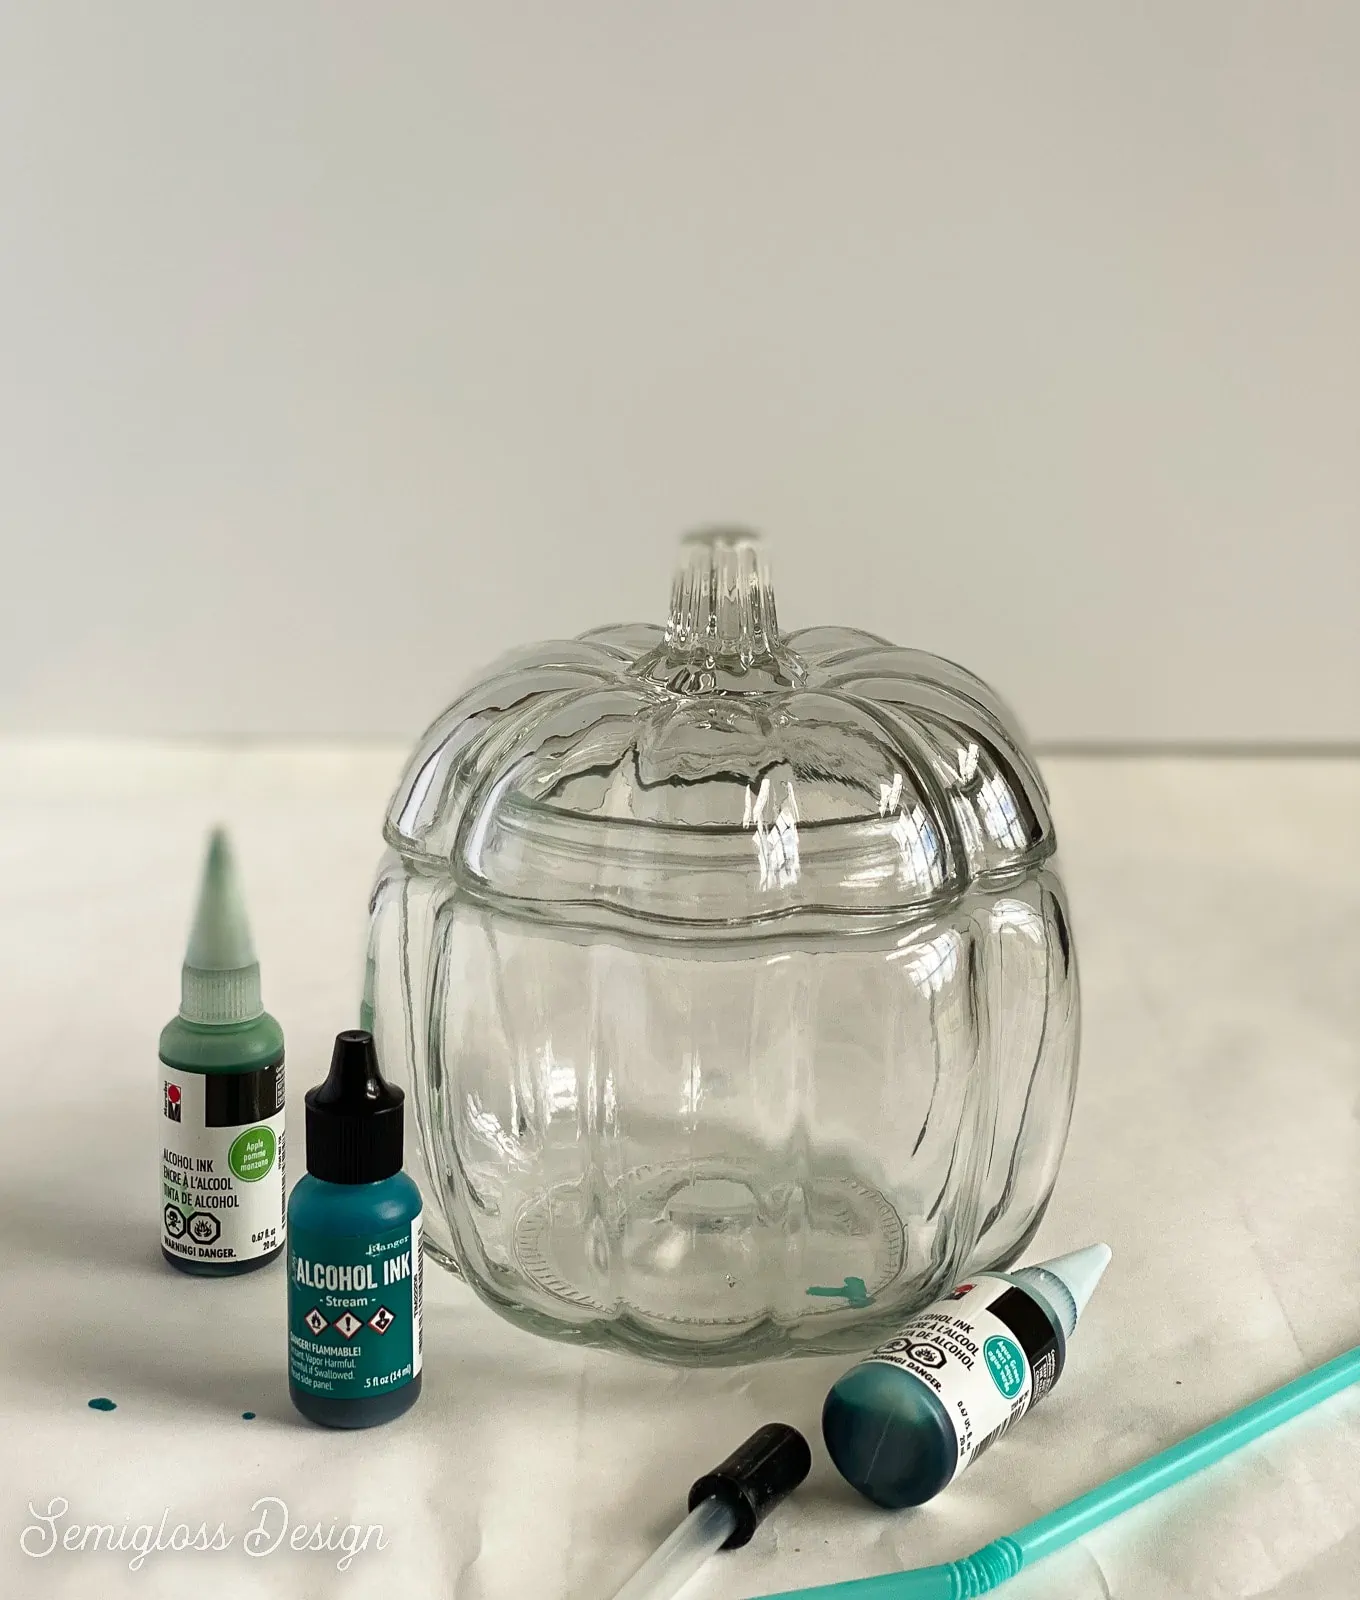
- Glass pumpkin
- Alcohol inks
- Straw or canned air
- Rubbing alcohol
- Clear spray paint (optional)
Work in a well-ventilated space since alcohol ink is a bit stinky. Use any safety gear that makes you feel safer.
Supply Notes
I like craft alcohol ink (versus artist-grade.) The colors are much more vibrant.
If you can’t find glass pumpkin jars, regular fake pumpkins would work great. Just make sure you get the white ones or spray paint them white first. Then simply drop the color onto the outside of the pumpkins.
If you want to place them outside, be sure to seal them with a few coats of clear spray paint.
Combining Colors
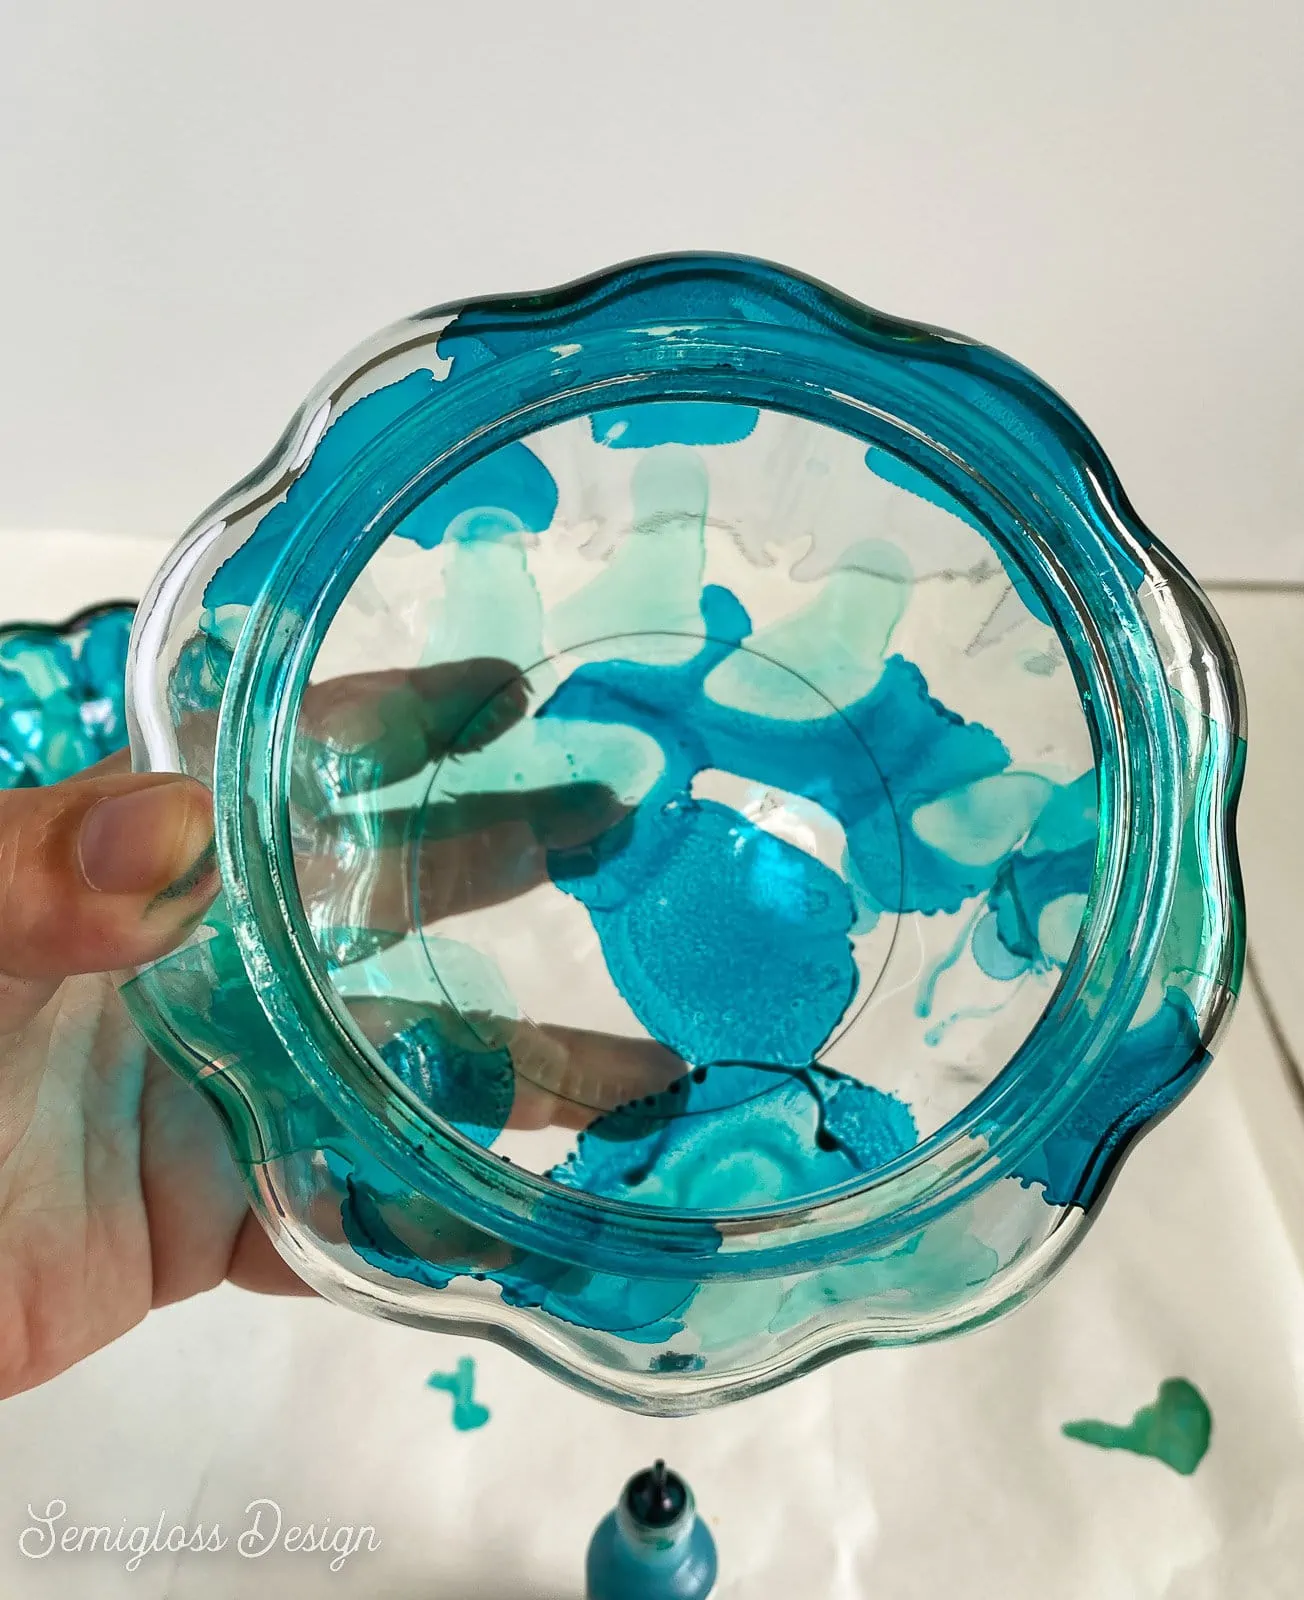
Alcohol ink is transparent, so the colors mix together when they overlap.
When mixing colors, keep color theory in mind. If you mix too many colors, the results will be a muddy brown.
If you love orange, mix pink, red, and yellow.
Orange is my least favorite color, so I made mine teal with teal, yellow, and green inks.
The ink turns darker where it pools and dries.
If you hate the results, simply wipe the surface with rubbing alcohol to remove it.
Rubbing alcohol can also be used to dilute colors. Place ink and the alcohol in a disposable cup and use an eye dropper to apply.
If you touch the ink after it dries, it will smudge, so seal it if you want to use the jar. (It’s not going to be food-safe though.)
Directions
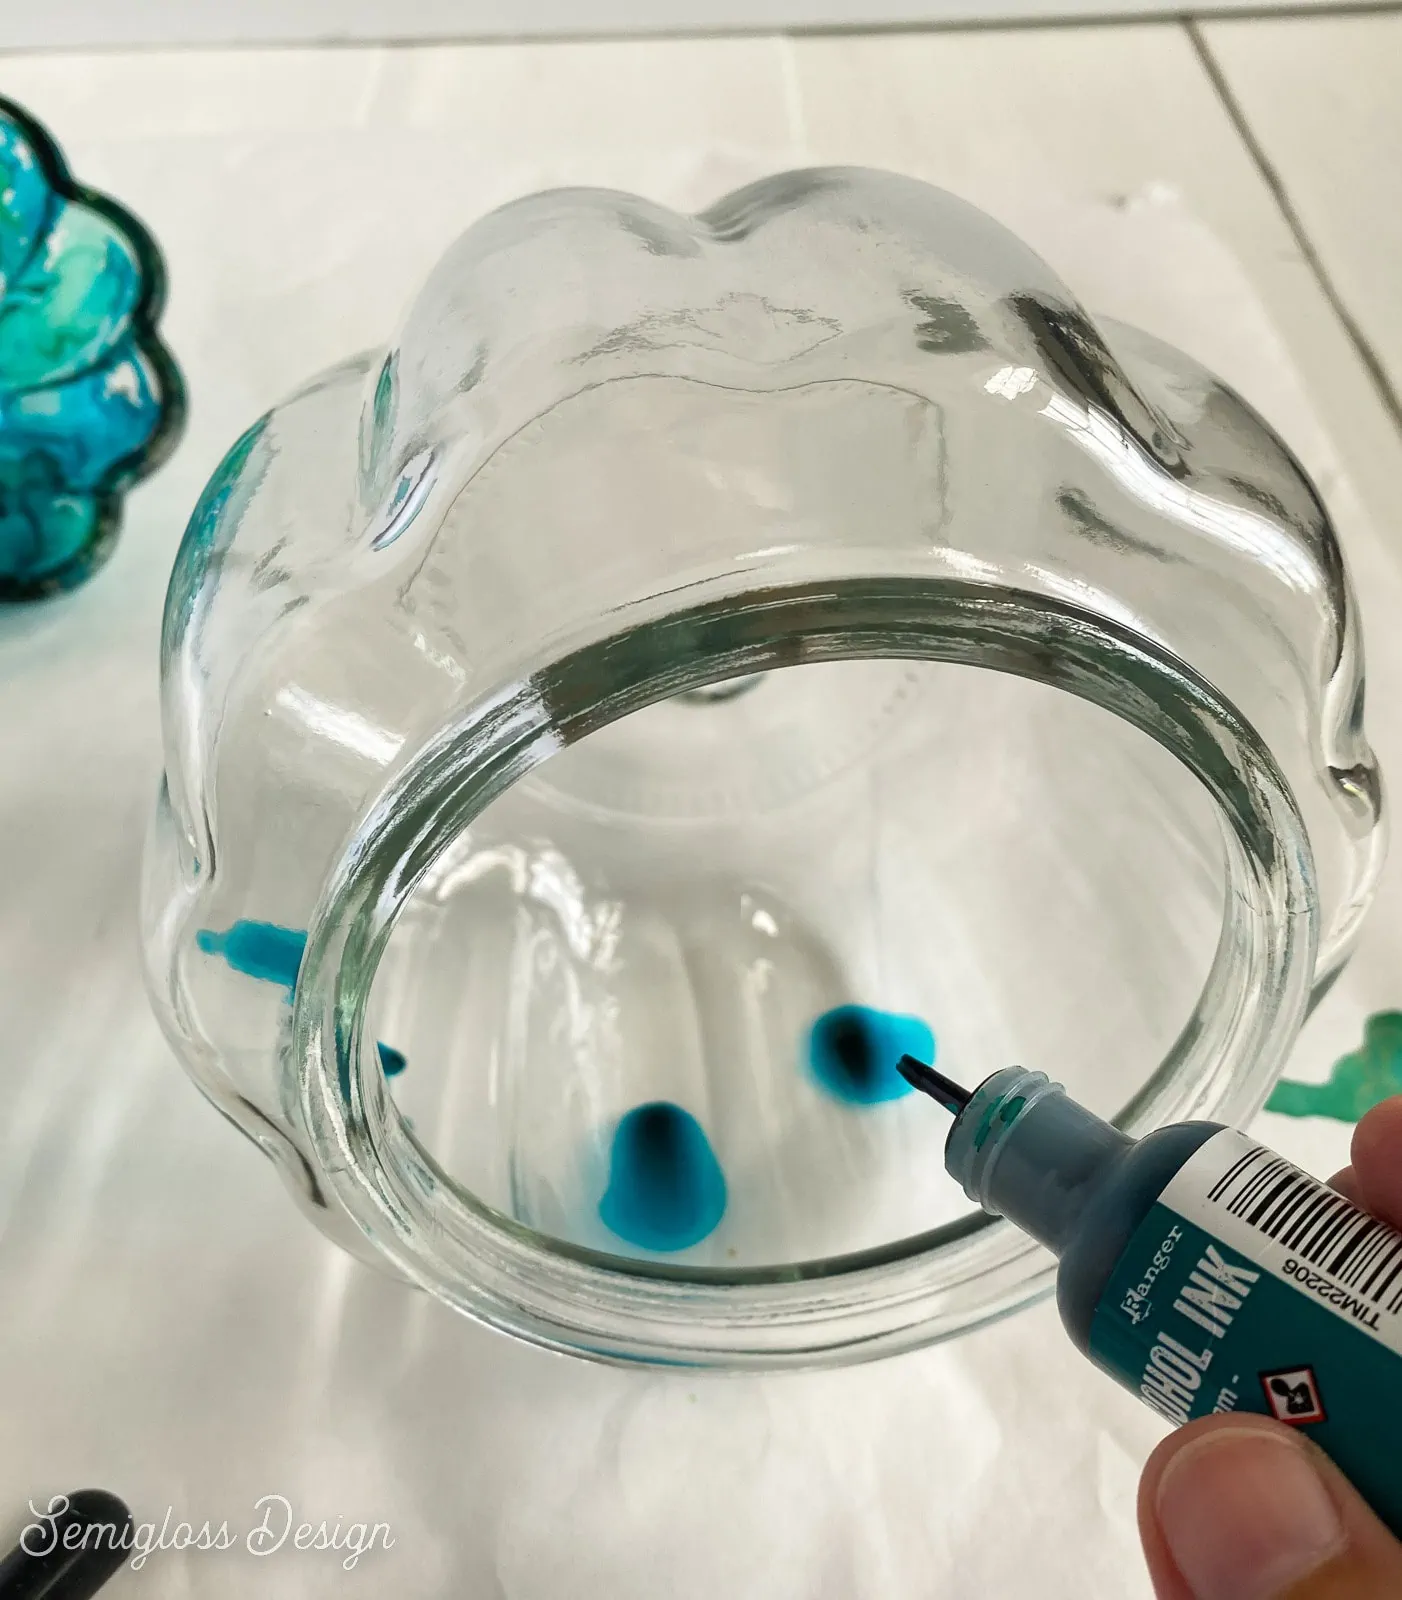
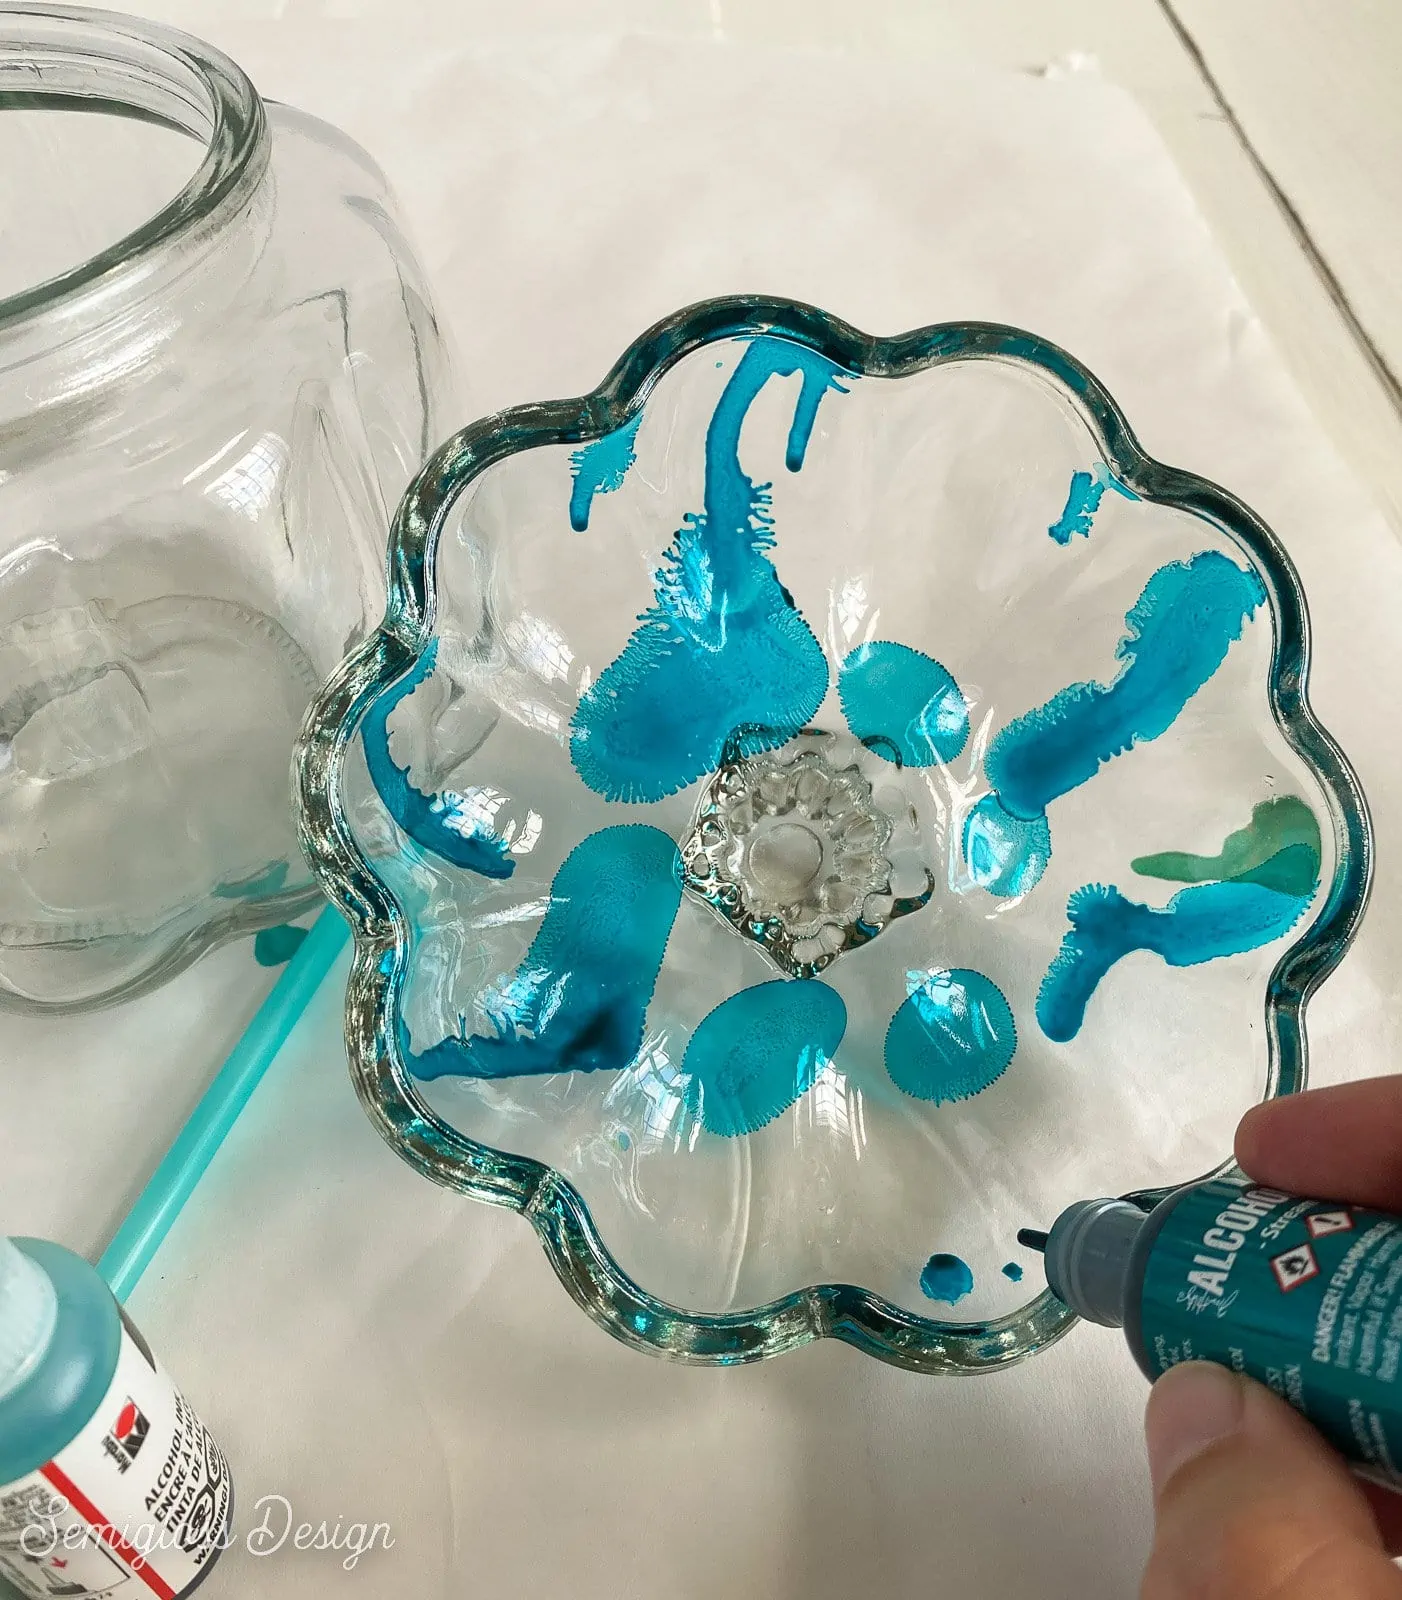
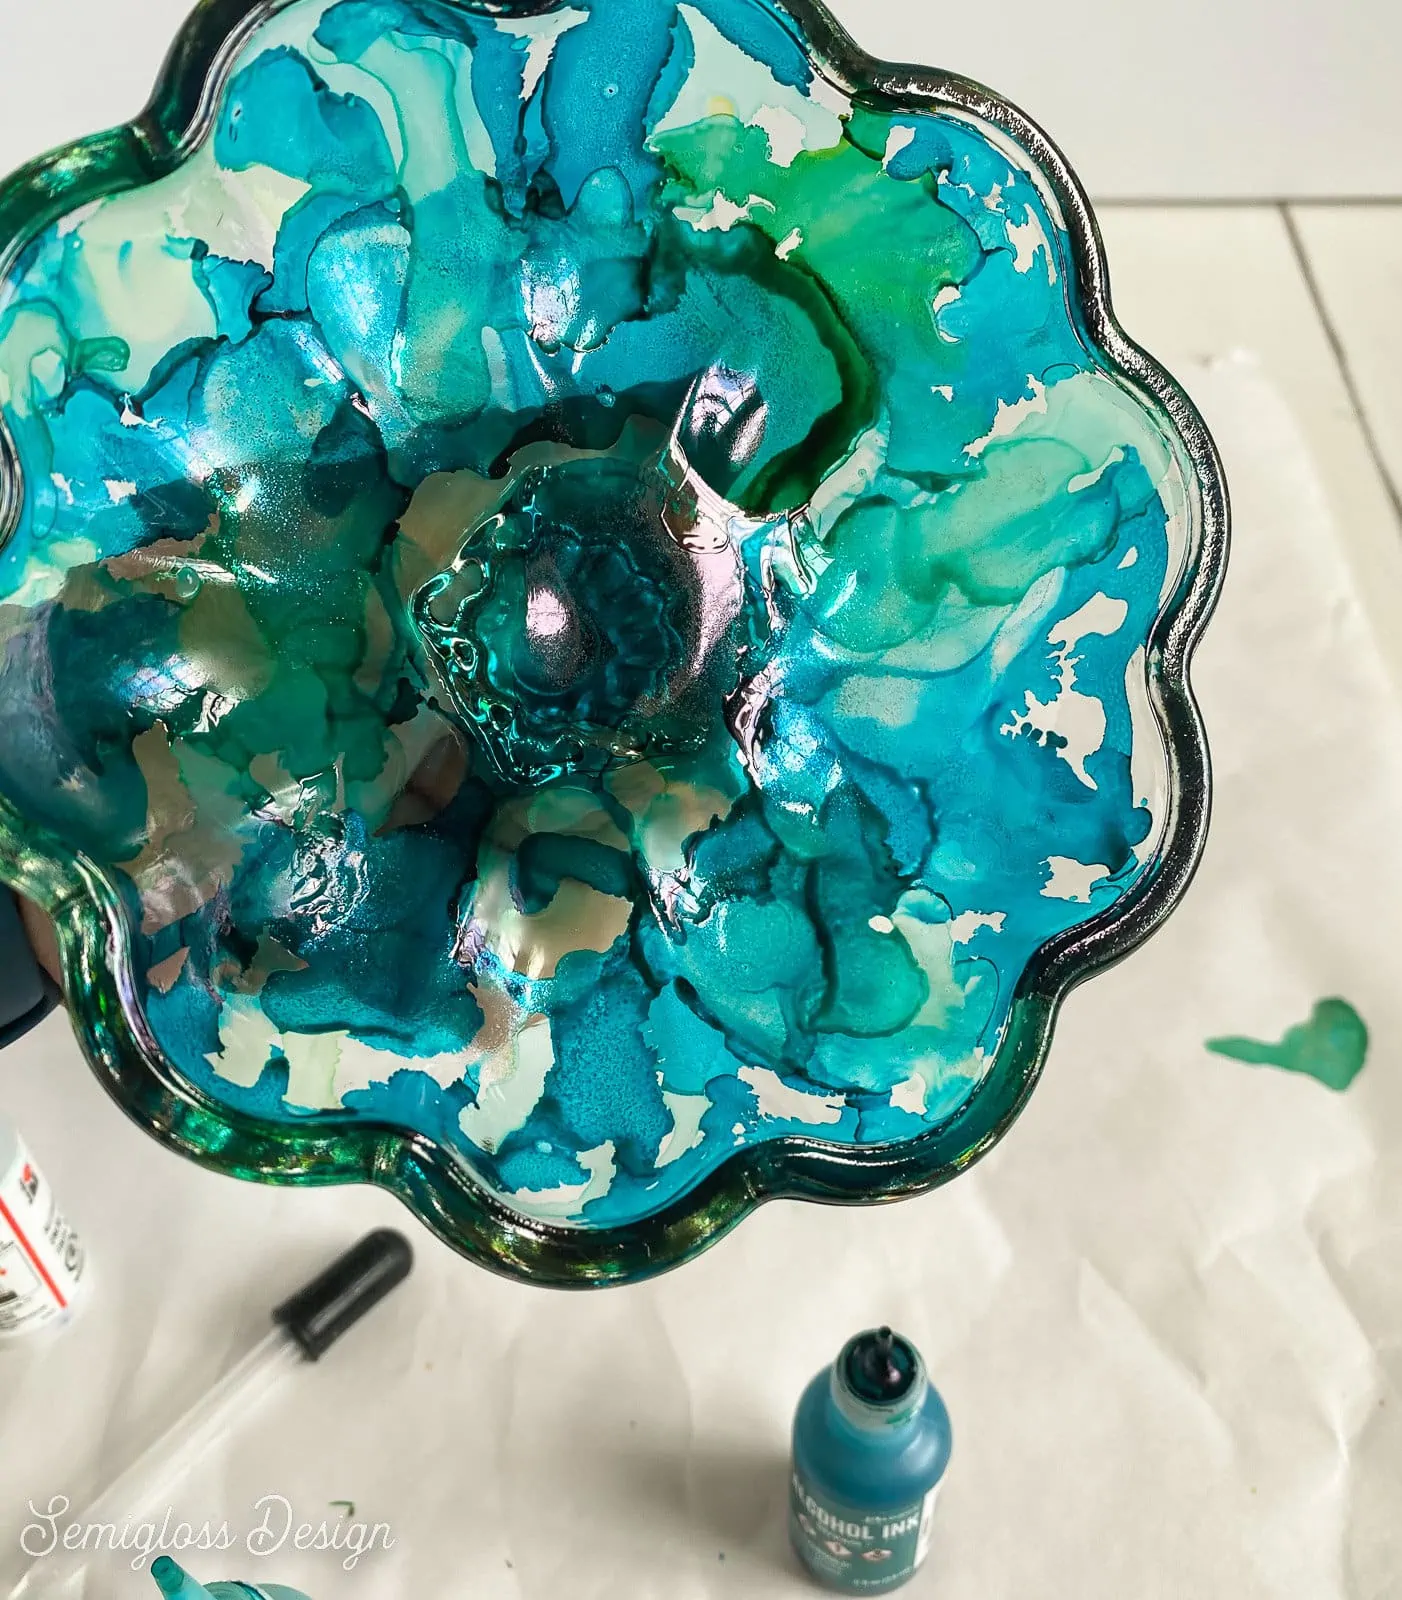
- Prepare your work surface since alcohol ink is messy and can stain. I like to use freezer paper with the shiny side down so that excess ink soaks into the paper and not to the other side. You might also want gloves. If you’re sensitive to smells, use a respirator.
- Clean the inside of the pumpkin with rubbing alcohol to ensure that the ink sticks to the glass. (Sometimes glass is coated with weird stuff that makes it hard for the ink to stick.)
- Start dropping ink into the bowl of the pumpkin and move the pumpkin around to spread the ink.

- Add ink in different colors and move the pumpkin to let the colors mix.

- Use a straw to move the ink around and make it dry. USE CAUTION THOUGH! Blowing into the bowl moves the fumes right into your face.
- Keep going until you’re happy with how it looks.

- Repeat the steps for the lid of the pumpkin, coating the inside. Even though the stem isn’t hollow, it will still reflect the color.
- Let everything dry for several hours with the lid off.
- If desired, you can spray it all with clear spray paint to make it more permanent.
You might also like:
Pin for Later!

Emy is a vintage obsessed mama of 2 DIYer who loves sharing affordable solutions for common home problems. You don’t need a giant budget to create a lovely home. Read more…