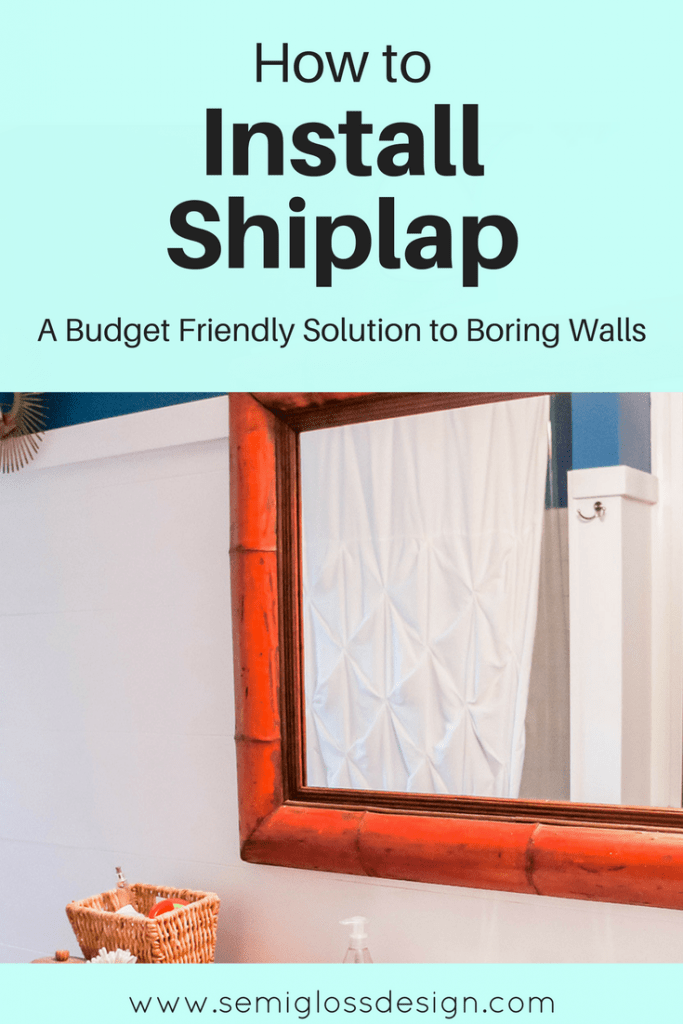
Love it or hate it, you have to admit that shiplap adds a nice texture to boring walls. So many of us buy homes that lack the special details we crave.
Adding wood trim is a great way to add interest to a room. This budget friendly shiplap technique will give your room the character that you love for a fraction of the cost.
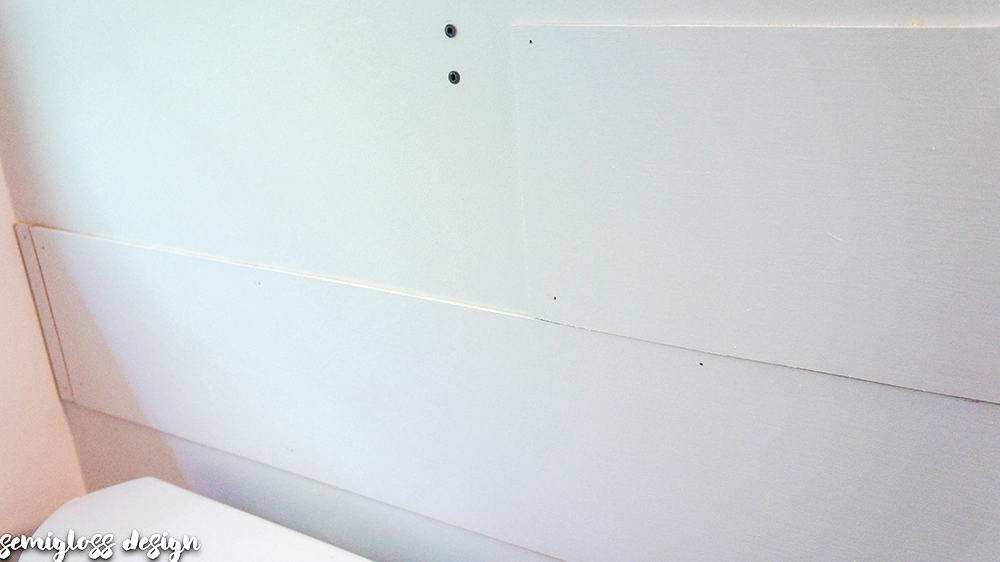
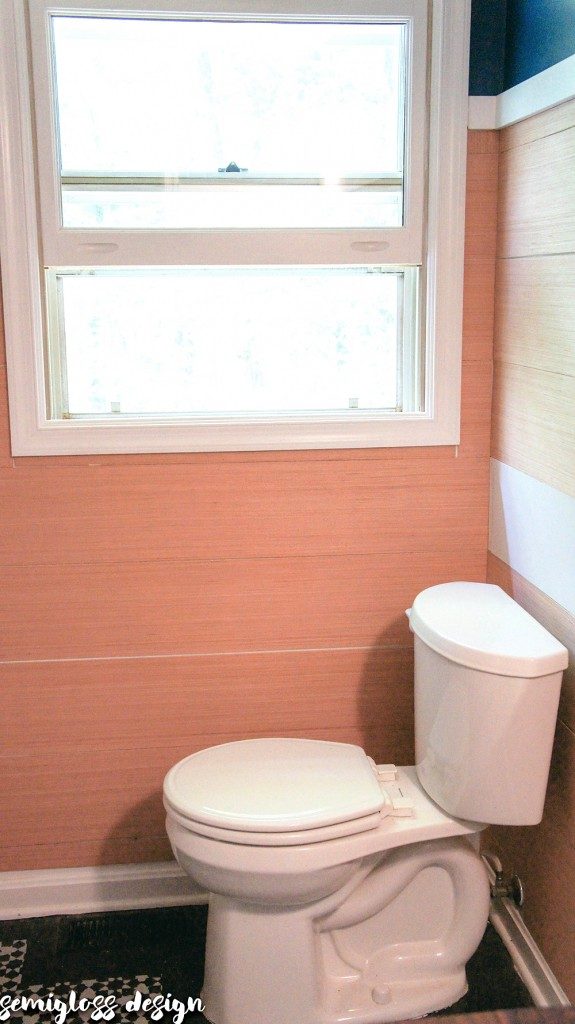
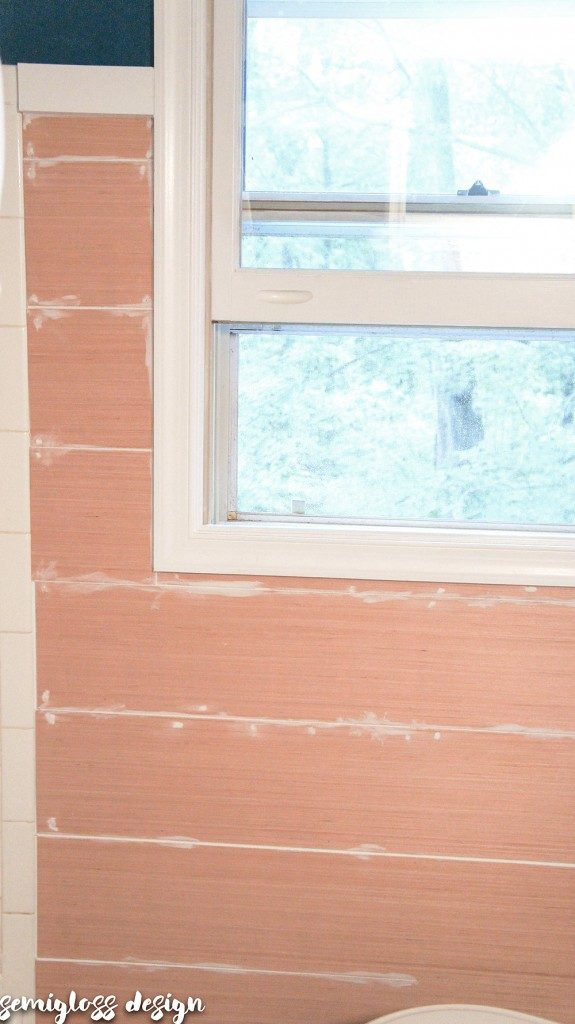
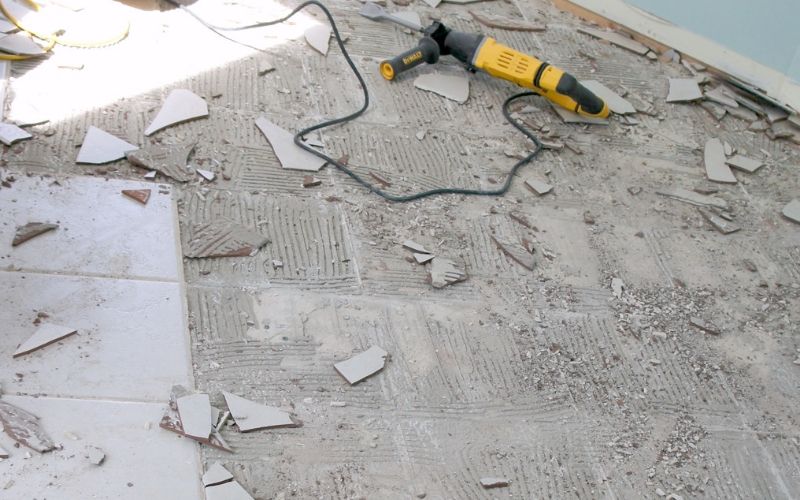
Recently we replaced our bathroom countertop and during the demo process, the wall got damaged. I had painted the walls white with the intention of adding shiplap at a later point, so this was just the excuse I needed to finish this room.
This method for shiplap is a little more budget friendly than tongue and groove boards.
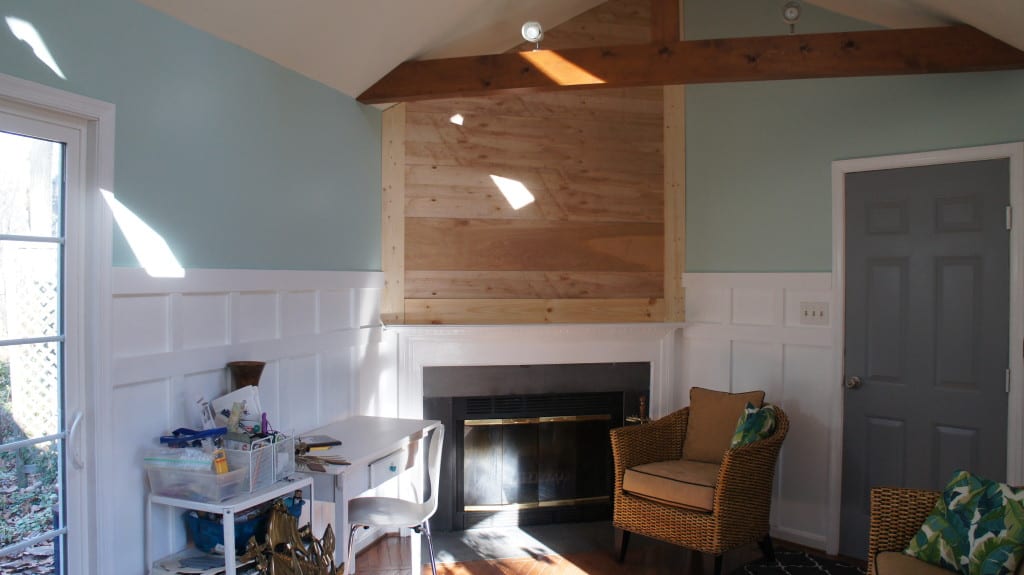
Plus, it’s a bit easier. This is also the method that I used in my sunroom and over my fireplace.
Both examples show that shiplap can feel traditional or modern depending on the context. For that reason, it’s one of my favorite wall treatments.
This post contains affiliate links. By purchasing an item through an affiliate link, I earn a small commission at no extra cost to you.
Shiplap FAQ
Should I Use Plywood or Underlayment for Shiplap?
Underlayment comes in 4×8 sheets and can be easily cut down at the hardware store. They usually charge you per cut, but it’s worth it to get it cut there.
Some stores will limit the width that they will cut. I’ve been told once that they won’t cut anything smaller than 12″ before, but on another day, they cut them into 8″ strips for me.
Underlayment is very affordable, costing under $20 a sheet (depending on your location). I like to use it because it’s so thin, which means that it doesn’t look awkward where it touches existing baseboards.
This also means that it’s lightweight, so it’s very easy to do this project on your own.
Plywood on the other hand is much thicker (about 3/4″) and costs closer to $50 a sheet for a smooth finish.
How do I Stagger Shiplap?
Depending on the size of your room, you might be able to use whole pieces of shiplap for a seamless look.
For larger rooms, staggering the seams is necessary. Typically, I install one whole long piece of shiplap. The next piece is cut from the left over piece if possible. (Keep in mind that the wood needs to be attached to studs, so it needs to align with those measurements.)
If left over wood is not available, I stagger by cutting the wood in halves and thirds, alternating with whole pieces. This gives the look of a random pattern and looks more natural.
What kind of nails should be used for shiplap?
For installing shiplap, I prefer to use a nailgun. I’ve used both battery powered and with an air compressor nail guns. Both have their advantages.
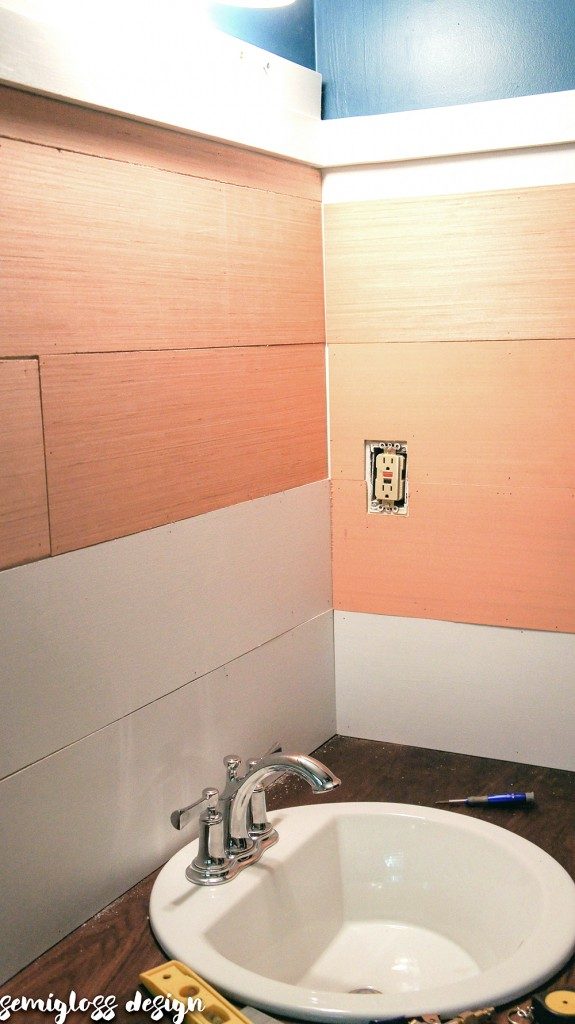
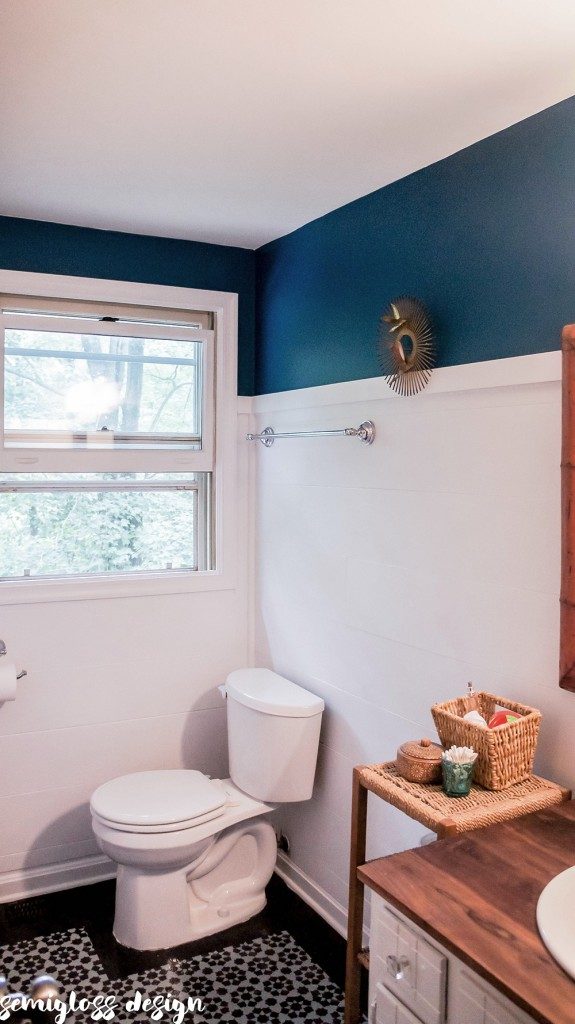
Decide on how high you want your shiplap. You can do the whole wall or do a partial wall. A general rule of thumb is to split the wall into thirds. In my downstairs bathroom, I added shiplap to the bottom third of the wall. In this bathroom, it’s closer to 3/4 of the wall because I wanted the top to line up with the shower tile.
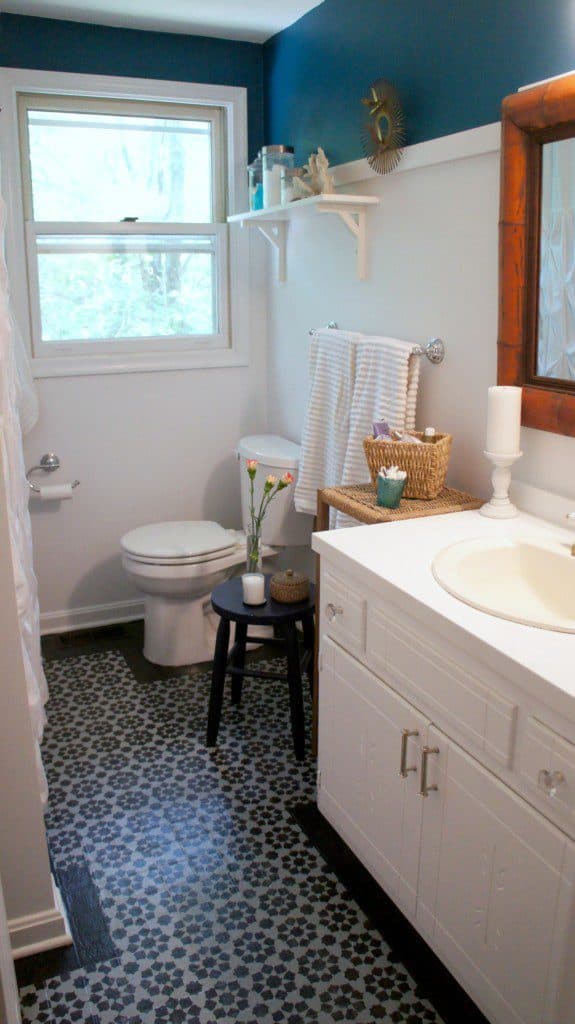
(Before picture)
Figure out how much wood you need. The easiest way to think about it is to figure out how many 4×8 panels would fit on your walls. Then figure out how you want them cut. Keep in mind that some stores will only cut certain sizes. For a farmhouse look, 6-8″ wide is pretty standard.
Measure between the baseboard and top. (I used my existing baseboards and I already had the top rail installed. You can add your top rail at the end.) Divide that number by the width of your boards. Figure out where you want the tiny cuts to fall. In my bathroom, I wanted a whole board sitting against the countertop edge, so I worked from there and put the skinny pieces at the top and bottom where they would bother me less.
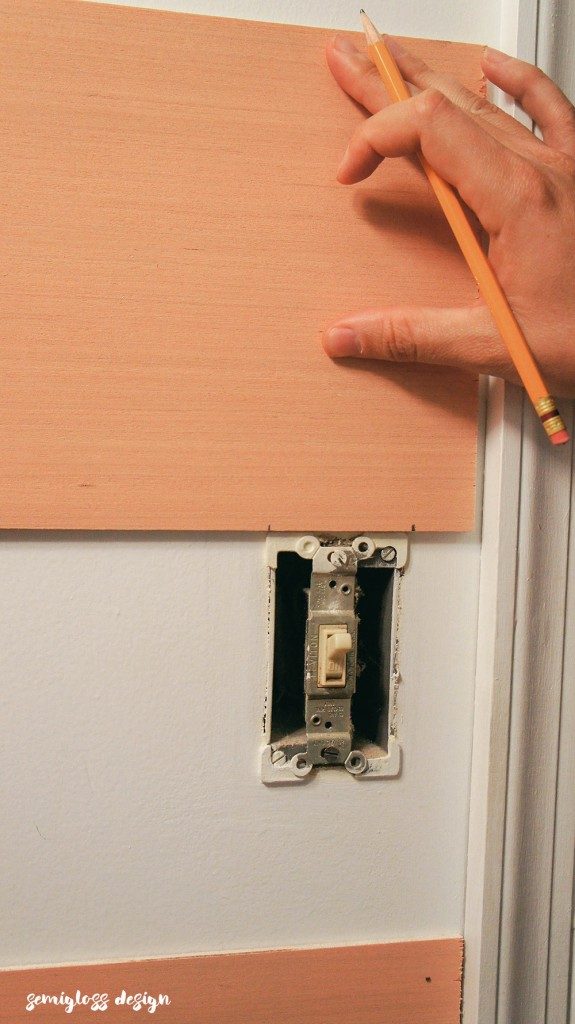
Prepare the room. Remove all of your light switch covers and towel bars (if a bathroom) for a blank slate.
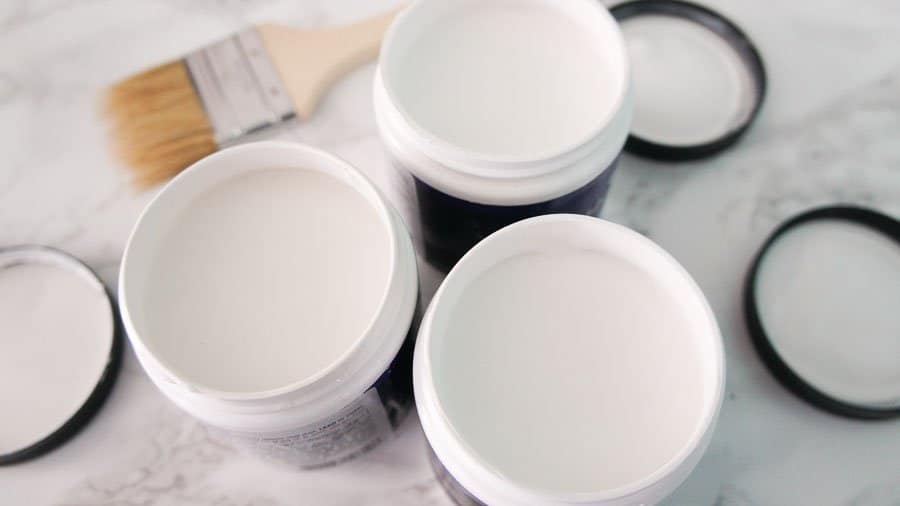
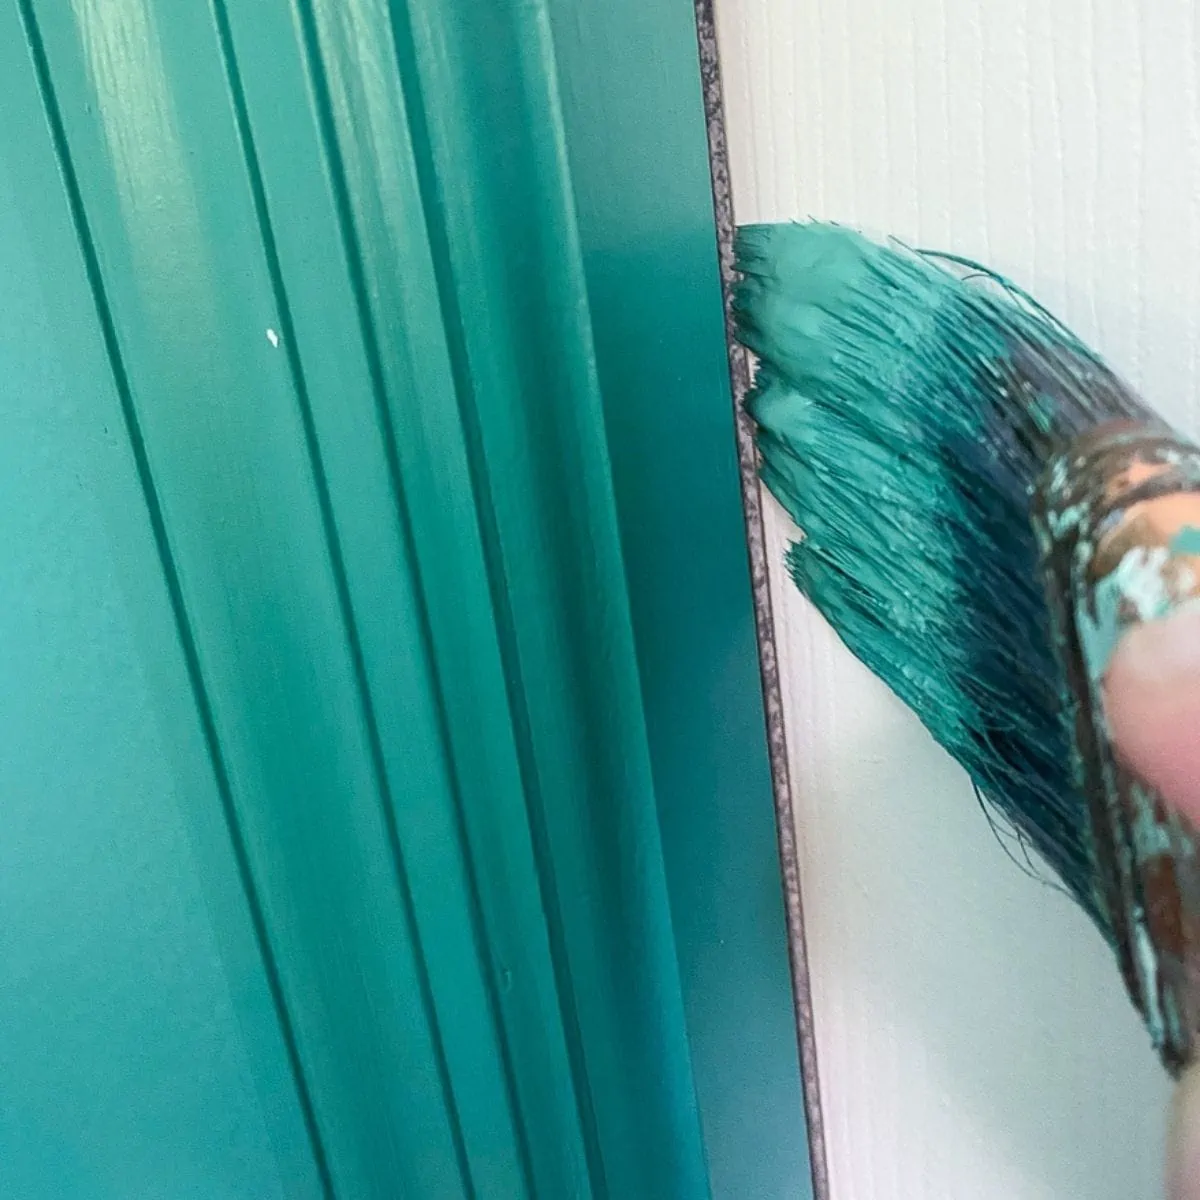
Pre-paint the wood if desired. I pre-painted 2 pieces that would sit against the countertop, so that I would not get paint on it.
Installing Faux Shiplap
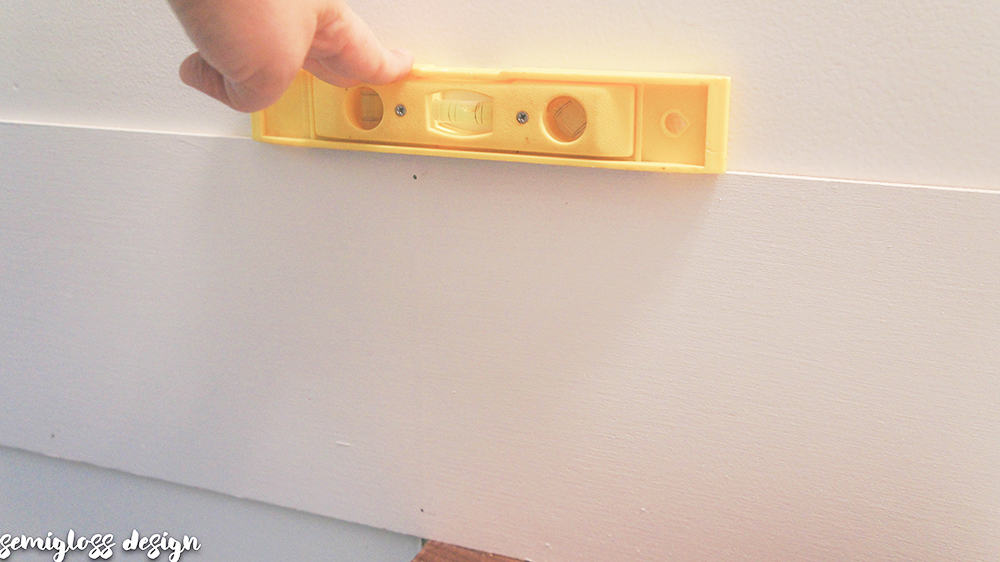
Install the first board. I started with the piece above my countertop. Use a level to get the board nice and straight.
Use a nail gun and attach to the wall. Because this wood is so thin, it needs nails every 6-8 inches. There will be spots that bow out a bit and they need to be nailed in those spots as well. You will use a LOT of nails. That’s why you want to use a nail gun.
Use a coin to space the 2nd row of wood. You can eyeball it if you want. Continue along the walls. Stagger the boards so that the seams aren’t all in one place. This also lets you use the scraps and waste less wood. I installed as many of the easy pieces as possible before continuing to the harder cuts.
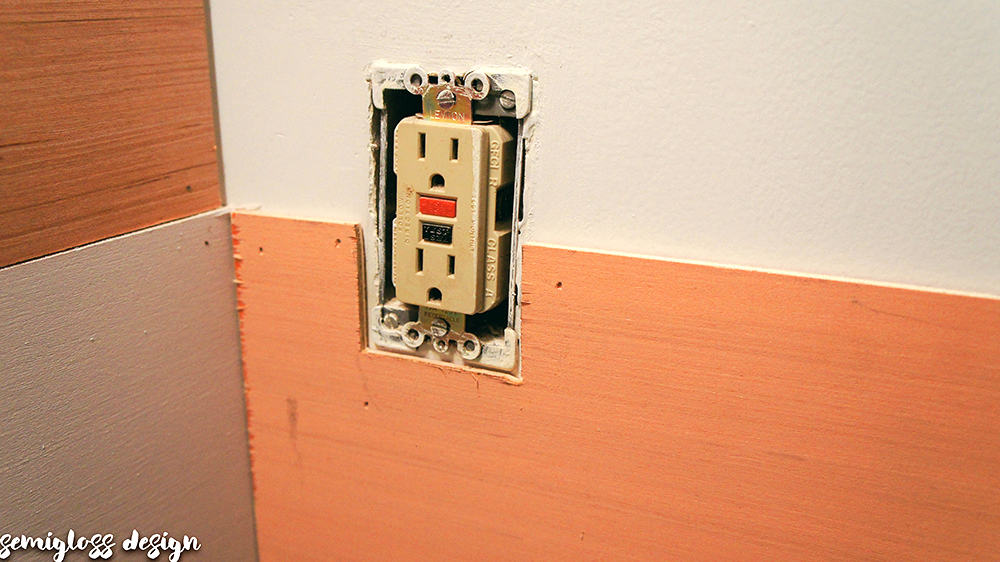
Cut the difficult pieces. Some pieces are harder to cut. For pieces that hit a light switch, cut the board to the right length. Then hold is up to the obstacle and mark along the side and top or bottom (depending on where it needs to be.) Connect the lines to form the rectangle. For light switches, you will need to cut around the entire box. Don’t cover the part where the switch is screwed into the wall. You will need to access those spots later. Use a drill to make a hole big enough to fit a jigsaw blade it and cut out the hole.
Dry fit it to make sure it fits. Make adjustments if needed and then install it.
Continue until the walls are covered.
Cut and install the skinny pieces at the tops and bottoms. For long thin pieces, measure both ends of the space because it will most likely be uneven. Use a circular saw or jigsaw to cut the shape.
I used long boards for behind the toilet, then nailed around the outsides as best as I could.
Finishing The Shiplap Walls
Add trim to the top. I used 1×3’s but there is also trim that has a slight overhang that works well with this wood. Read more about trim for corners and capping off shiplap.
When the walls are covered, add corner trim if desired. I like the way that it finishes the space.
Fill all the nail holes with spackle. Let dry and sand.
Caulk all edges. I caulked between the seams for a cleaner look. Plus, in a bathroom, you want fewer gaps for dirt. Caulking shiplap makes it look seamless.
Once the caulk is dry, paint everything. My walls took 2 coats of paint.
Rehang all of your towel bars. I did NOT use anchors for this process because the screws went into wood and were pretty long. If I regret that decision, I’ll update this to reflect that.
The light switches can be unscrewed from their box. Use plastic spaces to make them flush. Then install the light switch covers. One day I’ll get around to replacing all of my almond covered switches to white ones. The bathroom feel so much brighter now! The bottom portion has always been white, but the shiplap really makes a difference!
So what do you think? Do you want to give budget friendly shiplap a try?
Emy is a vintage obsessed mama of 2 DIYer who loves sharing affordable solutions for common home problems. You don’t need a giant budget to create a lovely home. Read more…
Can you give any more detail to how exactly you caulked between boards? I want to do it, but I’m afraid it will “look” caulked. Also, I went to Lowe’s and asked for underlayment and they looked at me like I had 2 heads. Would it be called anything else? I saw some thin smooth plywood.
If it’s not in a bathroom, you don’t have to worry about caulking each plank. But you might want to paint the edges before you install them! I would still caulk where the shiplap meets trim. It gives everything a finished look.
Caulking does hide some of the details, but I really didn’t want water damage behind the wood, so it was a sacrifice I was willing to make. It still adds a nice texture to the walls. In my kids bathroom, I used tongue and groove boards for a more pronounced shiplap look. It’s more expensive and the planks are only about 5 1/2″ wide, but it’s another option. Those are caulked too.
When I caulked, I applied it to each crack and used my finger to shove it into the crack. Then use paper towels to wipe away the excess from your fingers. Make sure you buy paintable caulk. It takes a while, but it was worth it.
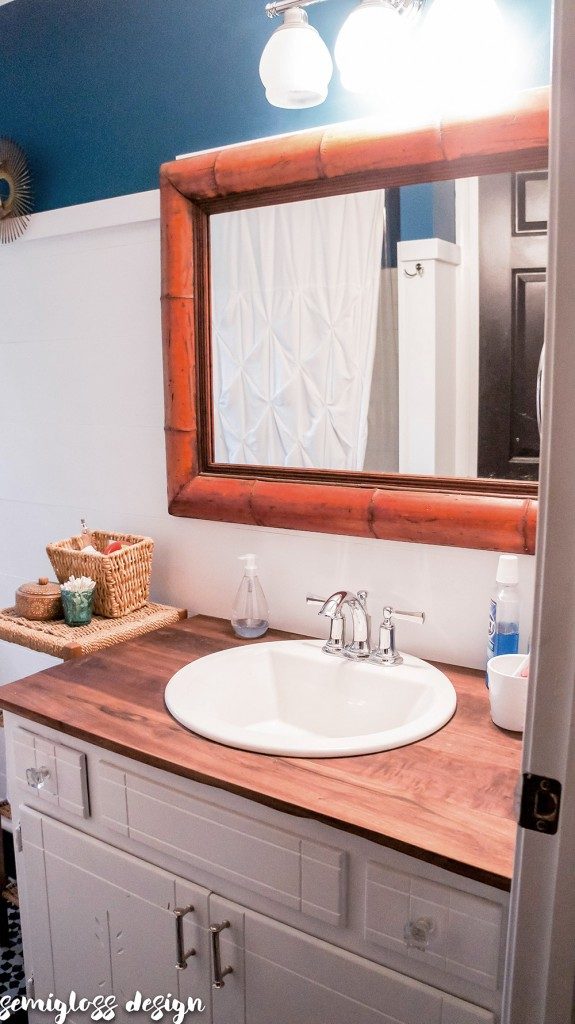


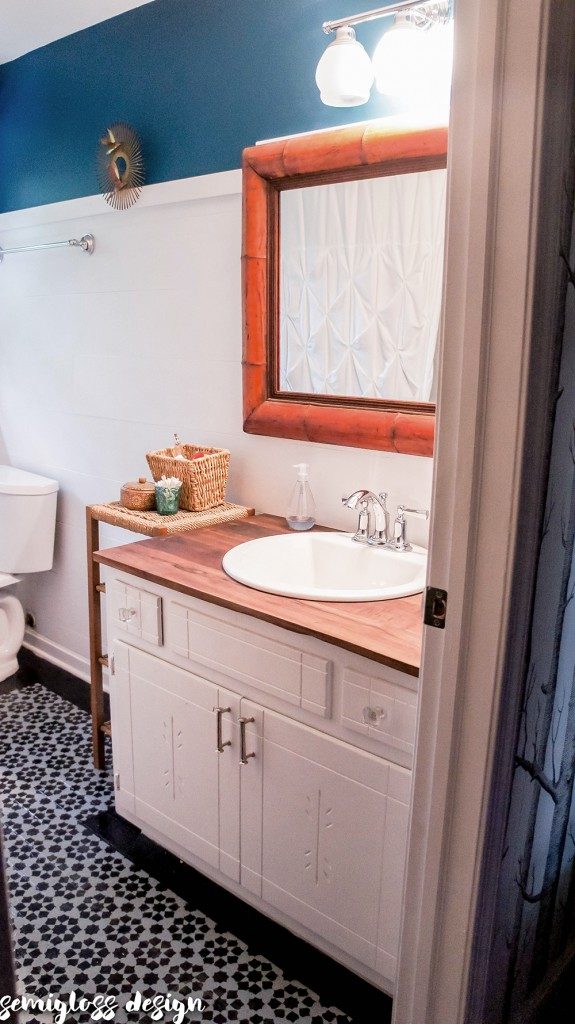

your bathroom looks SO good! i love the countertop/vanity/mirror combo!
Thanks Cassie! I’m so happy with how it has turned out. 🙂
I still have tons of that underlayment from anther project and this looks like just the thing for hubbie’s new studio! I love your tutorials.
I need to hear all about his new studio!
Can you give any more detail to how exactly you caulked between boards? I want to do it, but I’m afraid it will “look” caulked. Also, I went to Lowe’s and asked for underlayment and they looked at me like I had 2 heads. Would it be called anything else? I saw some thin smooth plywood.
Hi Stacey,
Here’s a link to the exact wood that I used: https://www.lowes.com/pd/UltraplyXL-Premium-Underlayment-UltraplyXL-1-4-in-Whitewood-Plywood-Application-as-4-X-8/1000069369
It’s in the section with the large plywood sheets. It might be called different things in different parts of the country, maybe? It’s 1/4″ thick and smooth. It’s generally used under flooring. The smooth, thin plywood is probably it.
If it’s not in a bathroom, you don’t have to worry about caulking each plank. But you might want to paint the edges before you install them! I would still caulk where the shiplap meets trim. It gives everything a finished look.
Caulking does hide some of the details, but I really didn’t want water damage behind the wood, so it was a sacrifice I was willing to make. It still adds a nice texture to the walls. In my kids bathroom, I used tongue and groove boards for a more pronounced shiplap look. It’s more expensive and the planks are only about 5 1/2″ wide, but it’s another option. Those are caulked too.
When I caulked, I applied it to each crack and used my finger to shove it into the crack. Then use paper towels to wipe away the excess from your fingers. Make sure you buy paintable caulk. It takes a while, but it was worth it.