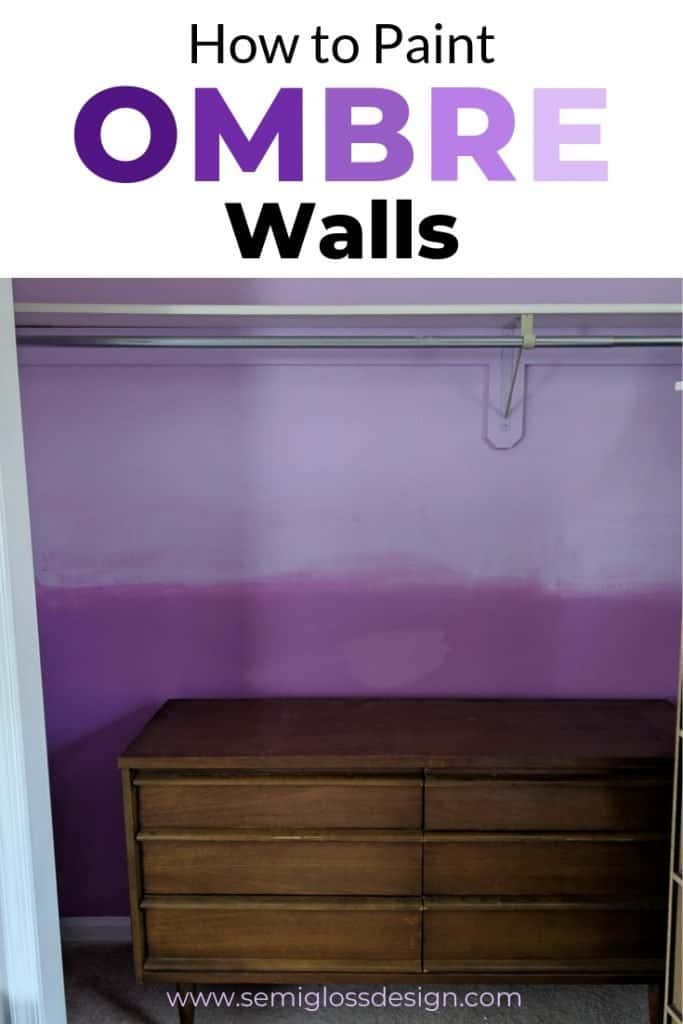
How to Paint Ombre Walls
Learn how to paint ombre walls. Ombre walls are a great way to add interest to a boring wall.
This process uses a technique similar to my painted ombre dresser.
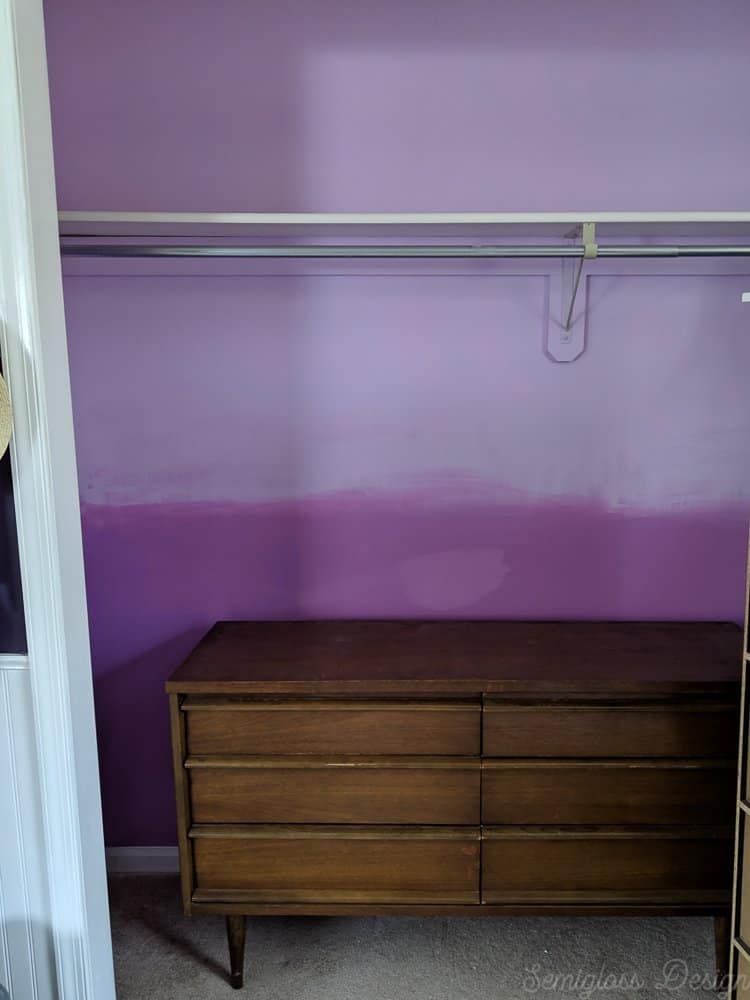
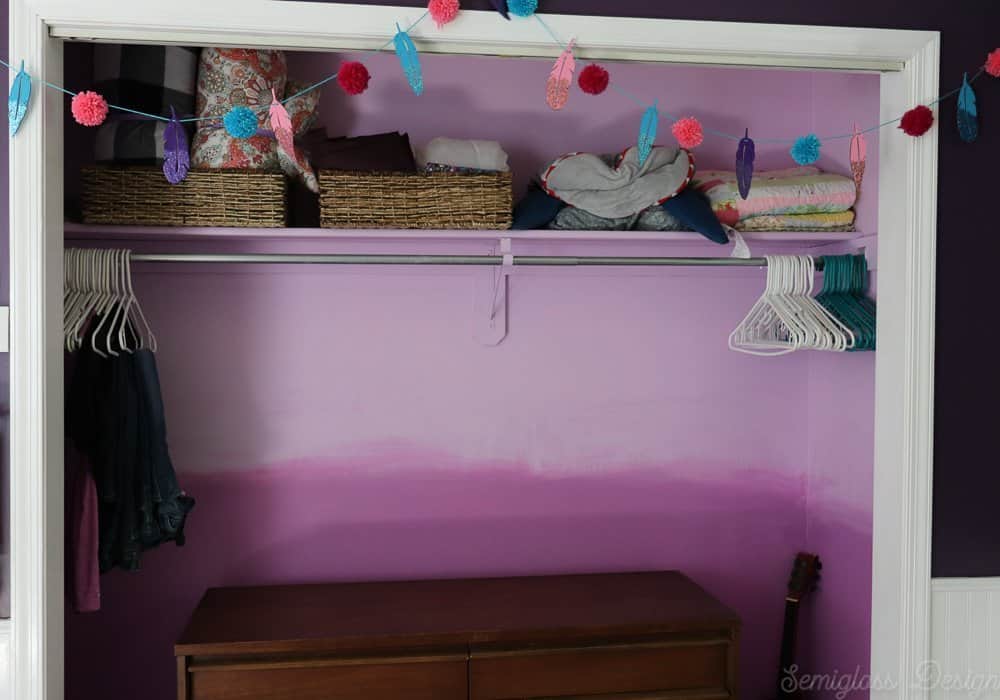
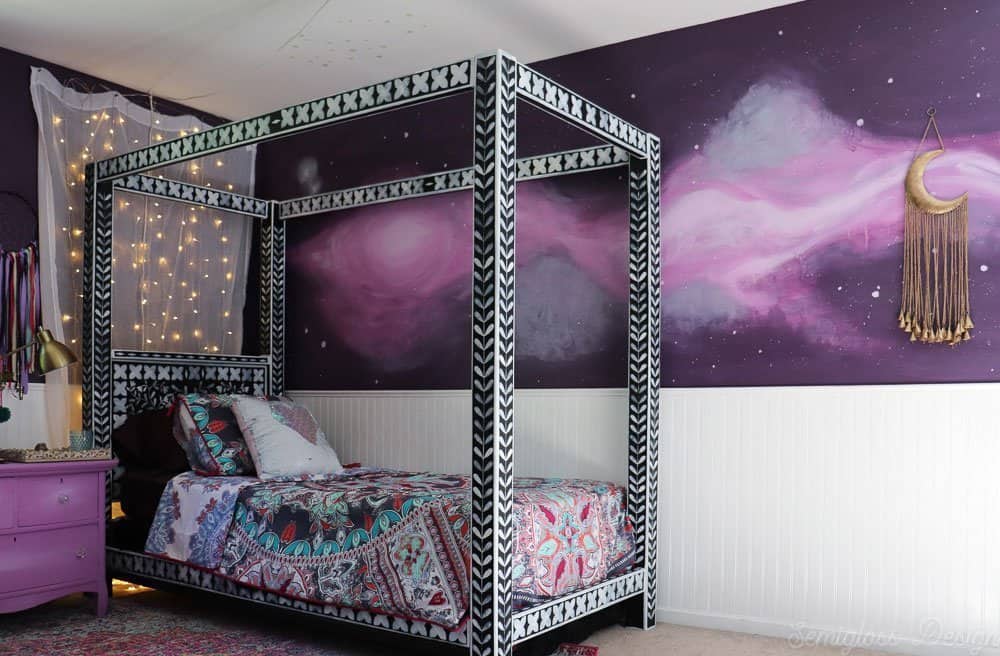
I knew that I wanted to do something fun with my daughter’s closet, but it needed to be a bit more subtle than the galaxy mural that I shared last week. So, I blended two colors to make an ombre wall.
What Are Ombre Walls?
Ombre is when you paint colors to look like the paint blends into another color.
You might also be interested in learning how to paint a geometric accent wall.
Learn How to Paint Ombre Walls
Supplies Needed
This post contains affiliate links. By purchasing an item through an affiliate link, I earn a small commission at no extra cost to you.
- Paint in 2 or more colors*
- Spray Bottle
- Paint brushes for each color, plus 1 for blending each pair of colors
- Drop cloth to protect workspace
*I used Berries Galore and Purple Whisper by Valspar in an eggshell finish.
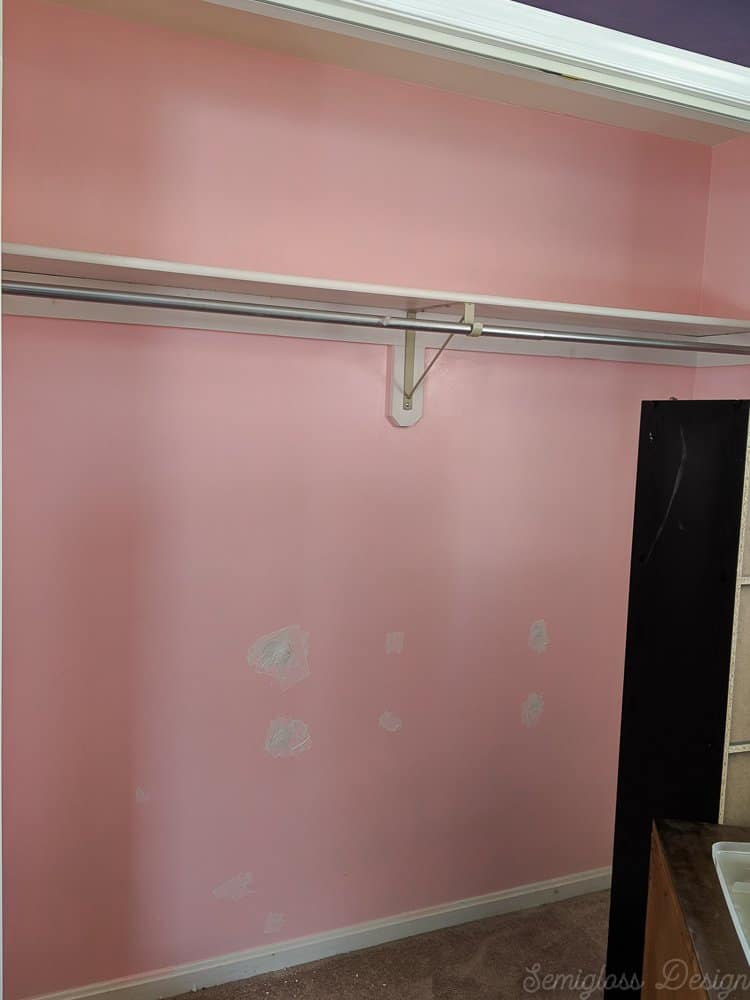
Please note that due to time constraints, I worked around the repairs that were still drying. Discolored spots are due to paint still drying. I’ll add a better photo once everything dries.
- Start with any repairs needed. I had to patch holes in the wall. Ensure you prime any spots you patch because the spackle or joint compound will absorb the paint differently and look weird. Related: How to paint a room

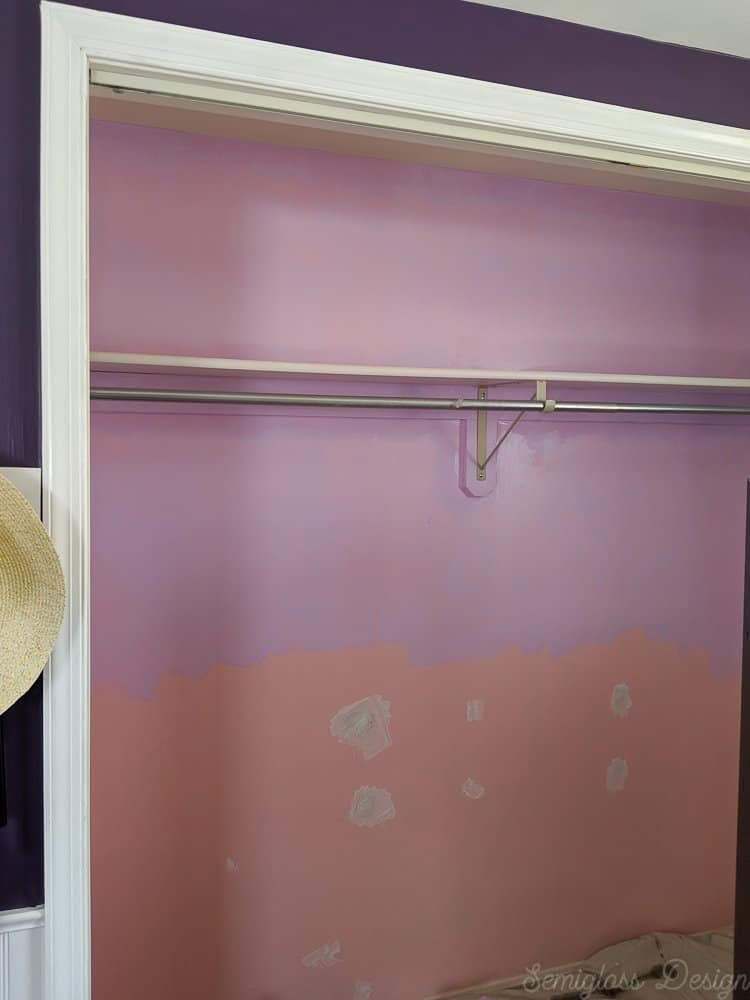
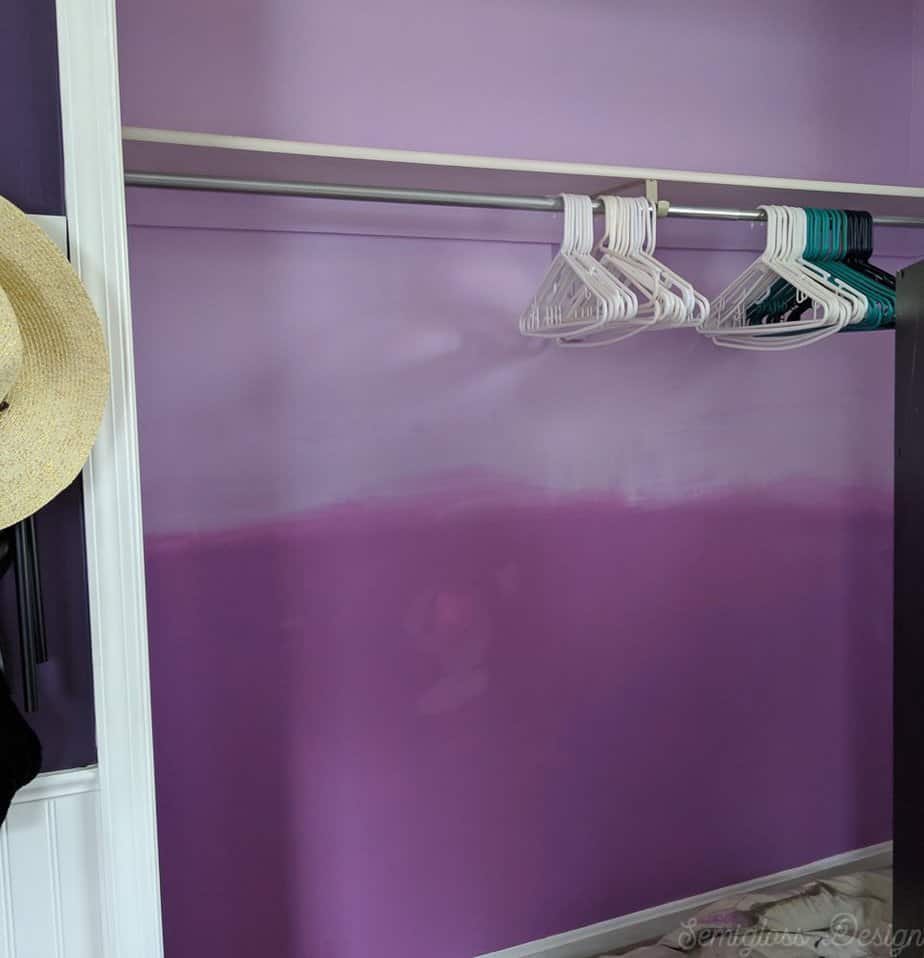
- Figure out how many colors you want to use and roughly divide the wall into that many portions. I used 2 colors, so it’s cut in half.
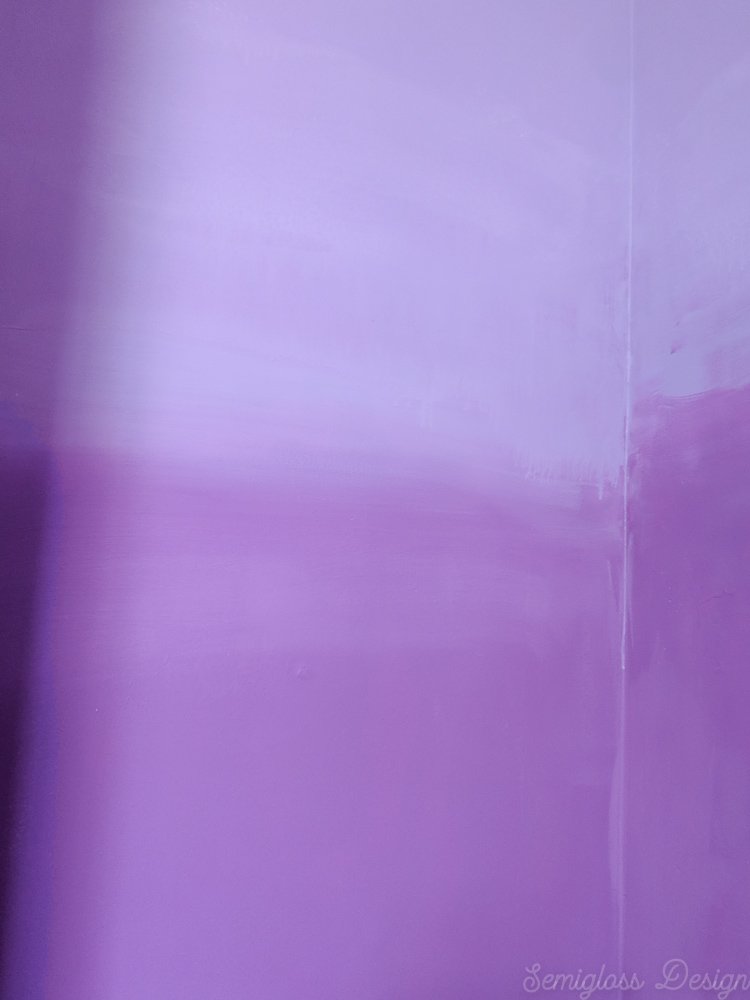
- Paint the lightest color at the top, cutting in around the edges as usual.
- Paint the next darkest color until you’re finished. Each color should roughly butt up against the next color. Make sure you cover the previous color completely.
- You might need 2 coats of paint for full coverage.
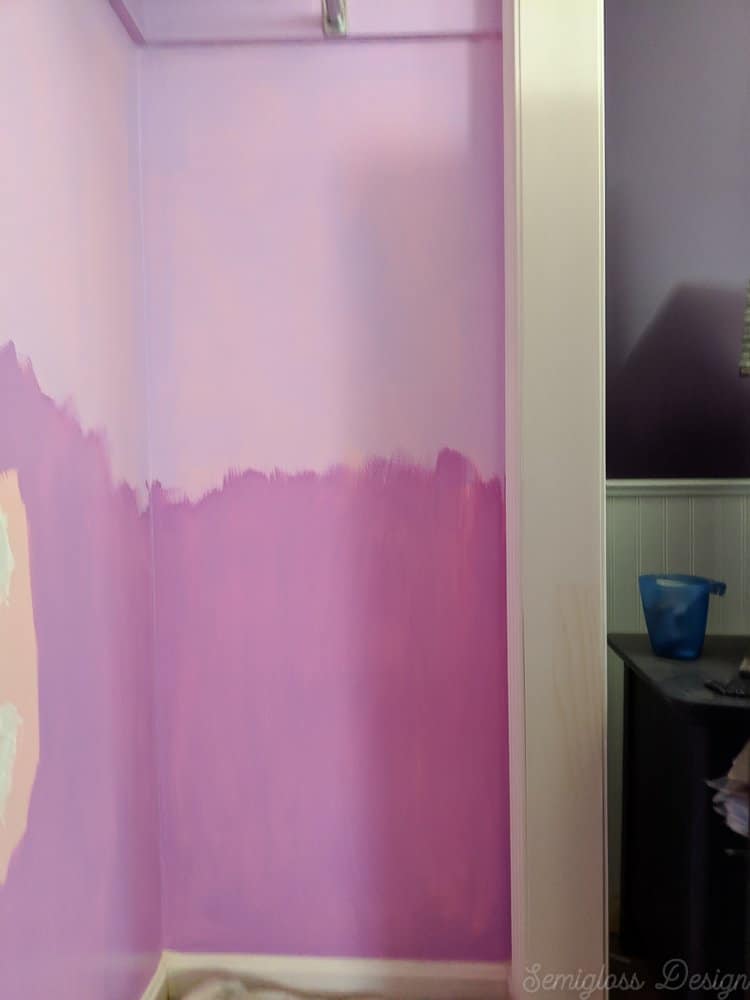
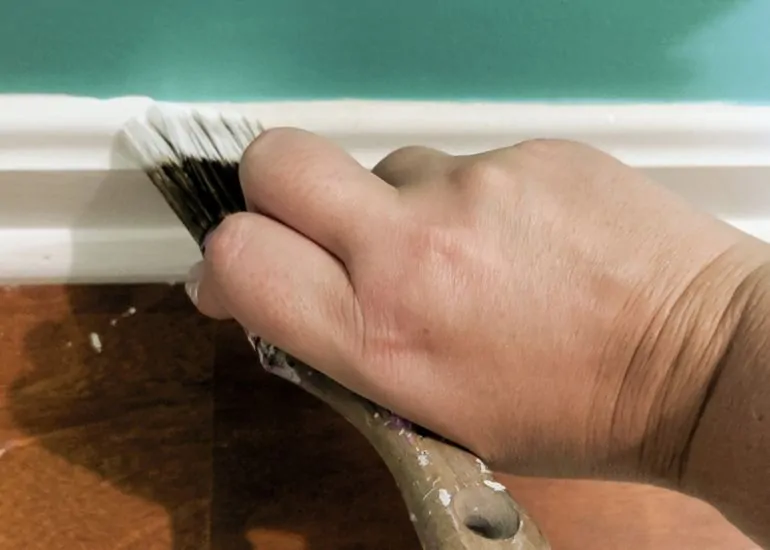
- After the paint dries, add paint where each color meets.
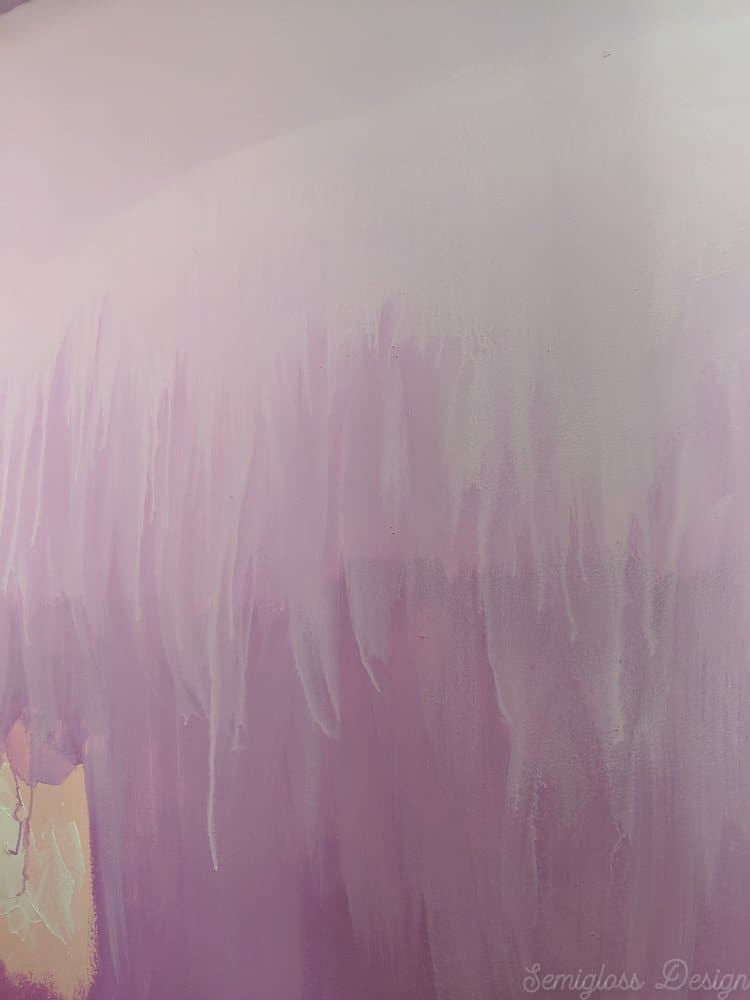
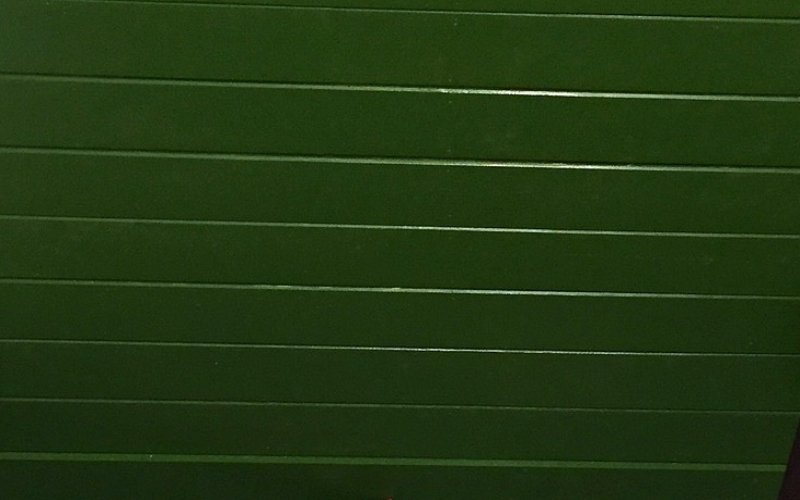
- Spray where you just painted and use a clean brush to start blending the colors.
- Use a sideways motion for best results. Up-and-down brush strokes never look as nice. See Exhibit A.
My next steps probably should have been my first: It’s time to clear out the clutter. We’ve decided to nix her vanity, desk, bedside table, and bed, so it is time to move everything out.
You might also like:
Pin for Later!

Emy is a vintage obsessed mama of 2 DIYer who loves sharing affordable solutions for common home problems. You don’t need a giant budget to create a lovely home. Read more…
This is such a fun idea. I bet your daughter loves it! I haven’t tried doing an ombre effect but want to try it sometime. Thanks for the tips!
Your daughter must be happy dancing! Love the Ombre wall I would love to do this one day. Love your easy to follow tips. 🙂
The ombre treatment is so fun! I need to find a wall to try this on. I did our outdoor bistro set in ombre a couple years ago.
This is going to be such a fun room! Great job with the ombre wall, Emy!
What a great idea and great tips, too. Your daughter will have beautiful art every where she looks. That’s one lucky gal! So excited to see your progress every week.
Oooh! Love that ombré wall! Great job!
I love the ombre coloration on the walls, it is so pretty when the color fade into to each other like that. Plus these are such fun colors to be using too!
This looks way easier and less expensive than purchasing a mural. Thanks for breaking it down for us!!!
You are always so good at making the DIY steps seem easy. This wall treatment is such a great idea for the closet. BTW- I am looking for a dresser just like that for my living room! Looking forward to seeing how the rest of the room comes together
What a great idea and color for a girls room! It turned out great!
That’s a very cool pop! Compliments the galaxy mural in a very cool way!
Emy this is such a great tutorial! It looks gorgeous with the galaxy mural you did, I can’t wait to see this weeks update!
You always come up with the coolest, most creative finishes!