ORC: Painted Shibori Walls in the Tropical Sunroom
It’s week 3 of the One Room Challenge and I’m feeling good about our progress. I’m at the point where my master plans actually feel do-able, unlike last week where I wanted to weep loudly and drink too much wine. We got so much done over the past weekend and even though we didn’t finish any of it, we’re super close. I’m feeling pretty confident. Famous last words, right… Besides, my shibori walls are looking pretty cool!
In case you have no idea what I’m talking about, I joined the One Room Challenge as a guest participant. Twice a year, Linda at Calling It Home hosts a fun challenge to makeover a room in your home in 6 weeks. There are 20 featured designers who posts on Wednesdays and over 200 guest participants like myself who post on Thursdays. At the end, we have a completely finished, super fab room to be proud of. Maybe after enough One Room Challenges, my house will be complete!

Catch Up Here:
This post contains affiliate links. By purchasing an item through an affiliate link, I earn a small commission at no extra cost to you.
For this One Room Challenge, I’m making over my sunroom. There was not a lot wrong with it, but it has much more potential. With pool season around the corner, we want it to be ready for a summer of relaxing!
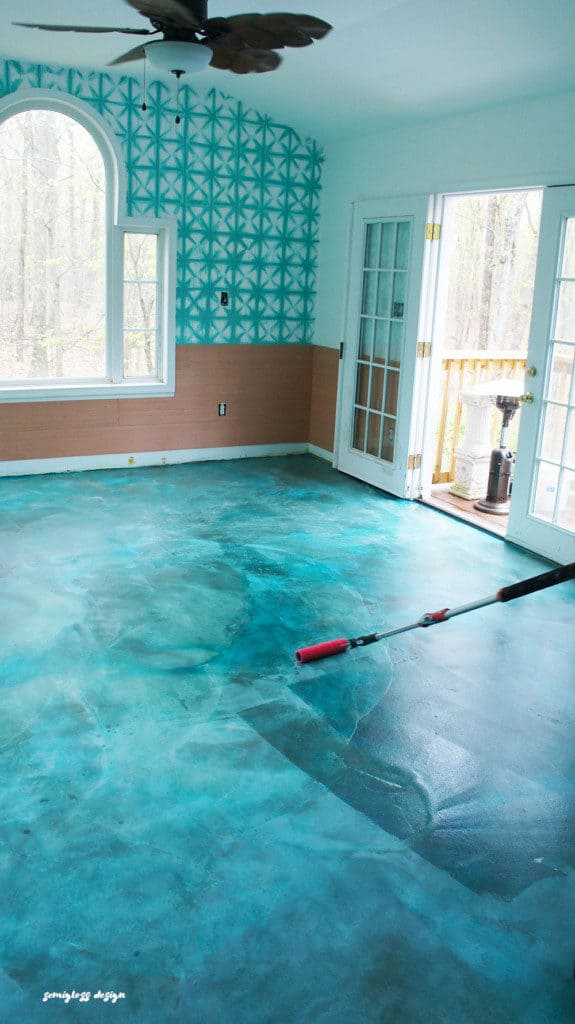
Our sunroom is fully enclosed, but because there is no HVAC, it acts more like a 3 season room. We live in a forest in central Maryland, so our summers can get a bit swampy. (We have our very own swamp on our property, actually.) The point of all of this, is that we have to be careful what we put in the room because it needs to withstand our weather. I fell in love with this shibori wallpaper, but it would never work in this room due to the humidity. Plus I’m super cheap. So I decided to try my hand at painting my own shibori walls. I’m so in love with the way that @coppercorners has painted her home to resemble wallpaper.
Besides, it looked super fun.
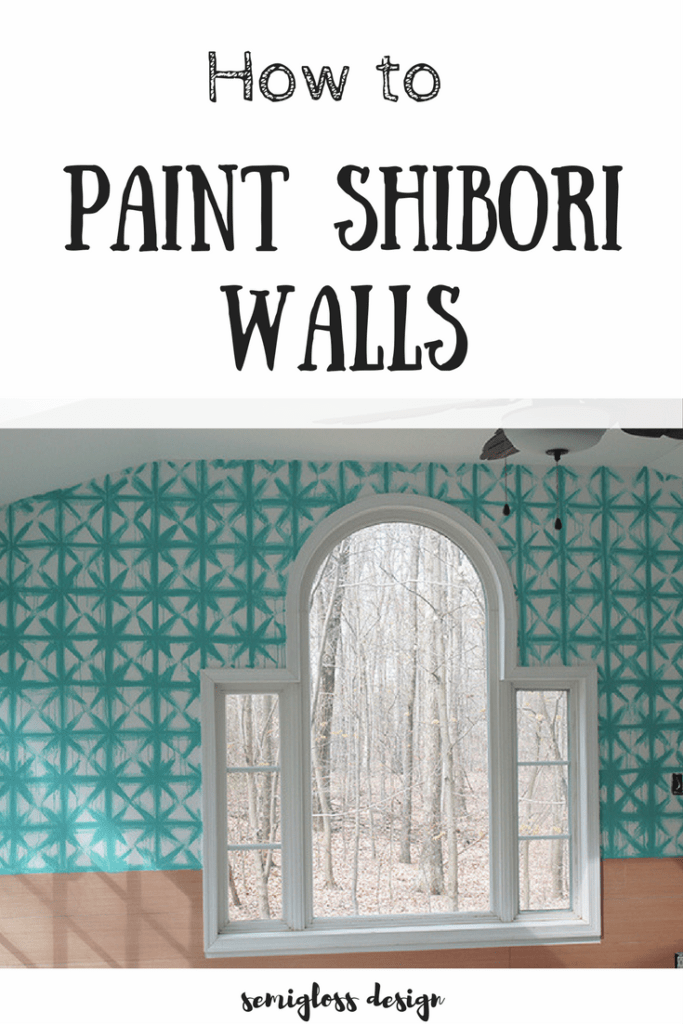
How to Paint Shibori Walls
Supplies Needed
- Paint (I’m using Sherwin Williams Cooled Blue
- Chip Brushes in different sizes (the texture of these brushes is perfect)
- Handy Paint Cup (much easier to use when going up and down a ladder all day)
- Ladder (or step ladder if you’re tall)
- Spray Bottle
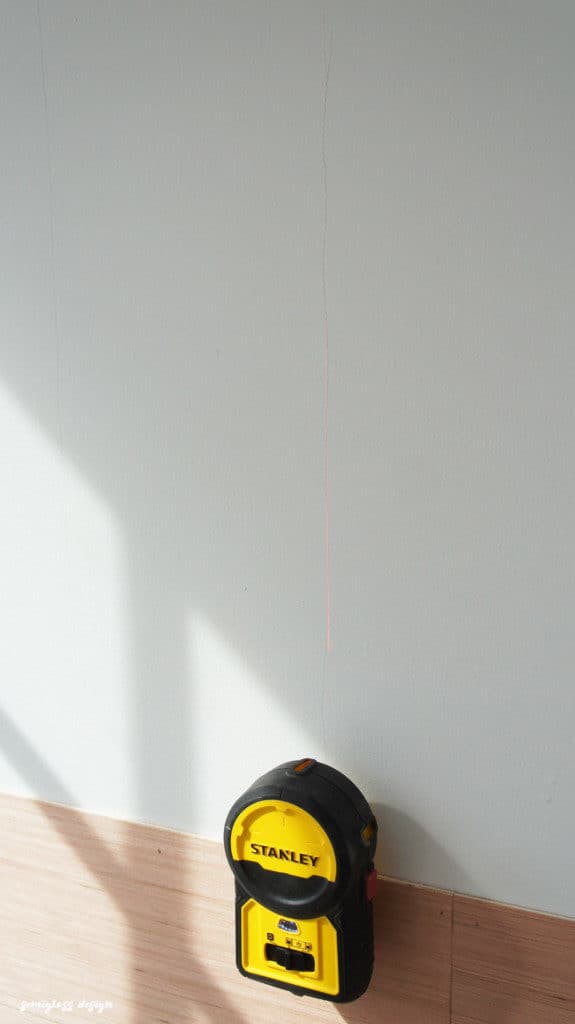
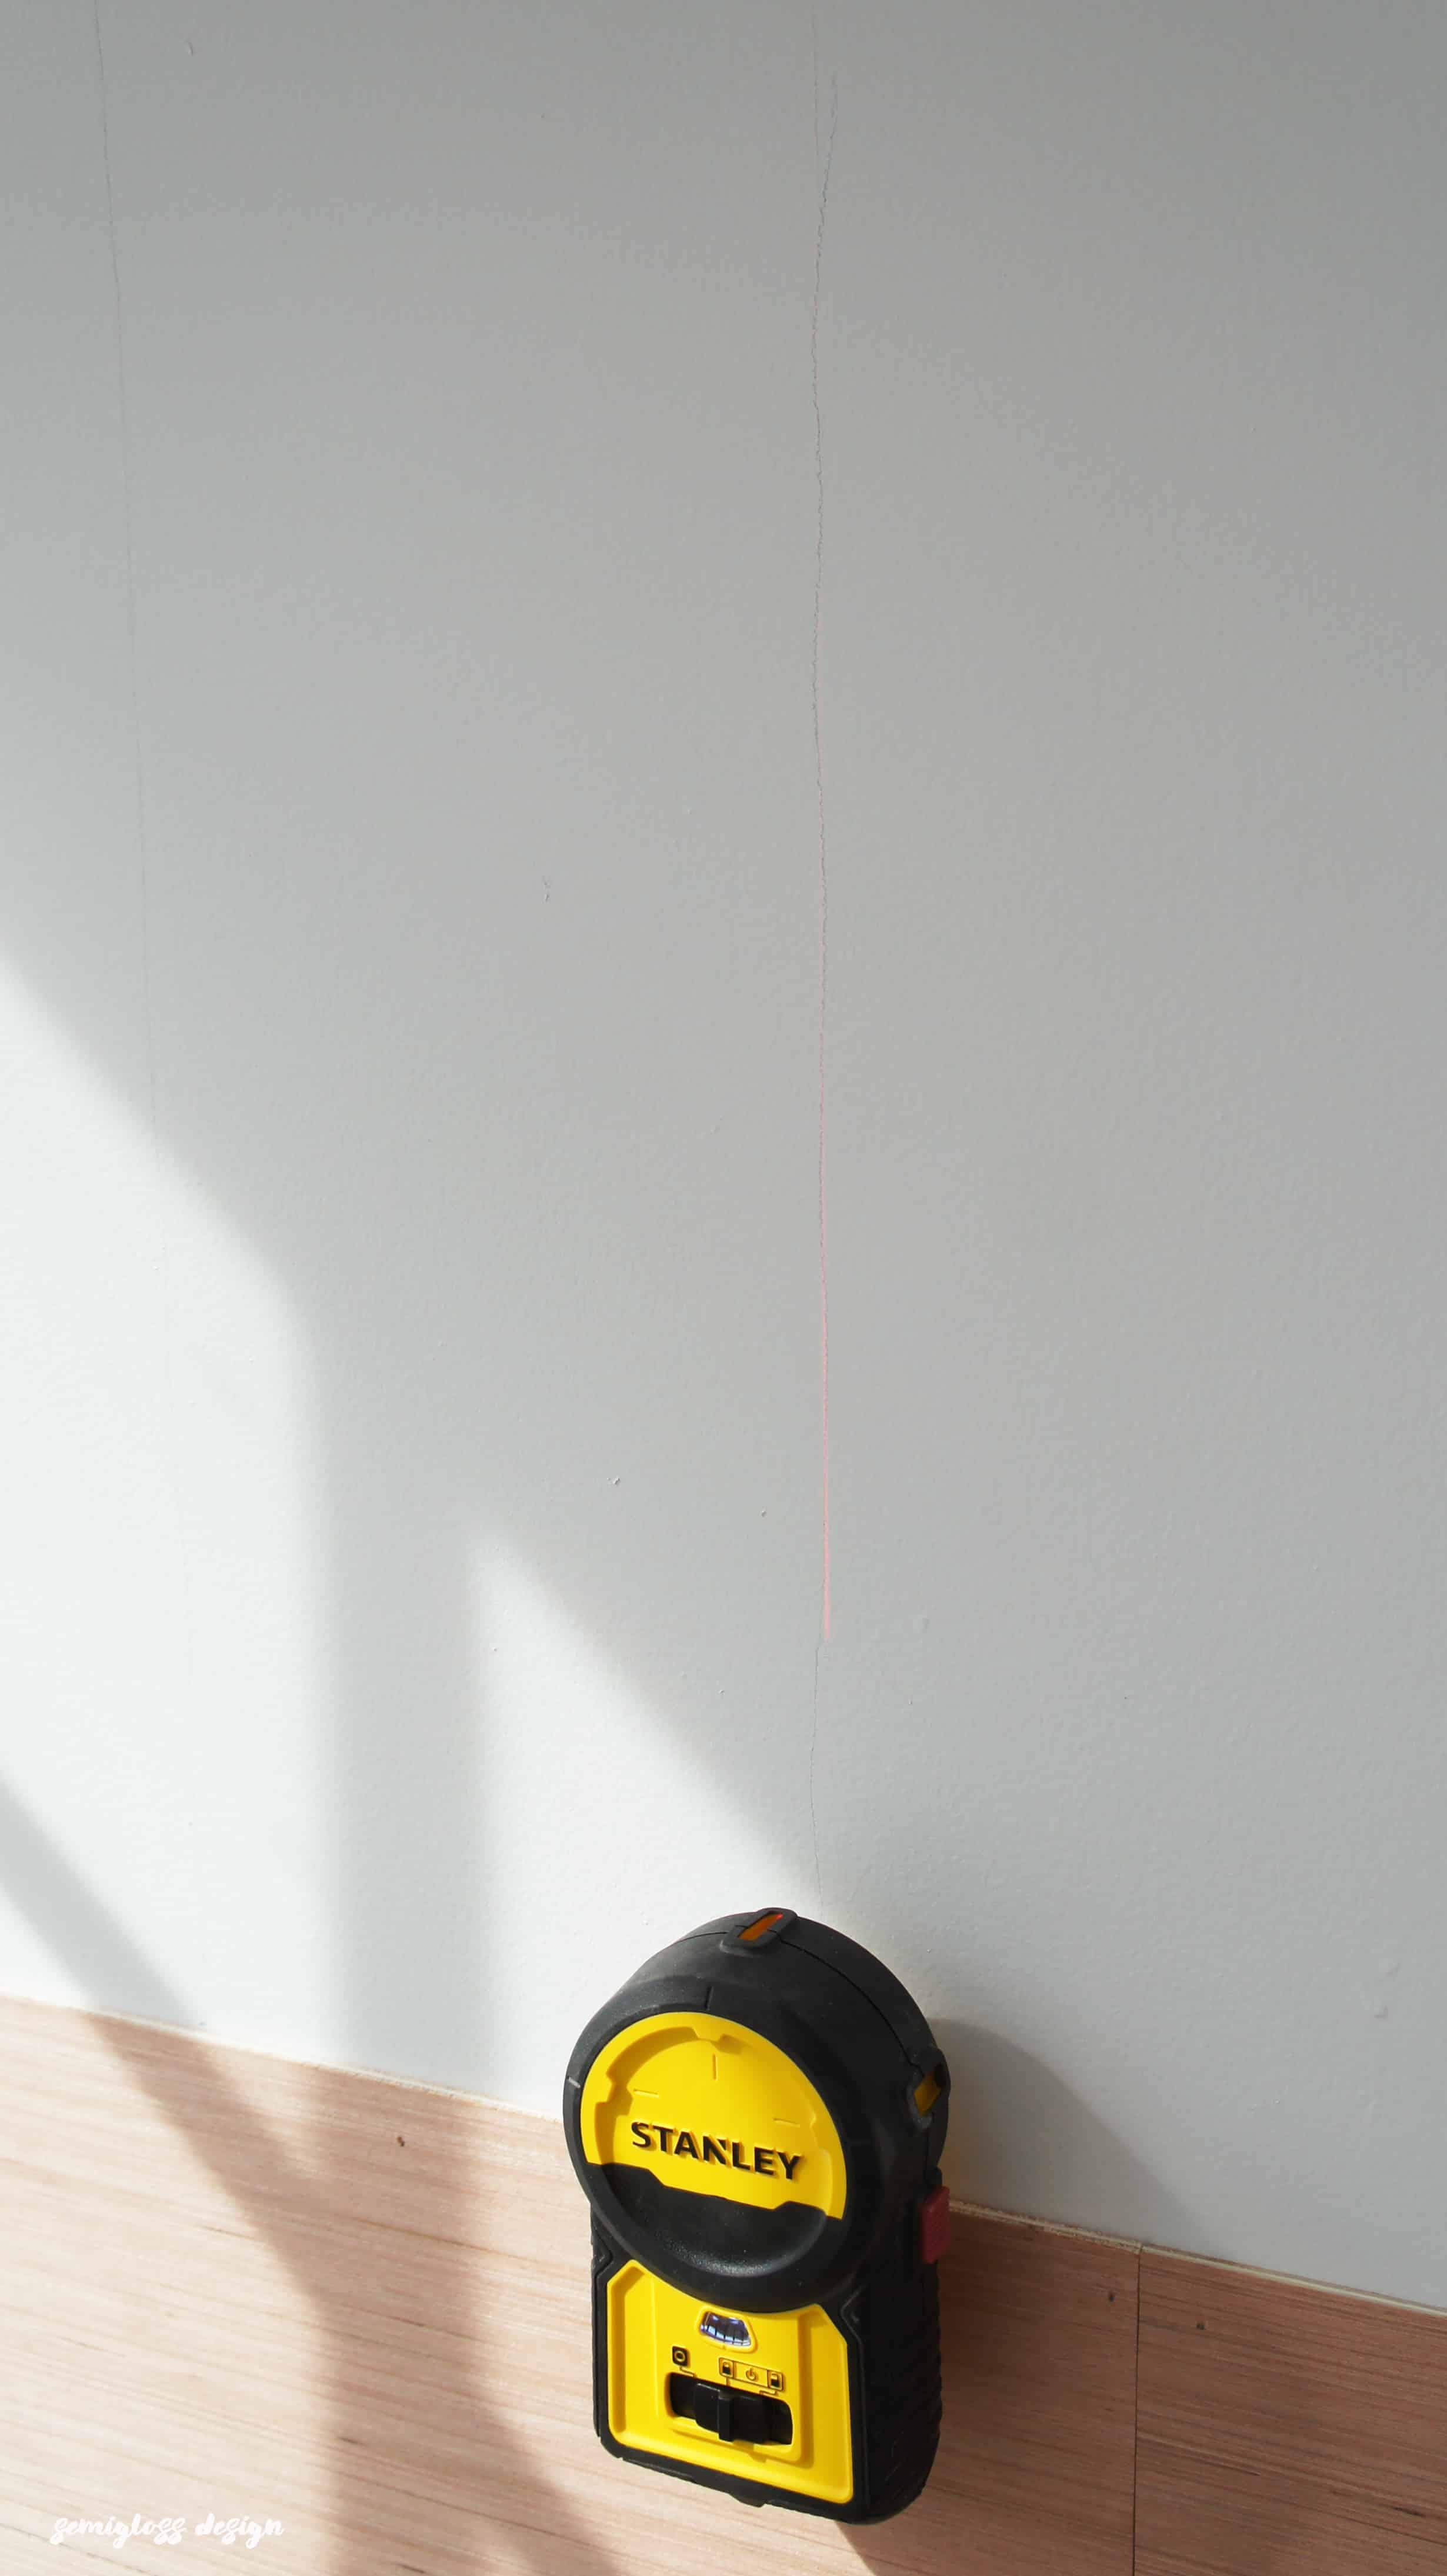
- Laser level
- Pencil
Note: This technique is not for perfectionists. The inconsistencies are what makes it interesting.
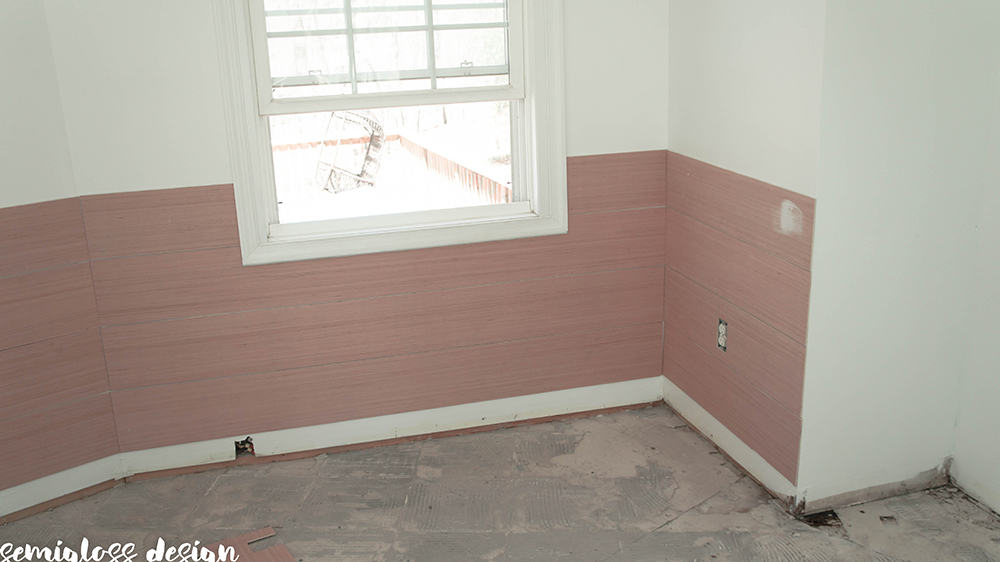
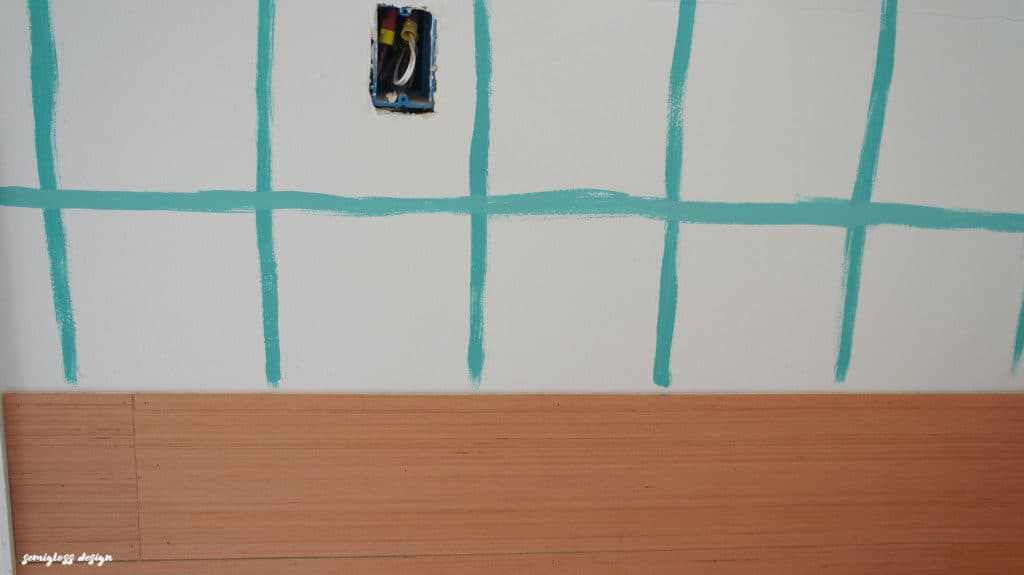
- Plank the walls. We started by cleaning the demo debris off the walls and painting them white. I added wood planking to the bottom half of the walls to break up the space visually. The planking is just underlayment plywood that I had the hardware store cut into 8″ strips. It’s attached with a nail gun. I left a tiny gap between each piece of wood. They will need the finishing trim pieces and the be caulked and painted. This will happen this week (probably as you’re reading this.)

- Now for the fun part. I measured out 8″ vertical increments along the wall. I used a laser level to get straight lines that I marked with a pencil. They aren’t perfect at all, but that’s fine because they’re going to be covered.
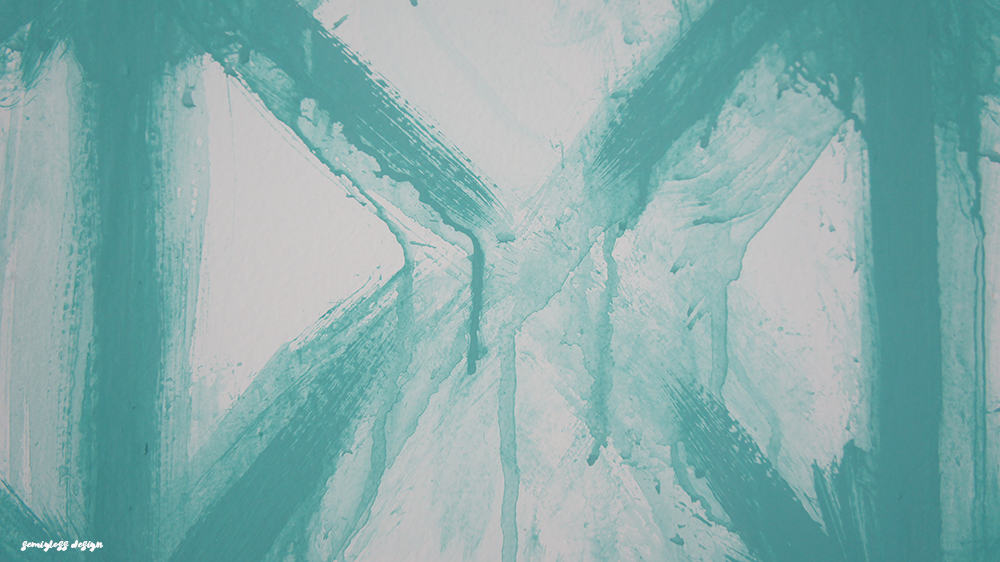
 (I started off painting all the lines out at first, but soon discovered that working in small sections with wet paint looked much better.)

- Then I measured 8″ horizontal increments and marked them as well. I chose 8″ because the scale seemed nice for a room this large. Normally this shibori pattern is done a bit smaller, but it would have been overwhelming. Plus, a bigger pattern means less painting!
- I experimented with several methods before finding one that I liked the best. My favorite method was to paint the lines with watered down paint, and then go over it with full strength paint using a skinny paint brush. This helps the 2 paints blend better. You want the center lines to be darker and blend to softer lines.
- I painted X’s at each intersection, varying how close they meet in the center of their square. Sometimes the paint ran from too much water. I used a paper towel and wiped off what I could, but I left a lot of the drips, because I like them.
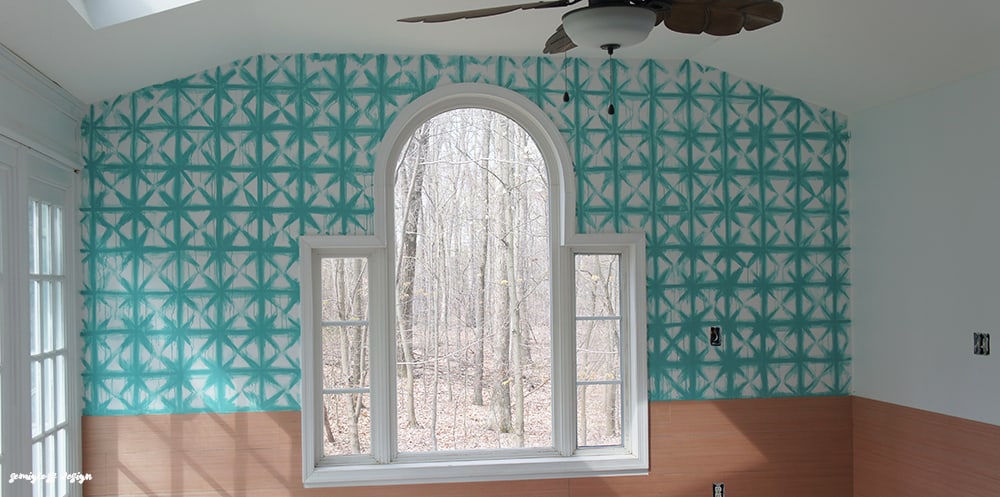
- I perfected this method on the bar wall. Cabinets are going on this wall.
 (I started off painting all the lines out at first, but soon discovered that working in small sections with wet paint looked much better.)
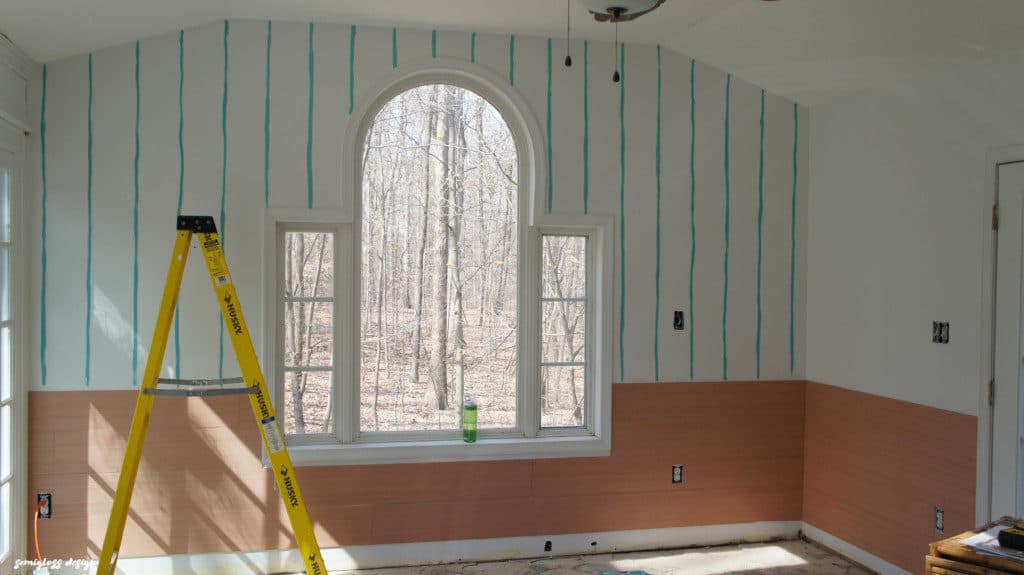

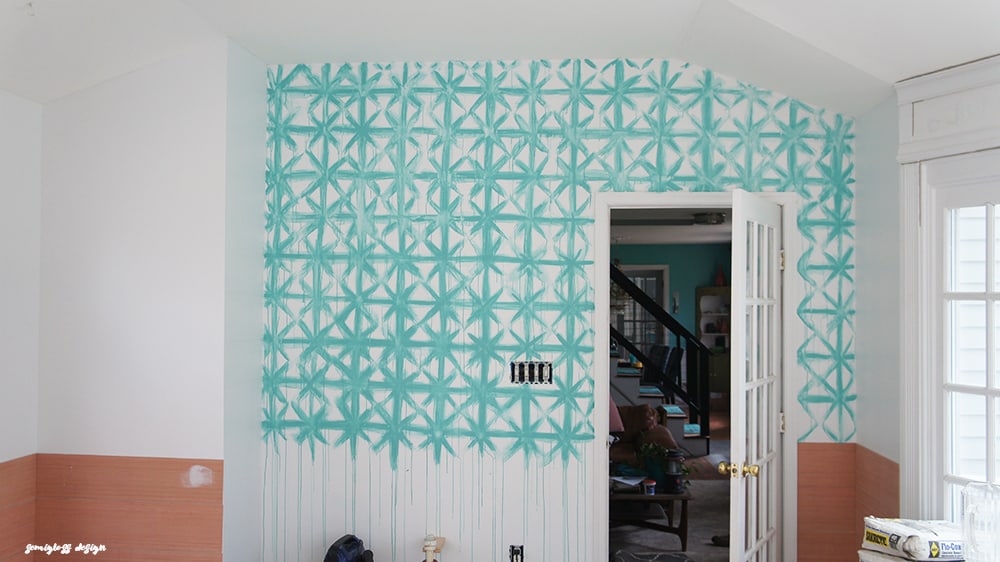
My son says that it looks like I don’t know how to paint. I like my shibori walls, so we’re going to have to agree to disagree. I have a few more walls to go. I’ve been saving up some podcasts to listen to while I binge paint over the next few days.
Pray for my claw hand…
We were very productive this weekend and also go the floor poured and stained. It’s awaiting the clear coat, so I’ll write more about it next week. For now, here’s a sneak peek. And yes, it’s everything that my dreams are made of. Mermaid floor dreams do come true….
Still To Do:
Pour the floor and let it cure.- Paint the fun shibori pattern on the walls. (Halfway done)
- Install cabinetry.
- Super fun countertop treatment
Stain the floors- Install the sink
- All new baseboard
- Finish painting trim
- Install shelving
- Build a bar
- Make new cushions
- Paint the armoire
Yikes.
See the final room reveal here!

Instagram | Facebook | Pinterest
You might also like:

Emy is a vintage obsessed mama of 2 DIYer who loves sharing affordable solutions for common home problems. You don’t need a giant budget to create a lovely home. Read more…


Wow! Very very cool- I really love this- especially with the floor!
Thanks Diane! That floor is everything. It makes me so sad to cover it with furniture.
this is incredible, emy! you are so talented- i love it!
Thanks Cassie! I will forward this comment to my wall hating son. 😉
I totally love your Shibori walls! What a great idea. And the colors are perfection! Looking so forward to seeing more!!! Susie from The Chelsea Project
Thanks Susie!
WOW this looks very expensive to me. can’t believe it was a DIY. bravo!!
Thanks Morgan! It was a lot of fun!
Super cool technique! I would have never thought to do that….plus I’m a total perfectionist, so this project would probably give me anxiety! Haha! Can’t wait to see it all come together!
Thanks Cristy! Yeah, it helps to not be a perfectionist. 🙂
Those Shibori walls are unreal! They look so so so good!
Thanks Kate!
I love that Shibori wall! It would make a perfect print for a wallpaper. Great job, and good luck.
Thanks Delia!
My goodness, this is so awesome Emy! So creative. Love that wall. Can’t wait to see full reveal!
Thanks Tee!
I am SO impressed with the fact that you painted that wall. I totally thought it was wallpaper when I saw it. It’s amazing! And your floors are seriously the coolest! I’m so looking forward to seeing this come to life!
Thanks Thalita! I’m loving the floors so much!
So impressed! Such a fun colorful space. Can’t wait to see it finished!!
Thanks Jessica! I’m ready to see it finished too! 😉
Emy, Your walls turned out fantastic! You did a superior job on them and on your floor!
Thanks Carol!
What a cool technique!! The walls look great!
Thanks Ruthie!
I can’t believe you did that by painting, the wall looks AMAZING! And of course I love the color you went with!
Okay, when I saw your floor post – I thought these were wallpapered… When I was doing my accent walls, I thought the tape with paint over it looked like a cool shibori design, and literally saw your Instagram post later that night showing the progress for these! LONG story short, they look amazing, and totally fool people into thinking they are wallpaper 🙂