The Beginner’s Guide for How to Use a Cricut Maker
Learn how to use a Cricut Maker. Taking your new Cricut Maker out of the box can be intimidating, so I’m here to help with an easy step-by-step tutorial for creating your first project.
You might be interested in learning more about the differences between the Cricut and Silhouette.
This post contains affiliate links. By purchasing an item through an affiliate link, I earn a small commission at no extra cost to you. As an Amazon Associate I earn from qualifying purchases.
I’m including links to both Amazon and the Cricut website. Cricut often holds sales (especially around holidays), so the price might be better on the Cricut website. Who doesn’t love saving money?
All About the Cricut Maker
The Cricut Maker is a fantastic cutting machine that can cut various materials.
It cuts ordinary materials like cardstock, vinyl, and iron-on vinyl, but it also cuts stuff like fabric, felt, leather, and balsa wood.
In total, it can cut over 300 different materials.
I bought my Cricut Maker to cut fabric (which, ironically, I haven’t used it for yet.)
The Cricut Maker has many blades that allow you to deboss, engrave, score, wavy cut, and more.
A basic Cricut Maker includes the machine, the cords, a fine-point blade and housing, a fine-point black pen, a 12″ x 12″ FabricGrip mat, and a 12″ x 12″ LightGrip Mat, as well as a few materials to get started.
New accounts get a trial membership to Cricut Access, their marketplace for cut files and patterns.
Some kits come with tools or vinyl packages, saving you a lot of money if you’re just starting.
Get my free SVG files
Get Crafting Today
Get access to my SVG library with over 50 cut files and cheat sheets.
Accessories
There are a ton of accessories available for the Cricut Maker. The types of craft projects you make will determine which accessories are necessary for you.
Here are a few things that will make your projects easier, no matter the craft type.
Cricut Mats
The Cricut Maker only comes with the fabric mat and the light grip mat. It’s a good idea to have all the mats on hand, but buying the mat set is cheaper.
Extra mats are not bad because they don’t last forever. They also get dirty, especially if you cut felt or fabric.
Learn more about Cricut mats here.
Transfer Tape
If you plan on using vinyl, you will need transfer tape to help you place your decals on items.
Tool Kit
Having a tool kit makes weeding your design easier. (Weeding means removing the extra bits of material that are not part of the design.)
The tool kit contains a pick tool, tweezers, scissors, a spatula, and a scraper. I use the pick tool the most.
My least favorite tool is the tweezers because they are so awkward.
Stuff to Cut
You will need the stuff to cut. As I said earlier, the Cricut Maker cuts a wide range of surfaces, so it will depend on the type of crafts you want to make.
Vinyl
Vinyl is one of the easiest things to cut when you’re a beginner. It comes in a variety of colors and patterns. (I have a guide to the differences between Cricut vinyl types here.)
Vinyl is very versatile and can be used on various hard surfaces.
Iron-On Vinyl
Iron-on vinyl is another favorite material to cut. It is mainly used on softer surfaces; heat is required to make the vinyl adhere to the surface.
Cardstock
Cardstock and paper are also popular for cutting.
If you’re using a brand-new mat, de-stick it by rubbing a towel on the surface. A mat that is too sticky will result in a torn-up paper mess.
SVG Files
Cricut Design Software allows you to use basic shapes and text, but it’s fun to play with more complex designs.
Be sure to check out my SVG shop. I add new designs all the time.
Shop My SVG Designs
Surfaces to Put Your Designs On
You will also need surfaces to put your designs on.
Of course, you can just stick them on random items around the house, but you might want to buy some items just for this purpose.
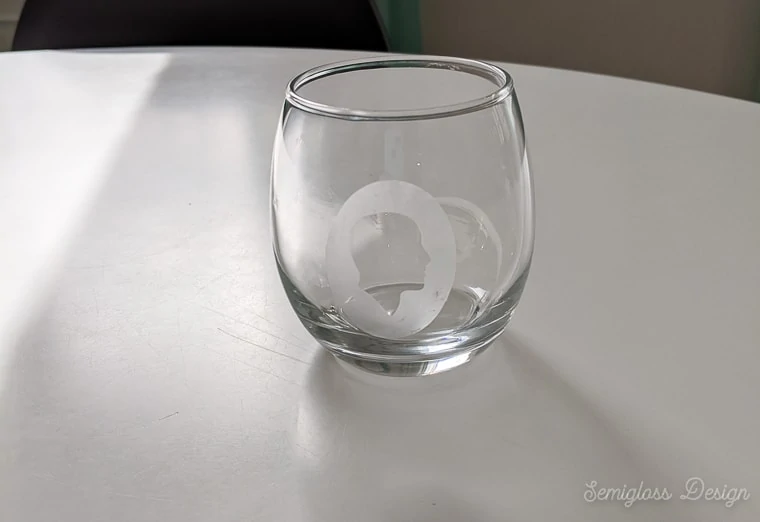
Mugs, insulated tumblers, and glasses are some of my favorite items to place vinyl on. You can also make labels for containers.
You might want t-shirts, tote bags, or pillow covers for iron-on vinyl.
If you use infusible inks, they work best on the Cricut blanks and items that work with sublimation.
Additional Supplies
These items aren’t necessary to use the Cricut Maker, but they are fun additions when you’re ready.
Extra Blades
There are a ton of fun blades available for the Cricut Maker. I love my rotary blade.
(If you use it for paper and fabric, you might want two so your fabric blade doesn’t get dull from cutting paper.)
The knife blade will allow you to cut through thicker materials.
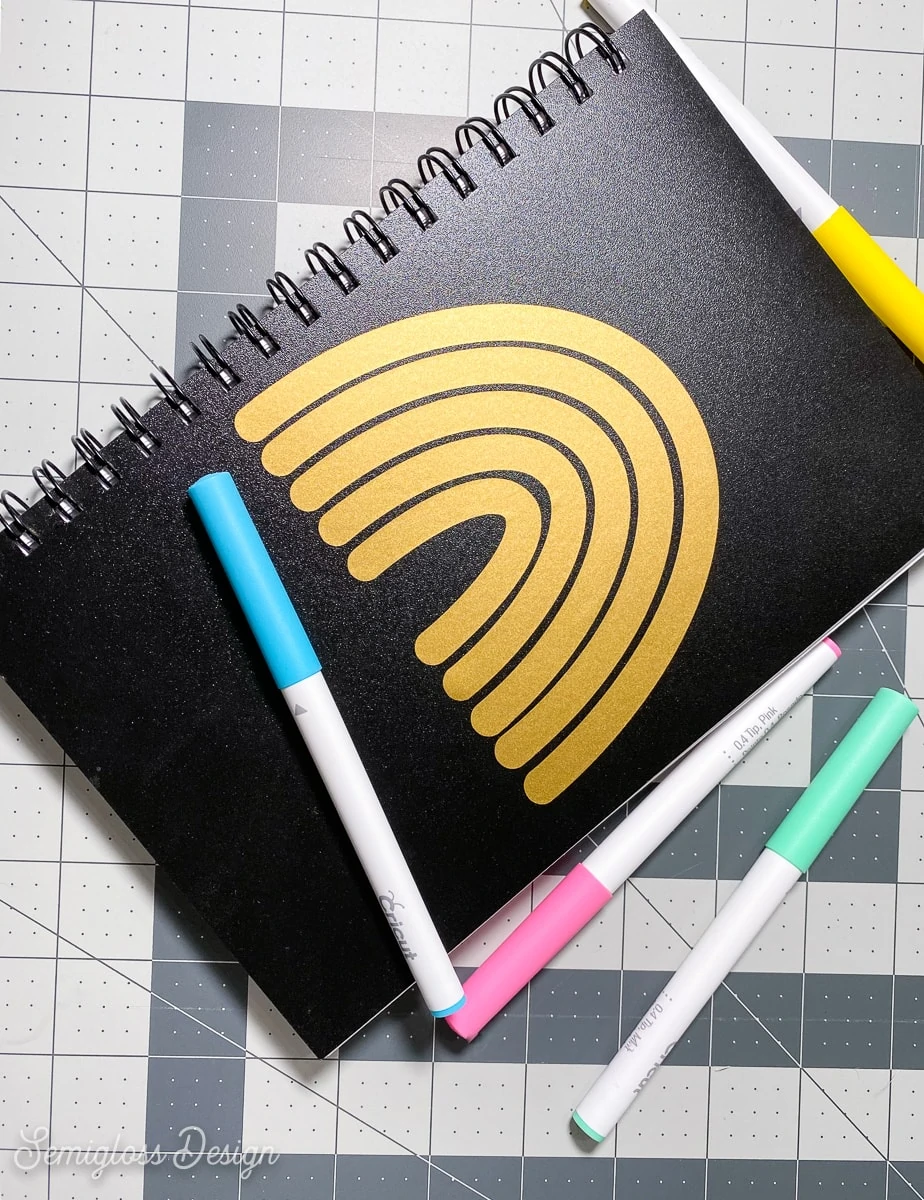
Markers
I have some markers, but I still need to experiment using them. They come in a variety of colors and line thicknesses.
Easy Press
The Easy Press isn’t necessary, but it is so nice to have. It makes pressing iron-on vinyl much quicker and with less guesswork. It was a splurge, and I’m so glad I bought it.
Please note: if you use infusible ink products, you will get the best results with an EasyPress, not an iron.
Be sure to check out my post on how to use an EasyPress.
How to Use the Cricut Maker
Using a new tool can be intimidating, so I’m here to help make the process easier and walk you through setting up your Cricut Maker and making your first project.
Getting Started with the Cricut Maker
The first step is to take your Cricut Maker out of the box. It took me a while, too…
Your new machine will need a pretty big surface to sit on.
I currently have mine sitting on an IKEA Alex drawer unit, but before that, I had it on an IKEA kitchen cart that I hacked.
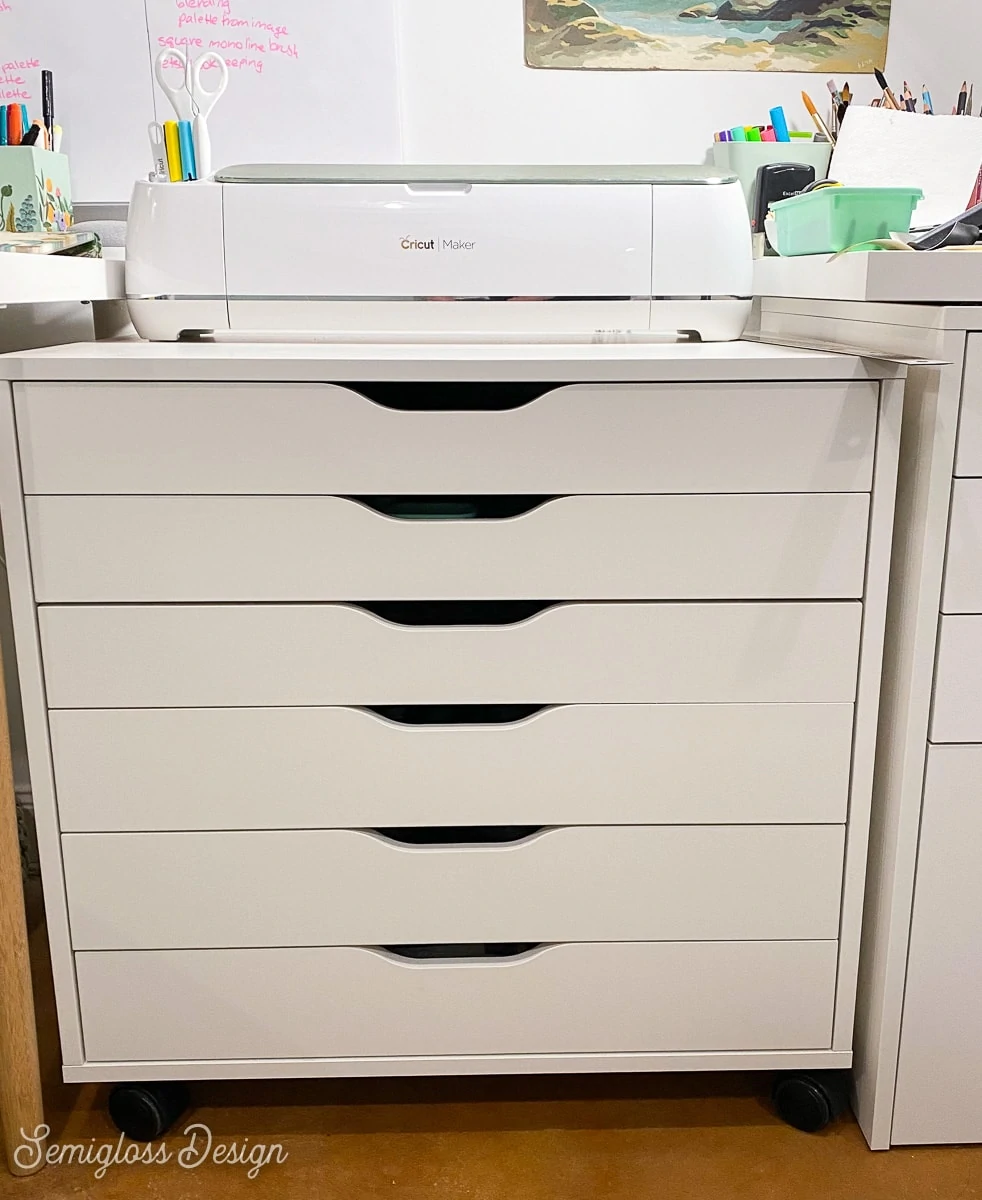
I’ve also had it on a desk. Wherever you place it, ensure you have space in front of and behind the machine so that the mat can move without hitting anything.
It will also need to be near your computer if you plan on using it with a computer (it also works with iPads and phones – both iPhone and Android.)
I also like an additional workspace for cutting vinyl and putting it on the mat.
Remove all of the packaging and plug it in. Connect it to your computer with the USB cable if using a computer.
(It has a Bluetooth connection, but I can never get Bluetooth to work, so I use the cable.) Update: the Bluetooth connection works flawlessly. Try it!
Next, you must download the software to use the Cricut Maker. It’s called Cricut Design Studio and is web-based, but it still requires downloading an application.
Download and install the software. If you’re new to Cricut, you must create an account.
The software will walk you through setting it up for your machine.
Get access to my SVG Library.
Get access to over 50 SVG sets and Cricut cheat sheets. Join my SVG library.
Getting to Know Your Cricut Maker
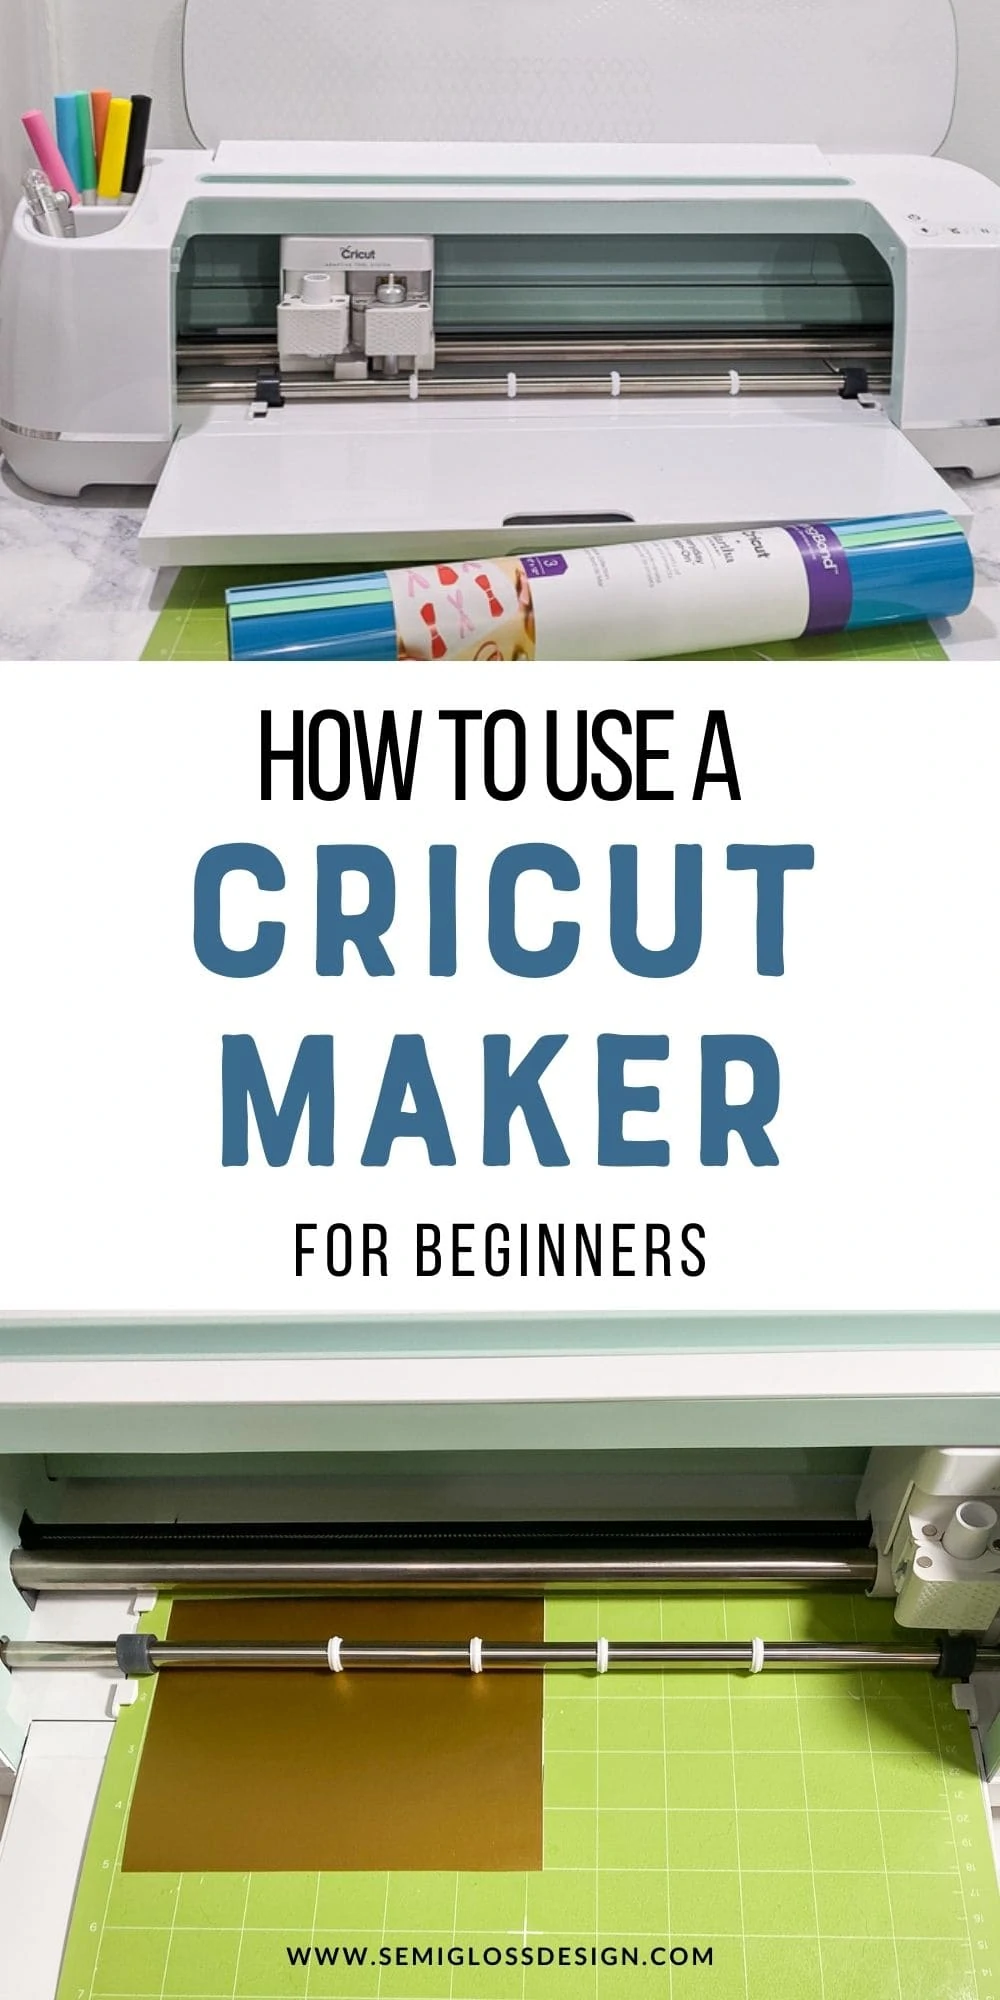
The Cricut Maker is a sleek, beautiful machine. The top has cubbies for storing tools and pens. It even has a place to hold your tablet or iPad while you work.

Lift the top lid, and the front part will open automatically.
The front contains hidden compartments to hold more tools. It even has a magnetic strip to keep extra blades (bottom left corner.)
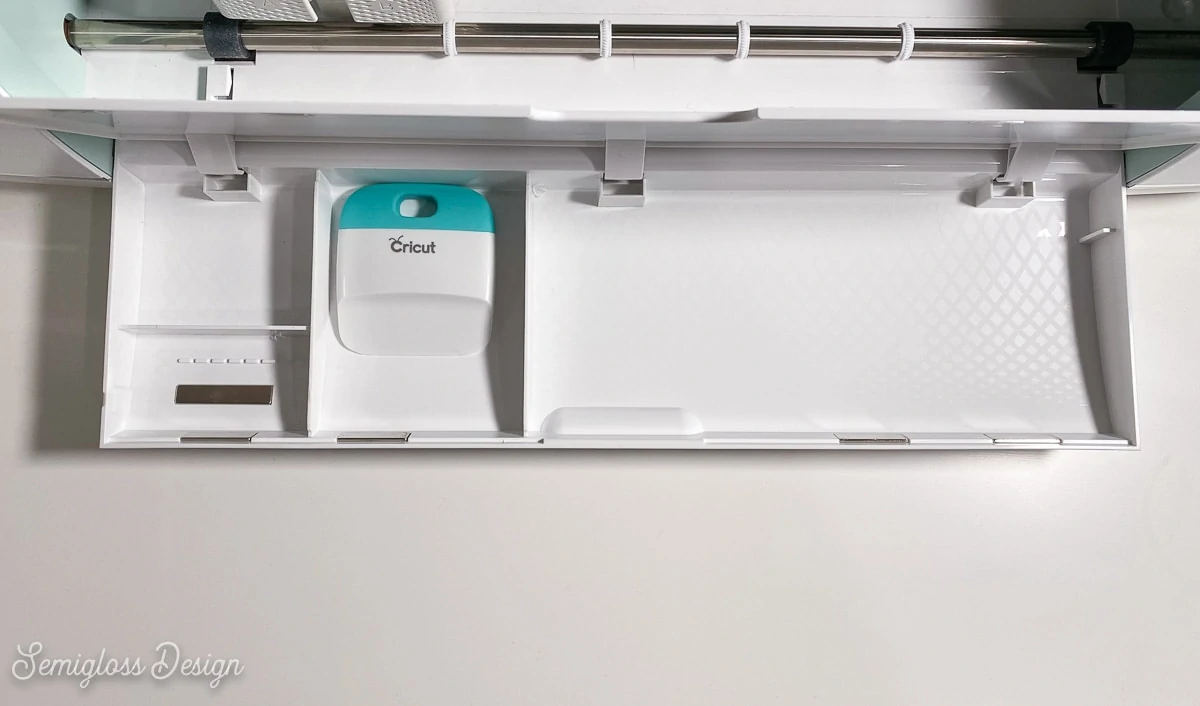
Pro tip: Keep frequently used tools in the top cubby or remove them before loading the mat.
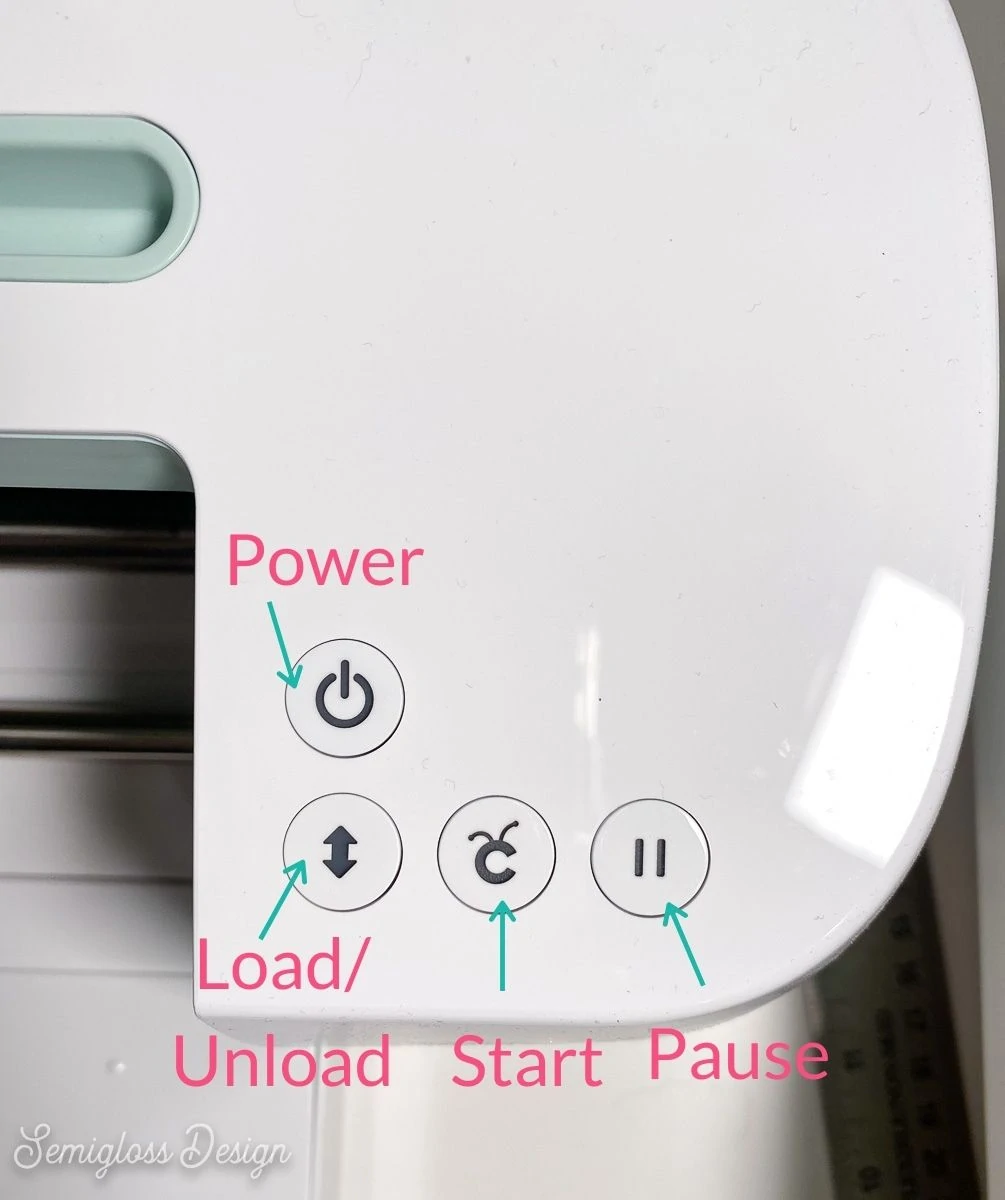
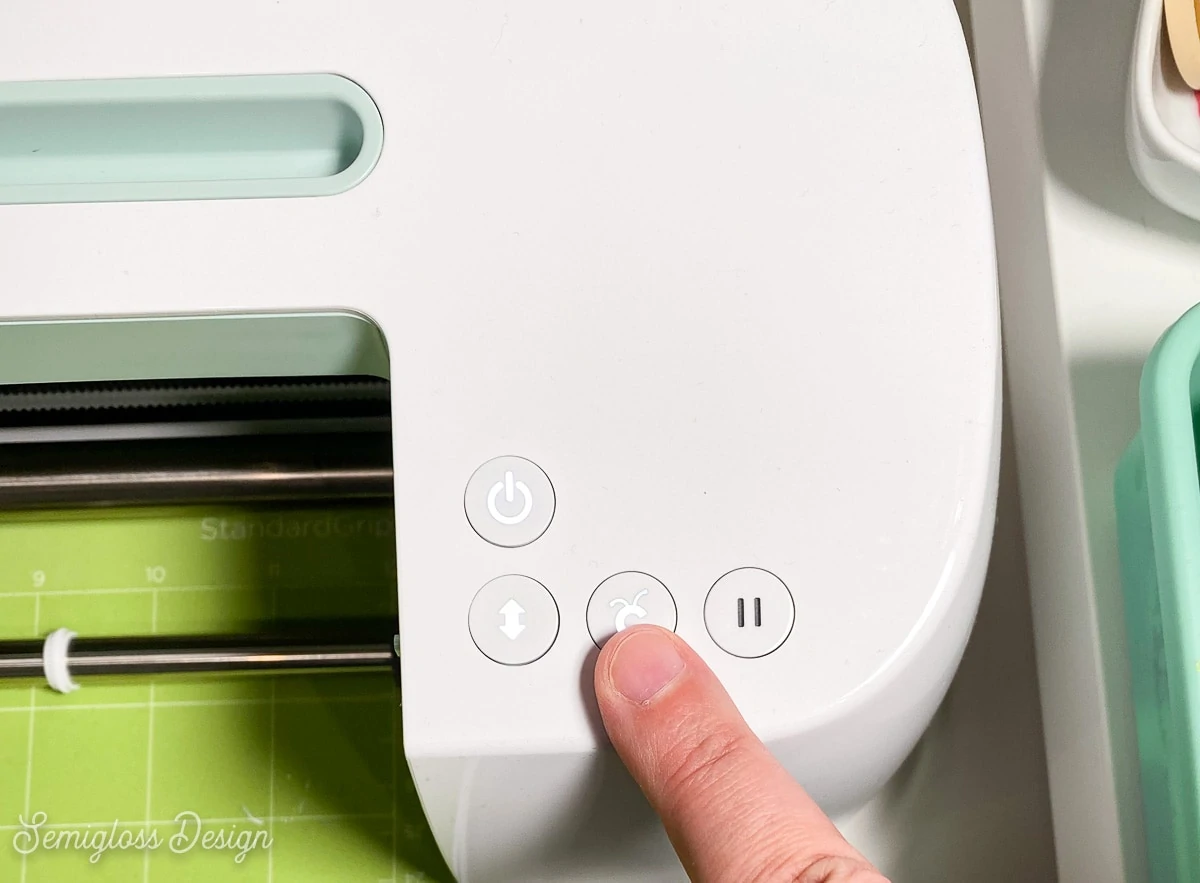
The buttons are pretty simple.
There’s a power button for turning the Cricut Maker on and off. The double-sided arrow is used to load and unload the mat. The “C” button is the start button. The pause button pauses the machine.
The machine houses the blade holder. The clamp on the left holds Cricut pens, and the clamp on the right holds the blade.
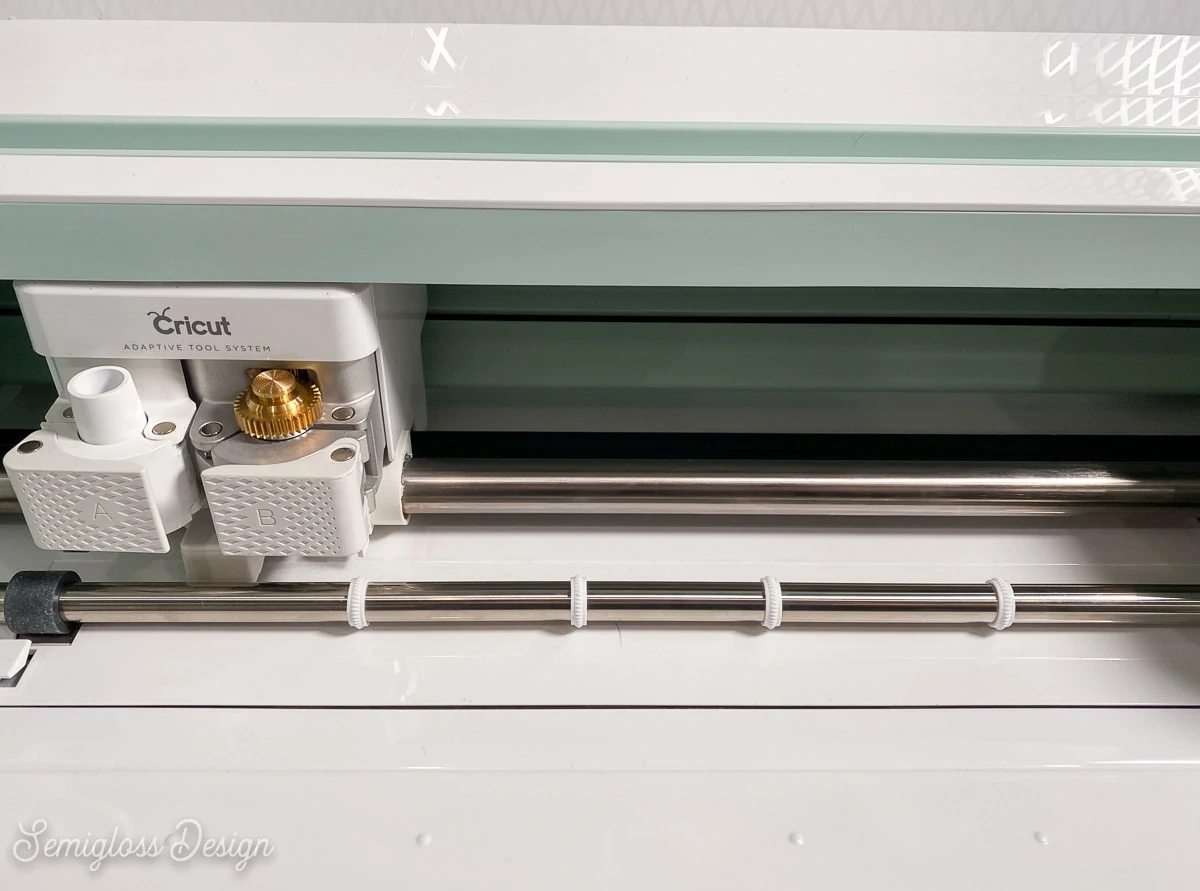
Changing a blade is easy. Pull the white clamp towards you, remove the blade, and replace it with a different blade. Then, close the clamp.
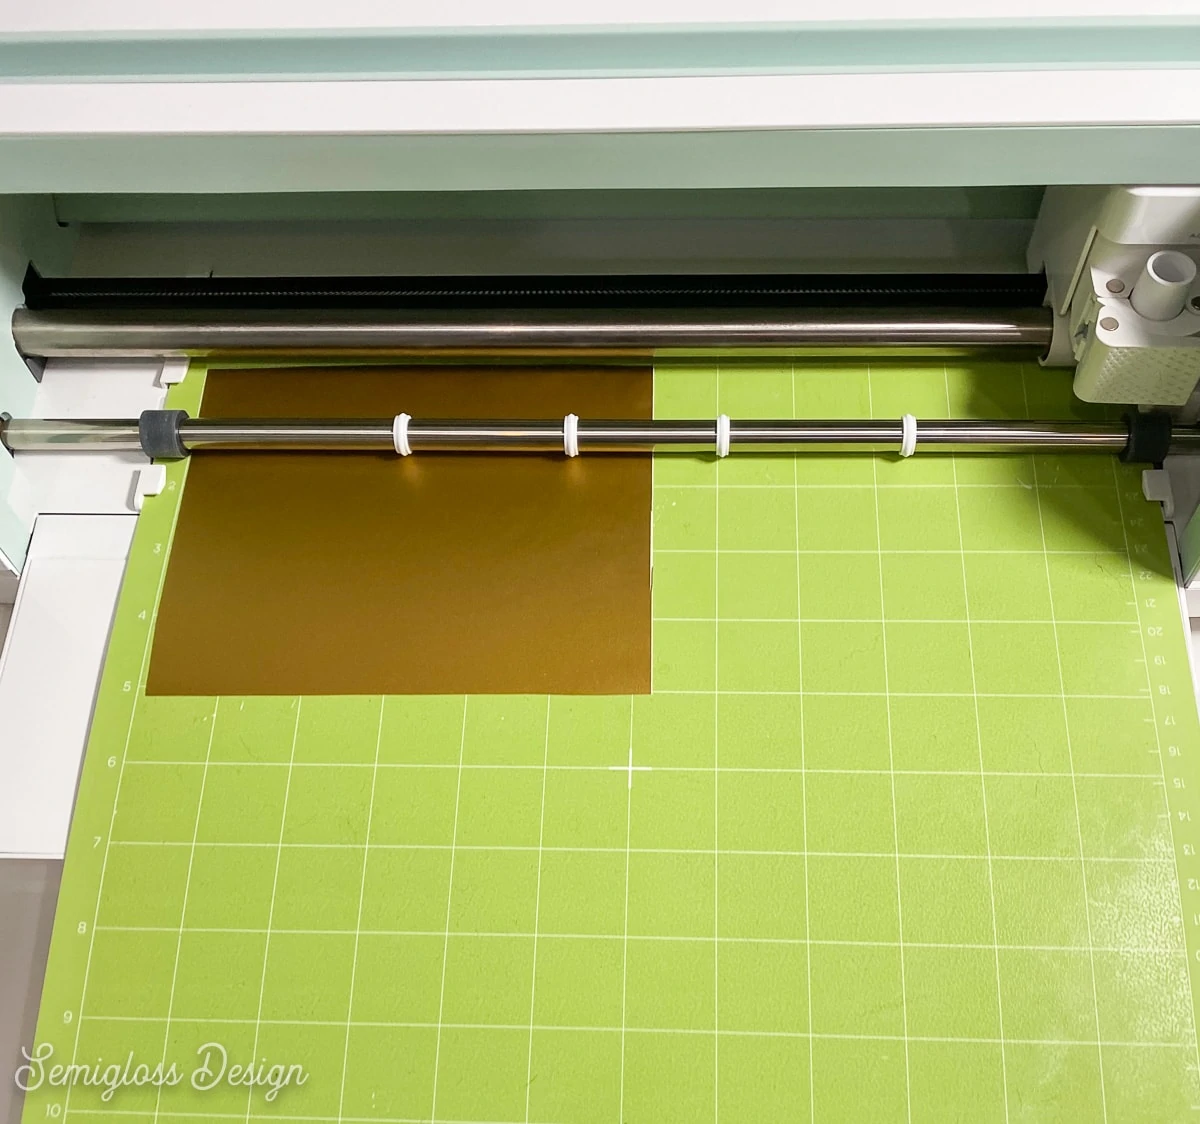
The silver bar is what moves the mat. The white rings can be moved when cutting something delicate that would get indentions (like leather). For most uses, though, leave them where they are.
Making Your First Project
You should choose something simple for your first project. Paper seems like it would be the easiest to cut, but I will suggest vinyl instead. (Paper can be difficult on a new mat.)
Here’s a list of Cricut Projects that are perfect for beginners.
Select vinyl that can be repositioned (not permanent or outdoor vinyl.)
Choose a pre-made design. You can use one from the Cricut store or buy one from Etsy. Many free designs are also available.
Choose a simple, not too intricate design. This will save you time when you weed the vinyl. You also want a design that is one color.
If you get a design from somewhere else, choose the SVG file. It’s the easiest file type to use.
Okay, we know we’re cutting vinyl and have chosen our design. What next? We need to figure out what we’re placing the vinyl on. This will dictate the size of the design.
Remember that the Cricut Maker can only cut up to 12″ wide. Some vinyl sheets are only 9″ wide, so take note of what you are cutting.
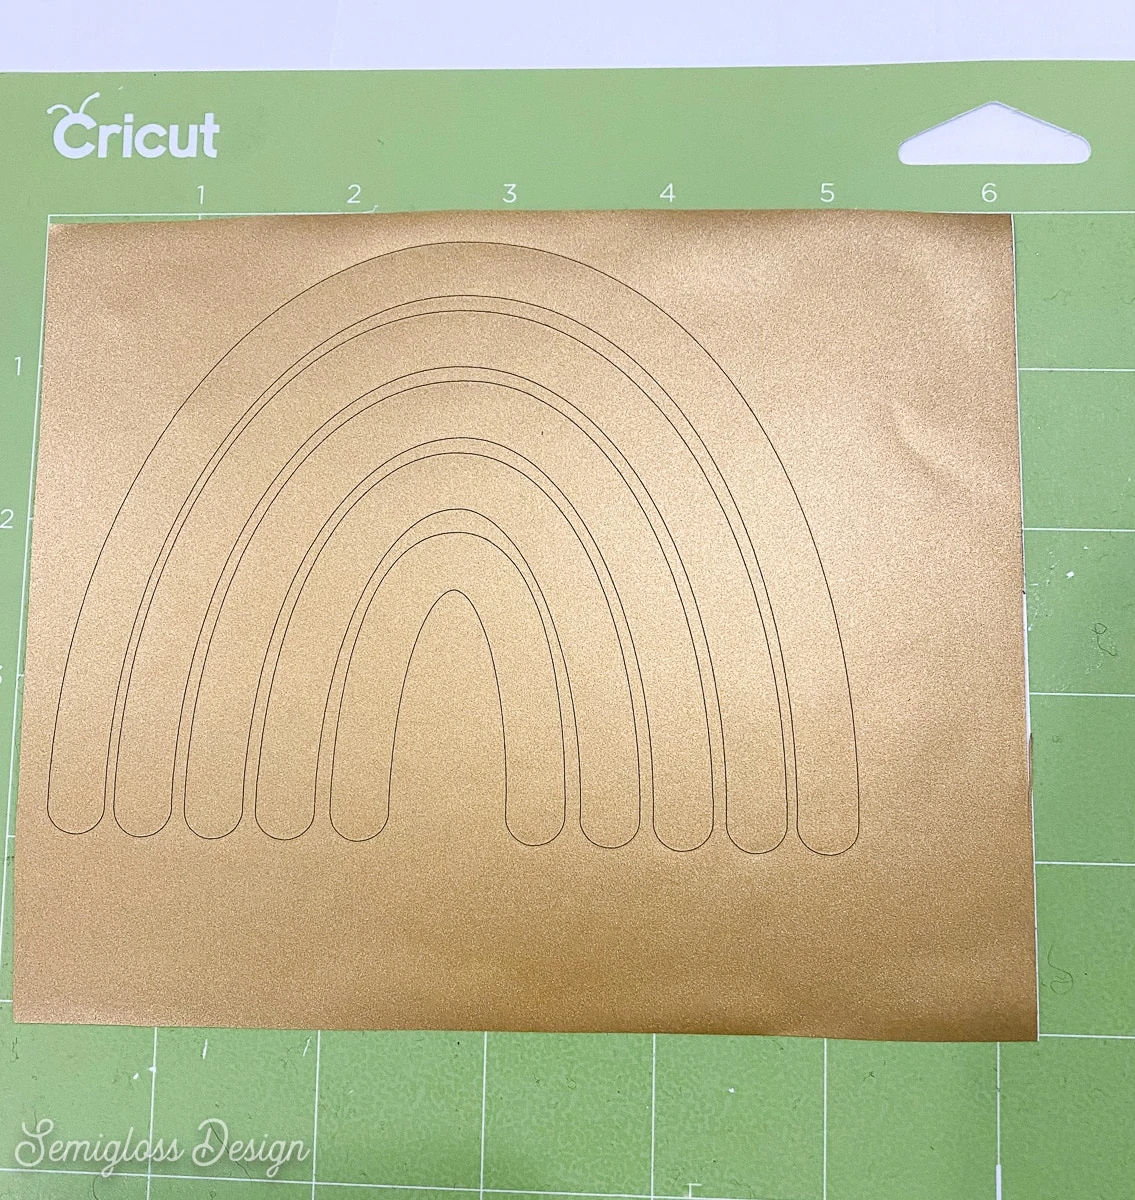
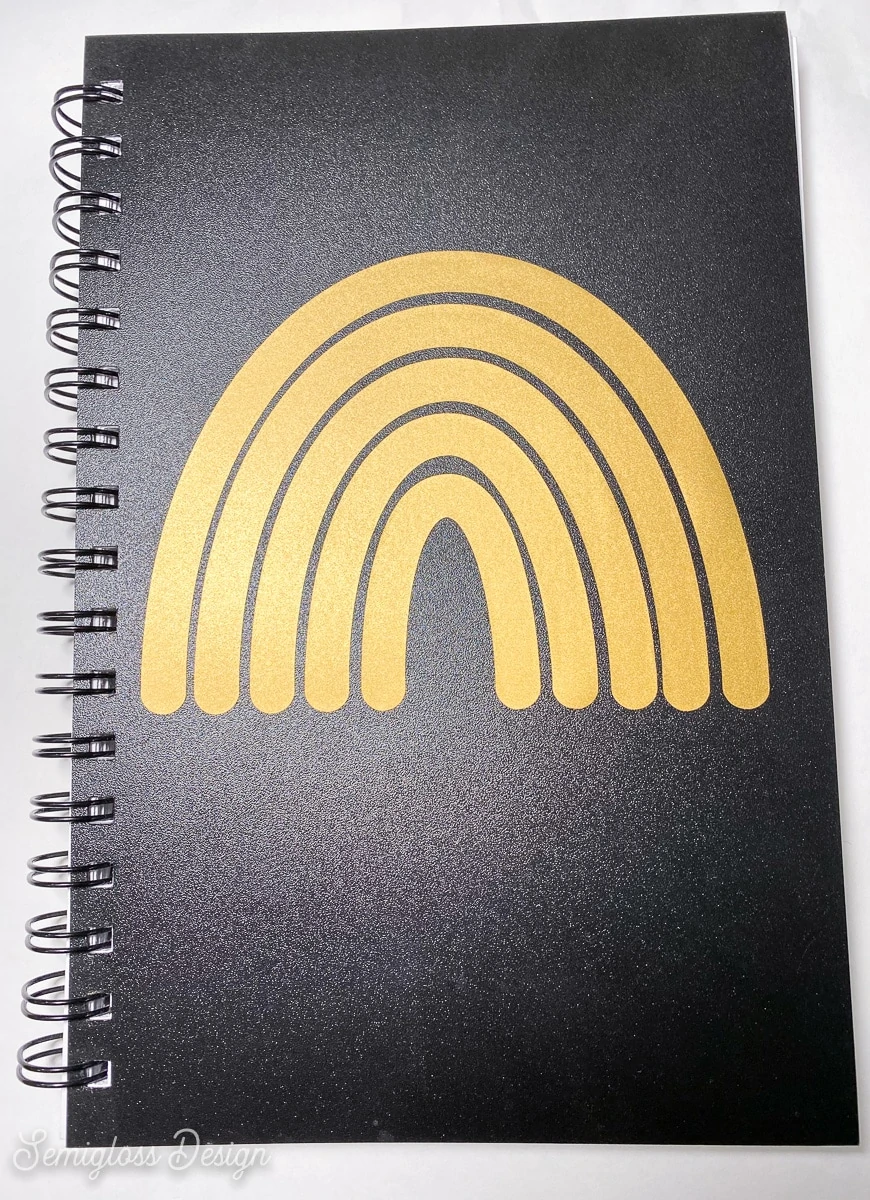
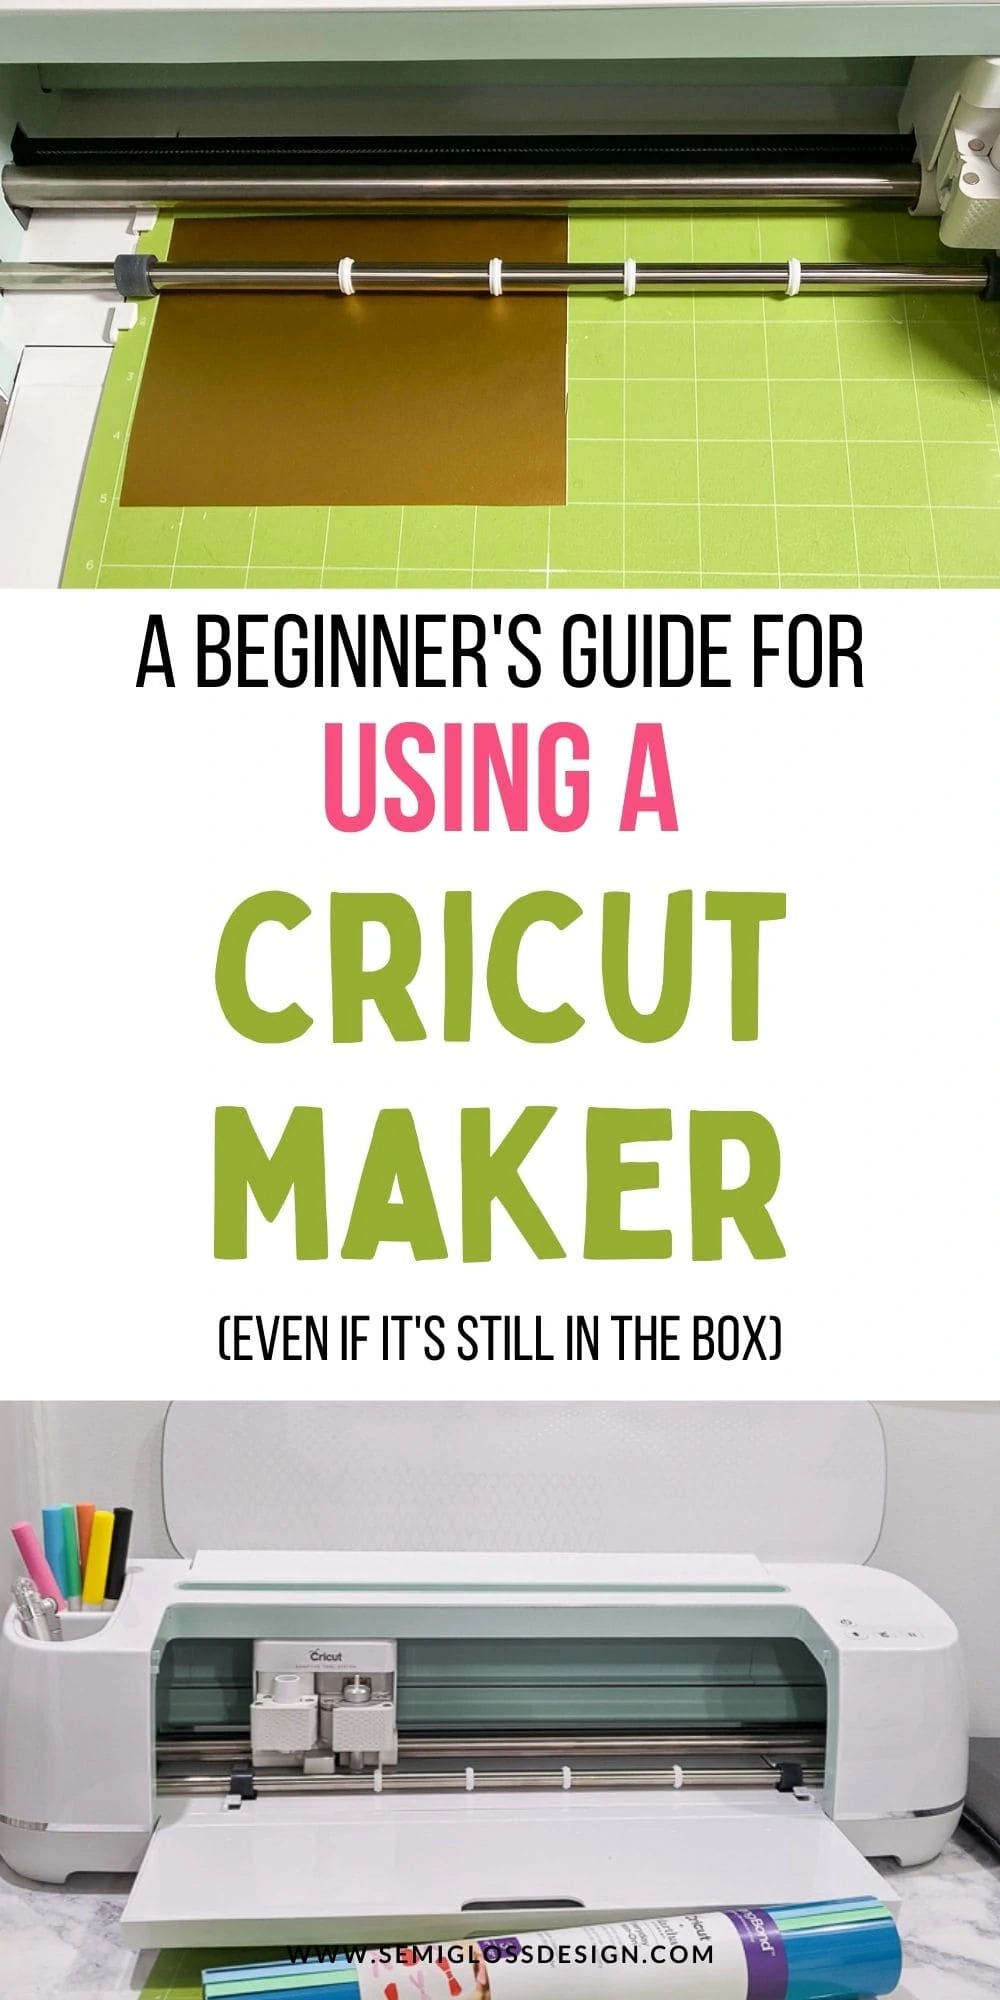
I’m putting a gold vinyl rainbow on a sketchbook cover for this tutorial.
This SVG is available to download at the bottom of this post.
Learn how to make SVG files with Canva.
Using the Cricut Maker – A Step-by-Step Tutorial
A full tutorial explaining the options for Cricut Design Space is coming soon. Don’t let that scare you. This software’s learning curve is pretty easy.
This is a quick overview of cutting a simple design.
Before starting, ensure the Cricut Maker has plenty of space behind it.
Loading the Design
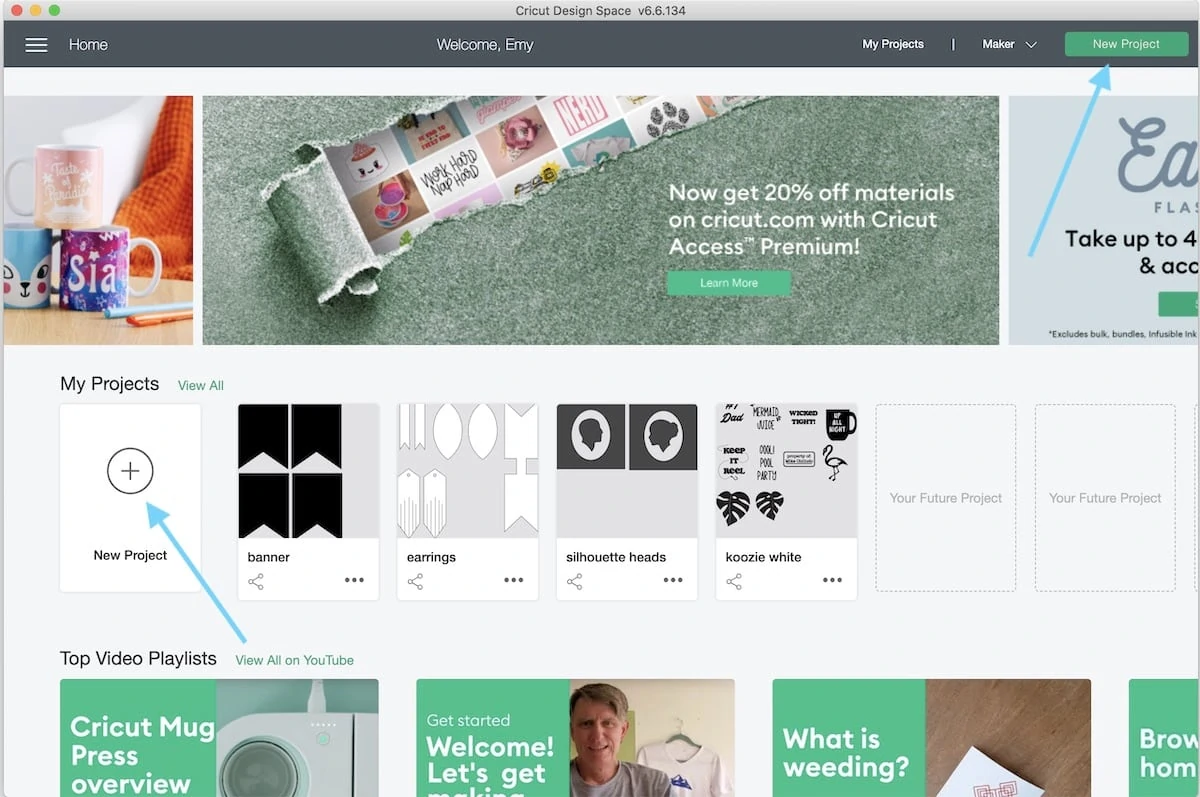
- Open the Cricut software. (Even if you opened it yesterday, it will probably need to install an update, so let that load.)
- Start a new project.

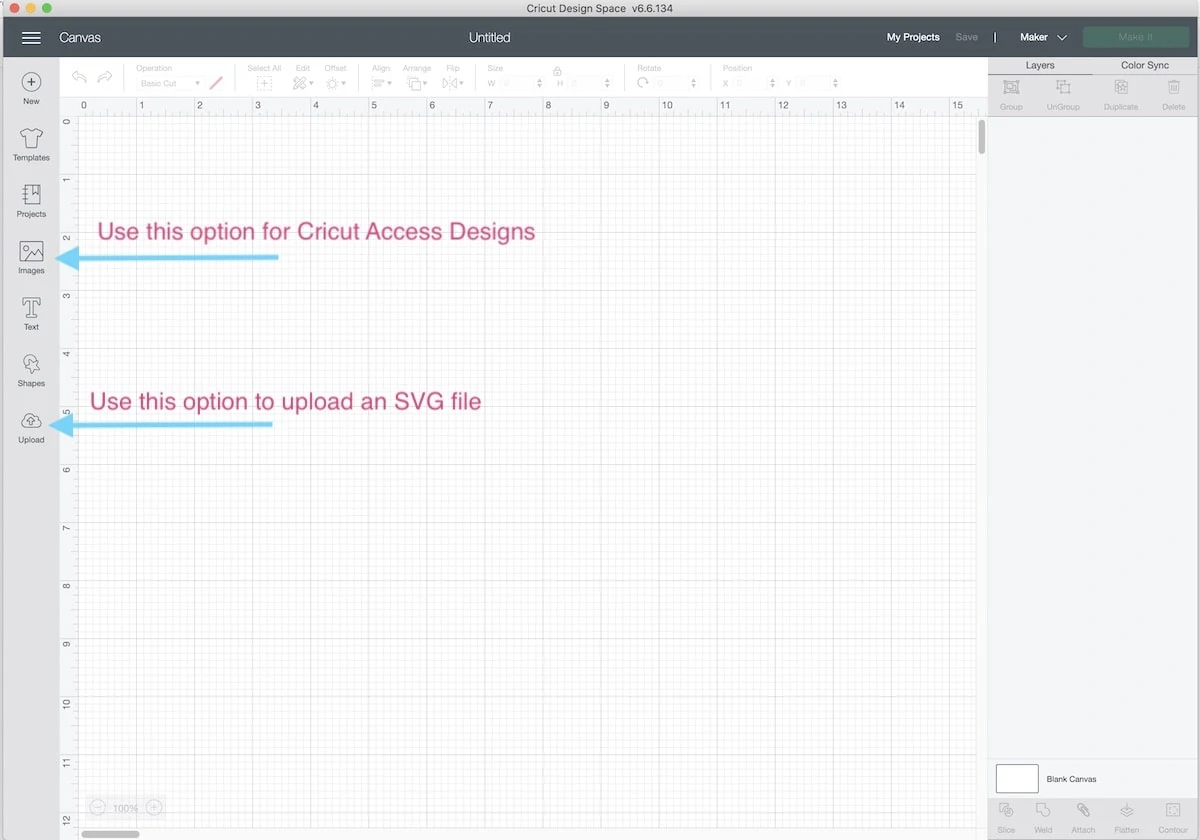
- If you’re using a design from Cricut Access, click on images to find your design.

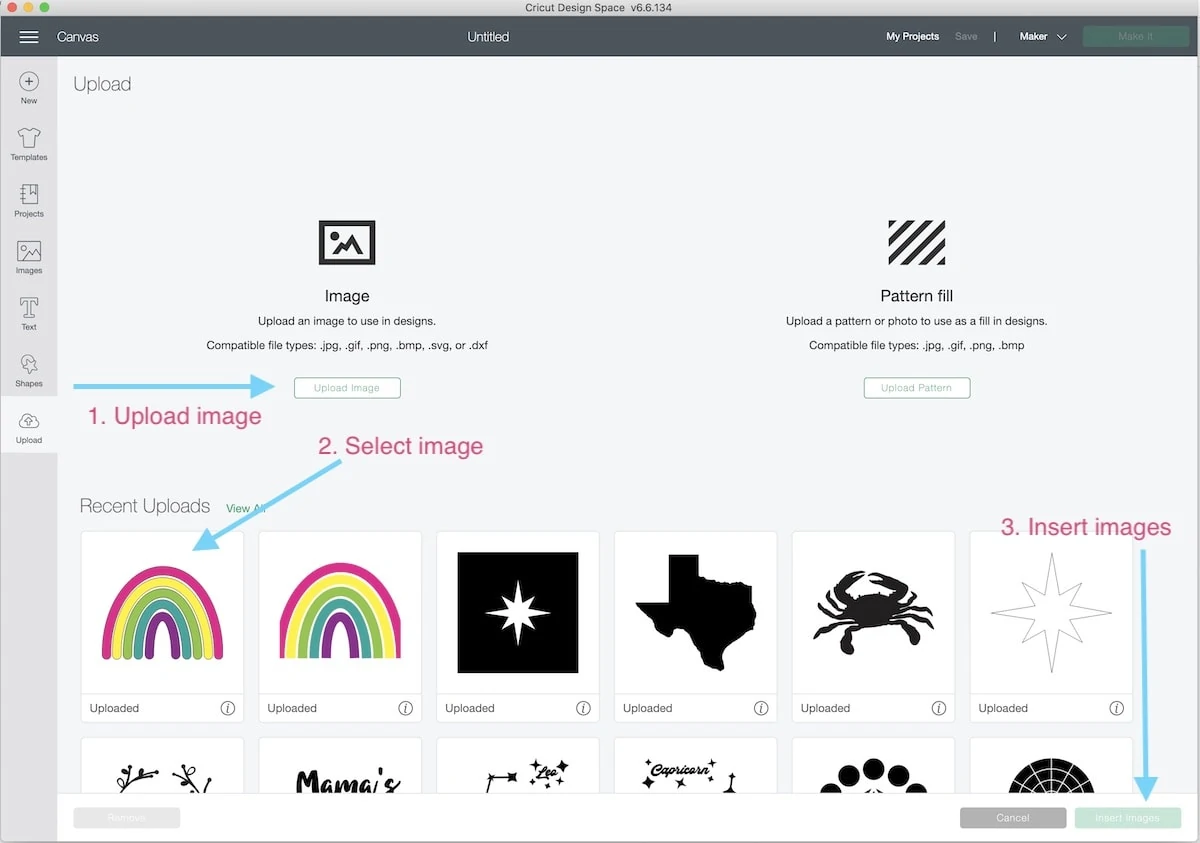
- If you’re using a design you got somewhere else, you must upload it.
- You can use various image file types, but SVGs are the easiest.
- Upload your SVG image, click the picture to select it, and click Insert Image.

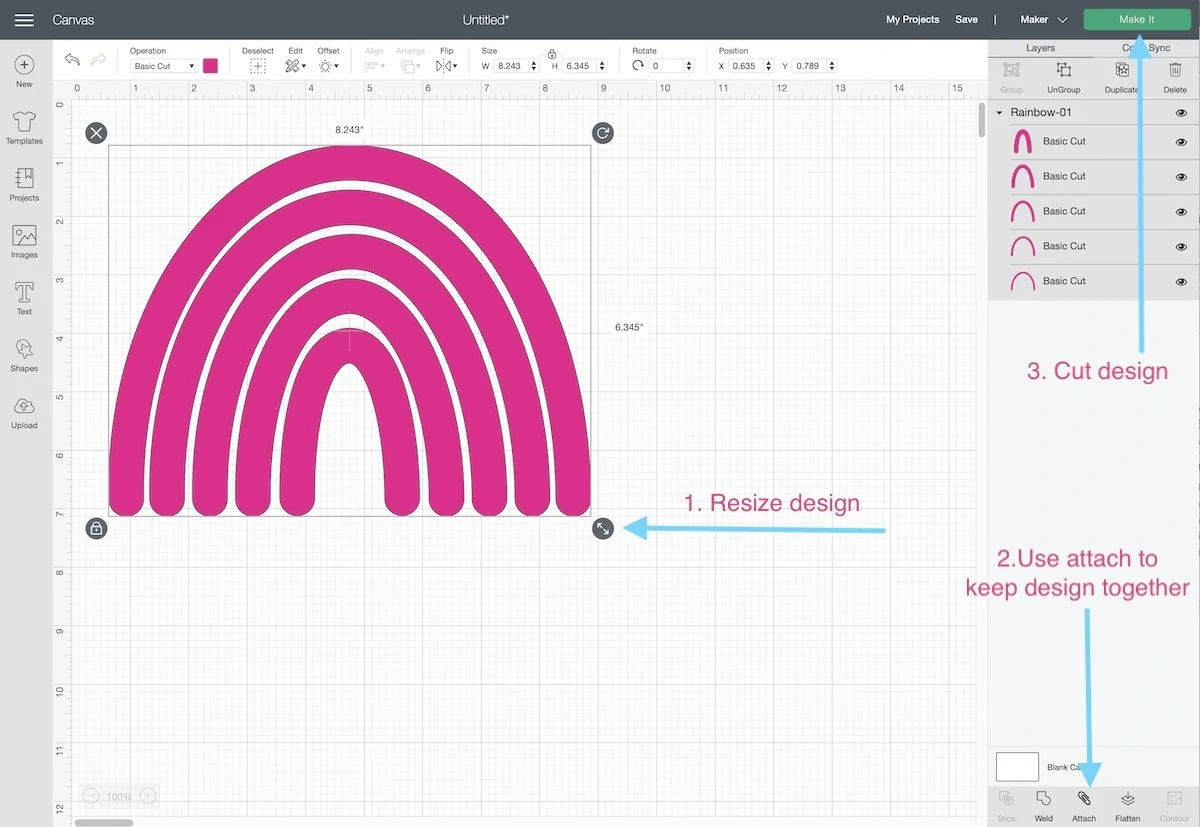
- Resize the image by pulling on the arrow in the bottom right corner.

- If your design contains many pieces and you want them to be cut as they are designed, select the entire design and click attach.
By default, Cricut tries to save vinyl so it separates the entire design. This makes applying the design a nightmare, though.
Cutting the Design
- When you’re happy with your design, click the green “Make It” button in the top right corner.
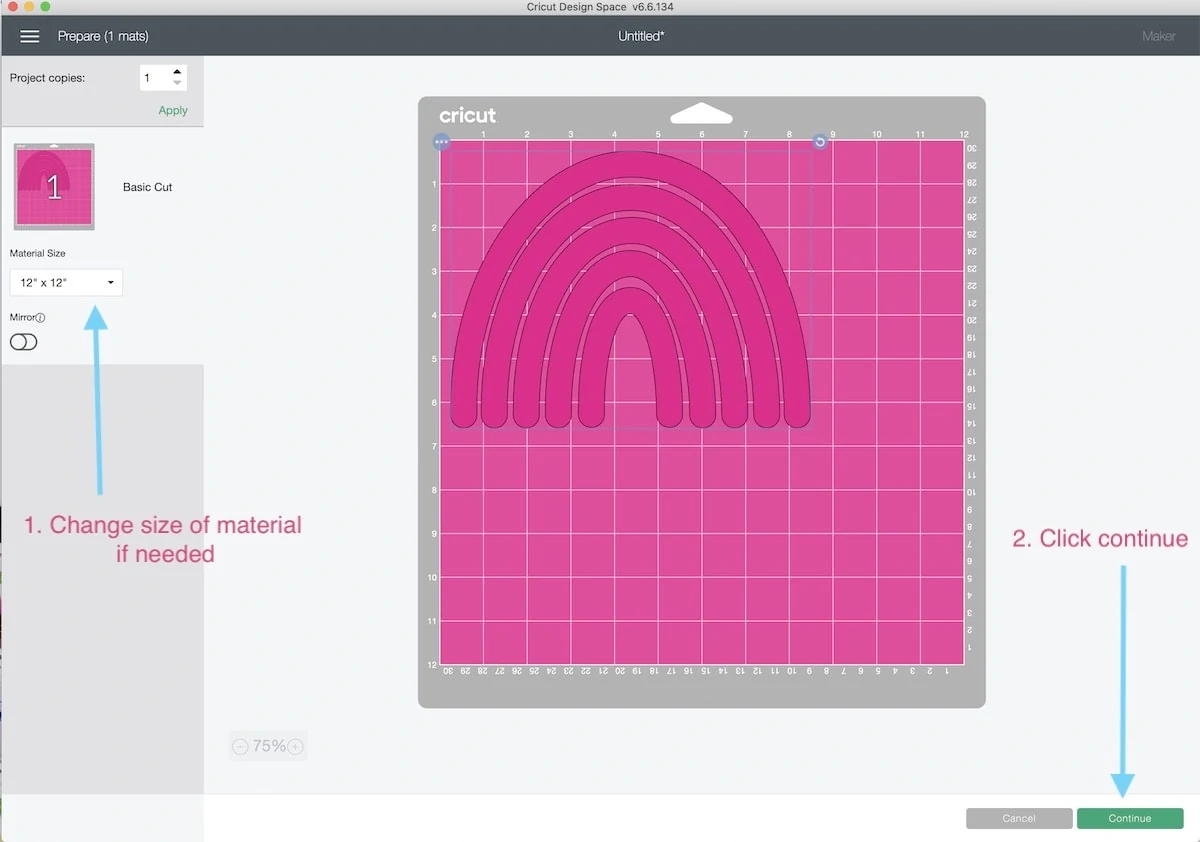
- On the next screen, you can choose your material size. By default, it’s set to a 12″ x 12″ mat.

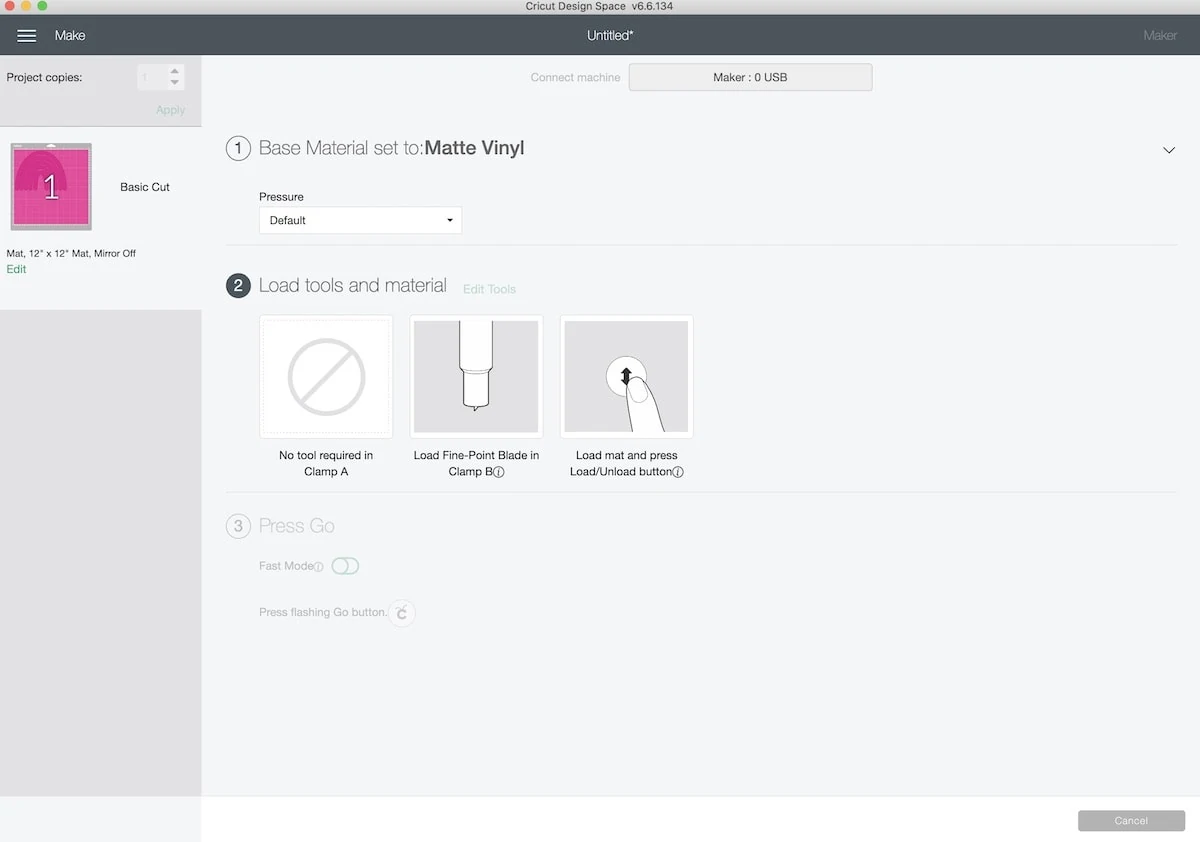
- Turn the Cricut Maker on.
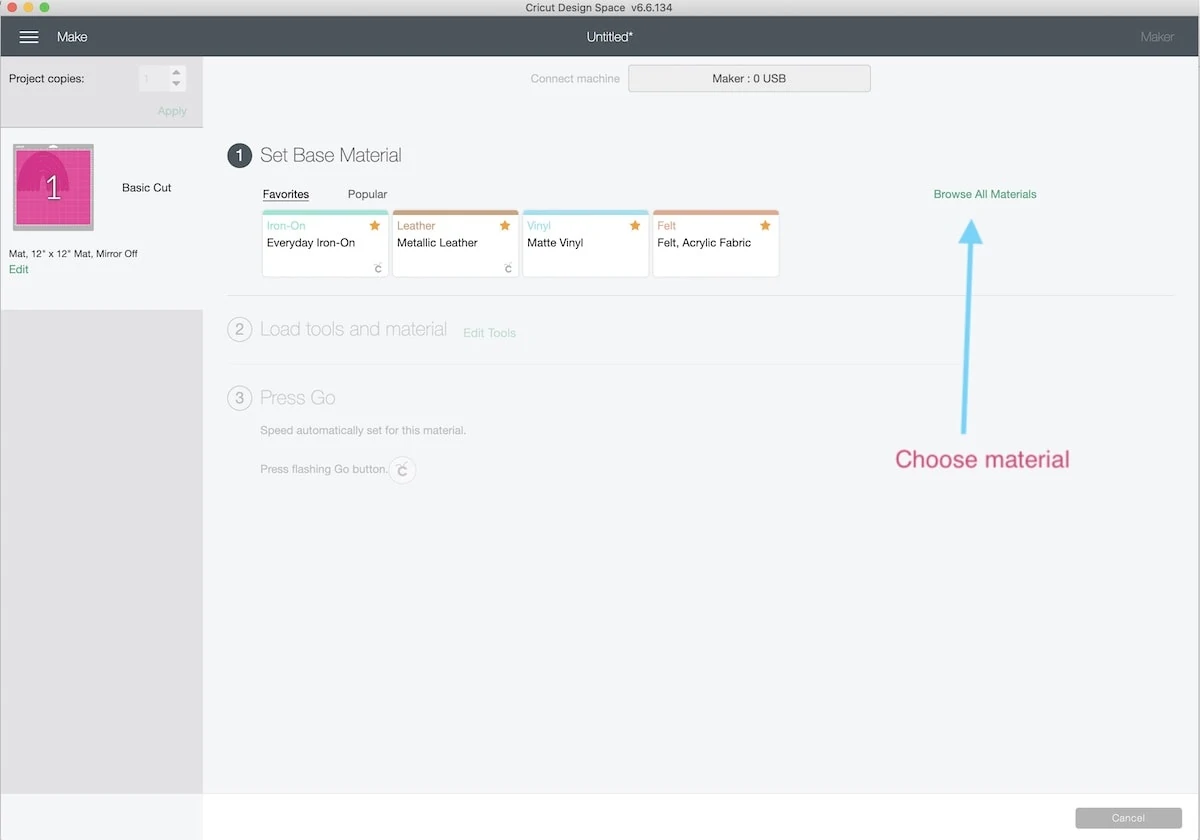
- Select the material that you are cutting. (Click “browse all materials” to choose your material.)
- Change the blade if needed.
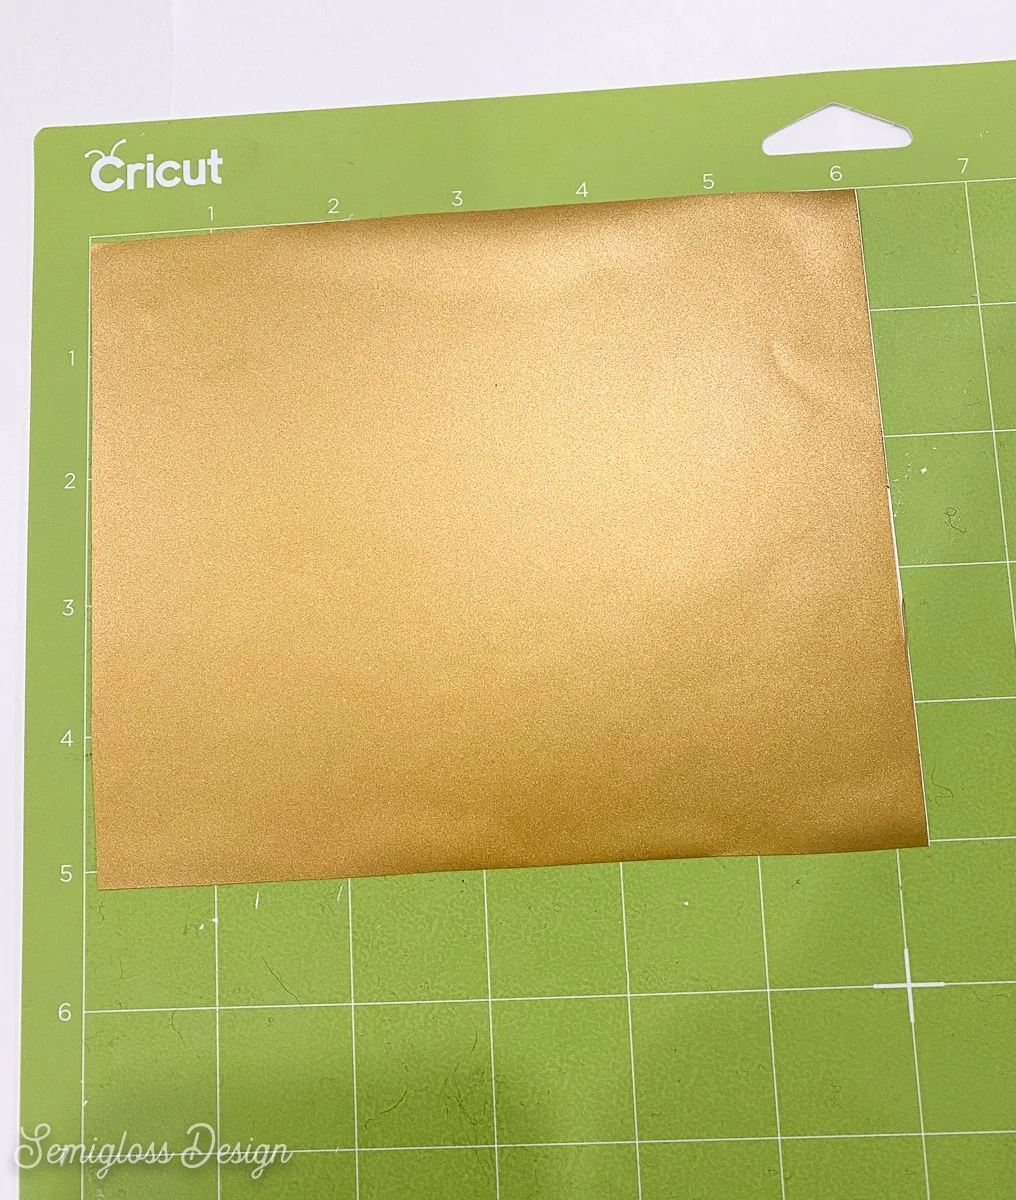
- Cut a piece of vinyl as big as you need to cover the design. (I added about 1″ to ensure it was big enough.
- Remove the clear plastic cover from the mat.
- Place the vinyl on the mat in the top left corner and smooth it out to ensure it adheres to the mat.
For regular vinyl, you can use the standard mat (green.)
- Place the mat on the Cricut Maker under the guides on the side.

- Click the load button.
- Click the flashing C button to make the Cricut Maker cut the material.

- It will start moving and making noises before cutting.

- When it’s finished, click the unload button.

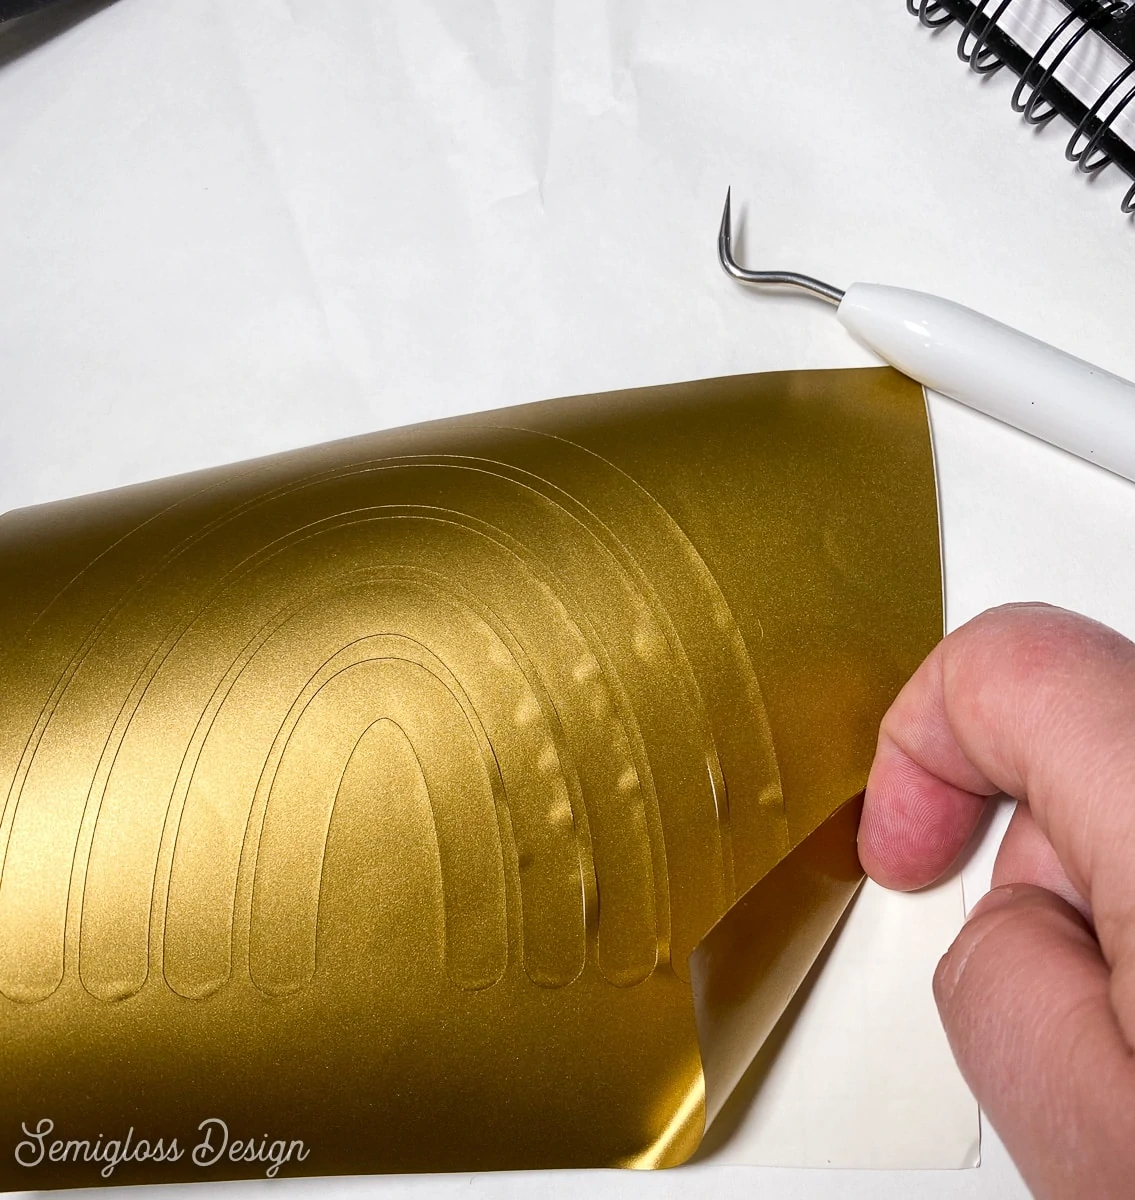
Weeding the Design and Applying Vinyl to a Surface
- Click the Finish button.
- You can save the project if you plan on using it again or exit the screen.
- Remove the vinyl from the mat.

- Replace the plastic cover on the mat to keep it clean.
- Weed the excess vinyl from the backing, leaving the design on the backing.
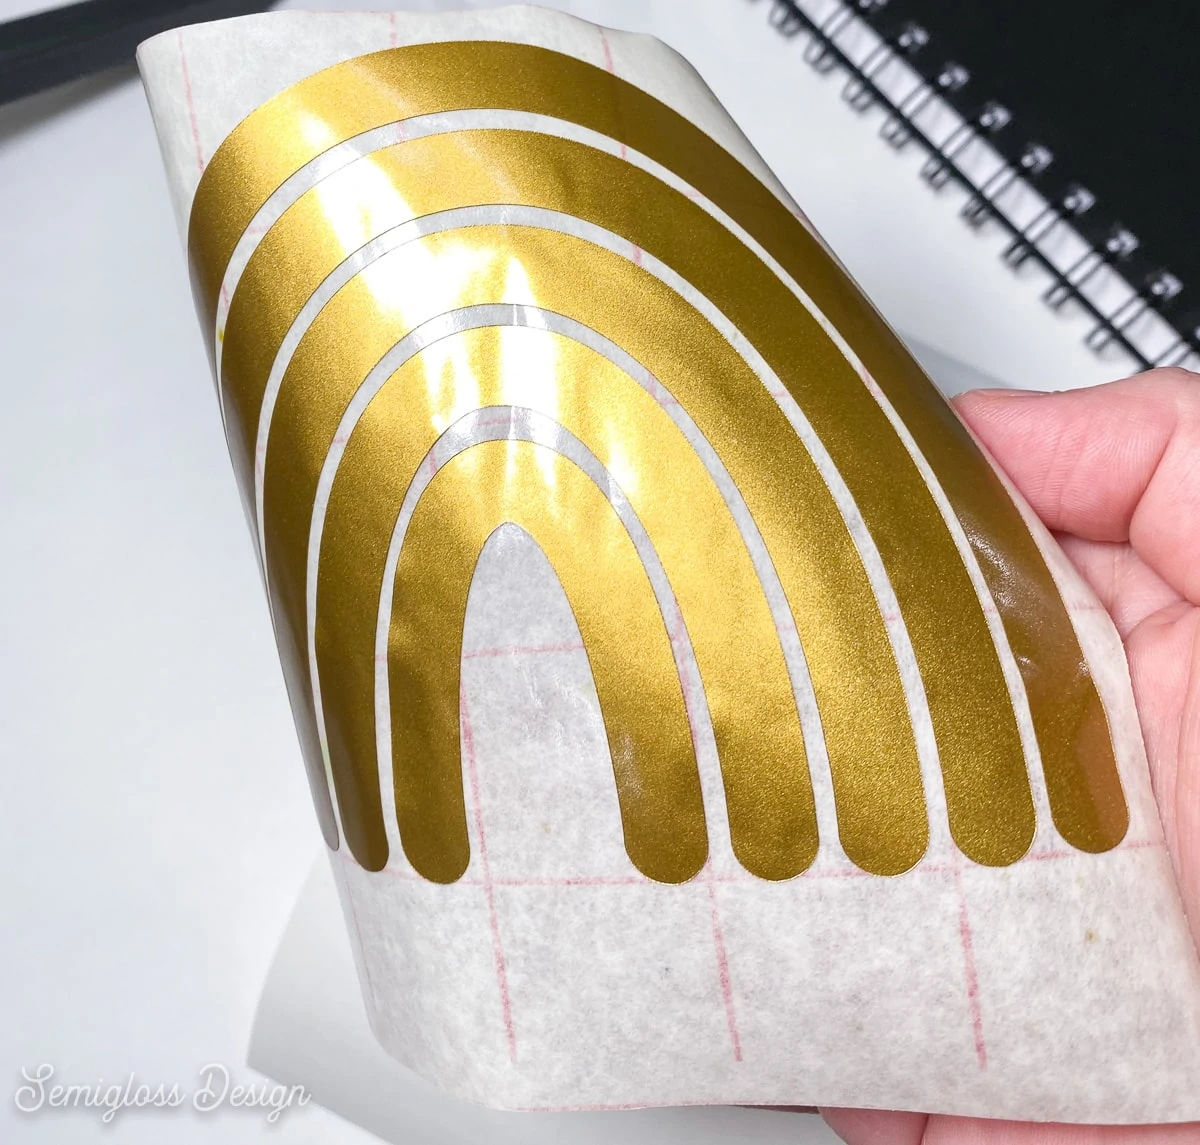
- Cut a piece of transfer tape the same size as the design.
- Peel the backing from the transfer tape.
- Apply the transfer tape to the design and press it to make sure that the vinyl adheres to the transfer tape.
- Remove the design from its backing. The design will now be attached to the transfer tape.

- Place the design on the desired surface and smooth the transfer paper until the design adheres to the item’s surface. If needed, use the backing paper to burnish the edges to ensure the design adheres well.
- Remove the transfer tape and admire your design.


Cricut Maker FAQs
What can I do with a Cricut Maker?
A Cricut Maker can make various projects, such as mug decals, cut iron-on vinyl for pillows or t-shirts, cut stickers, cut felt and fabric, debosses surfaces, score paper, cut leather, and engrave thin metal.
You can use this machine with pre-made designs or make your own designs and upload them.
Visit this site to learn about all the materials that the Cricut Maker can cut.
What do I need to get started with a Cricut Maker?
You will need something to cut. Vinyl is a great first project for beginners.
The toolset is handy for removing the excess vinyl from your design. Transfer tape is useful for aligning your design onto the surface.
What kind of computer do you need for Cricut?
Cricut Design Space is the software that Cricut uses to cut designs. You will need an internet connection and a computer, tablet, or cell phone.
To see specific computer requirements, click here.
Can you use a regular iron for Cricut iron-on vinyl?
Yes, you can use a regular iron with iron-on vinyl.
However, if you use iron-on vinyl a lot, it will save you so much time and frustration to upgrade to a Cricut EasyPress. The heat is consistent throughout the device, whereas many irons vary in temperature. EasyPress also allows you to press a larger design at once, helping you avoid overheating the vinyl.
What does the Cricut Maker come with?
The Cricut Maker comes with the machine, the cords, a black pen, a fine-point blade, a mat for fabric, and a light grip mat.
It also comes with a few small pieces of cardstock and fabric to practice using the machine.
What is an SVG?
SVG stands for scalable vector graphics. This means that the image can be resized infinitely without losing quality.
SVGs can be created with design software like Adobe Illustrator, Affinity Designer, and Inkscape. Canva has also added the ability to create SVG files.
By contrast, JPG and PNG files are pixel-based and get blurry when resized.
Cricut can use many different file types such as SVG, JPG, and PNG, but I find that SVG designs work the best with the software.
Cricut Projects
- Make Leather Keychain
- Easy Felt Garland
- Make Stencil for Etching Glass
- DIY Koozie
- Reverse Canvas
- Snowflake Pillow
- Easy Sign for Halloween
- Making Decals for Tumblers
More Cricut Tutorials
- How to Cut Scrapbook Paper
- Using Infusible Ink
- Cutting Leather
- Using a Cricut EasyPress
- Changing the Canvas Size in Design Space
- Cricut Joy Set Up Tips
- The Difference Between Smart Vinyl and Regular Vinyl
You might also like this post with gift ideas for Cricut users.
Download a Free Rainbow SVG
This file includes a 1 color rainbow SVG. The download button will take you to a google drive file to download the file.
All downloads are for personal use only. Please do not redistribute or sell files.
Download the Rainbow SVG file here.
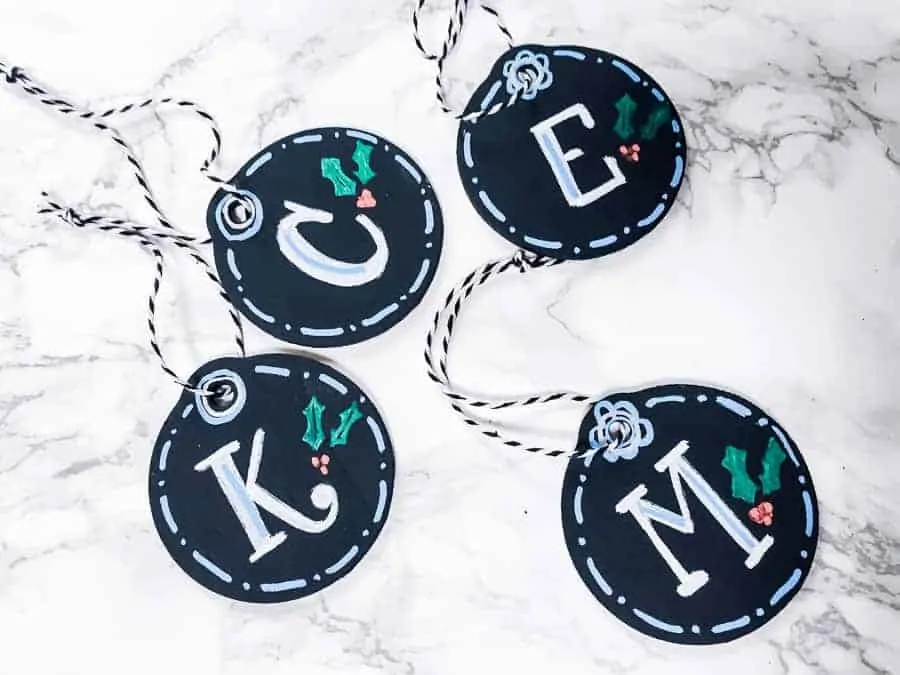
Pin for Later!

Emy is a vintage obsessed mama of 2 DIYer who loves sharing affordable solutions for common home problems. You don’t need a giant budget to create a lovely home. Read more…