How to Use Cricut Infusible Ink on Fabric
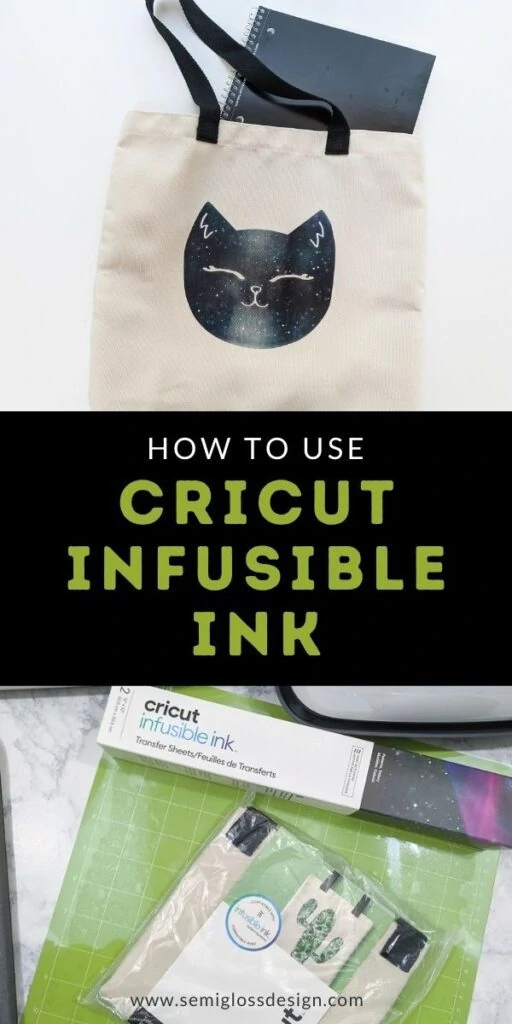
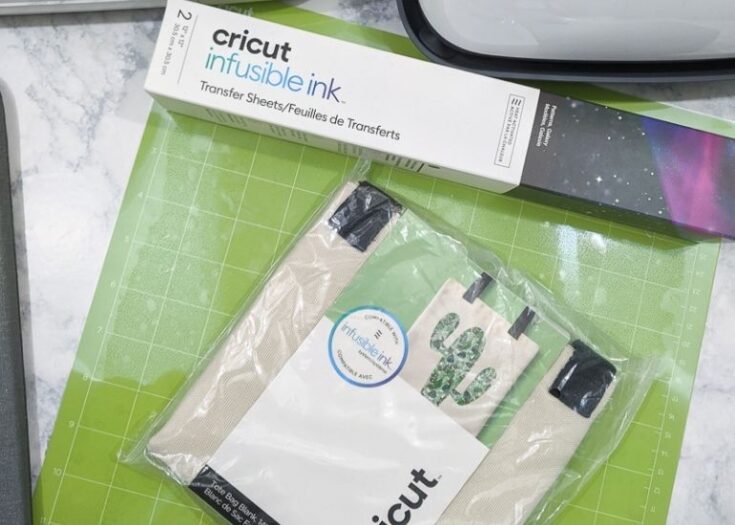
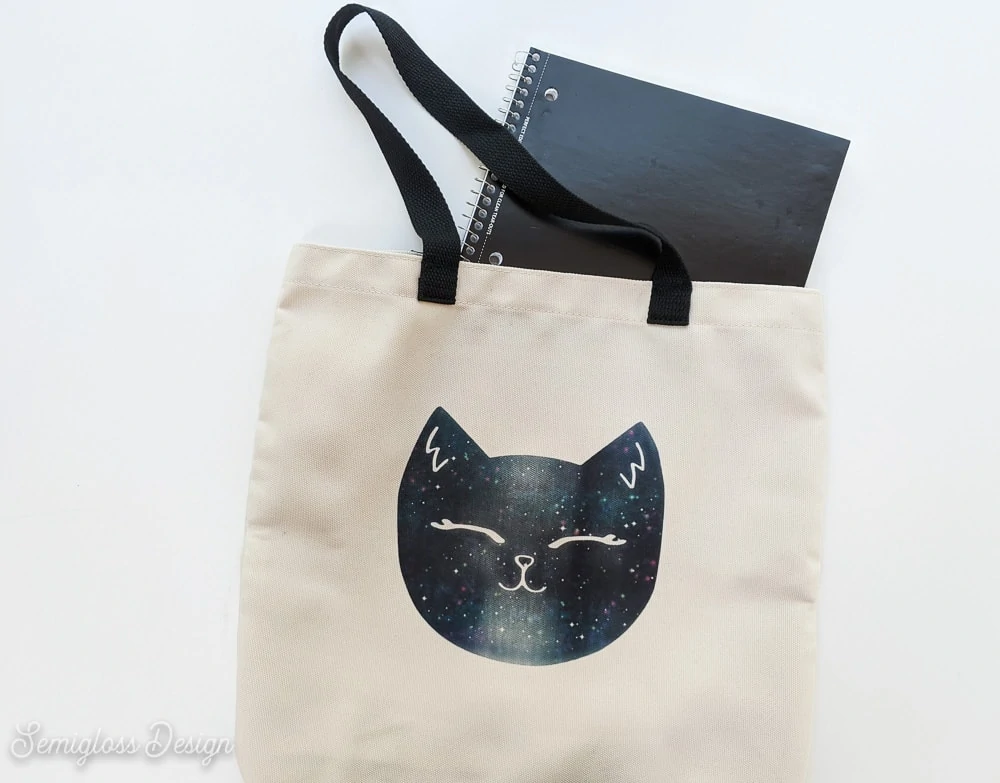
Learn how to use Infusible Ink to create beautiful designs on fabric. Infusible ink is used to create permanent designs that won’t wrinkle or crack. This tutorial shares how I created a custom tote bag for my daughter.
If you’re new to Cricut, be sure to check out this post explaining vinyl types.
This post contains affiliate links. By purchasing an item through an affiliate link, I earn a small commission at no extra cost to you. As an Amazon Associate I earn from qualifying purchases.
All About Cricut Infusible Ink
Cricut Infusible ink is a permanent way to add a design to surfaces without cracking or peeling over time as vinyl does.
The ink gets infused into the fabric or surface, resulting in a soft, pliable texture.
Infusible ink is available in many solid colors and patterns. There are also infusible ink pens available.
The only downside of infusible ink is that it can’t be used on any surface. It must be used with Cricut or sublimation blanks.
Cricut Cut Settings For Infusible Ink
Use with Compatible Blanks Only
Standard Grip Mat
Color Side Up
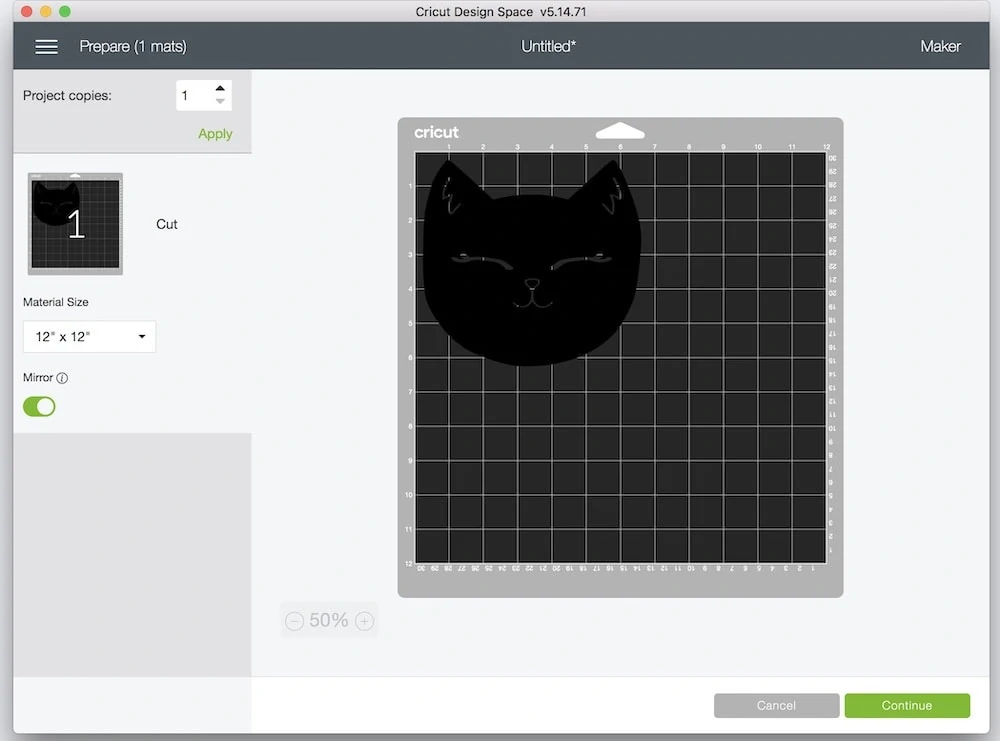
Mirror the Design
Material: Infusible Ink
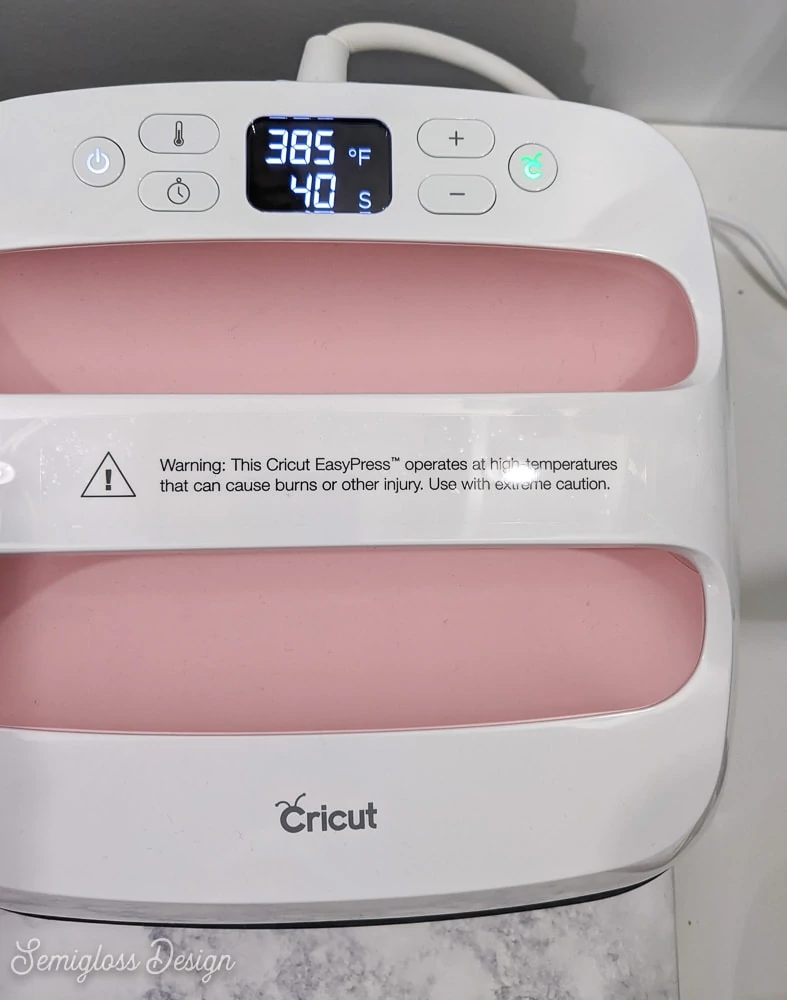
EASY PRESS SETTING for Canvas Tote
385º
40 seconds
Infusible Ink FAQs
What can I use infusible ink on?
Infusible ink can be used on all Cricut blanks and sublimation blanks. They have a special coating that allows the ink to work better.
If you use plain t-shirts, the colors will appear faded and dull.
Cricut currently offers these blanks:
- t-shirts (Available in several styles and size ranges.)
- tote bags
- baby onesies
- wine bags
- cosmetic bags
- pillowcases
- coasters
- mugs
The mugs can be used with the Cricut mug press.
There are a lot of non-Cricut branded sublimation blank items, such as mousepads, koozies, earrings, magnets, keychains, tea towels, glass tumblers, and more. Every time I look, I see more items added.
What happens if you use infusible ink on cotton?
The color may not be as bright if you use infusible ink on cotton or any other non-Cricut blank. It still works, but the colors aren’t as vibrant.
I’ve read that synthetic fabric works better with Infusible ink.
If you choose to use a non-Cricut blank, be sure to choose a white or light-colored blank for the best results. Because it is transparent, the ink will not show up on dark colors.
What mat do you use for infusible ink?
Use a standard mat with infusible ink sheets. The sheets have a texture similar to cardstock, so a standard mat works great.
Be sure to smooth the sheet well when applying it to the mat since the sheets are rolled up.
Read more about the differences between Cricut mats.
Do you mirror infusible ink?
Yes, you mirror infusible ink. However, the sheet should be placed color-side-up onto the mat.
Can you cut infusible ink with a Silhouette?
Yes, it is possible to cut infusible ink with a Silhouette. The settings are Blade 5, Speed 4, Force 26, and 1 pass.
Want to learn more about how to use your Silhouette? This affordable ebook taught me everything I know! Plus, it comes with a handy settings cheat sheet that gives you perfect cuts every time!
How to Use Infusible Ink
Supplies Needed:
- Electronic cutter (I use a Cricut Maker)
- Infusible ink
- Infusible blank
- Cricut Easy Press or heat press
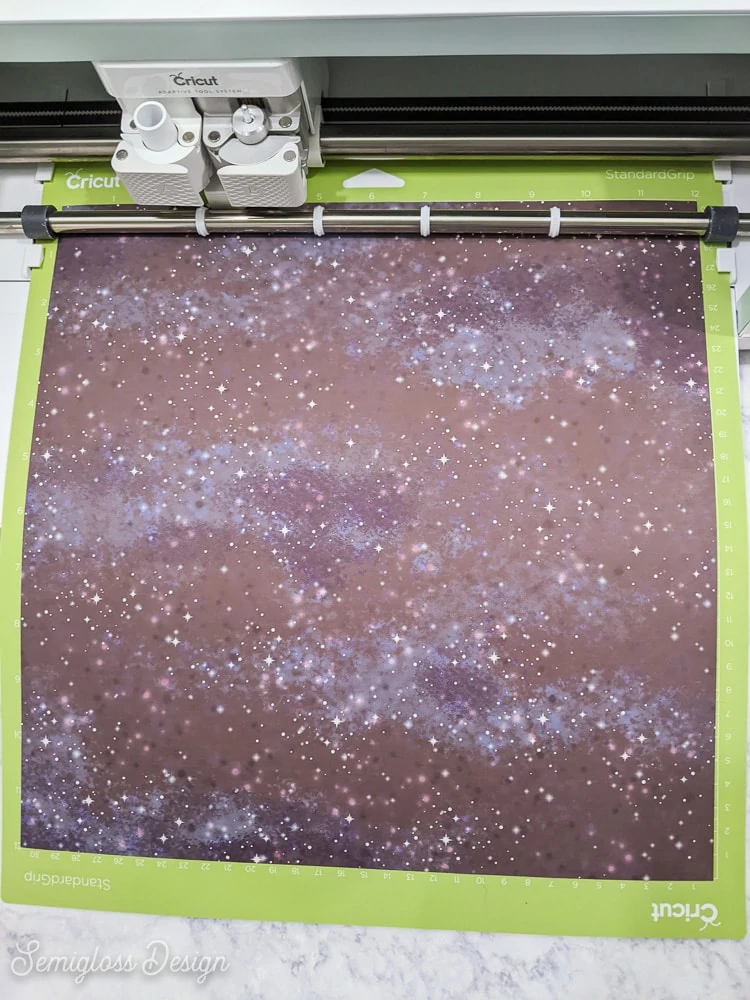
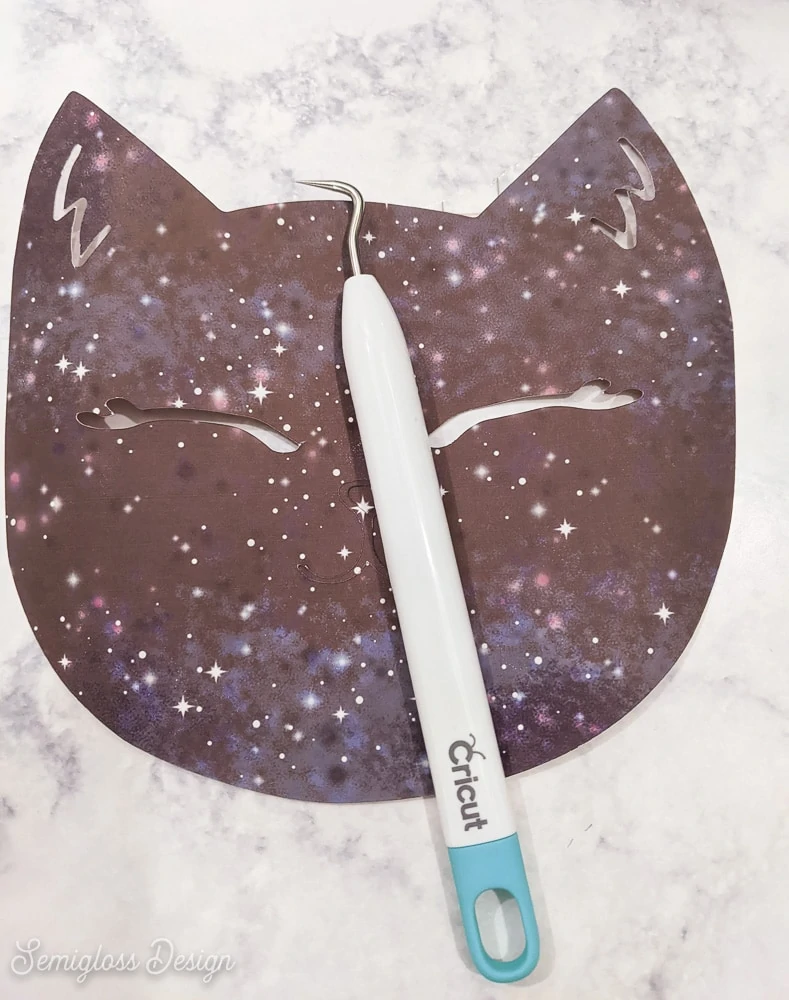
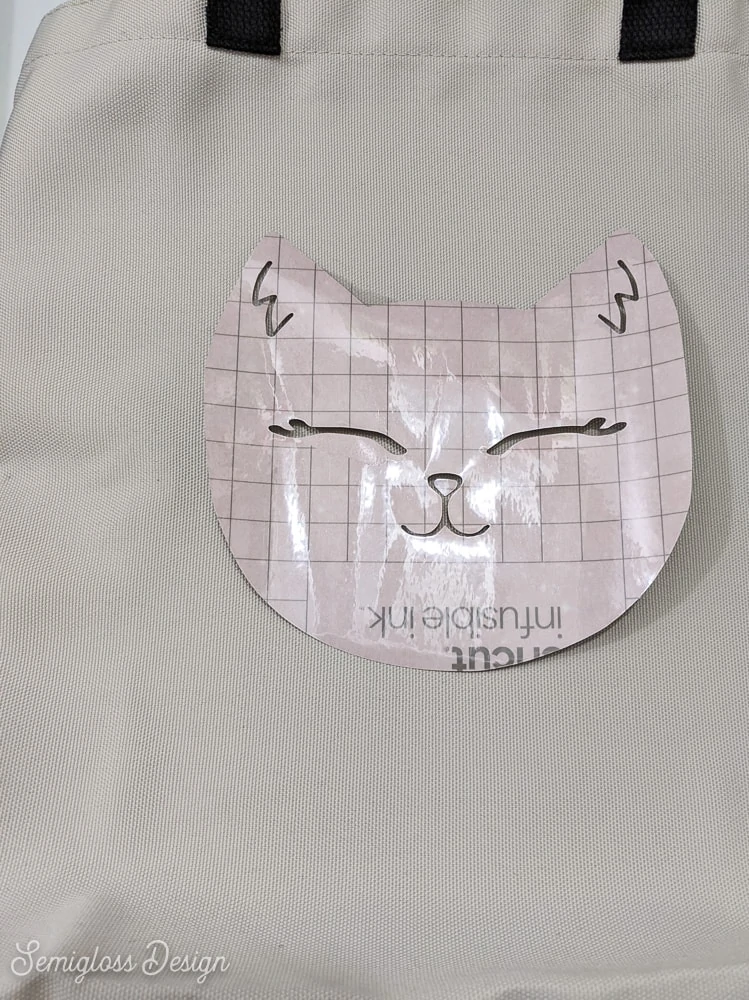
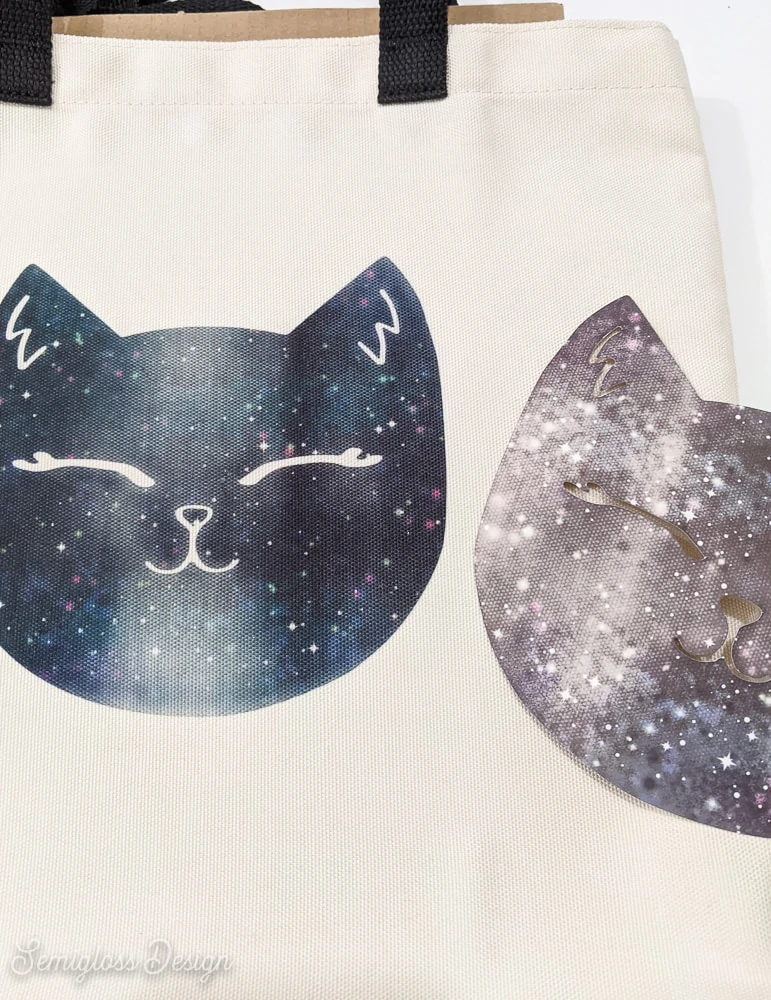
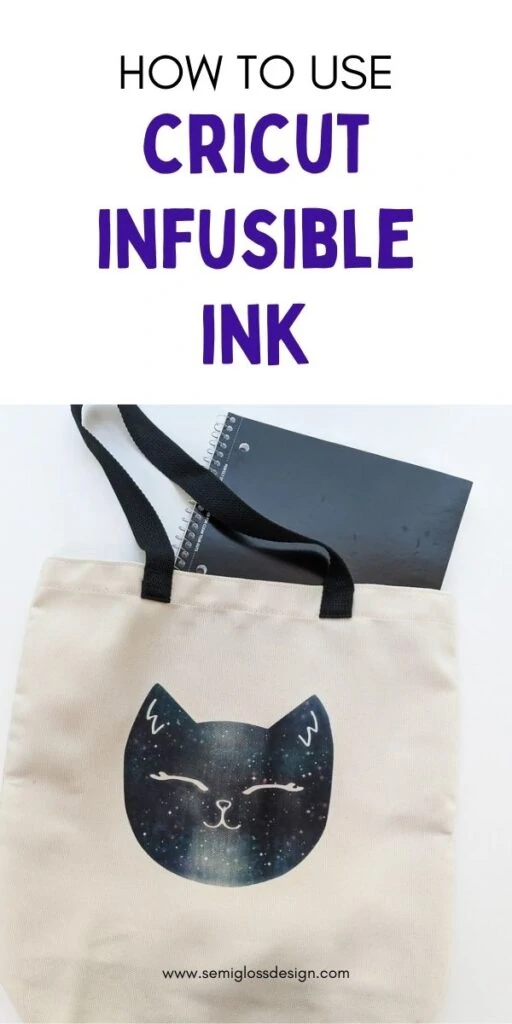
I used the galaxy pattern, which includes two different patterns.
You might be interested in learning how to use a Cricut Easy Press.
My daughter kindly provided the cat artwork, which I vectorized and turned into an SVG. I love that I have a reminder of her art style at this time in her life.
How to Use Infusible Ink
Learn how to use infusible ink. Infusible ink sheets allow you to add patterns to your designs without cracking or peeling. The ink soaks into the surface leaving a permanent design that can be easily washed.
Materials
- Infusible ink
- Infusible blank
Tools
- Electronic cutting machine
- Easy press
- Easy Press mat
- Weeding tools
Instructions
- Create your design as usual. If it has multiple pieces, be sure to select "attach" to keep the pieces together.
- Select the "Make It" button.
- Be sure to mirror the image.

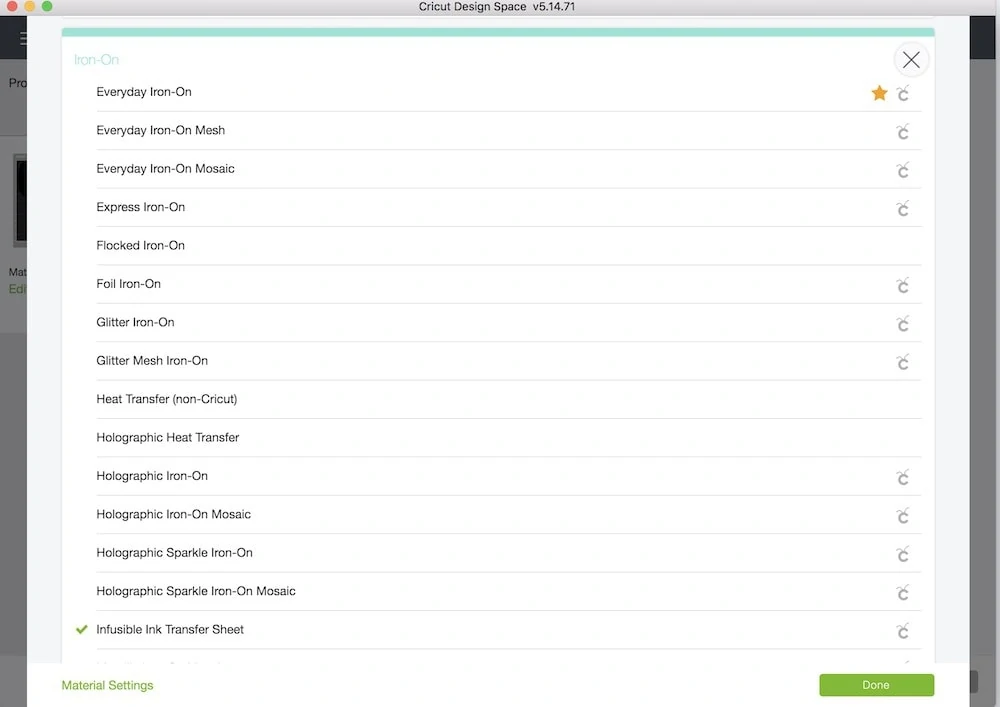
- Select the materials option. Infusible ink is under iron-on vinyl on the menu.

- Place the infusible ink sheet on the standard mat, color side up.

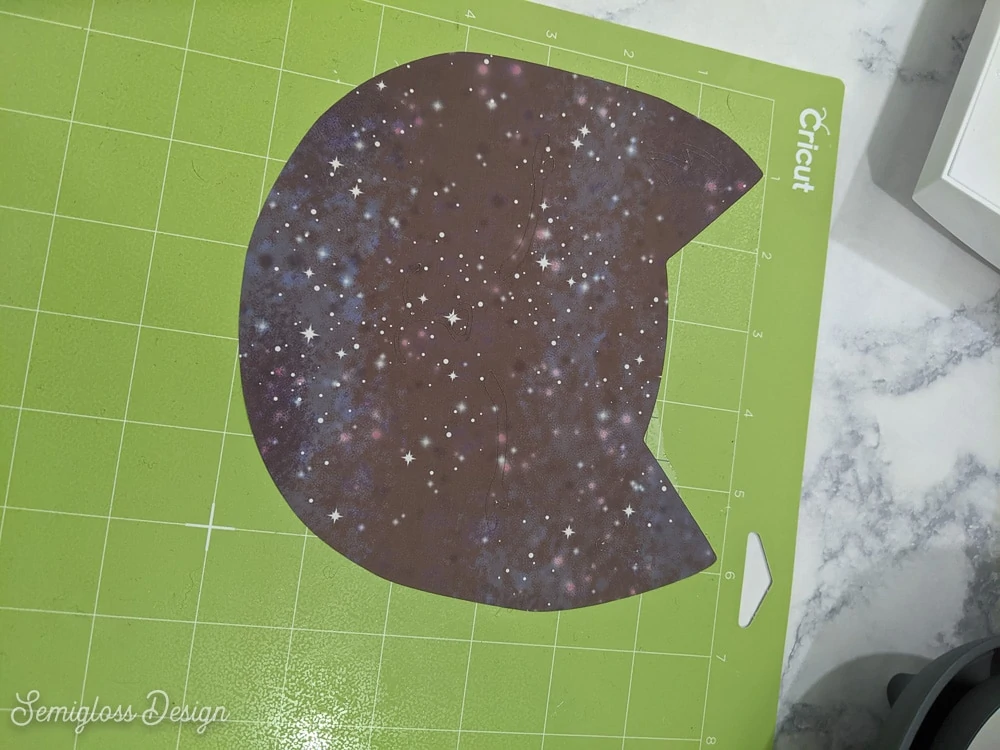
- Cut the design.

- Unload the mat.
- Remove the paper from the mat. (It has the texture of cardstock and behaves like cardstock when removing the design.)
- Try to leave the design on the plastic backing while weeding. (It's fine if you forget, though!)

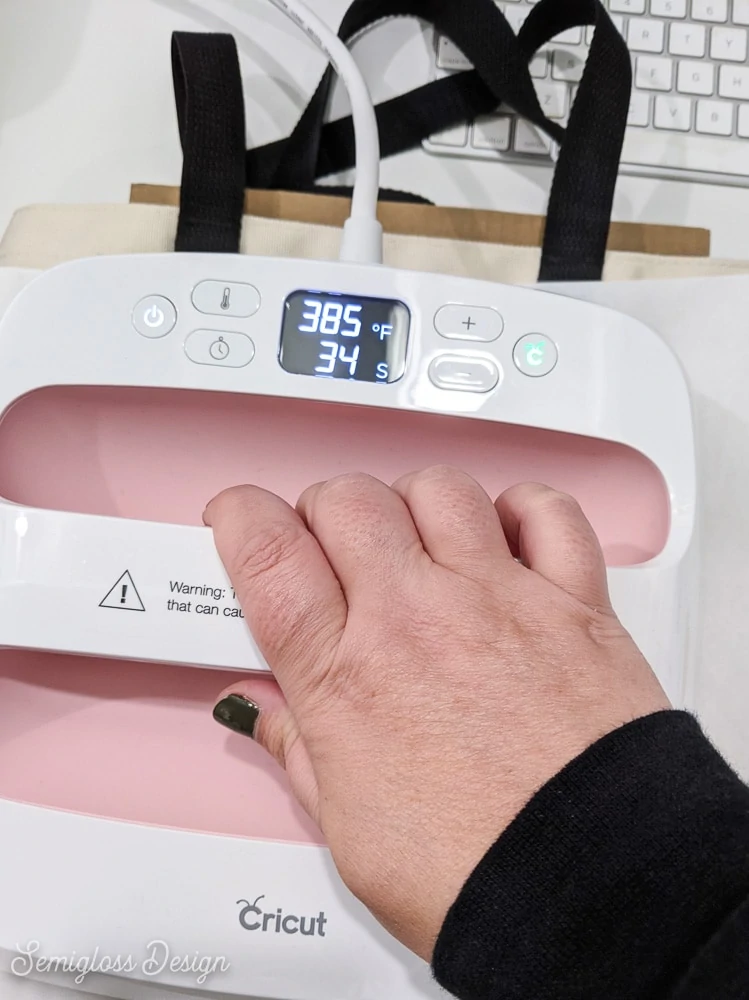
- Turn on your Easy Press and set the temperature to 385 and the timer for 40 seconds for a tote bag.

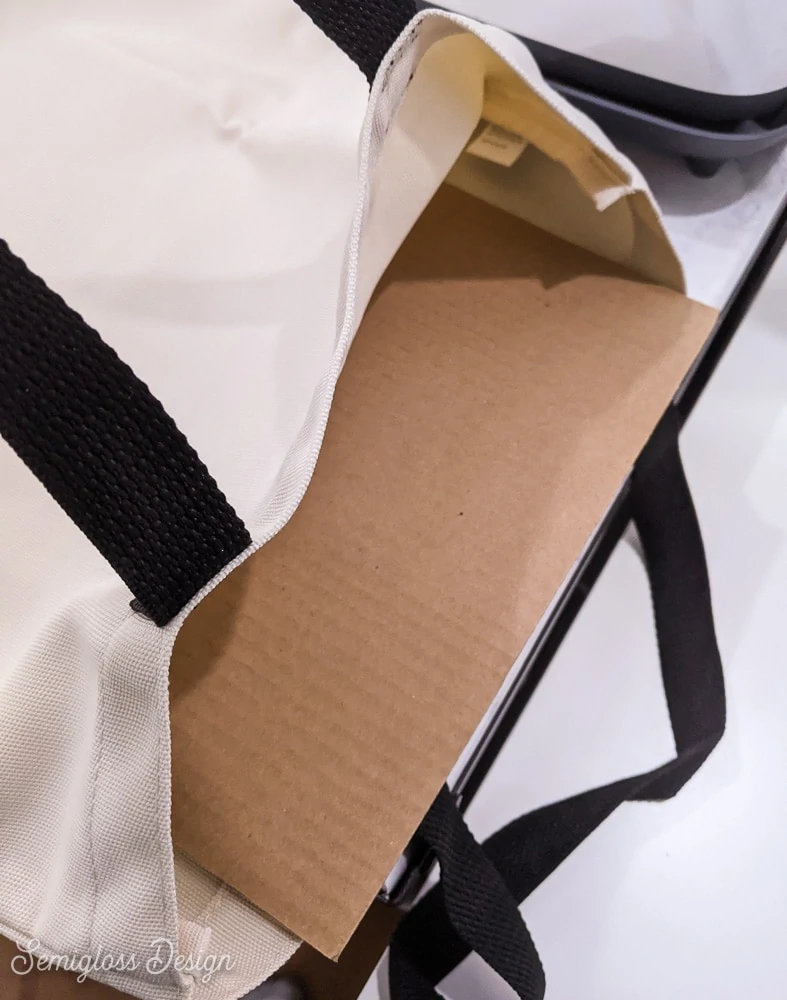
- Place the blank tote bag on the Easy Press mat.
- Place cardstock inside the bag to prevent ink from leaking through.
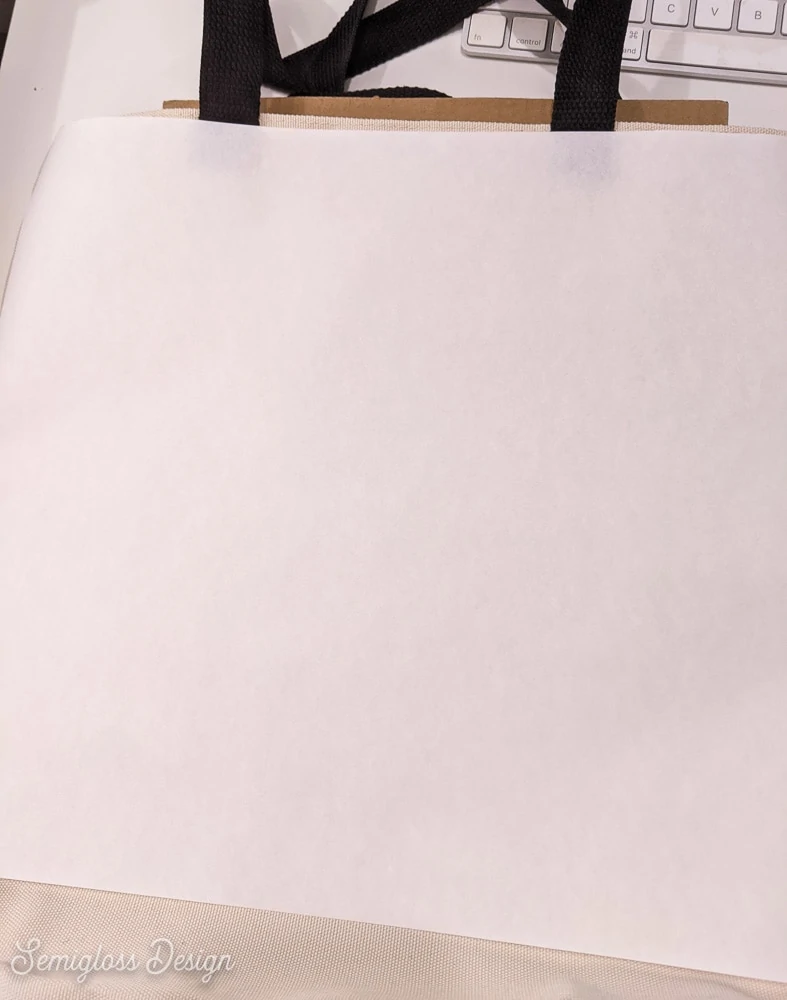
- Cover it with the enclosed butcher's paper and press it for 15 seconds.
- Remove the easy press.
- Apply the infusible ink design to the surface, color side down.

- Cover with butcher paper and press for 40 seconds.
- Remove the easy press and the butcher paper.
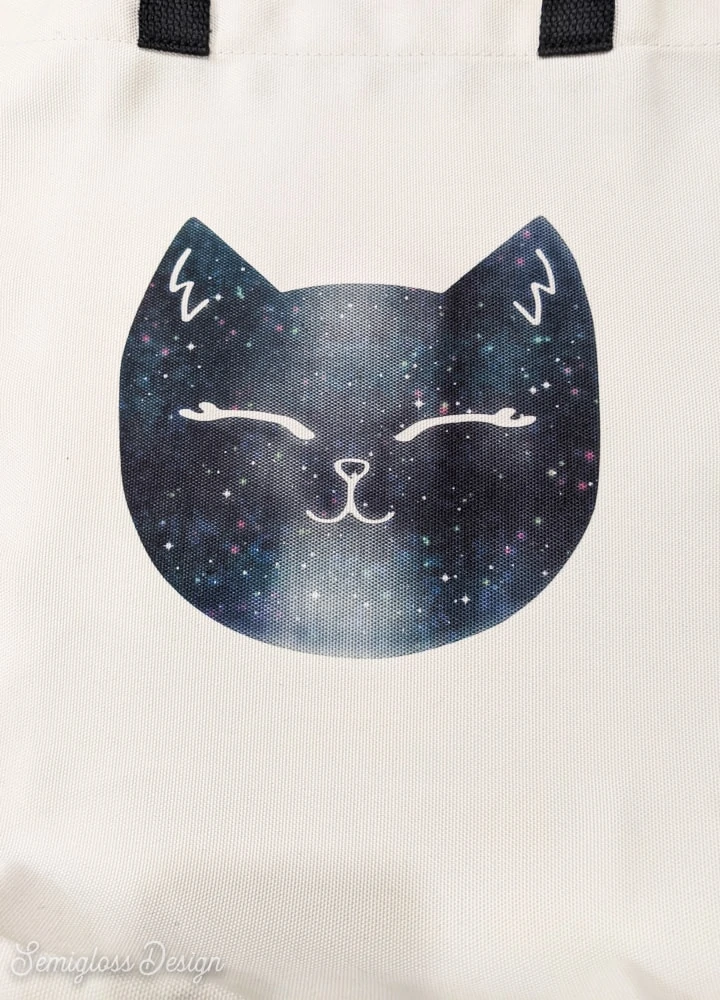
- The backing can be peeled off right away for the tote bag.

- The color is so much brighter than the paper was!

- Enjoy your tote bag!

Notes
Always check the Cricut heat guide for the best temperature, time, and peeling instructions.
Recommended Products
As an Amazon Associate and member of other affiliate programs, I earn from qualifying purchases.
-
 Cricut 2006830 Tote Bag Blank, Medium Infusible Ink, Canvas
 -
Cricut Transfer Sheets, Solid Color Infusible Ink (Black)
-
Cricut Maker, Champagne
-
Cricut Easy Press 2 - Heat Press Machine For T Shirts and HTV Vinyl Projects, Raspberry
-
Cricut EasyPress Mat, Protective Heat-Resistant Mat for Heat Press Machines and HTV and Iron On Projects, [12" x 12"]
-
Cricut Tools, Mint Basic Set


![Cricut EasyPress Mat, Protective Heat-Resistant Mat for Heat Press Machines and HTV and Iron On Projects, [12" x 12"]](https://m.media-amazon.com/images/I/41FNKJcKcfL._SL500_.jpg)

Get access to my SVG Library.
Get access to over 50 SVG sets and Cricut cheat sheets. Join my SVG library.
You might also like:
- Infusible Ink Citrus Fruit Coasters
- How to Use a Cricut Easy Press
- Cricut Maker Vs Silhouette Cameo
- DIY Leather Earrings with a Cricut
Pin for Later!

Emy is a vintage obsessed mama of 2 DIYer who loves sharing affordable solutions for common home problems. You don’t need a giant budget to create a lovely home. Read more…