How to Etch a Pumpkin Using a Dremel
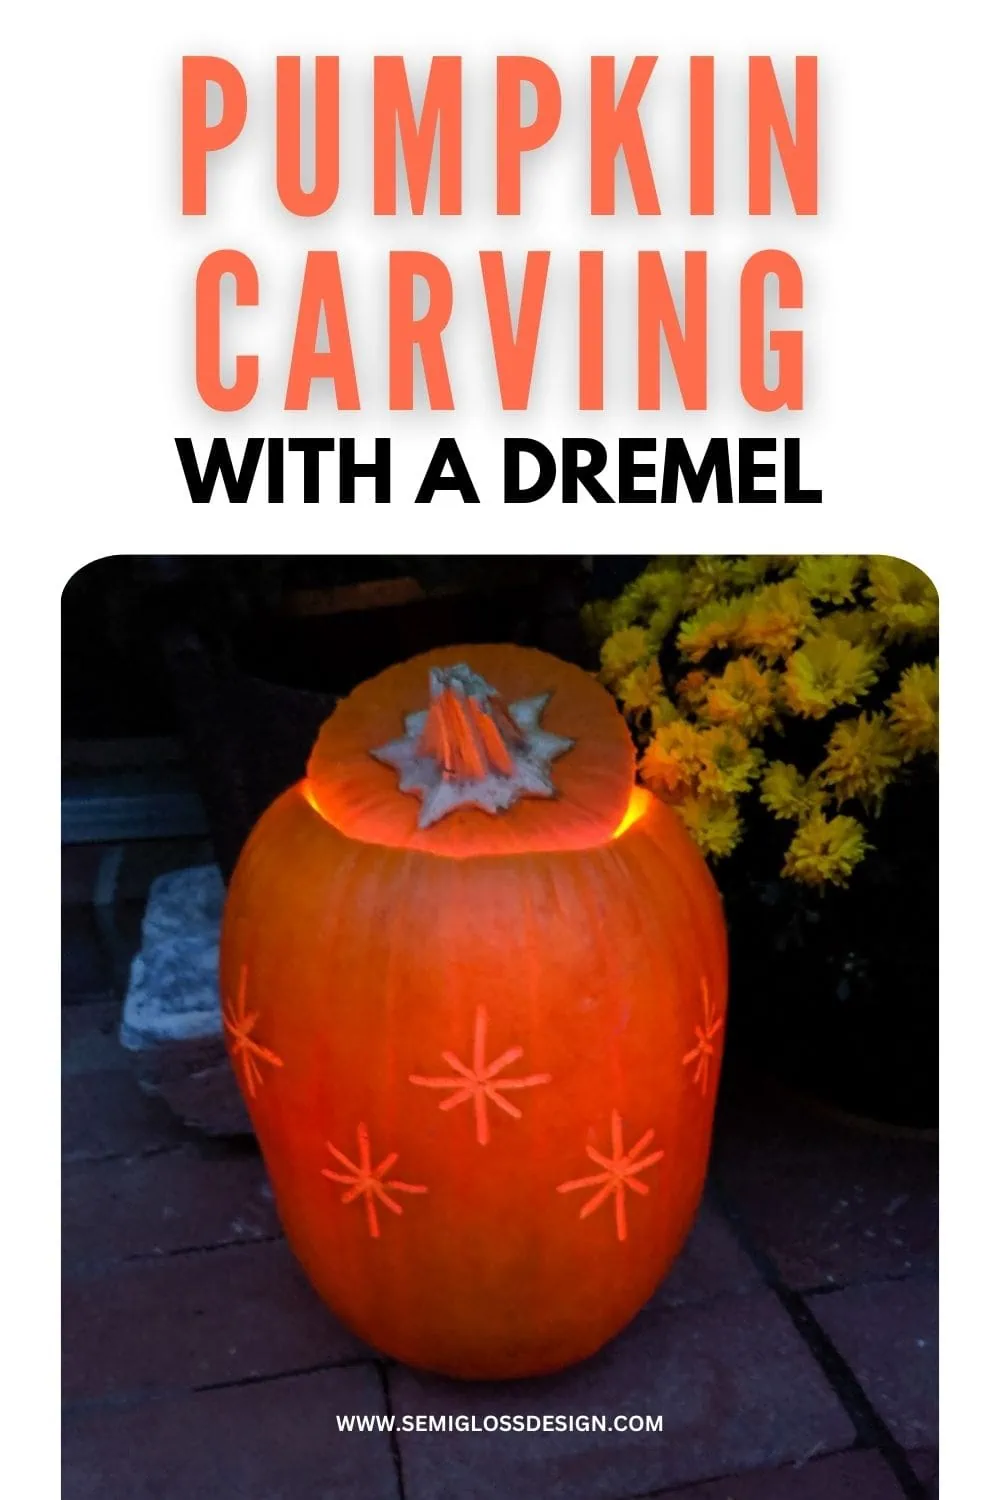
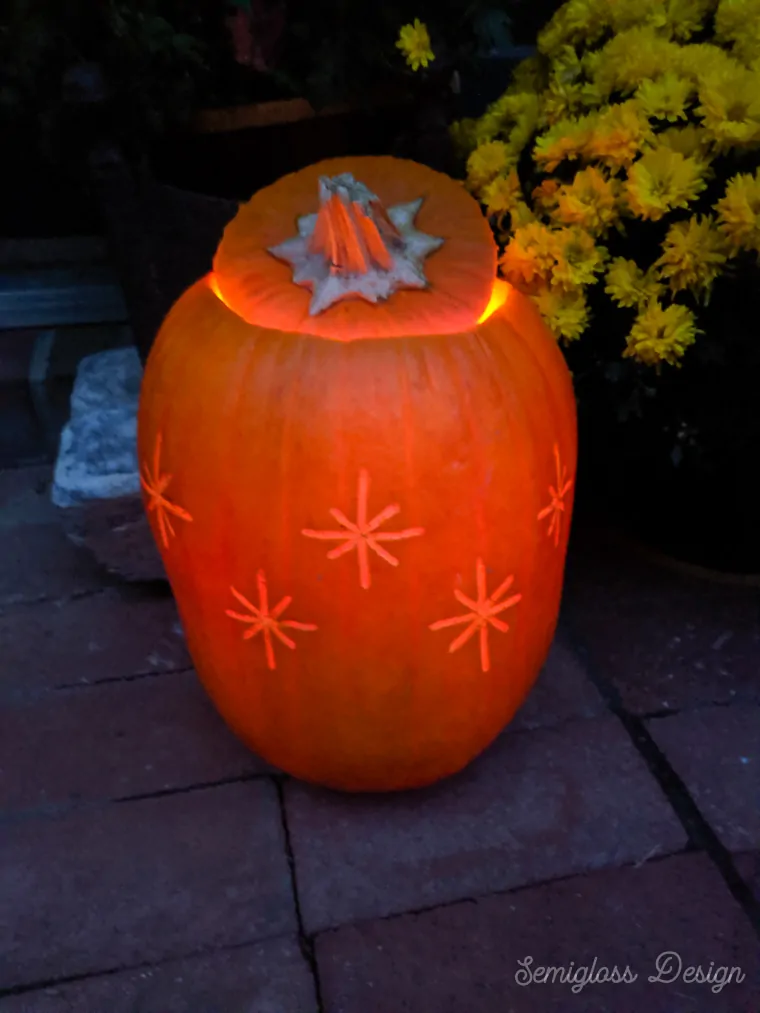
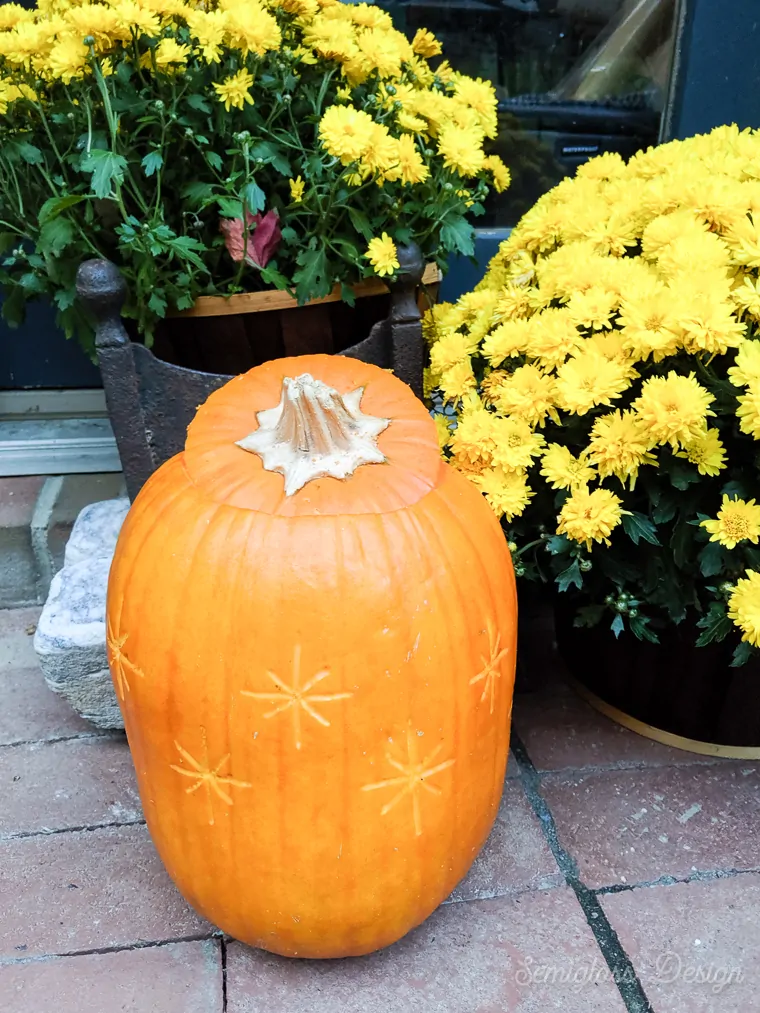
Learn how to etch a pumpkin using a Dremel. This pumpkin features a simple retro starburst design that glows when a candle is placed inside.
I love retro starbursts, and it seemed like a fun way to carve a pumpkin. Plus, it meant that I would get to use my Dremel, which is the most relaxing tool to use ever.
Why Etch a Pumpkin?
Etching allows you to carve a pumpkin without cutting through it. When a candle is placed inside, it glows and illuminates the etched design.
This look is perfect for someone who is a bit tired of carving goofy faces on pumpkins.
Why Use a Dremel for Carving Pumpkins
Have you ever used a Dremel for carving? It’s my favorite thing ever. Talk about a moment of zen.
Power tools are fun, and I enjoy using them in unexpected ways.
Plus, it’s a way to be more creative with your pumpkin carving.
Using a Dremel to carve pumpkins is also easier because you don’t have to figure out which areas to leave.
And then you don’t accidentally cut away the eye that you painstakingly cut out. Not that that ever happens to me!
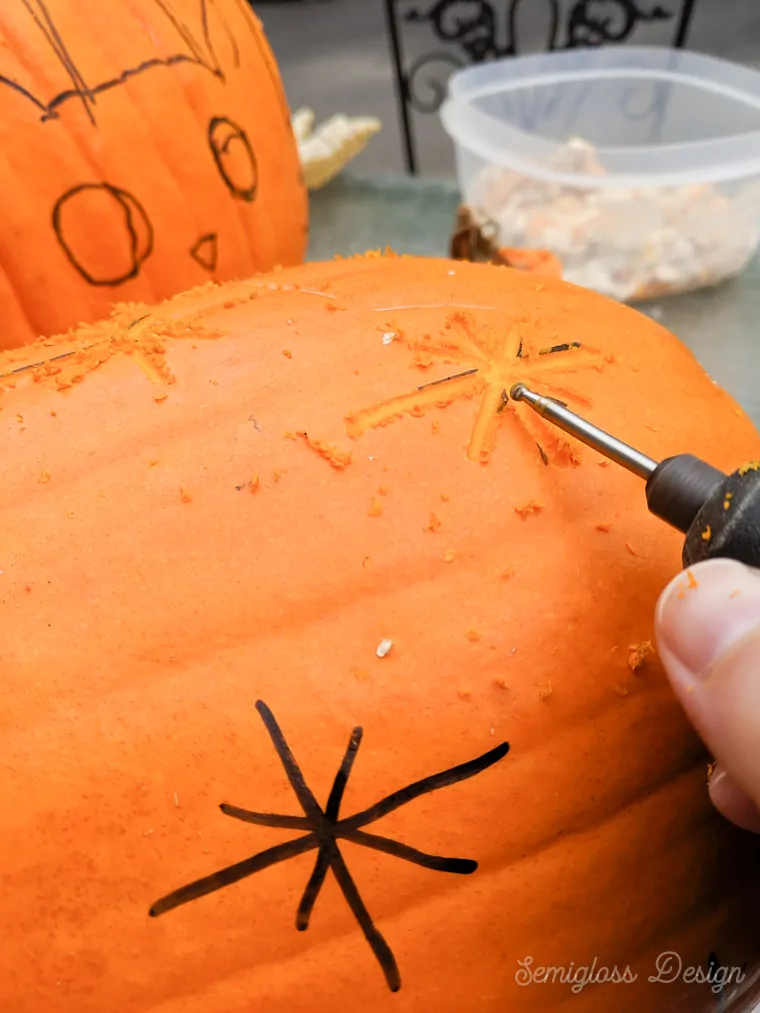
I use the engraving bit, which also makes it safe for bigger kids to use. (I wouldn’t hand it to a toddler probably, but it’s fine for a responsible big kid.)
You can use the drilling bits for more intense carving, but I love using them for etching and just scraping the pumpkin skin away.
It looks so magical when lit up.
How to Etch a Pumpkin Using a Dremel
This post contains affiliate links. By purchasing an item through an affiliate link, I earn a small commission at no extra cost to you. As an Amazon Associate I earn from qualifying purchases.
Supplies List:
- Pumpkins
- Pumpkin carving kit (I have this one, and I love the metal for cutting and scooping. It’s much safer than a giant knife.)
- Dremel
- Engraving Bit
- Dry Erase Marker
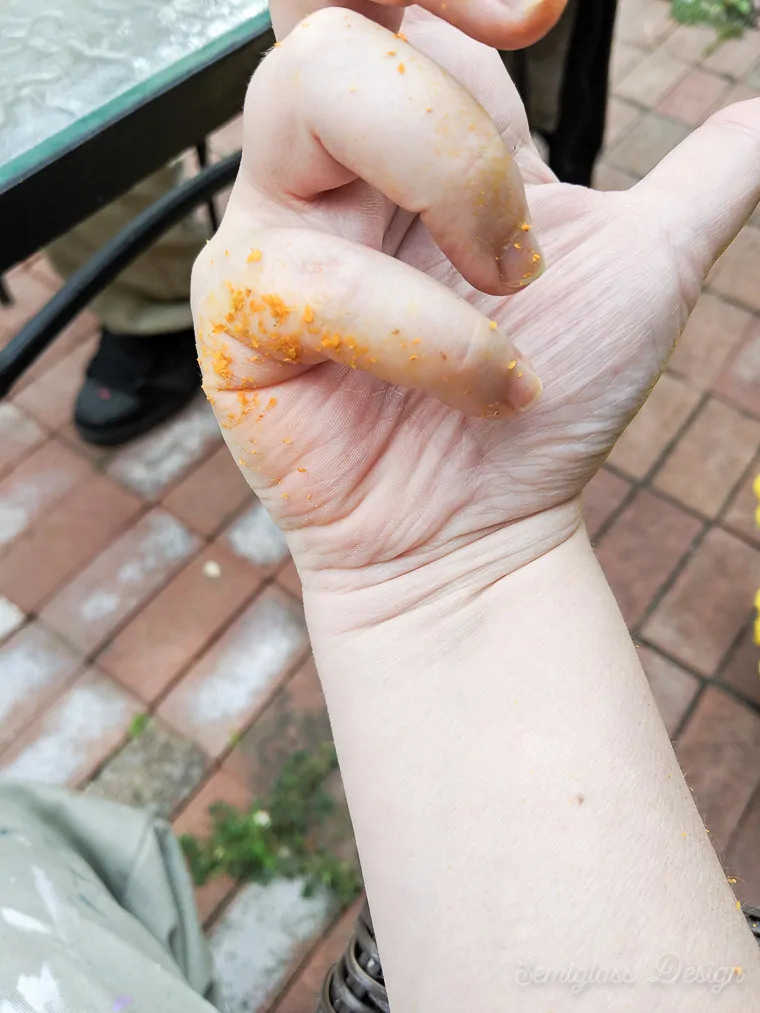
A note before starting: this is a messy project. Work outside in old clothes if possible. Pumpkin skin goes everywhere!
Pumpkin Prep Work
It’s still necessary to clean out the inside of the pumpkin so that you can insert a candle.
To prolong the life of your pumpkin, consider cleaning it with vinegar first. This will prevent the pumpkin from rotting without harming any hungry animals.
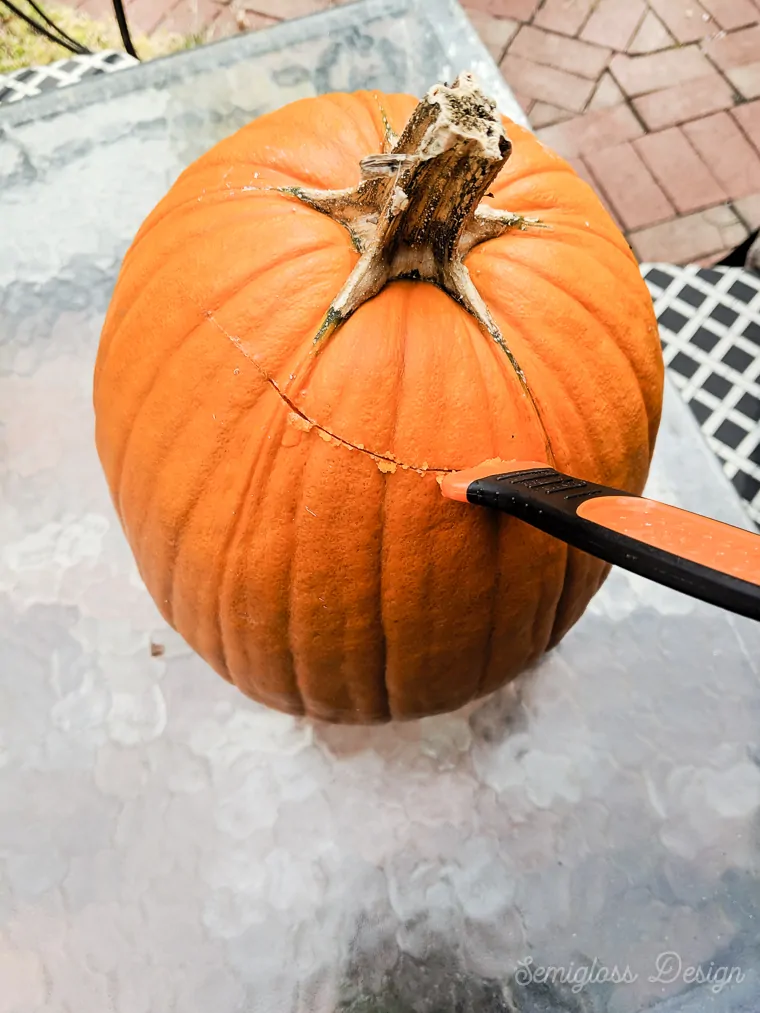
- Cut the lid out, making sure not to cut it too small. It can’t be redone after it’s cut because it needs to fit back inside. I use a serrated blade from the pumpkin kit and cut at an angle.

- Remove the lid and set it aside.
- Remove the seeds and set them aside to eat later. If you’re like us, you’ll forget about them or burn them…

- Scoop out the rest of the guts to remove the stringy pieces. The scoop has a serrated edge that helps scrape away the inside until it’s smooth.
- For etching, it’s not necessary to get it perfect because a string hanging down won’t detract from the look. However, they need to be minimal to keep your pumpkin safe from the flame.

Using the Dremel to Etch a Pumpkin
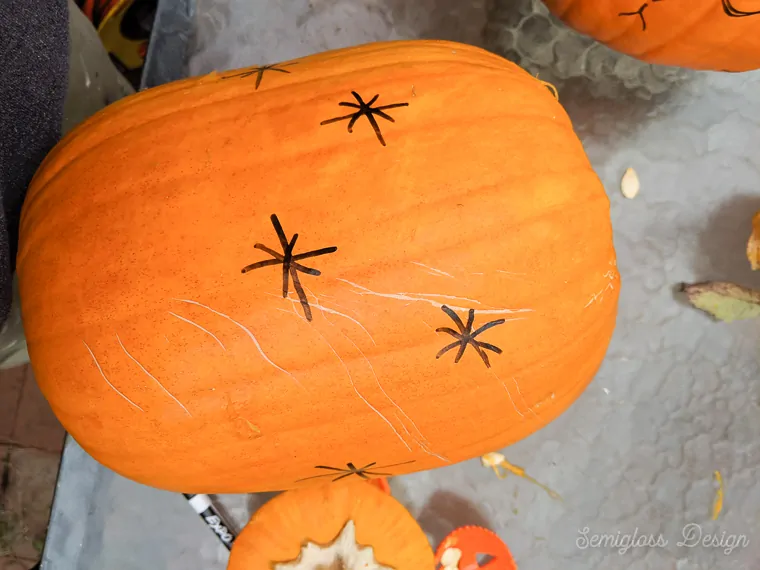
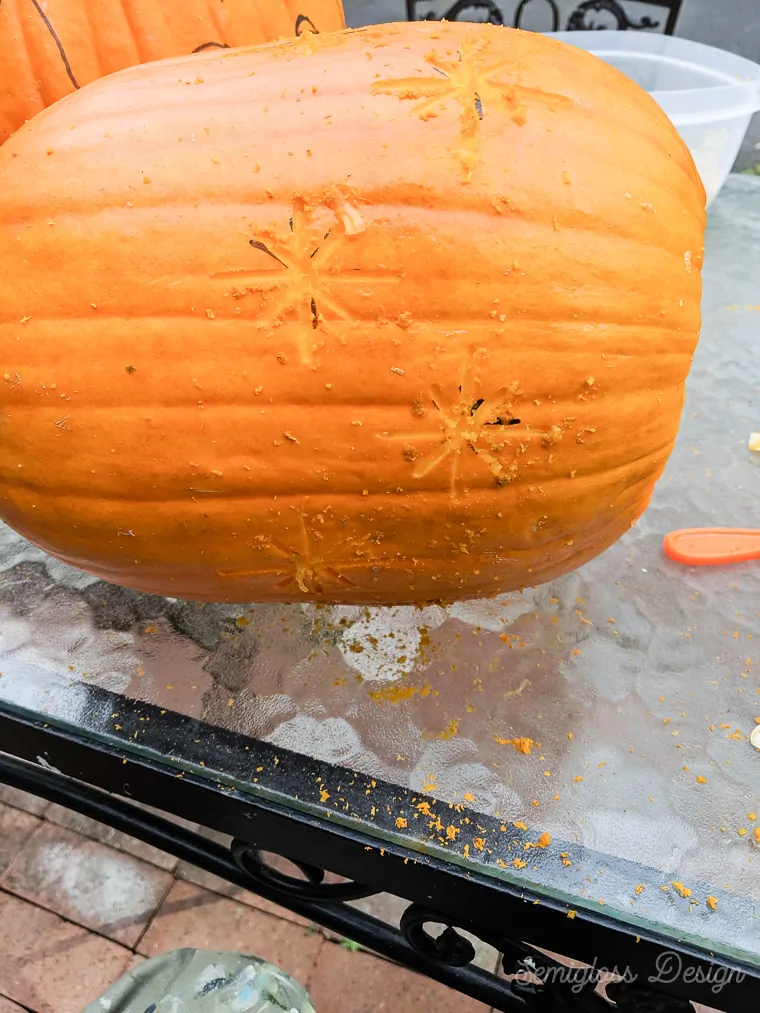
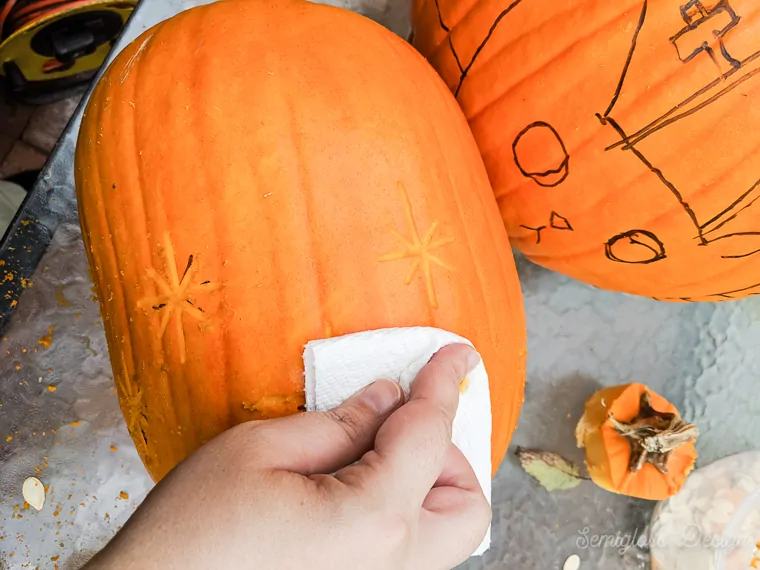
- Draw out your design using a dry-erase marker. (Dry erase markers are easy to erase from the skin of the pumpkin, unlike a permanent marker.)
- Place the bit in the Dremel and tighten it.
- Turn on the Dremel and adjust the setting to a speed that you’re comfortable with. I set mine to 3 because I’m comfortable with the Dremel, and pumpkins are soft and easy to carve.
- Use the Dremel like a pen, tracing over your design.
- If you mess up, make a thicker line.
- Go slow for the best results.
- Any stray marker spots can be removed with a paper towel. Wet the napkin with pumpkin if necessary.
- When you’re finished, place a candle in the pumpkin. You can either drill holes near the top or just set the lid at an angle to allow air inside.
Tips for Using a Dremel for Pumpkin Etching
- Start with a very simple design. This allows you to get a good idea of how the Dremel works.
- Go slower than you think as you trace the lines.
- Start with a shallow groove before carving deeper.
- Thick pumpkins will require deeper and thicker grooves to stand out. I could see light through my pumpkin when I held it up to the sun, so I was confident that I could get away with a thinner design.
- Don’t expect perfection. And if you want a nicer design, set the speed even lower. You will need to go over the design a few times to get it thick enough.
- If your design is getting stringy, carve at an angle to use the shank of the bit to remove the strings. This is also a good way to remove larger portions of a design.
You might also like:
- Felt Halloween Banner
- Faux Metallic Pumpkins
- Decoupage Pumpkins
- Vinyl Jack o’Lantern Sign
- Witch Mug DIY
Pin for Later!


Emy is a vintage obsessed mama of 2 DIYer who loves sharing affordable solutions for common home problems. You don’t need a giant budget to create a lovely home. Read more…