How to Make DIY Vinyl Decals for Tumblers
Get easy tips and tricking for making DIY vinyl decals for tumblers. Vinyl is a fun way to customize your favorite tumbler. You can add any design that you want to personalize an insulated cup for yourself, friends, or family members.
You may want to read this beginner’s guide to using a Cricut Maker before getting started.
This post contains affiliate links. By purchasing an item through an affiliate link, I earn a small commission at no extra cost to you. As an Amazon Associate I earn from qualifying purchases.
Applying vinyl decals to items is my favorite craft at the moment. It’s so quick and easy.
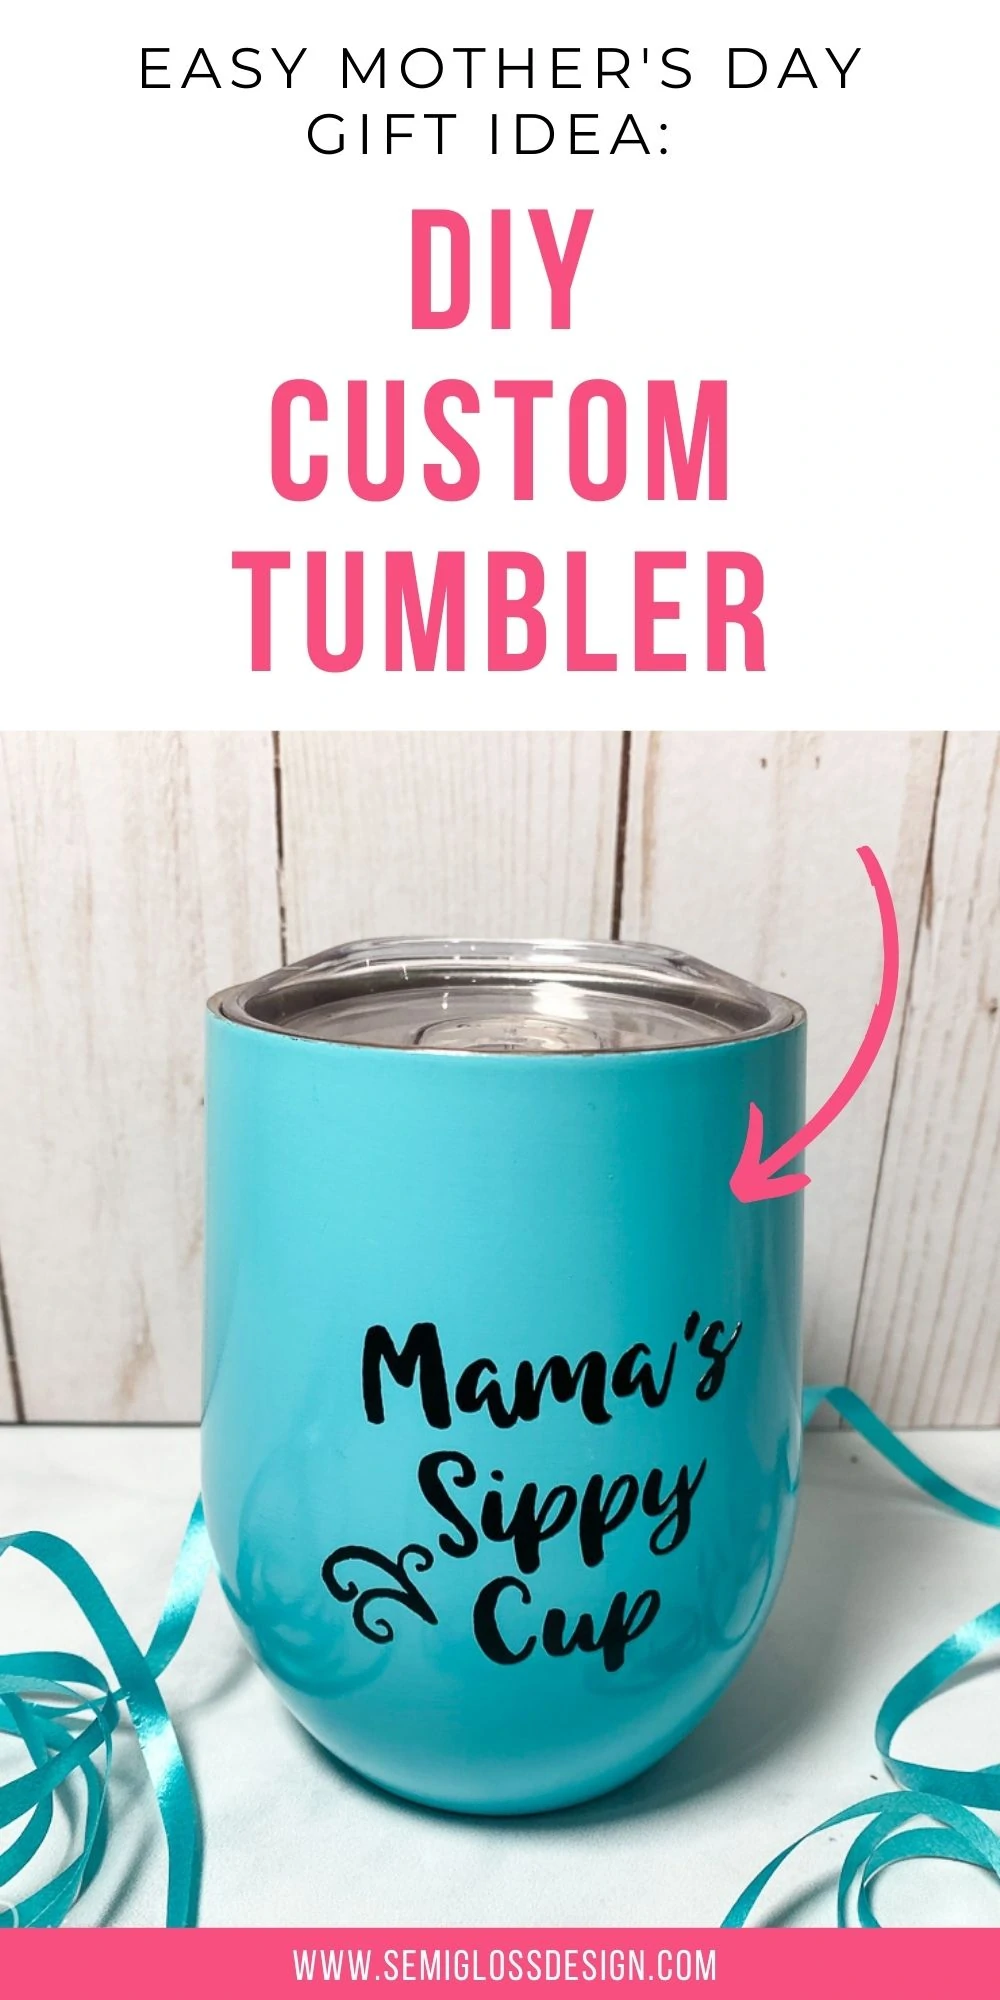
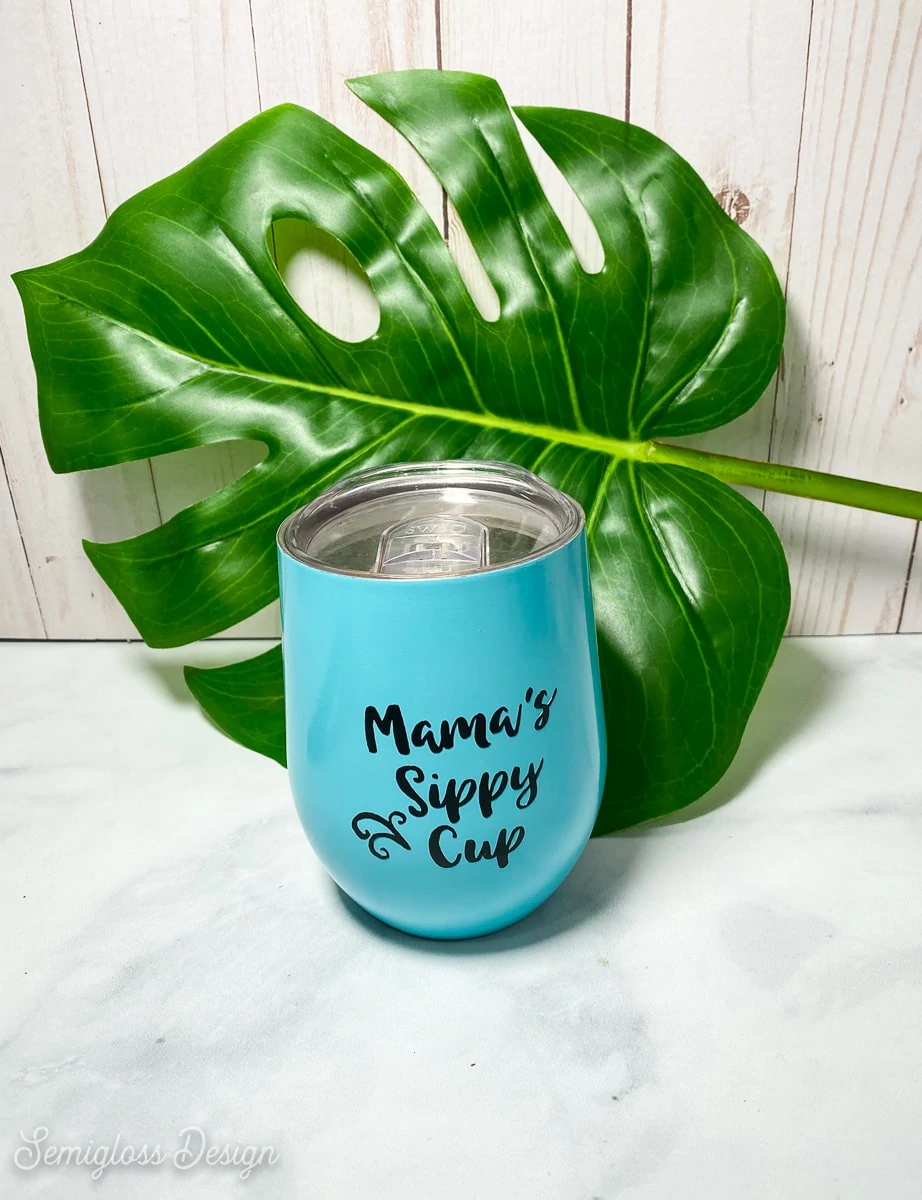
With summer on the way, I wanted to personalize an insulated wine tumbler. I love using a tumbler on a warm day. Did you miss the post where I did a very scientific test to see which brand of insulated tumbler kept my drink the coldest?
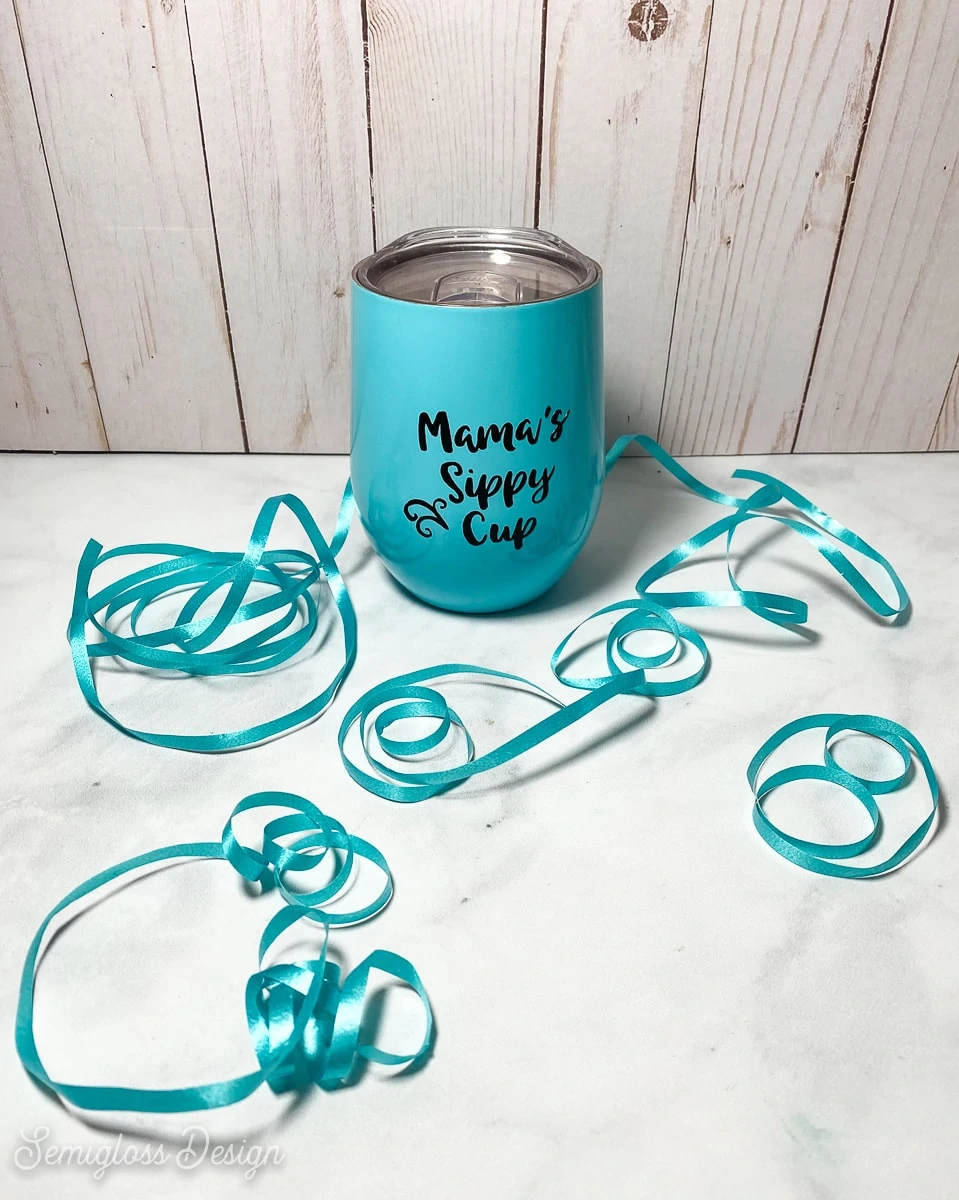
This decal tumbler would make a great gift, by the way.
Vinyl Decal for Tumblers FAQs
What kind of vinyl is used for tumblers?
For the best results, use permanent or vinyl that is designed for outside use.
Which tumbler should you choose?
When picking out a tumbler to use, choose one that has smooth sides and minimal labeling.
My personal favorite tumbler brand is Corkcicle, but they do have a prominent logo on the cups. For this tumbler, I used a Swig brand tumbler.
Yeti is a popular brand, but the sides of the cup are slightly textured and might be more difficult to get the vinyl to stick.
How do you seal a decal on a tumbler?
If you want to make the design permanent, you can add a coat of epoxy resin over the design. As far as I know, this is the only food-safe coating available. I haven’t tested this process myself, but I know that it’s a thing.
I’ve seen polycrylic suggested and as much as I love polycrylic, I would never use it on something used for food. I’ve also seen the dishwasher-safe mod podge suggested and again, I would not try that option either.
To get a good seal on the decal without epoxy, use a design that is a bit wider with less delicate parts. The more surface it covers, the better. After applying the vinyl, heat it slightly with a blow dryer or other heat tool.
Can you epoxy over vinyl decals?
Yes, you can epoxy over vinyl decals. As I said earlier though, I don’t have any experience with this process yet.
I know there are tumbler turners to keep the cup moving though. It’s on my to-do list of things to try. (Leave me a comment if you would like to see this tutorial soon.)
How do you apply a decal straight on a tumbler?
You can either eyeball it as I do or you can use the hinge method. This means that you remove one side of the backing and place the decal onto the tumbler surface from the center out. Then you remove the rest of the backing and once again apply it from the center out.
Tips for Making Your Own Decal Design
Most tumblers are slightly rounded, so it’s important to keep a few things in mind when designing your decal.
- A simple design will be easier to work with.
- A design with delicate details won’t stick as well and may come off over time.
- If you use text, make sure that you weld it in the design software. This makes the design into 1 shape, instead of a lot of separate shapes.
- Choose a font that is smooth (not distressed) and simple. This will also make weeding easier.
- When weeding, pay special attention to the dots on the letter “I” and punctuation like commas and apostrophes. These tiny parts are easy to lose.
- Measure your cup for sizing the design. Make the design a bit smaller than you think. It will seem tiny, but it will look fine once it’s on the tumbler.
Applying DIY Vinyl Decals on Tumblers
Supplies Needed:
I’ve included links to items from both Amazon and the Cricut website. Cricut often holds sales (especially around holidays and weekends), so it’s worth checking the prices from both shops to get the best deals.
- Cutting Machine (I used a Cricut Maker) | Cricut Website
- SVG design (join my library to get access to all of my SVG designs – link below)
- Vinyl (Permanent works best) | Cricut Website
- Weeding tools | Cricut Website
- Tumbler
- Transfer tape | Cricut Website
- Rubbing alcohol
Get access to my SVG Library.
Get access to over 50 SVG sets and Cricut cheat sheets. Join my SVG library.
If you don’t have a cutting machine, you can buy ready-made decals.
If you have a Cricut, but don’t know how to use it, check out my beginner’s guide to using a Cricut for the first time.
Directions
- Clean the tumbler with rubbing alcohol to remove any oils from your skin. This helps the decal adhere better.
- Resize and cut your design as needed. I resized my design to a little less than 2″ x 2″.
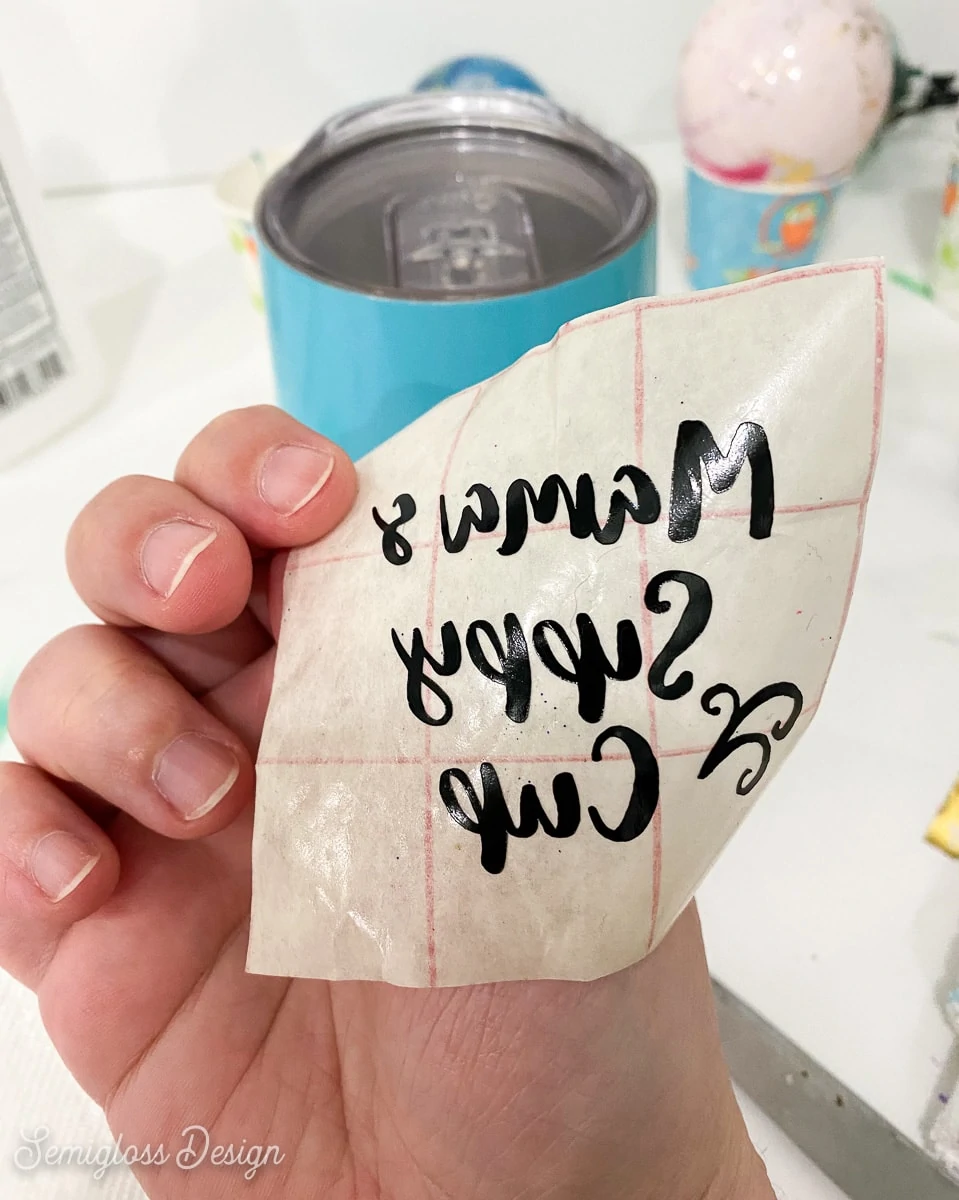
- Weed the design being careful not to lose the small parts.
- Cut a piece of transfer tape the same size as your design.
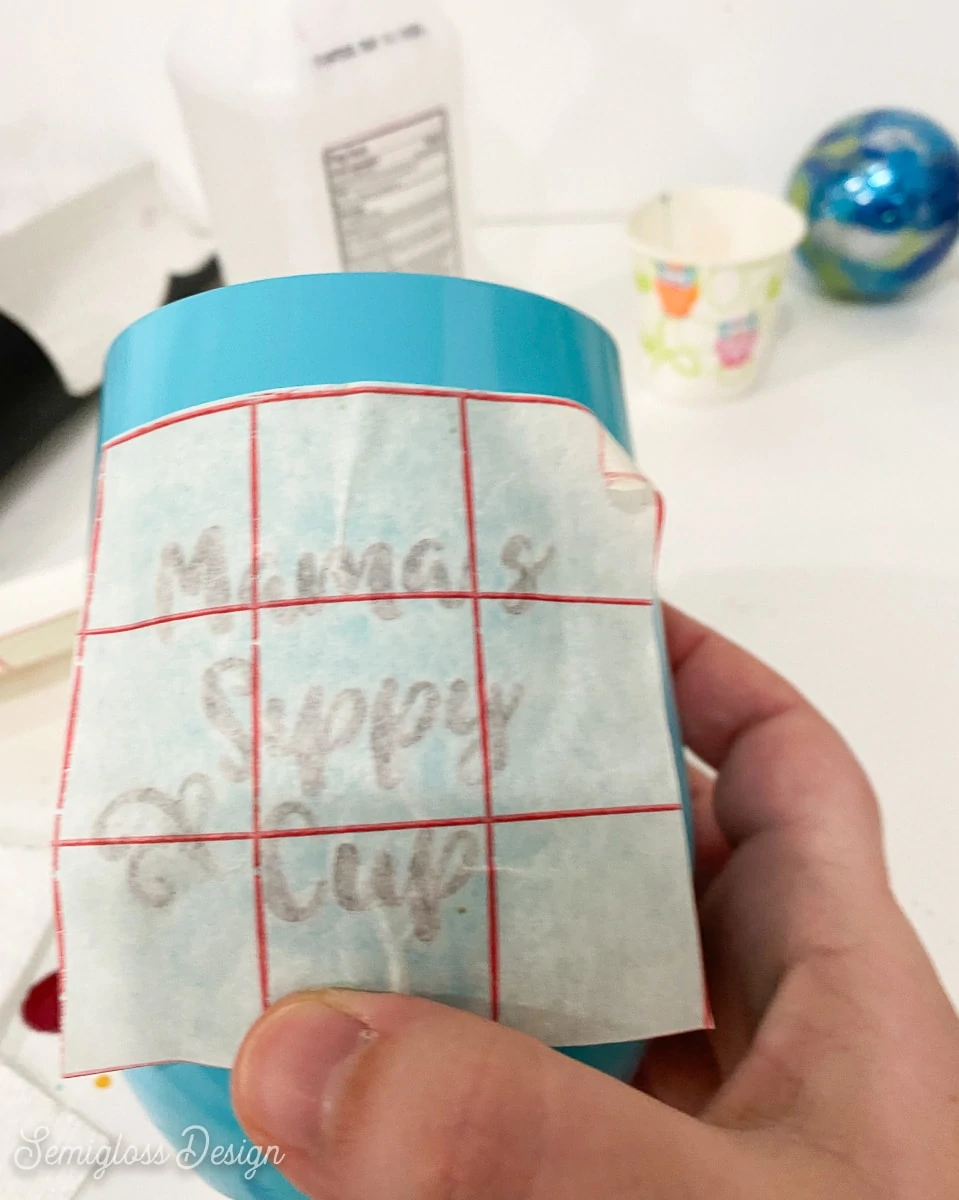
- Remove the backing from the transfer tape and apply it to the design, smoothing as you go to make sure that it adheres well.
- Remove the transfer tape and vinyl decal from the backing.

- Line up the decal on the tumbler and apply the design. I like to use the backing paper to burnish the edges to make sure that it sticks well.
- Don’t apply the design too close to the top of the cup. This will make drinking difficult.
- Remove the transfer tape.
- Burnish the edges a little more if needed to make sure that it sticks.
- Use a blow dryer to lightly heat the design on the cup for a few seconds. This will help it stick for longer.
Care Instructions for Your Tumbler
Vinyl is not microwave or dishwasher-safe.
Hand-wash your tumbler with a decal. Don’t let it sit in water for long periods of time or the decal will come off.
Get access to my SVG Library.
Get access to over 50 SVG sets and Cricut cheat sheets. Join my SVG library.
You might also like:
Pin for Later!

Emy is a vintage obsessed mama of 2 DIYer who loves sharing affordable solutions for common home problems. You don’t need a giant budget to create a lovely home. Read more…
So if you make a mistake, how do you remove them?
It should peel off. If it’s touch to peel, hot water should help.