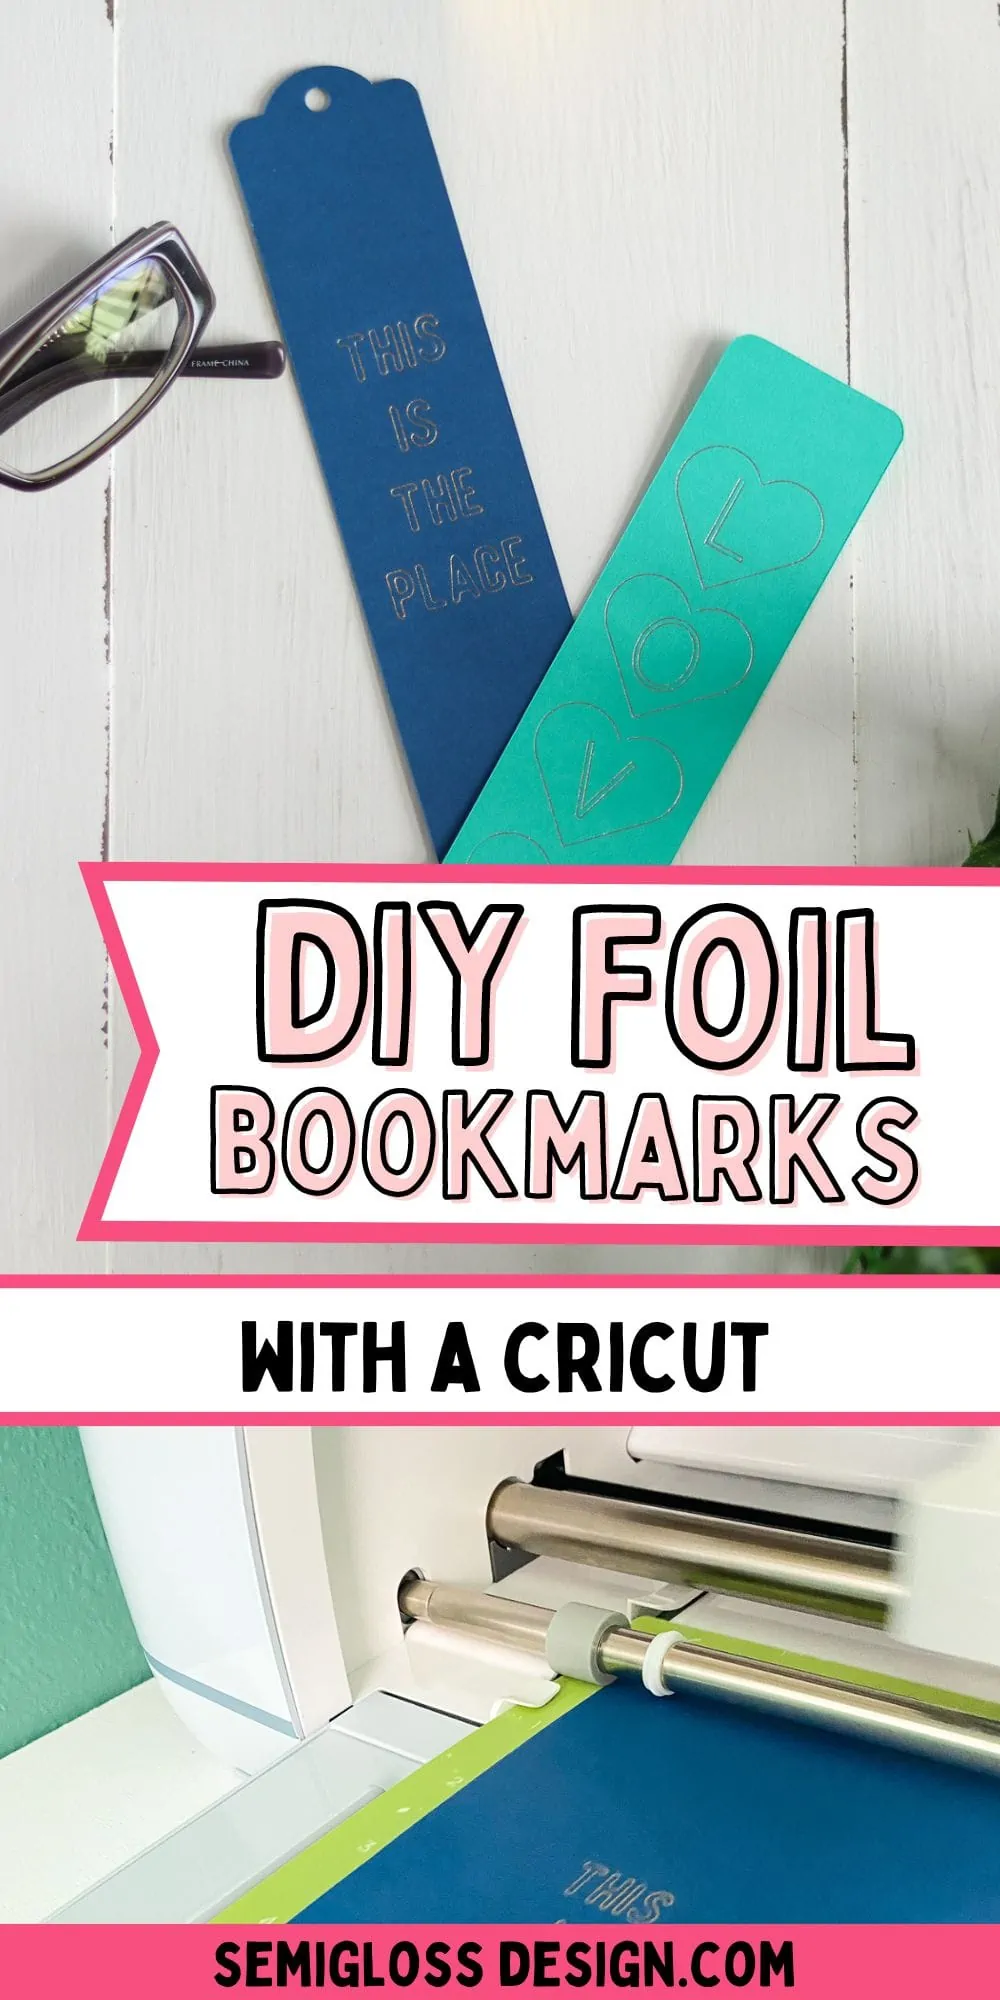
How to Use the Cricut Foil Transfer Kit to Make Bookmarks
Learn how to use the Cricut foil transfer kit to make bookmarks. These simple bookmarks are the perfect first project for the foil transfer kit.
If you’re new to Cricut, you might like this post on how to use a Cricut Maker.
This post contains affiliate links. By purchasing an item through an affiliate link, I earn a small commission at no extra cost to you. As an Amazon Associate I earn from qualifying purchases.
I was so excited when I saw the Cricut Foil Transfer kit because I love adding metallic accents to my craft projects.
It’s a multi-step process, so I was a bit intimidated, but it ended up being super easy to use the Cricut foil transfer kit.
All About the Cricut Foil Transfer Kit
The Cricut Foil Transfer Kit allows you to add metallic foils to your projects without needing messy glue or heat-based equipment like my foil laminator art.
It allows you to add a foil design and cut it in one easy process, with no extra equipment needed.
It works with all of the Cricut machines, except for the Cricut Joy. There is another kit that works with the Cricut Joy.
What Does the Foil Transfer Kit Include?
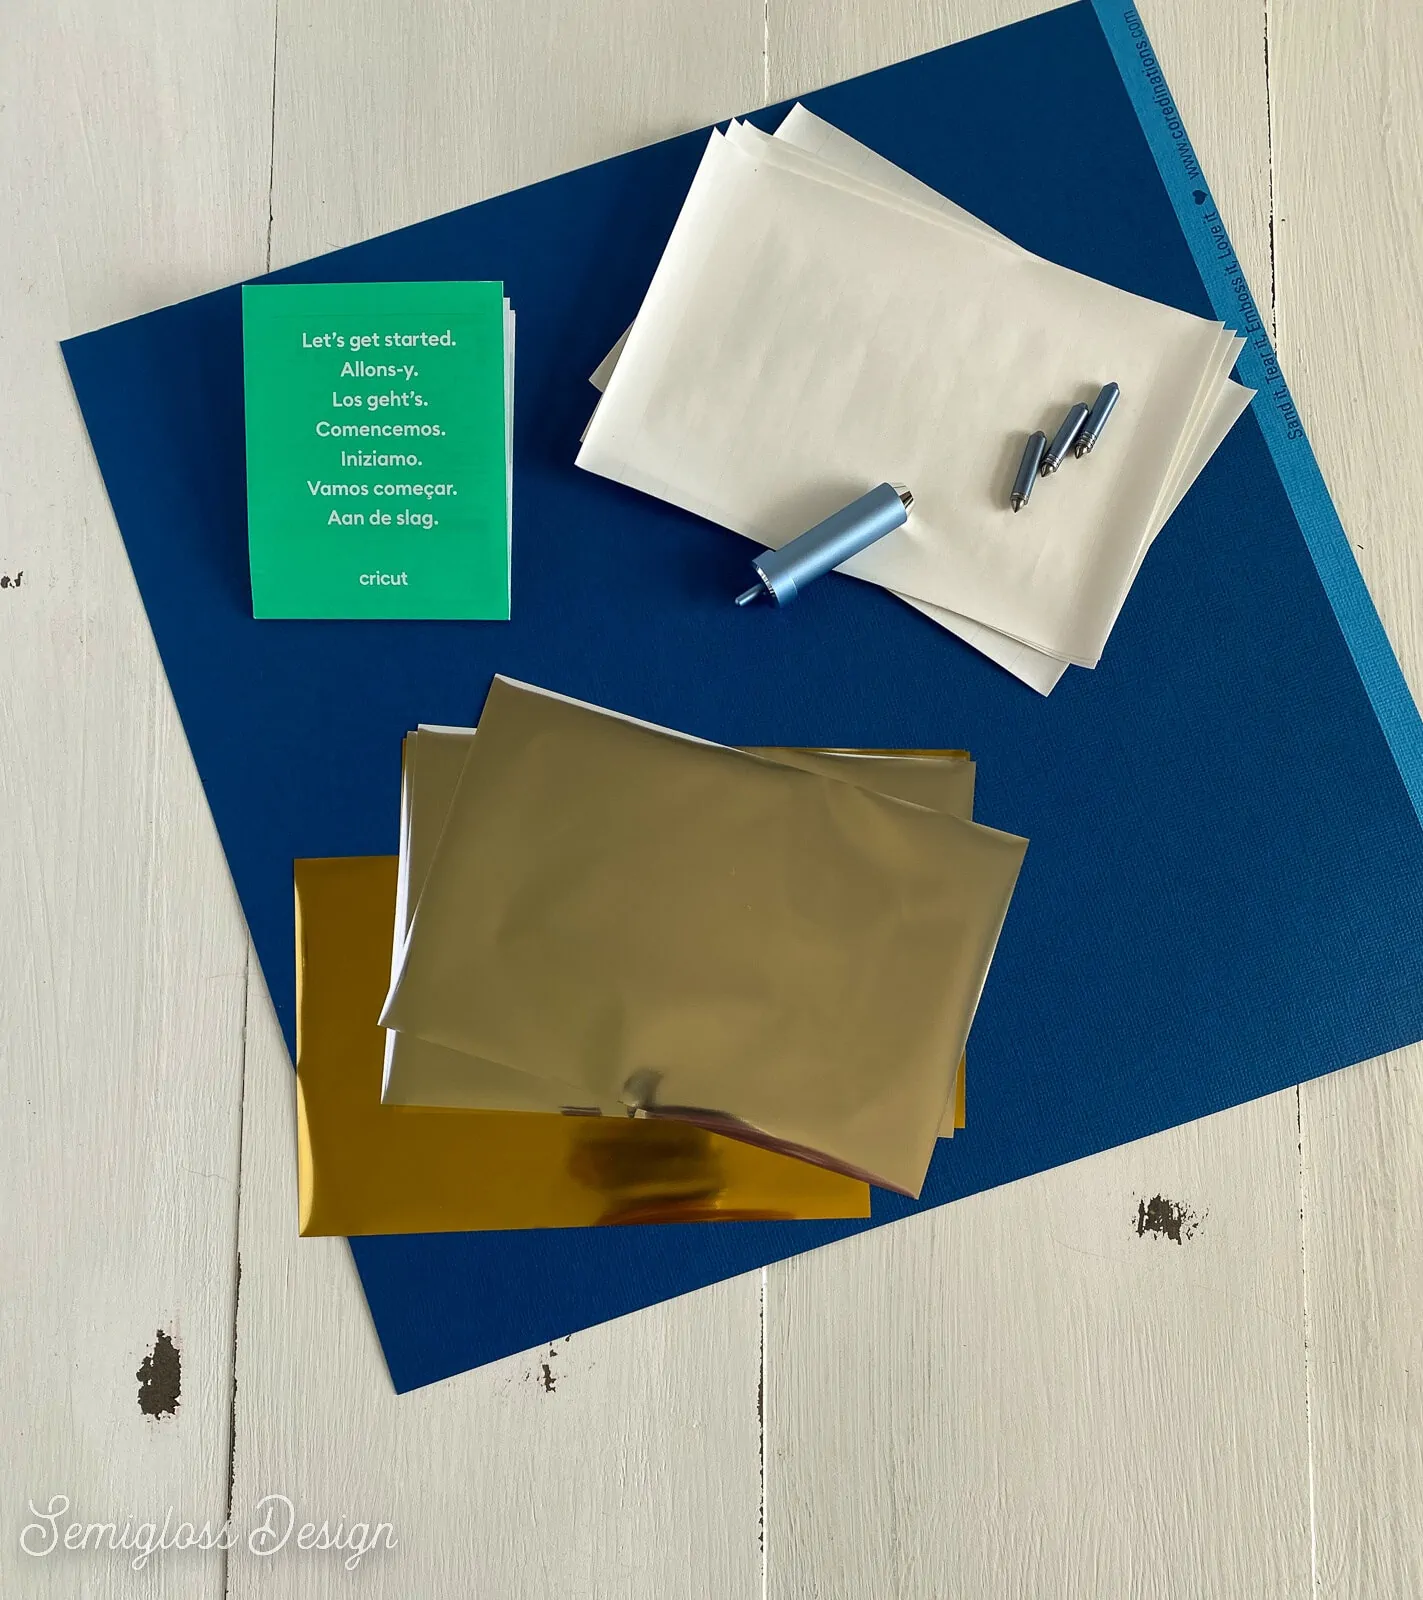
The kit includes the foil tool with 3 interchangeable tips in fin, medium, and bold thicknesses, 12 4″ x 6″ foil sheets in gold and silver, and tape to attach the foil to the surface of your project.
There are other foil colors and sizes available to buy as well. The rose gold is so pretty in person.
The foil tool works like other blades. Push the button on the top to release the tip and insert another.
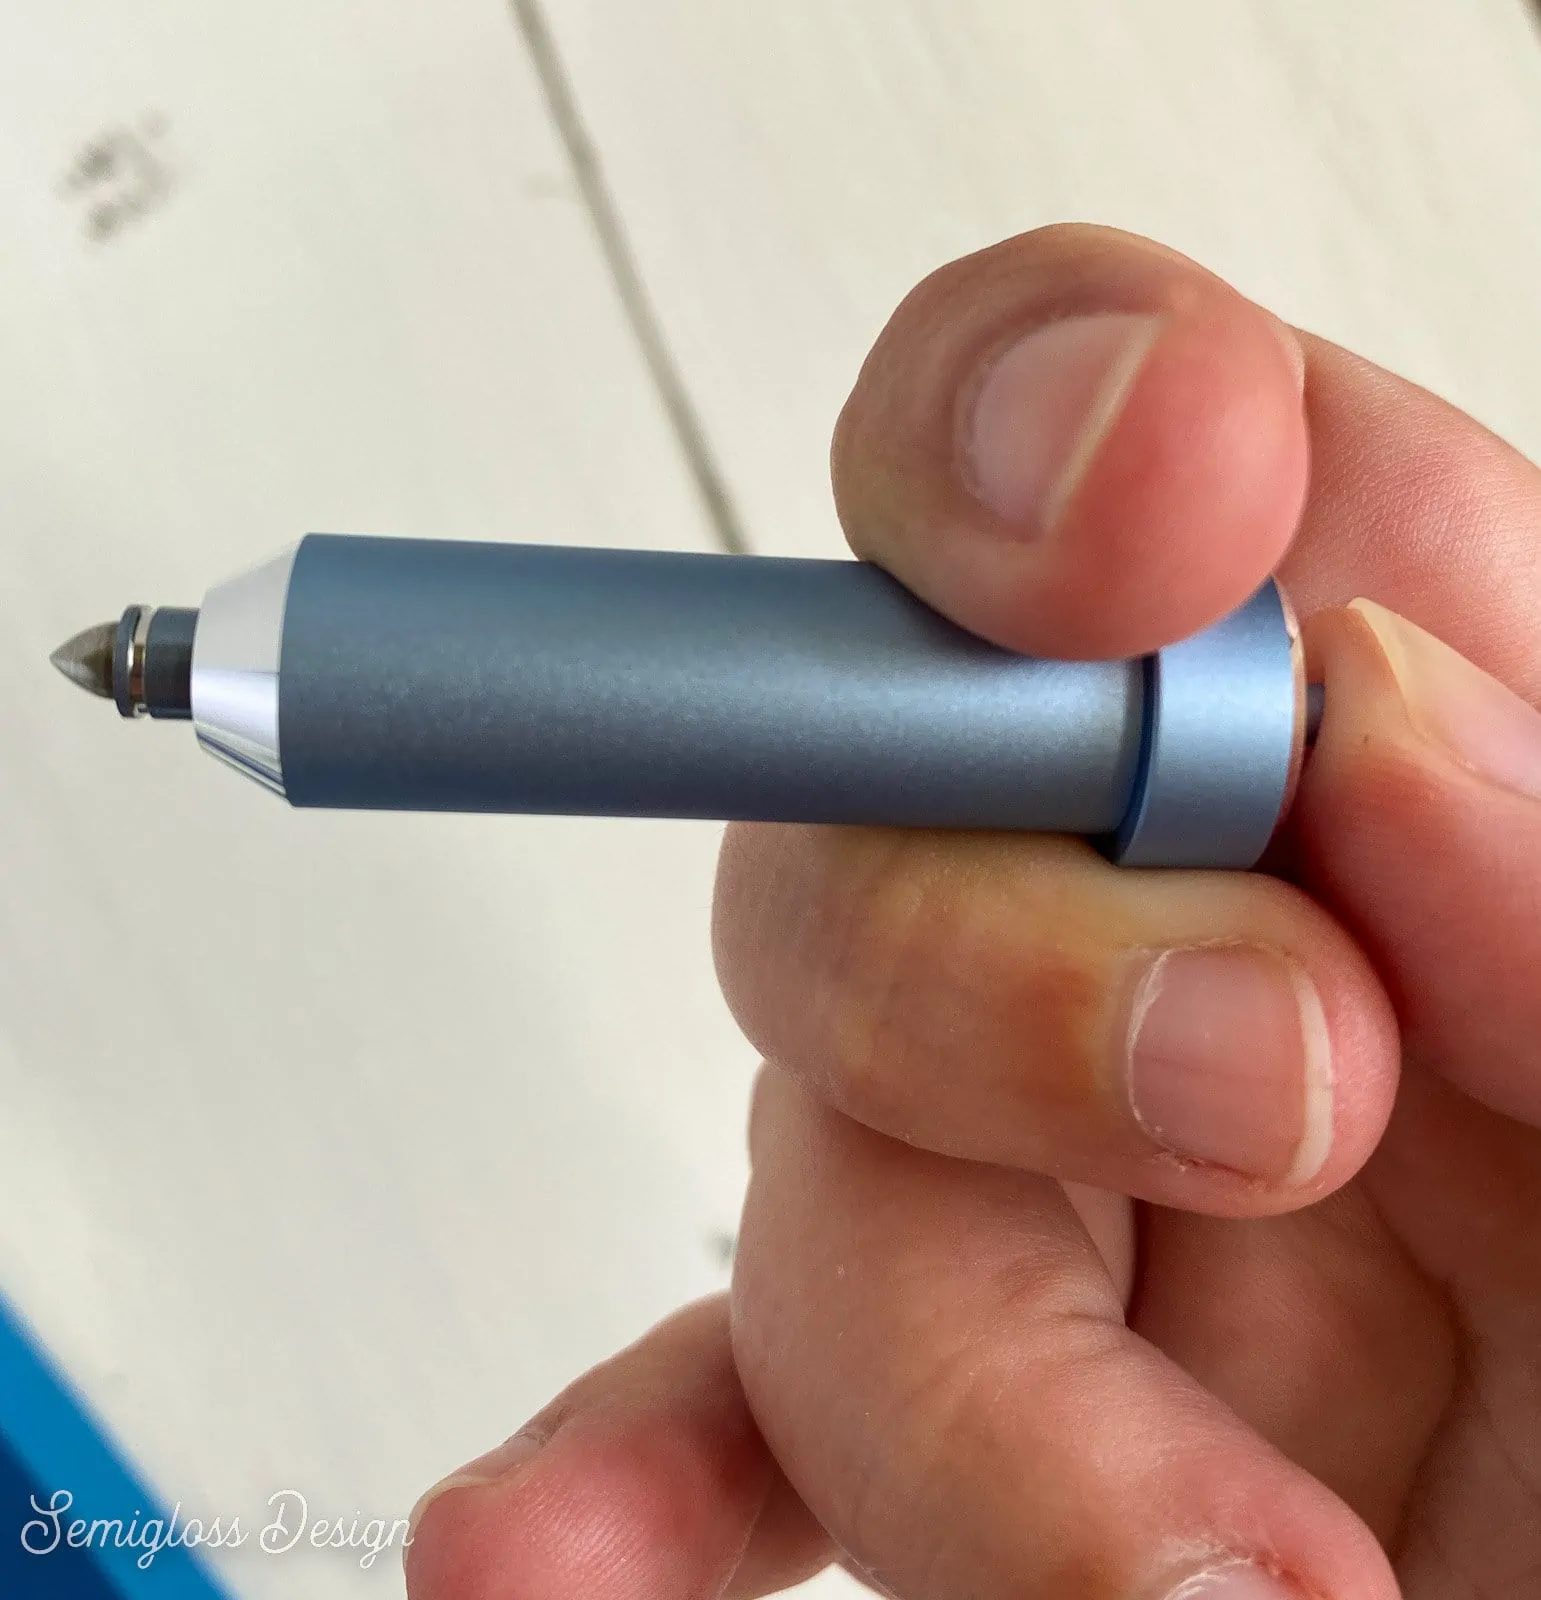
The tips are marked to indicate thickness.
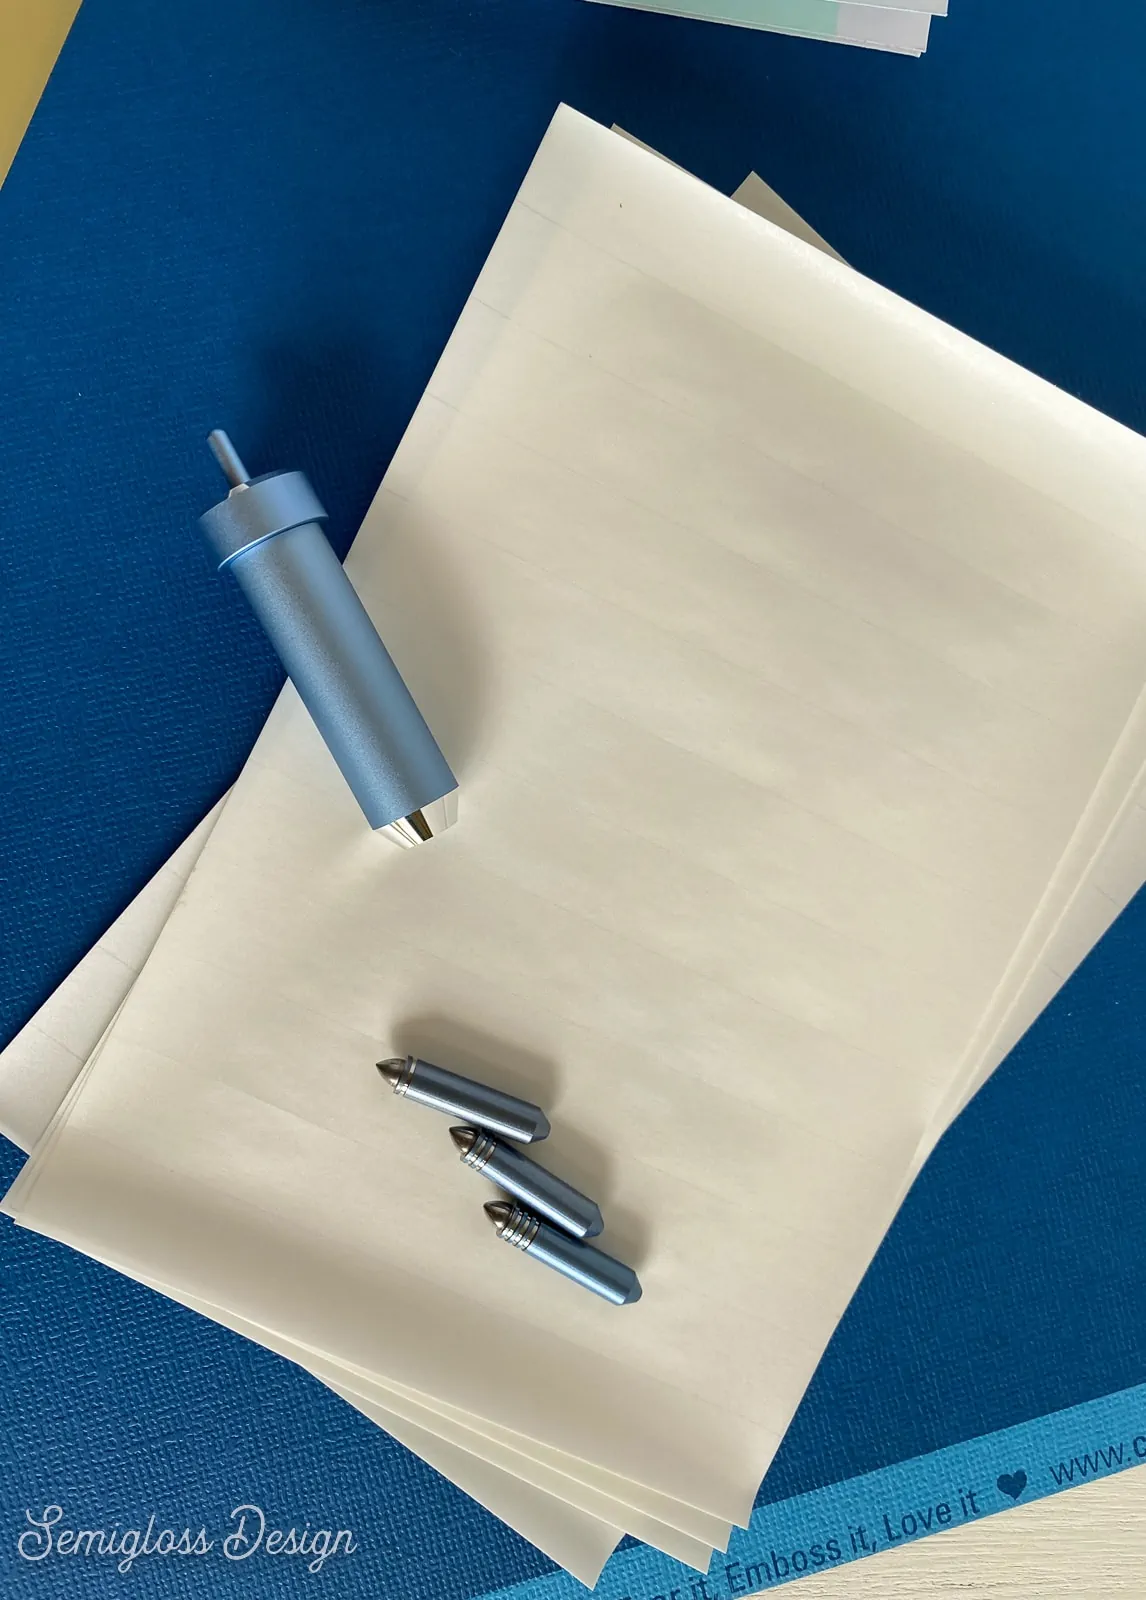
One line = thin, two lines = medium, and three lines = bold.
What is Needed with the Foil Transfer Kit?
I’m going to assume that you have a Cricut already. I’m using my Cricut Maker 3.
Unless you’re making a giant project, the kit comes with everything you need except the surface material that you’re putting it on.
It can be put on paper, cardstock, leather, and balsa wood.
What Tape Do You Use with the Foil Transfer Kit?
The kit contains plenty of tape, but if you run out, you can use a low-tack tape like washi tape.
Is the Cricut Transfer Foil Permanent?
The foil gets pressed into the surface, so yes it’s permanent.
What Can You Do With Cricut Foil?
Cricut foil can be used to add sparkle to anything made with paper, cardstock, leather, or balsa wood.
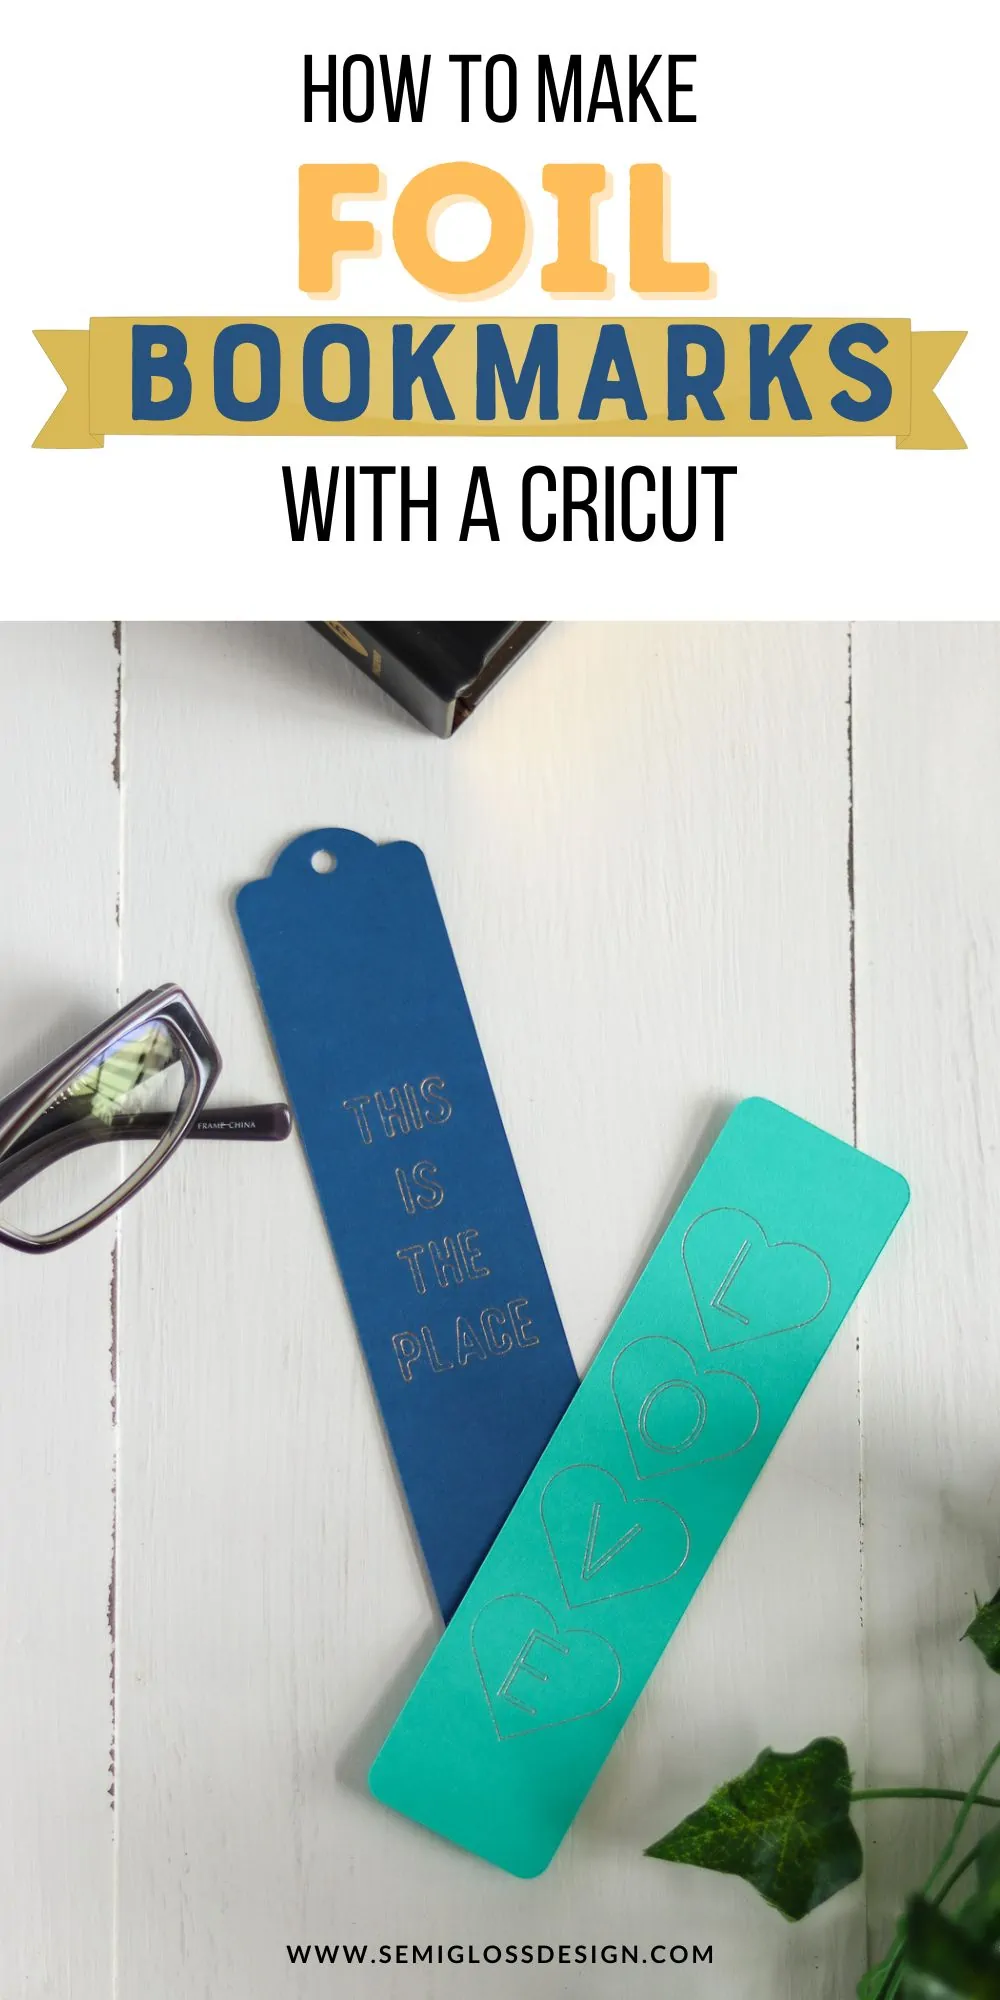
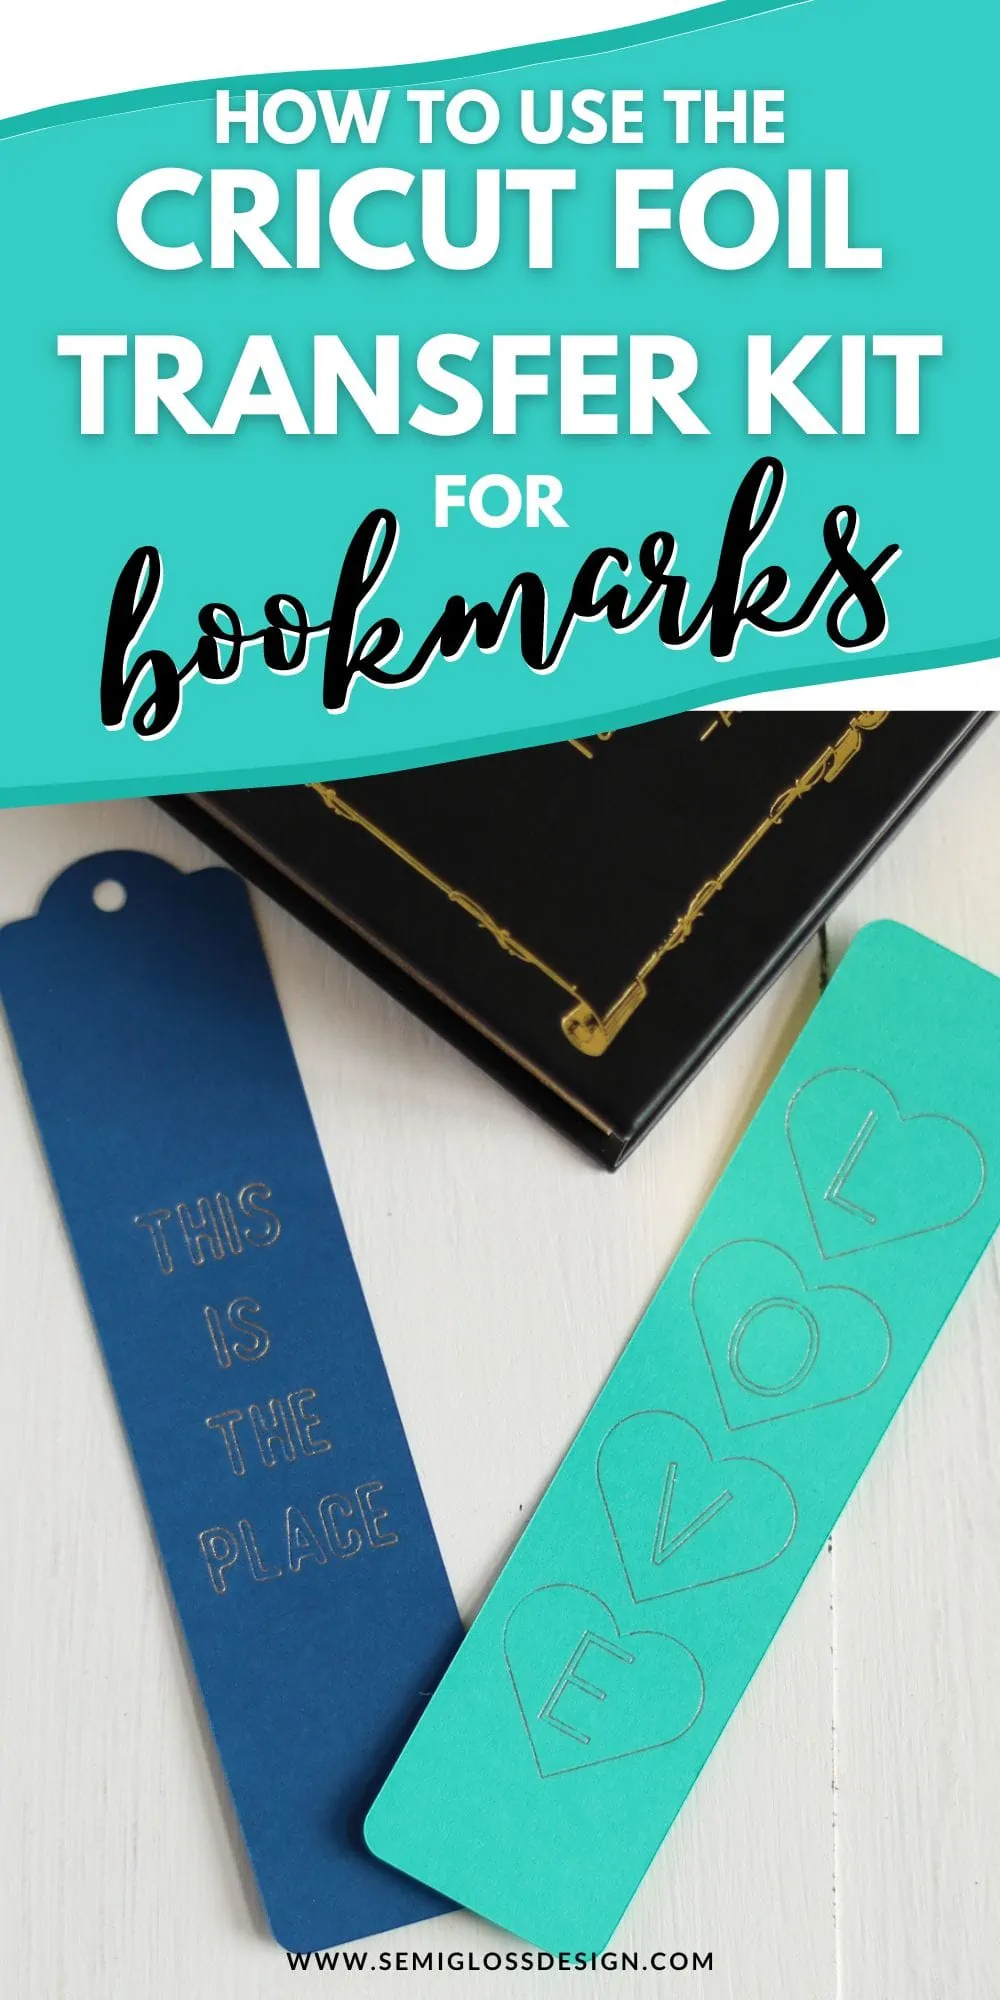
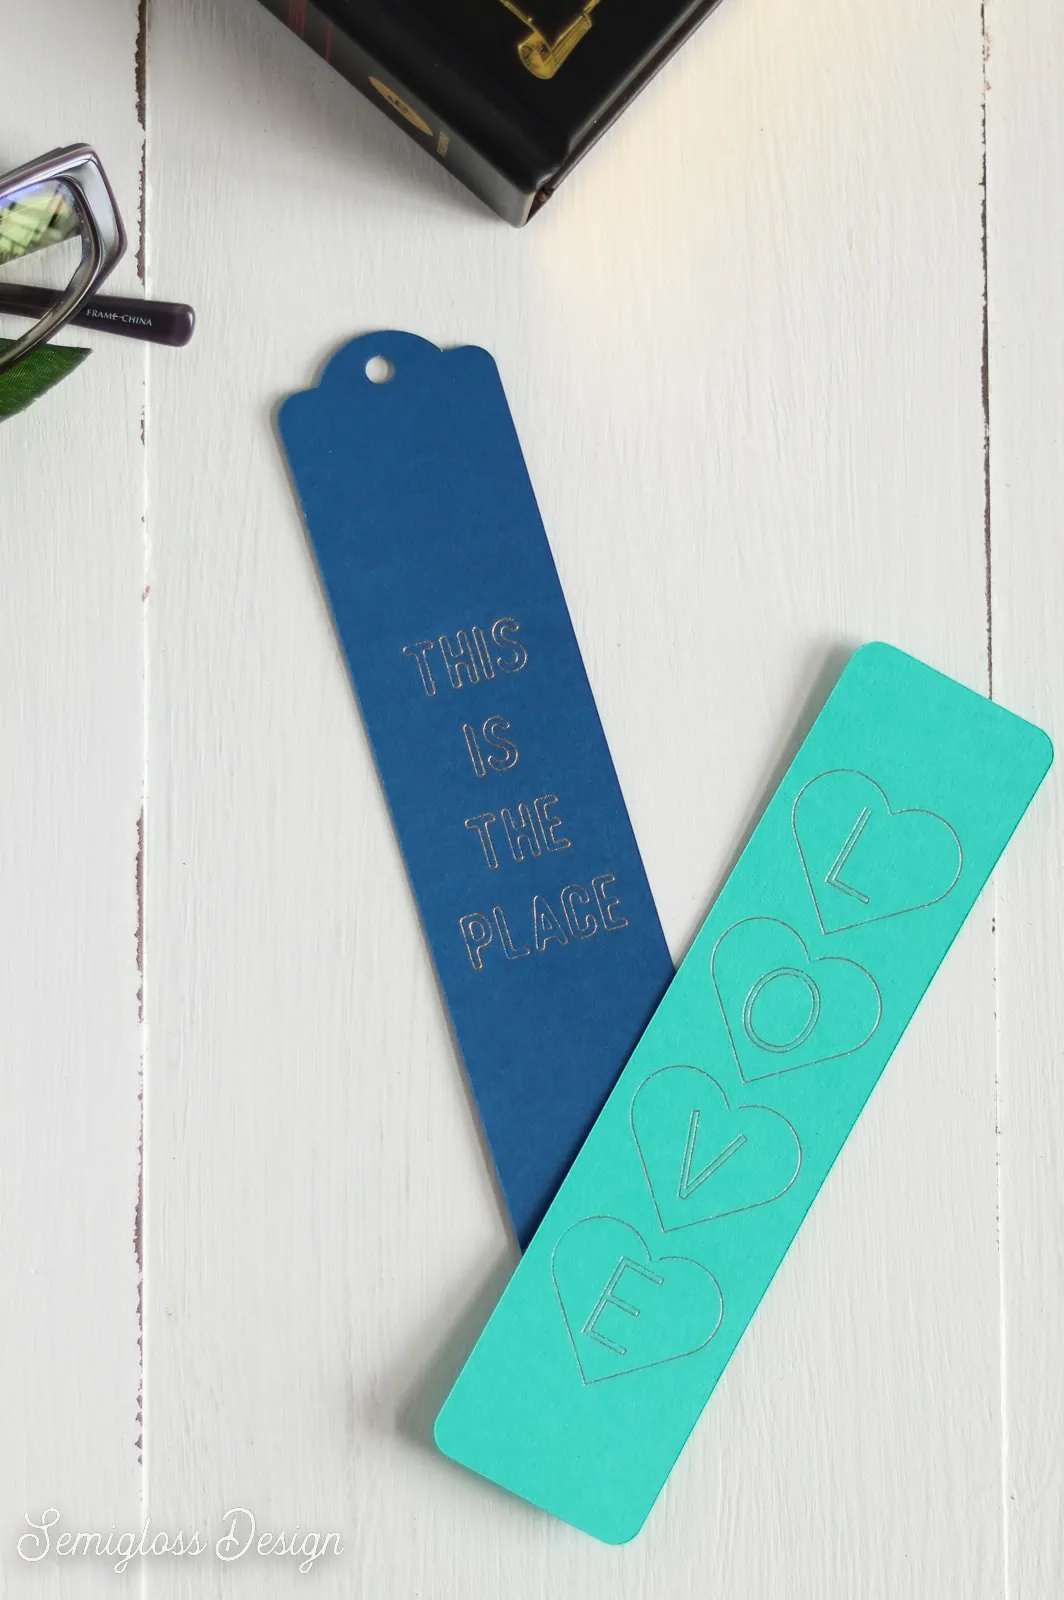
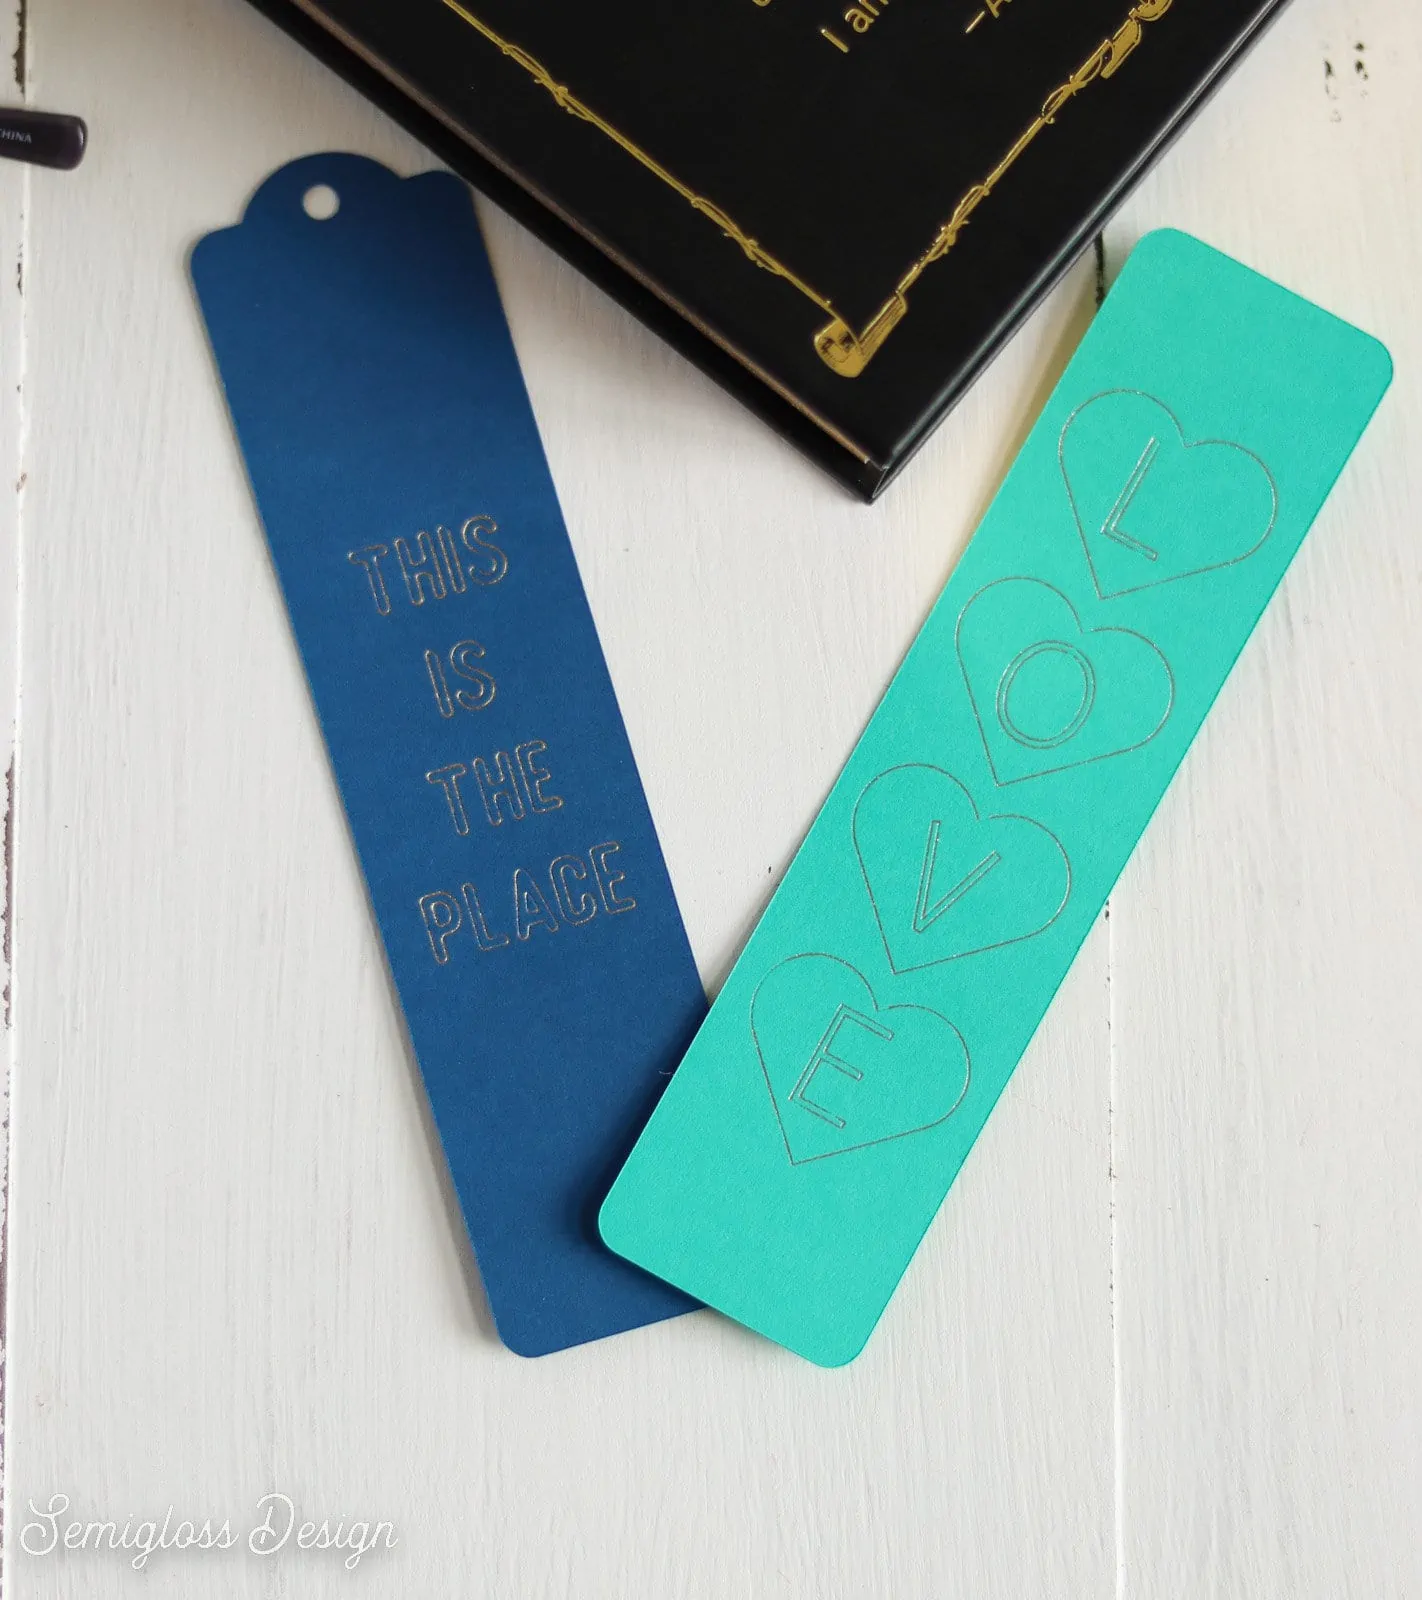
I made bookmarks with my kit, but the foil can be used to make cards, gift card envelopes, invitations, or jewelry.
How pretty would it be on leather earrings?
Basically, you can add it to anything that needs a bit of glam.
How to Use the Cricut Foil Transfer Kit
Supplies Needed:
- Cricut Foil Transfer Kit
- Cardstock
- Cricut (I’m using my Cricut Maker 3)
- SVG for bookmark shape and design (scroll to the bottom of the post to access the design.)
Directions:
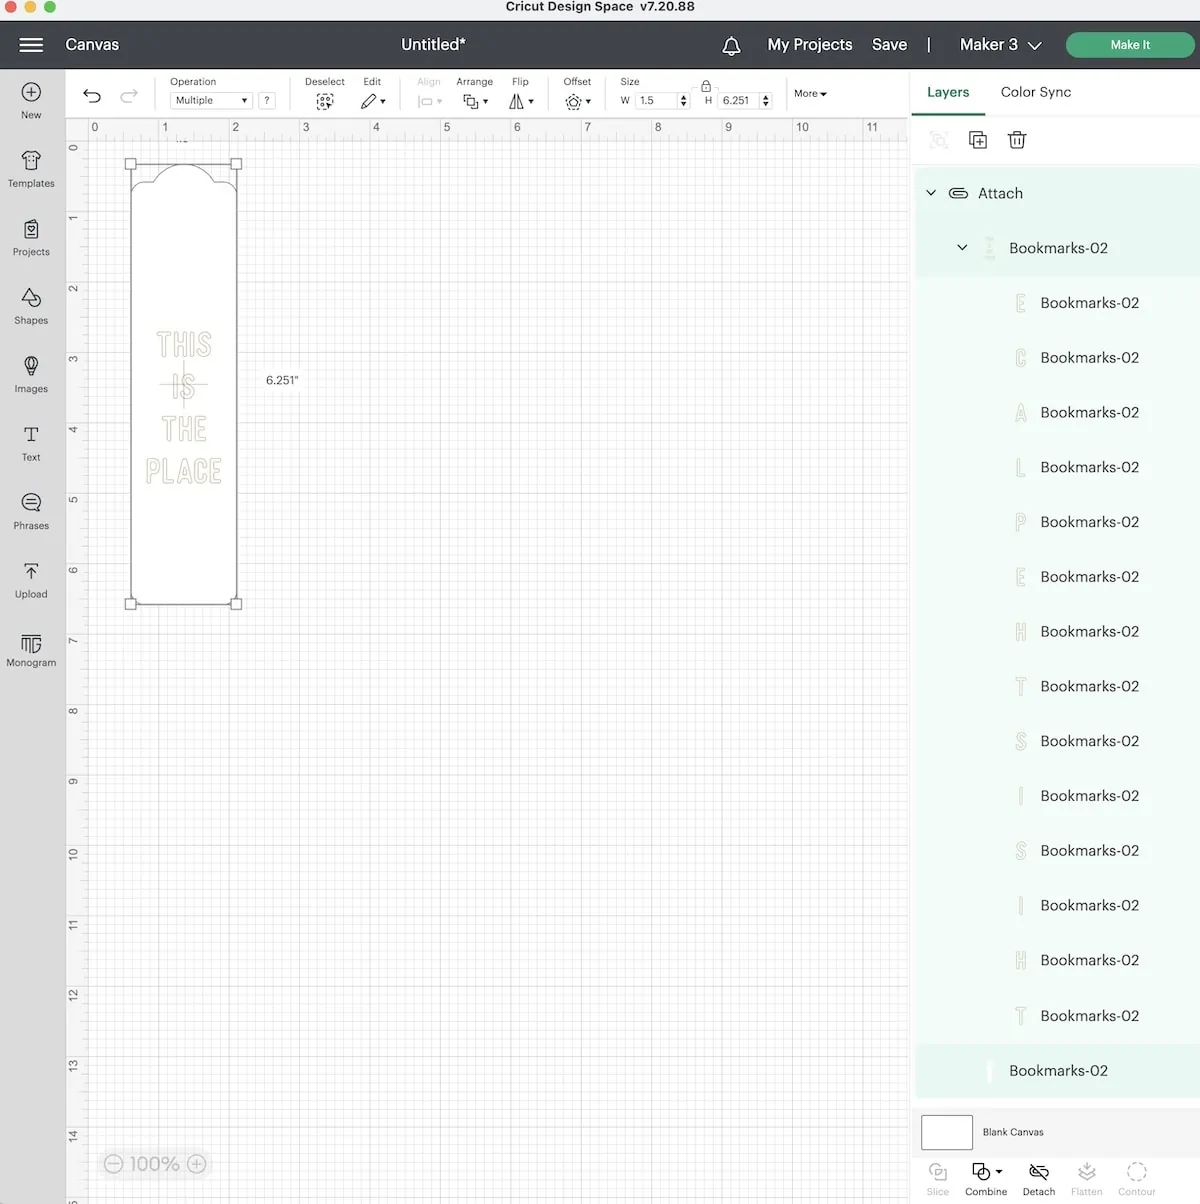
- Make your design as usual. I have included a link to download the bookmark shape SVGs at the bottom of this post. Make sure you align the text with the bookmark.
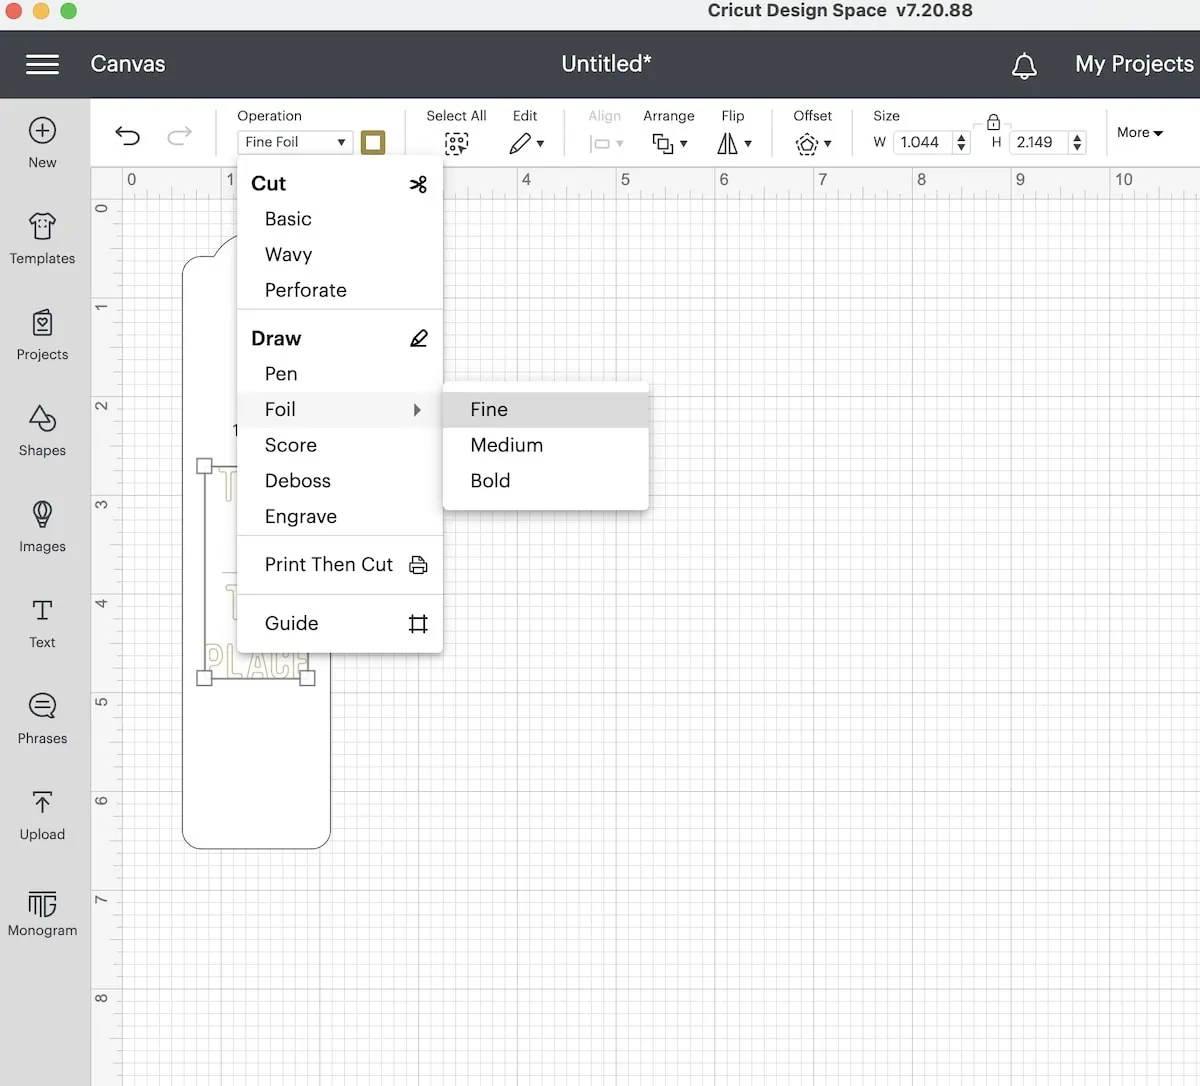
- Select the foil design layers and set the operation to foil with the correct thickness. You can change the foil color if you want.

- Set the bookmark shape to cut.
- Attach all of the layers to keep the design in the right place.

- Click Make It.
- Move the bookmark design to about 1″ down and 1″ over from the edge. This will allow you to access the foil without needing to unload the mat to remove it.

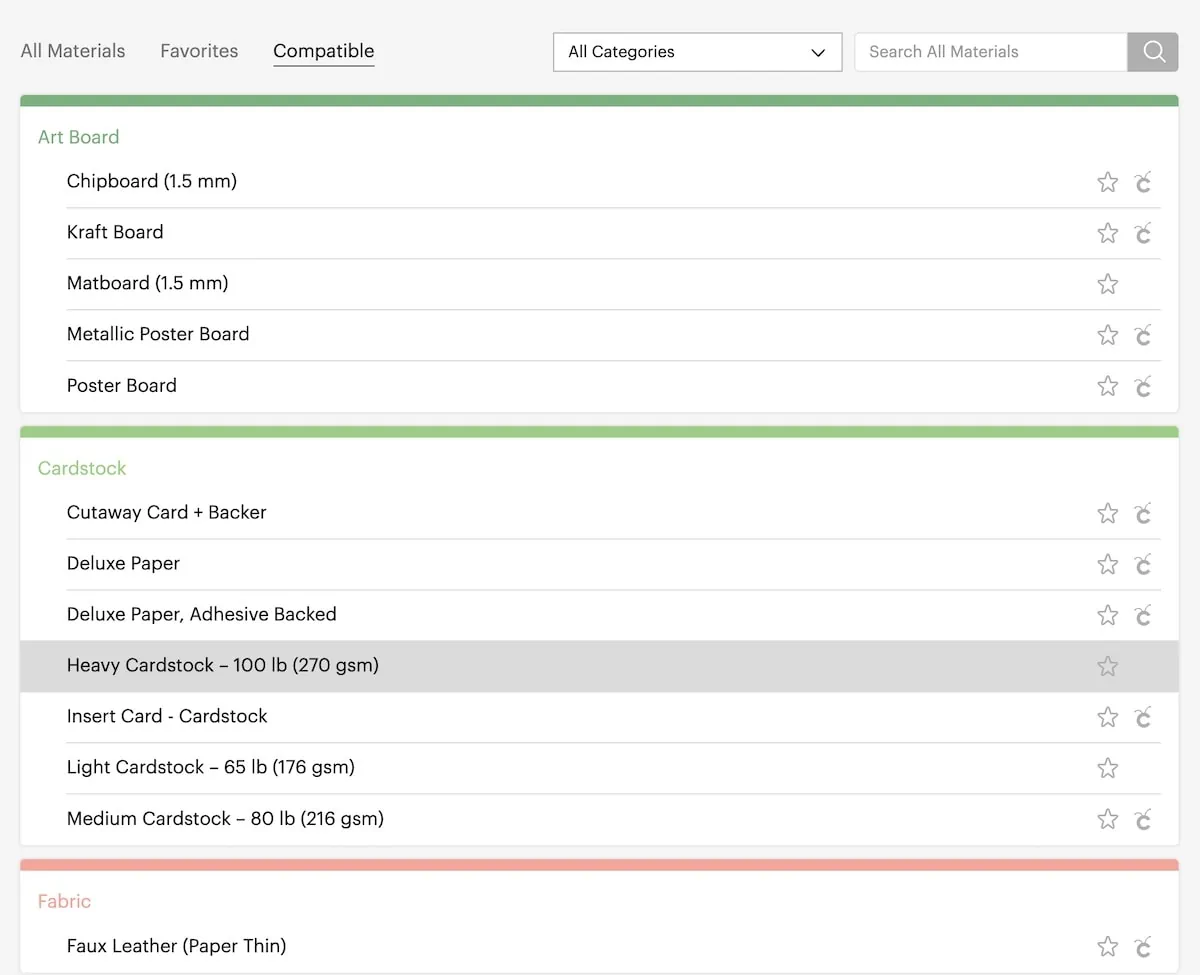
- Set the Base Material to Heavy Cardstock for the bookmarks.

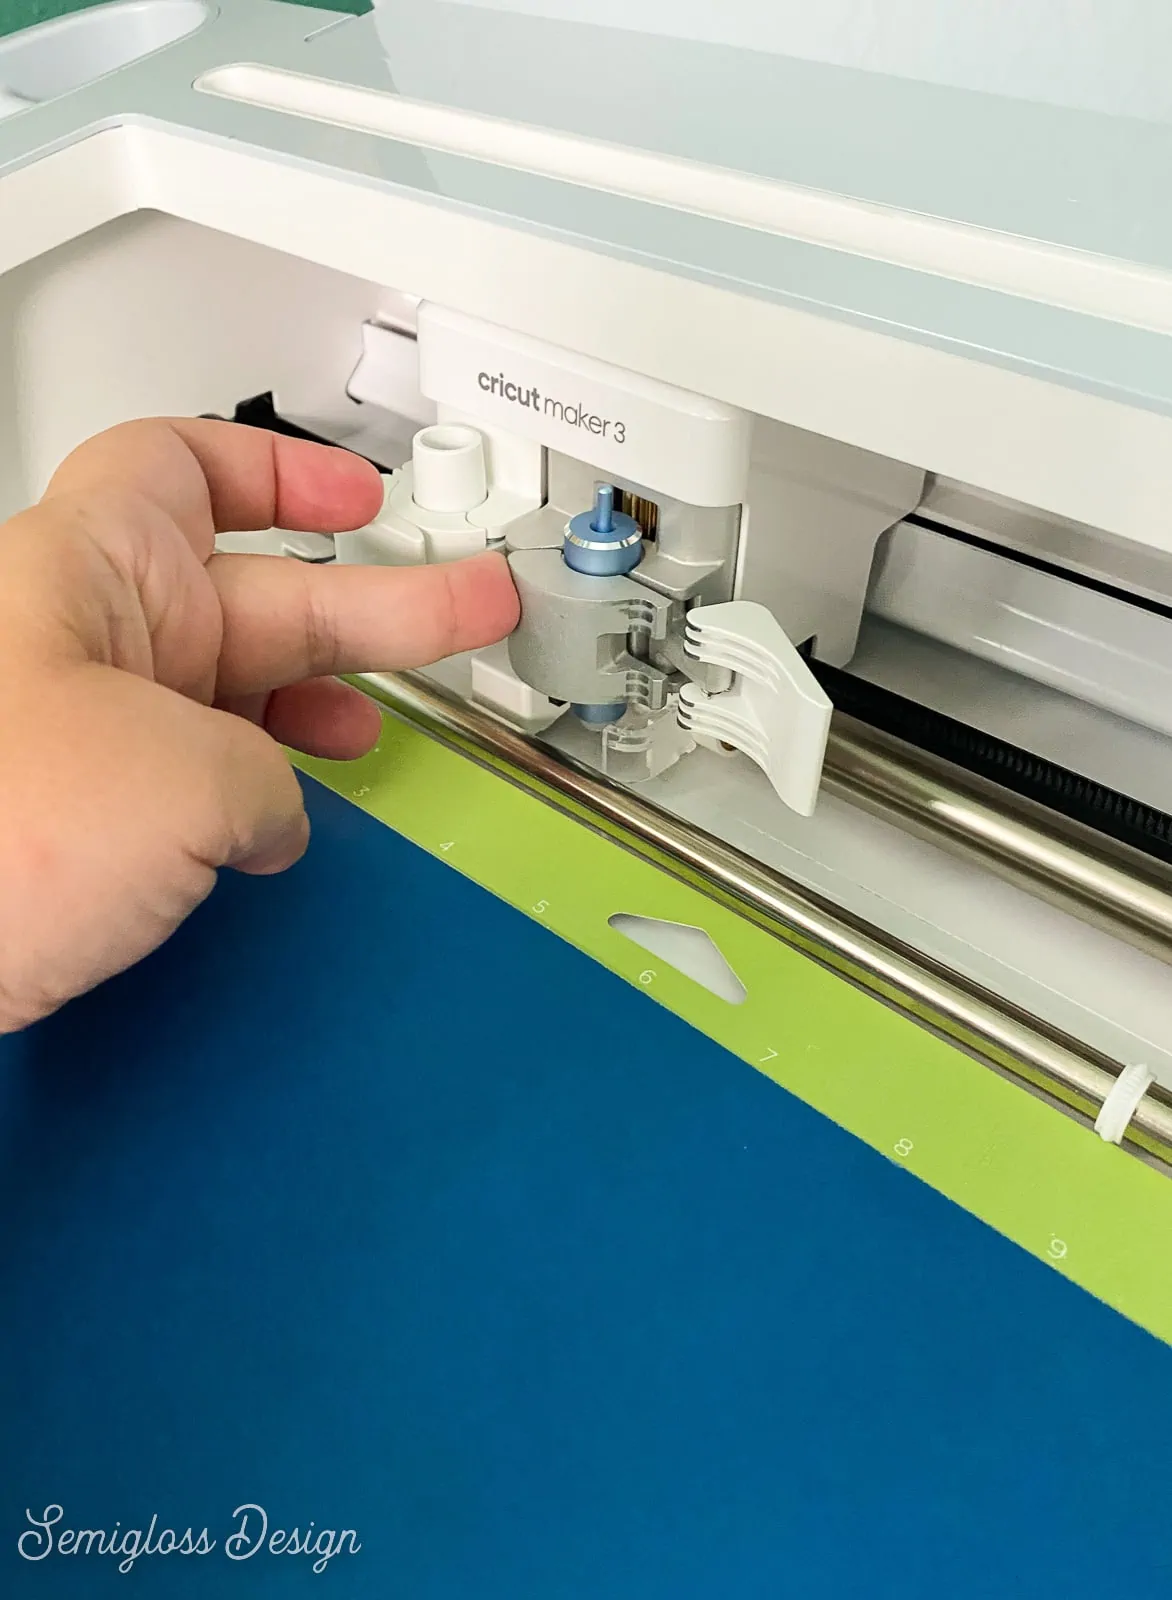
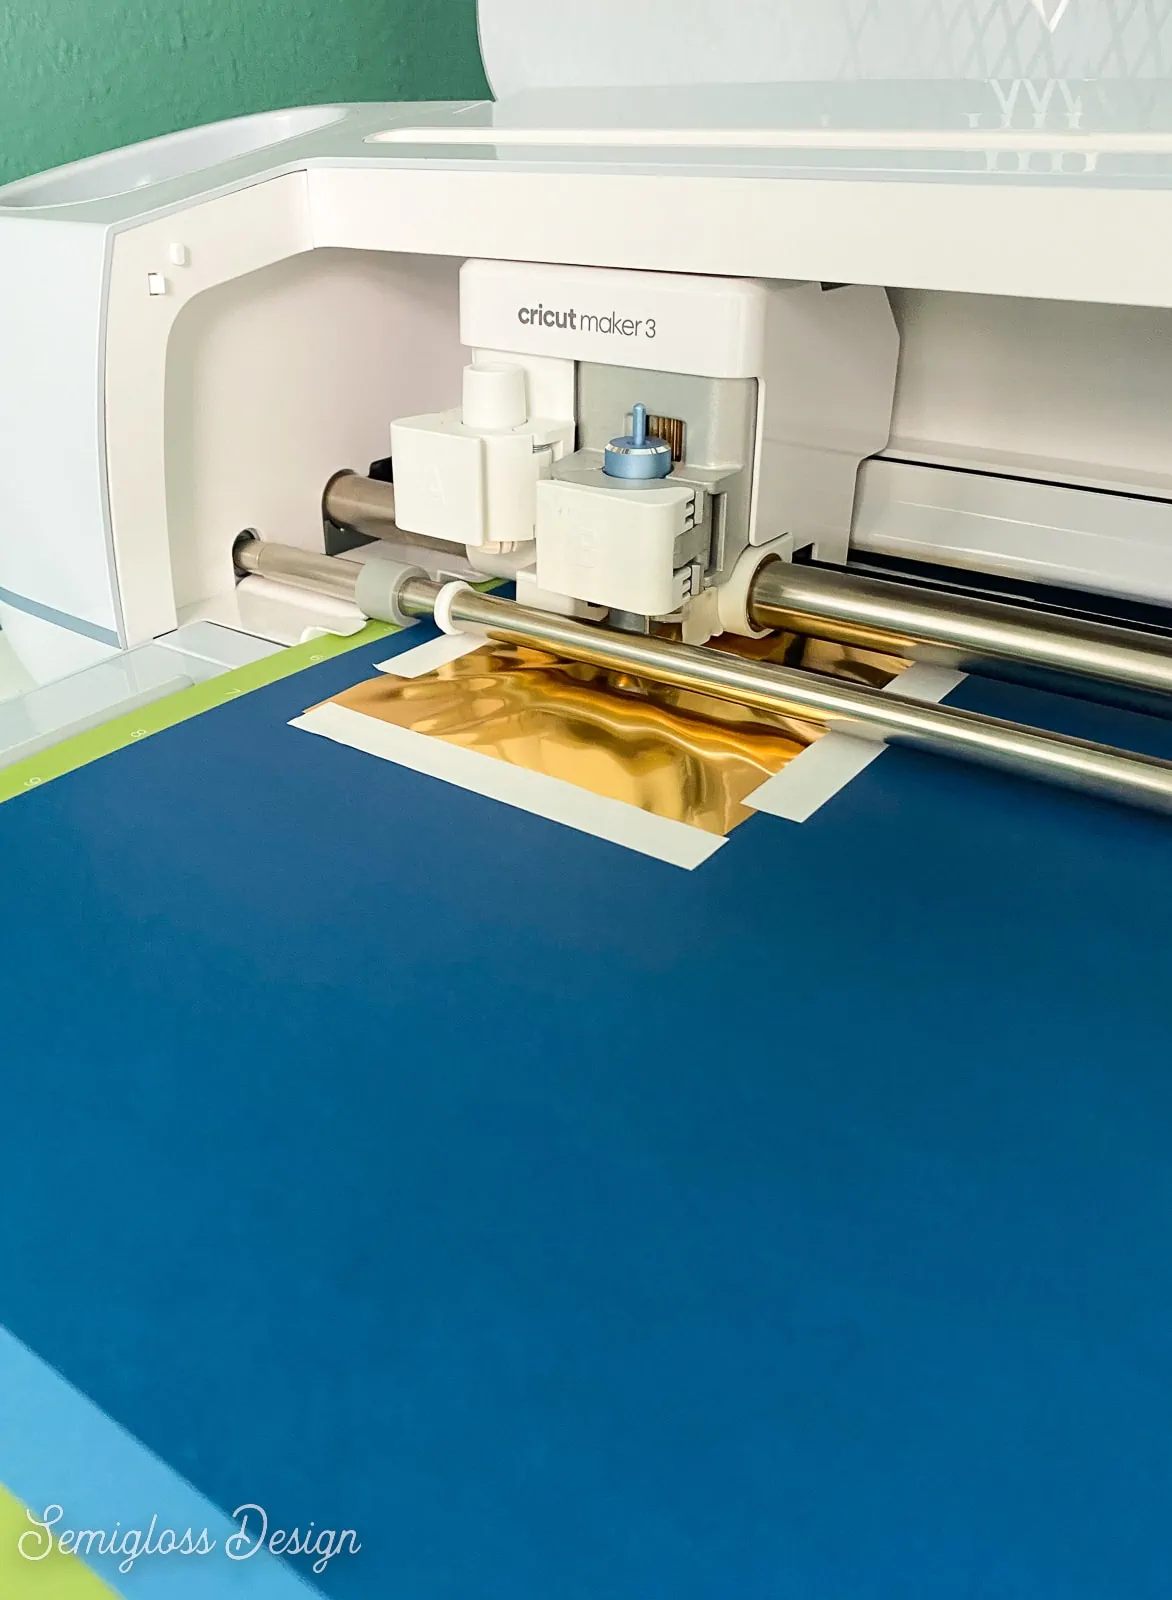
- Change your blade to the foil tool with the correct size tip.

- Move the white rollers on your Cricut to the side. This will prevent them from making marks on your design.
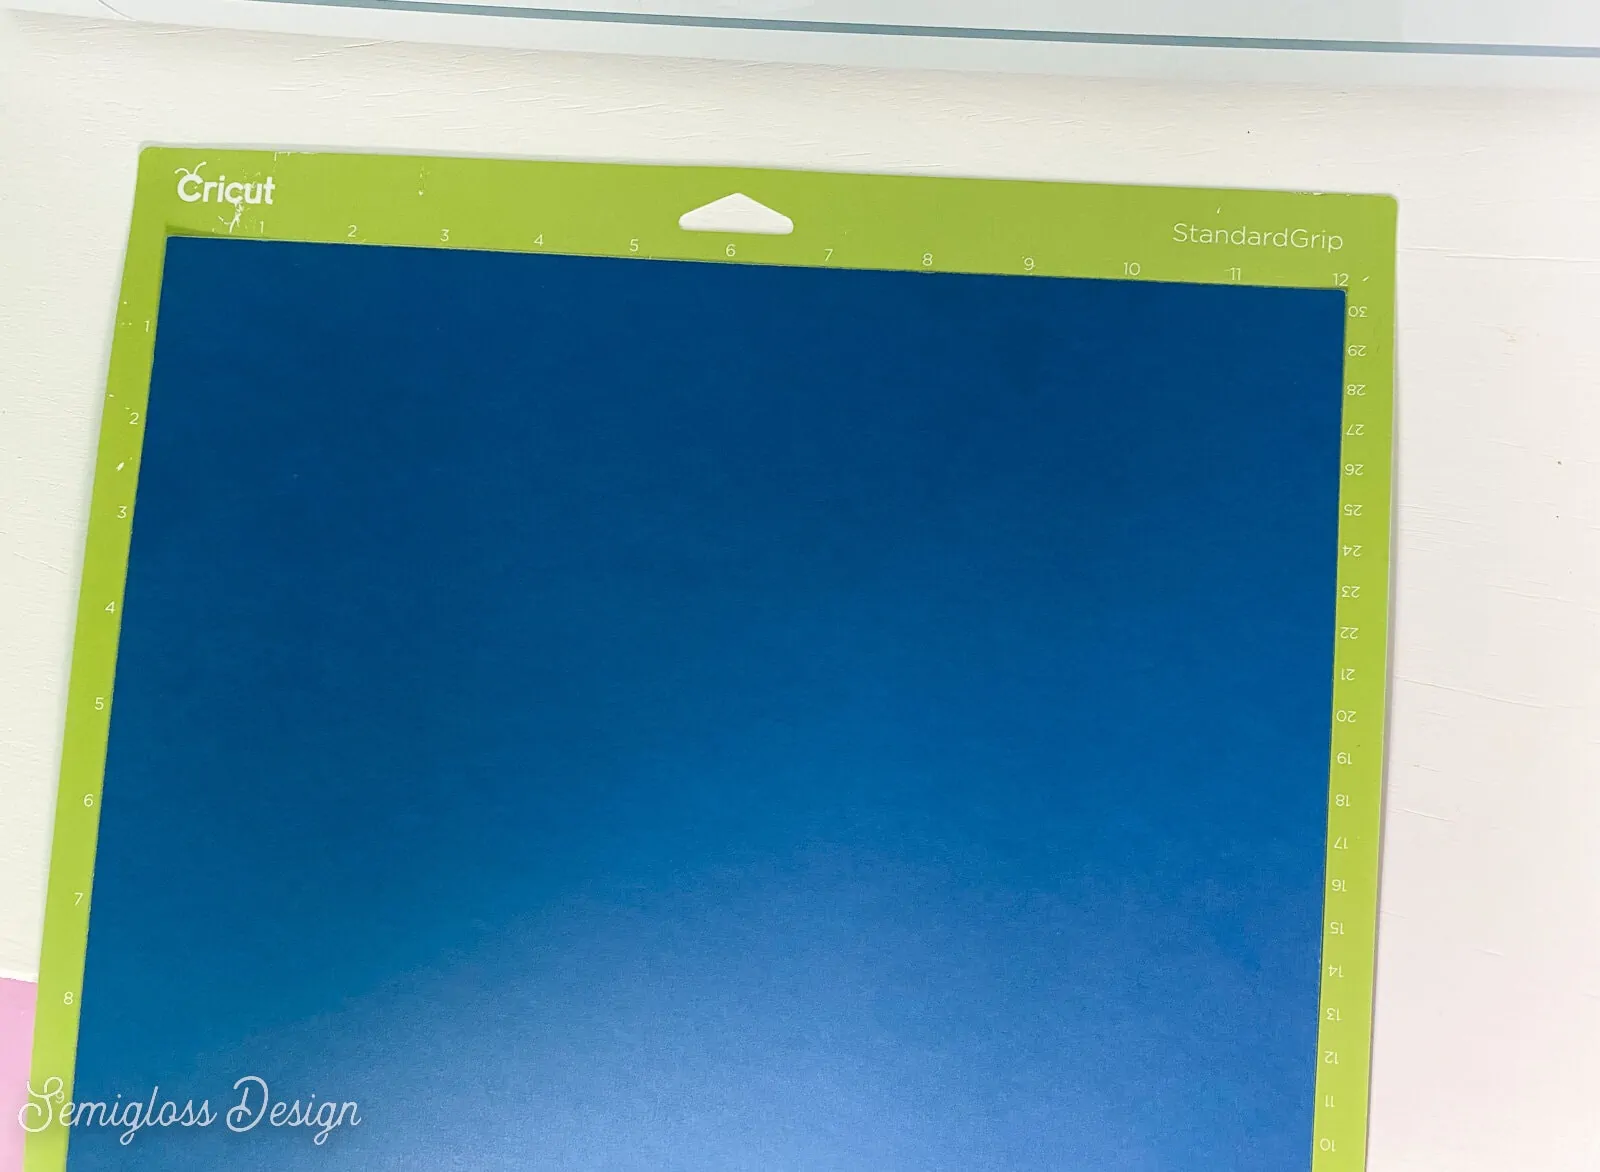
- Place the cardstock on the mat. I used the Standard mat.

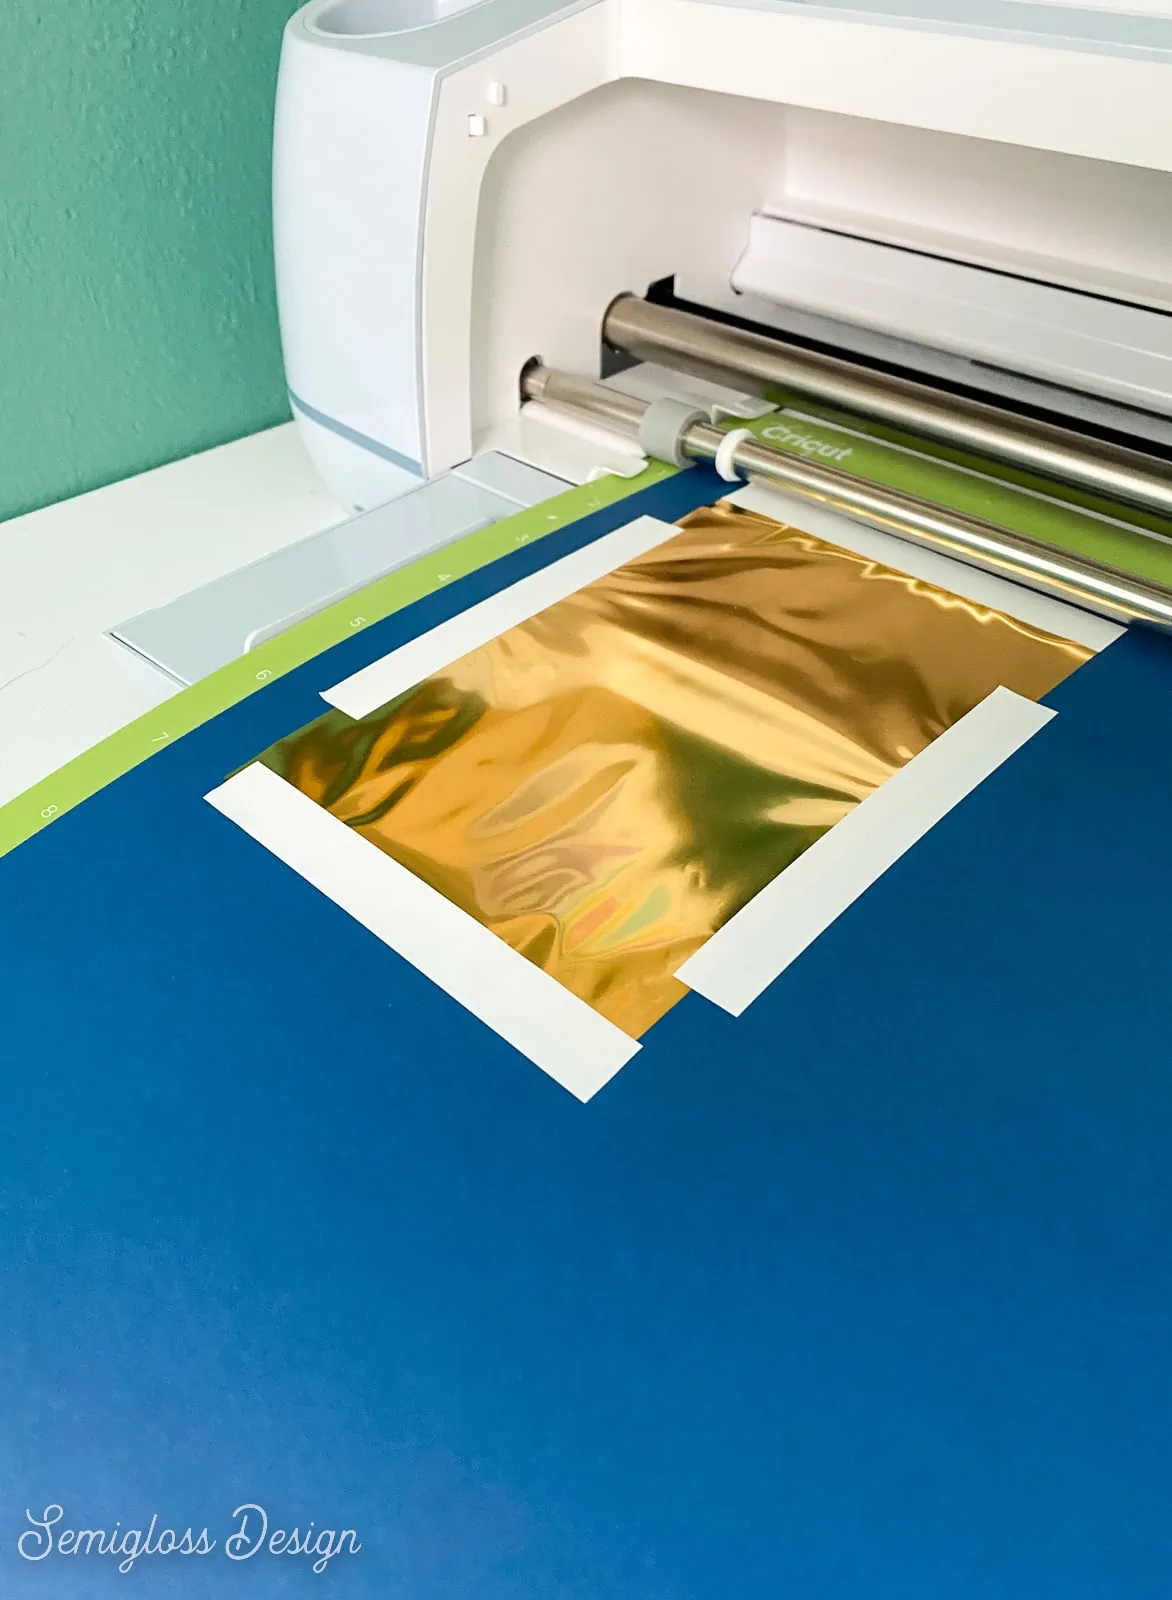
- Tape the foil onto the cardstock in the right place. Remember that we moved it 1″ down and 1″ from the edge in step 6.
- Load the mat.
- Press the start button on your Cricut.
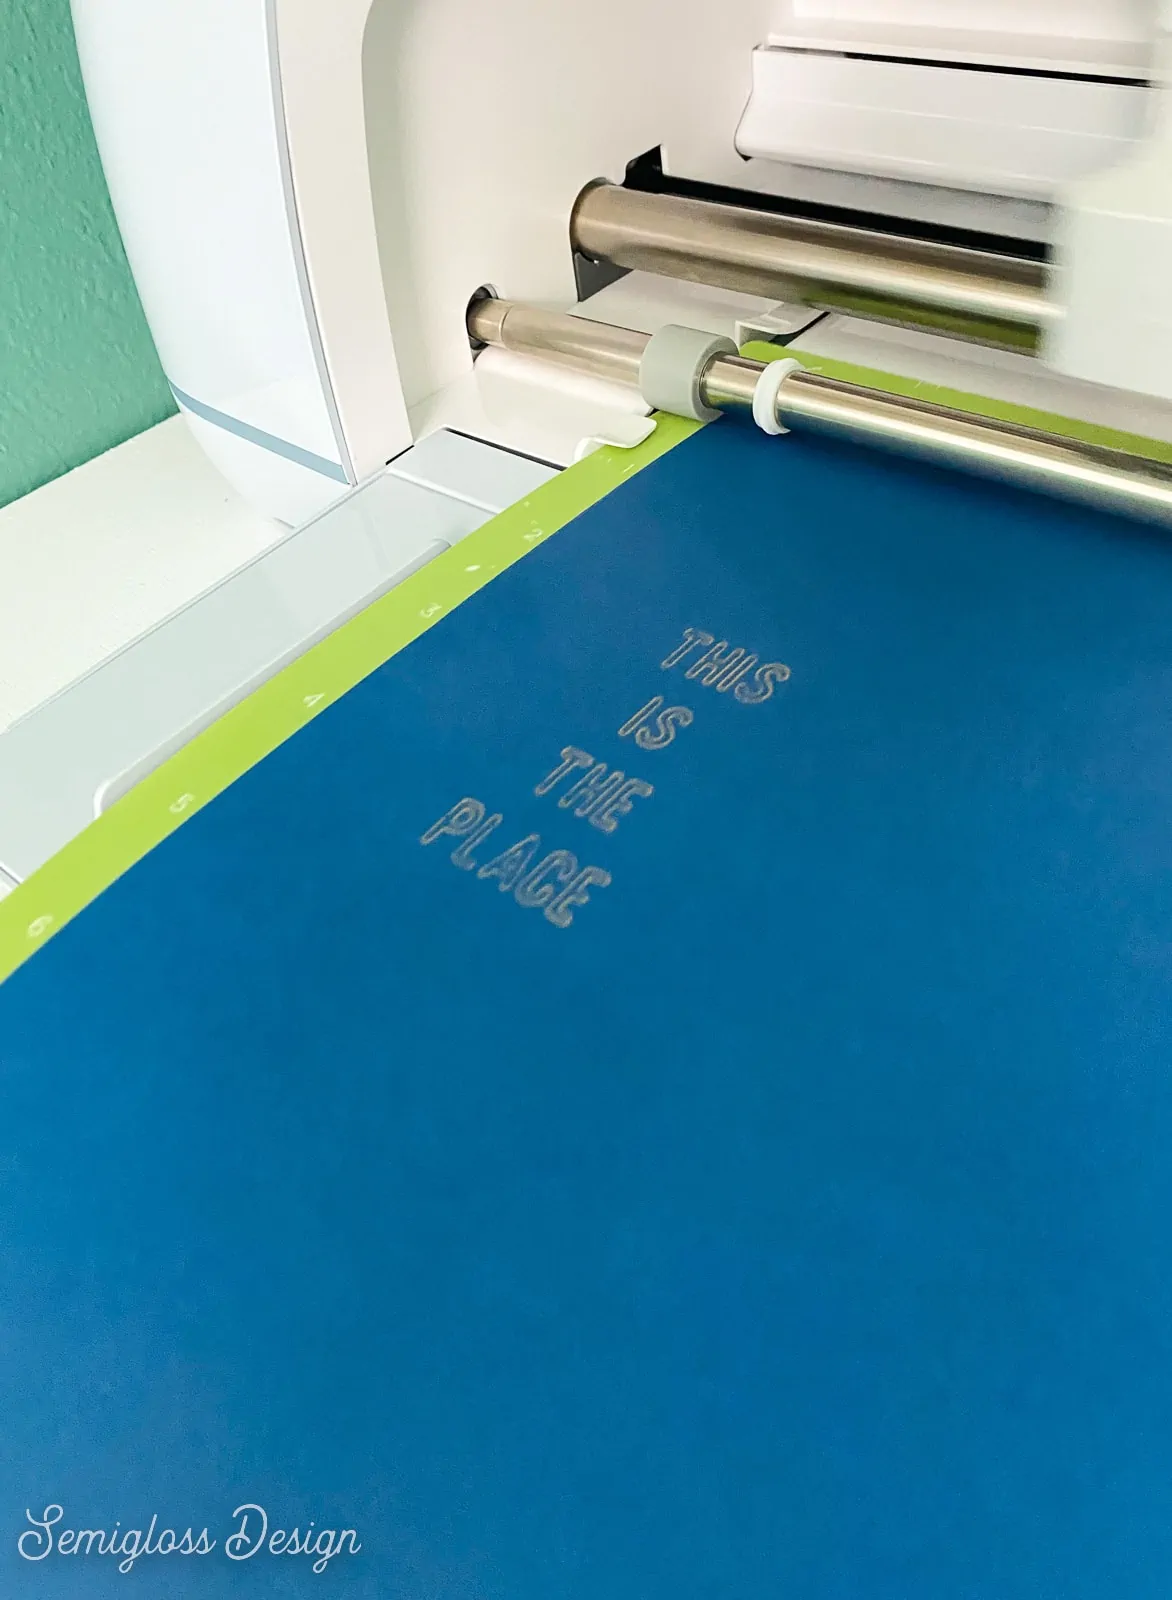
- When it’s done, don’t unload the mat. Instead, carefully remove the foil from the cardstock.
- Change the tool to the fine-point blade.
- Press the start button on the Cricut and let it cut the bookmark.
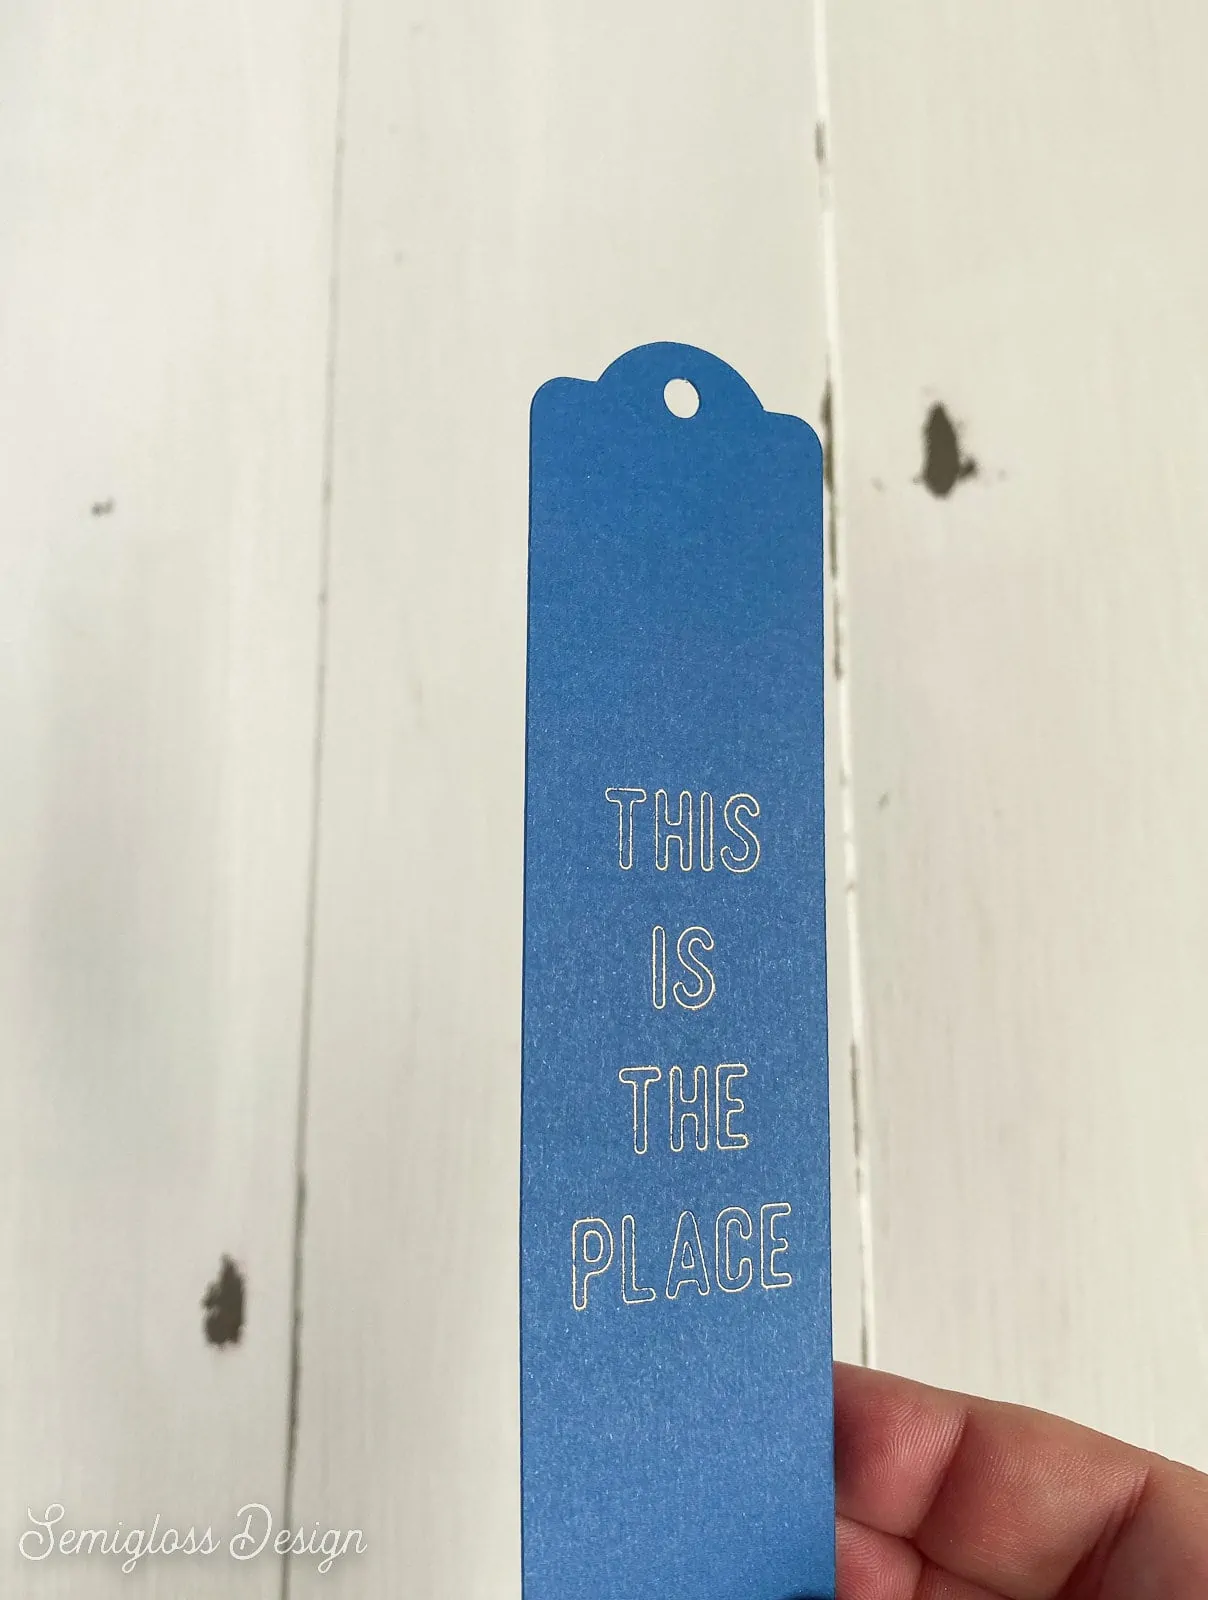
- Make sure that it cut the cardstock correctly and then unload the mat.
- To avoid making the cardstock curl, pull the mat away from the cardstock.
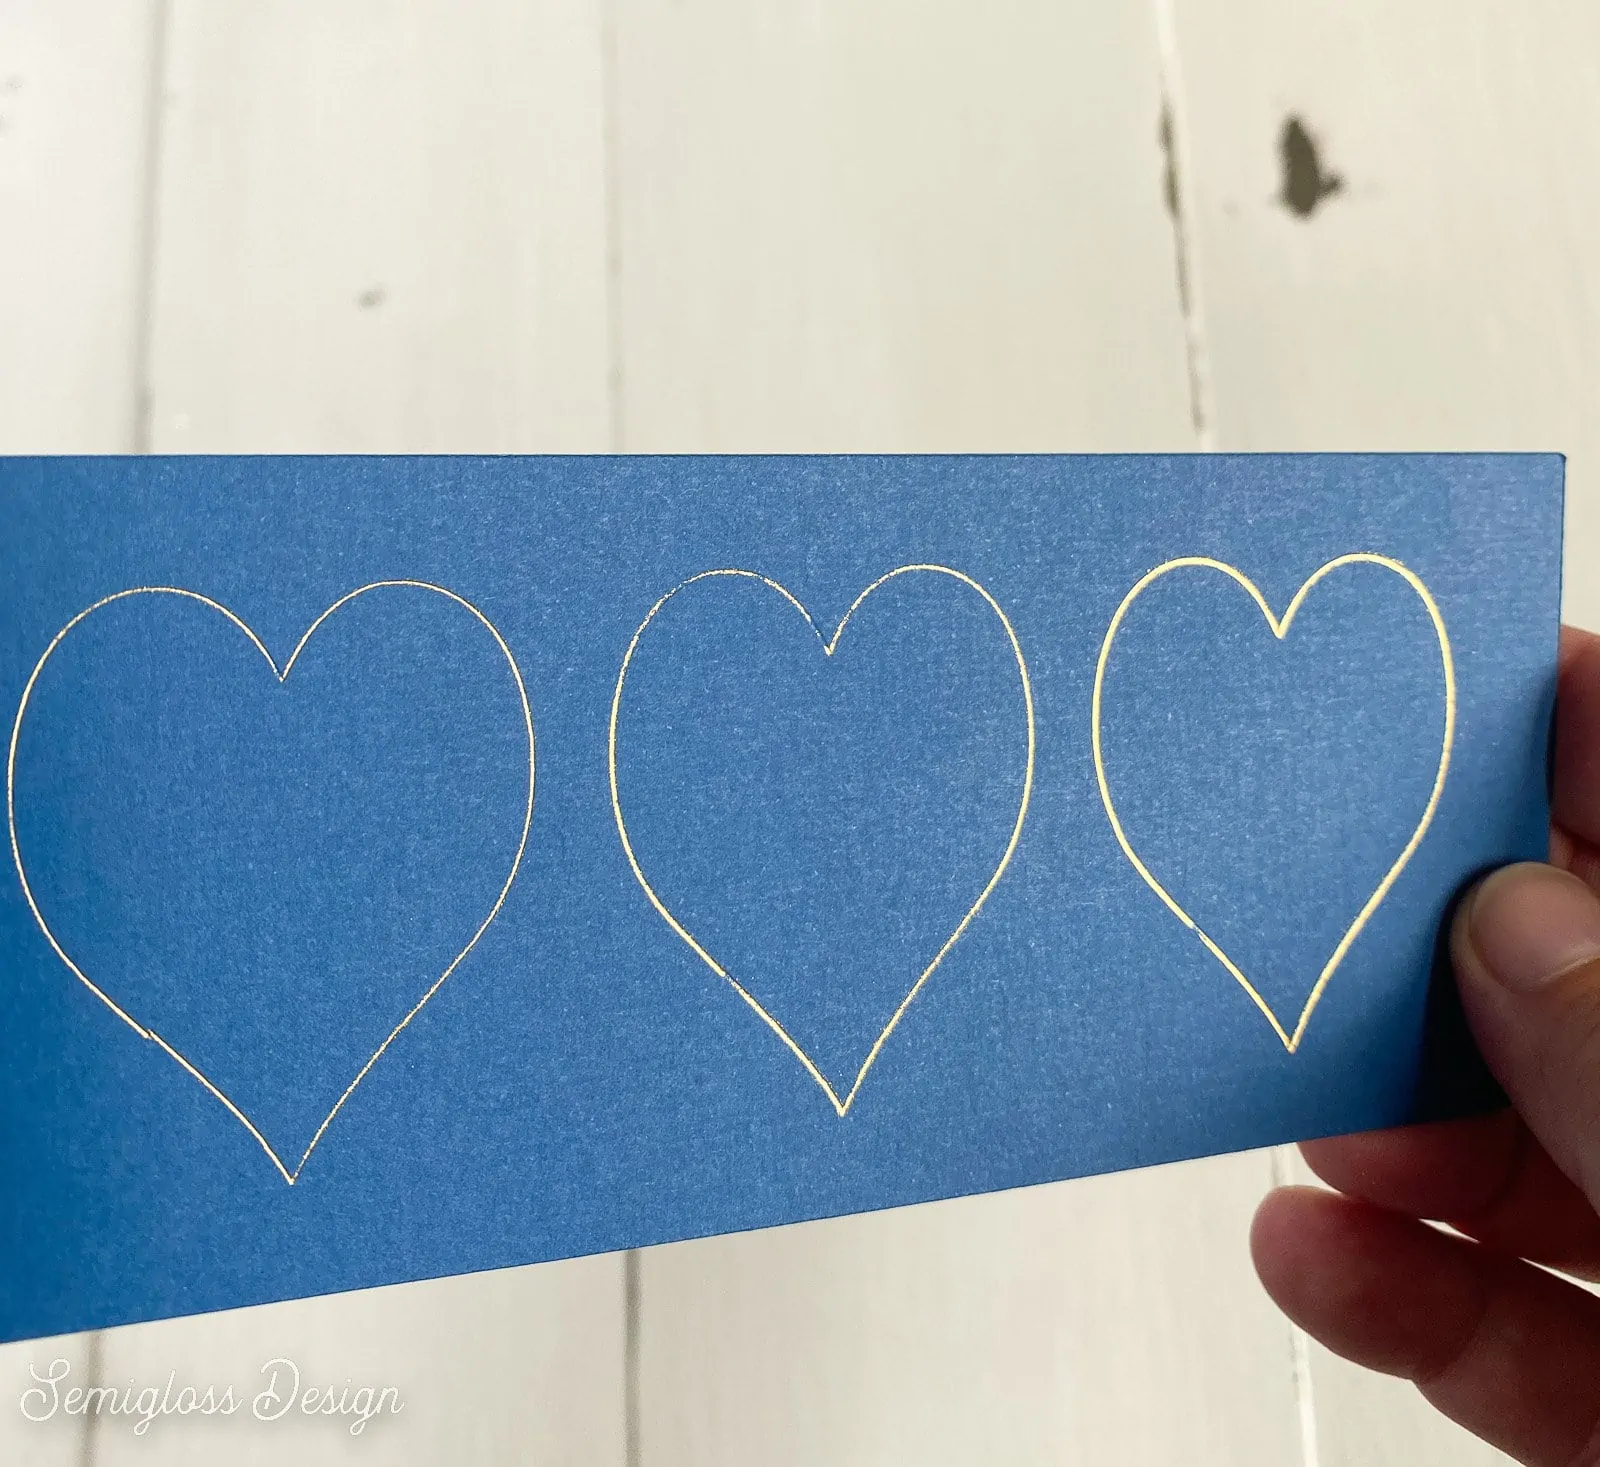
- Ta-da! You made a gold foil bookmark!


Notes About Designing for the Foil Transfer Kit
If you want to design your own designs, there are a few things to keep in mind.
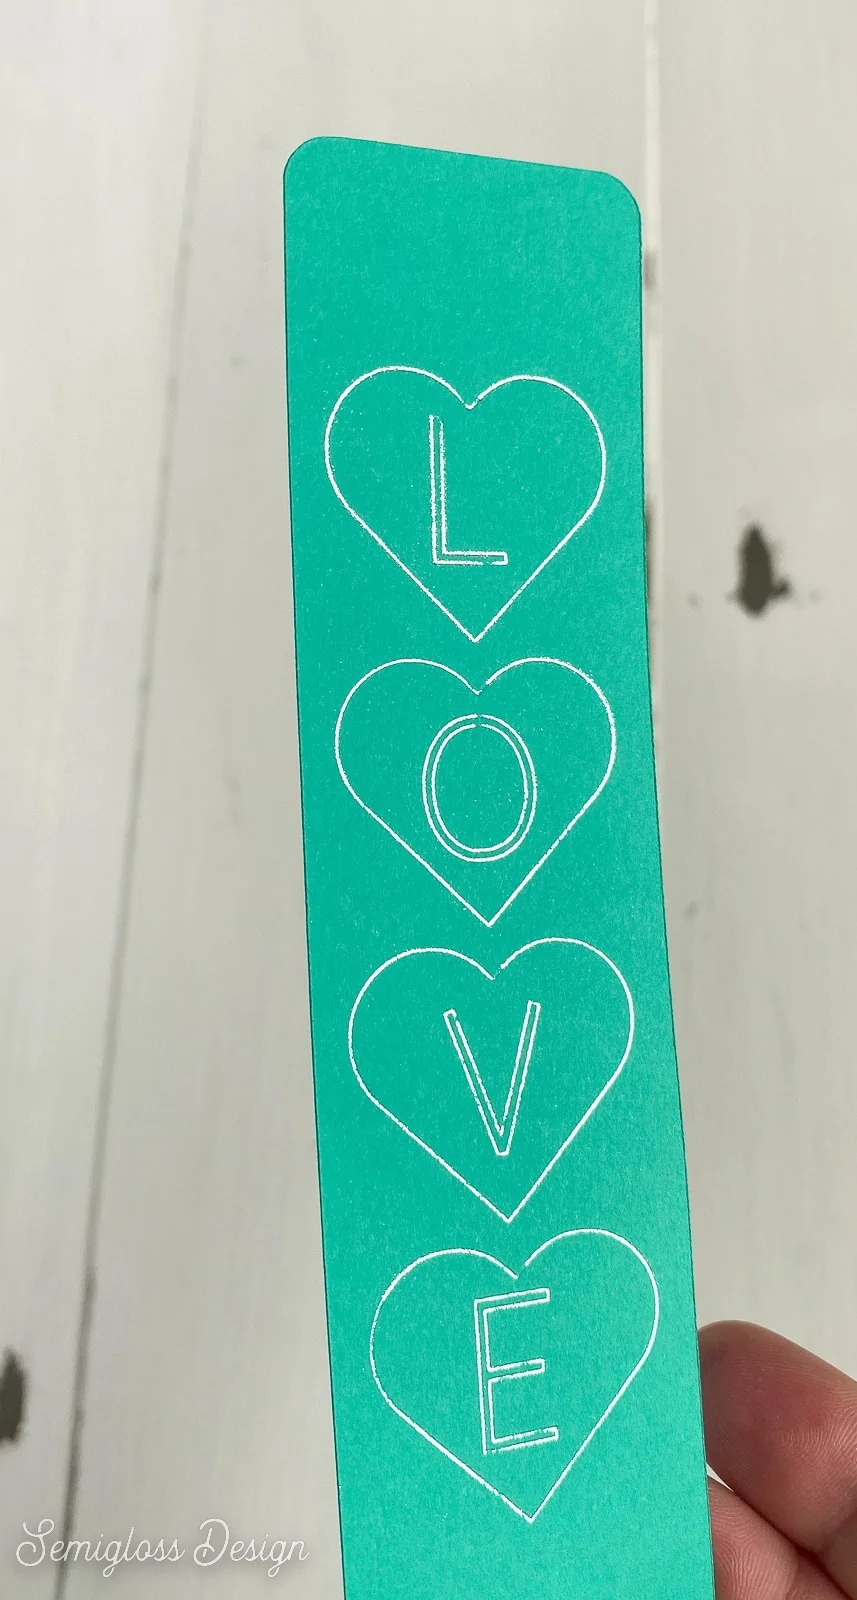
- You cannot fill large solid shapes with foil. Shapes become outlines.
- Use lines and not shapes. I used a .5 pt stroke in Adobe Illustrator.
- If you use Procreate, use a monoline brush instead of one with texture. It just tends to look a bit nicer with a smooth line.
- Thick lines may turn into outlines.
- All of the fonts will convert to outlines, even if they are very thin. Even the Cricut fonts converted to outlines.
You can also use designs from Cricut Access. Be sure to check the box by “Draw only” under the operation type.
Get access to my SVG Library.
Get access to over 50 SVG sets and Cricut cheat sheets. Join my SVG library.
Download the Bookmark SVG
All downloads are for personal use only. Please do not redistribute or sell files.
You might also like:
- Cricut Foil Transfer Birthday Card
- Cricut Vinyl Types Explained
- How to Make Cricut Stickers
- How to Cut Scrapbook Paper with Cricut
Pin for Later!

Emy is a vintage obsessed mama of 2 DIYer who loves sharing affordable solutions for common home problems. You don’t need a giant budget to create a lovely home. Read more…