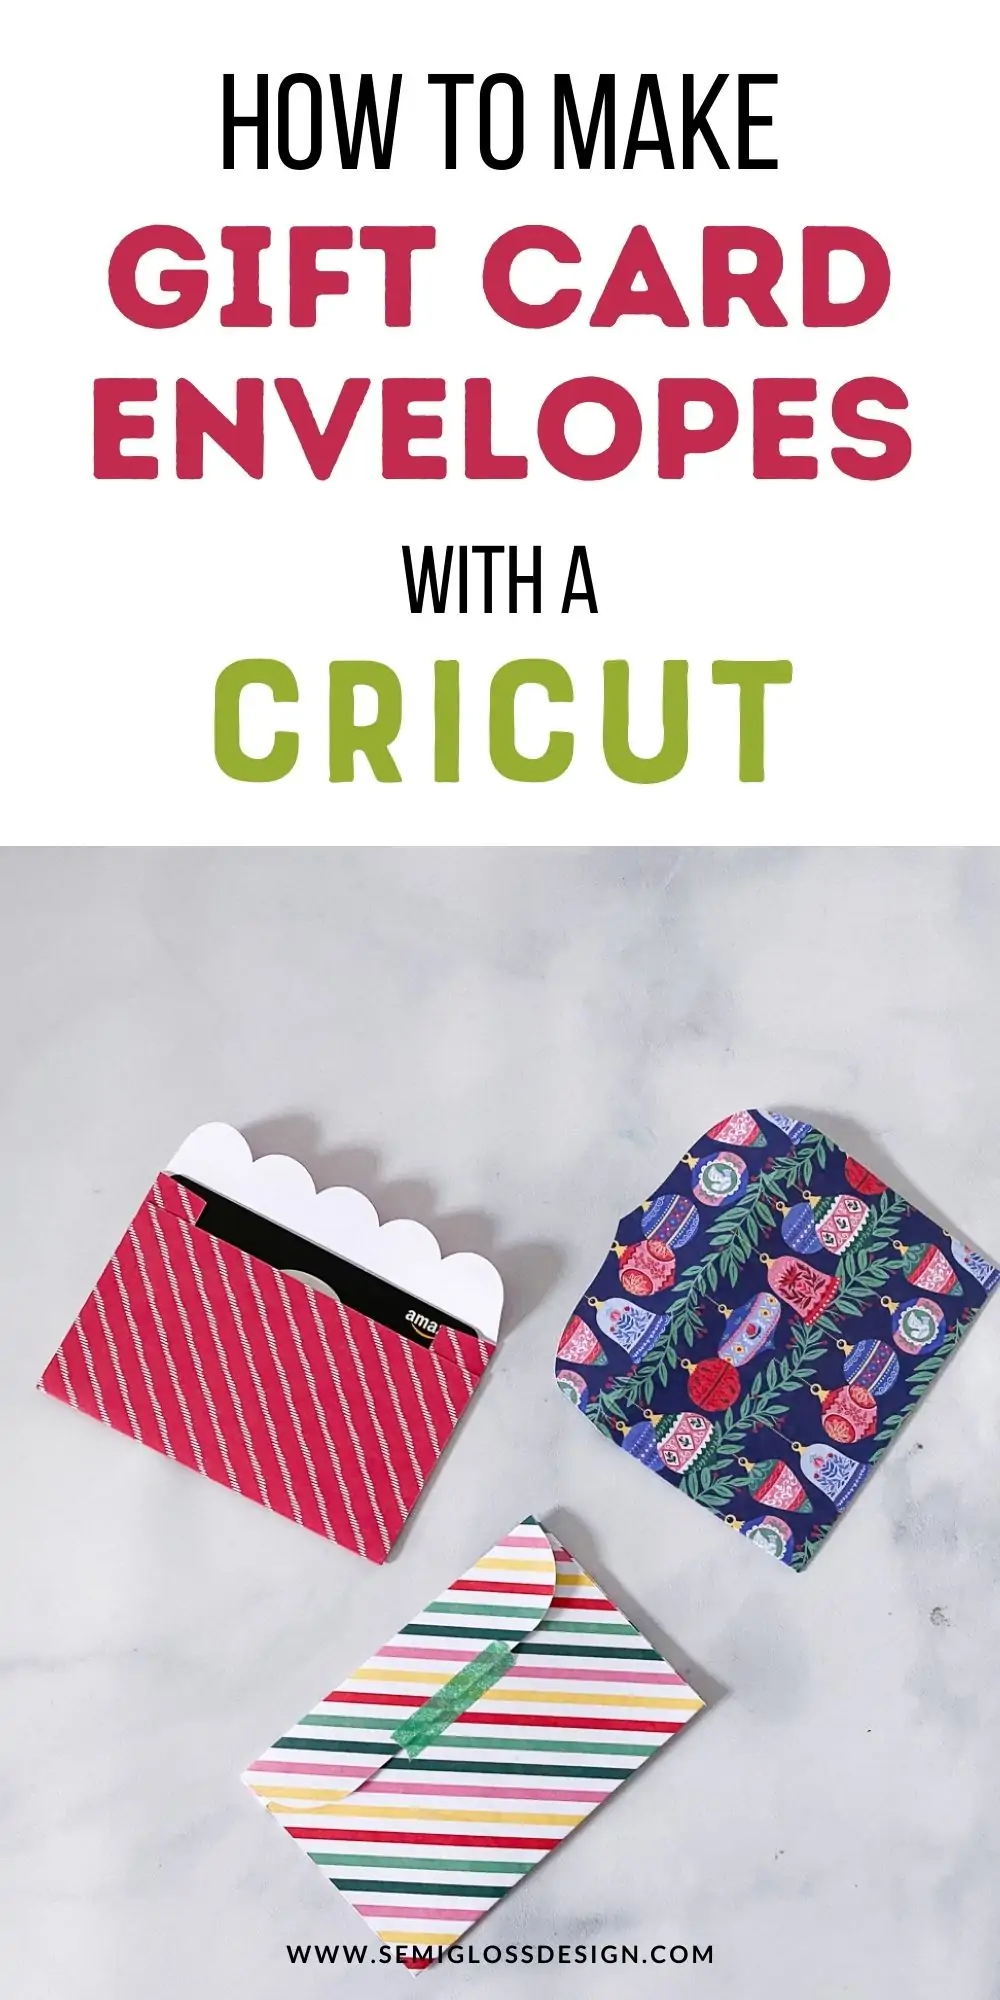
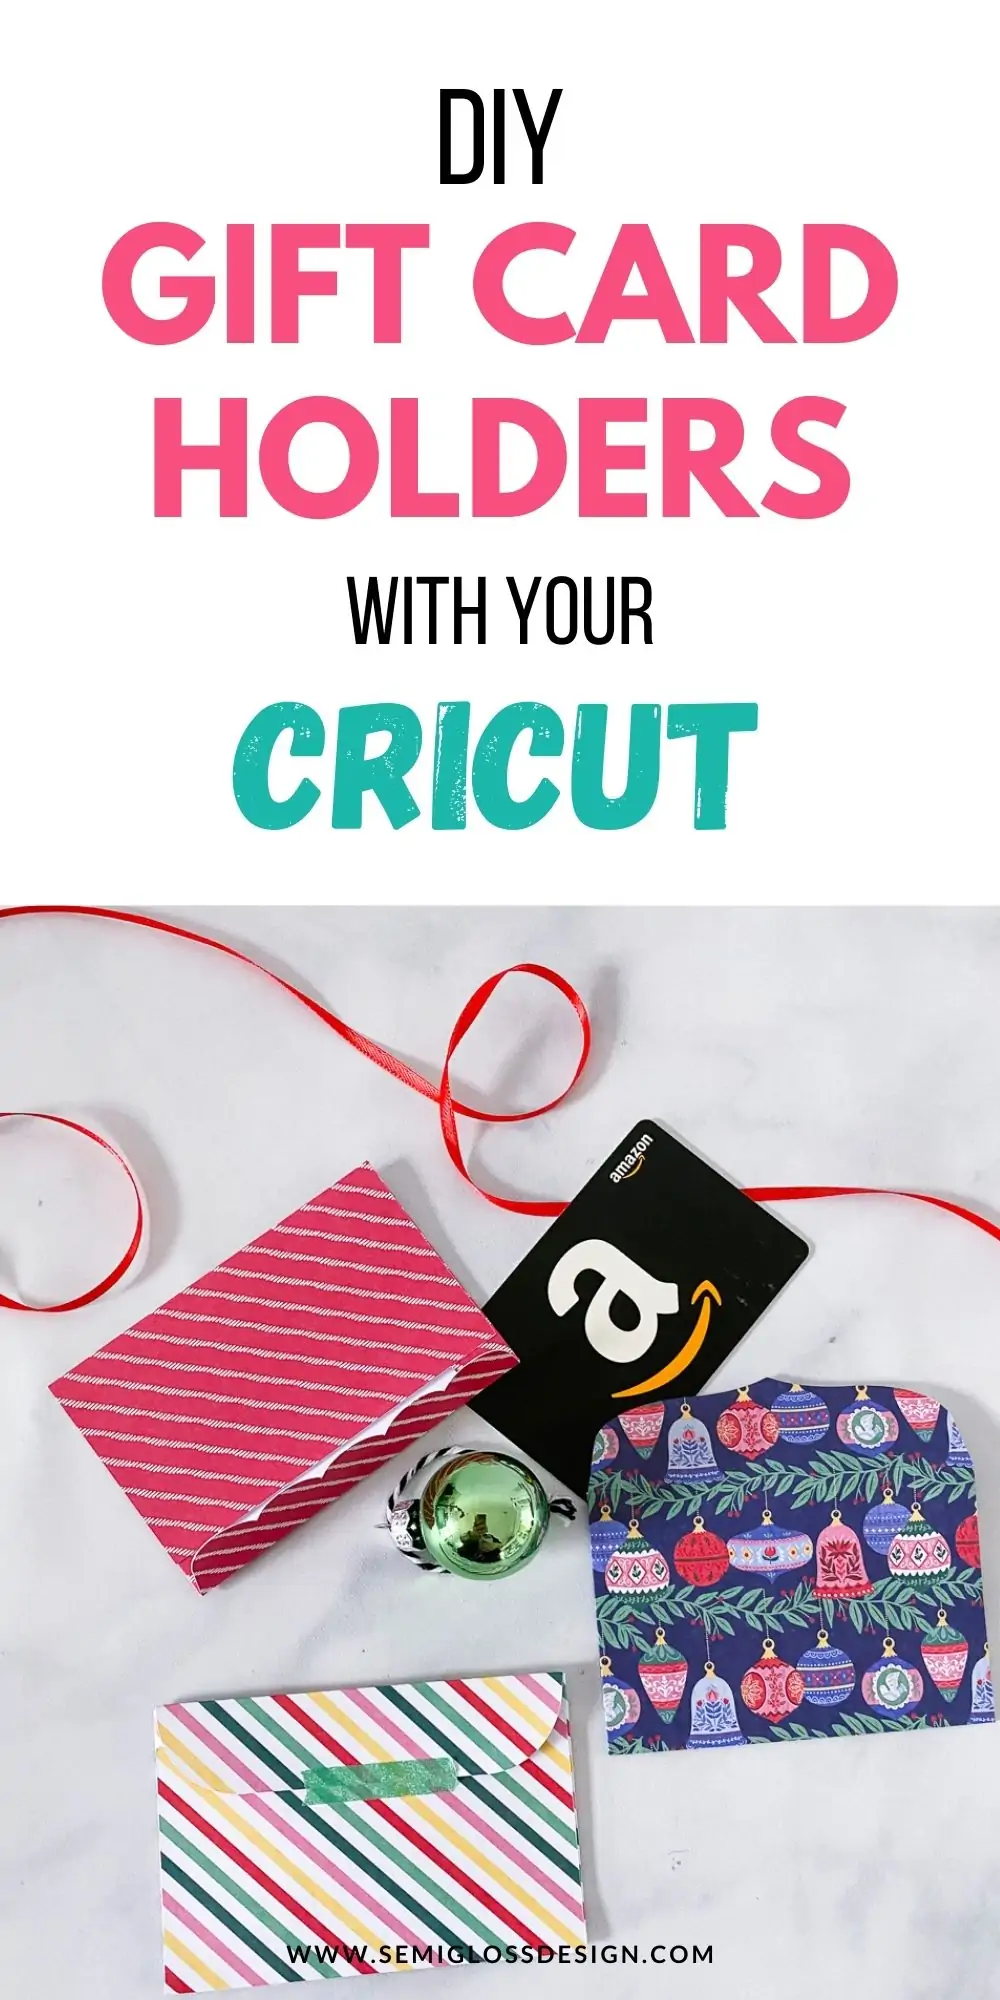
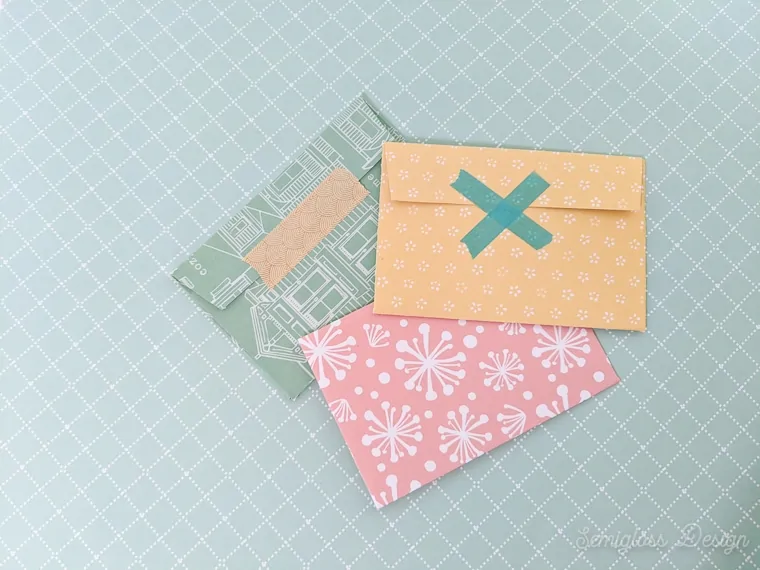
How to Make a Cricut Gift Card Envelope
Today, I’m sharing a tutorial for making a Cricut gift card envelope. You can download the SVG to make your own gift card envelope with your Cricut.
Don’t have a Cricut? I’ve got you covered with a printable gift card envelope template.
This post contains affiliate links. By purchasing an item through an affiliate link, I earn a small commission at no extra cost to you. As an Amazon Associate I earn from qualifying purchases.
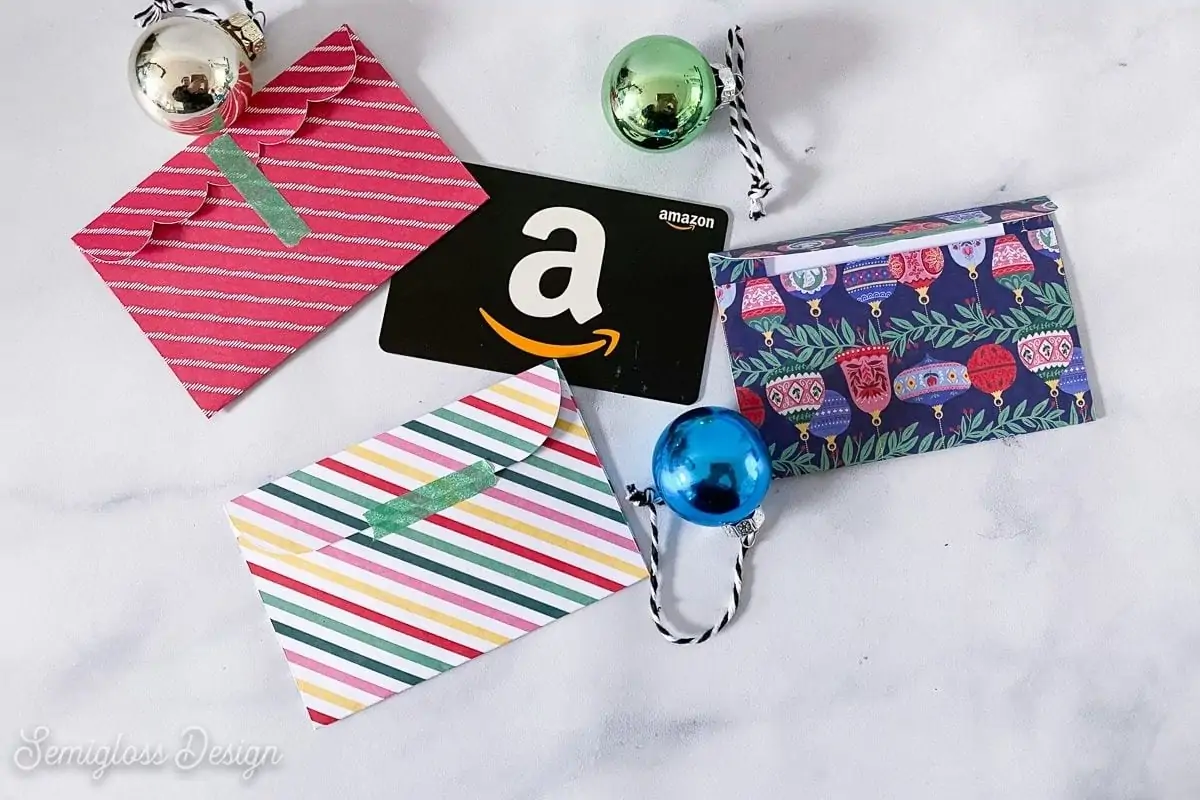
Gift cards are one of my favorite things to give (and receive!) However, I find the store gift card envelopes a little boring, so I like to make my own.
These are so easy to make and it’s possible to make a lot in no time at all!
Here’s how I use my Cricut to make gift card holders.
Shop My SVG Designs
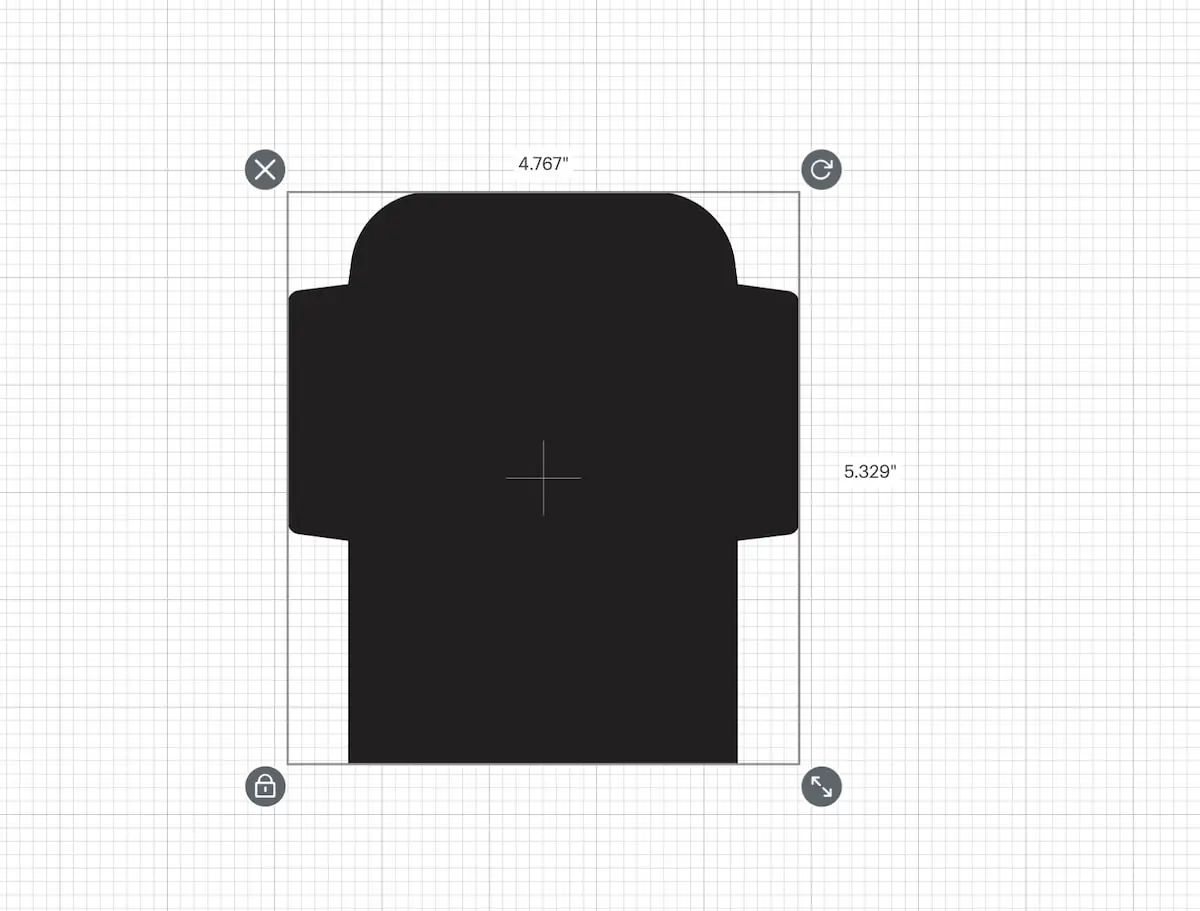
Cricut Gift Card Envelope
Supplies Needed:
- Cricut
- LightGrip Mat
- Scrapbook Paper
- Weeding Tools
- Bone folder tool
- Washi Tape
- Glue
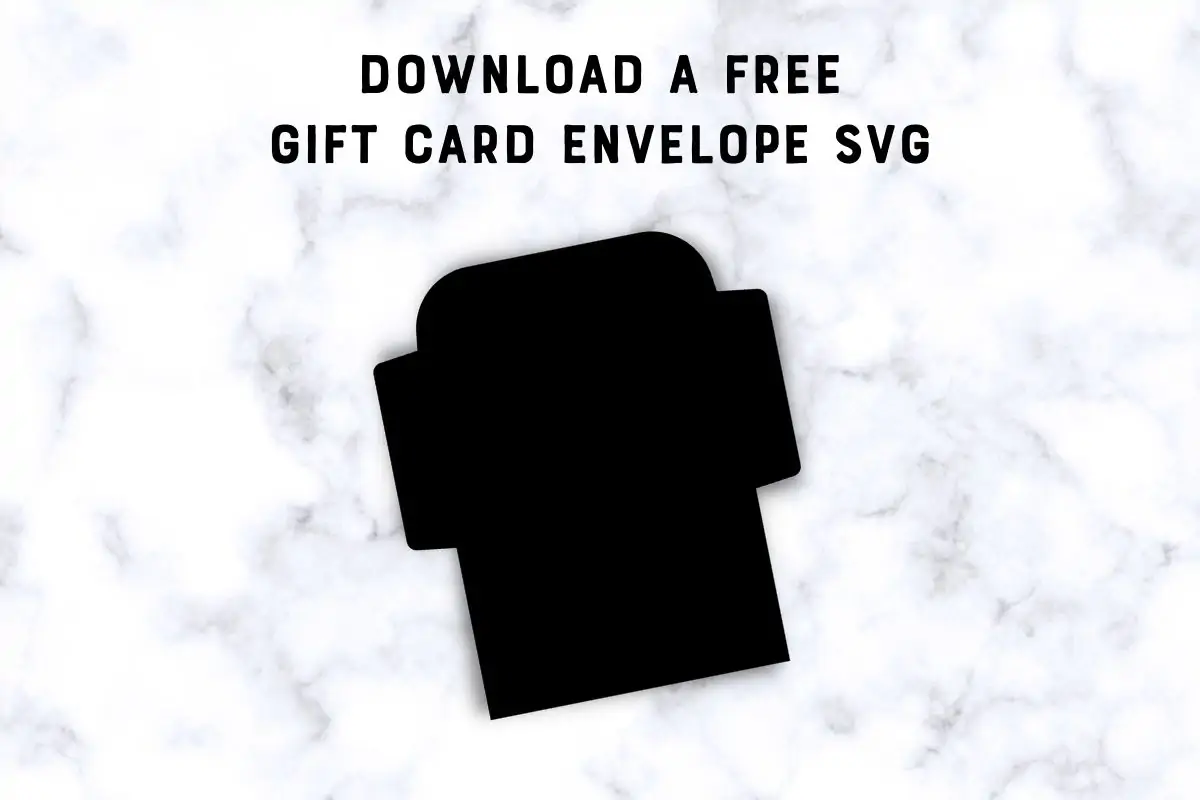
- Gift Card Envelope SVG (download available at the bottom of post)
Notes about Supplies:
Cricut
I used my Cricut Maker for this project, but any cutting machine will work. The exact cut settings will differ for other brands though.
If you don’t have a cutting machine, I also have a post for a printable version of this gift card envelope.
Paper
I used scrapbook paper for this project because it’s available in so many pretty patterns. It’s thick enough to be substantial but not so thick that it’s hard to work with.
If you use thinner or thinner paper, your cut settings will be different.
If you need more information about cutting scrapbook paper, check out this post.
Washi Tape
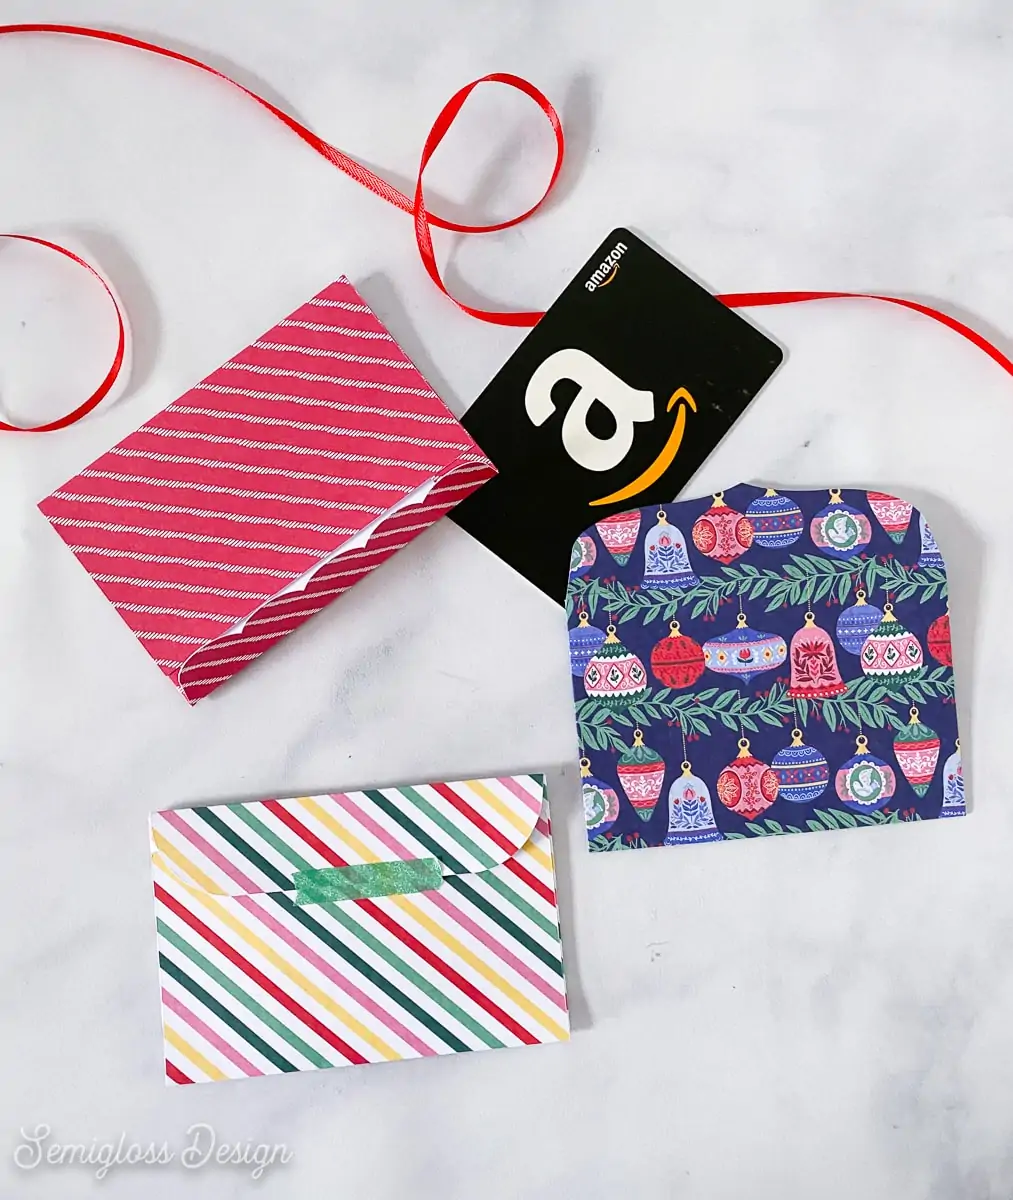
I use washi tape to close the envelopes, but you can use regular tape or glue if you want.
Cutting the Paper
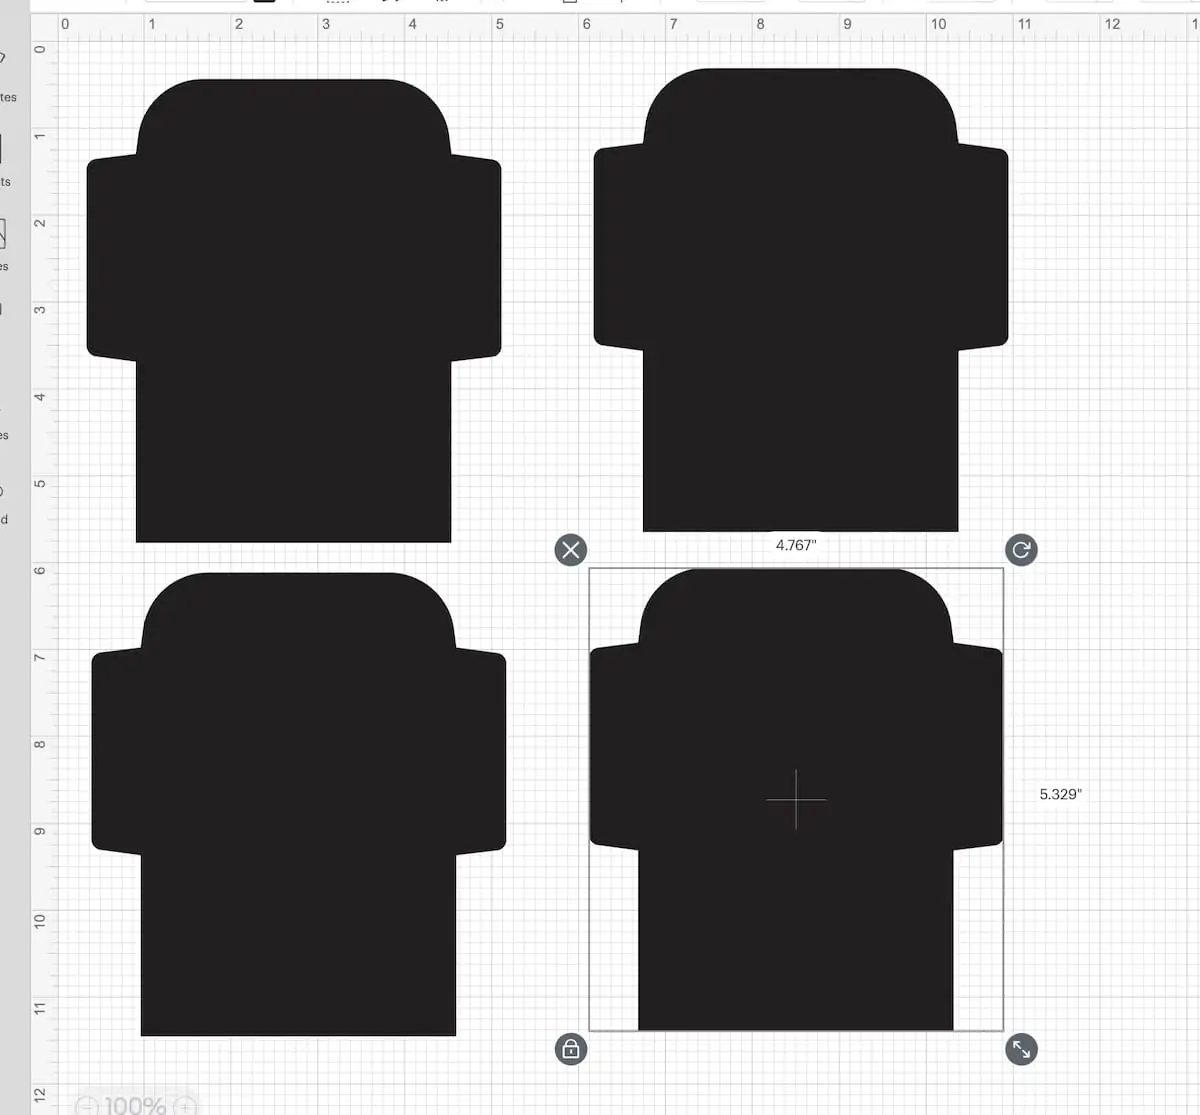
- Upload the design to Cricut Design Space as usual.

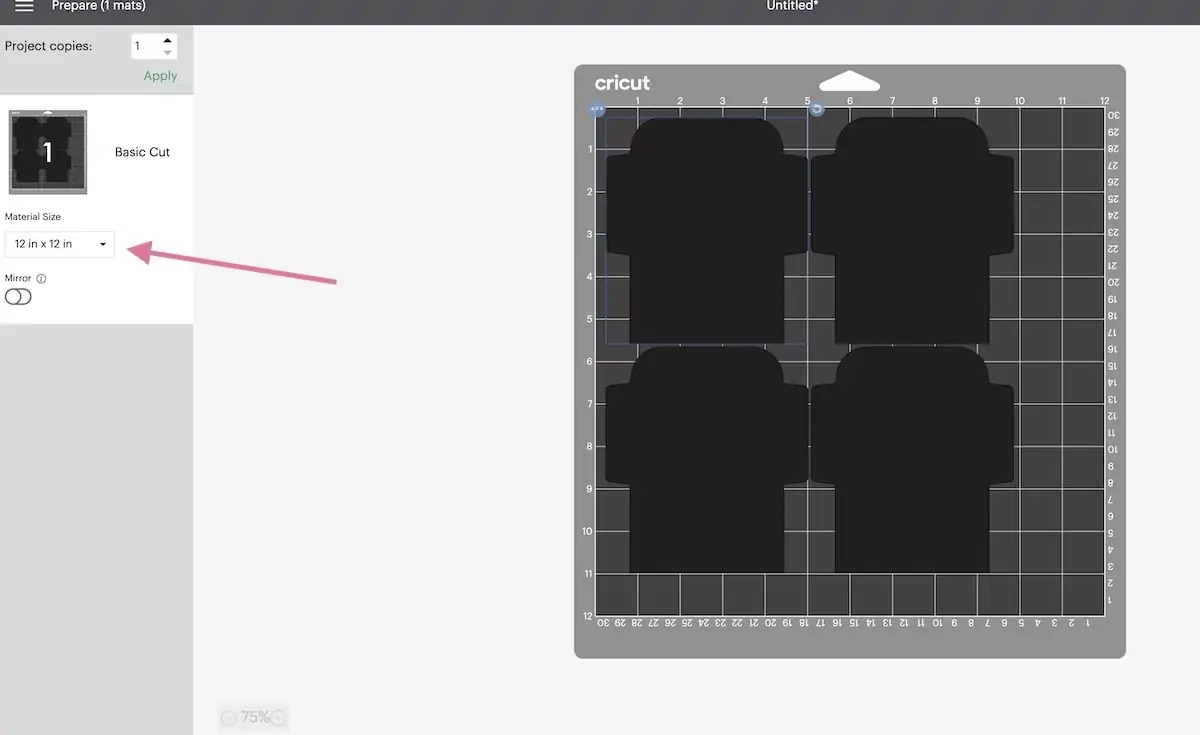
- If you need to cut more than one, duplicate the design and fit them in a 12″x12″ space since that’s the size of scrapbook paper. (If your paper is sized differently, fit them into that size.)

- Click Make It.
- Make sure that the designs fit properly on the material size.

- Click continue.
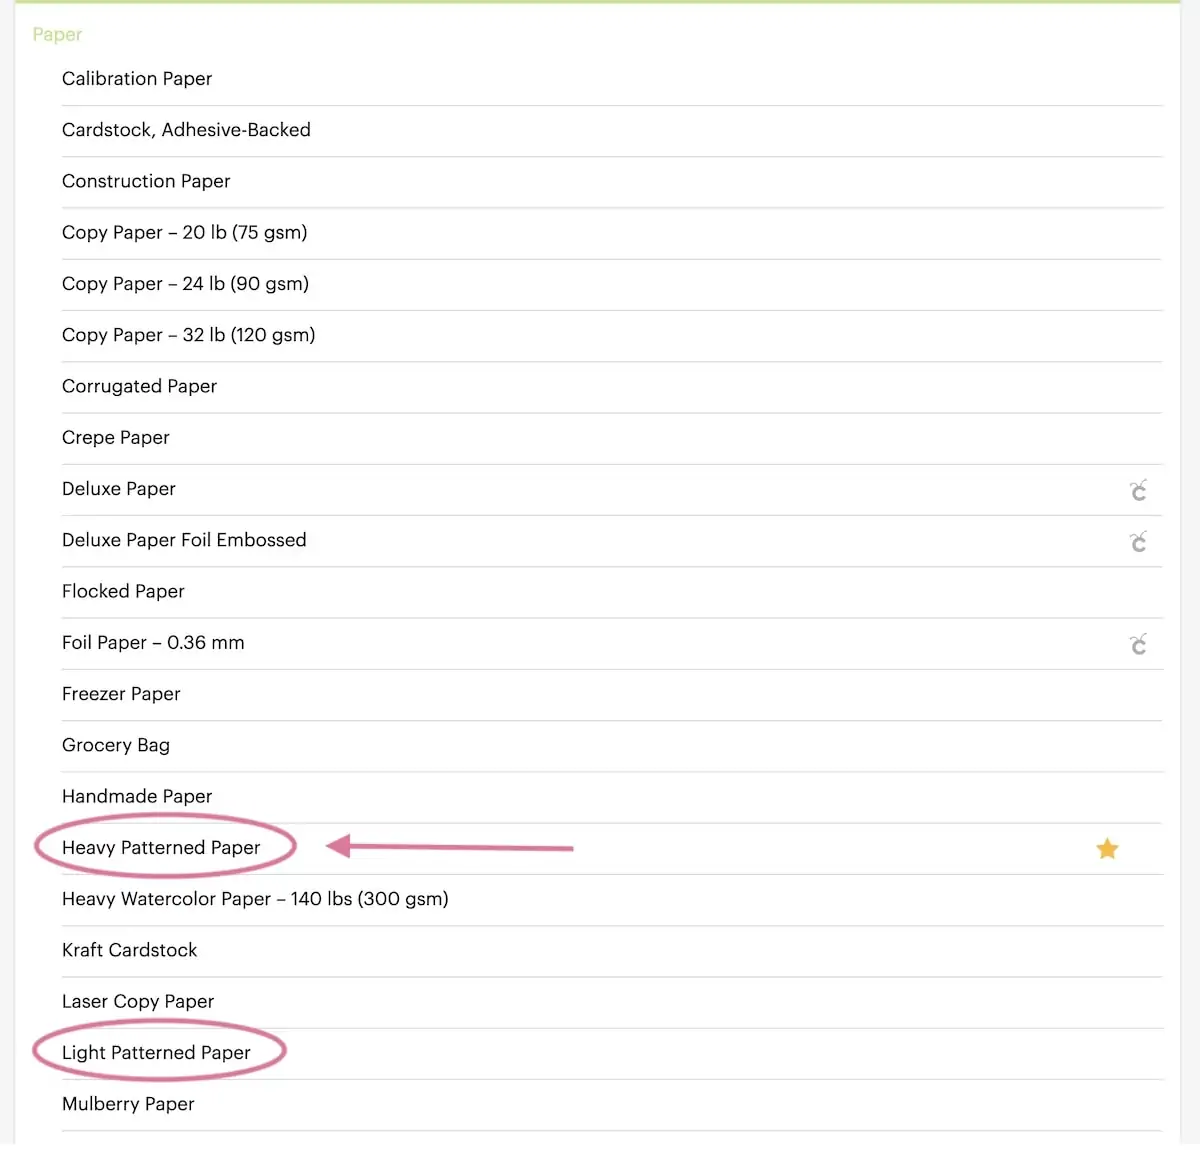
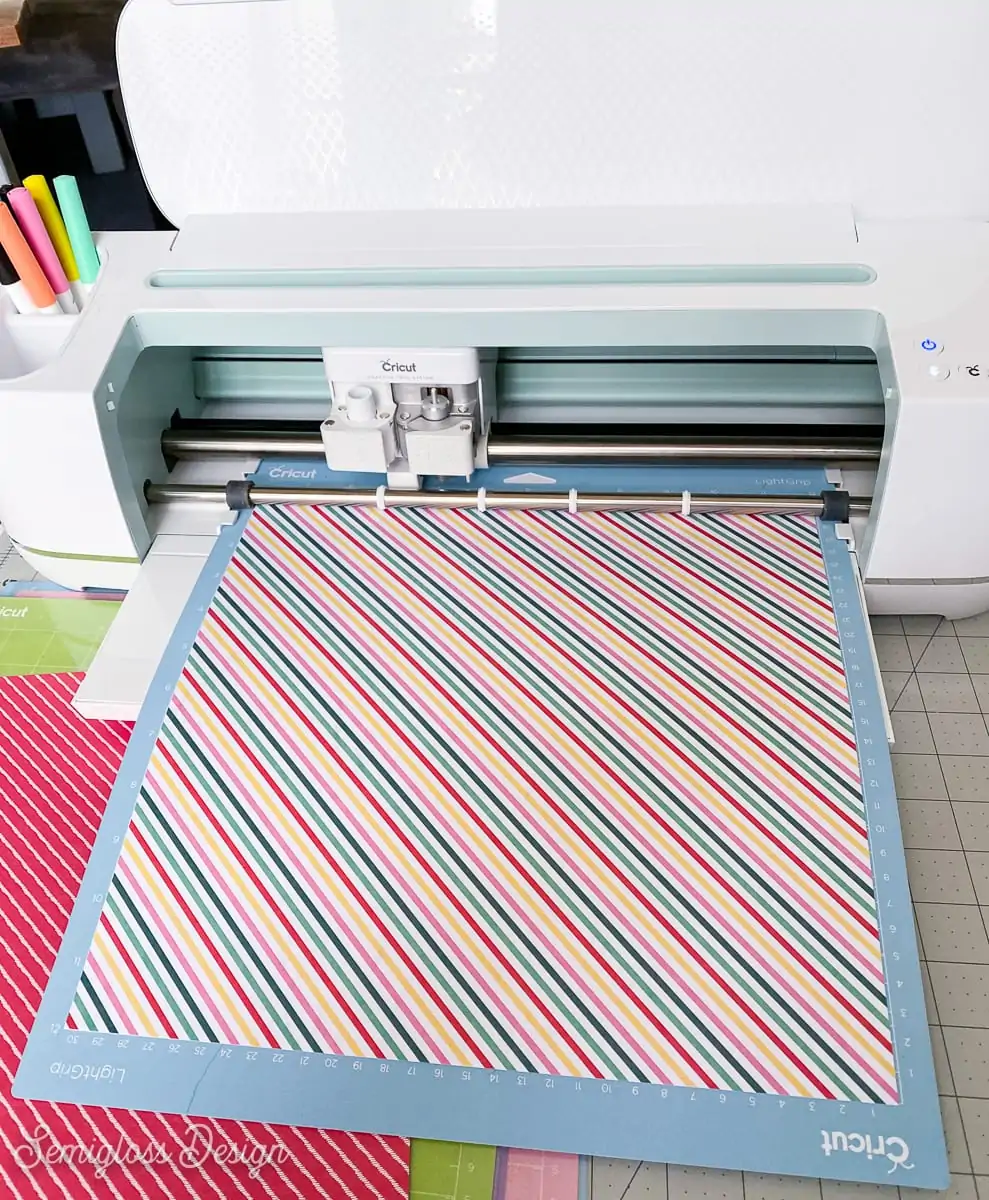
- Choose your material. Most scrapbook paper will work with the setting for Heavy Patterned Paper. (If your paper is super lightweight, choose Light Patterned Paper.

- Place your scrapbook paper on a LightGrip mat and smooth it to make sure that it sticks to the mat.

- Cut the design.
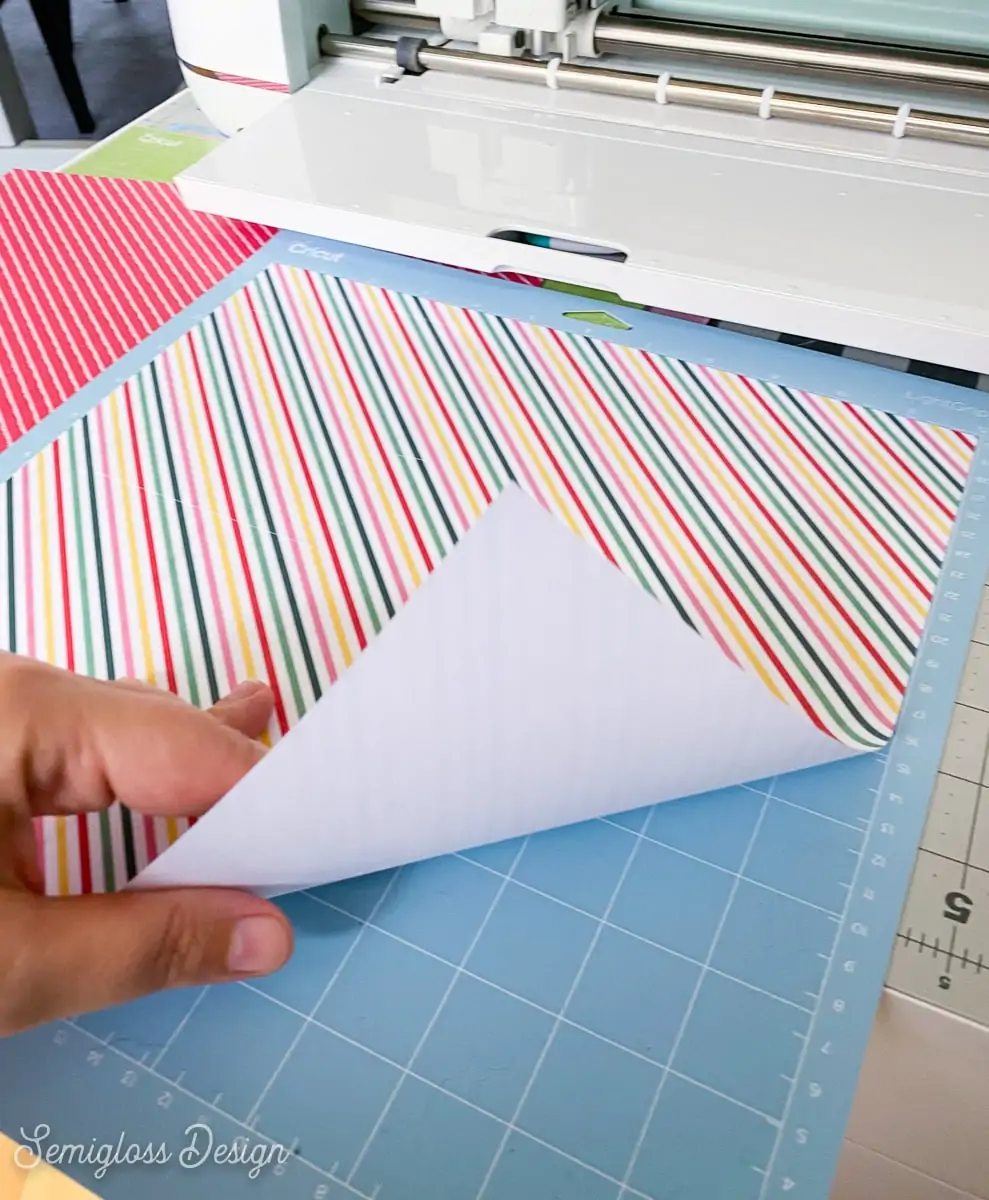
- When the design is cut, don’t unload the mat yet. Use the spatula tool to make sure that your design has cut through the paper. If it’s good, unload the mat. If not, send it to cut one more time.
Weeding the Paper
- Gently pull the mat from the excess paper. Go slowly to avoid curling the paper.
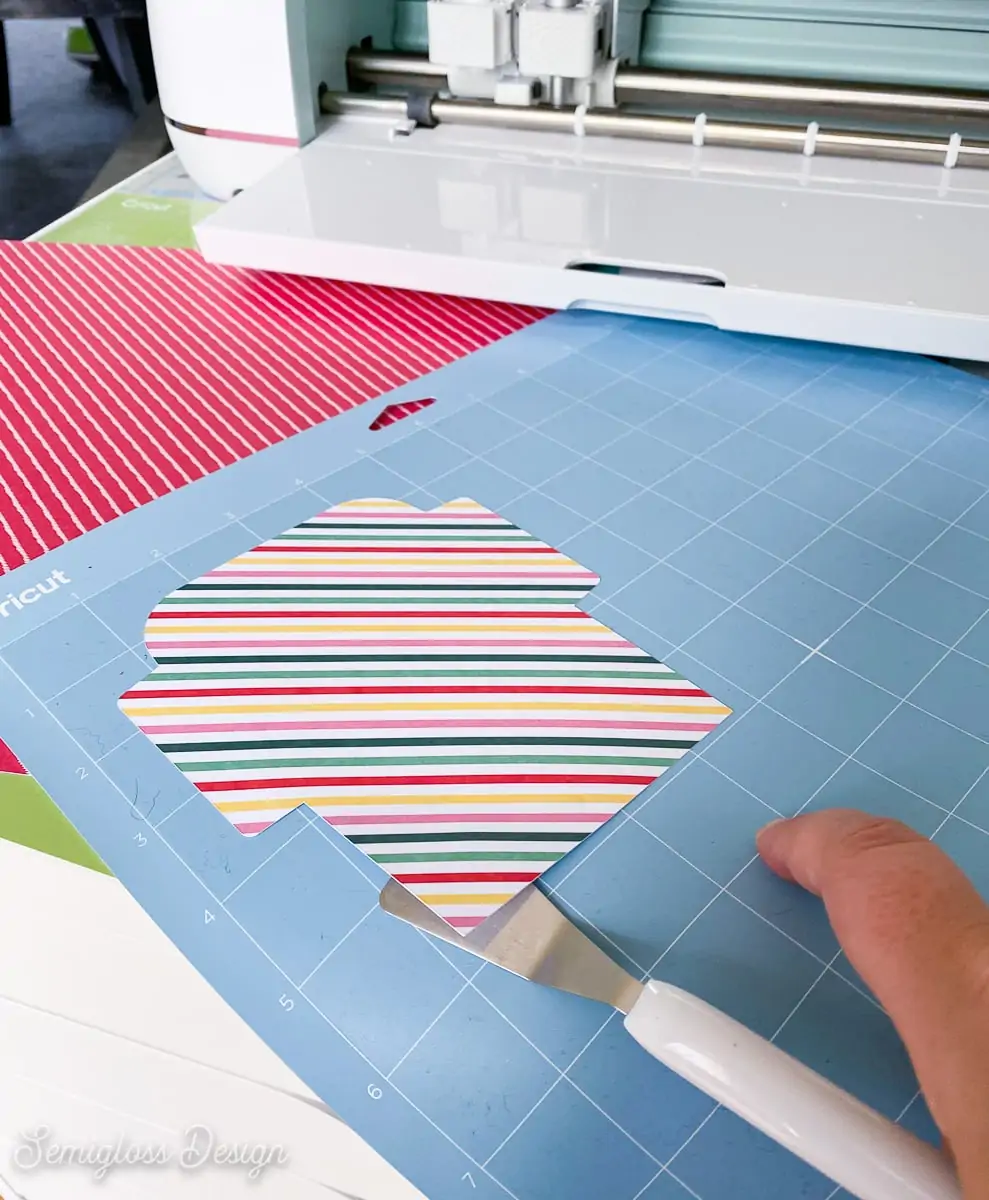
- Use the spatula tool to remove the envelopes from the mat slowly.
- If the paper curls, you can gently curl it the other way.
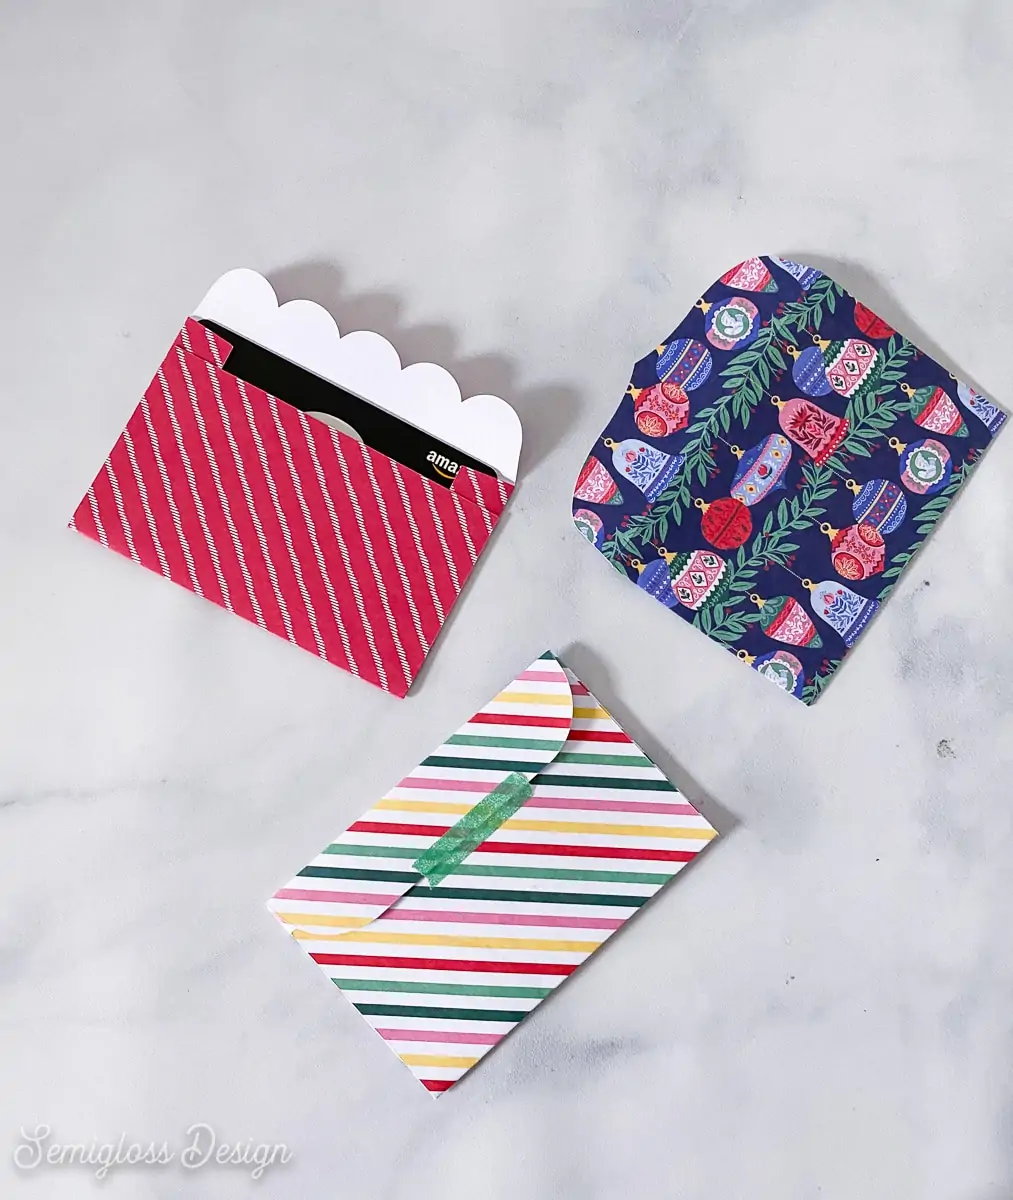
Making the Gift Card Envelope
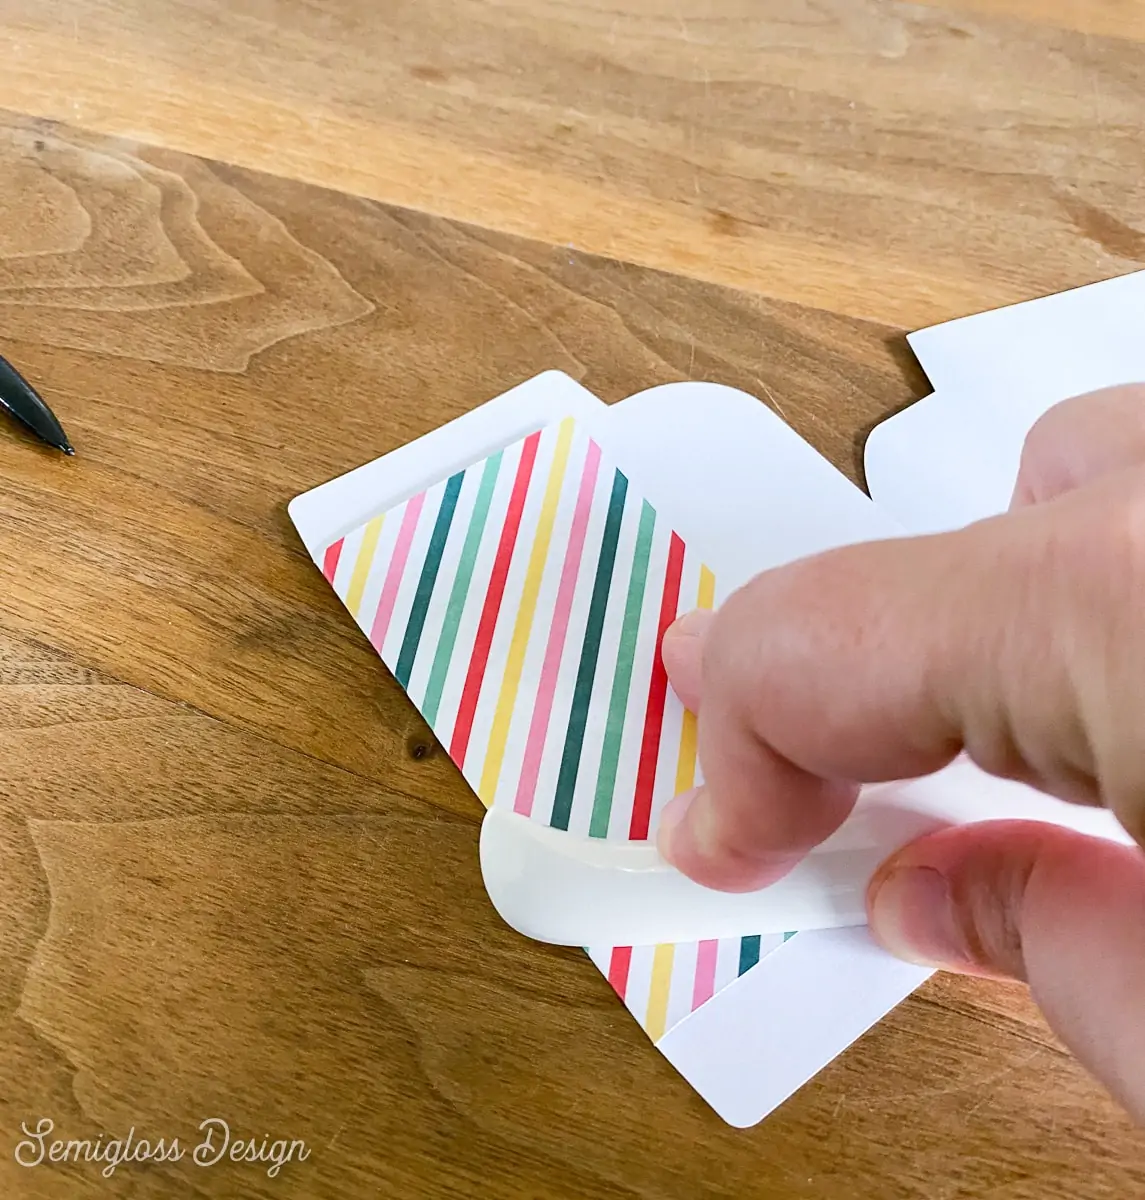
- Gently fold the envelope flaps down. I like to use the edge of a table to help make folds.
- Use a bone folder to get a nice crisp fold.

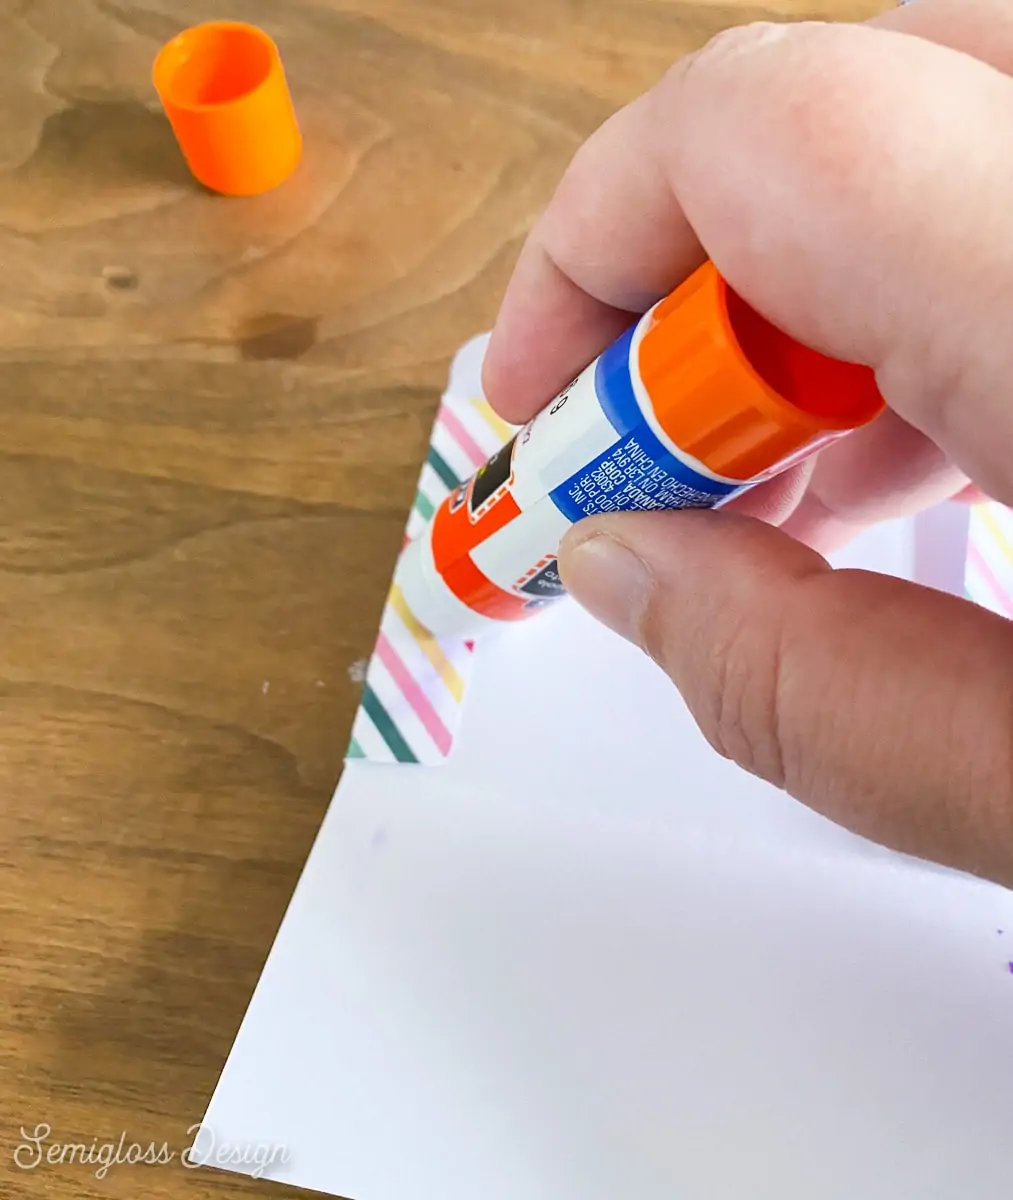
- Apply glue to the side flaps.

- Press the back flap onto the glue and press.
- Let the glue dry completely.
- Insert the gift card and close with washi tape.

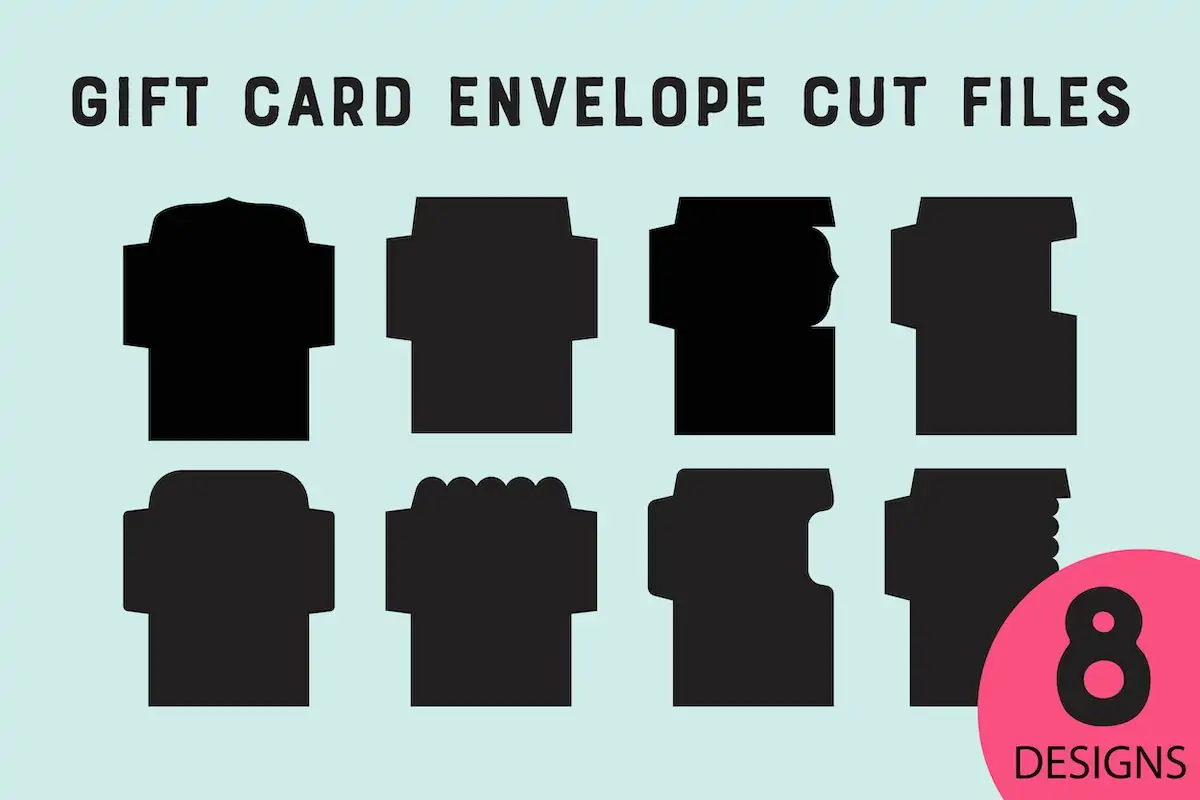
Get the Deluxe Gift Card Envelope and Sleeve Cut File Set!
This set includes 4 envelope designs and 4 sleeve designs for just $3.50!
Get it today!
Get access to my SVG Library.
Get access to over 50 SVG sets and Cricut cheat sheets. Join my SVG library.
Download the Gift Card Envelope Cut File
This cut file is a zip file that includes SVG, PNG, JPG, and DXF files for one design. Use the SVG with Cricut and the DXF file with Silhouette.
All downloads are for personal use only. Please do not redistribute or sell files.
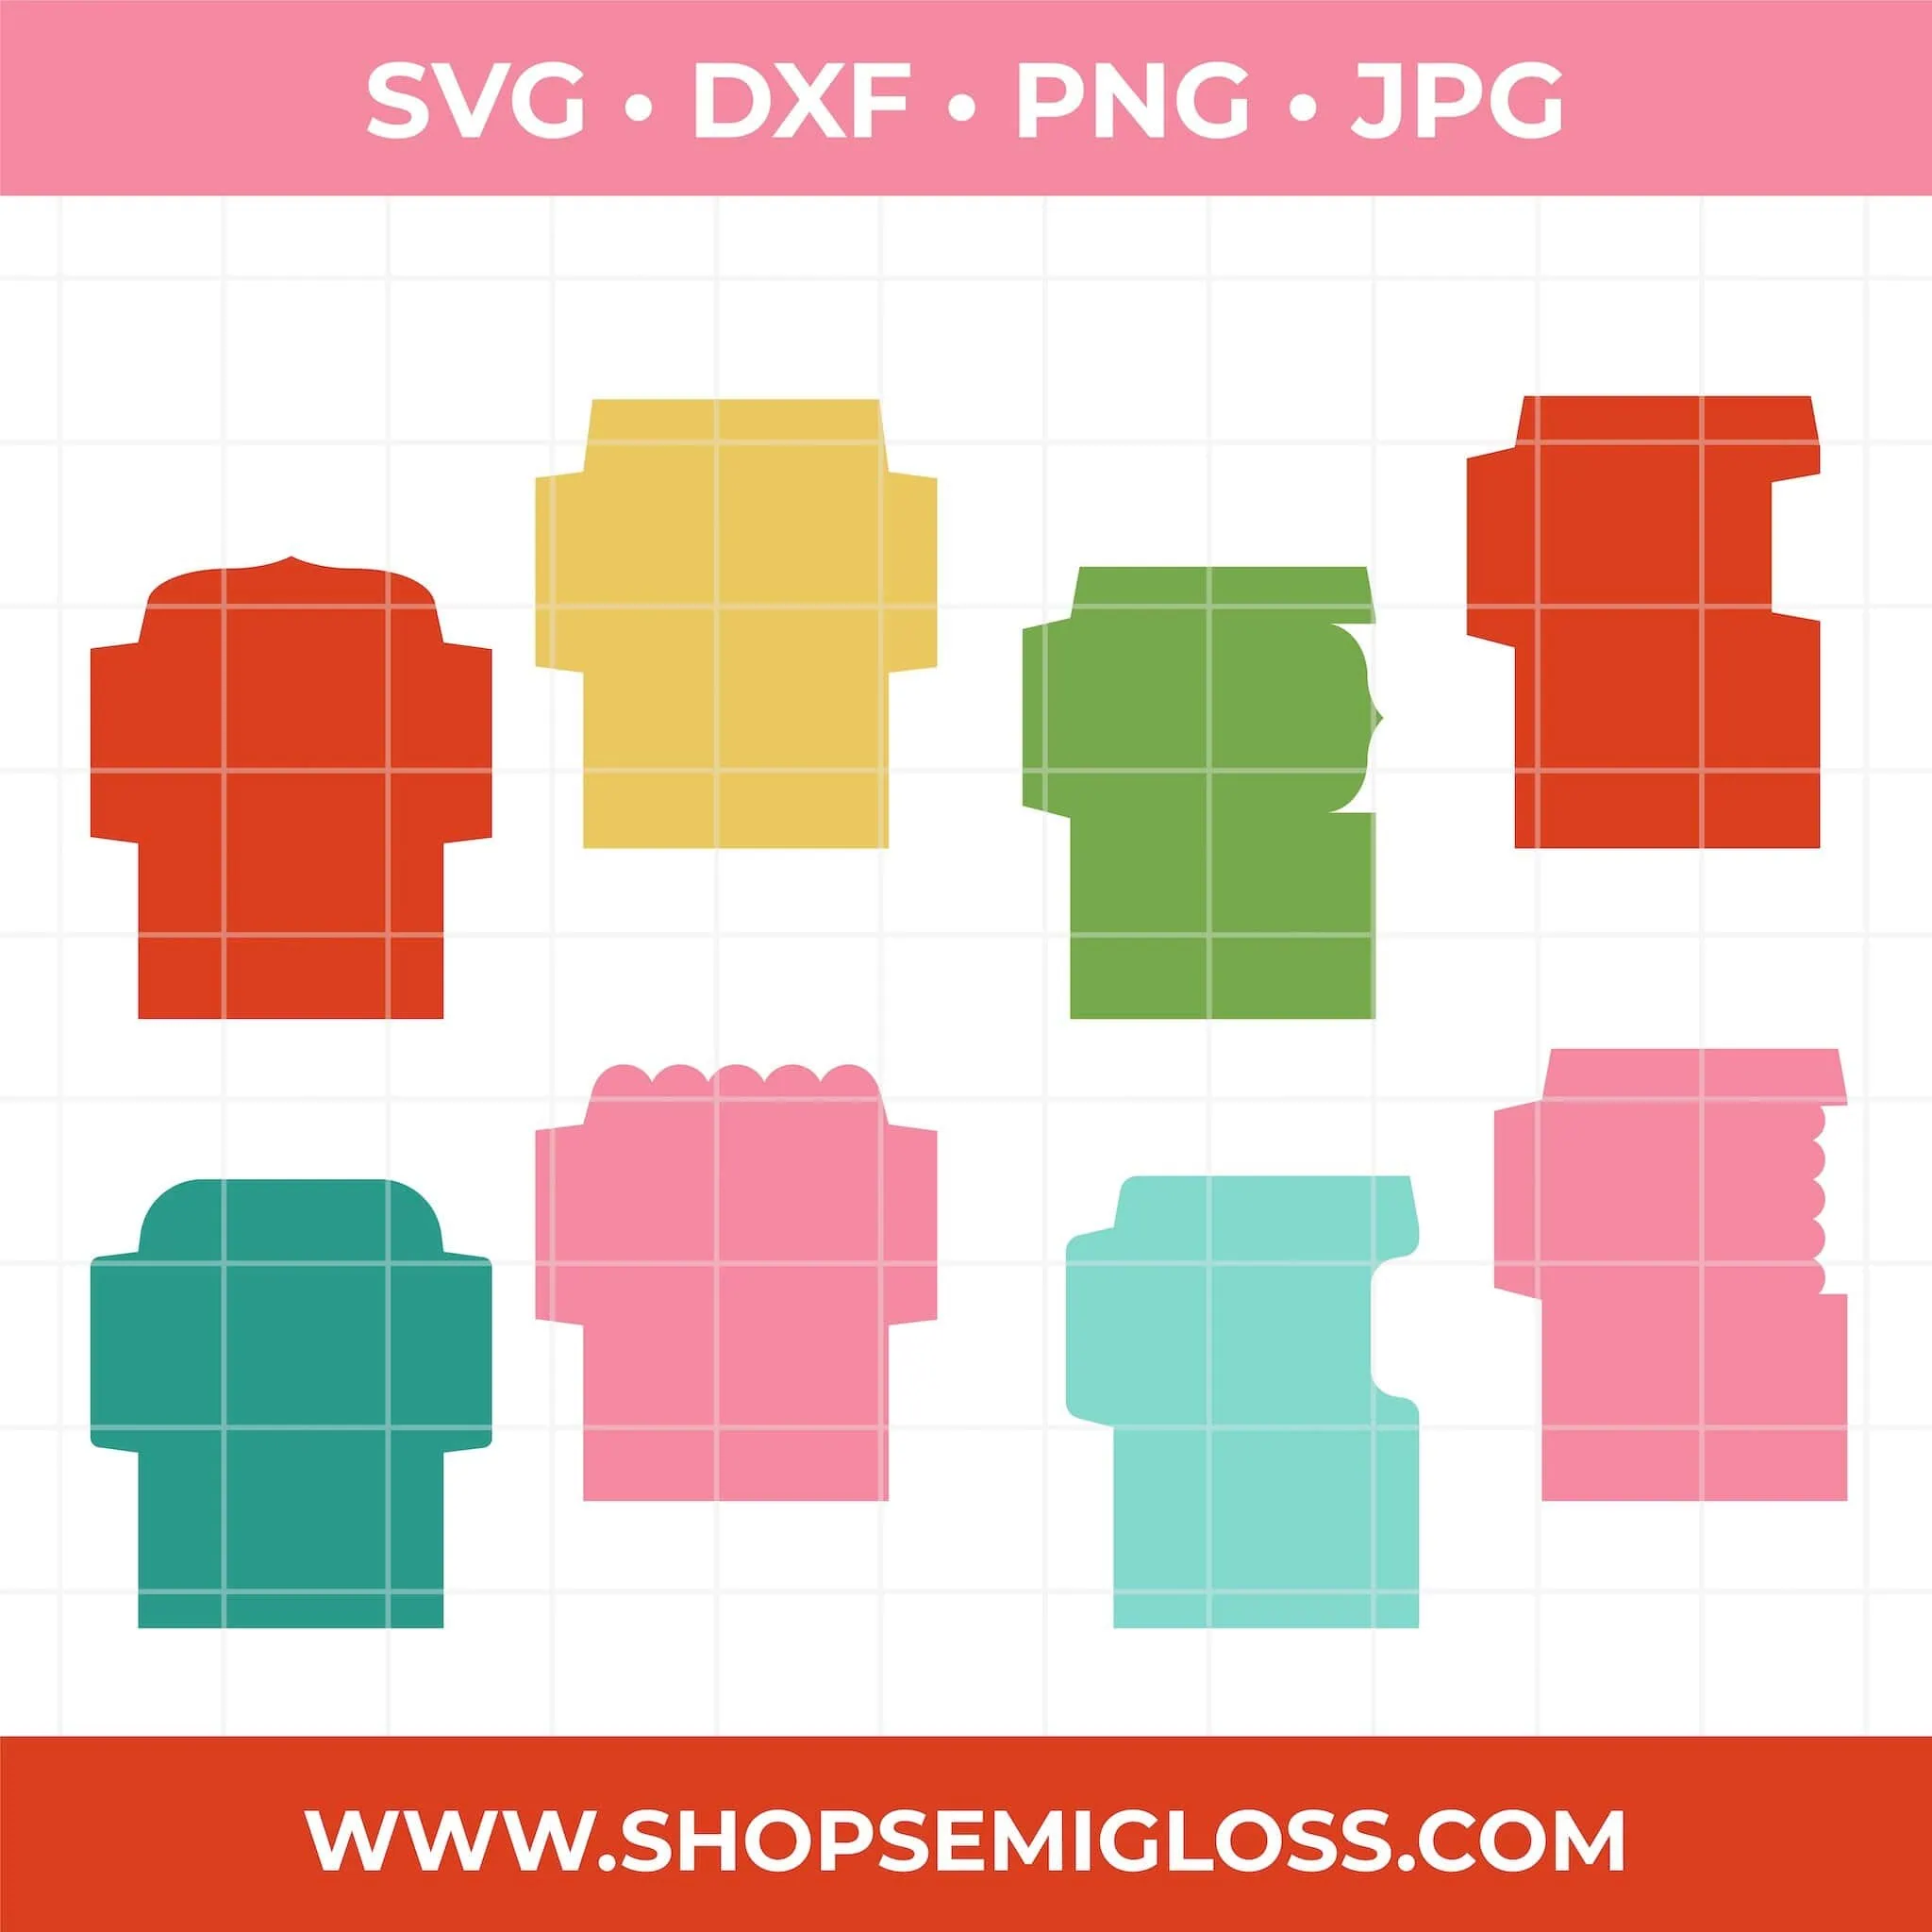
Gift Card Envelope SVG and Cut Files
Get all of the designs with the deluxe cut file set!
Shop My Gift Card Holder SVG Designs


Shop all gift card holder designs.
You might also like:
- How to Use a Cricut Maker
- Greeting Card Envelope Template
- Gift Card Sleeve Template
- Easy Foil Bookmarks
Pin for Later!

Emy is a vintage obsessed mama of 2 DIYer who loves sharing affordable solutions for common home problems. You don’t need a giant budget to create a lovely home. Read more…


Love this. Thank You for the file.