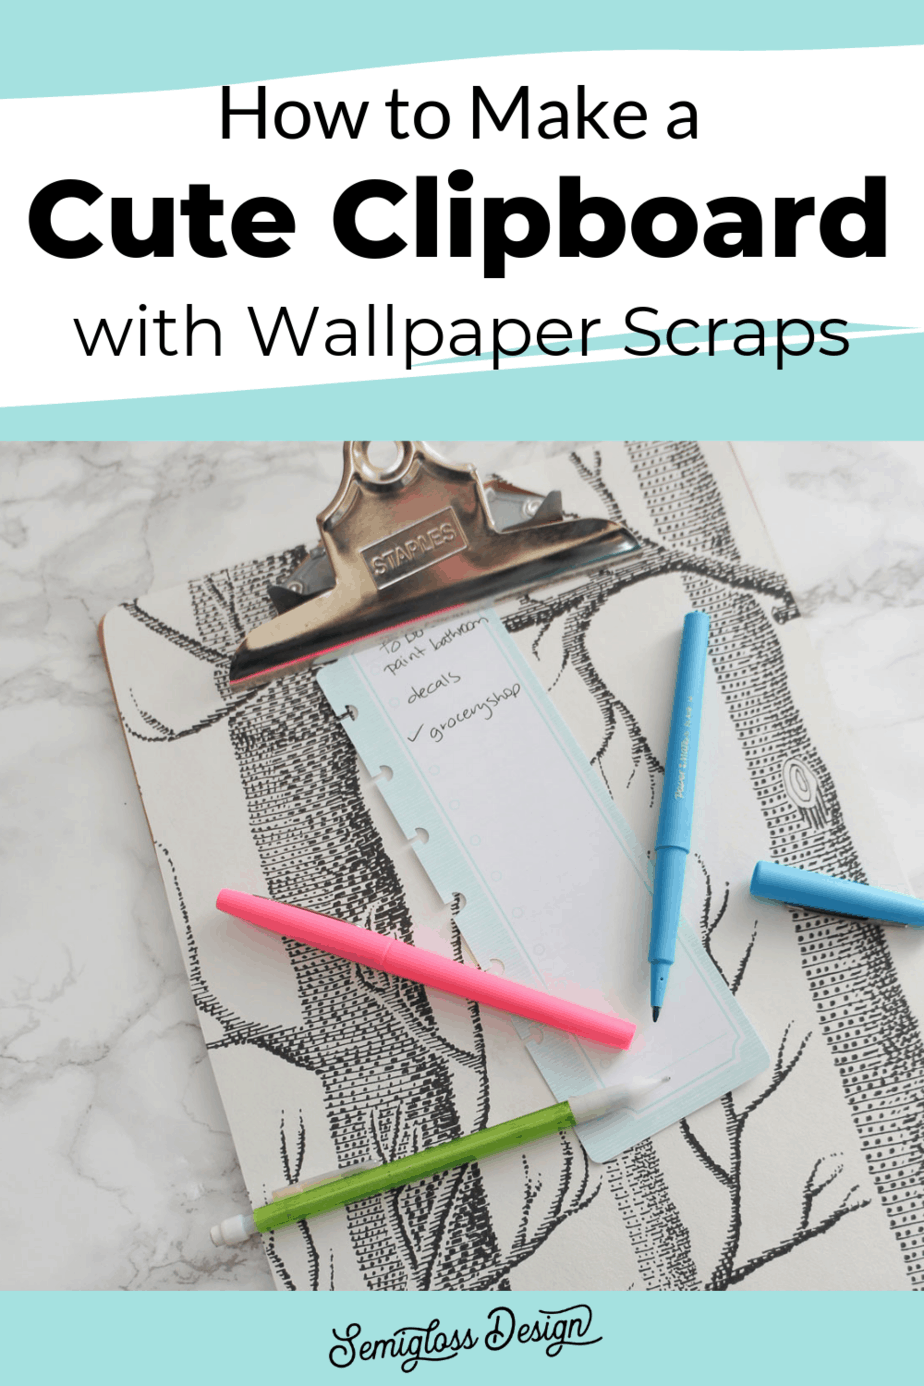
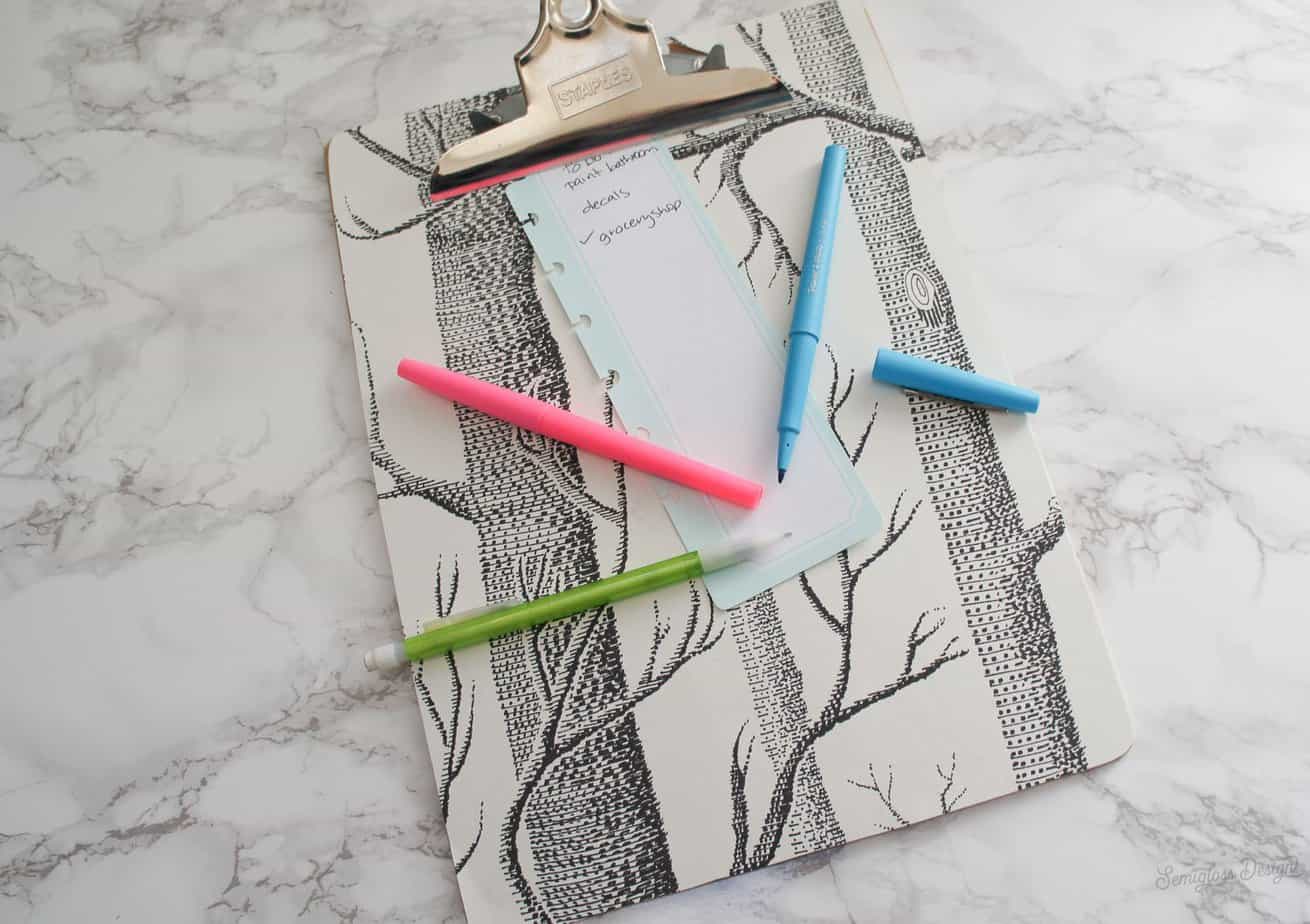
Make a DIY Clipboard with Wallpaper Scraps
Make a DIY clipboard using wallpaper scraps.
After wallpapering my hallway, I have a ton of random pieces of wallpaper left over. Since it’s gorgeous, I would love to find things to do with it. While I was trying to organize my desk, I ran across a plain clipboard that I use for my papers and a project was born.
This decorative clipboard is one of those stupidly easy crafts that just take a few minutes to complete.
DIY Clipboard with Wallpaper Scraps
Supplies Needed
This post contains affiliate links. By purchasing an item through an affiliate link, I earn a small commission at no extra cost to you.
- Clipboard
- Wallpaper scraps (I used this wallpaper)*
- Decoupage Glue*
- Paint brush
- Pencil
- Scissors
*If your wallpaper is removable, you won’t need the glue and this project is even easier! Make all of the cuts before peeling away the backing. Be sure to dry fit.
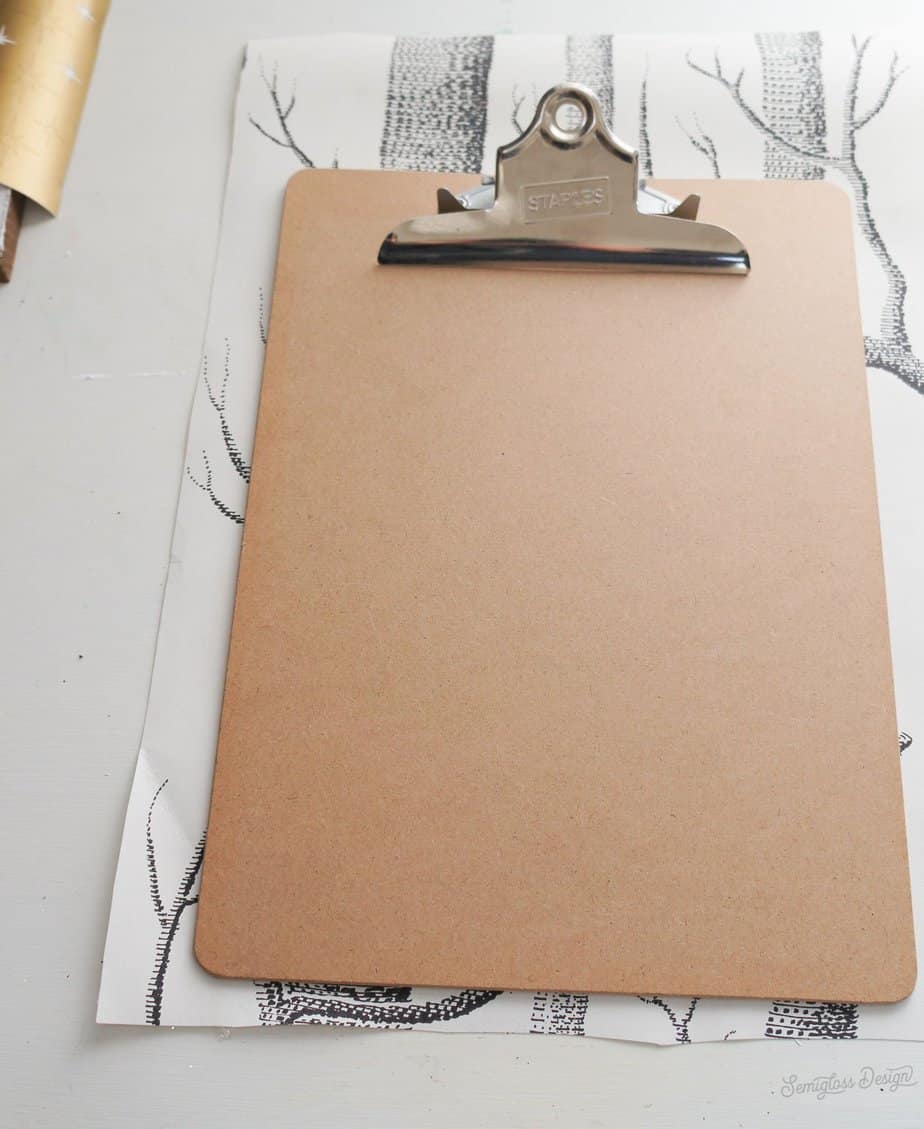
- Cut a piece of wallpaper slightly larger than your clipboard.
- Trace the clipboard edge with a pencil.

- Cut along the lines you traced, making it slightly smaller than what you drew.
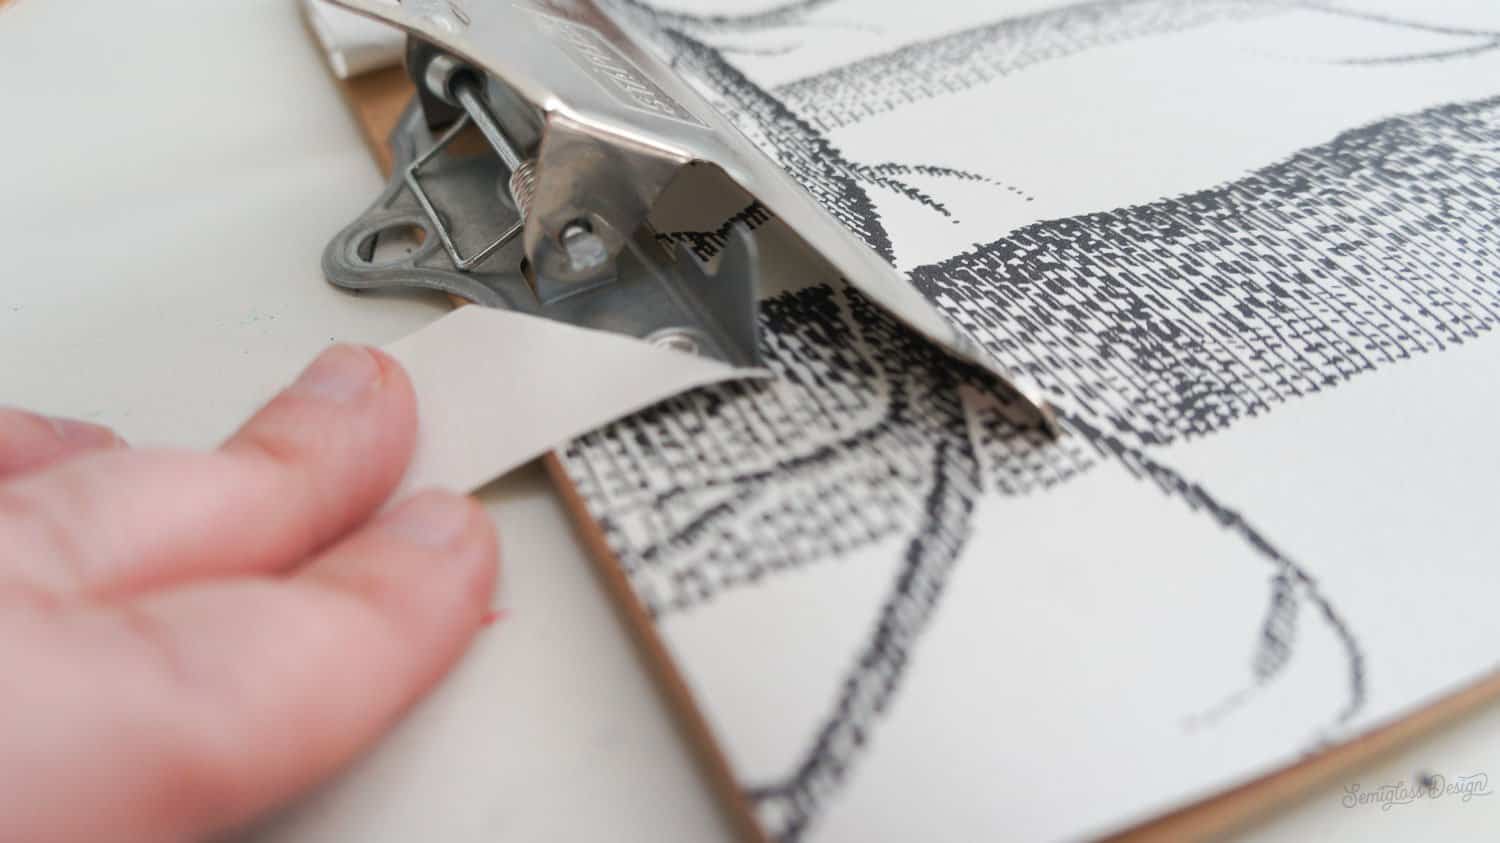
- Mark where the clip is on the wallpaper. It’s hard to see, but I marked a T shape to intersect the clip.

- Cut along the T shape.
- Dry fit it and see how it looks. You might need to trim a bit more.
- My clip was oddly shaped, so I folded the wallpaper along the metal lines, making marks where I needed to cut. Then I trimmed those spots.
- Dry fit it again to make sure that it fits.
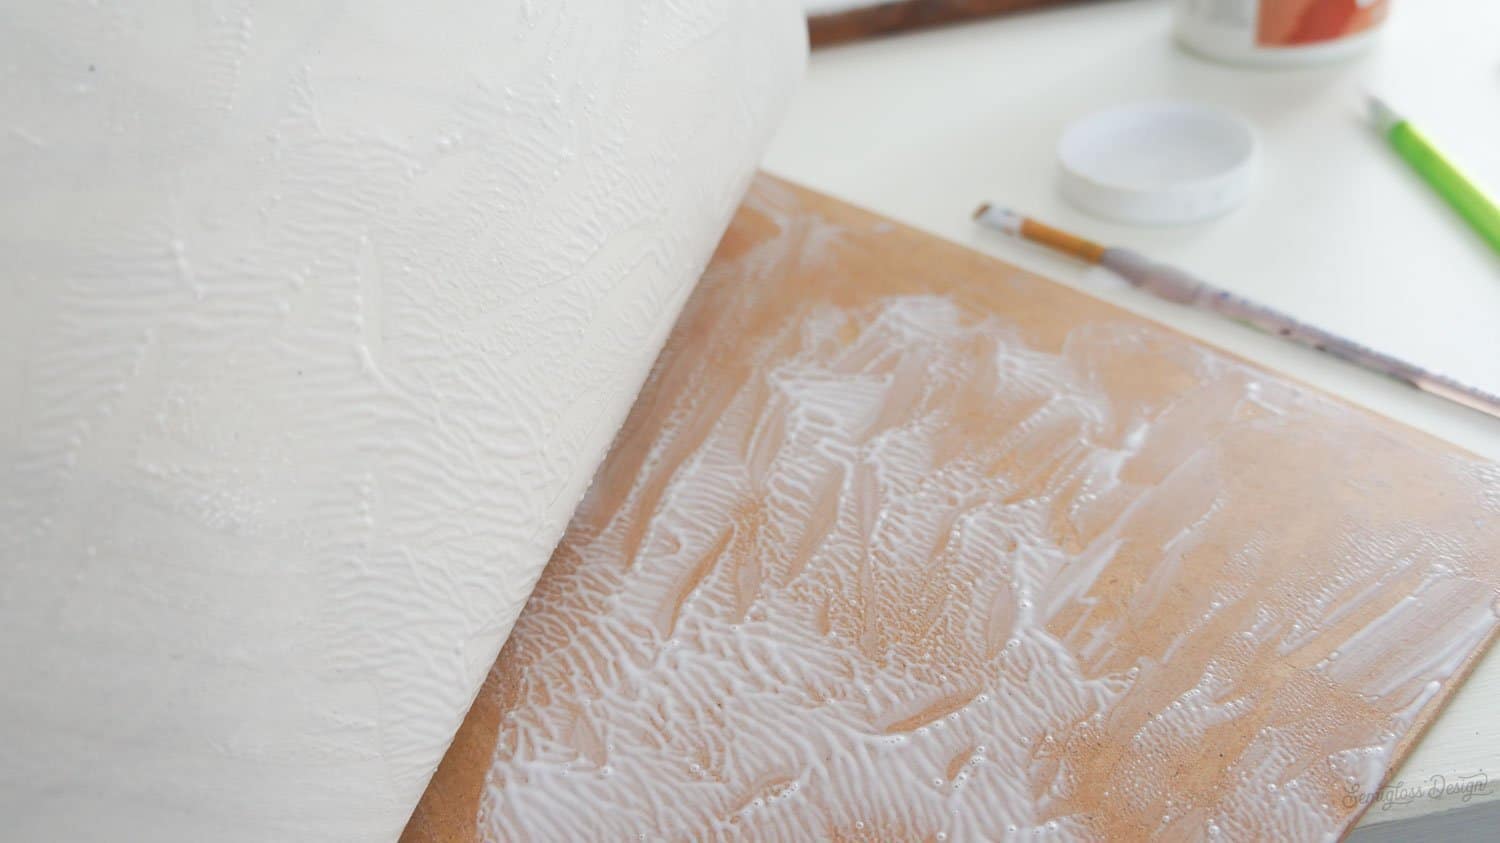
- Once it fits well, apply a thin layer on decoupage glue with a paint brush to the surface of the clipboard.
- Replace the paper, smoothing as you go.
- Be sure to get the edges well, including the top portion by the clip.
- If necessary, place heavy objects on top of corners where the paper wants to curl up.
- Let the glue dry.
- Enjoy your DIY clipboard.


You might also like:
Pin for Later!

Emy is a vintage obsessed mama of 2 DIYer who loves sharing affordable solutions for common home problems. You don’t need a giant budget to create a lovely home. Read more…