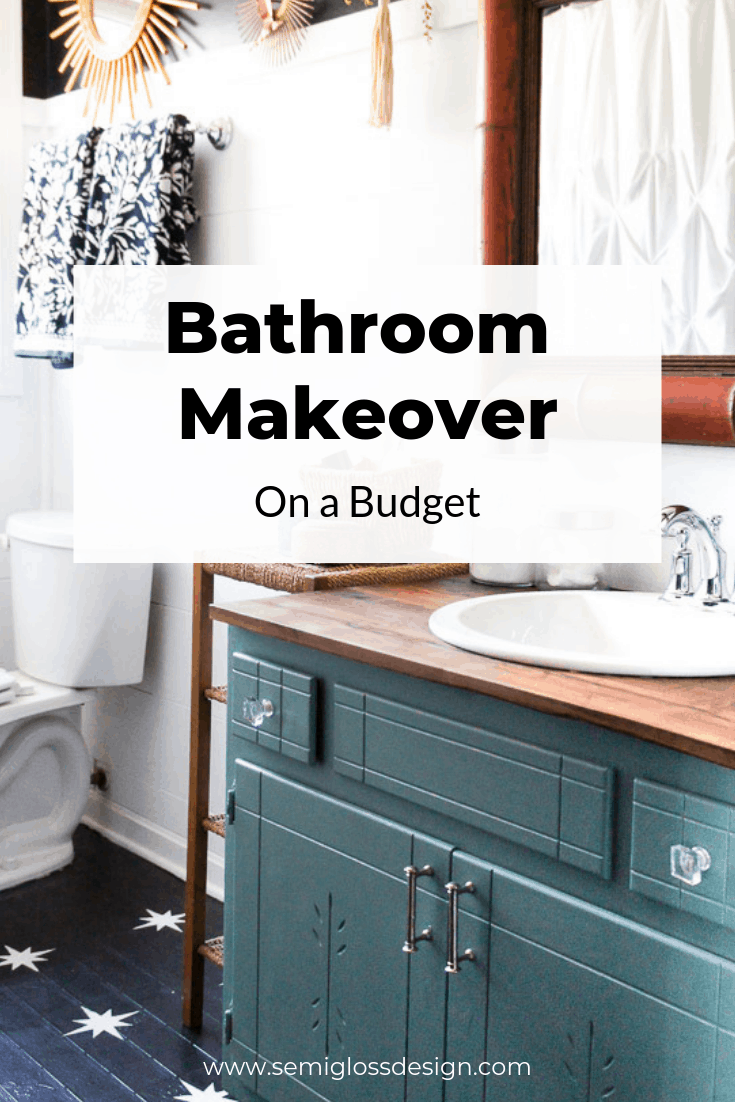
Bathroom Makeover with Paint: Bathroom Ideas on a Budget
Looking for bathroom ideas on a budget? I’ve shared my bathroom makeover full of fun DIY’s before, but I was feeling the itch to make some changes.
My bathroom was pretty cute before, but it didn’t feel like me. I completed it a few years ago, at a time when I was just desperate for one clean, finished space.
If you’ve done any renovations, you get that. My taste is evolving a bit and I wanted this space to reflect that.

Why a Budget Bathroom Makeover?
One day we will completely re-do the bathroom. It’s going to be pretty drastic because I want a deep tub. That day is not today.
Until then, it makes no sense to put in tile that we will have to rip out. I also considered these peel and stick tiles, but they were more work than I wanted to do.
Paint is cheap and makes a huge difference! Besides painting, I added a few new accessories and new towels, which we needed anyway.
Bathroom Ideas on a Budget
This post contains affiliate links. By purchasing an item through an affiliate link, I earn a small commission at no extra cost to you.
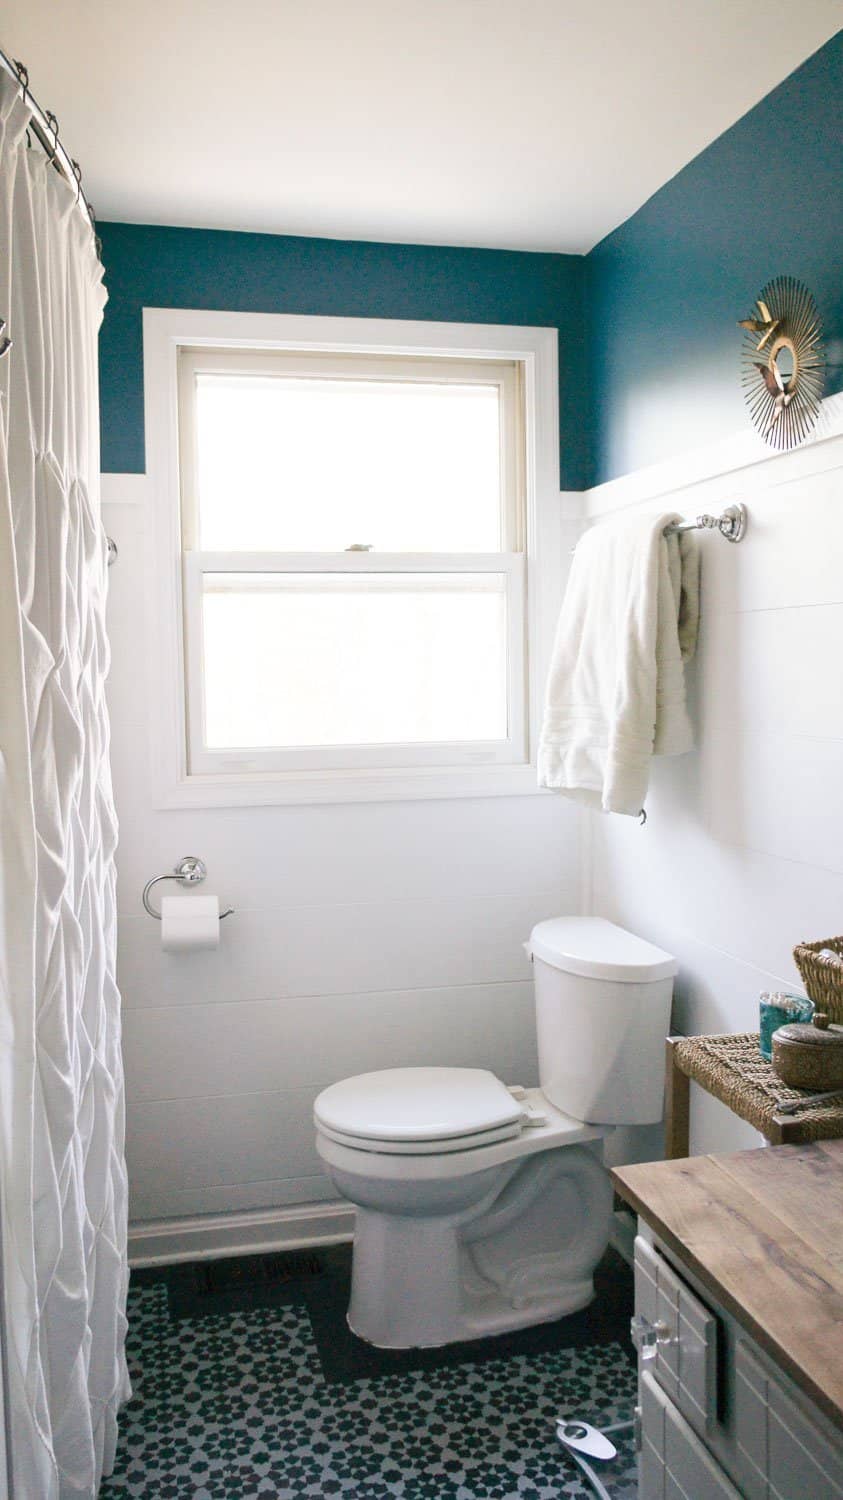
Here’s what I started with. Like I said, not bad. I just wanted a change that wouldn’t cost much money.
Tutorials
Bathroom Makeover After
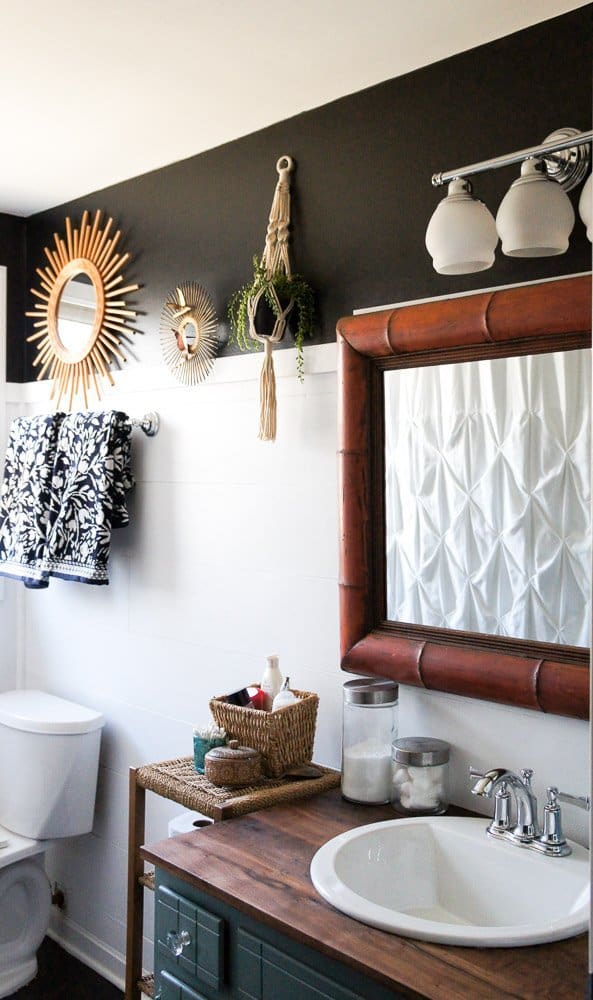
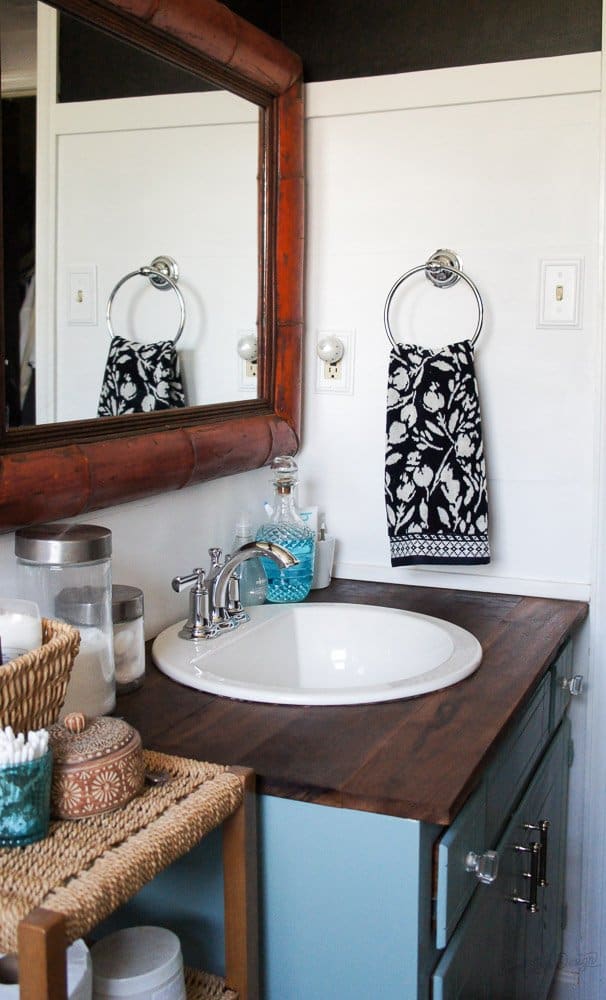
I repainted the top portion of the wall in Sherwin William Tricorn Black. This is my favorite black paint.
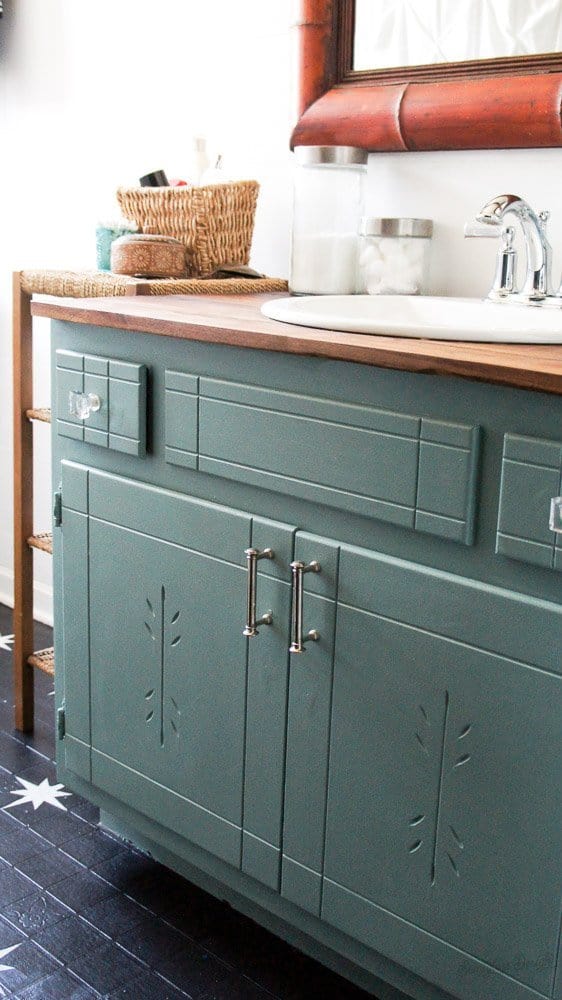
Using Rustoleum Milk Paint on a Cabinet
I repainted the vanity cabinet using Rustoleum Milk Paint in Highland Blue. It was my first time using this paint and I liked it.
It goes on like thin chalk paint, leaving a very matte finish. The color is a pretty aqua color.
It needed 2 coats with some touch-up. When it was dry, I applied 2 coats of polycrylic in matte to protect the finish.
Painting cabinets is pretty easy. Make sure they are clean.
You can remove the doors and hinges if you want, but since I plan on replacing the whole thing in the future, I just painted them without removing them.
If you leave the doors attached, leave them open while the paint dries.
Stenciling the Floor
This is just an overview. For a full tutorial, check out this post.
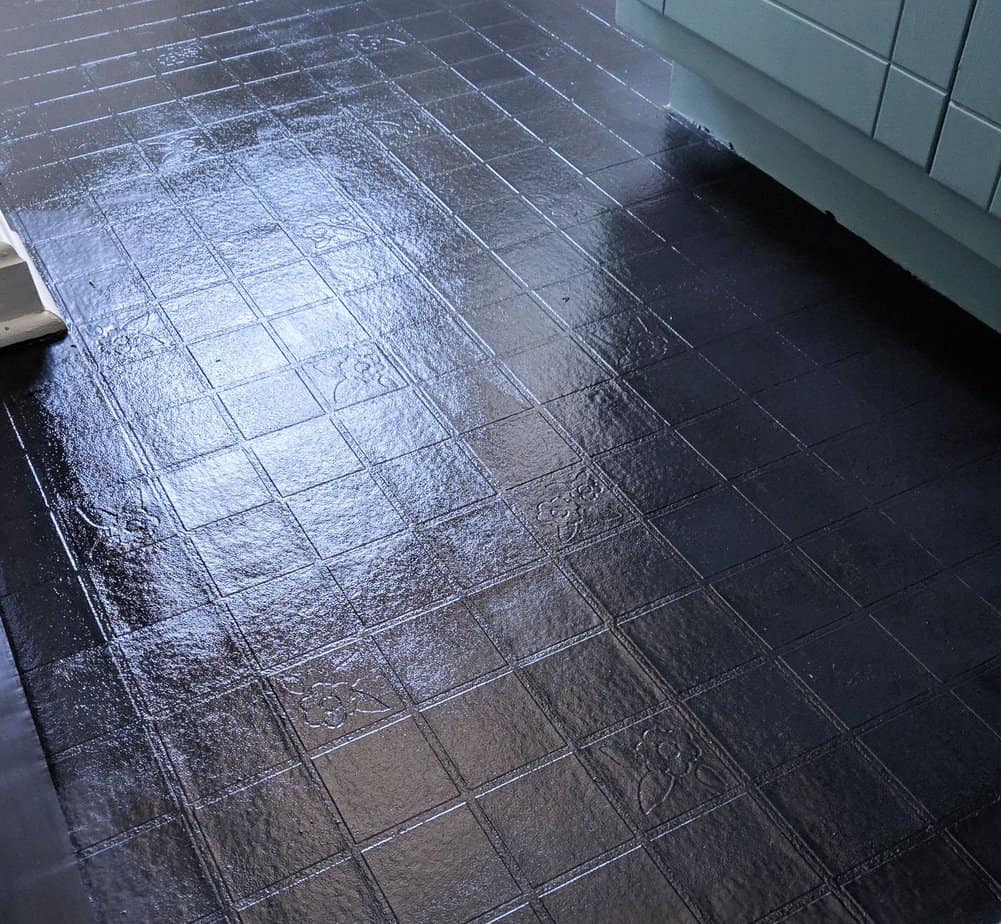
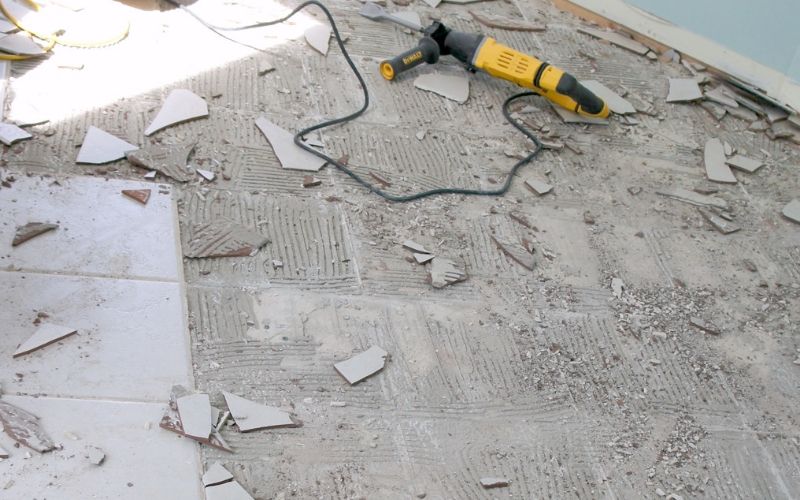
Then I started with repainting the floors. They were in pretty good shape, considering I painted them 3 years ago.
The only chips are where the floor itself is crumbling and where the caulk hit the paint on the floor. Those areas get wet a bit more, so I can understand that.
I cleaned the floor thoroughly and then started painting. Last time, I used Floor and Porch paint. The paint was dried up and my car was in the shop, so I decided to improvise.
I used my wall paint: Sherwin Williams Tricorn Black. Time will tell how it holds up. It needed 2 coats.
Edited to add: (DO NOT USE REGULAR LATEX PAINT. Use floor and porch paint instead! It holds up much better)
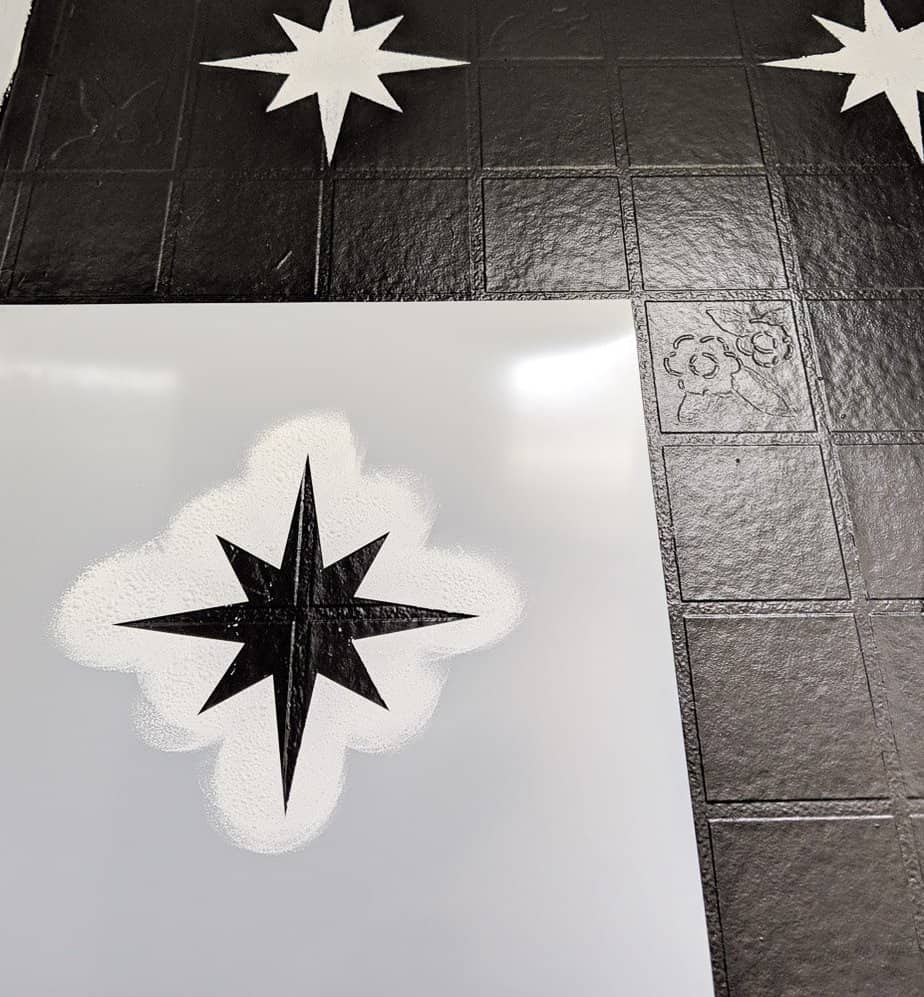
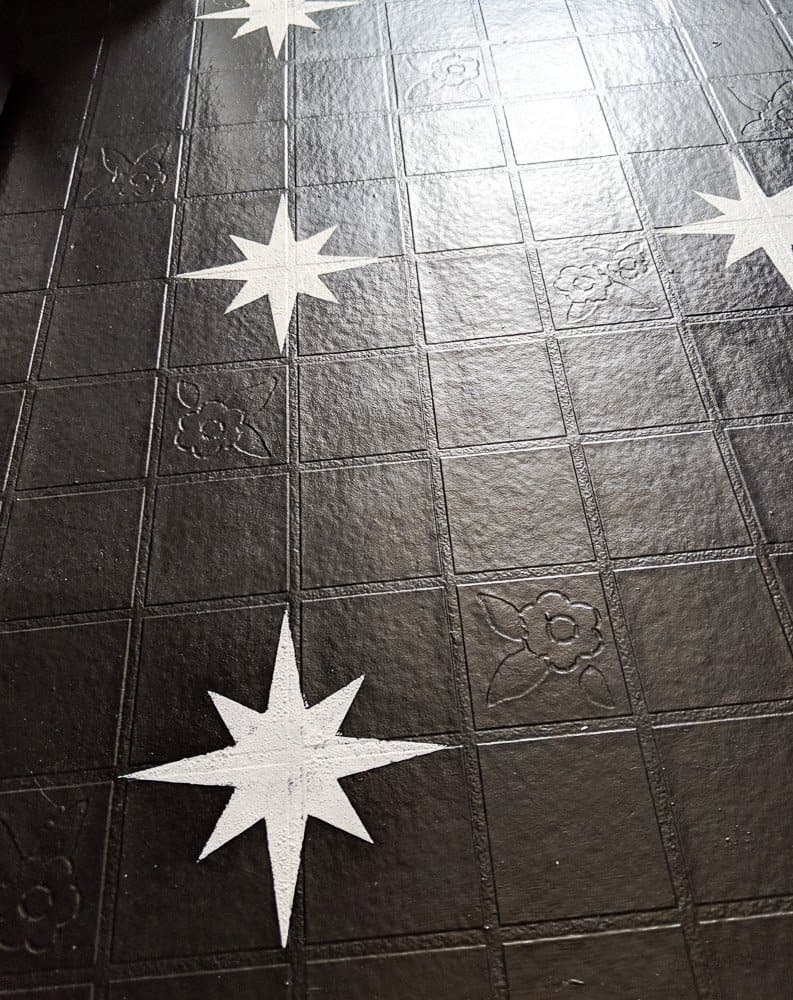
After the paint was dry, I added a stencil. It lined up perfectly with the grid of the vinyl. Each 12″ square got a starburst stencil painted on it.
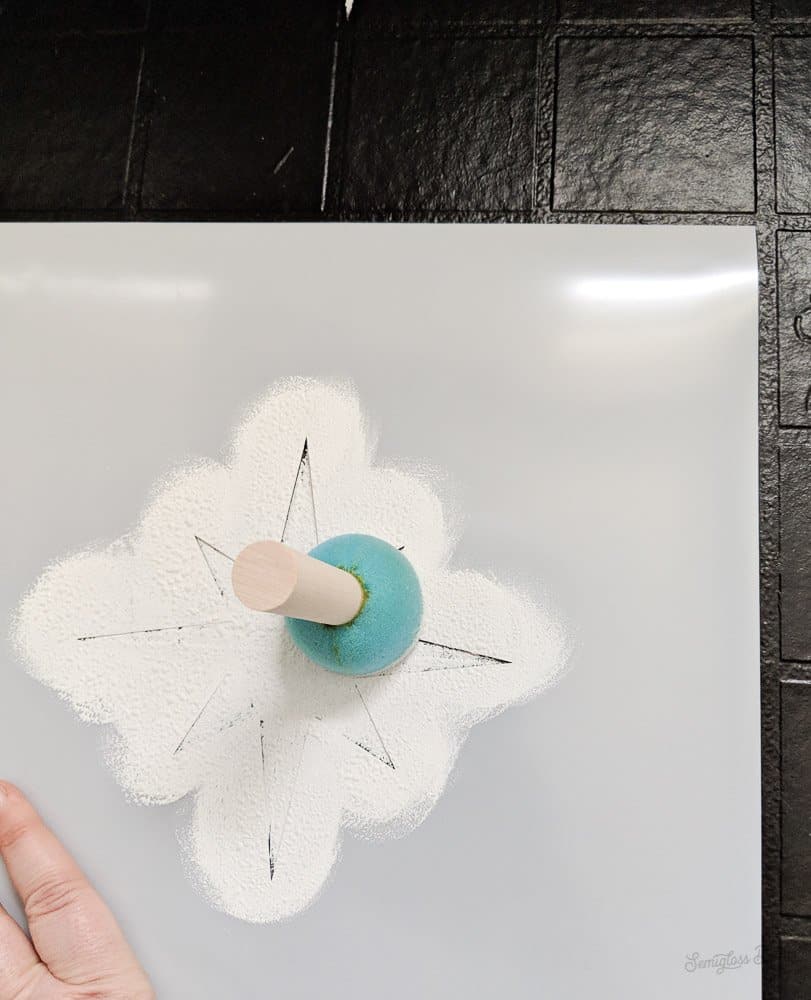
I like using a stencil pouncer because it’s easy to control the amount of paint that gets used. For more intricate stencils, I like to use a foam roller.
If you use a roller, make sure that it is almost dry. Too much paint will cause the paint to bleed under the stencil.
I used white chalk paint so that I could get good coverage: Valspar in Kid Gloves.
This stencil design is nice because it’s easy to get around objects like toilets. If you’ve ever stenciled a floor, you know that the edges and going around objects can be painful.
I cut this stencil using 7 mil mylar, which I really liked. It’s my first time using this material for stencils and I’ll stick with it.
The plastic is rigid, but it cut easily with my Silhouette. I used the settings: 9, 3, 33, Double pass.
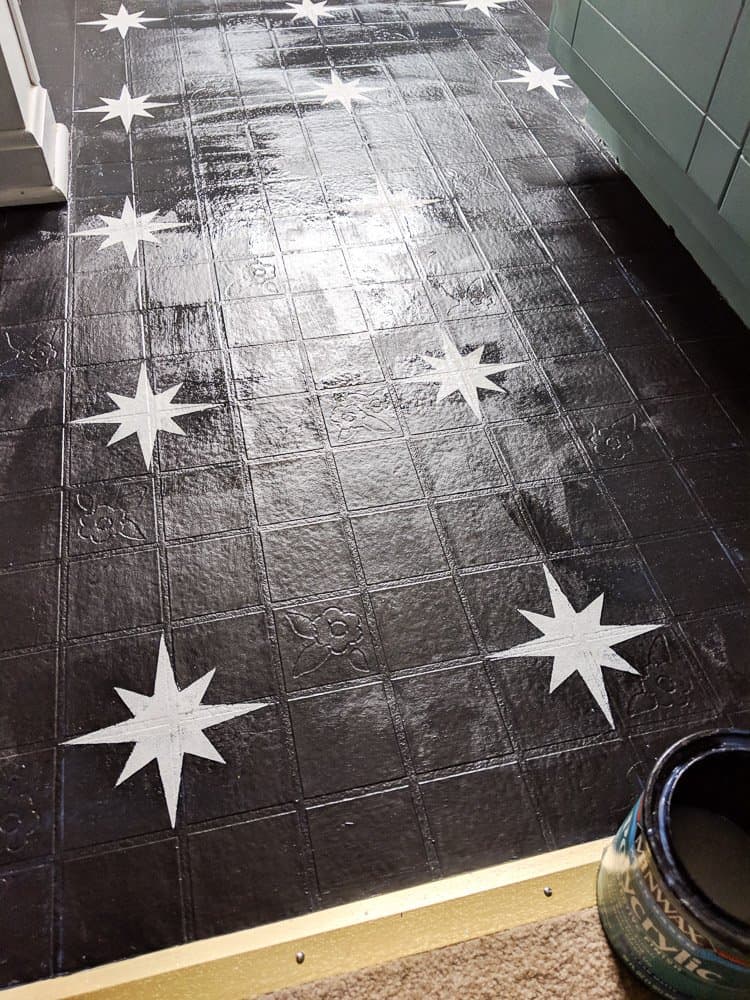
Once the stencil was dry, I applied a coat of polycrylic. Honestly, it still needs 1 more coat.
Finishing Touches
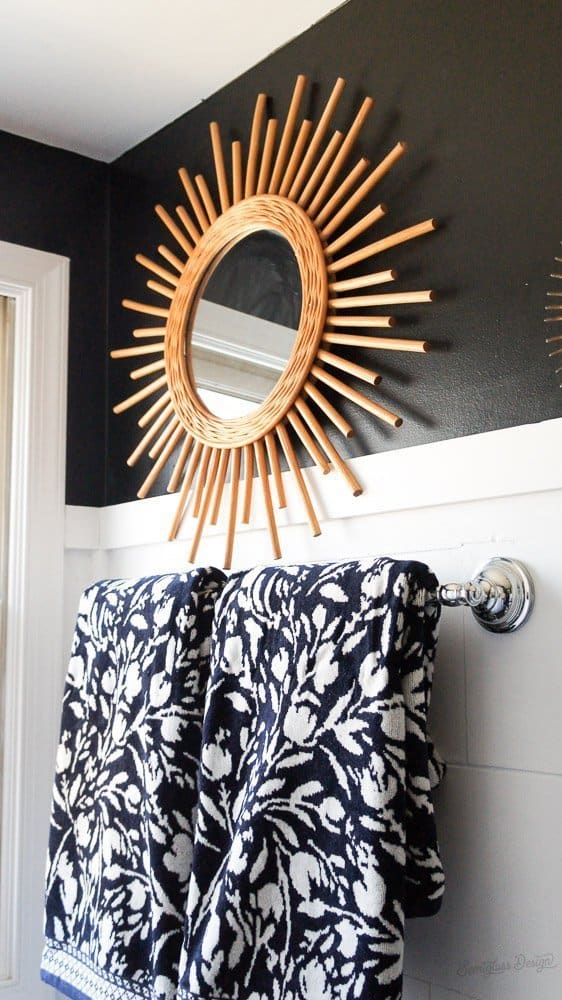
The towels are from the Opalhouse line at Target and were on clearance. Here are similar towels.
The mirror came from At Home, also on clearance. Here’s a similar mirror.
The brass sculpture was found at a thrift store a few years ago.
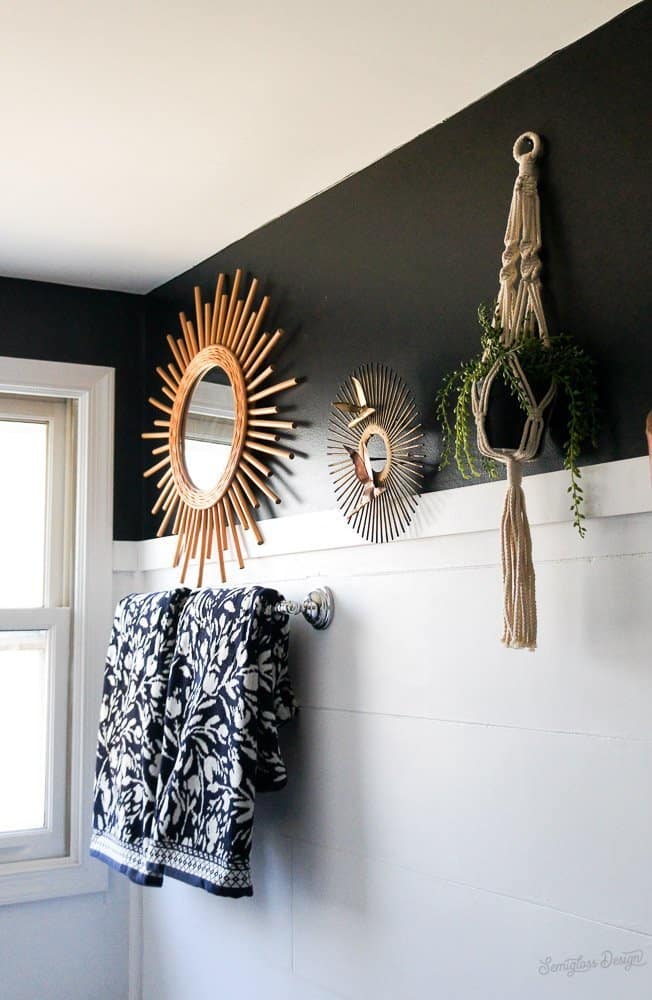
The macrame planter came from Michaels, (similar) and the faux plant is from IKEA. They have the best faux plants.
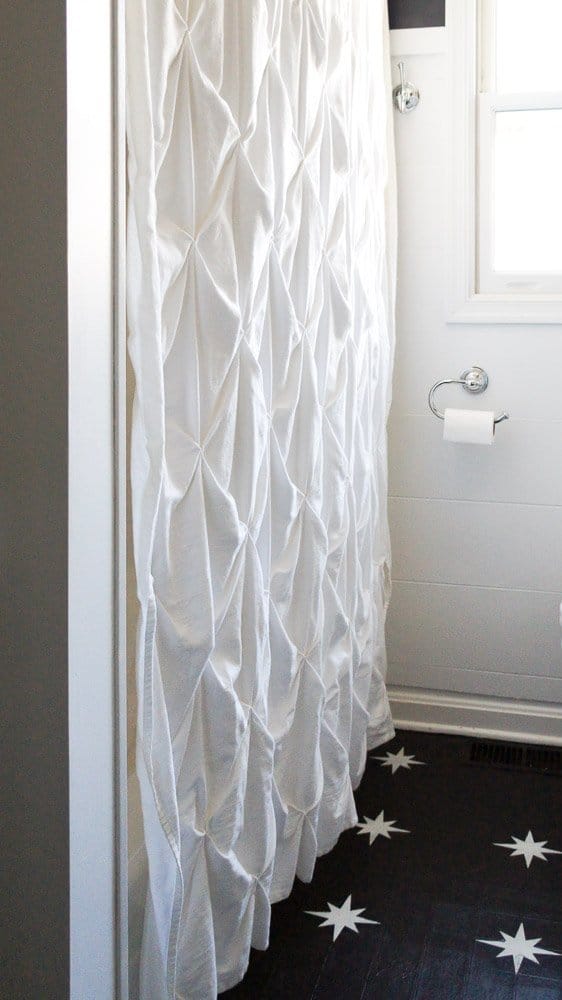
I’ve had the shower curtain for a few years.
I was so worried about the different wood tones/ bamboo/ rattan, but I love how much warmth they add!
What are your favorite bathroom ideas on a budget?
You might also like:
Pin for Later!

Emy is a vintage obsessed mama of 2 DIYer who loves sharing affordable solutions for common home problems. You don’t need a giant budget to create a lovely home. Read more…

i LOOOOVE what you did to the floor! so fun!
Thanks Cassie! Paint is so magical!
I absolutely love your second makeover better than the first. Colors, designs are wonderful. The only thing I feel doesn’t “fit” is the rattan mirror frame. It is pretty and I know you love it, but the genre just does not fit with the Americana/ Rustic theme. Of course it is totally up to to you, but at the very least, I would paint it to match the color of the vanity to tie it together.
Overall, a fabulous job!
I love the black walls with the white ship lap!! And I do like how you mix all the different textures together. I don’t like everything all matchy! ;). My only problem is the dang advertisements cover the pictures 🙁
Thanks for the compliment. Unfortunately ads are a necessary evil, especially when it’s the only income for my family at the moment. Thanks for understanding.