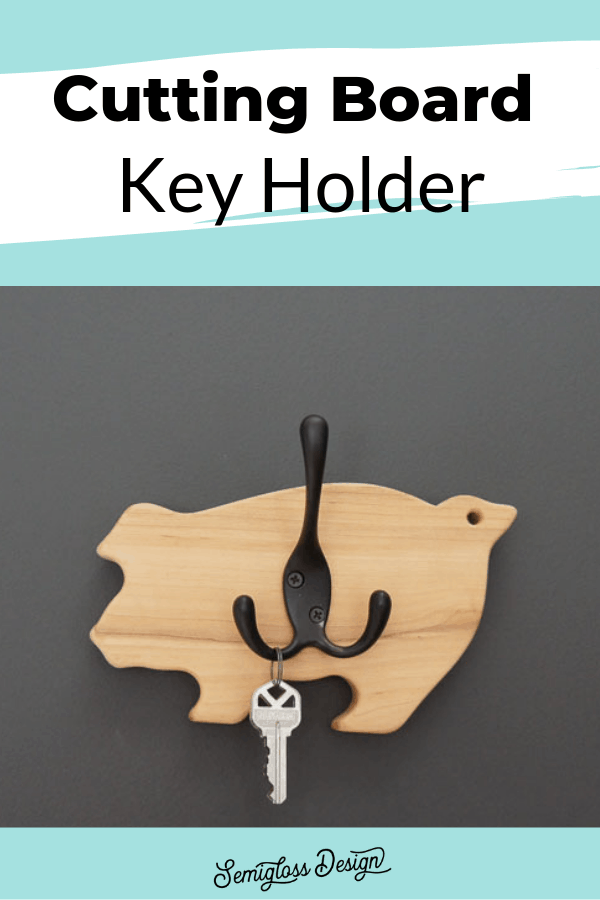
DIY Key Holder from Cutting Board
Learn how to make a DIY key holder from an upcycled cutting board.
One of the worst areas in our house is the entryway. Besides being the room where everything gets thrown, it doesn’t function well as an entryway. I’m working on improving it bit by bit. Making a DIY key holder is one of the easier projects, so far. No more searching for keys!
You might also be interested in reading more about a modern entryway makeover.
Cutting Board Before
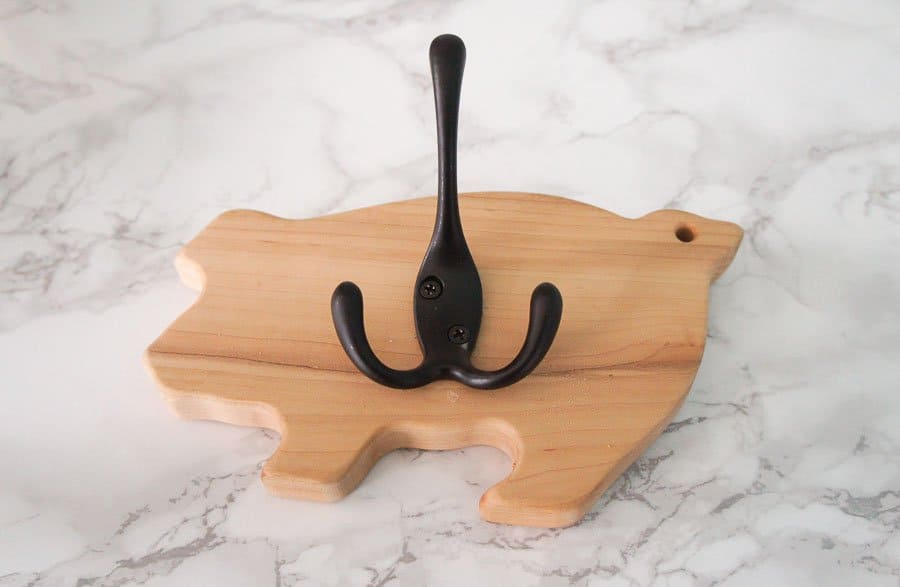
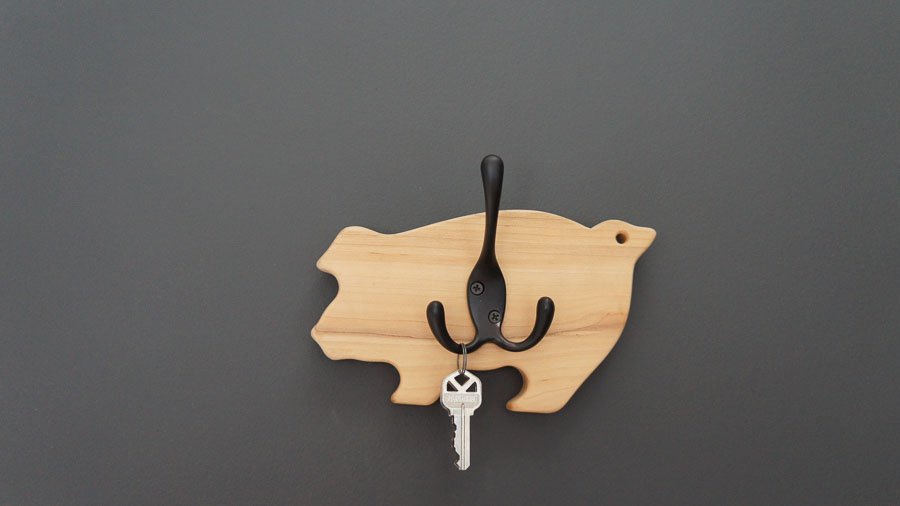
Cutting boards can be found at thrift stores for just a few dollars. I seem to have a knack for finding ones shaped like pigs (this is my 3rd one!) He’s adorable, but also way too small to actually work as a cutting board. So I turned him into a key holder using a hook that I already had.
This might be the easiest DIY project that I’ve ever done!
DIY Key Holder from Cutting Board
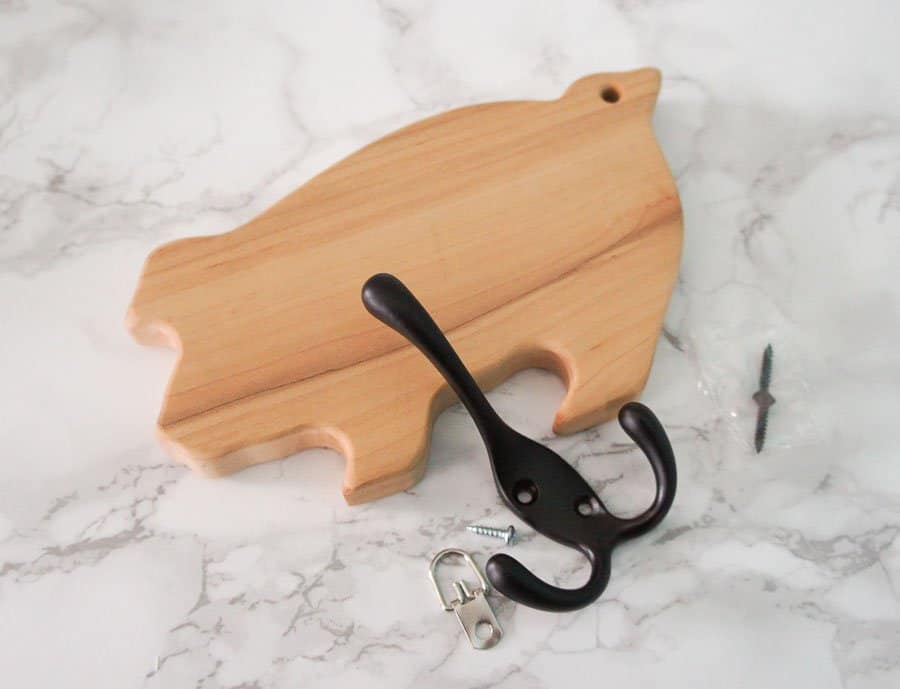
Supplies Needed
This post contains affiliate links. By purchasing an item through an affiliate link, I earn a small commission at no extra cost to you.
- Cutting board
- Hook (I used these, but smaller ones would have been cute too!)
- D Ring Hanger (I use these constantly, so I buy them in bulk.)
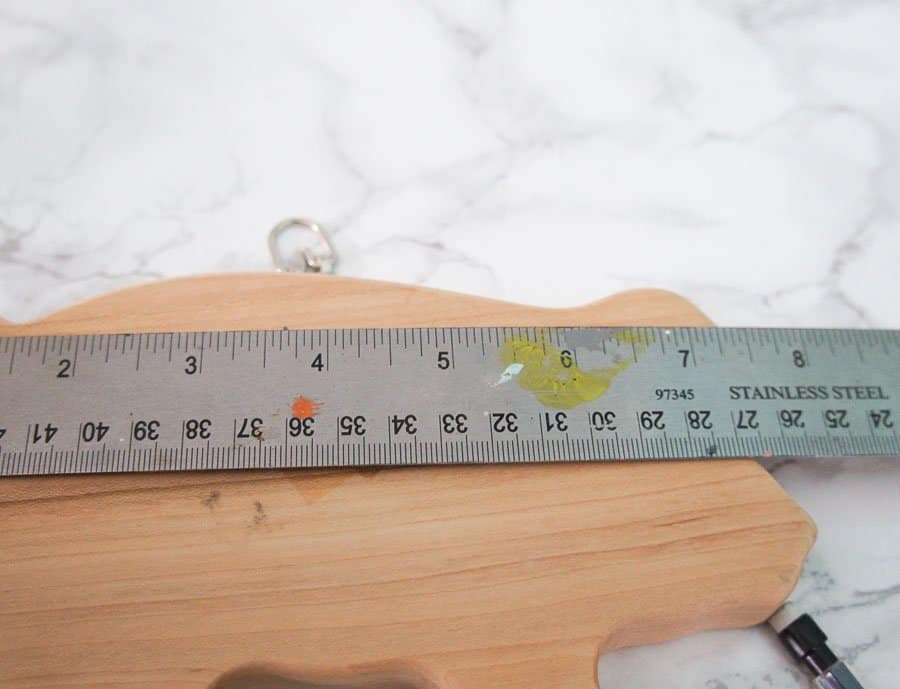
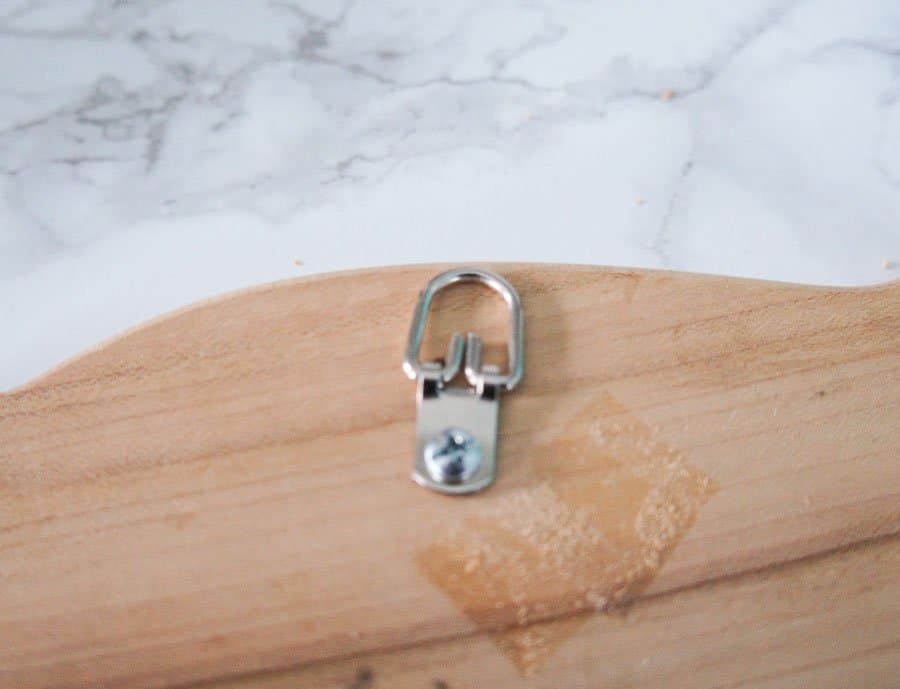
- Measure your cutting board to find the center and mark a spot on the back.

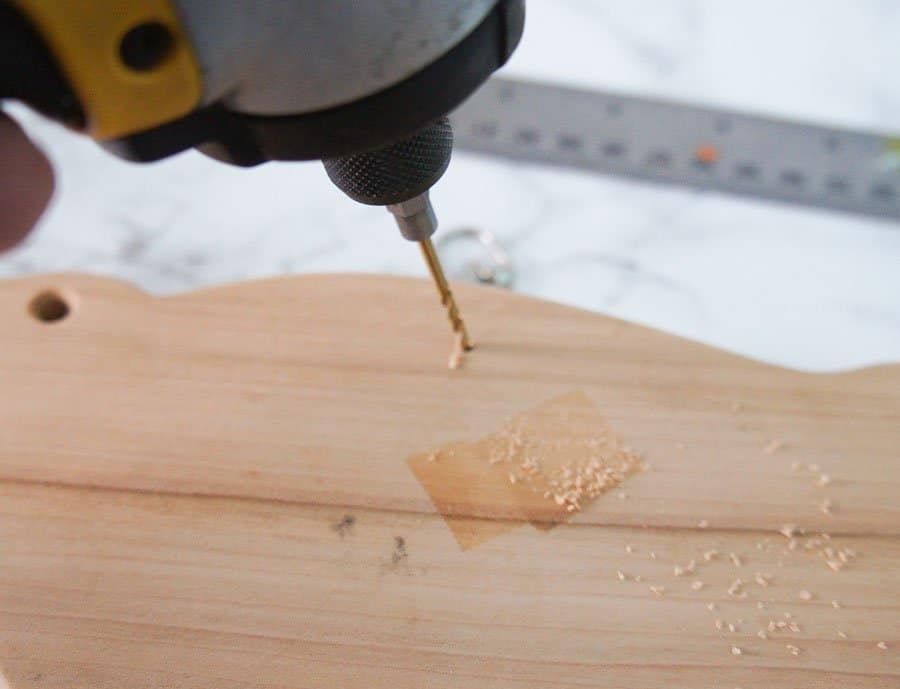
- Drill a pilot hole for your D-ring on the back of your cutting board. I don’t always drill pilot holes, but it was necessary because the wood was so hard.
- Place the D-ring onto the cutting board and attach it with a screw.
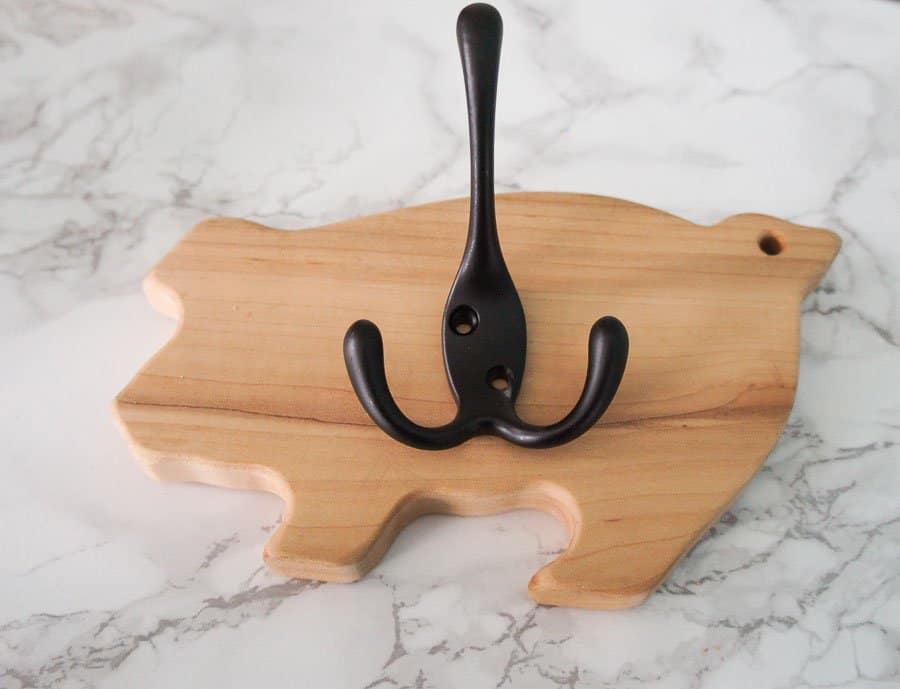
- Flip the cutting board over and find the center. Make a mark.
- Place the hook in place and mark where the holes are.
- Drill a pilot hole for each hook.
- Attach the hook with the screws.

- Hang your DIY key holder and enjoy.

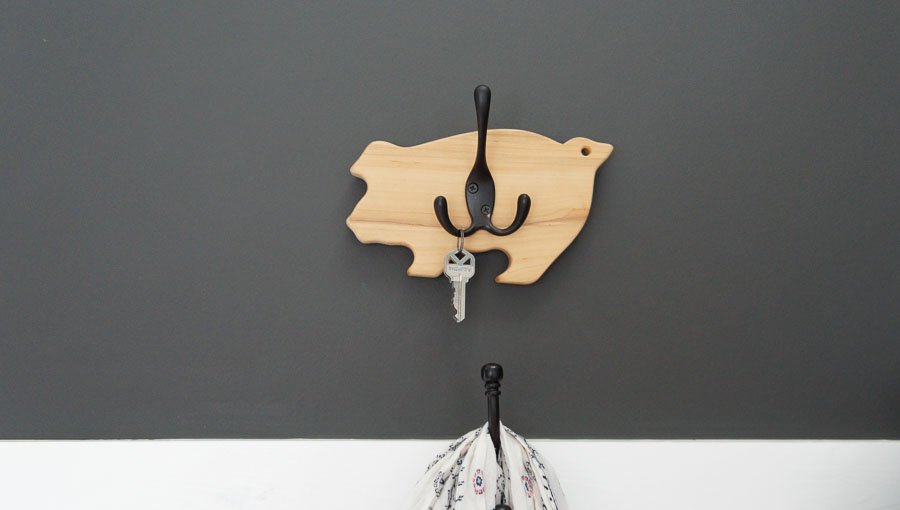
This little piggy went all the way home!

Emy is a vintage obsessed mama of 2 DIYer who loves sharing affordable solutions for common home problems. You don’t need a giant budget to create a lovely home. Read more…

This is so cute Emy! I love that you turned a cutting board in to something so functional 🙂
This is adorable! I always pick up cutting boards from the thrift store but have never seen one so cute. Pigs are one of my favourite animals too, theyr’e just so cute!!
So Cute! I would definitely pick up a pig (or other animal shaped) cutting board at the Thrift Store if I found one. This is a great way to reuse it!
OMG…this is so stinkin’ cute. Great job.
That little pig is so cute and it will always remind you of the love your daughter had for pigs.
This is sure to bring a smile everytime you get your keys. It is so cute.
This little pig is just too cute! I love how you were able to display it and turn it into something useful! Great job!
I seem to always pass the cutting boards by in a thrift store and I don’t know why. This is so cute and super simple. I love it!
I’m on an organization kick too! The Kon Mari Method is so motivating. Love this key holder!
Crafts that help me organize my home and make it look pretty at the same time, are my favorite. Love your little piglet key hanger.
So cute! I’m always losing my keys, so this would be a great project for me!