Old Tray Upcycled to DIY Magnetic Board
Learn how to make a DIY magnetic board from an old tray! You might also like this DIY dry erase calendar idea.
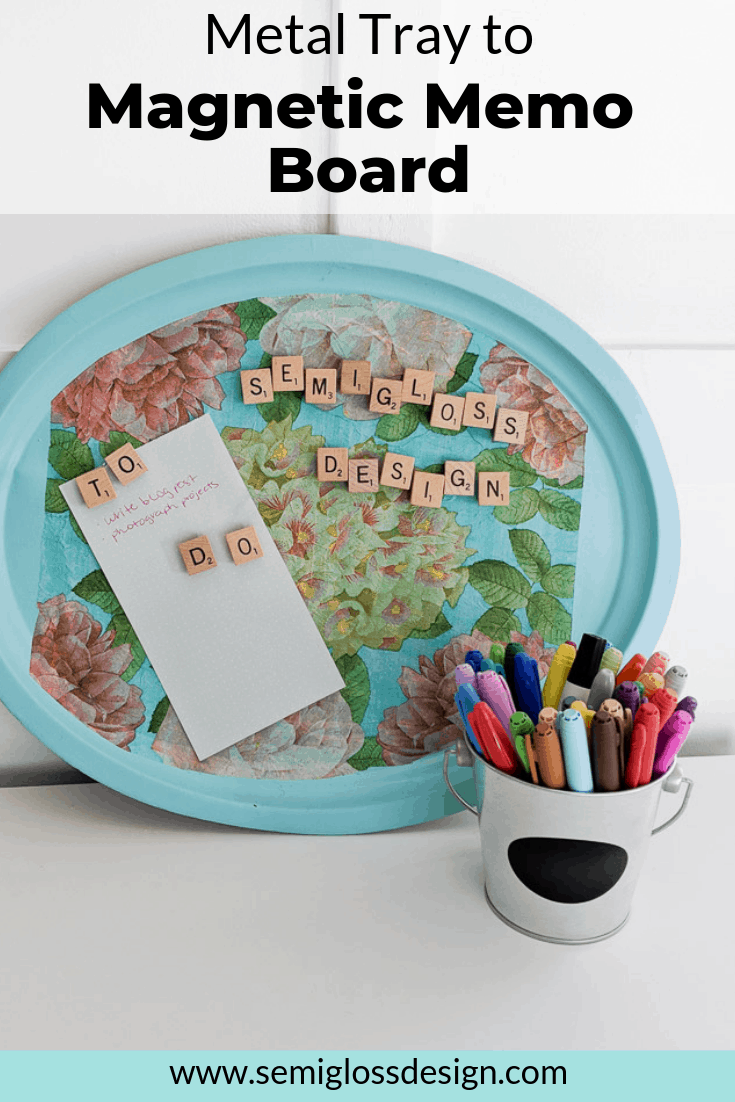
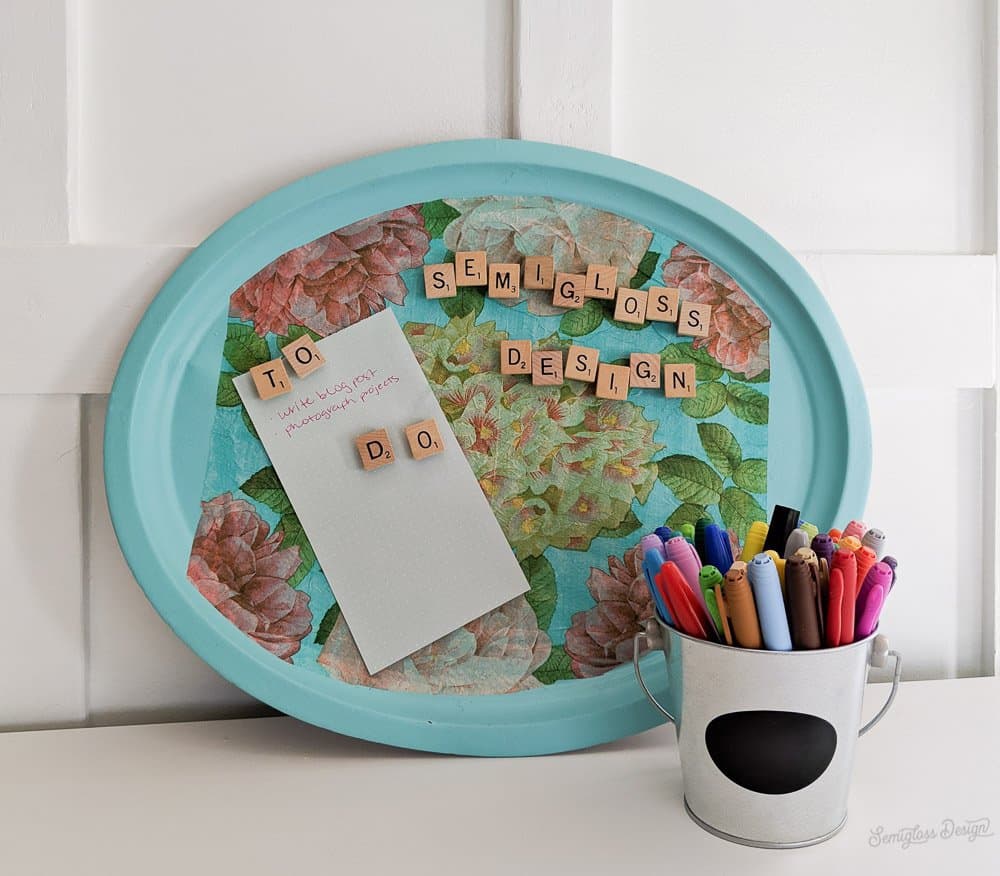
It’s time for another thrift store challenge. Last month, I made faux terrariums with old jars. This month, I made a magnetic memo board for my newly repainted office nook. I used an old tray that had seen better days for this project.

The Rules:
- Upcycle an item(s) from a thrift store, resale store, or garage sale into a new piece of decor.
- There’s no monthly theme.
- There’s no budget to stick to.
Meet the Hosts
Angela | Simply Beautiful By Angela – Deborah | Salvage Sister & Mister – Angie | Flippin Fanchers – Denise | My Thrifty House –
Jenny | Cookies Coffee and Crafts – Lynne | My Family Thyme –
Meredith | Southbound Blog – Marie | The Inspiration Vault – Gail | Purple Hues and Me – Molly | Just a Little Creativity –
Pili | My Sweet Things – Amanda | Domestically Creative – Ali | Home Crafts By Ali – Carmen | Living Letter Home –
Emy | Semigloss Design – Jeanie | Create and Babble – Marie | DIY Adulation – Heather | Glitter On A Dime
Make sure you follow our board on Pinterest for more upcycled decor inspiration!
DIY Magnetic Board from Upcycled Tray
Supplies Needed
This post contains affiliate links. By purchasing an item through an affiliate link, I earn a small commission at no extra cost to you.
- Old metal tray
- Spray paint
- Decorative napkins
- Decoupage glue
- Paintbrush
- Scissors
- E-6000 glue
- Picture Hanger
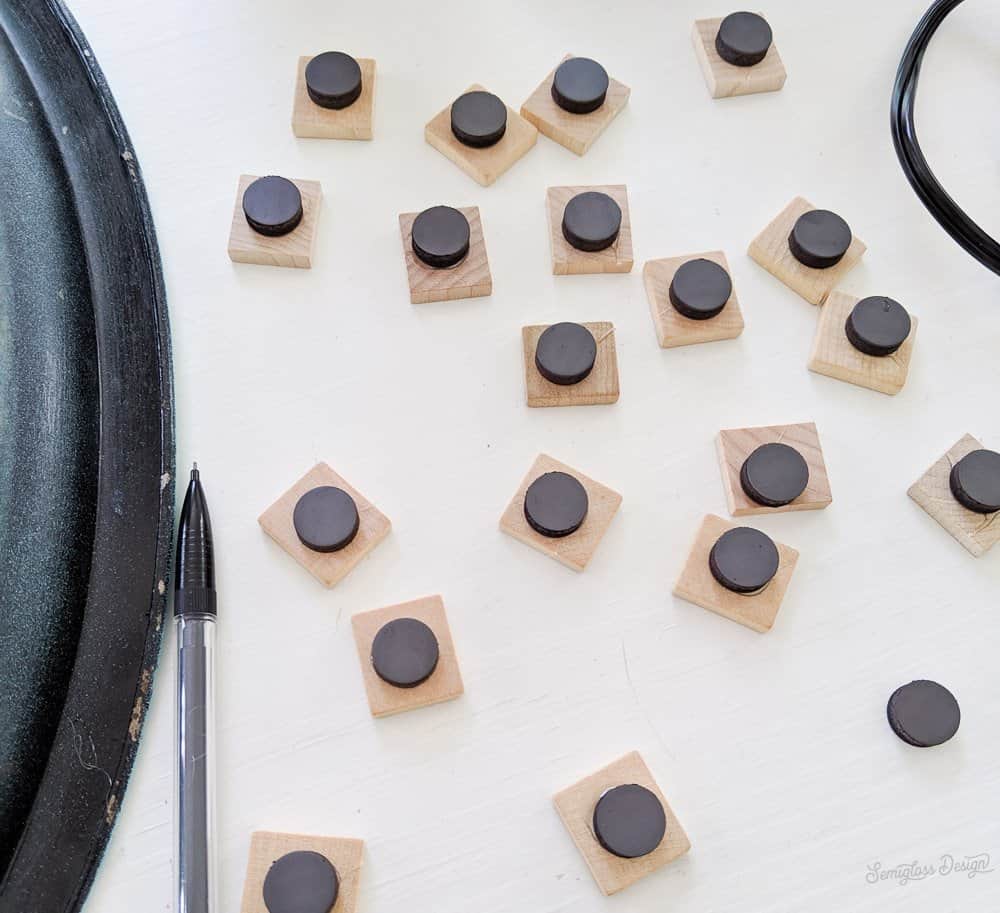
- Scrabble tiles
- Magnets
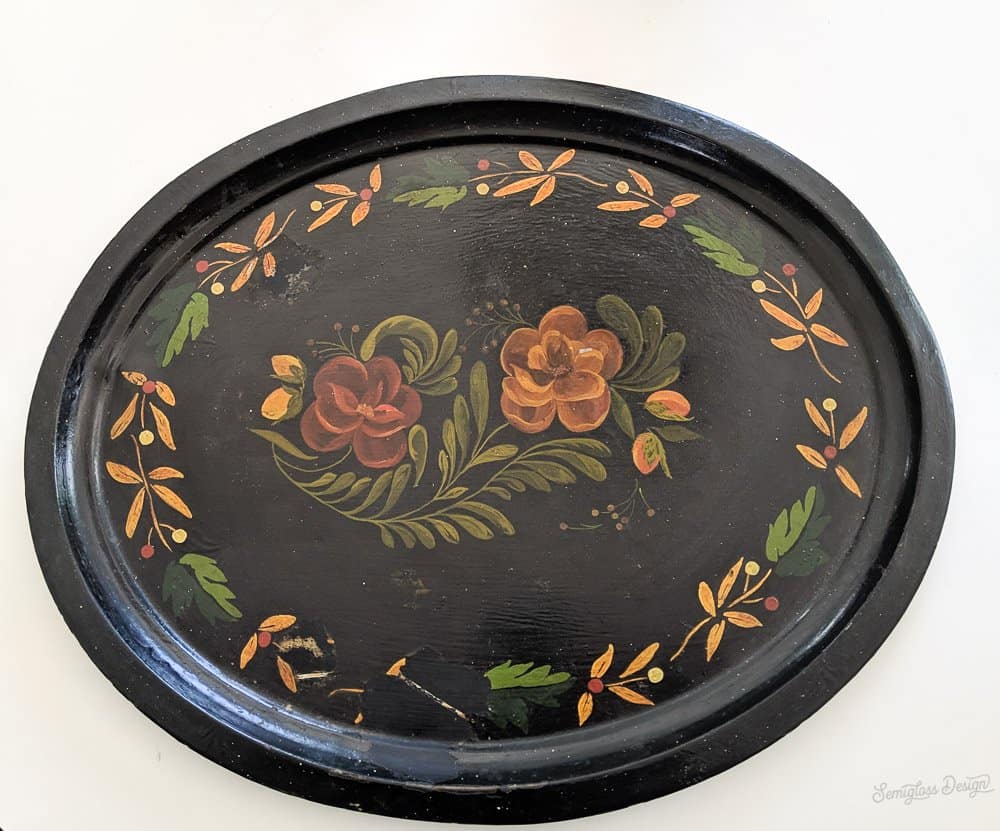
- Clean your tray well. Mine had some chippy paint, so I lightly sanded it before cleaning it.

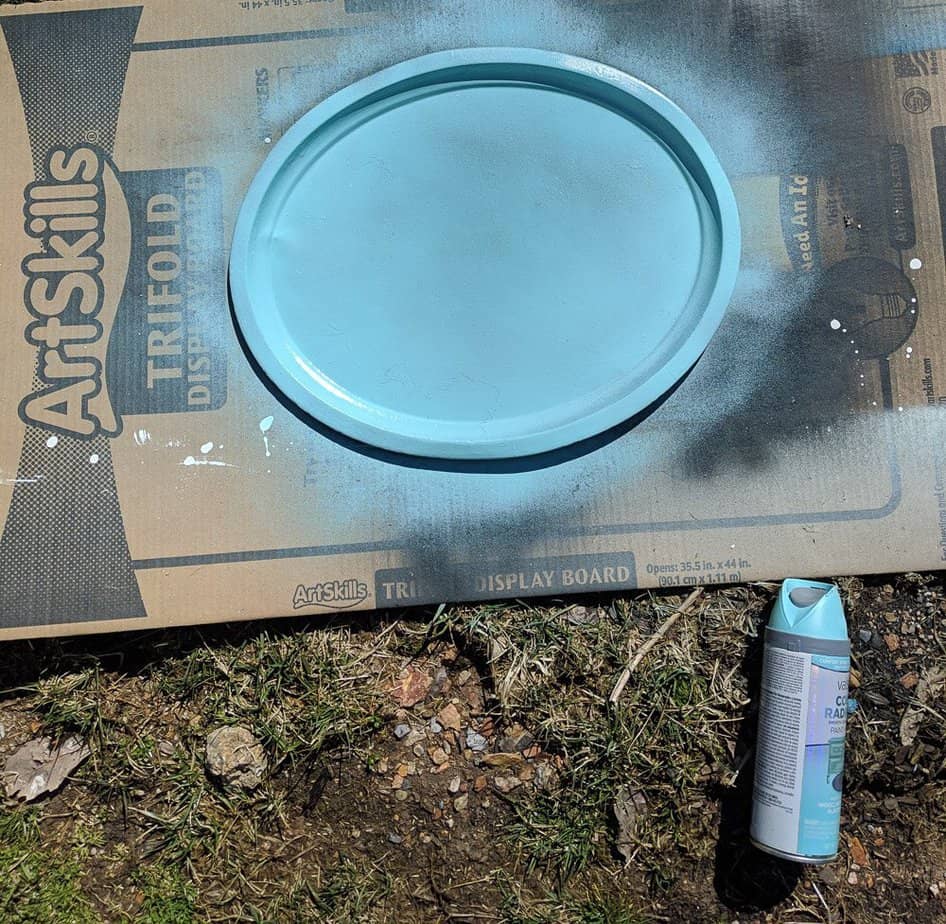
- Spray paint your tray. Do several light coats for full coverage. (Keep in mind that your napkin is transparent, so the color of your tray will show through.)

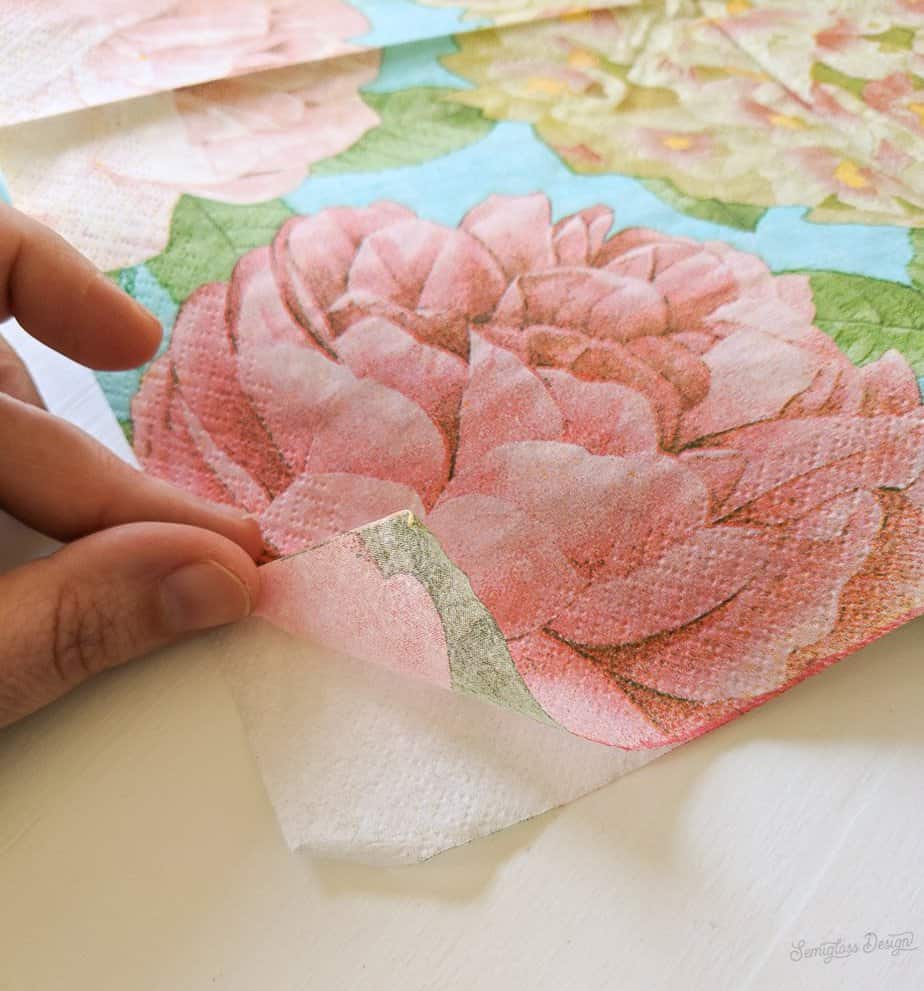
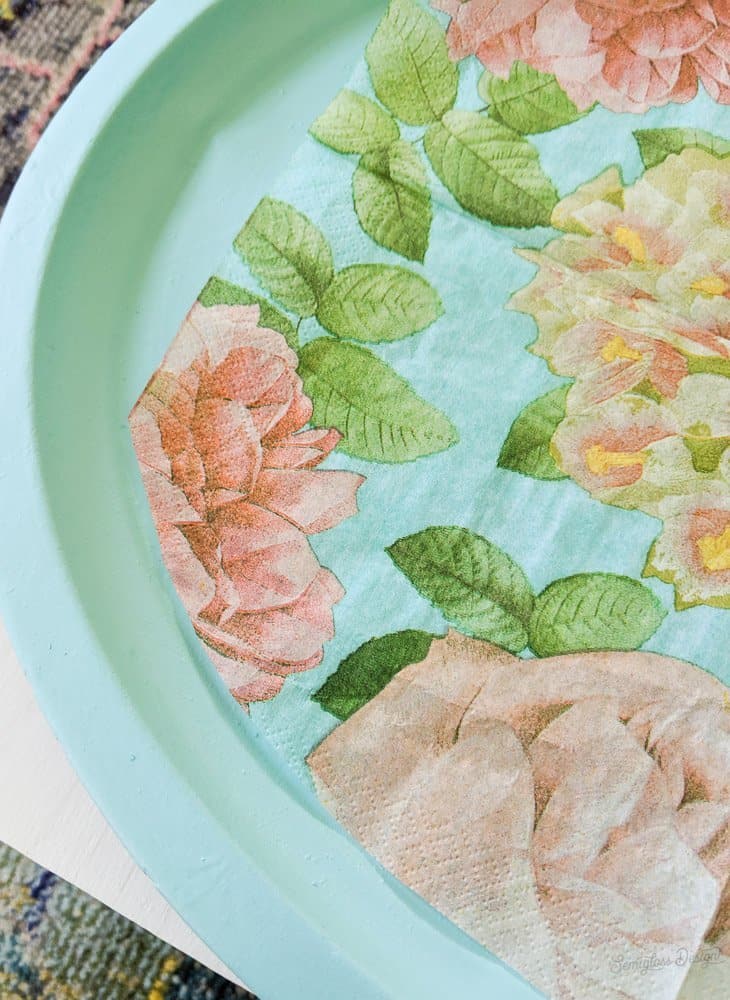
- Once the paint is dry, it’s time to decoupage with napkins. Separate your napkin. Most are 2-3 ply, so each layer comes apart. Rolling the corner between your fingers helps to peel it apart.

- Lay it out on the tray and trace around the edge with a pencil.
- Trim the lines your marked.

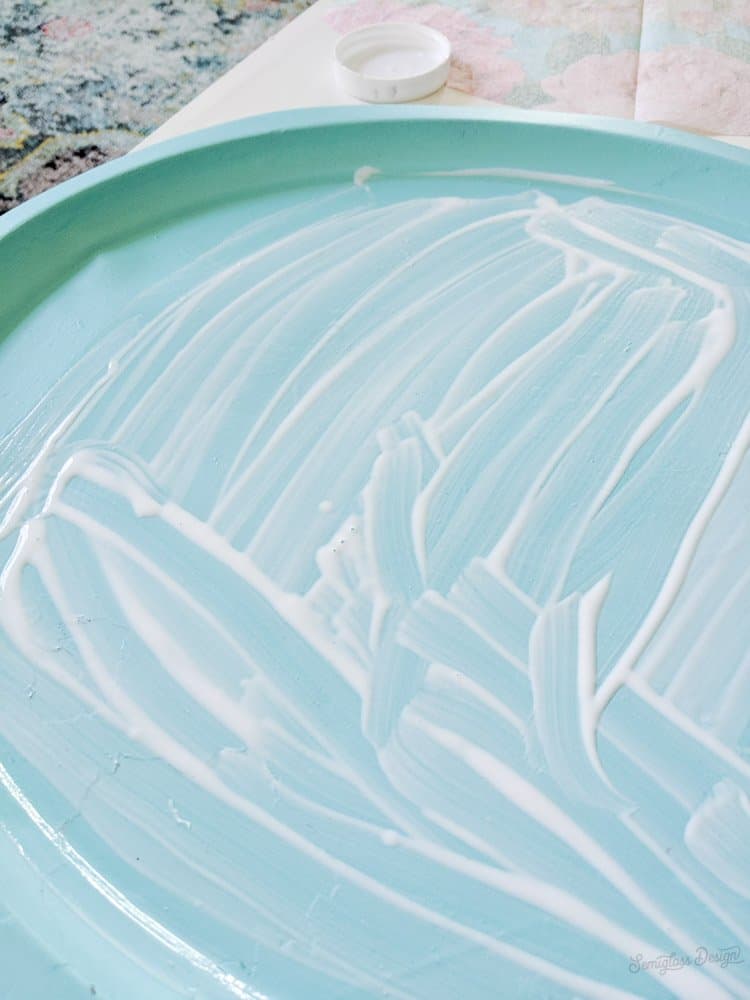
- Paint on a generous coat of decoupage glue.

- Lay the napkin in place, smoothing as you go. Wrinkles are okay. Just keep smoothing them out.

- If any edges are loose, add glue to the top and it will soak through.
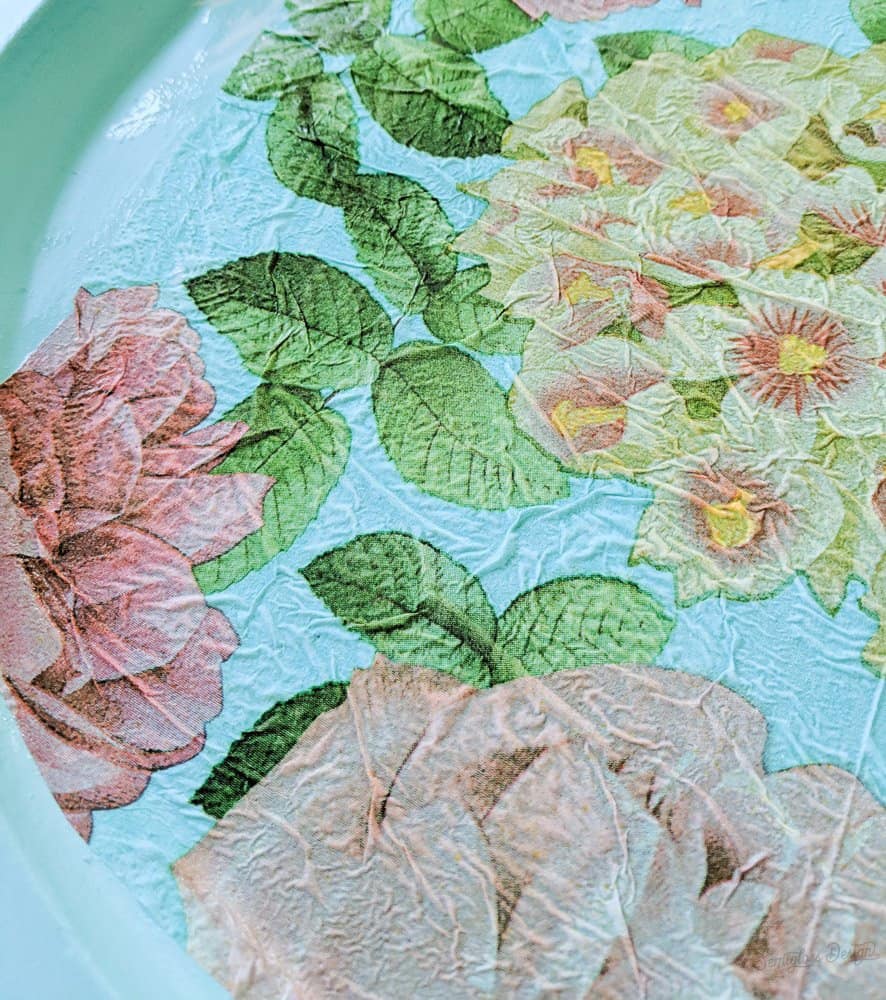
- Let the glue dry and add another coat to the top of the napkin.
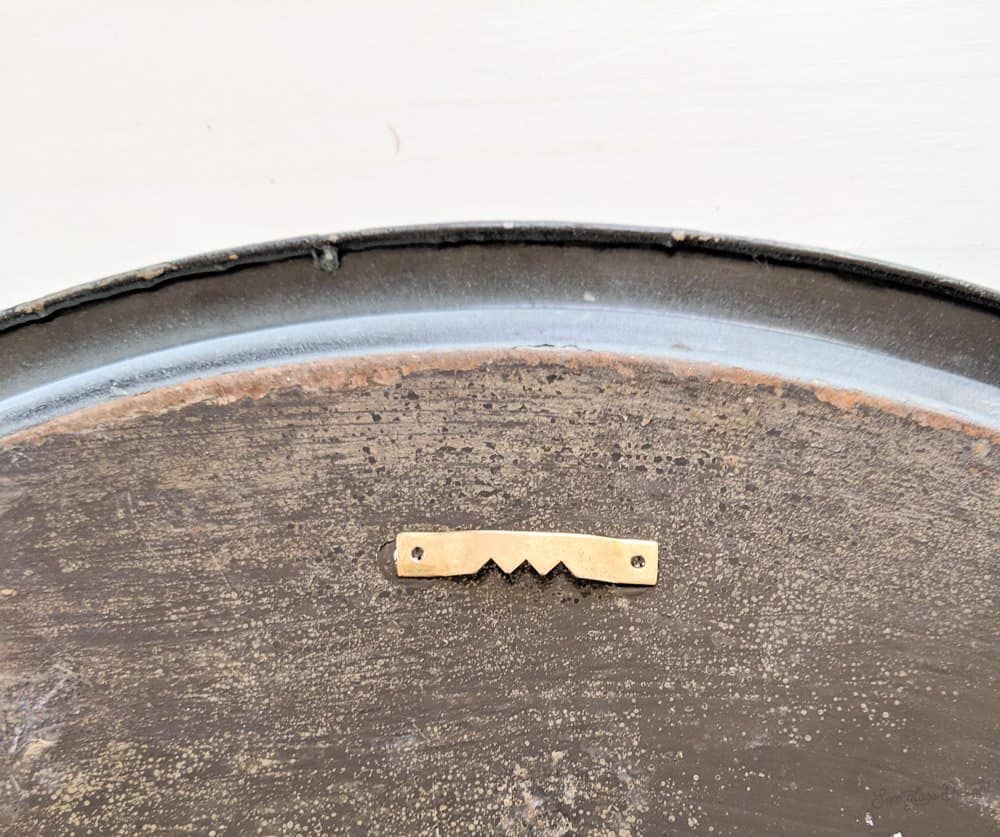
- Use E-6000 glue to attach a picture hanger to the back of your tray for hanging.

- Attach scrabble letters to magnets using E-6000 glue.

- Hang your magnetic board and use your fun Scrabble tile magnets to create a magnetic memo board.

And now for more thrifty goodness!

Emy is a vintage obsessed mama of 2 DIYer who loves sharing affordable solutions for common home problems. You don’t need a giant budget to create a lovely home. Read more…
Really love the color combo you did!!!
This is adorable! What a great idea to do with an old tray.
This is amazing Emy! I would never have guessed that those are napkins on there 🙂
I love those little magnet scrabble letters and the decoupage is beautiful!
Clever idea with the scrabble tiles. Great job.
This is so fun! The colors go together beautifully and I love the scrabble tile magnets.
What a fun project! A friend of mine loves using that technique with the paper napkins but I have never tried it. It turned out so pretty on this tray.