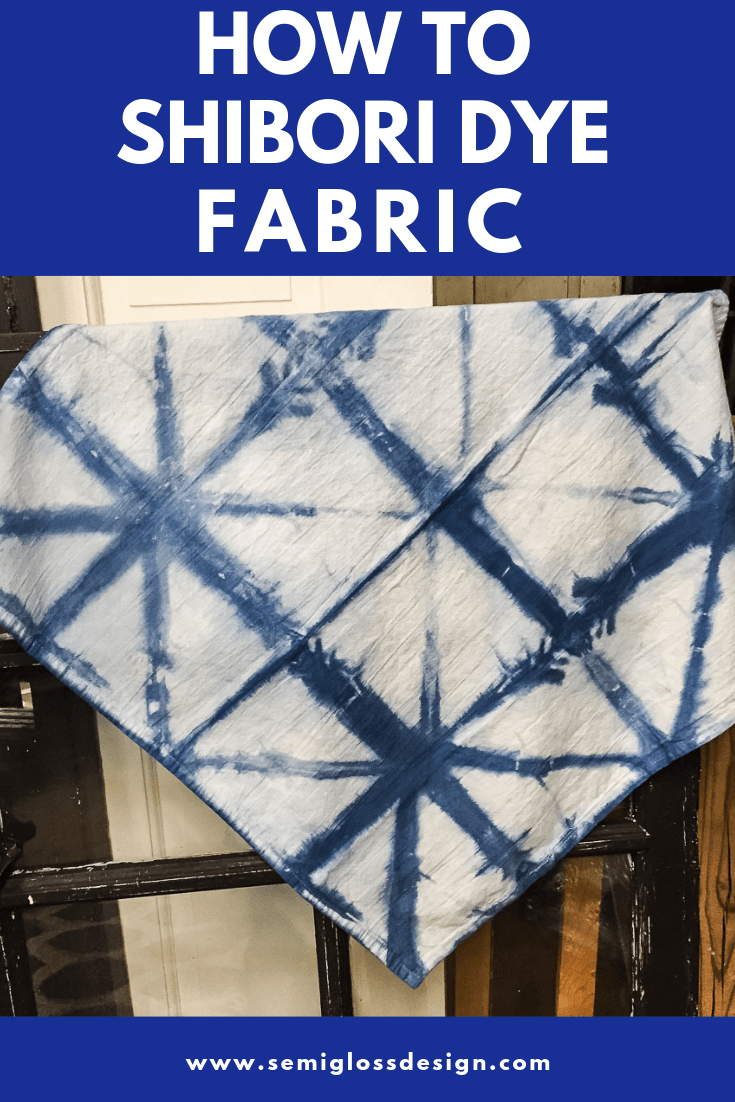
Learn How to Shibori Dye Fabric: Tips and Tricks
Learn how to shibori dye textiles with this easy tutorial. This tutorial uses indigo dye to create beautiful dyed textiles. Blue has always been my favorite color, so naturally I adore indigo.
Shibori is one of my favorite dyeing methods and I’ve used it before on my shibori dining room chair slipcovers. I’ve even painted shibori on my walls!
I dyed napkins, table runners and tea towels using three different folding methods.
Looking for a fun way to create your own textiles? Read more about how to shibori dye!
Shibori FAQs
What is shibori dye?
Shibori is a Japanese dyeing technique that involves folding or bunching fabric to create patterns. Wood is often used to create resists (places where the dye can’t go.) The shape of your wood or fold will determine the pattern.
Will dye stain my bathtub?
Dye has never stained my tub. My bathtub is enamel and is pretty easy to clean. I made a huge mess during this process and plan on using my utility sink next time.
However, it didn’t stain my tub, but I was worried this time! I scrubbed the tub with comet and it was fine.
A magic eraser or scrubbing with comet should take care of any stray spots.
Can you use rit dye for shibori?
You can use rit dye for a shibori technique, but the results aren’t quite the same. I use the Jacquard dye kit linked below that uses natural indigo dye instead of synthetic dye.
Natural indigo dye is so fun to work with because it changes colors when exposed to air.
Besides, Jacquard is always my choice for dye because the colors are vibrant and don’t fade with washing. I’ve never had good results with rit dye.
What is soda ash?
Soda ash is also known as sodium carbonate. It’s used to bind the dye to the fabric, so that it won’t fade or rub off like cheaper dye is known to do.
How to Shibori Dye
Supplies Needed
This post contains affiliate links. By purchasing an item through an affiliate link, I earn a small commission at no extra cost to you.
- Indigo Dye Kit*
- 100% Cotton textiles (I used these tea towels)
- 5 gallon bucket
- Wooden stick or dowel
- Scrap wood cut into triangles
- Extra Rubber bands
- Twine
*This dye kit is enough for a LOT of fabric. I dyed 8 tea towels, 4 long table runners, a pillow case and 4 napkins and there was still plenty of dye left. Invite some friends over for a dyeing party!
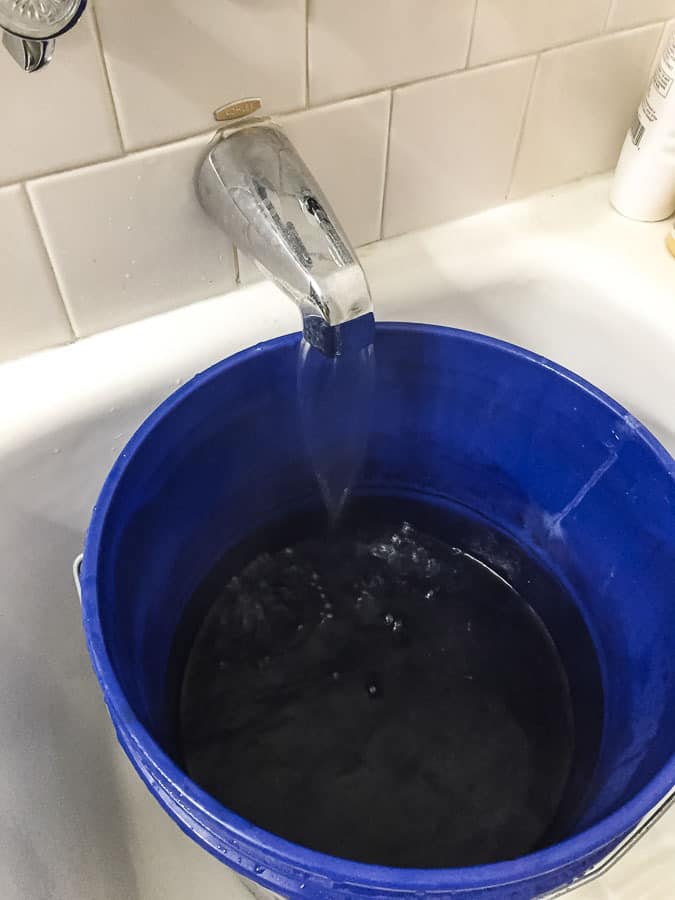
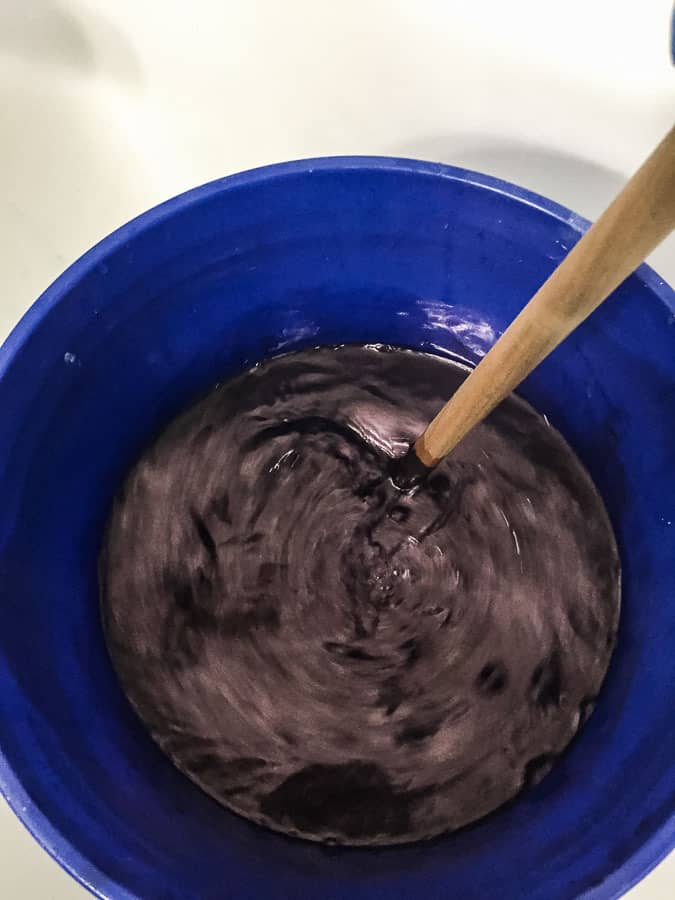
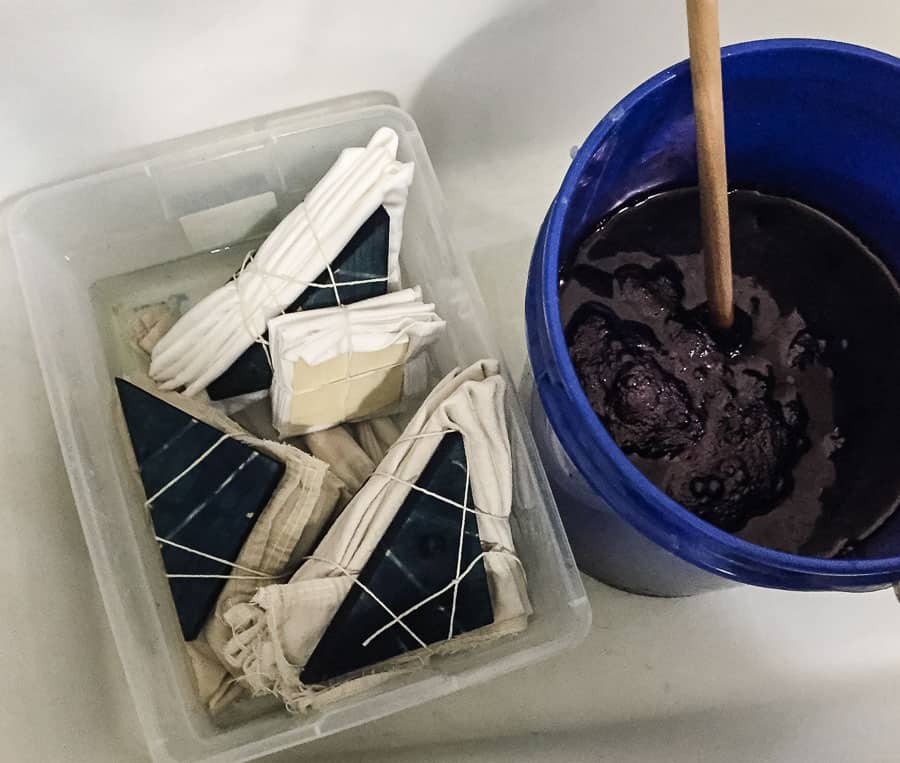
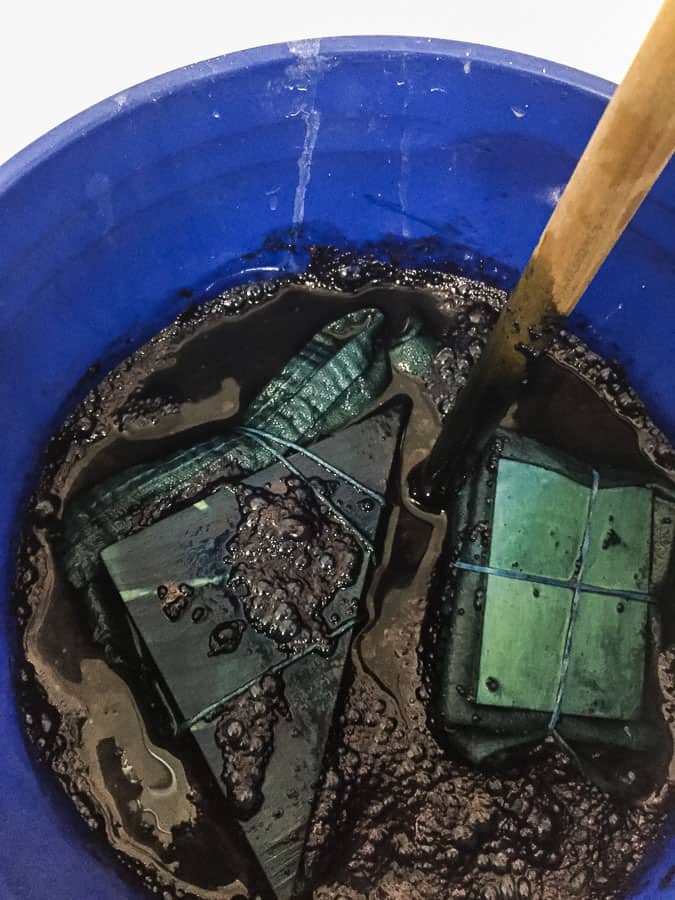
Prepare Your Indigo Dye Vat
- Fill a 5 gallon bucket about 3/4 of the way up with warm water.

- Pour the soda ash, reduction agent and dye into the bucket. The dye will look dried out and crystalized.
- Use a wooden stick or dowel to stir. Be sure to scrape the sides to make sure that the dye is dissolved.
- Slow it down and stir in the other direction.
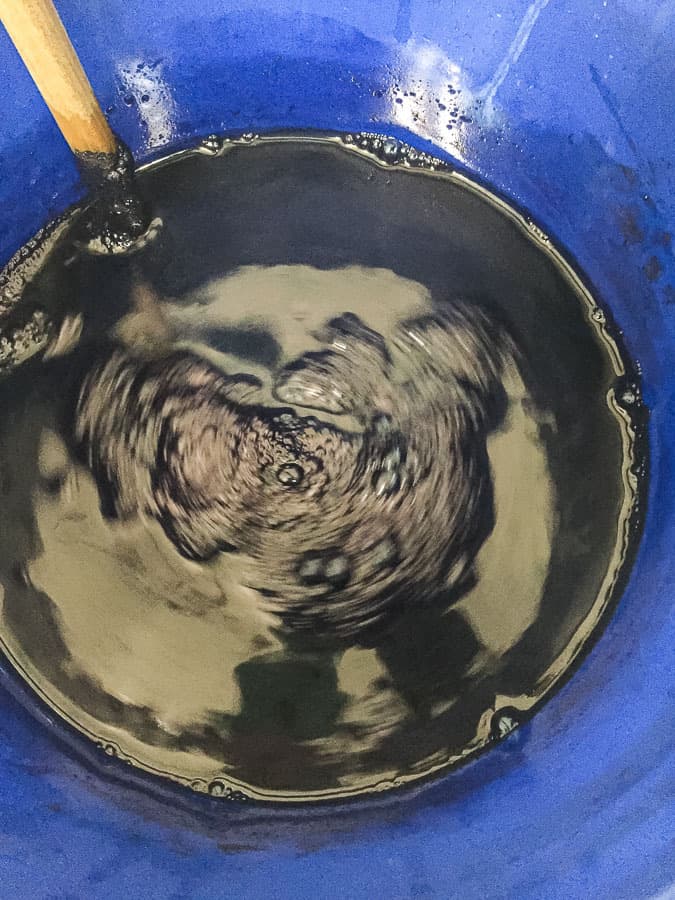
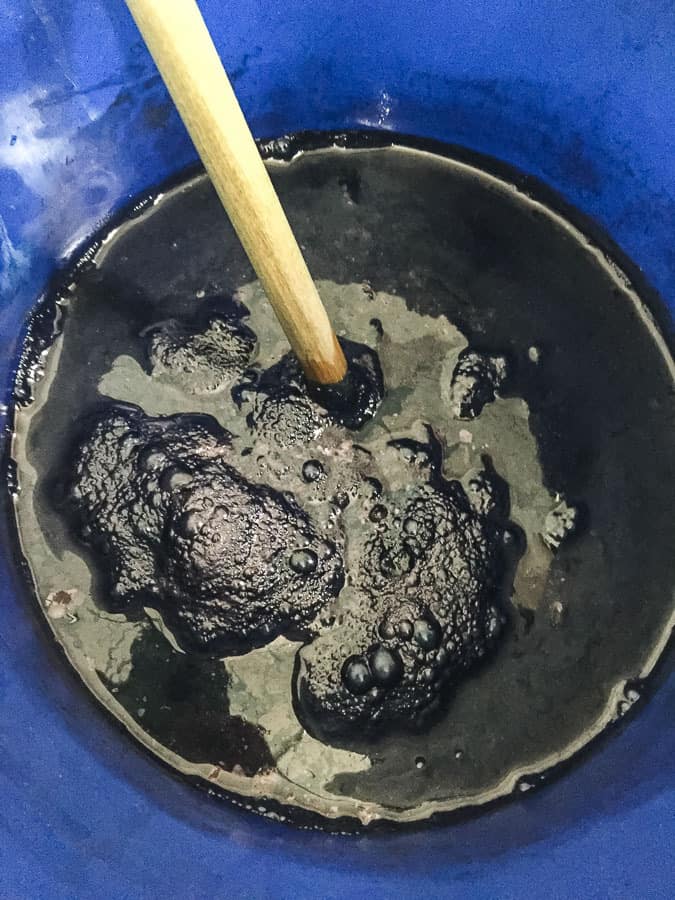
- Let it sit for about 30 minutes. There will be a big foamy part in the middle. This is known as the flower.
Prepare Your Fabric for Shibori: Folding Techniques
Different folding techniques produce different patterns.
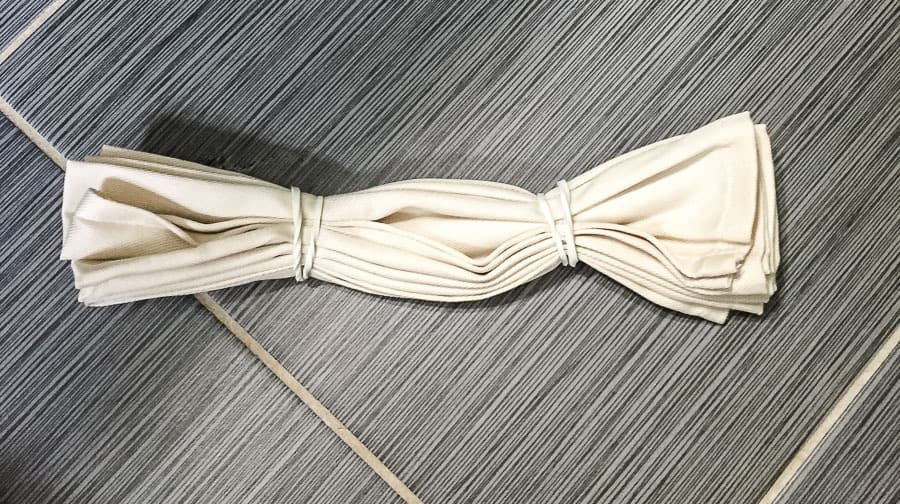
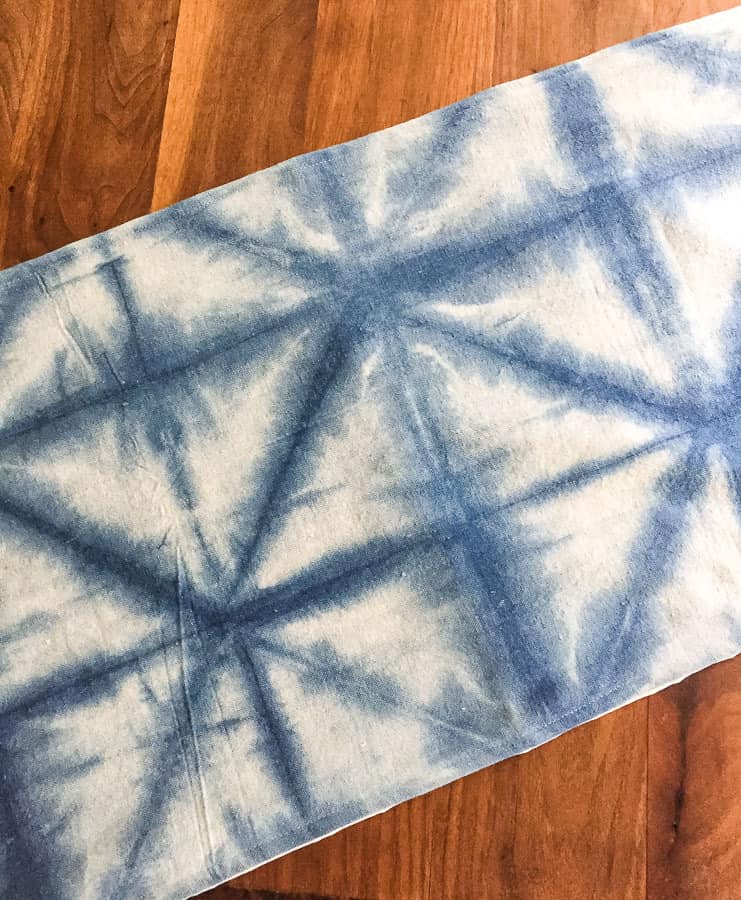
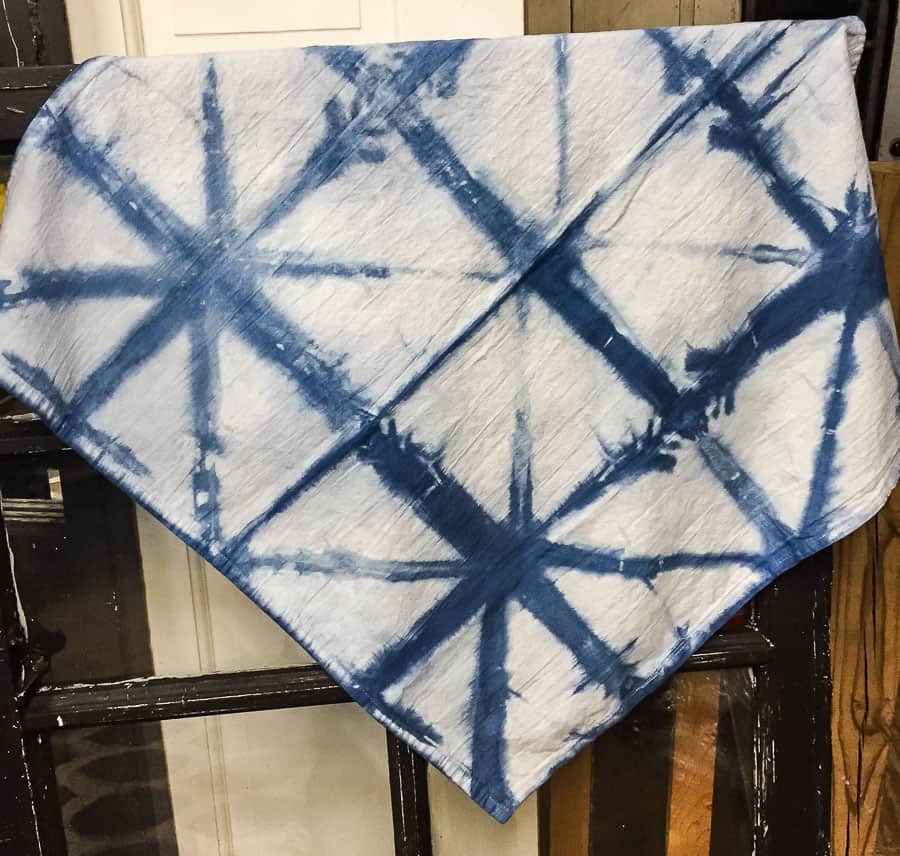
Triangle Fold
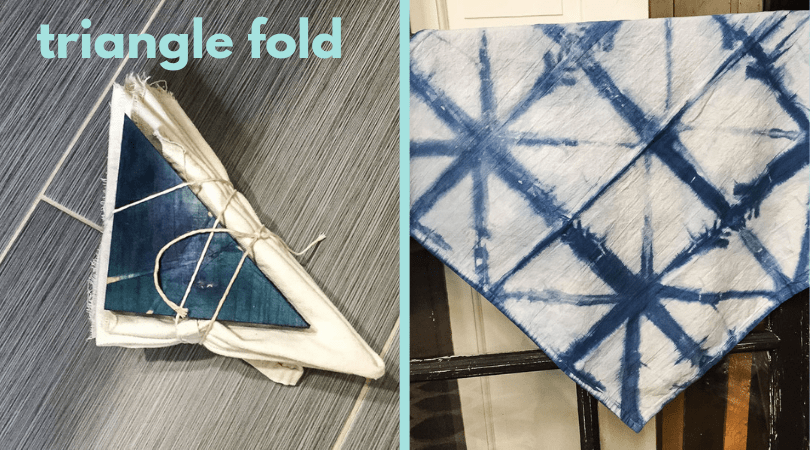
Fold your fabric into an accordion to fit your triangles. The triangles provide resistance, leaving the fabric dyed on the edges only.
(I used bleached drop cloths to make table runners. After the fabric was dyed, I sewed them into runners. Tutorial coming soon.)
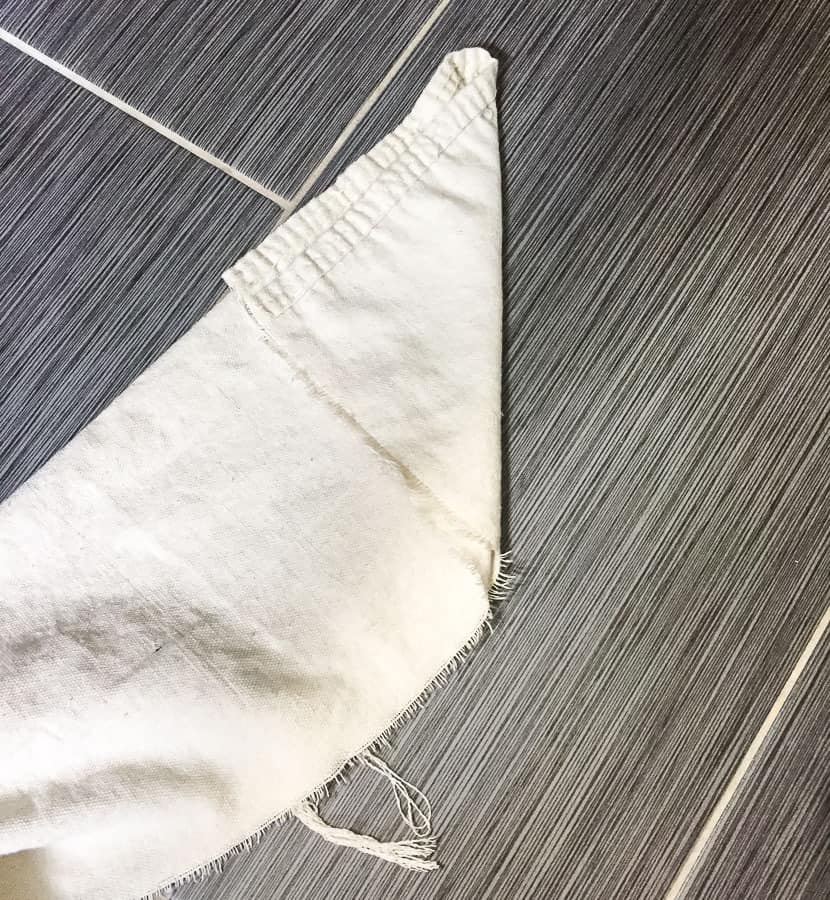
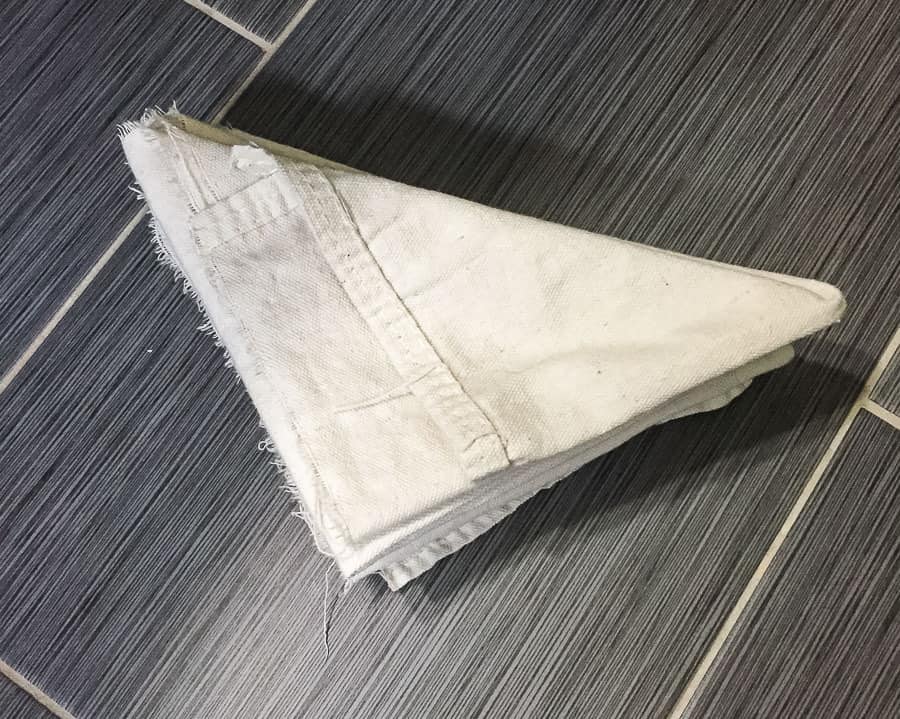
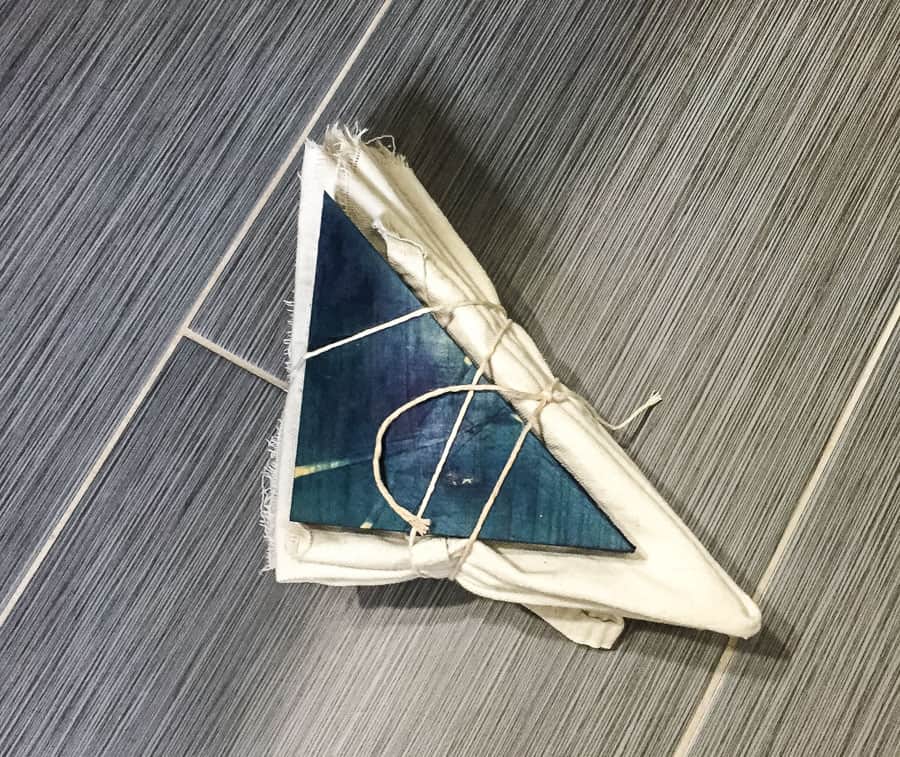
For my table runners, I had to fold them into 4ths. Then accordion fold them into triangles. You want the fabric to be a bit larger than the wood. Secure tightly with twine or rubber bands.
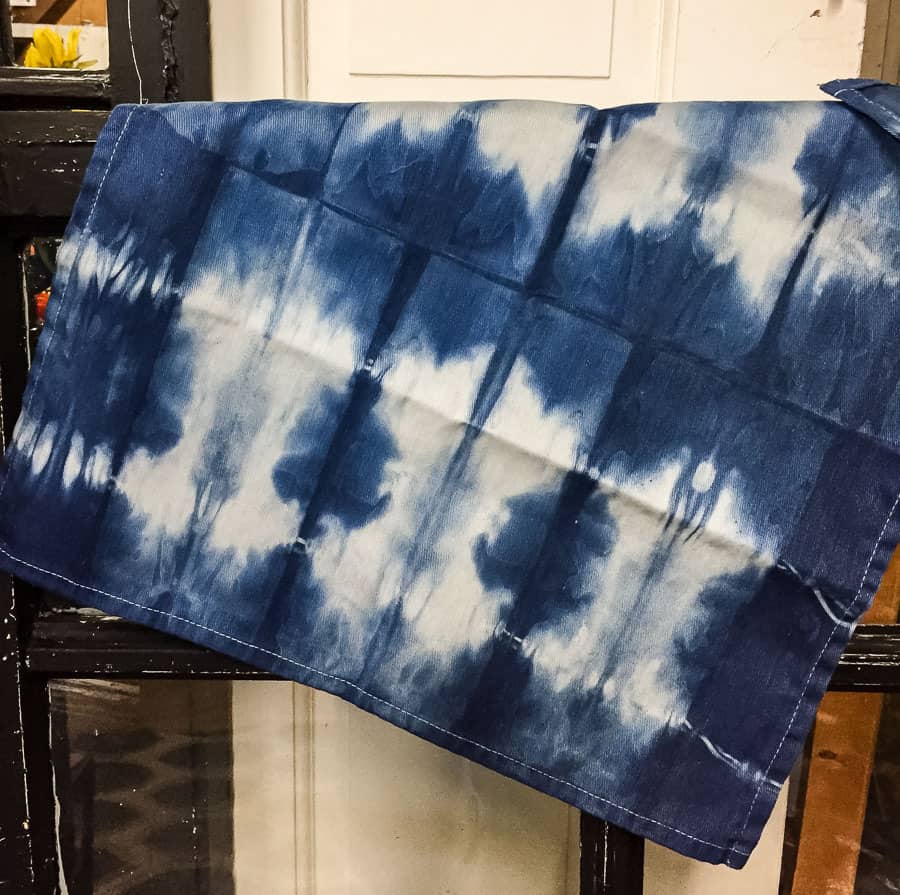
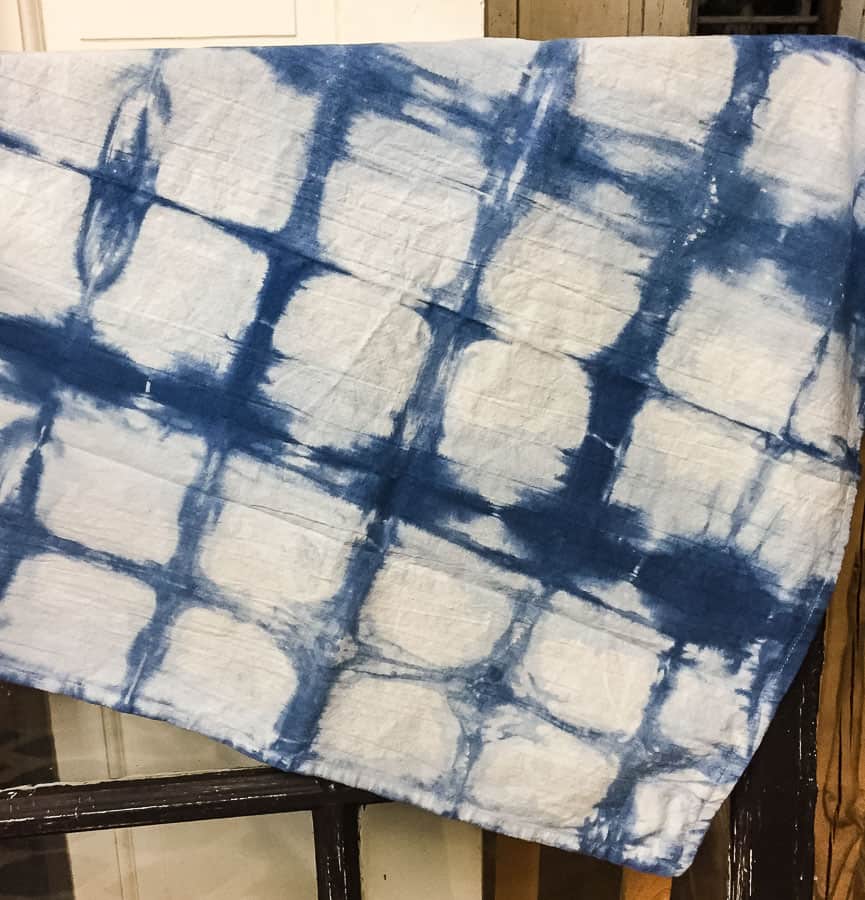
Square Fold
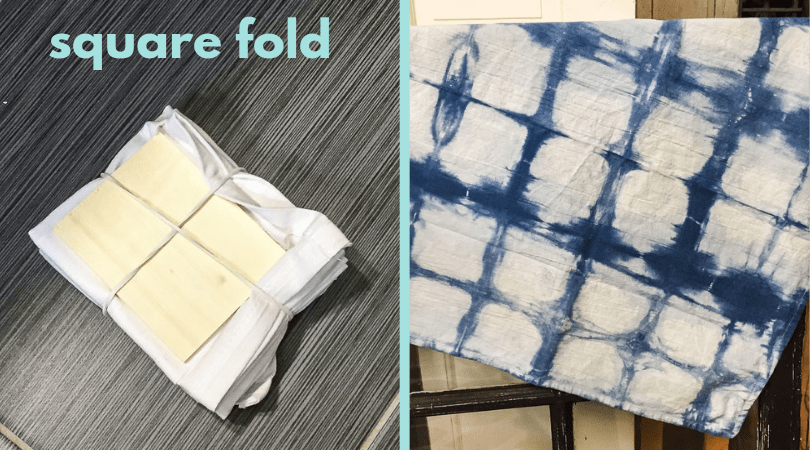
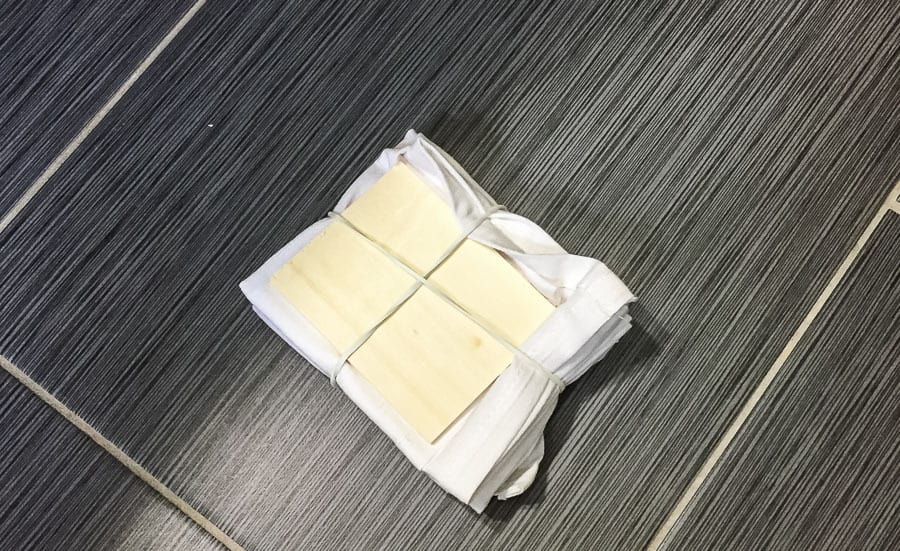
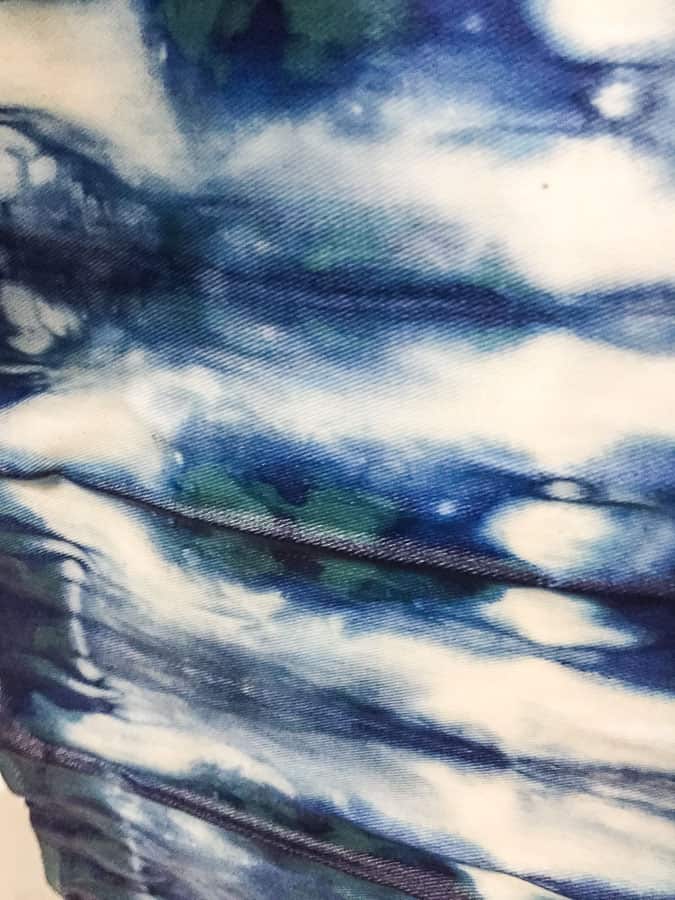
Accordion fold the fabric into strips and then fold into squares. Secure tightly with rubber bands.
Accordion Fold

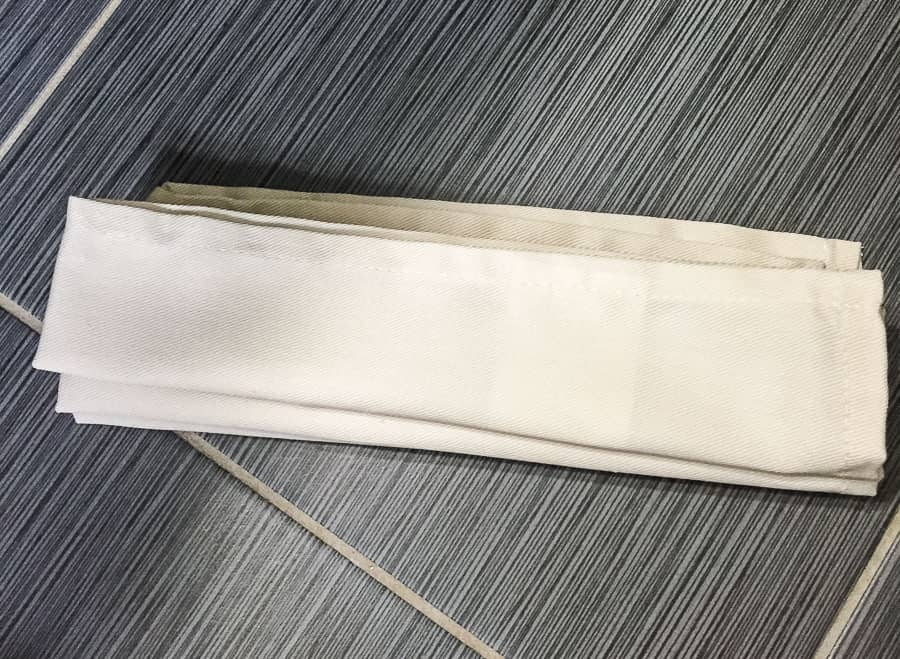
For these napkins, I folded them in half, and then accordion folded them. They were secured with rubber bands.
Dyeing Fabric
- For an ombre effect on the fabric, submerge the fabric in water before dyeing. For whiter resist areas, keep the fabric dry before dyeing.

- Submerge the fabric in the dye. The longer it sits, the darker the color will be. I let mine sit for about 5 minutes. (The fabric with wood resists float. The ones without wood sink to the bottom and can be fished out with the stick.)
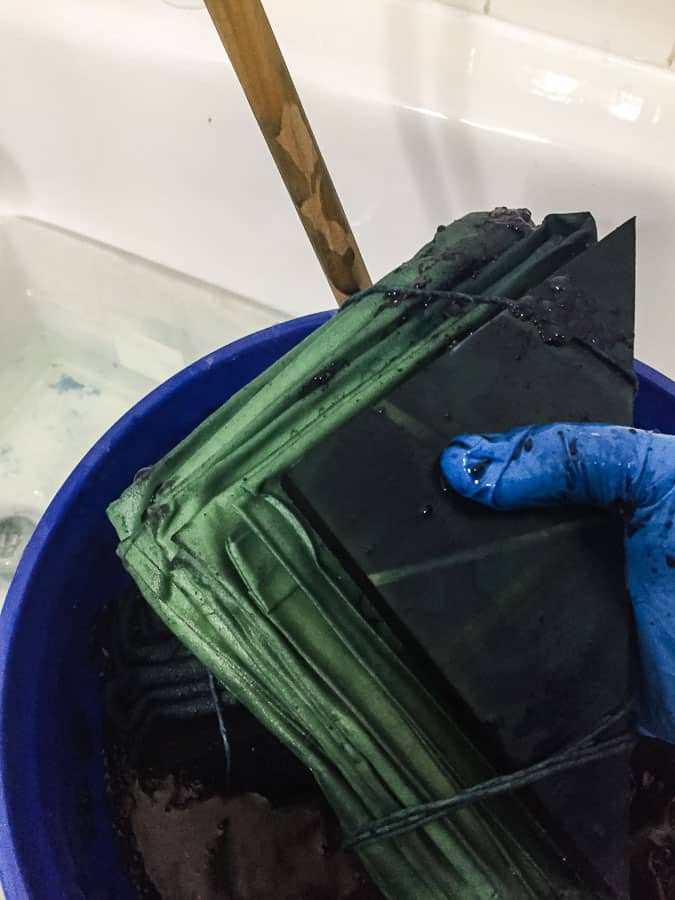
- Squeeze the fabric before taking it out of the dye. This helps to remove excess dye. The fabric will be green where it has not oxidized yet.
- Remove the wood and/or rubber bands to let the fabric continue to oxidize. It will start turning a very vibrant blue.
- Rinse after about 20 minutes. Rinse until the water runs clear.
- Continue until all your fabric is dyed.
- Wash everything in the washing machine and dry as normal.
Tips for Shibori Dyeing
- This kit dyes a lot of fabric. Have a lot of fabric to dye or invite some friends over.
- The mixed dye vat can last a few days with a lid on it. Don’t leave it for longer or it gets really smelly and moldy. Not that I know from experience…
- The kit comes with 1 set of square wood pieces. Cut more from scrap wood. Other shapes work too. Experimenting is the best part!
- If it gets on your skin, it’s not a huge deal. I splashed some on my arm and it came off easily in the shower.
- Shibori is very forgiving. The imperfect patterns are part of the appeal.

Shibori dyeing is so much fun!
Shibori dyeing works for any cotton or natural fabric. Want to see more things that I’ve dyed? Check out my ombre dip dyed curtains or my chalk paint dyed napkins.
You might also like:
Pin for Later!

Emy is a vintage obsessed mama of 2 DIYer who loves sharing affordable solutions for common home problems. You don’t need a giant budget to create a lovely home. Read more…