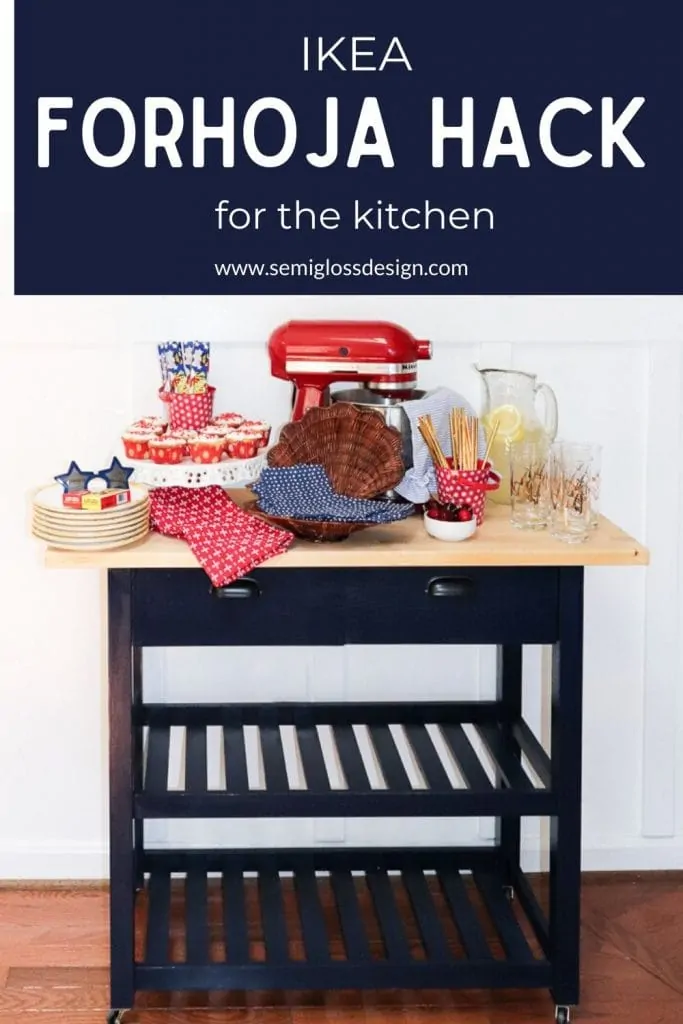
IKEA Forhoja Hack: Three Ways to Use a Kitchen Cart
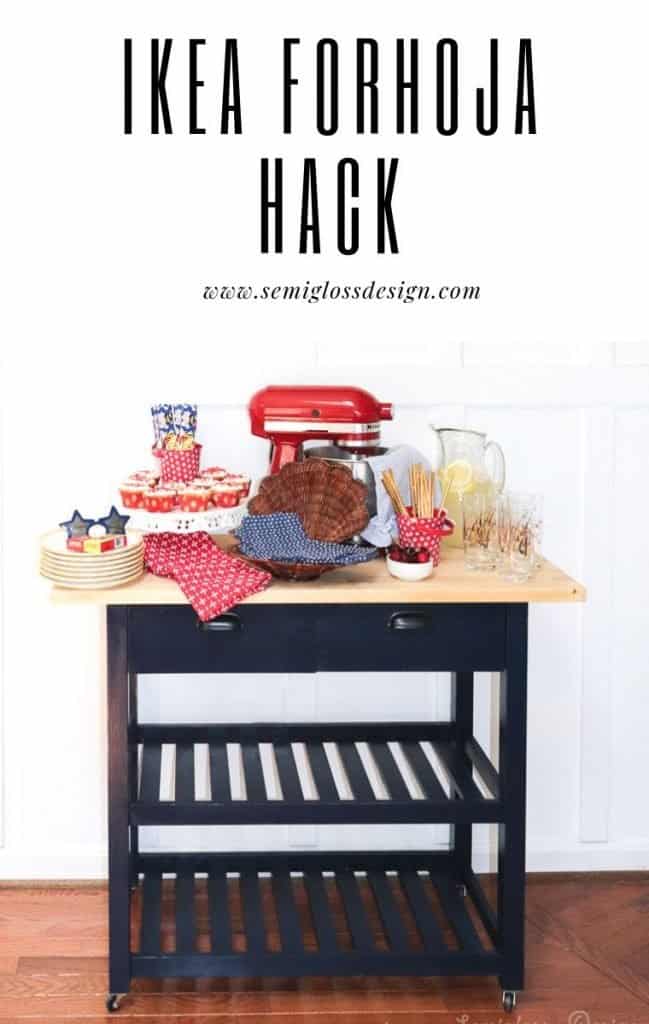
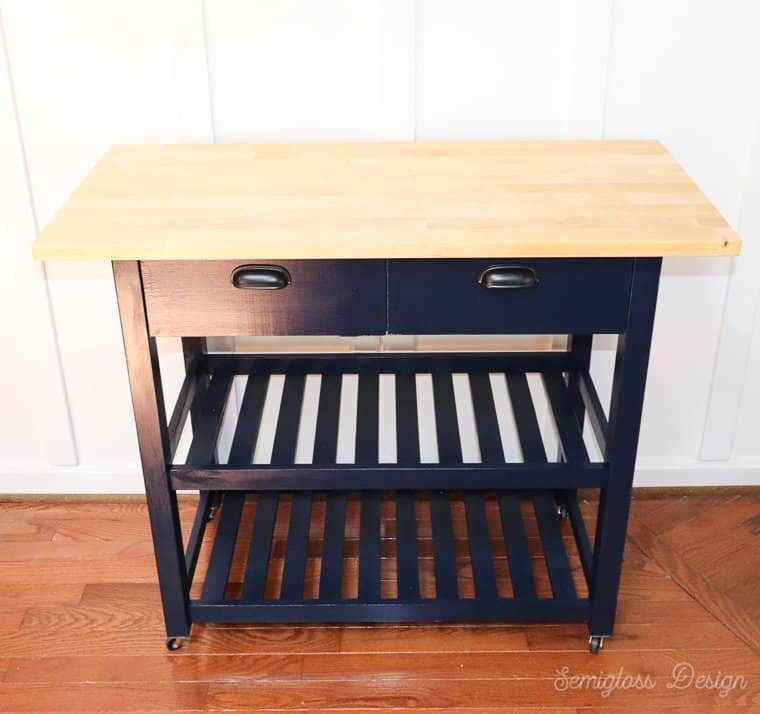
This IKEA forhoja hack adds style and function to the simple IKEA island. Featuring casters to make it easier to move around and a sleek navy paint job, it’s hard to believe that this is from IKEA.
Summer laziness prevented me from building a cart from scratch. Luckily, an IKEA hack is the next best thing.
You might also like this IKEA Bror utility cart hack.
This post contains affiliate links. By purchasing an item through an affiliate link, I earn a small commission at no extra cost to you. As an Amazon Associate I earn from qualifying purchases.
The IKEA forhoja is a very versatile piece that can be used in a variety of situations. It has a petite size, so it can easily fit in small rooms, but that also makes it easier to move around.
I hacked my IKEA forhoja kitchen cart to function as a portable photography studio, but I’m sharing a few other ways to use it as well.
IKEA Forhoja Hack
Supplies Needed
- IKEA forhoja kitchen cart
- 1/4″ wood
- Scrap plywood or 1×6
- 1″ Casters
- Drawer Pulls
- Paint
- Miter Saw
- Drill
- Nail gun
- Wood glue
- Nail setter and hammer
- Clamps
Prep Work
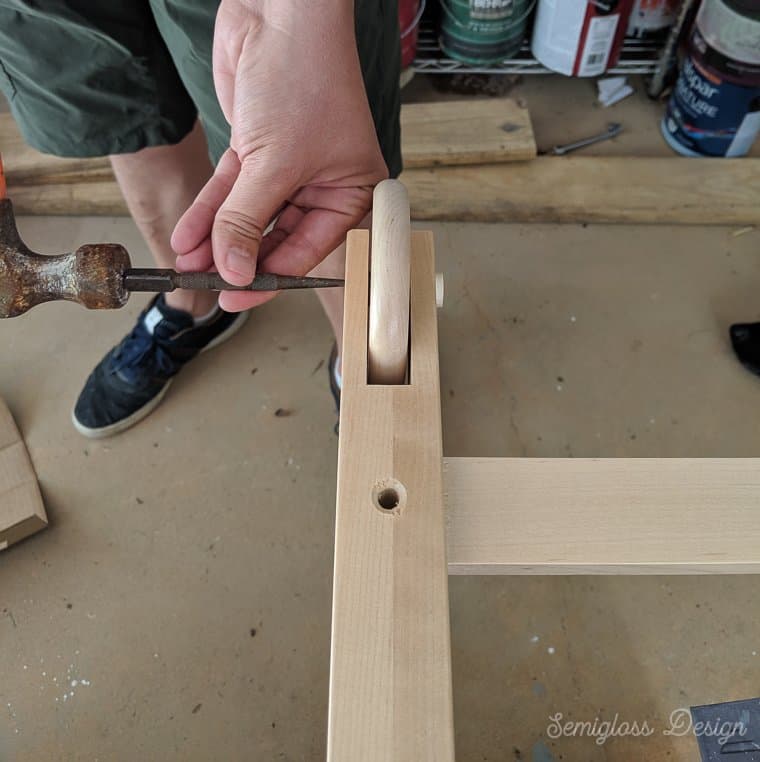
- Use a nail setter to hammer out the dowel holding the wheels in place.

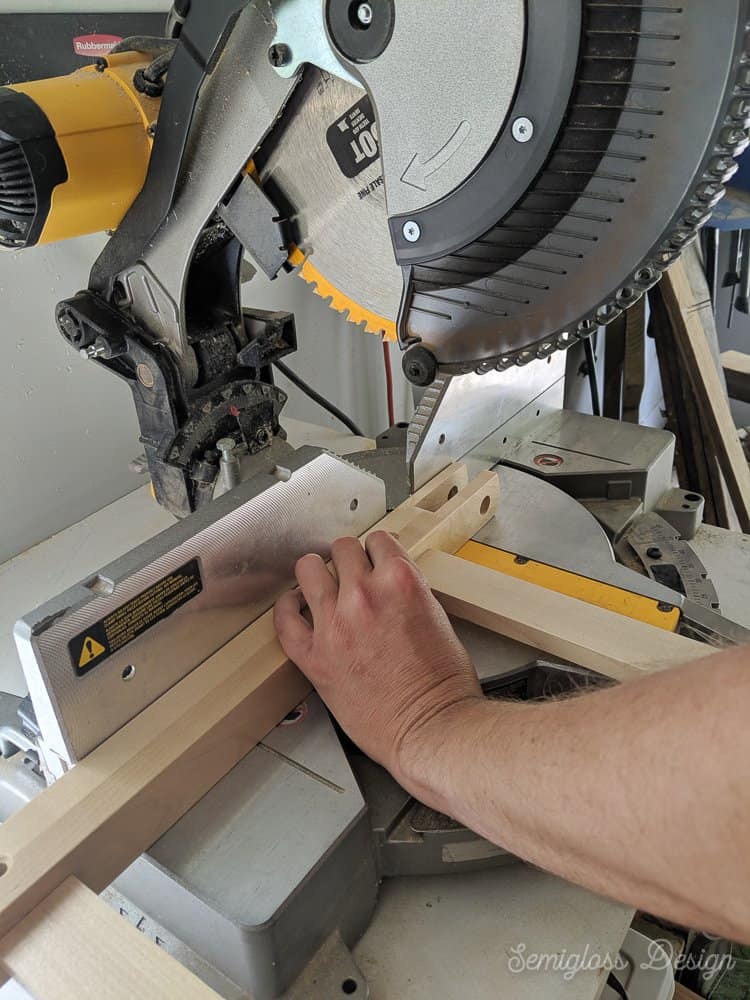
- Use a miter saw to cut the legs to remove the slotted part for the wheels.

- Mark the other legs and make the same cut. Be sure to sand the edges!

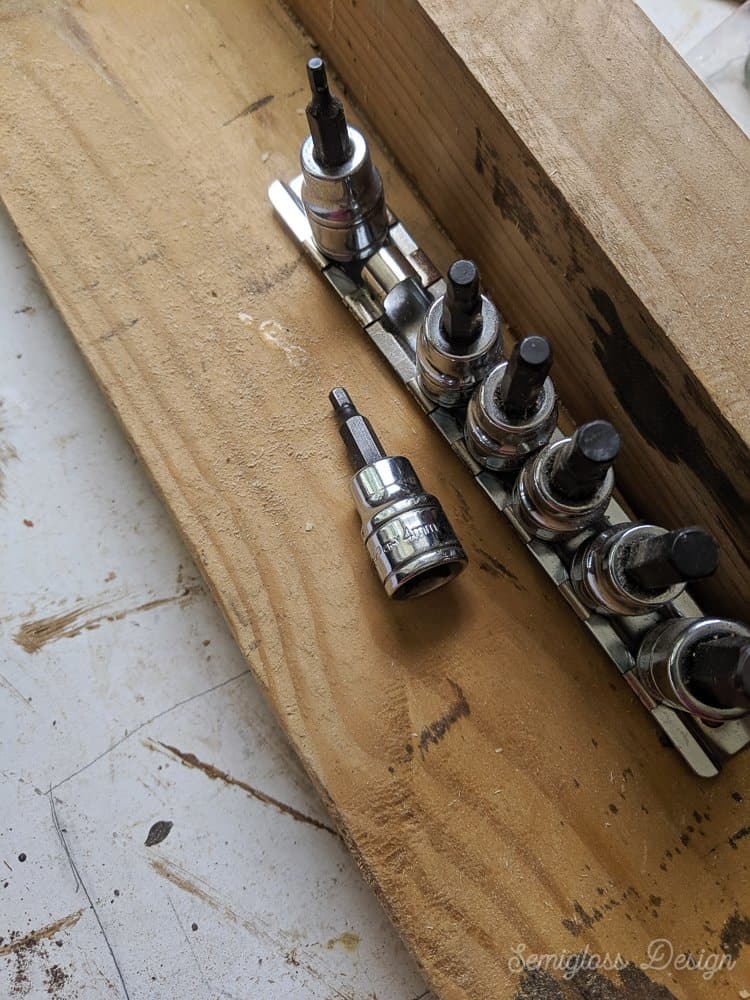
- Assemble the IKEA forhoja according to instructions. A ratchet set and a 4mm socket is easier to use than the allen wrench that came with it.
- Don’t attach the top yet.

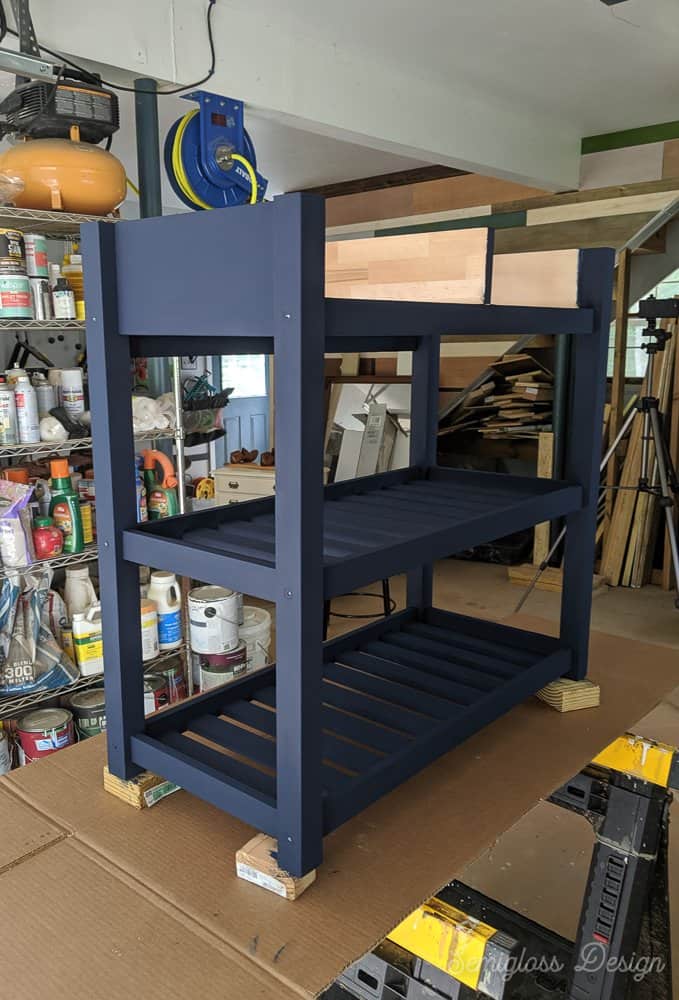
- Start painting the assembled cart.


Hacking the IKEA Forhoja
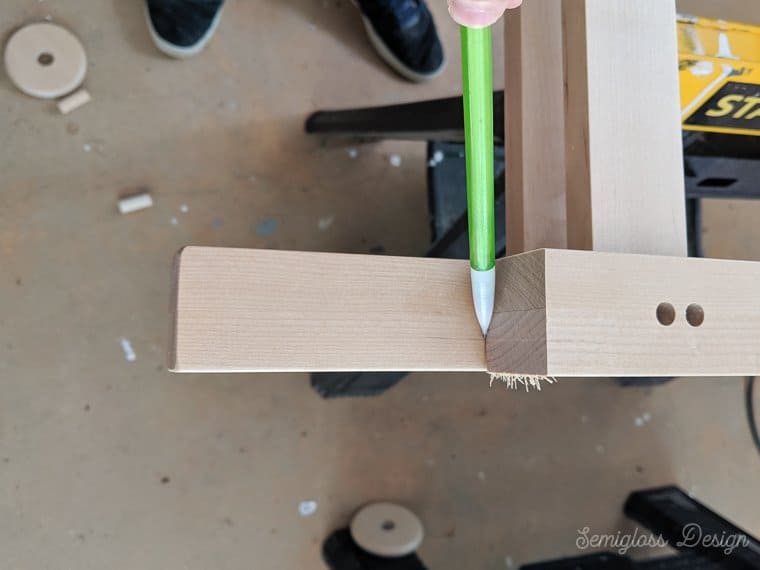
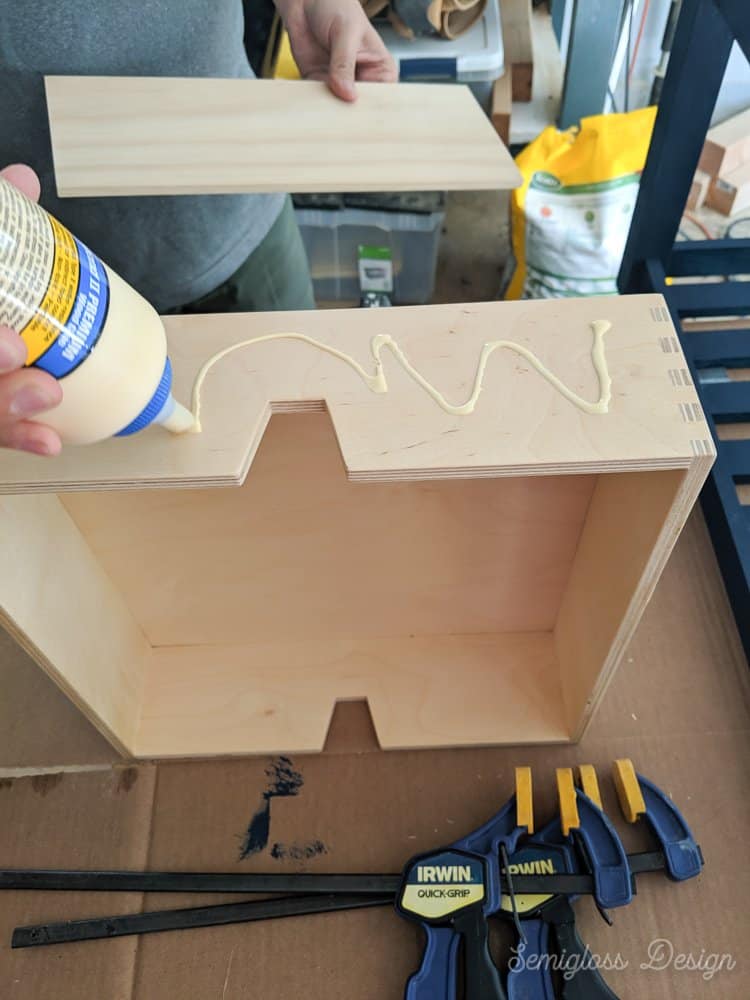
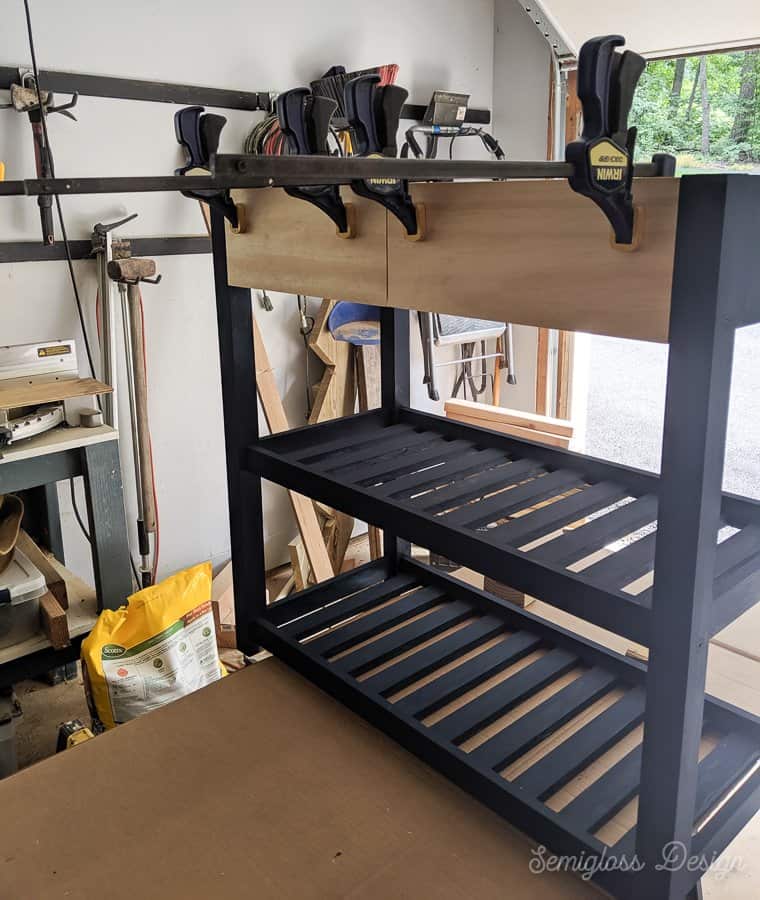
- Cut the drawer fronts to 14″ using 1/4″ wood. Check to make sure the wood is aligned right to be able to open.

- Attach the wood with wood glue.
- Clamp and let sit overnight.

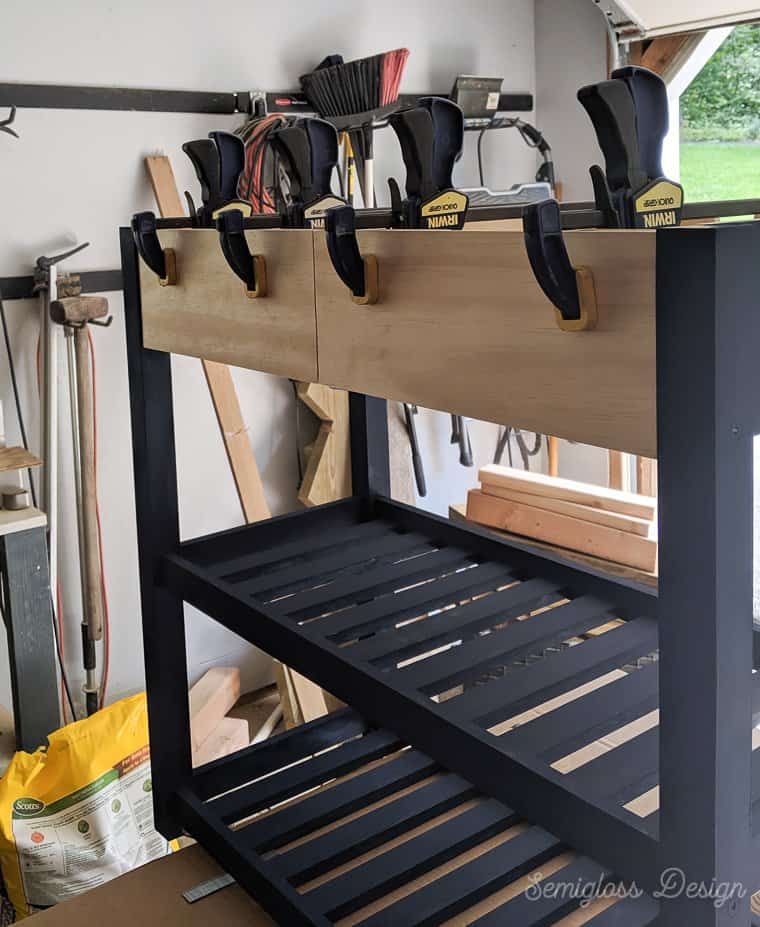
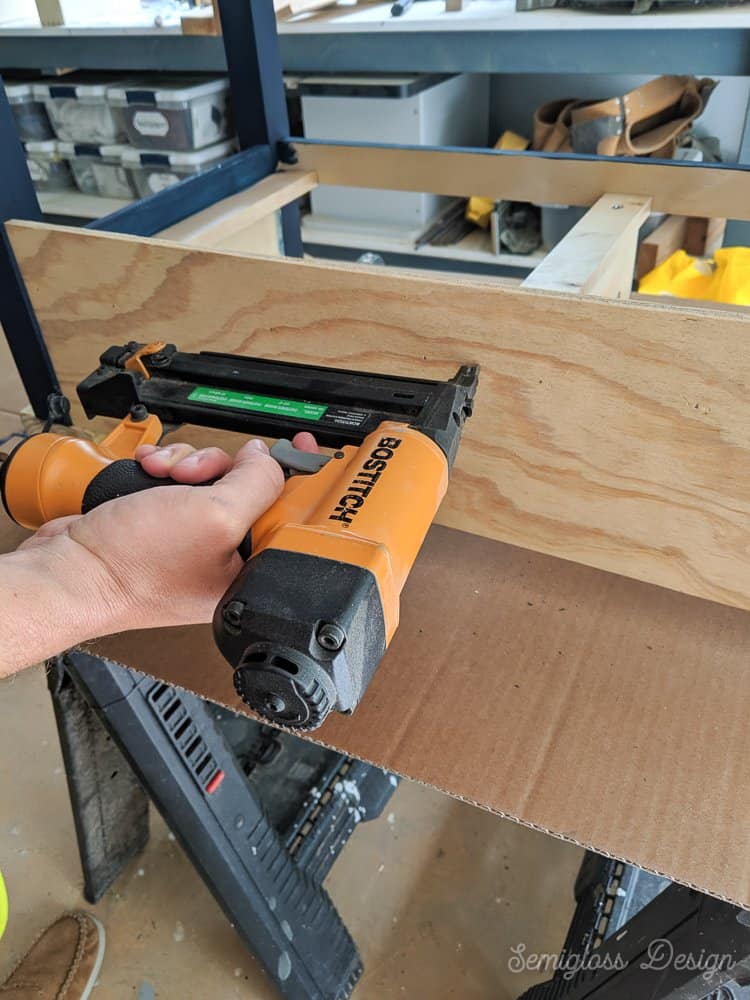
- Cut a piece of scrap plywood (or a 1×6) to 28 1/4″ and attach to the back with wood glue and a nail gun. (The new drawer fronts prevent the drawers from being opened from both sides and this part covers that.)
- Paint everything that remains.
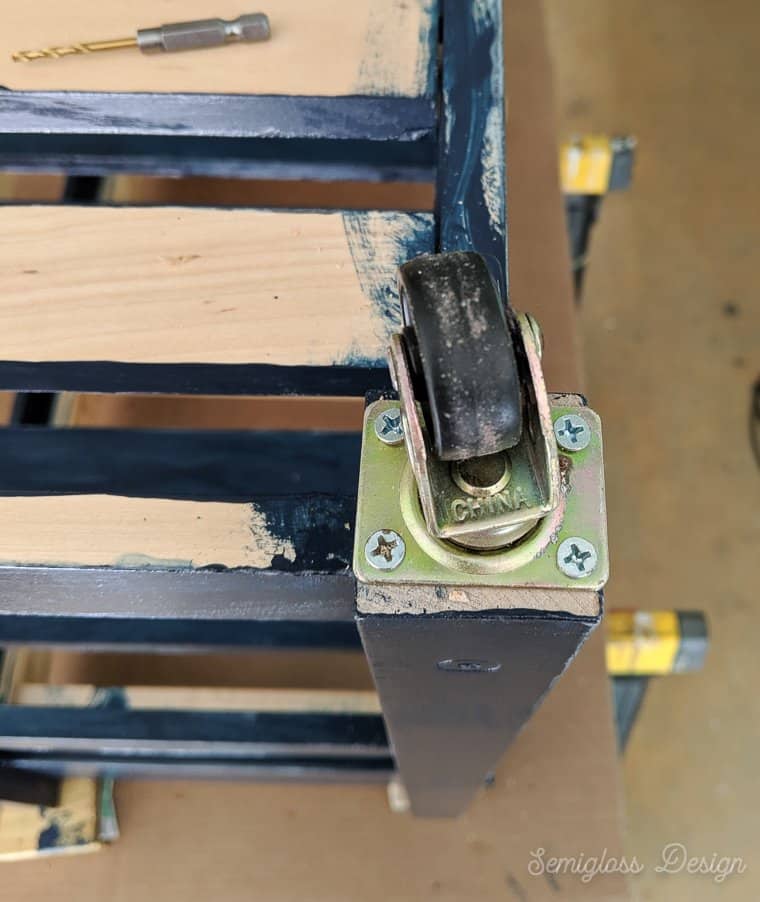
- Flip the cart upside down and attach the casters. Pre-drill for best results. To use larger casters, you will need to add a horizontal brace between the legs to accommodate the larger casters. I used 1″ casters because I was okay with a lower work space.

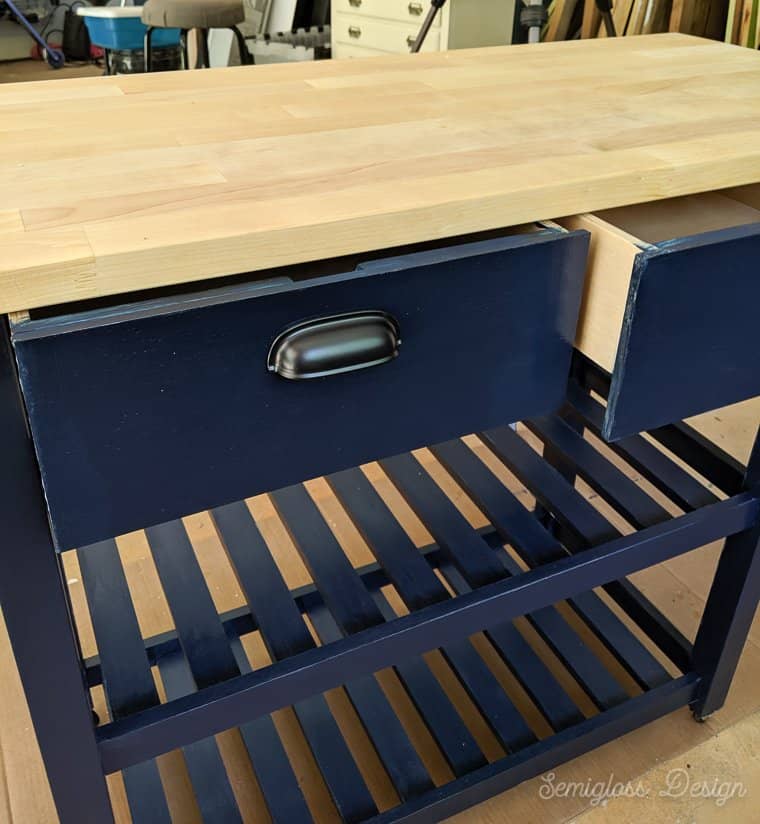
- Flip the cart back over and attach the top according to the directions.
- Install the drawer handles.

You might like these tips for painting IKEA cabinets and furniture.
IKEA Kitchen Island
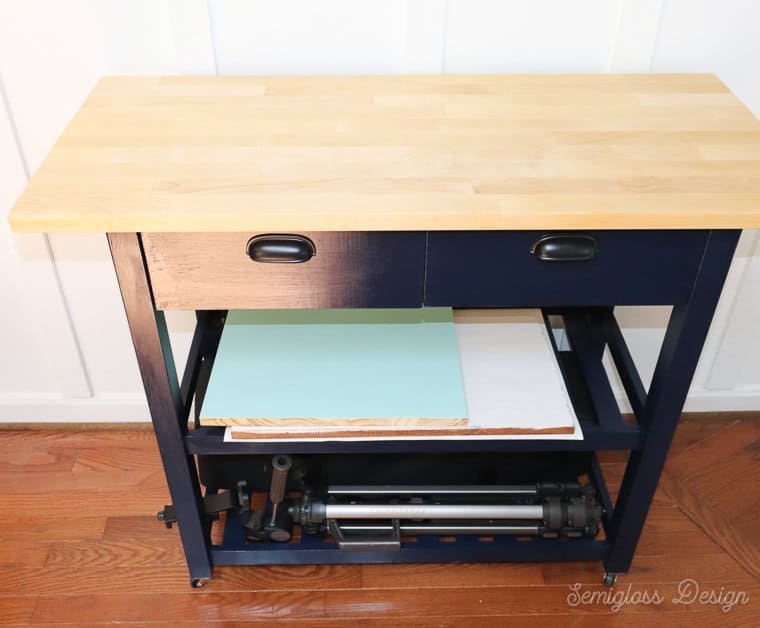
The IKEA forhoja is sold as a kitchen island.
It offers plenty of storage and a lovely butcherblock countertop.
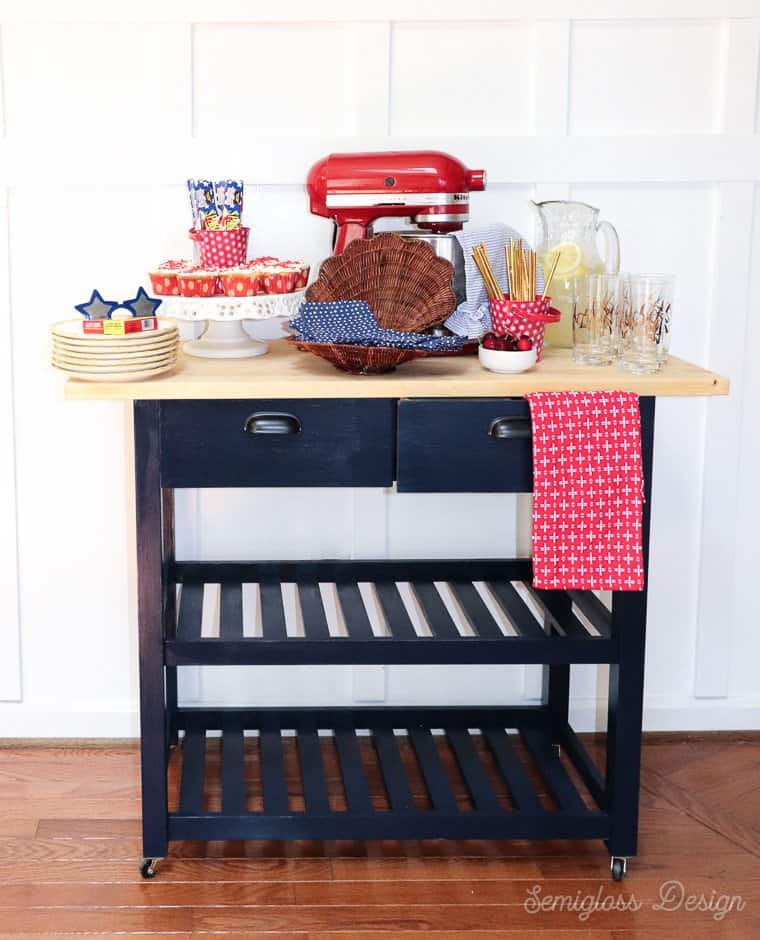
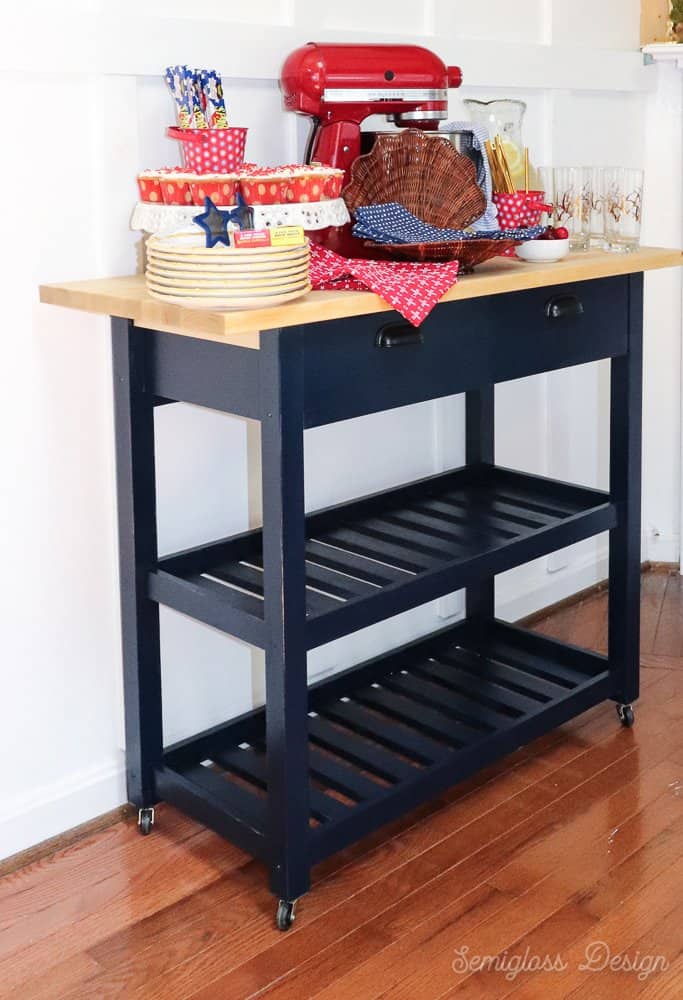
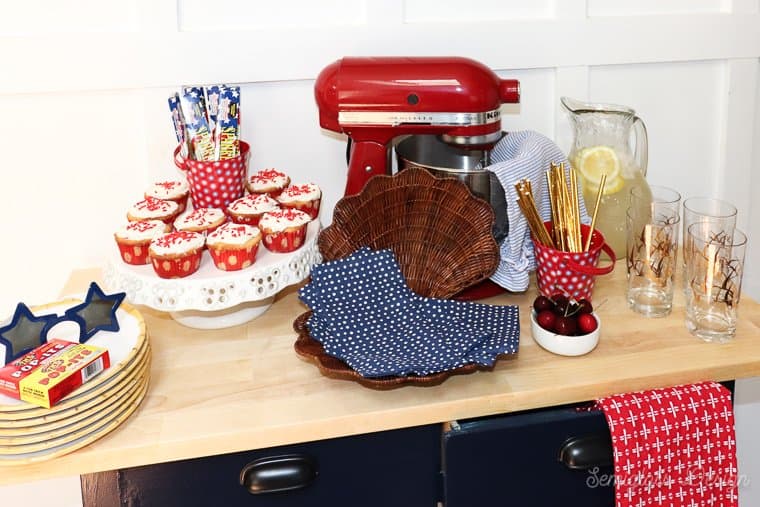
It would also work well as a makeshift buffet when you have friends over. Just roll it into your dining room (or wherever you need more room to sit food.)
IKEA Craft Cart
I love the idea of using the IKEA forhoja as a craft cart.
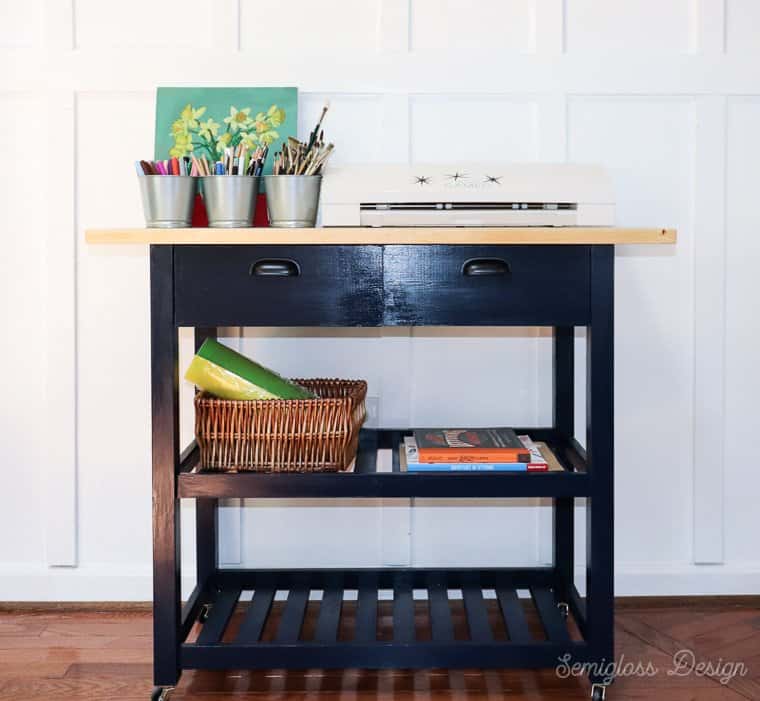
It fits a silhouette perfectly and the shelves are great for storing extra supplies.
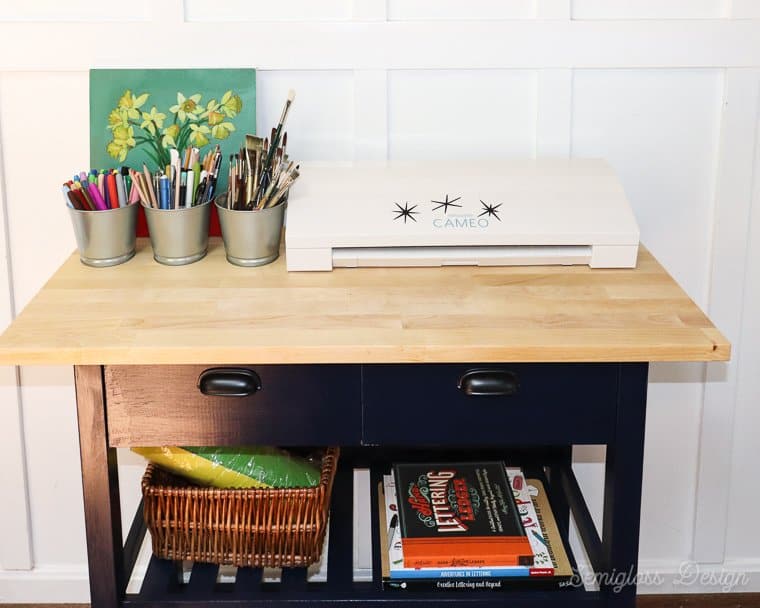
Add a stool and you have an instant craft area.
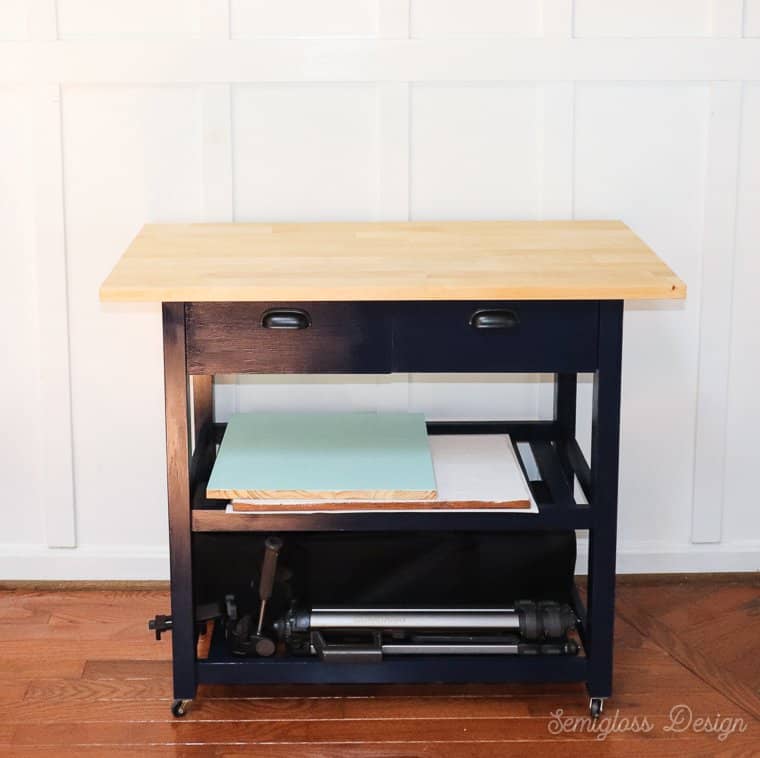
Portable Photography Cart
My real intention with this cart is to store all of my photography equipment in one place, but also to use as a surface to photograph on.
The kitchen look is perfect for cocktails.
It’s portable, so I can roll it into the best lighting situations.
The drawers hold extra lenses. The clamps and L brackets are for holding backgrounds (white foam core boards.)
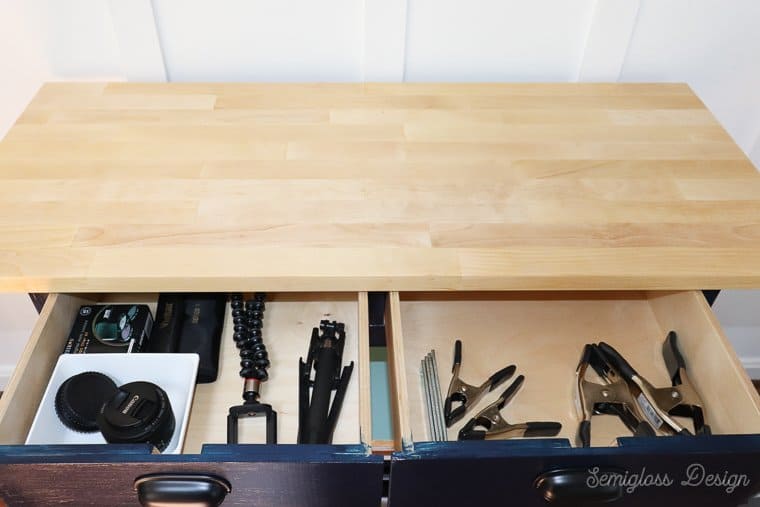
The shelves hold backgrounds (wood and foam core boards.)
The bottom shelf hold my lighting kit and tripod.
You might also like:
- Retro IKEA Besta Hack
- Dip Dyed IKEA Curtains
- Shibori Dyed IKEA Henriksdal Chairs
- IKEA Rast Hack: Wallpapered Drawer Fronts
Pin for Later!

Emy is a vintage obsessed mama of 2 DIYer who loves sharing affordable solutions for common home problems. You don’t need a giant budget to create a lovely home. Read more…

Love the idea! Did you sand down the cart prior to painting it?
No, I didn’t sand it down because I used a chalk-type paint. If you use latex, I would prime it first.
Hello☺️
I love this hack, so beautiful!
I’m from Denmark and unfortunately we dont learn “inches” in school and everything here is always in cm. 😔 I’ve tried to google the measurement on the wood you have used for the drawers, but it just doesn’t seem right.
If I ask you kindly, could you let me know the measurements in centimetres?
Thank you so much,
Take care
Michelle
Hi Michelle,
Thank you for pointing this out to me. I plan on adding the measurements in metric for all posts now.
So the first measurement of 14″ would be 35.5 cm for the drawer fronts.
The back piece would be 75.75 cm x 14 cm.
These are rounded estimates. I also don’t know the standard measurements for lumber in other countries, so I’m not sure how to tell you the thickness of the wood. It’s pretty thin though. 1/4″ is a little smaller than a centimeter. I hope this helps!
I love what you did with this ikea cart. What colour of chalk paint did you use? Did you brush it on, or spray paint it.
Thank you
I used Country Chic paint in Peacoat, a dark navy blue color. I just brushed it on.
Thanks!