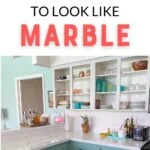
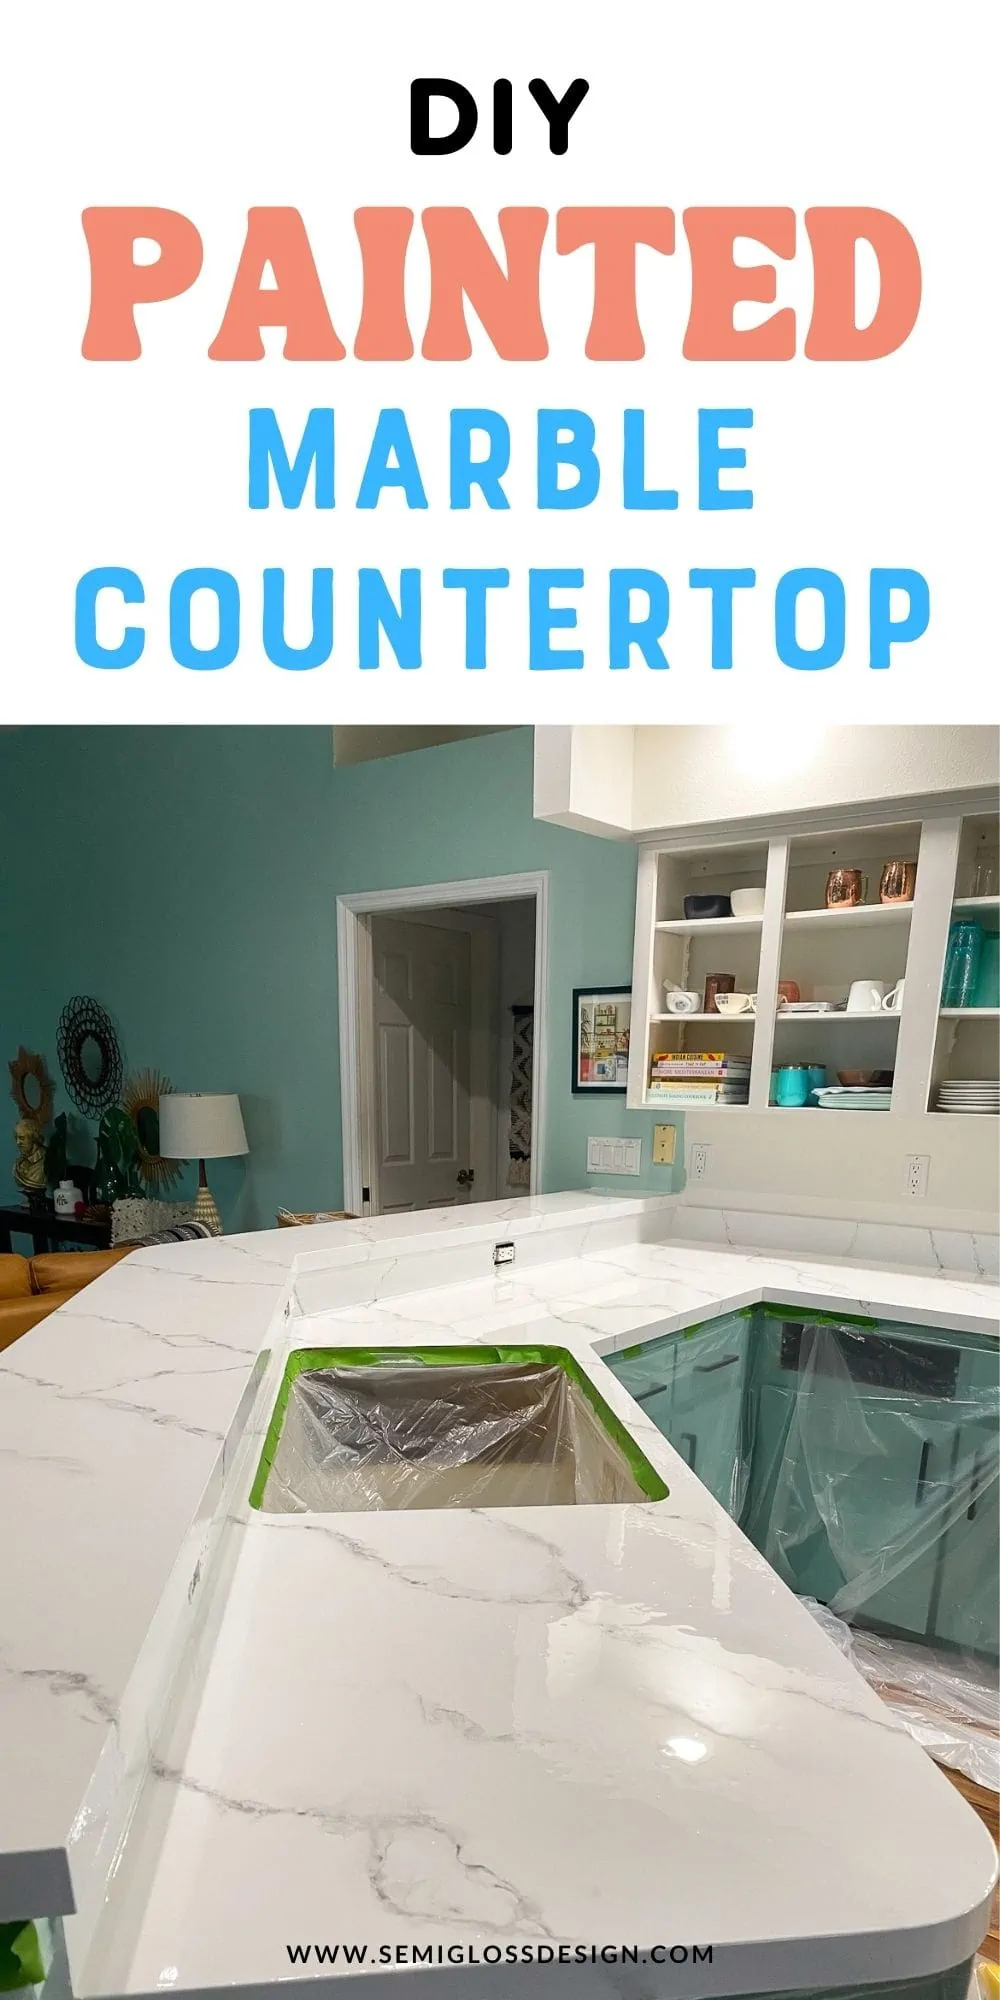
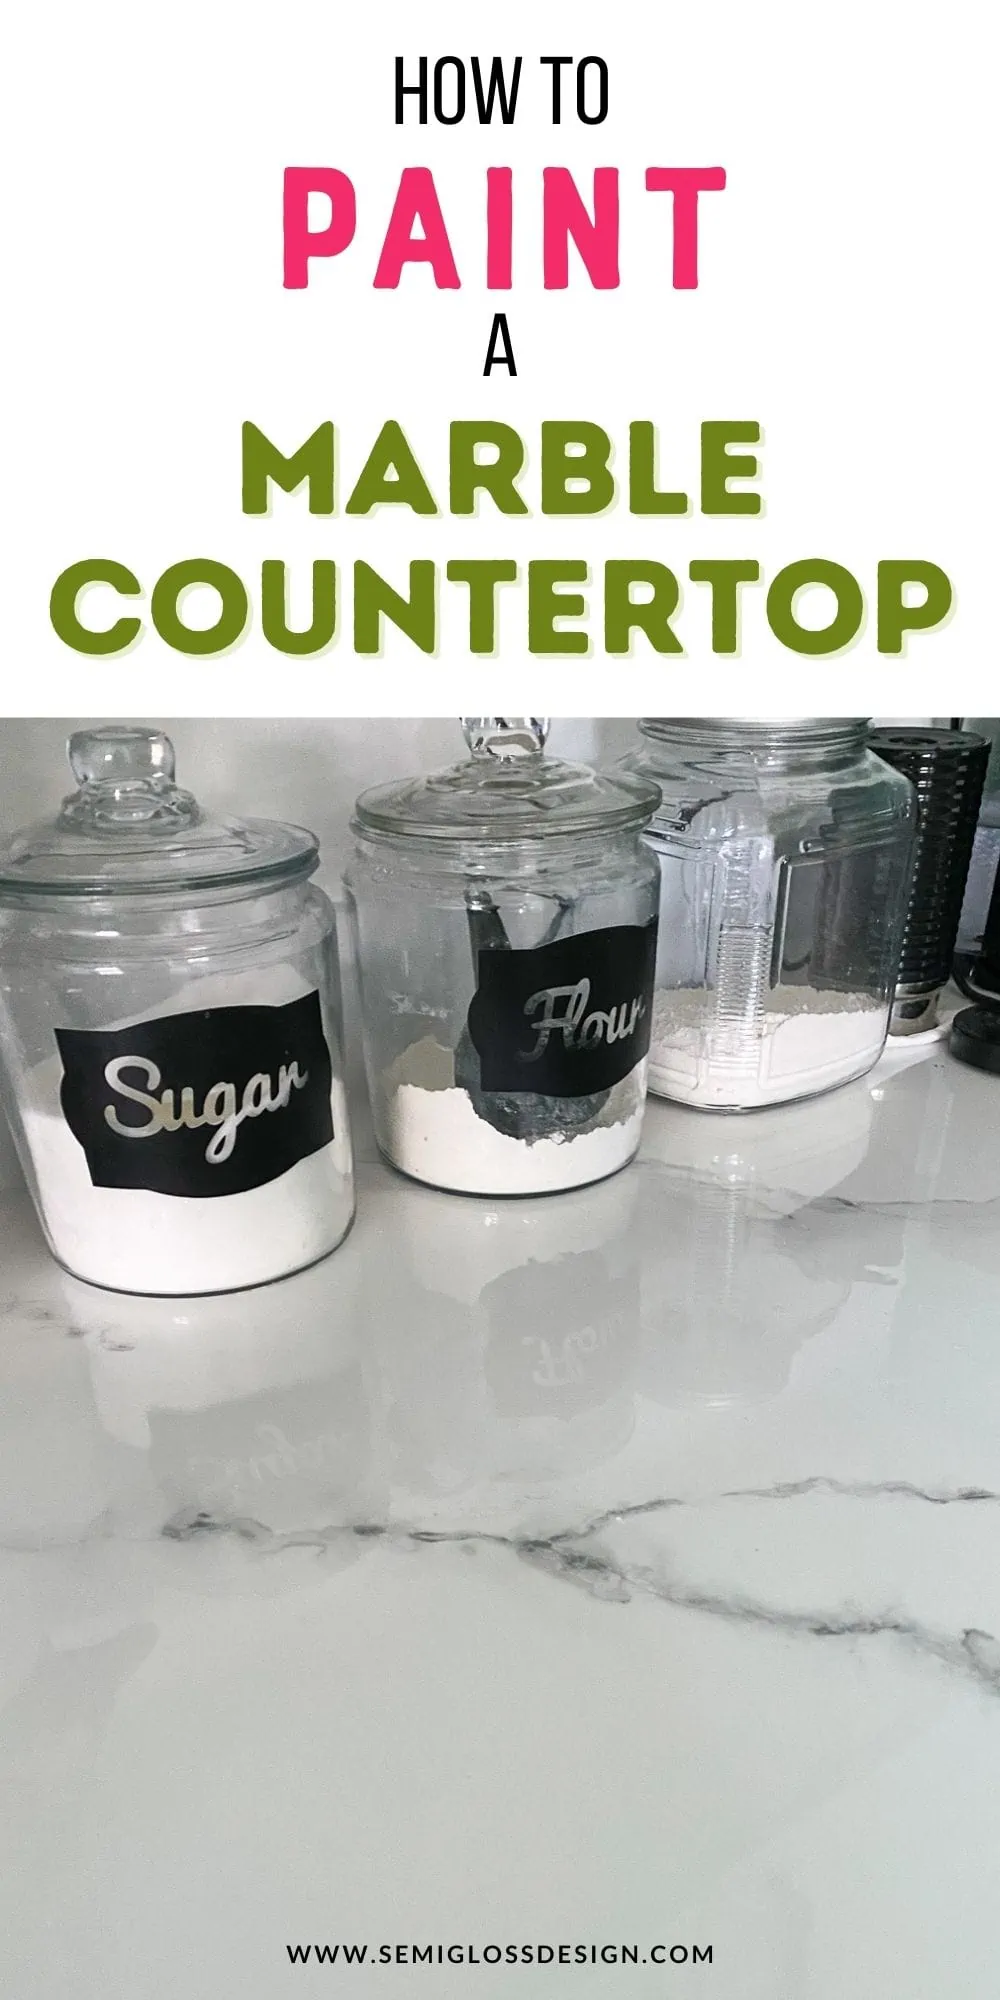
How to Paint a Countertop to Look Like Marble: Budget Countertop Redo
Learn how to paint countertops to look like marble. This is a great way to update your kitchen on a budget in just a weekend. For about $200, you can redo your laminate countertops to look like marble.
If you’re interested in more kitchen updates, you might like this post on painting laminate cabinets.
This post contains affiliate links. By purchasing an item through an affiliate link, I earn a small commission at no extra cost to you. As an Amazon Associate I earn from qualifying purchases.
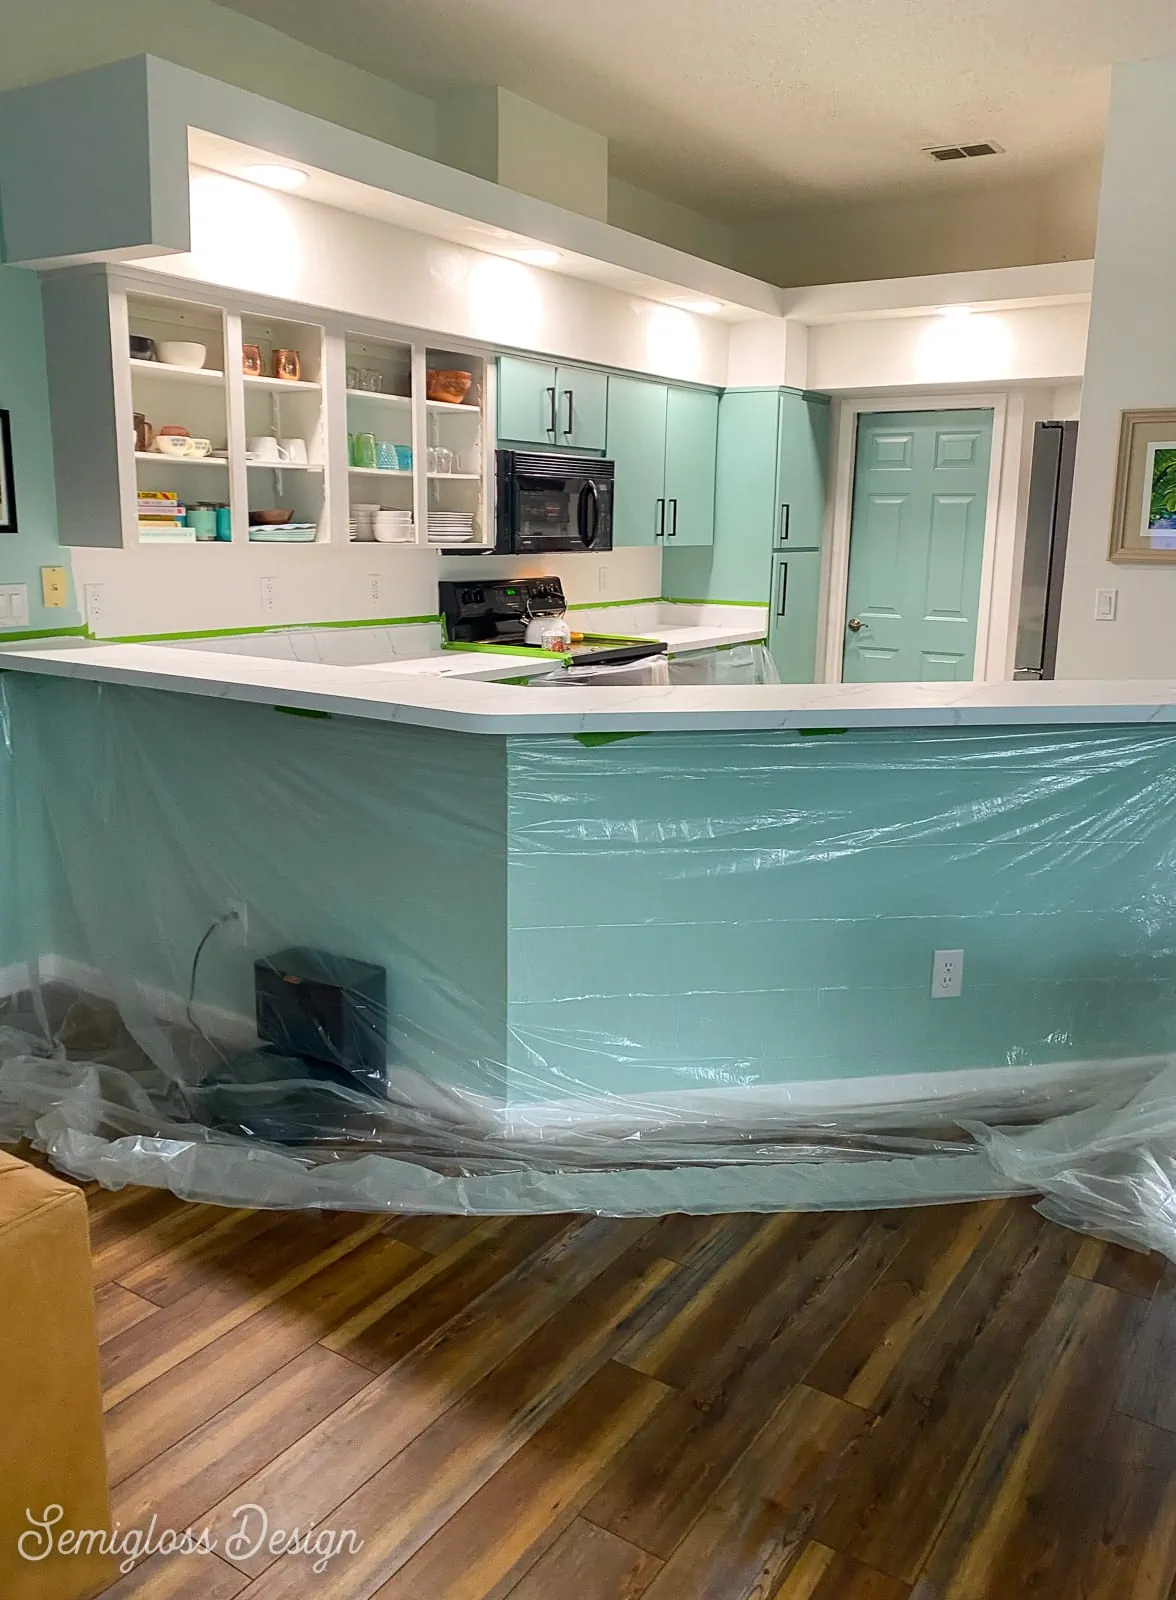
Although my laminate countertops were a neutral color, I hated them. They stained so easily and always looked dirty.
Everything that touched them stained the surface. It was so annoying. The fronts were also painted and were flaking off with use.
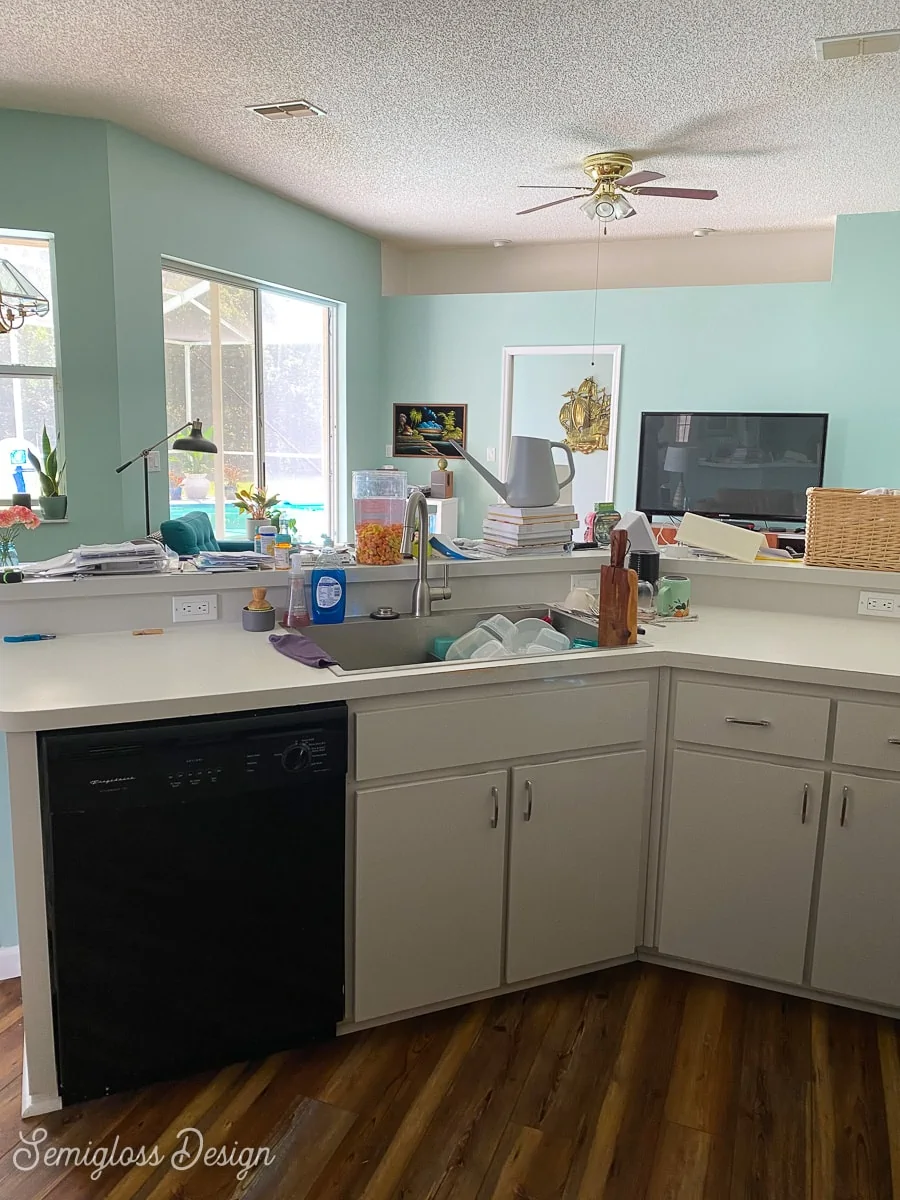
So we knew that we needed to do something to fix them. A complete kitchen renovation isn’t in the budget right now, so we looked for a cheaper DIY solution.
In our last home, we covered the countertop in a thin layer of concrete and sealed them with epoxy.
I loved how those surfaces held up over time, so we wanted something similar.
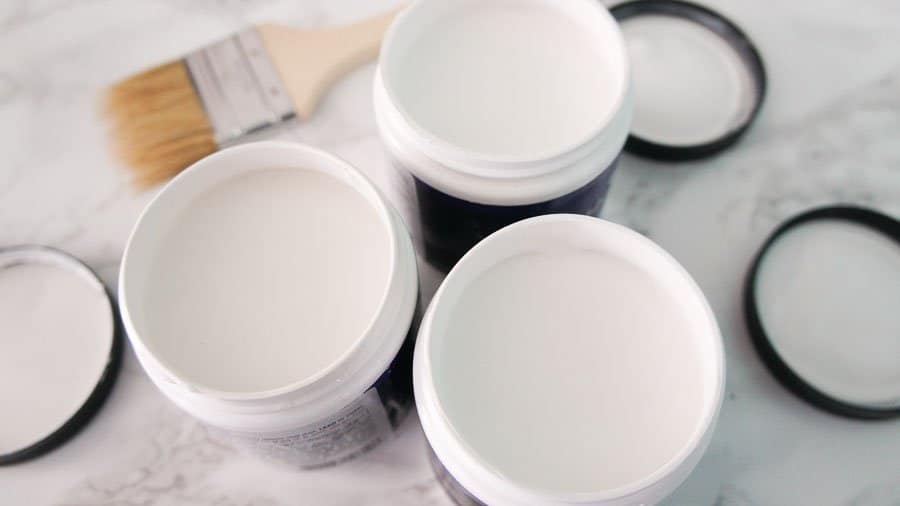
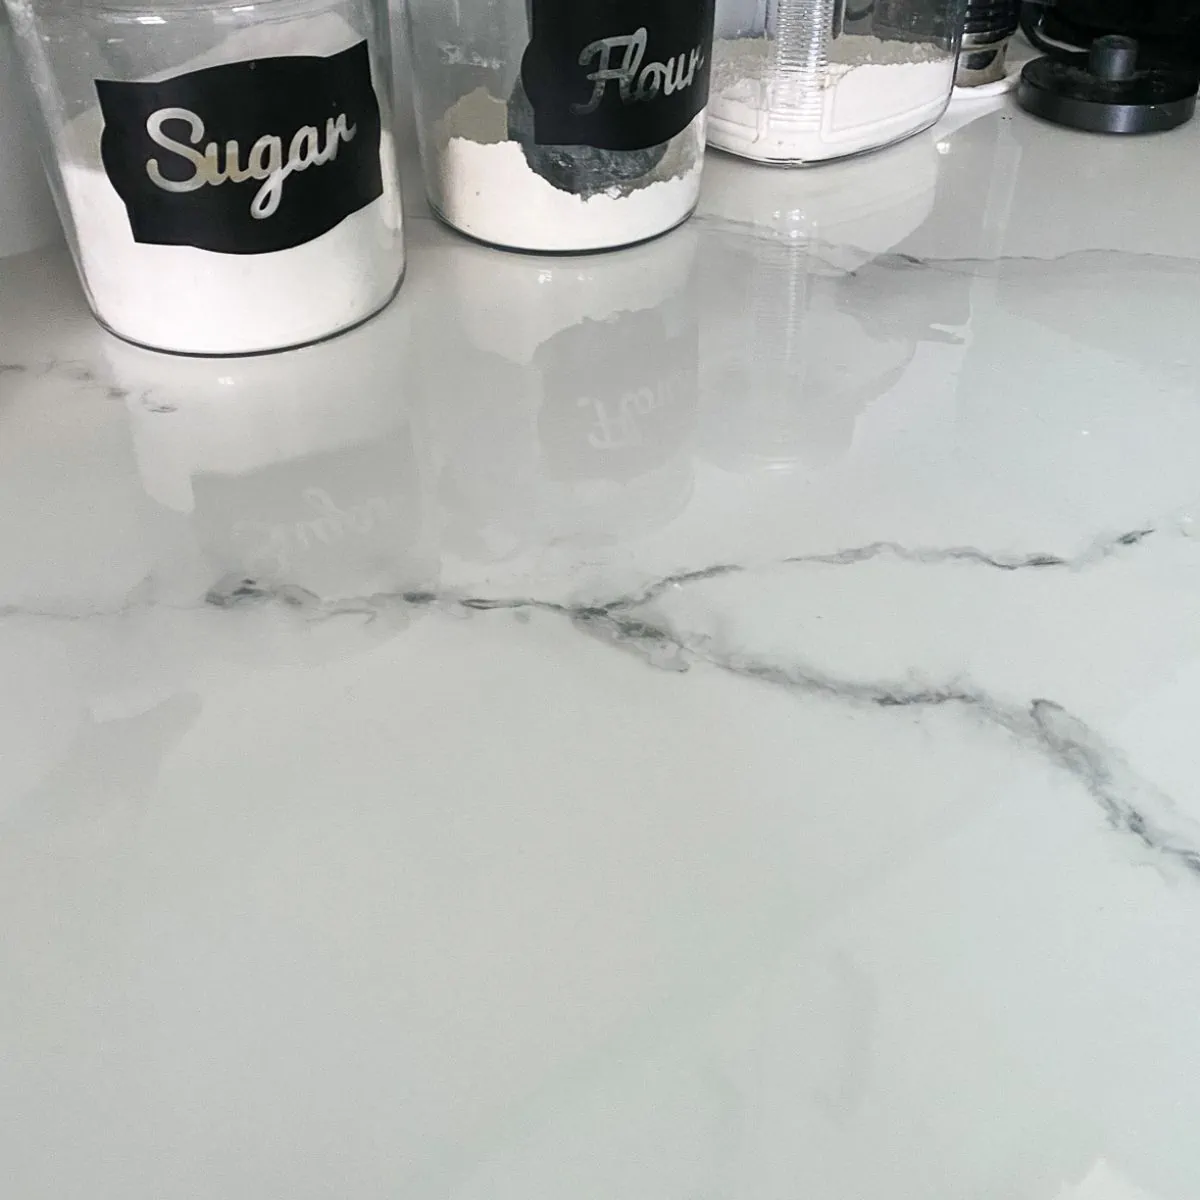
So I decided to try out the Gianni marble epoxy countertop kit.
The kit contains almost everything you need to paint and seal your countertop. The only thing I added was more tarps because my kitchen has a bar ledge that needed to be coated as well. I also needed painter’s tape and a roller tray, both of which I already had.
By the way, the kit covered way more than it says it will. I ordered extra because I didn’t want to run out of supplies halfway through the process.
Now I have enough to redo all 3 of our bathroom countertops as well.
I had a ton of concerns before I got started, but I found the process much easier and even fun to complete. Seriously, that was the most fun I’ve had in a DIY project in a really long time.
For about $200, I was able to redo my laminate countertops in a weekend.
Is this kit hard to use?
This kit was really easy to use and very forgiving. The paint went really far and covered really well. I needed 2 full coats of paint and 1 touch-up coat for the corners where it met the backsplash. It probably took about 1 1/2 hours, if that.
The marbling part was so fun and easy to correct if you created an ugly spot. It took me about 2 hours to complete.
The epoxy was pretty painless as well. I think it took about 30 minutes for this process. I had my husband help me, but I could have done it by myself.
Do the paint and epoxy smell bad?
Neither one smelled bad. The paint smelled like normal paint and the smell went away pretty quickly.
The epoxy smelled a little, but it went away too and then strangely started smelling like toilet cleaner as it dried.
Nothing toxic or dangerous though.
Do you need artistic talent to paint a marble faux finish?
While I think artistic talent helps with the process, it’s not necessary. The process includes a lot of blending and spraying with water, which is pretty forgiving.
If you hate how it looks, you can either spray it with water and wipe it away or let it dry and paint over it.
There were a few areas where I didn’t blend it enough, so I sponged white paint over those areas to correct the areas.
How messy is this process?
The paint is super thick and doesn’t drip. (Use a drop cloth if you’re nervous though.)
This epoxy was a lot easier to use than other brands that I’ve used in the past. It did spill onto the drop cloth, but it wasn’t a lot of it.
Gloves are included in the kit, but if you get the epoxy on your hands, rubbing alcohol removes the stickiness.
How long does it take for the epoxy to dry?
We applied the epoxy around 7 pm and it was dry to the touch by the next morning.
We waited another day before replacing everything. But I waited longer to put our heavy mixer back in place, just in case.
Do you really need to keep pets away?
This part worried me the most. My dog sheds like crazy.
We tried to keep her calm and not roughhouse with her during this process. We also applied it during her quiet hours. (If you have pets, you probably know when they get the zoomies and when they nap a lot.)
Before you get started, wipe the countertops with a microfiber to remove any dust or hair.
You can meticulously go around and remove hair with a pair of tweezers.
The epoxy dries pretty quickly, so I’ve only noticed maybe 2 pieces of small dog hair in it.
If you have cats that get on the countertop, keep them away since it needs several hours to dry.
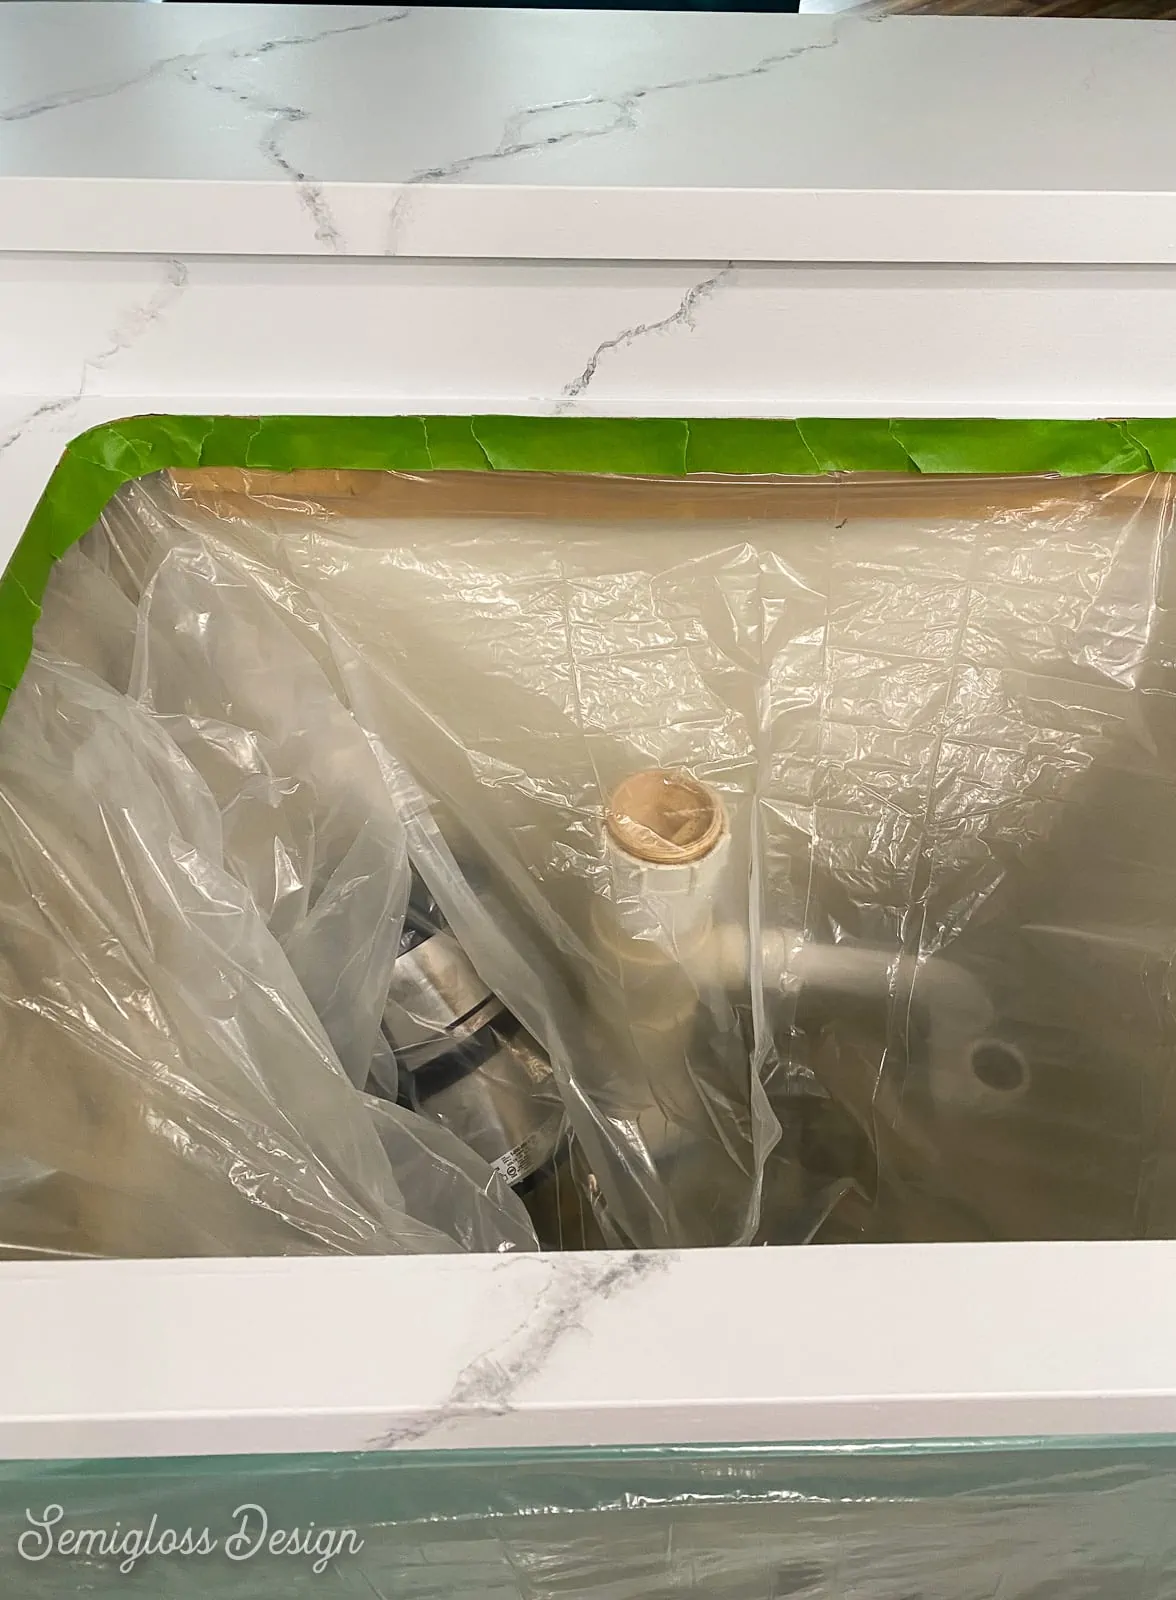
Do you need to remove the sink and appliances?
We removed our sink because the faucet is too close to the bar ledge and it would have been impossible to get around it. (We also just bought it so we didn’t want to take any chances.)
We taped our stove edges off with no issues.
So it’s up to you, but it’s possible to tape everything off. Be generous with the tape and plastic tarps!
Do you need to use epoxy or can you just use poly?
The epoxy sealer is really easy to use and dries to a durable finish that’s perfect for kitchen use. It can withstand daily cleaning and regular wear and tear. (In my last house, it was still looking good after about 5 years!)
Poly can be used in areas that aren’t used as heavily, like a bathroom. Be sure to use polycrylic, the water-based version, so that it doesn’t yellow over time.
Poly will wear away after time and may need to be touched up or repainted after time.
Do you need to prime or sand your countertops?
For light-colored laminate countertops, this isn’t necessary.
However, if your countertops are darker or shiny, extra prep might be a good idea. Primer will allow you to use fewer coats of paint and help it stick better.
Shiny surfaces like granite, solid surface or quartz should be sanded lightly and cleaned thoroughly before painting.
How to Paint a Countertop to Look Like Marble
Supplies Needed:
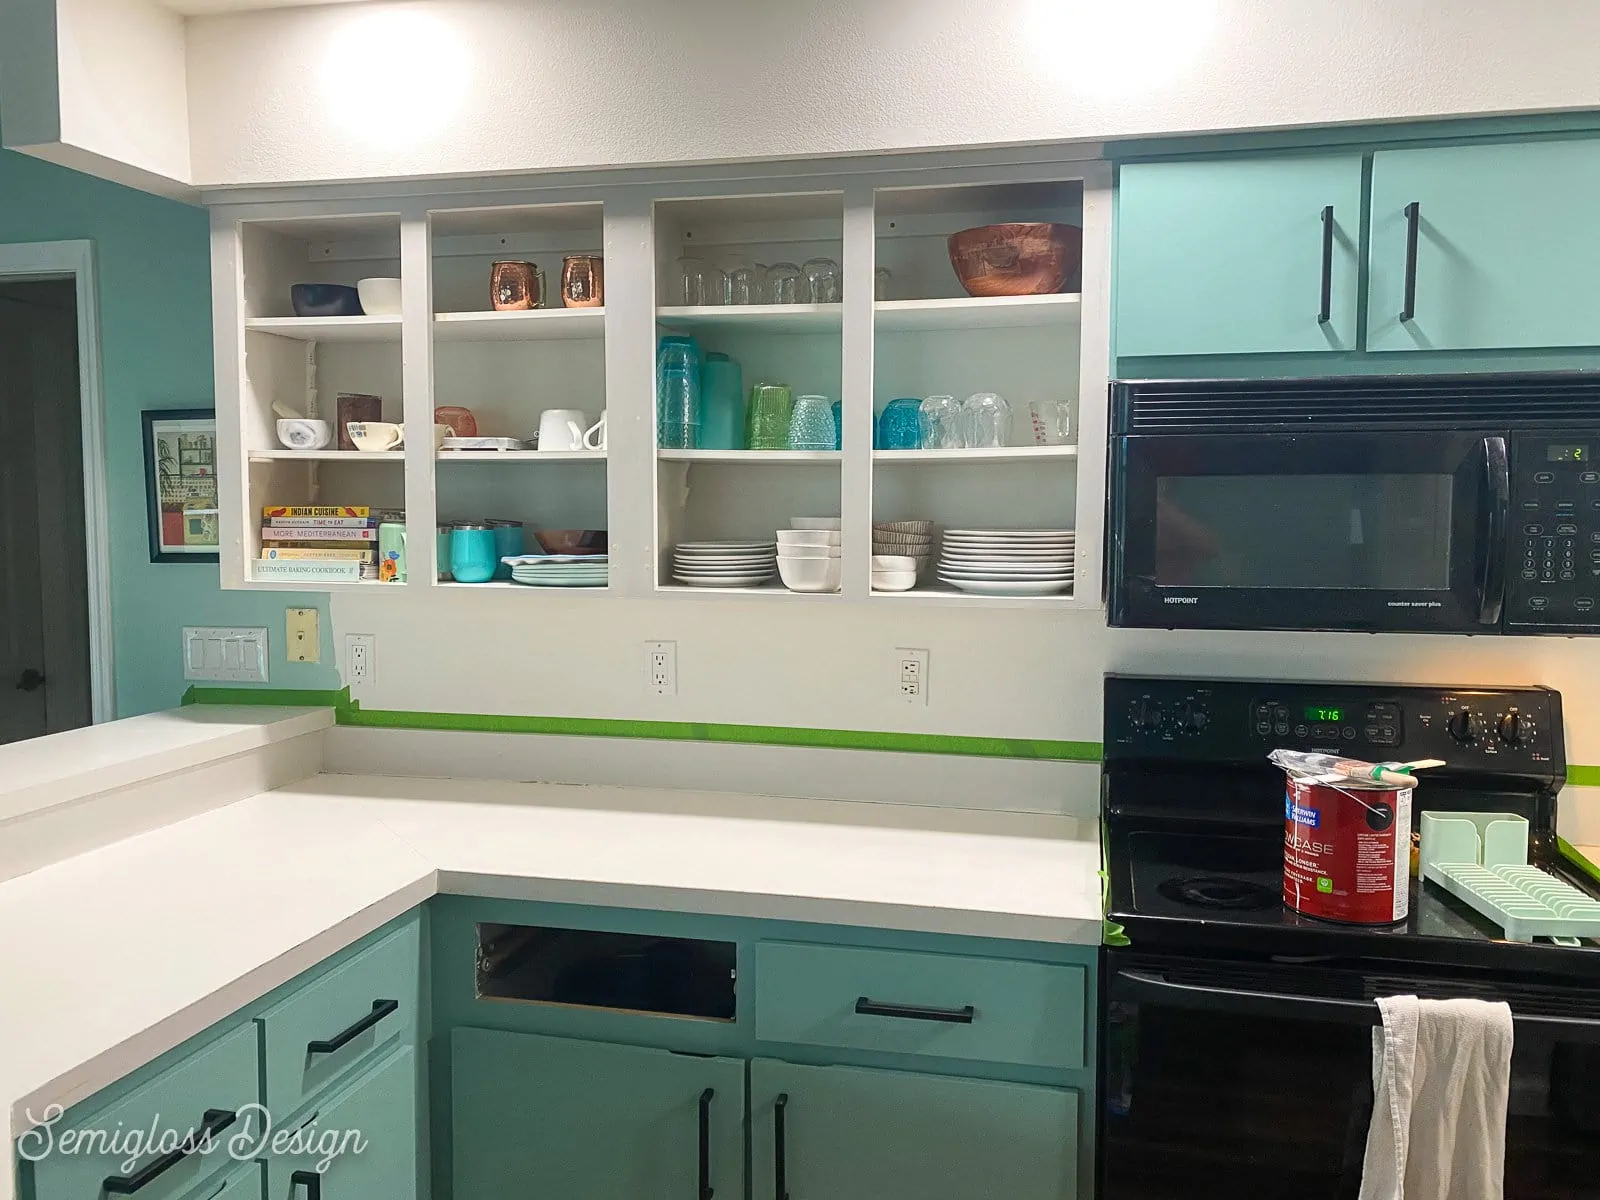
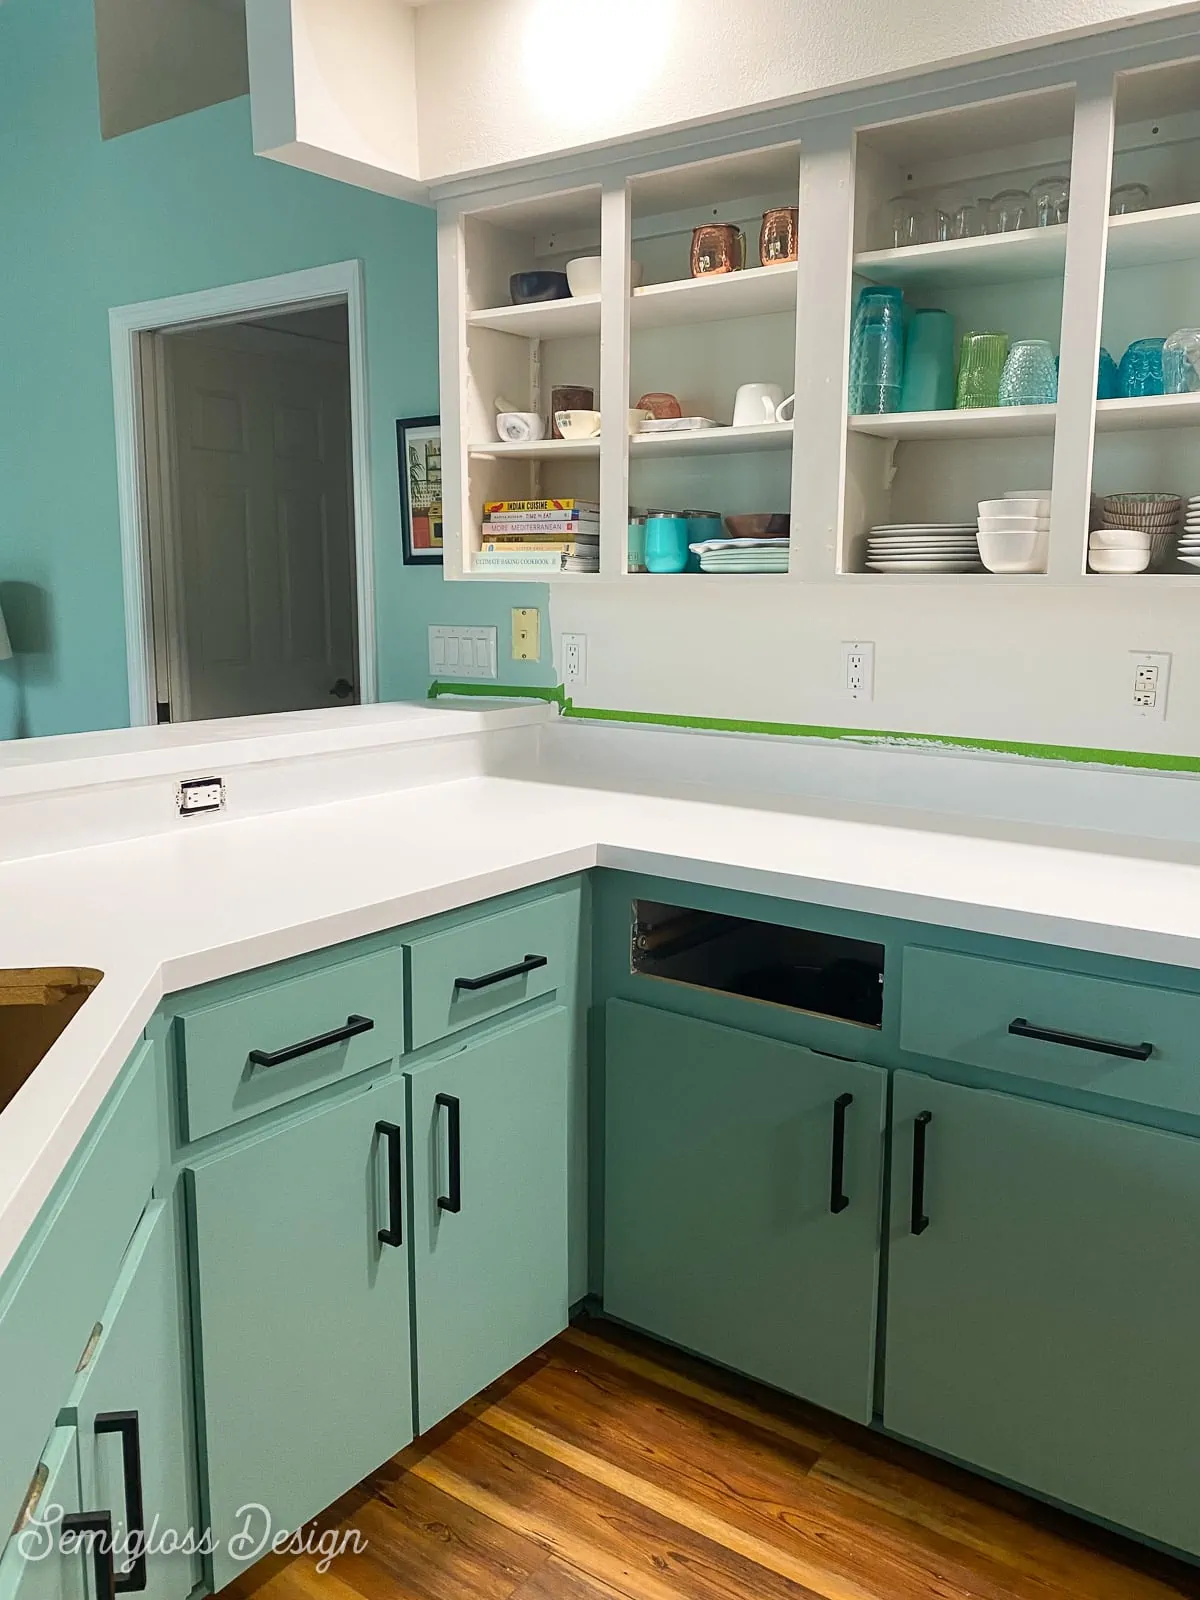
Please forgive the state of the kitchen as we worked. We had to repair a few drawers so they’re missing in the photos. I was also touching up the wall paint.
Countertop Prep Work
- Remove everything from your countertops.
- Clean them well. The instructions say to use brillo pads, but I didn’t have any on hand. Since my laminate countertops were already in pretty bad shape, I used a magic eraser instead. (Magic Erasers are technically a very fine sandpaper, so they work pretty well.)
- Rinse the cleaner with plain water several times to make sure that it’s clean.
- Remove the sink if you’re going to do that.
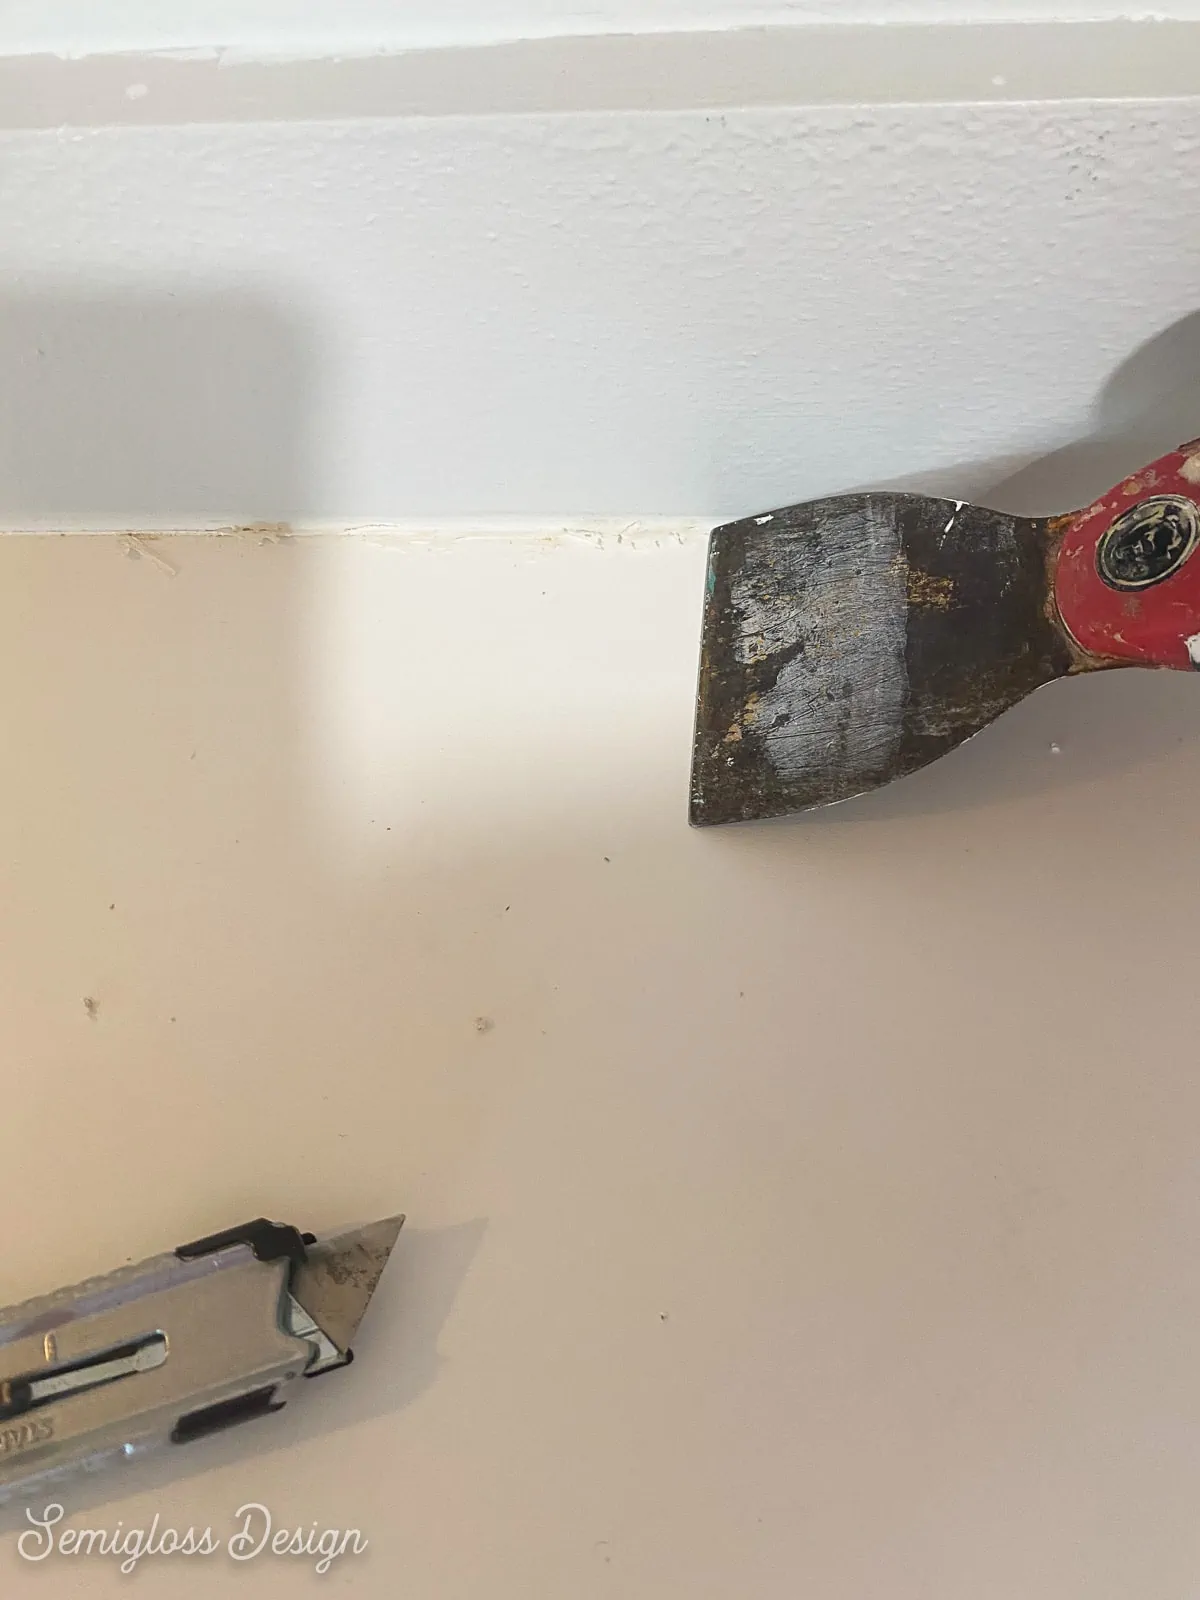
- Use a utility knife and a putty knife to remove any silicone caulk around the edges of your countertop where it meets the wall or backsplash.

- Clean up all the debris.
- Tape off any areas that you don’t want to get paint on, like the walls and appliances.

- You can also tape the drop cloths to the front of the cabinets now if you want. (I waited for the epoxy.)
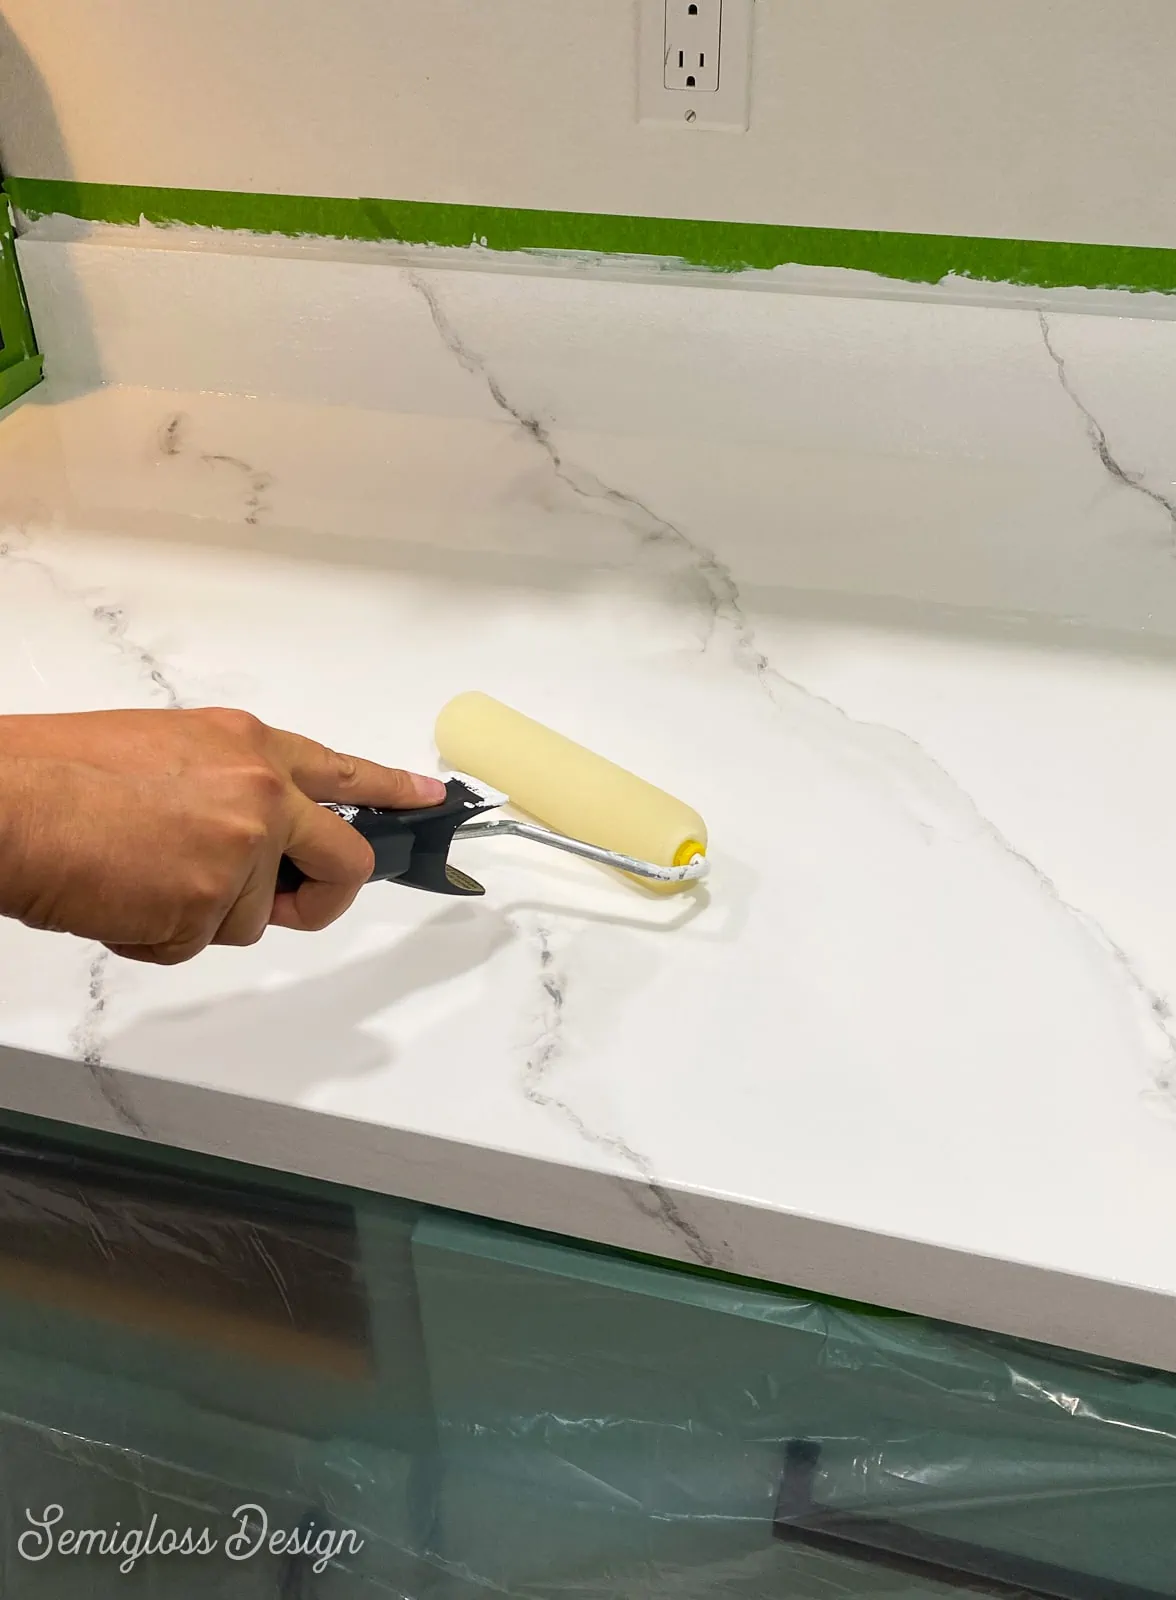
Painting the Countertop
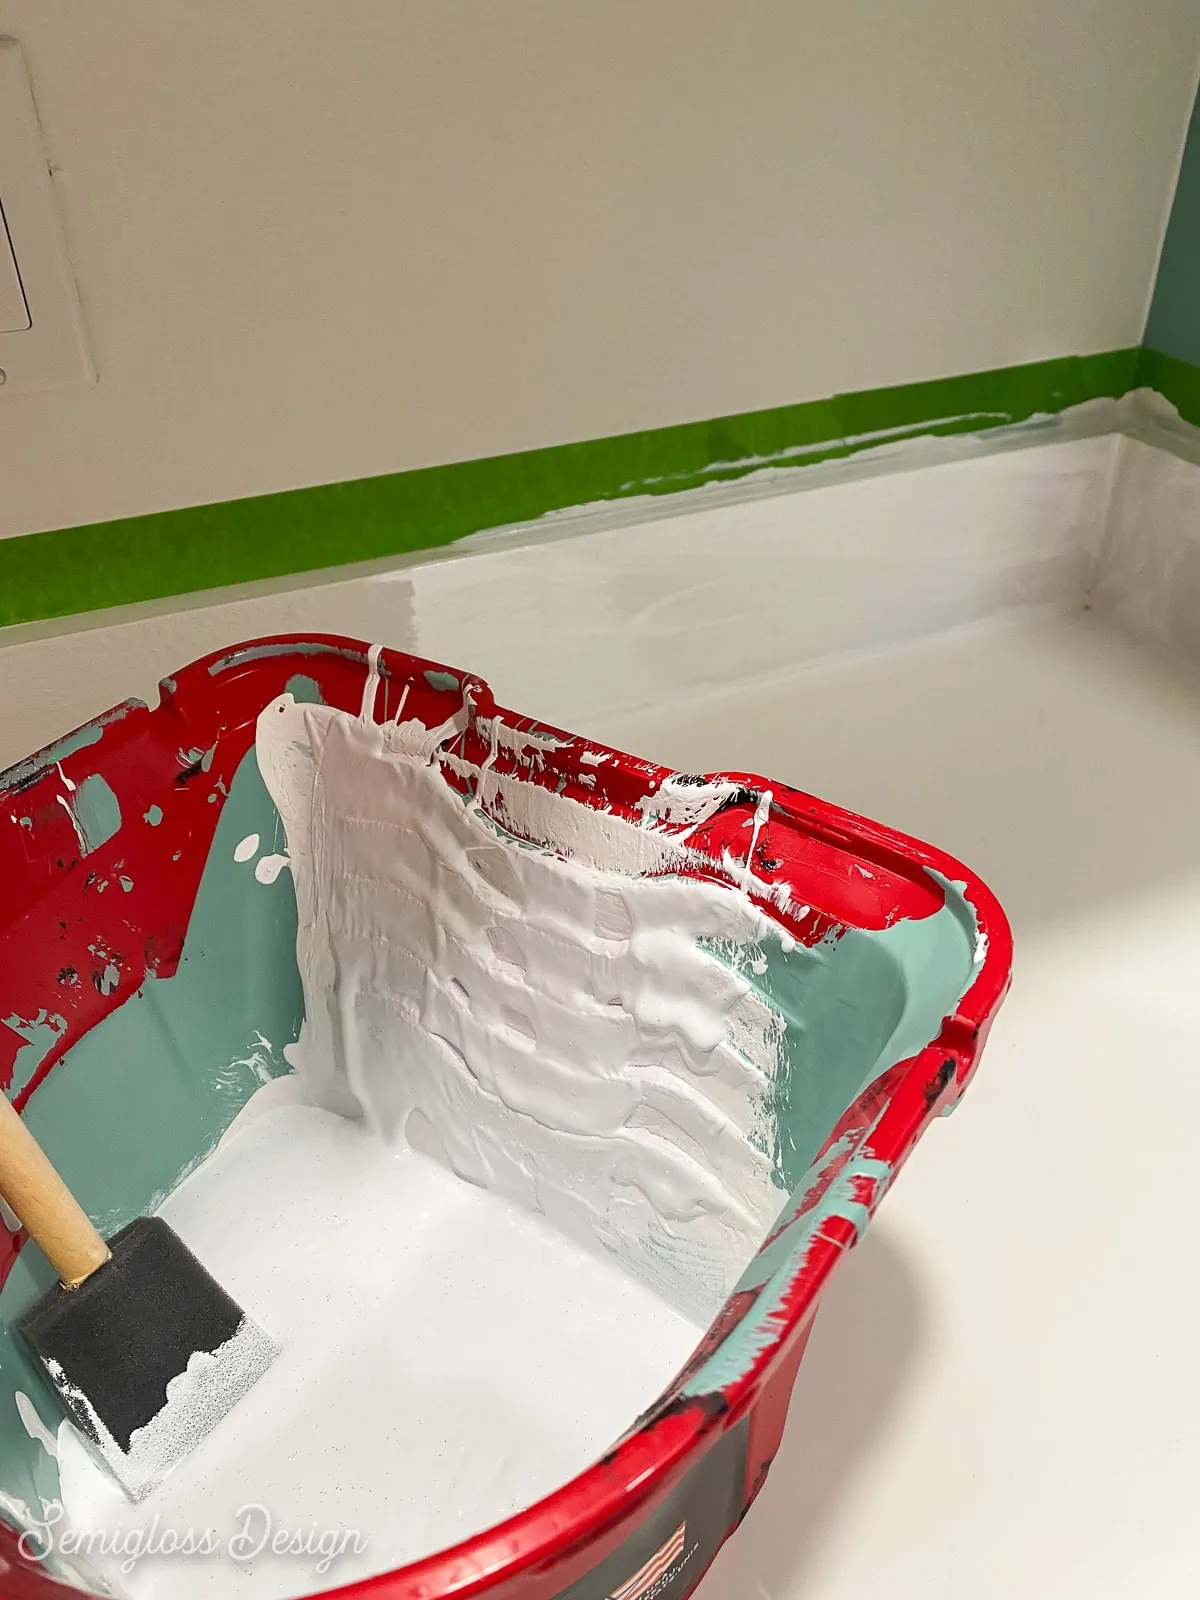
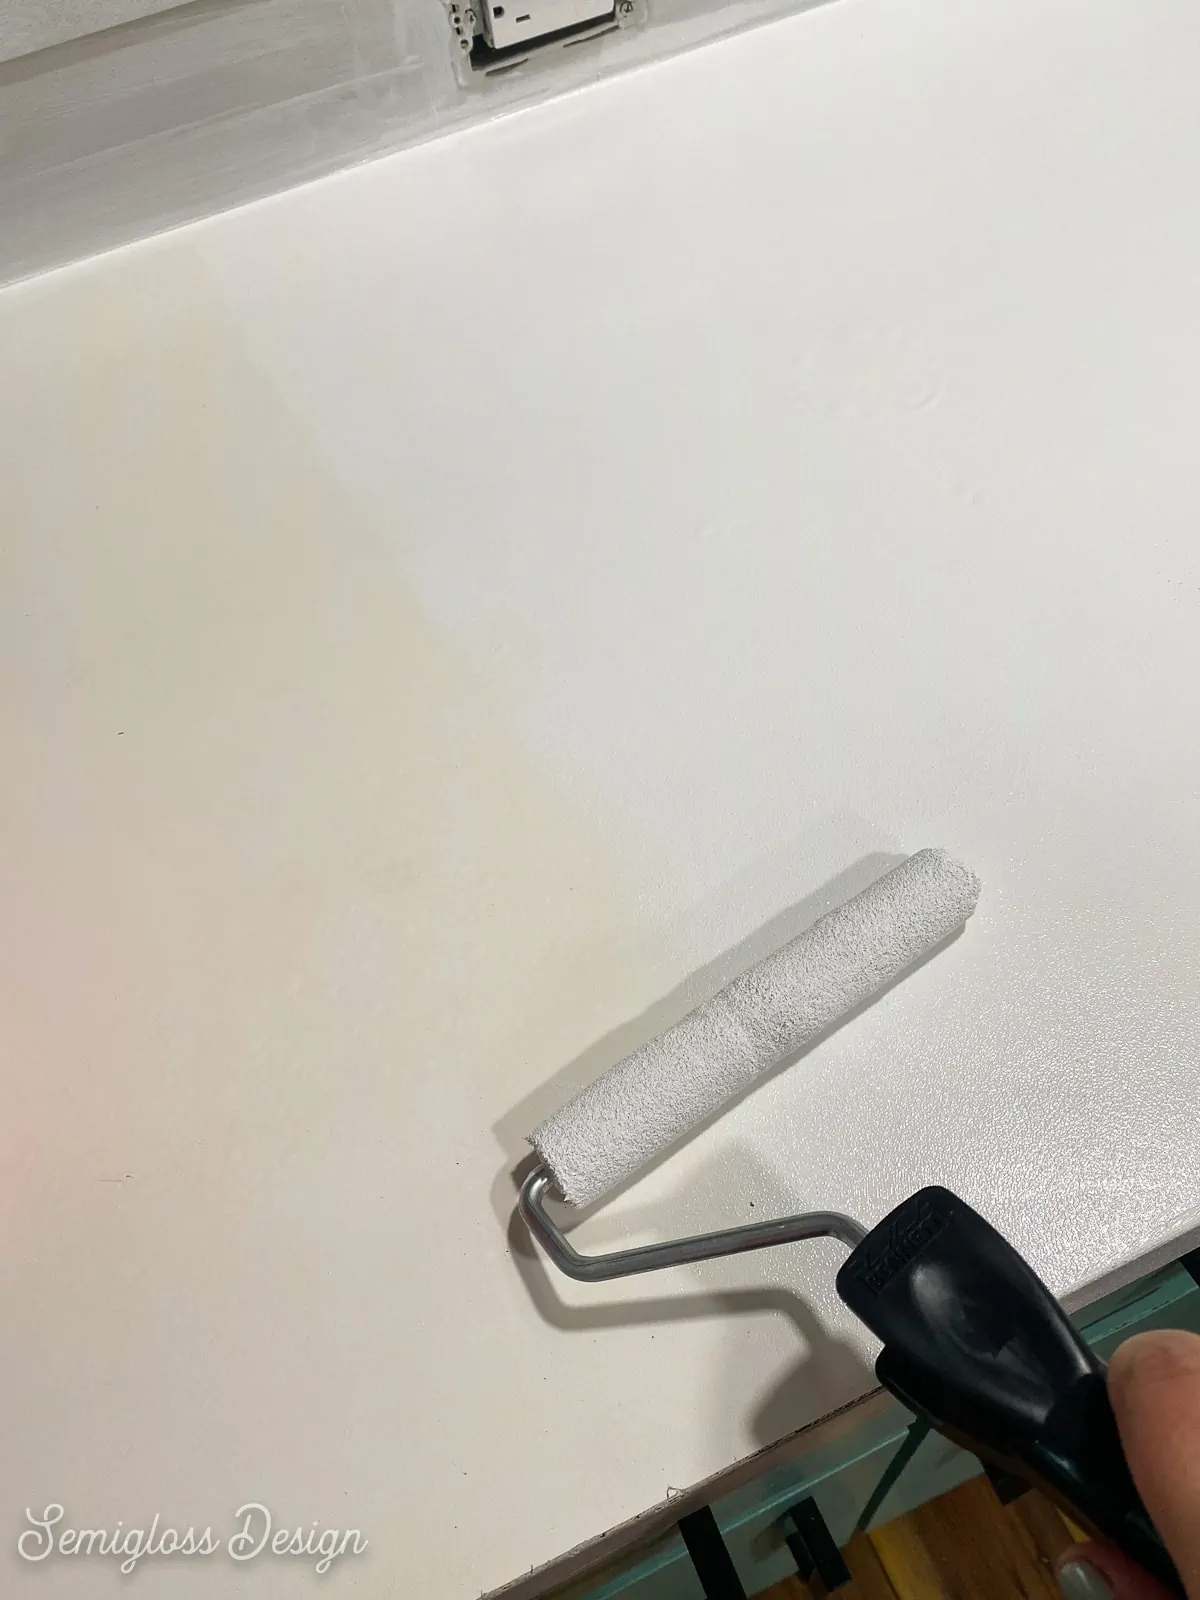
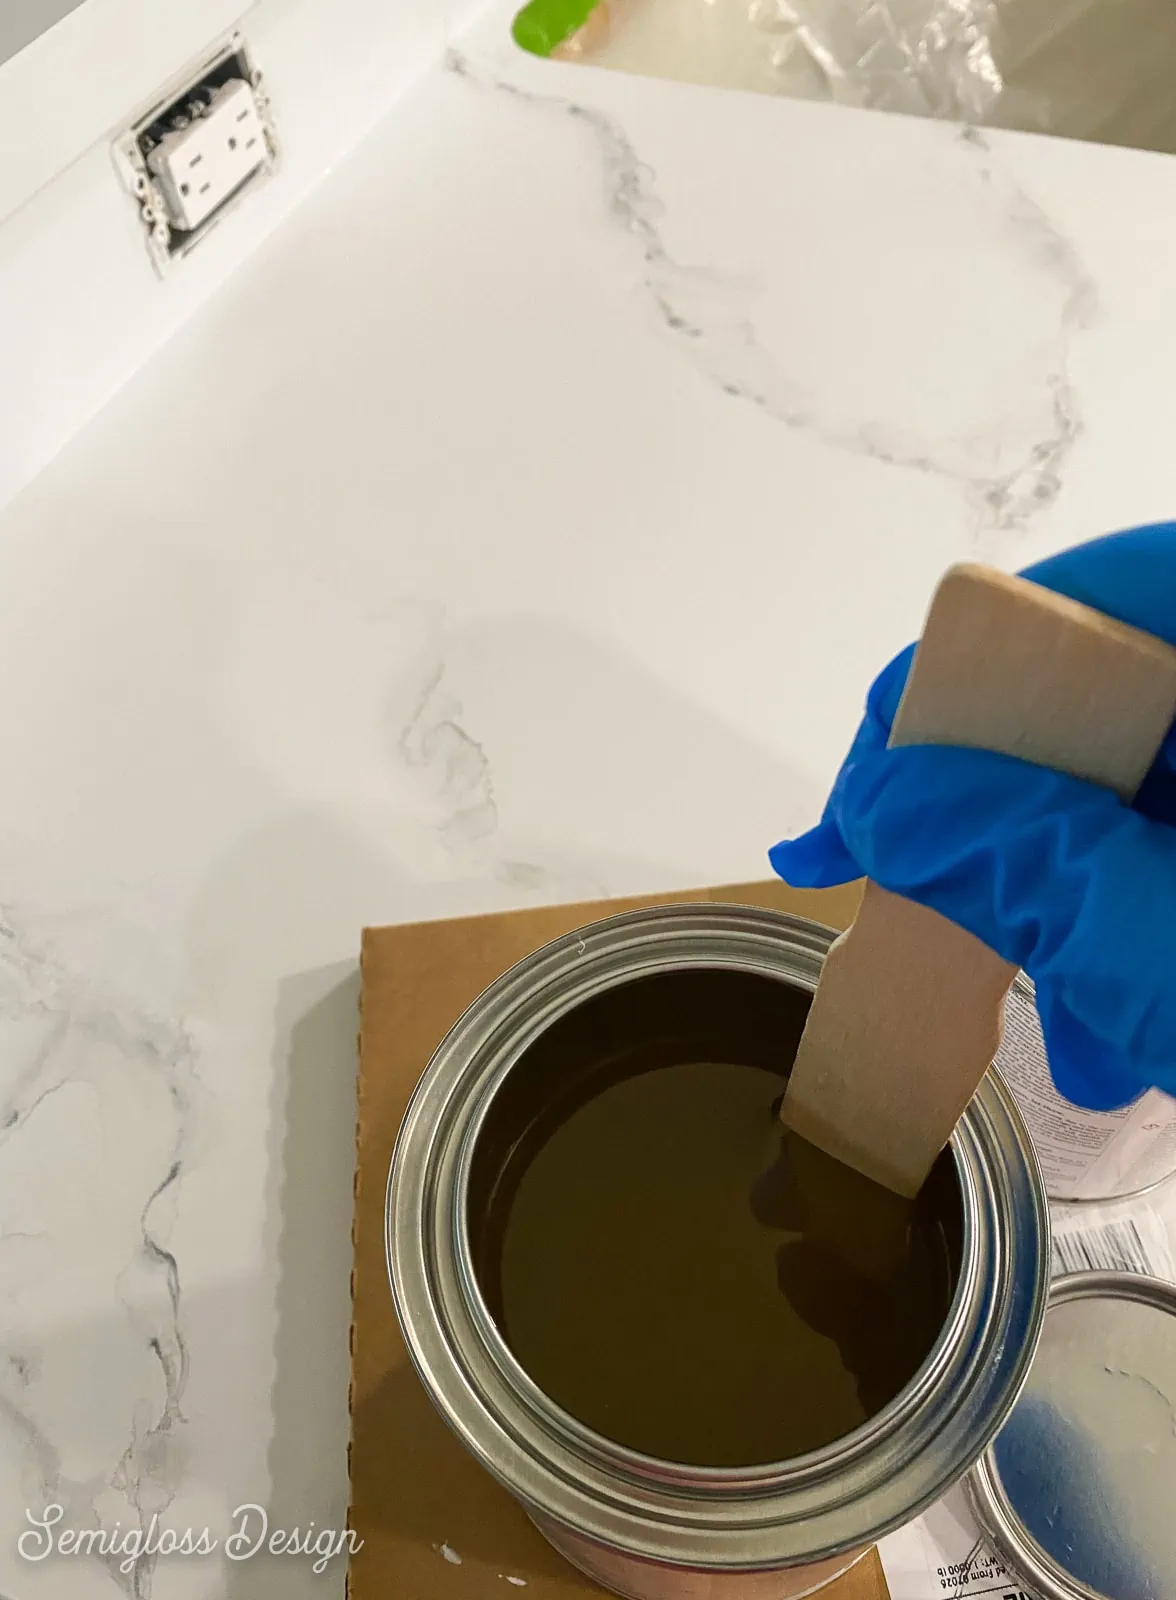
- Mix the paint well before using it. It’s very thick.
- Use the included foam brush to get the corners of the countertop.
- Use the small cloth roller to paint the larger flat parts of the counter. The roller covers much better than the foam brush so use it as much as possible.
- Let the first coat dry for 4 hours.
- Apply this second coat, paying attention to the thin parts near the edges and corners.
- Let the paint dry for at least 1 hour.
- Touch up any areas as needed.
- Let them dry for an hour before getting started on the marble faux finish.
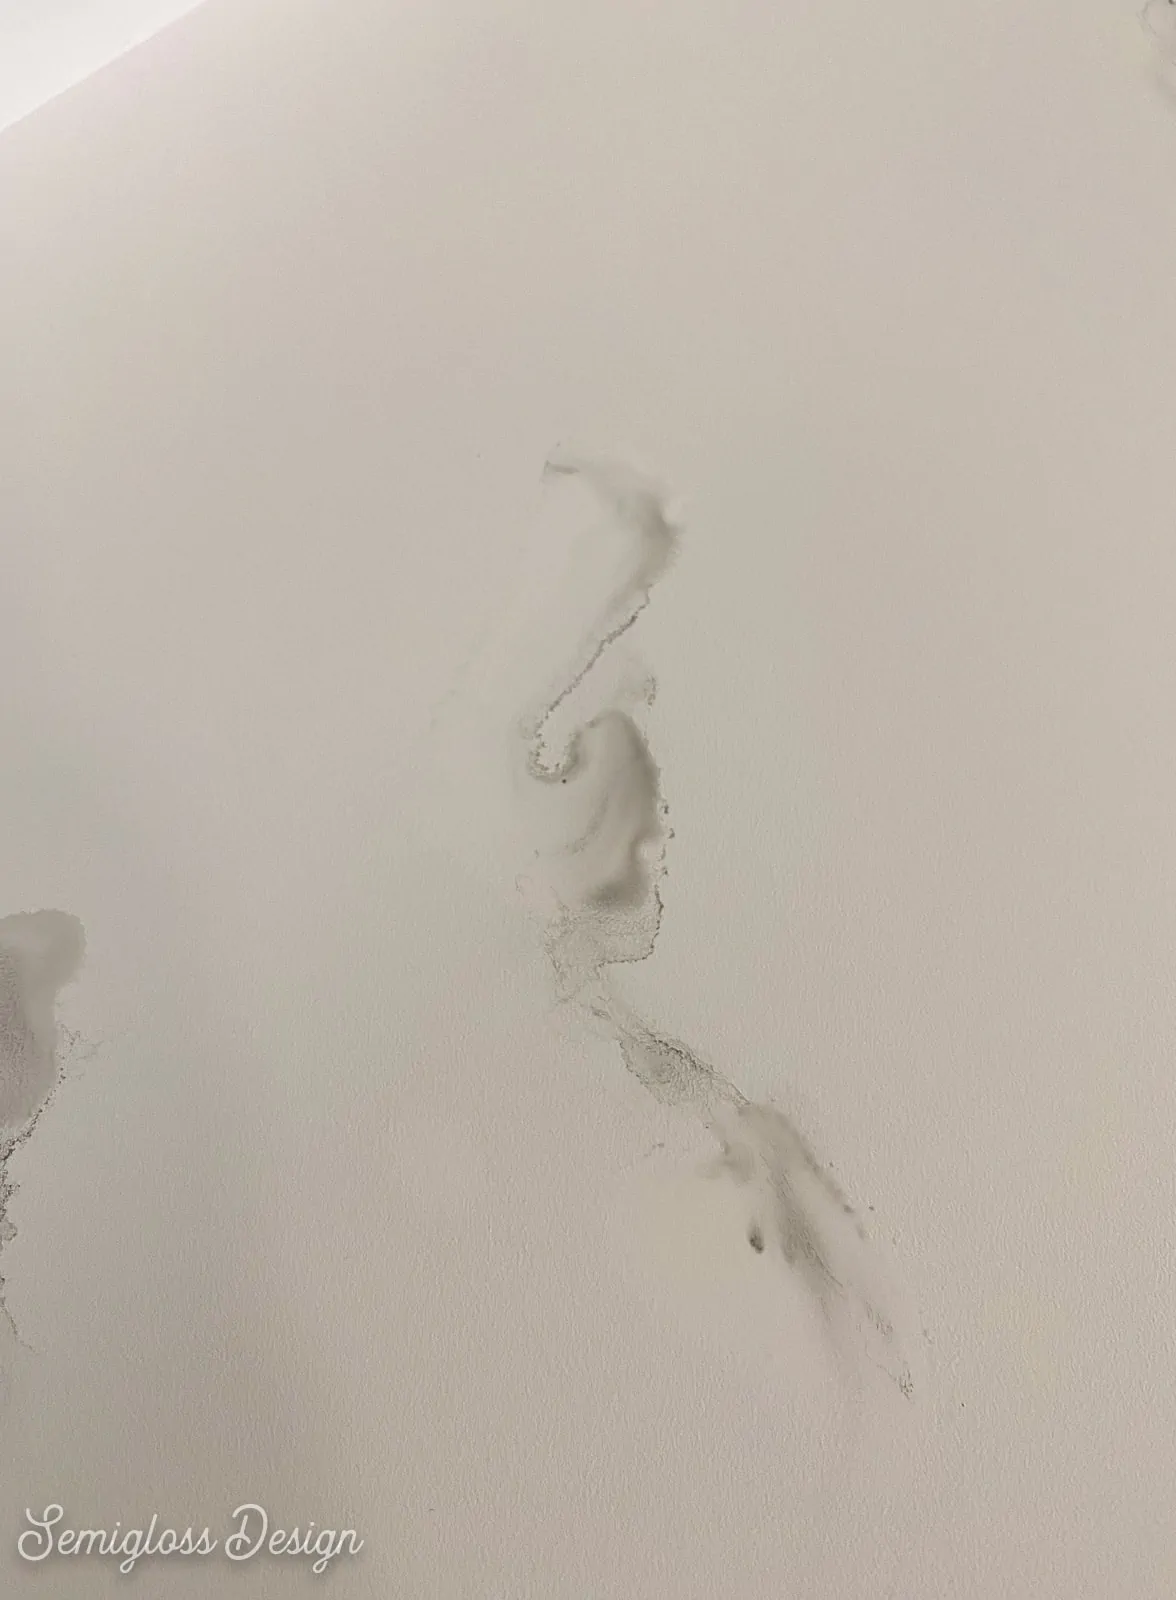
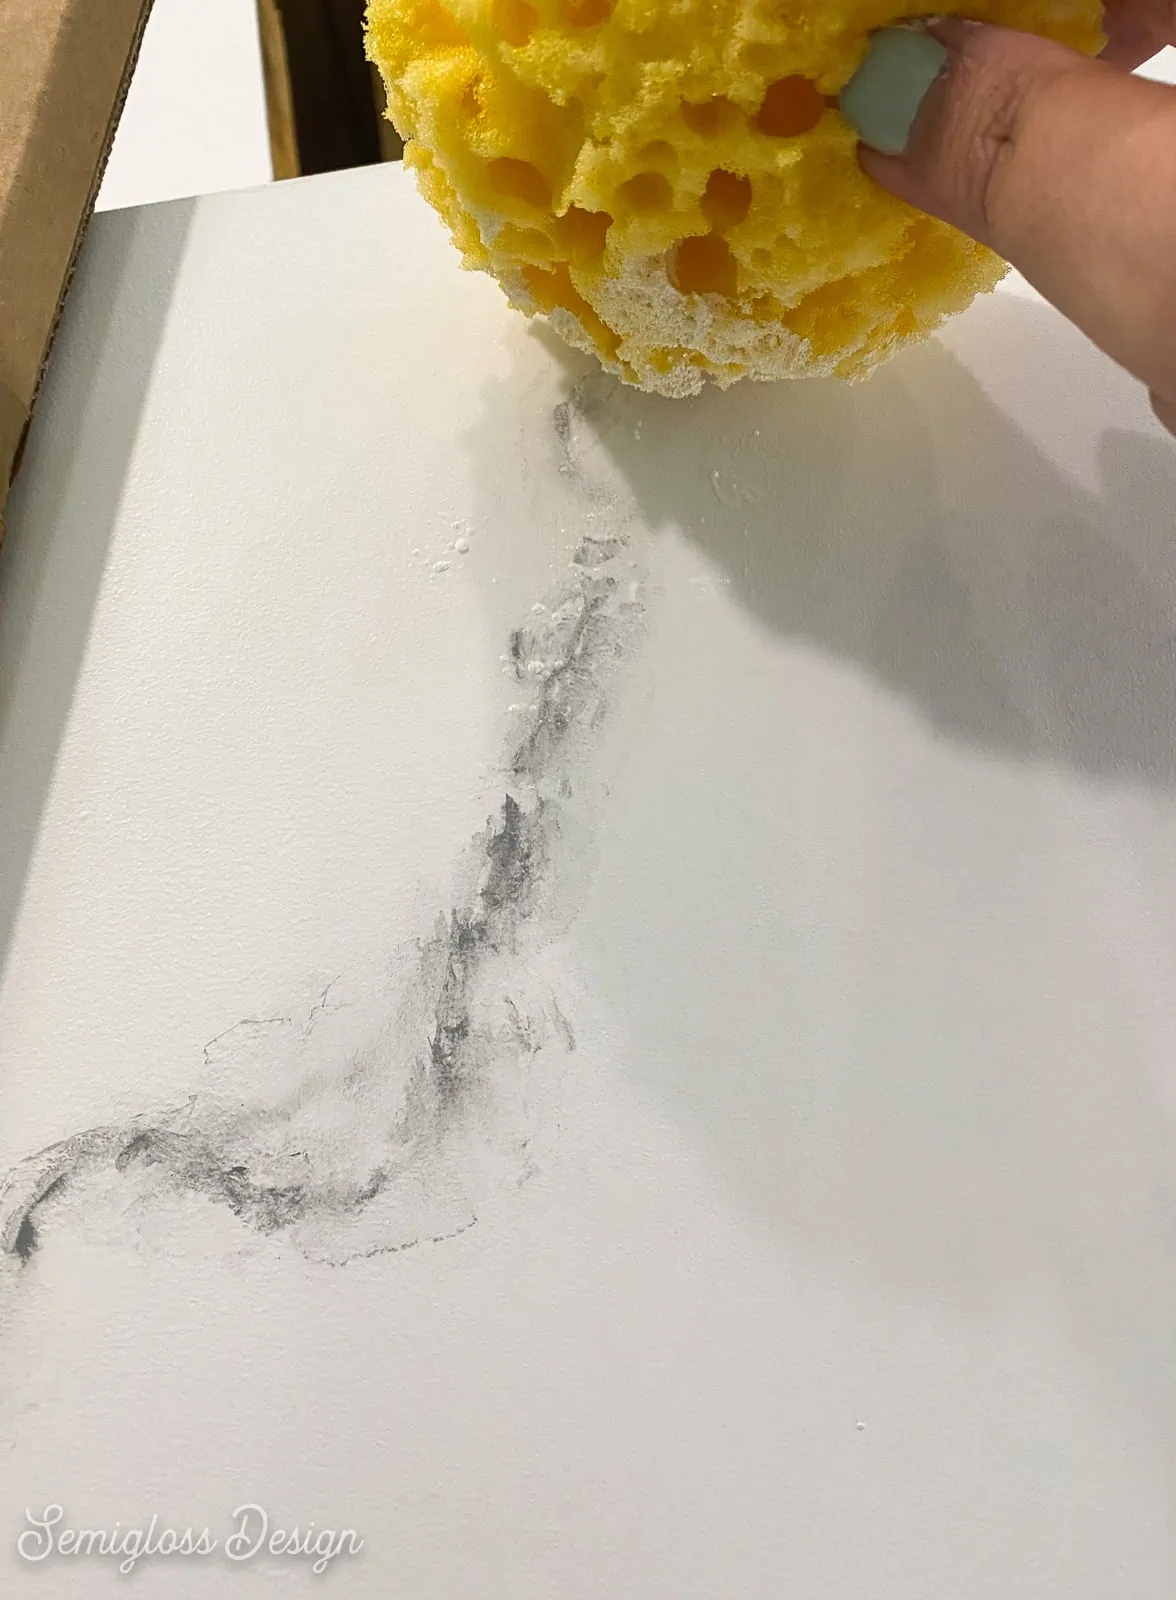
Painting the Marble Faux Finish
This kit comes with a foam core board to practice on, which is nice. It doesn’t work exactly the same, but it’s nice to feel confident before getting started.
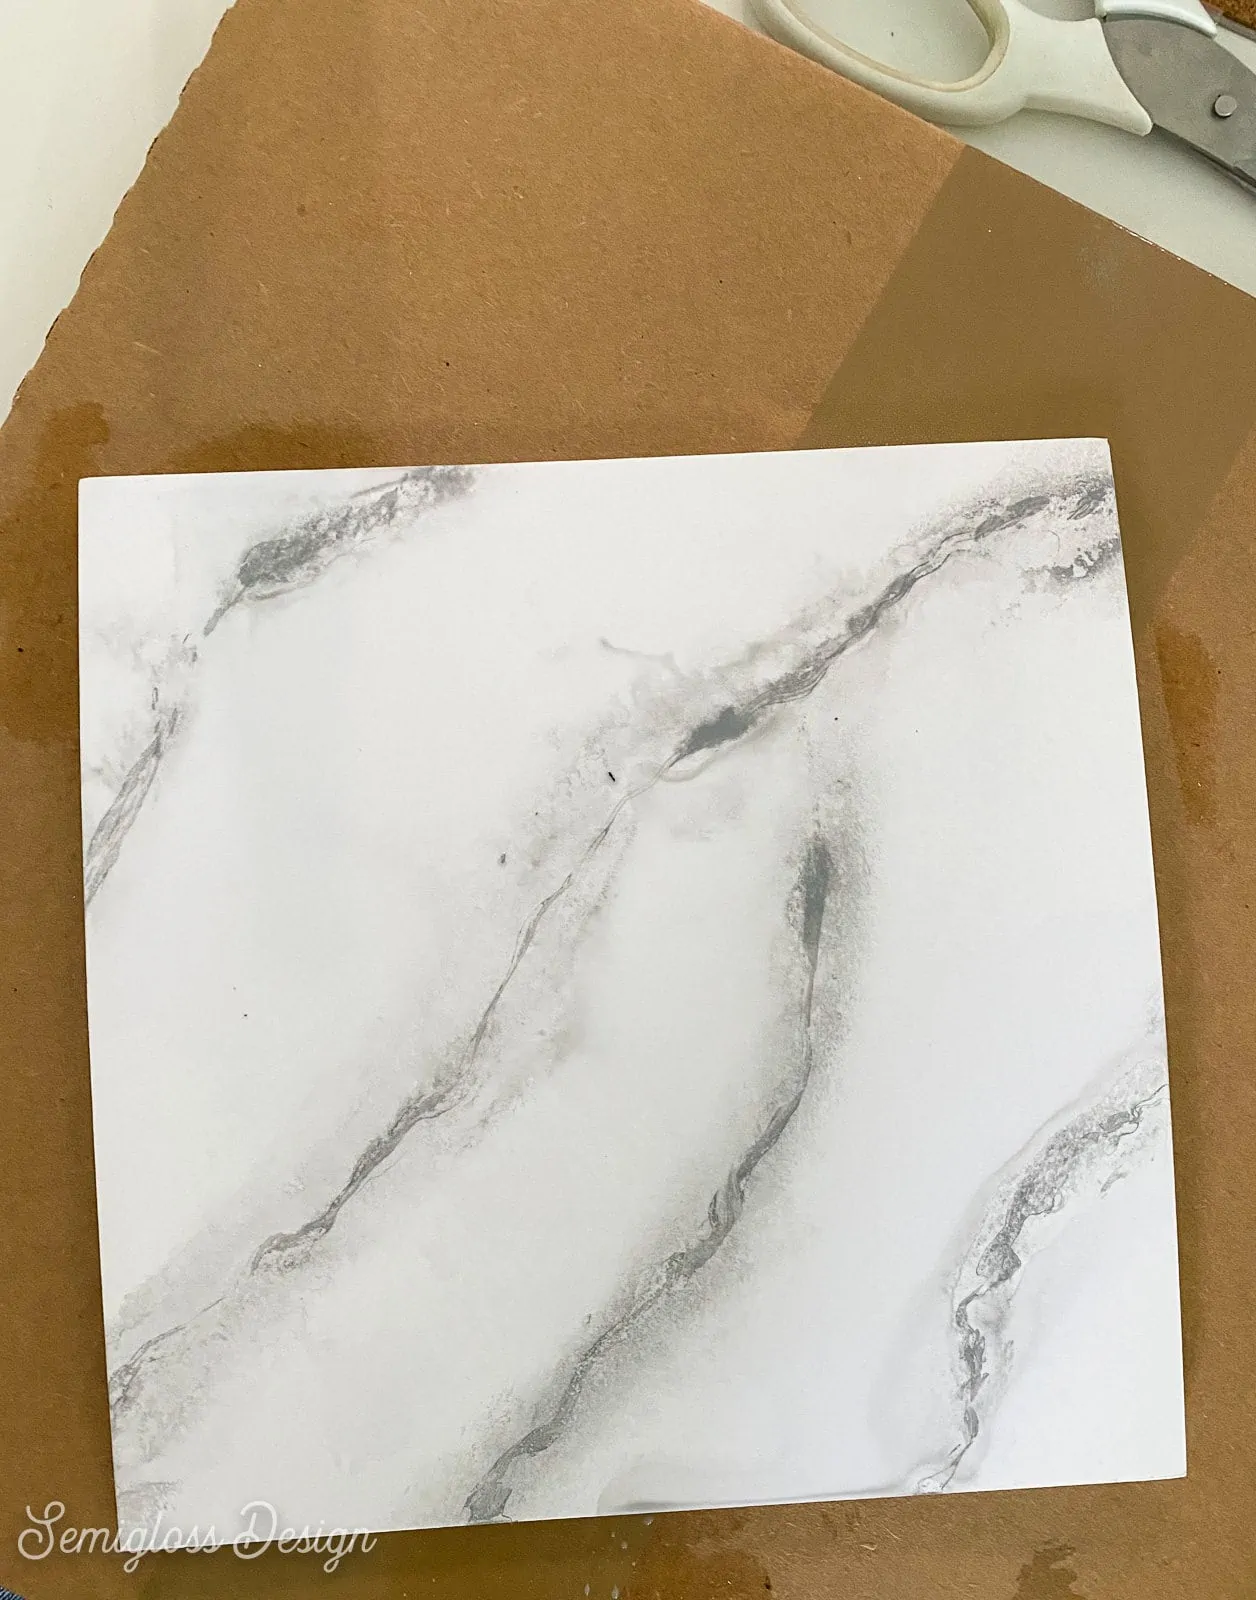
The instructions also recommend planning out the direction of your veins to look like the marble came from a slab. It’s also recommended to google image search marble textures.
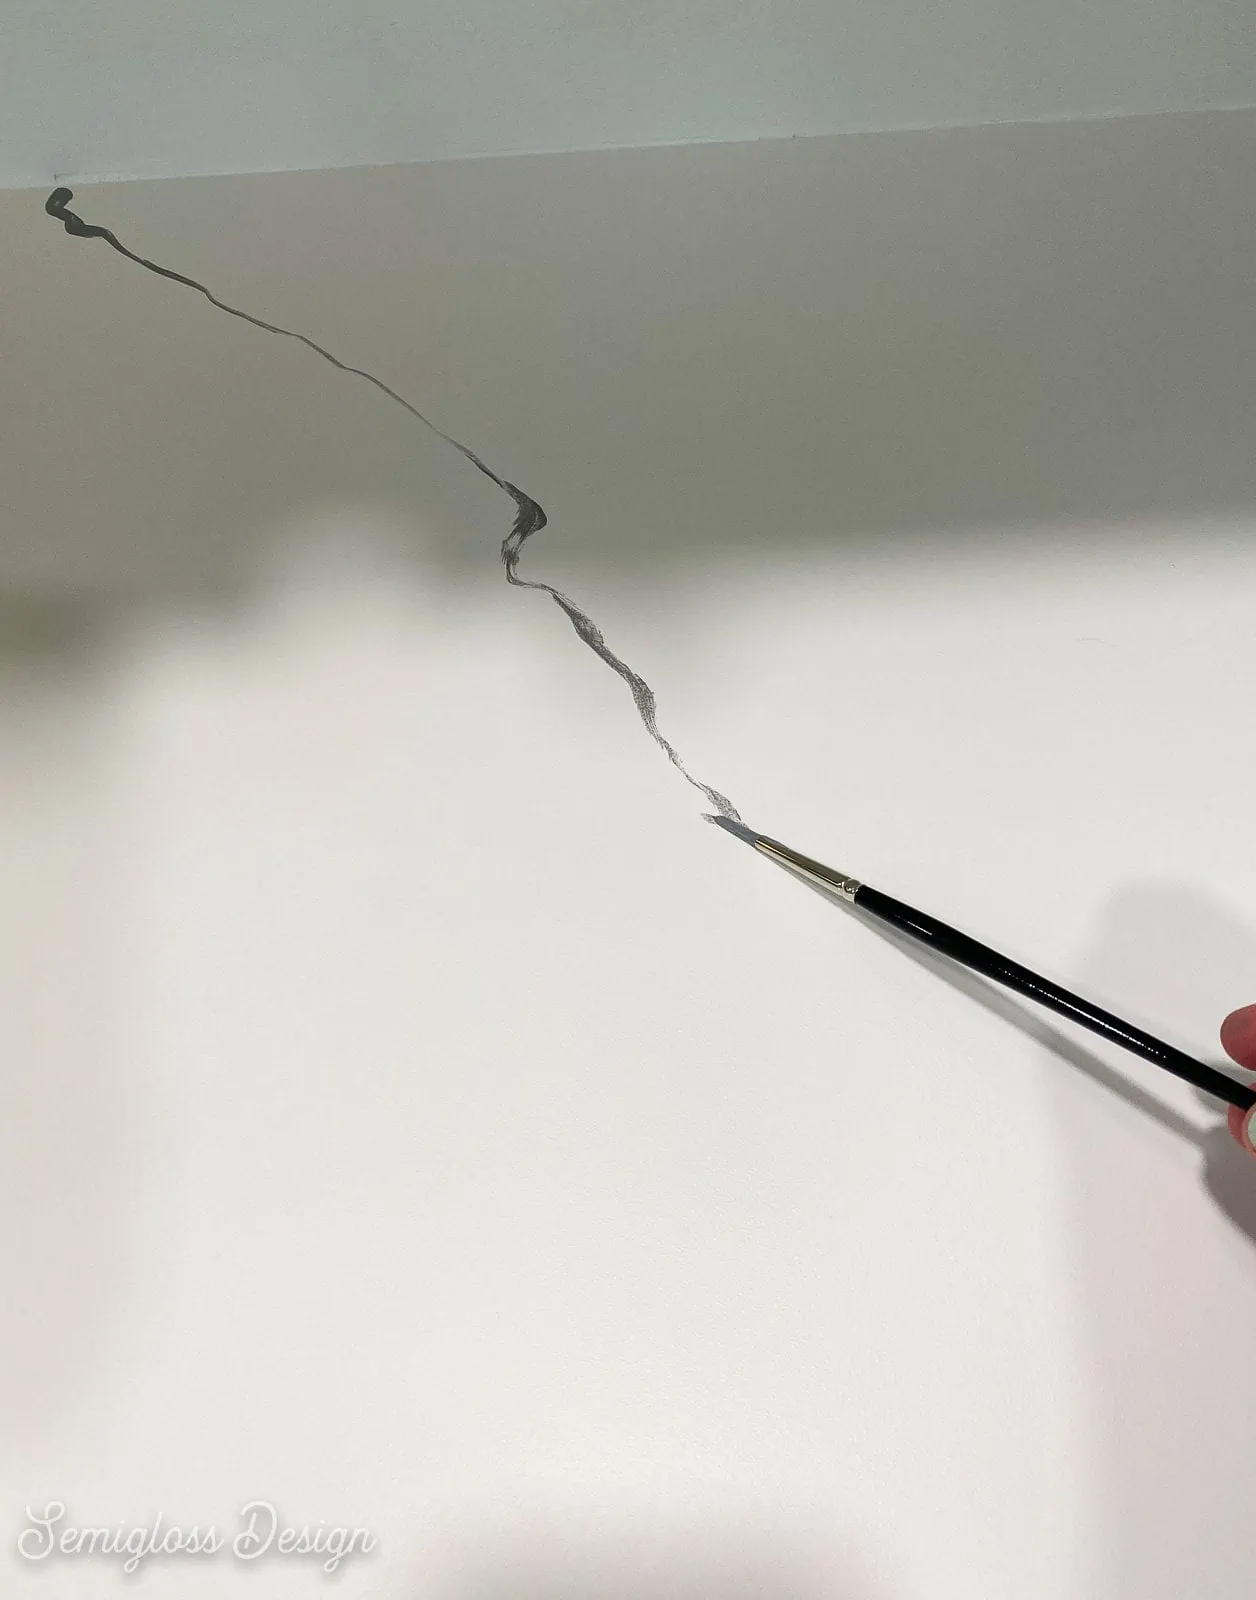
- Mix the gray veining paint.
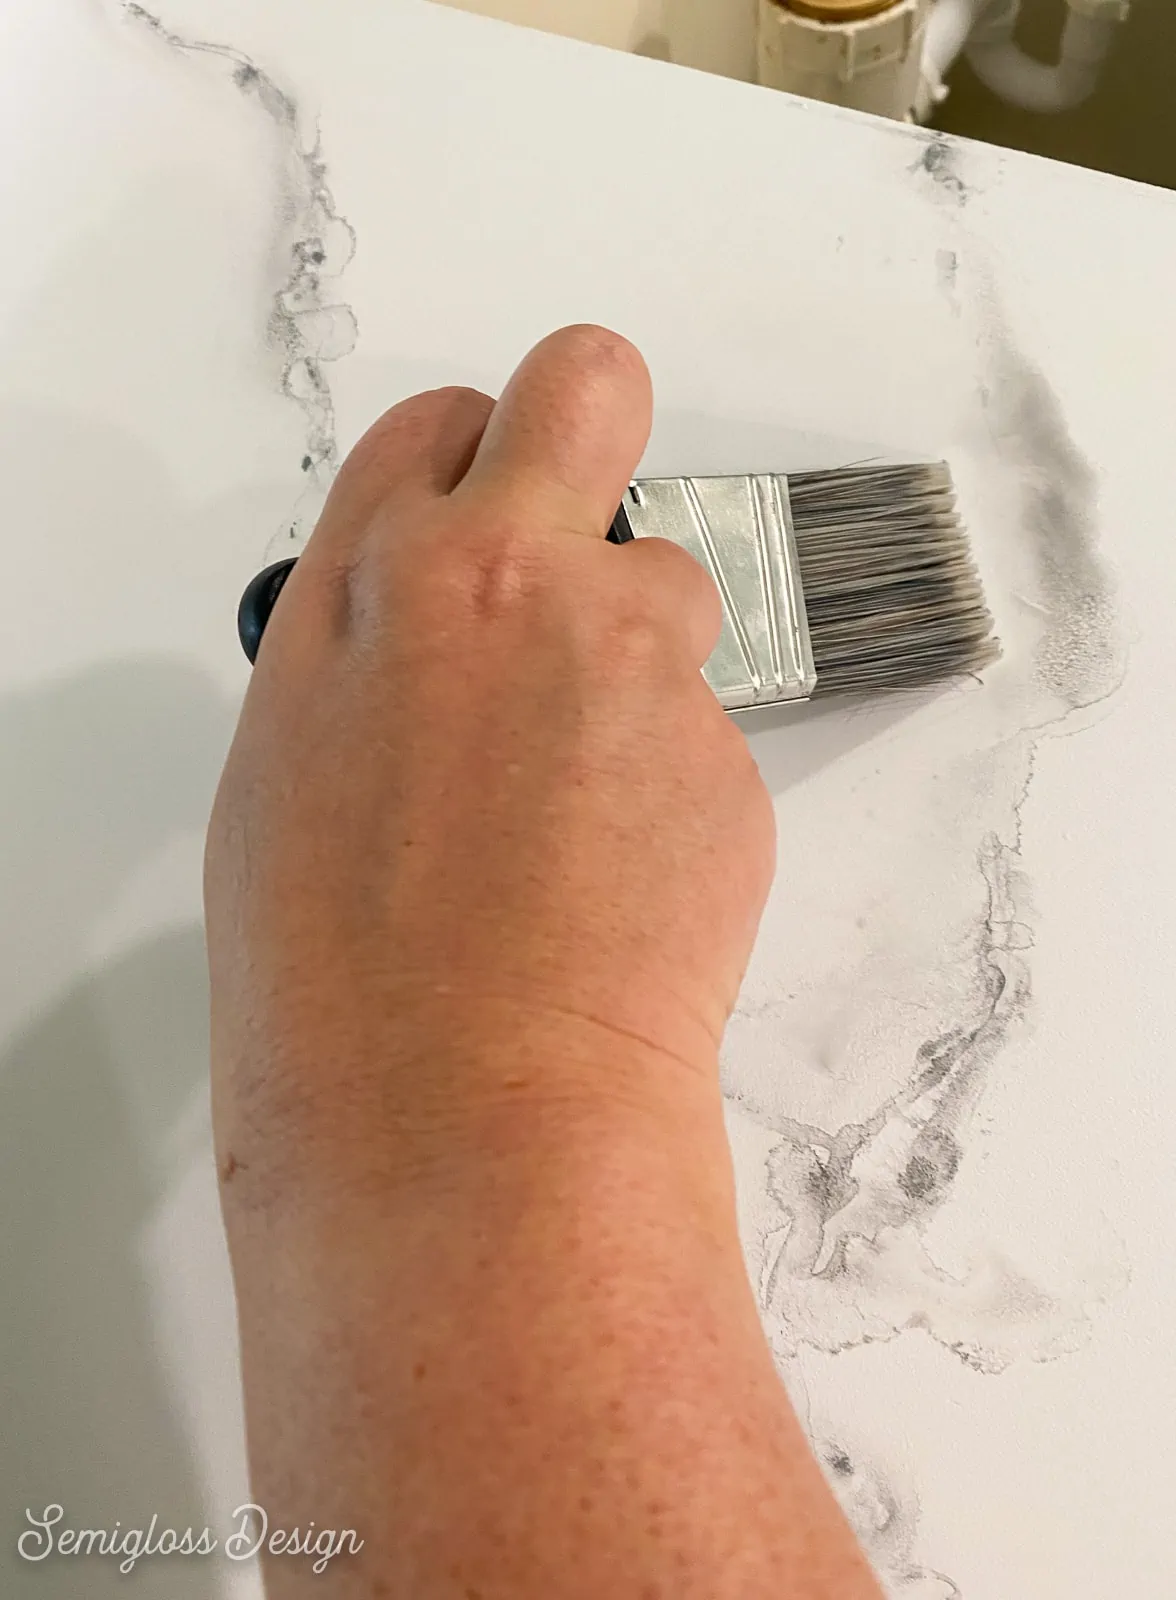
- Use the tiny paintbrush to add veins. Hold the brush at the end and let the bristles roll in places to make thicker lines.

- Make sure that your lines have movement and aren’t perfectly straight.
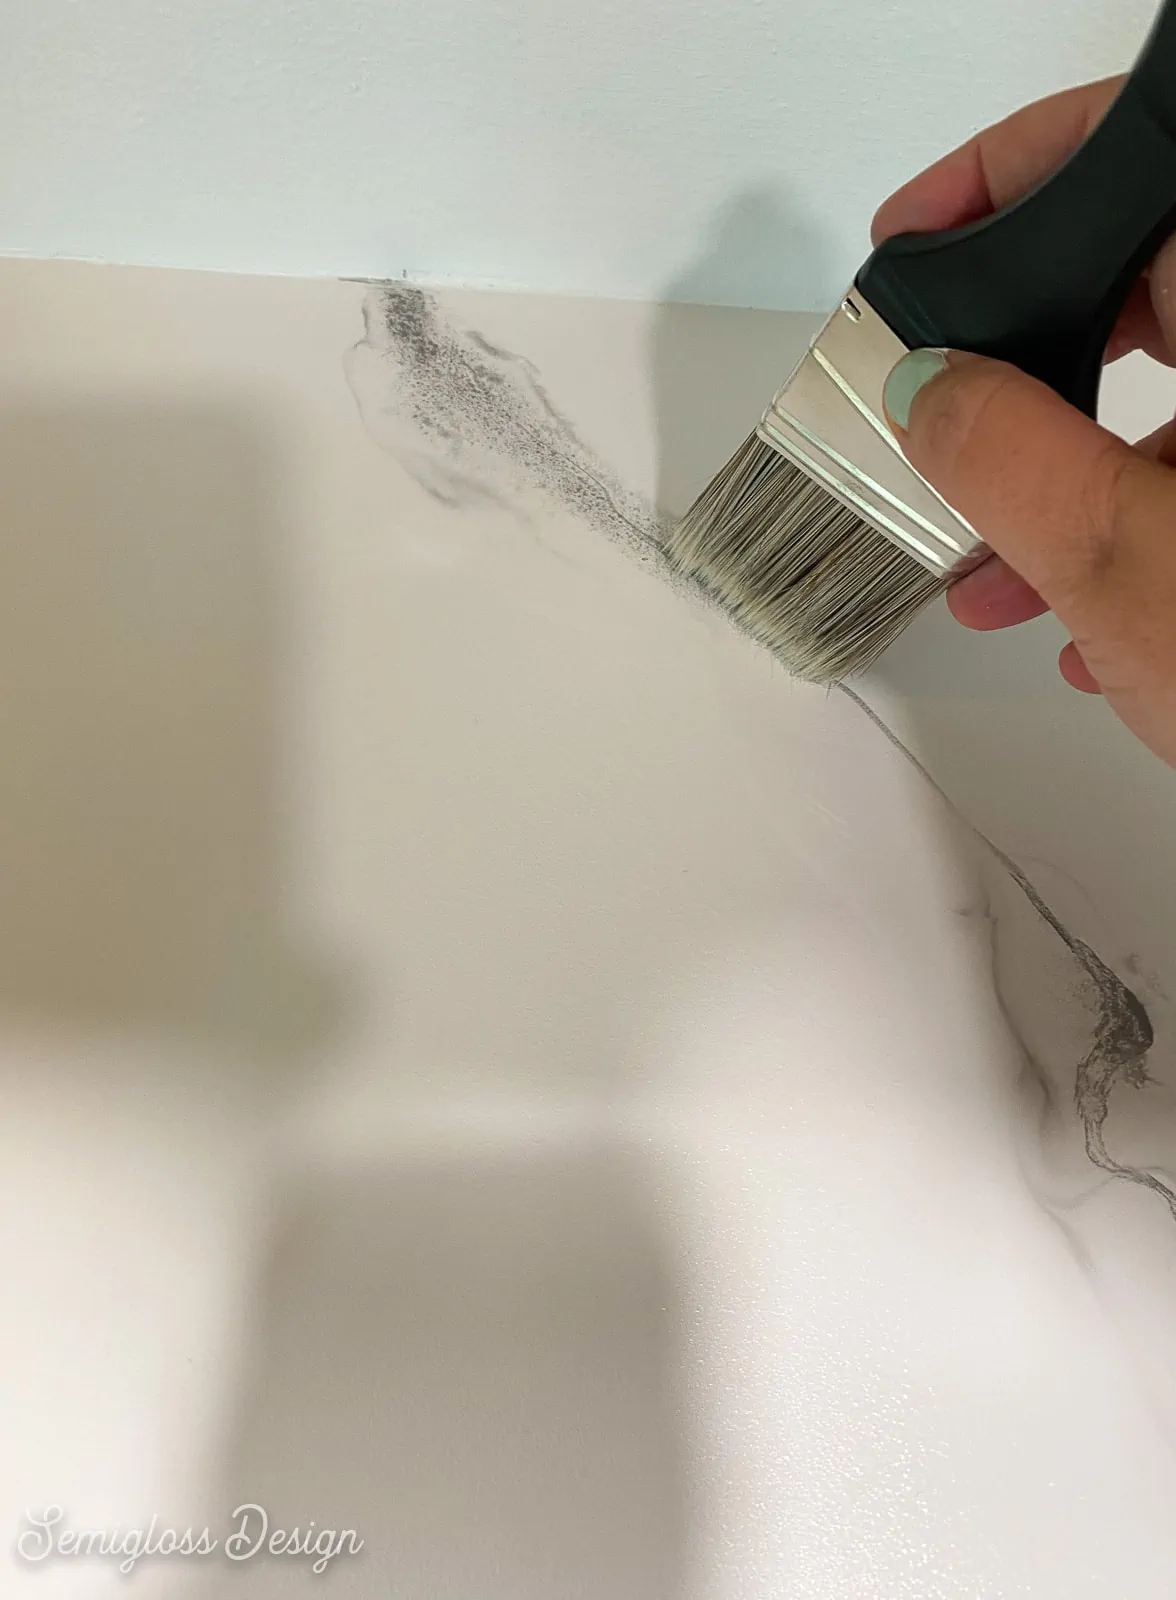
- Use the bigger paintbrush to dab at the line to break up the lines.

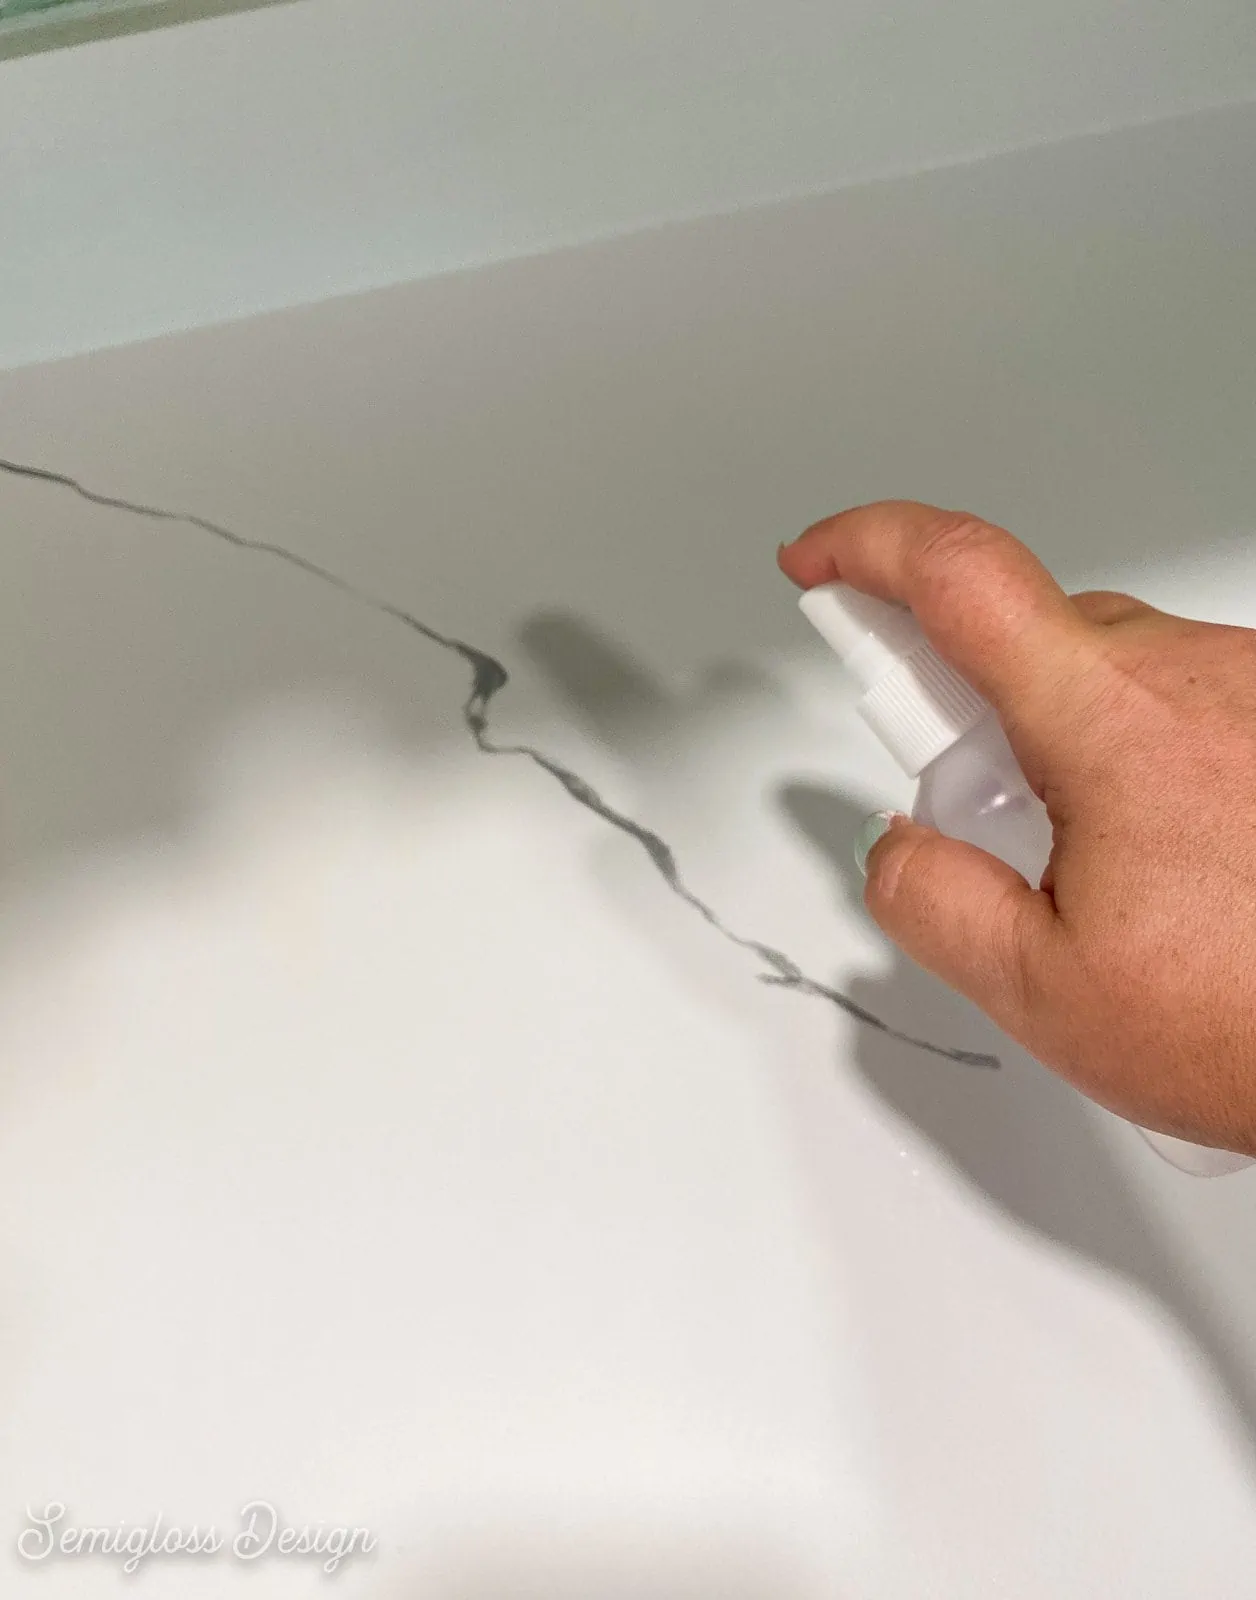
- Spray the paint with water to dilute the paint a bit. The more water you add, the softer your veins look.
- You can add more paint during this process or you can let it dry and see how it turns out.
- Spray in one direction against the paint to create a fun effect.
- If you spray too much water, you can use a big brush to move the water back to the vein line.
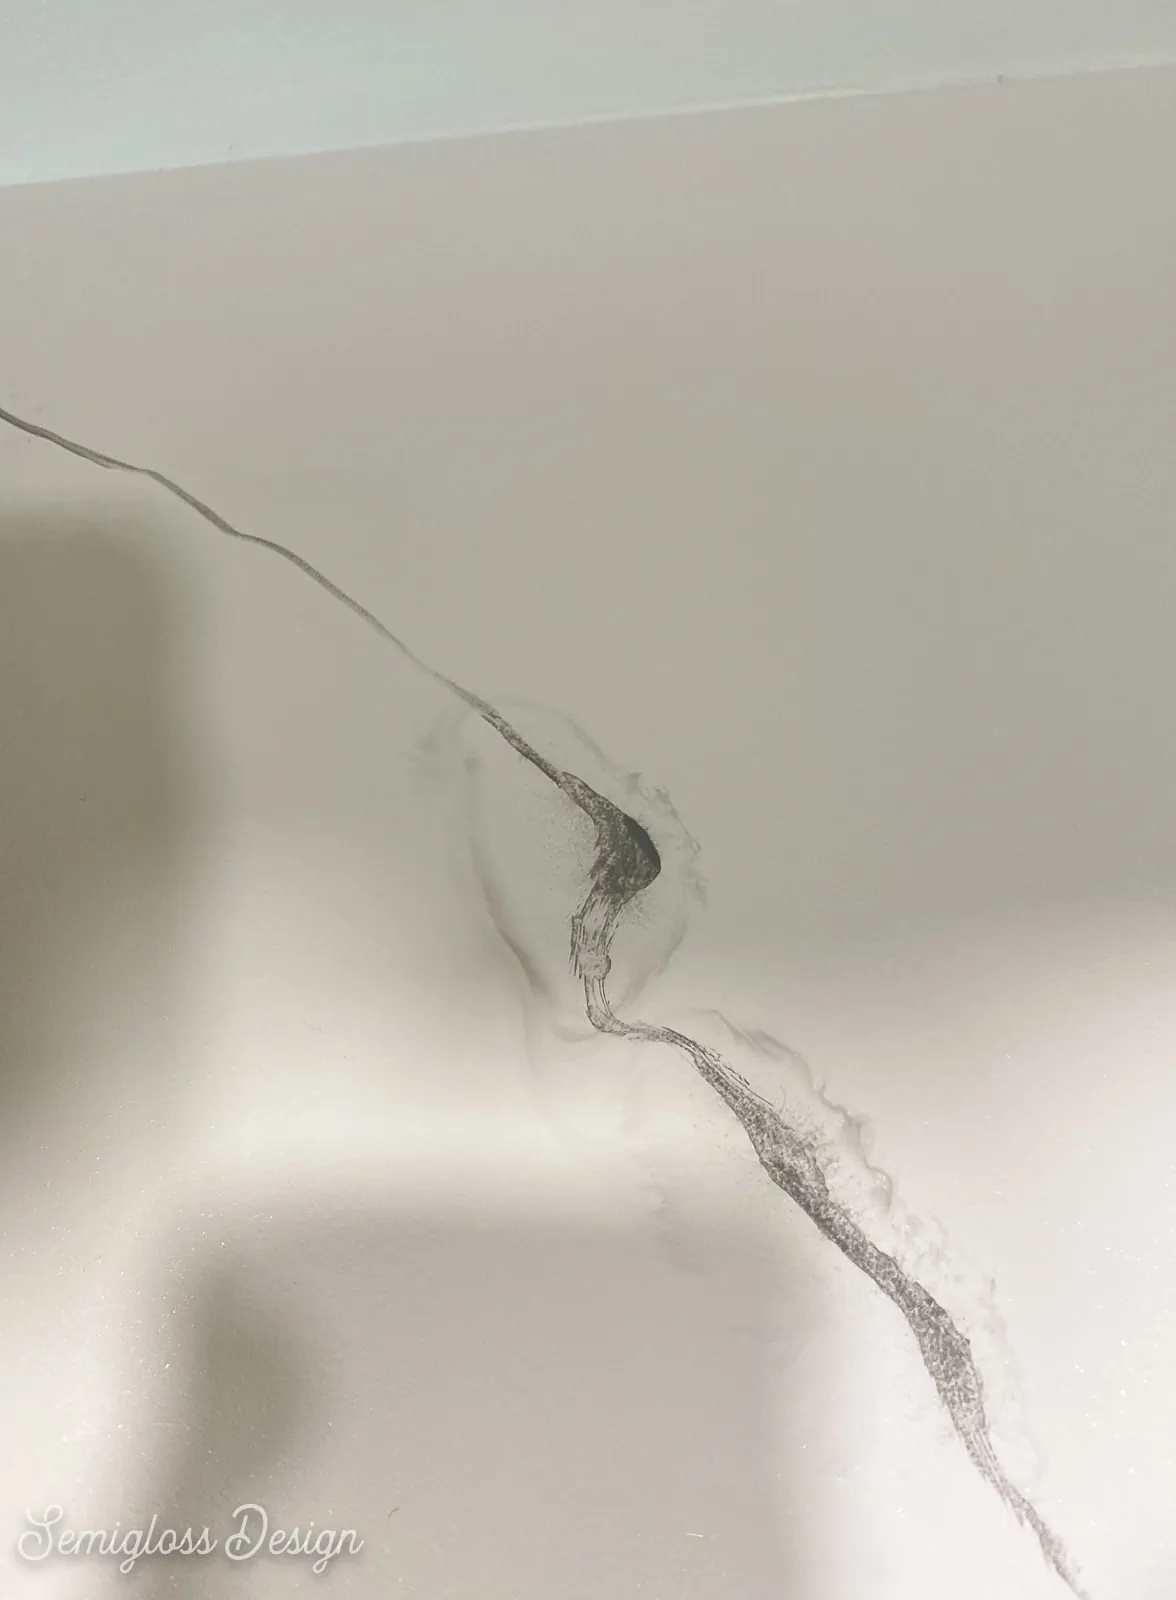
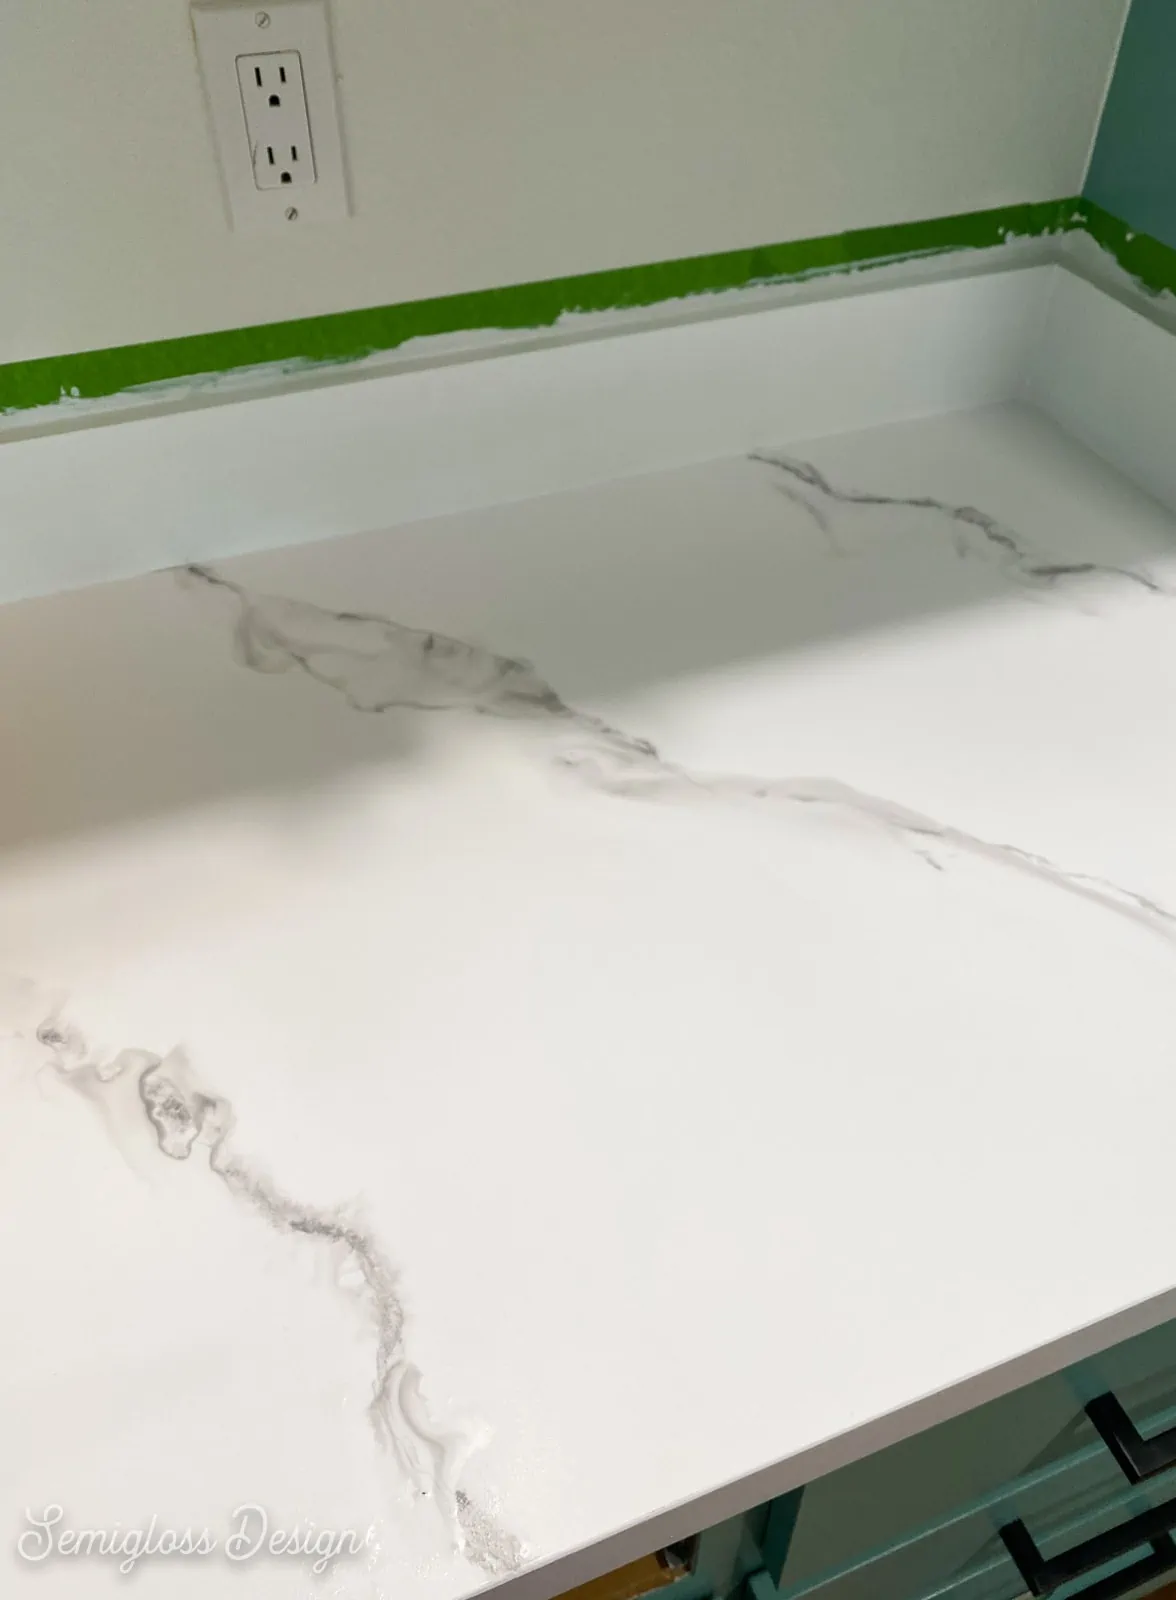
- Keep adding veins about 12″ to 15″ apart, varying the movement and width apart from each other.
- You can add the backsplash and edge parts as you go or at the end. Just make sure they match the direction of the main vein.
- You can go back and add “Y” veins or parallel veins to add interest.
- The directions don’t include this tip, but it’s something I did. I added areas of very faint gray paint veins in between some of my major veins.
- Adding drops of paint in pools of water also creates cool effects that make it look more like real marble. Add more water to soften the look.
- Stand back every now and then to find areas that need more veins. This can also help you find areas that need to be softened with more water.
- You can remove areas with a wet paper towel if needed.
- When you’re happy with it, let it dry.
- Then you can go back in with the 2b white paint and sponge. Apply it lightly over areas that are a bit too bold.
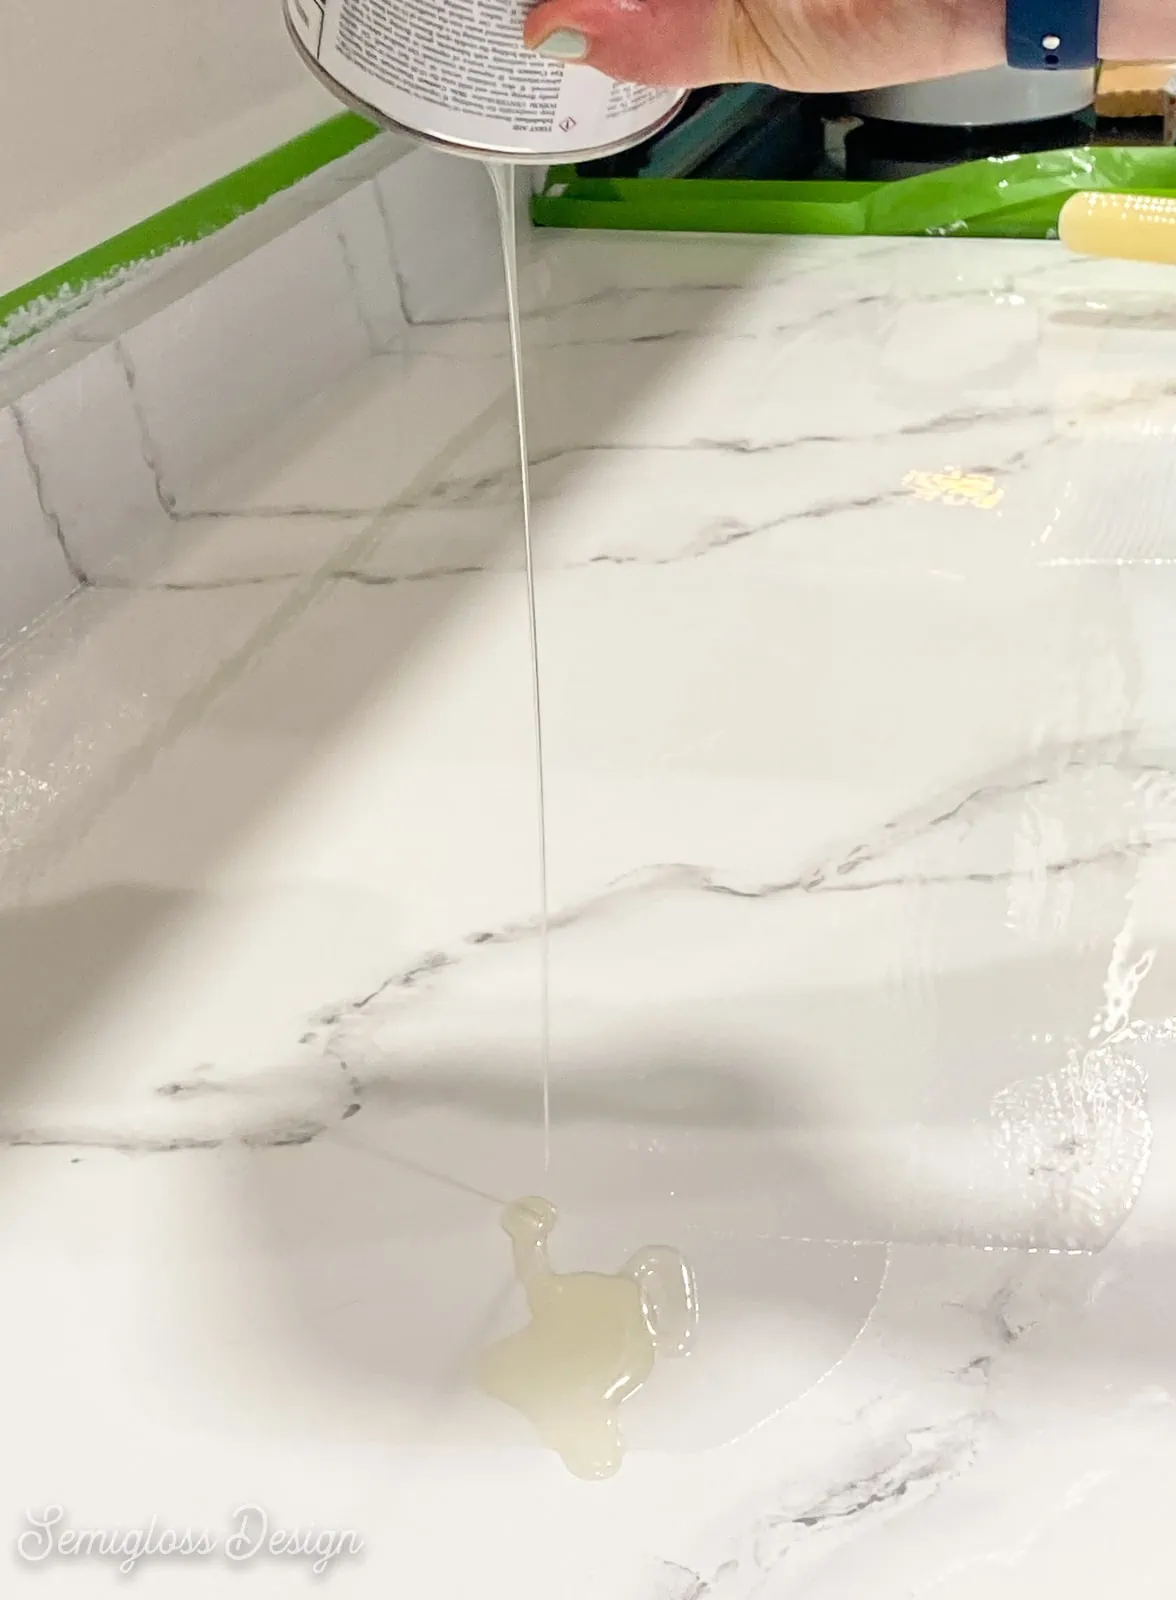
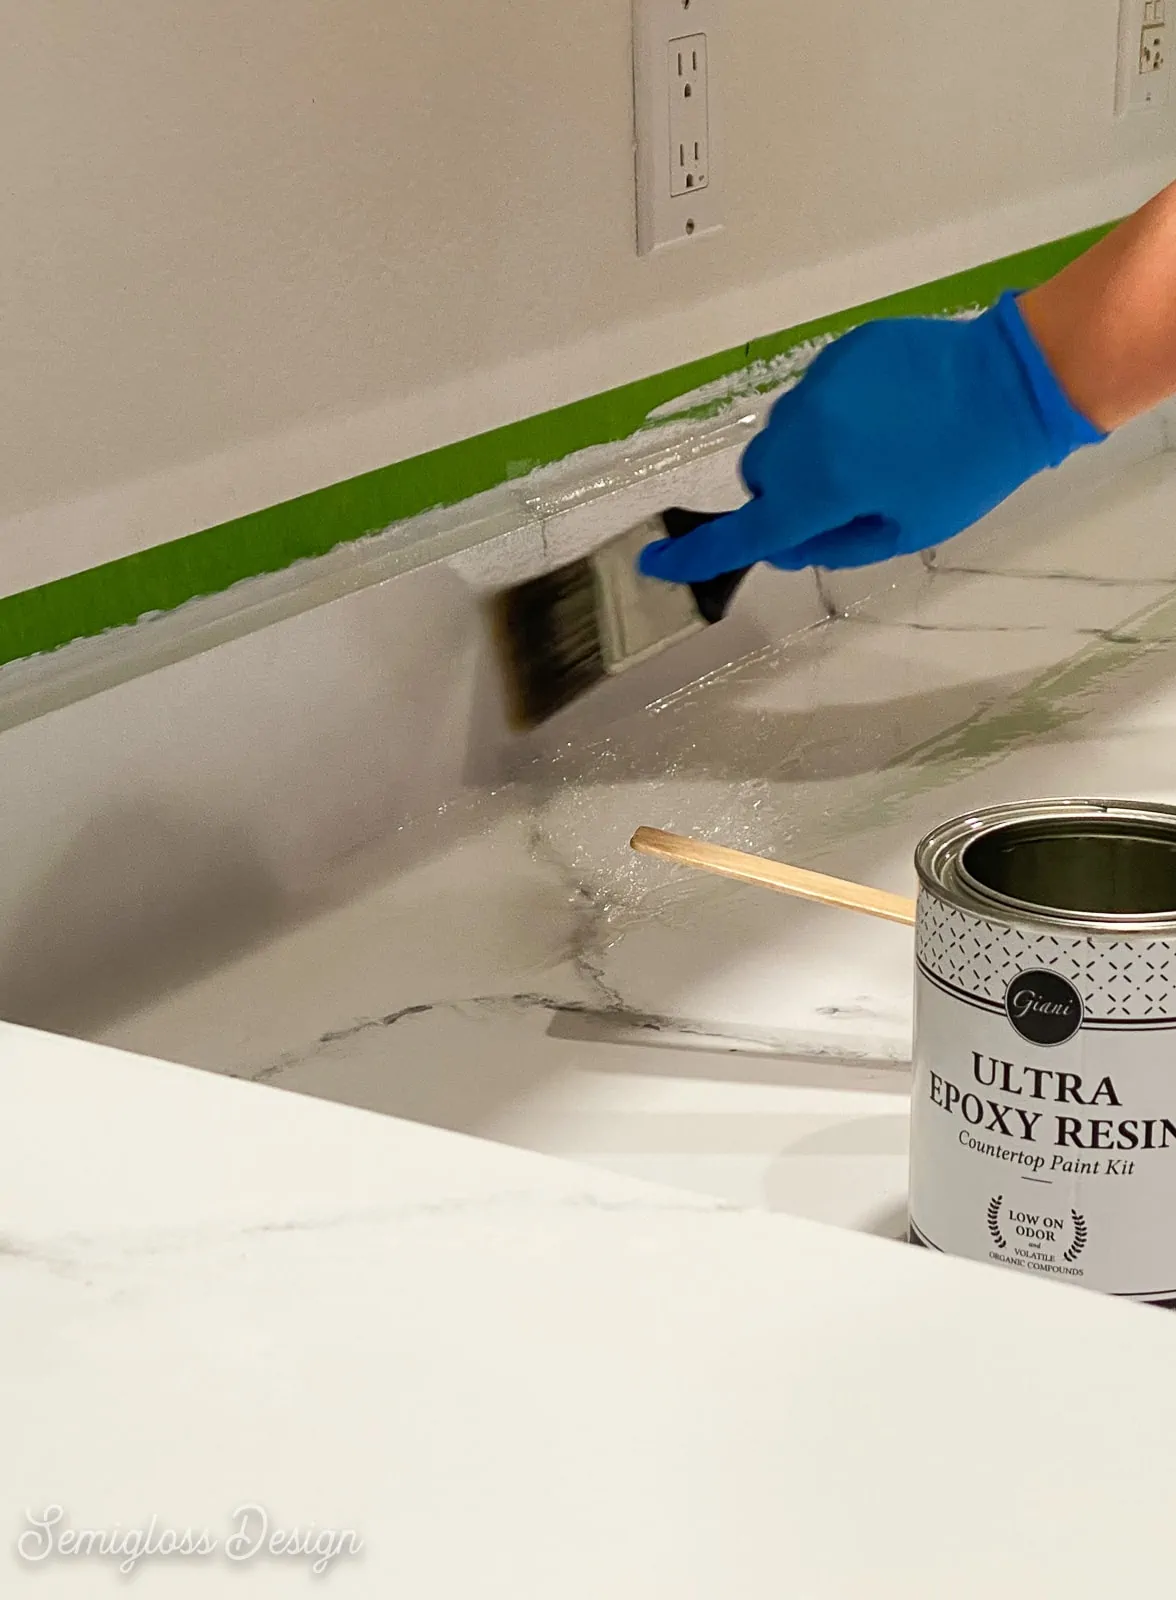
Applying the Epoxy Coat
Let the paint dry for 4 hours before applying the epoxy coat. While the paint is drying, bring the epoxy into the room to acclimate to the temperature.
Turn off any nearby ceiling fans and put animals away if needed.
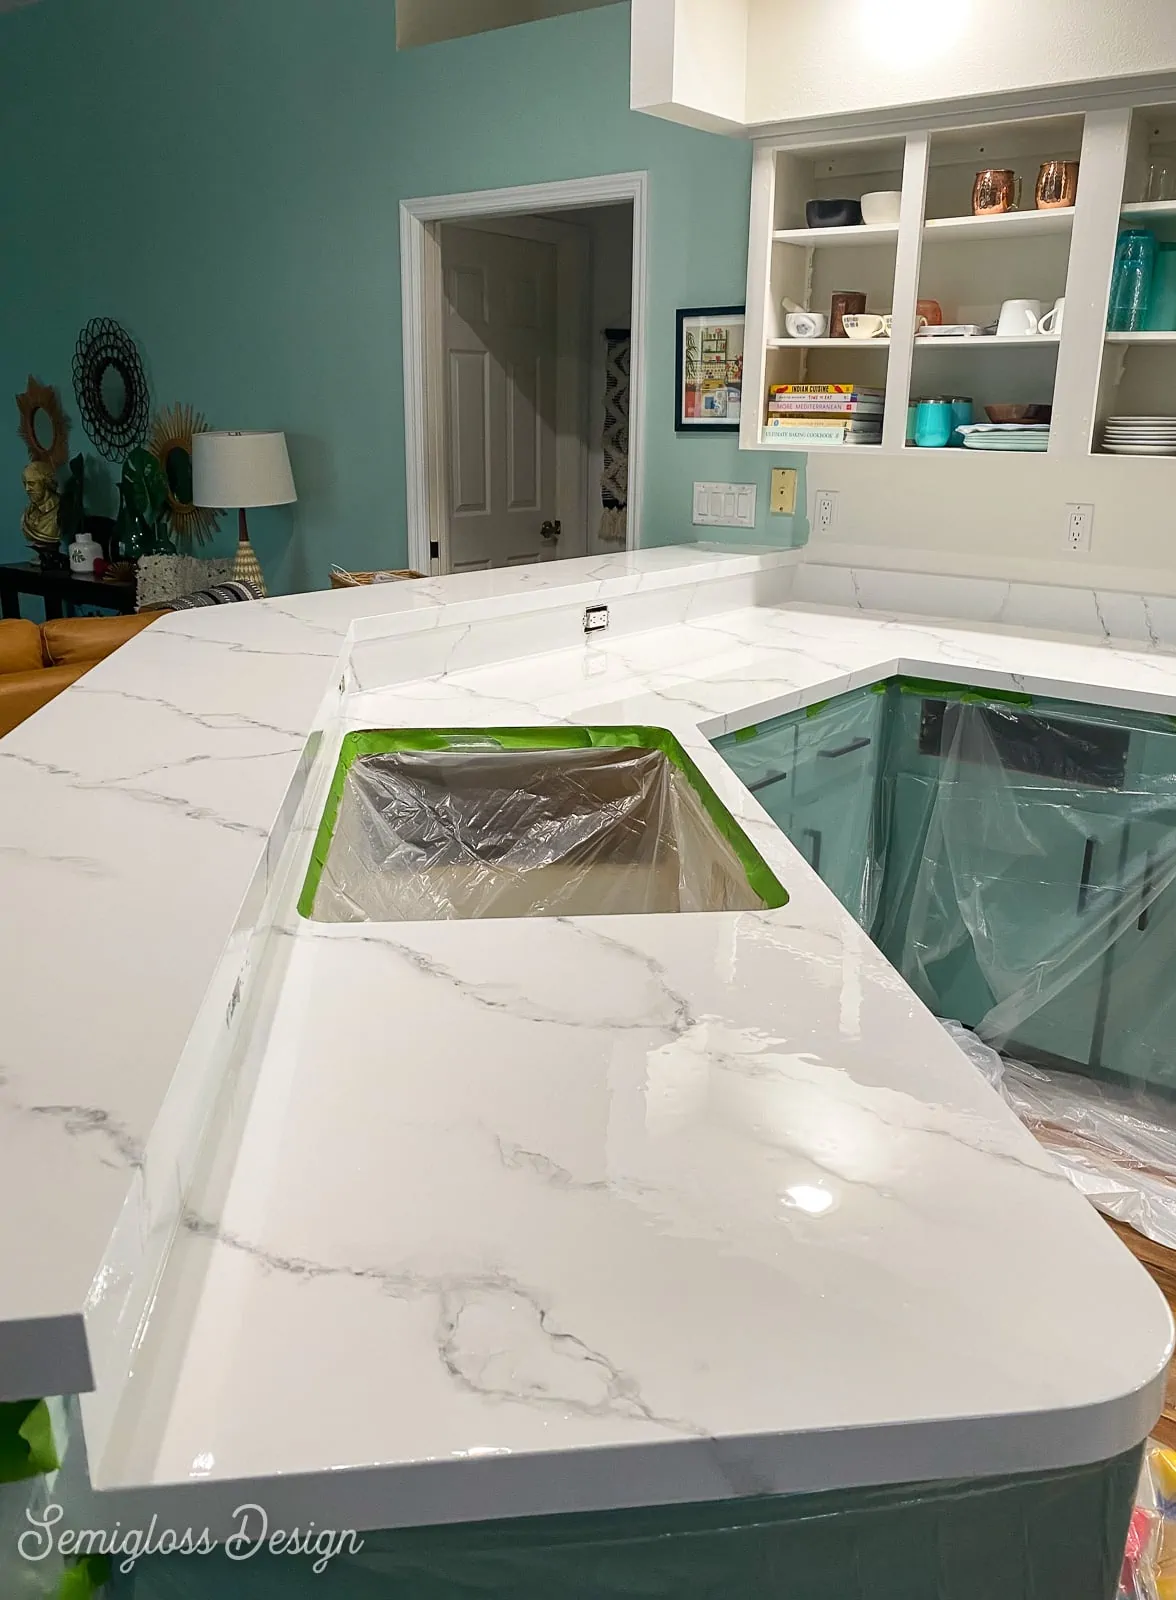
This is also when I added my plastic tarps. Make sure the tarp is taped well in corners and where cabinets meet appliances.
If you have an automatic vacuum, turn it off as well to make sure that it doesn’t try to vacuum up all of the tarps.
If you removed your sink, make sure to tarp this area as well. We also taped off the edges of the stove to create a wall for the epoxy.
It’s also a good idea to wipe the countertops down to remove any dust.
Be generous with the epoxy. The kit contains plenty! A thicker coat will look better in the end.
- Mix the epoxy as directed in the instructions. We set a timer and stirred for 3 minutes and 30 seconds.
- Then we poured the epoxy on the first area of countertops that we were working on. Pour it in an S shape.
- Use a foam roller to spread the epoxy over the counters.
- Use the brush to get the smaller areas like the corners and backsplash.
- Make sure you get the areas by appliances and the sink.
- Move on to the next area when the first area is covered.
- If you have a corner area, make sure you get that area before the spots on the side so that you’re not rubbing up against the wet epoxy.
- One mixture of epoxy covers about 6 feet of countertop.
- Mix the next can as needed and continue spreading the epoxy as needed. It stays workable for about 1 hour.
- If you see drips, use the brush to remove them.
- Remove the tape while the epoxy is wet, but has slowed down on dripping.
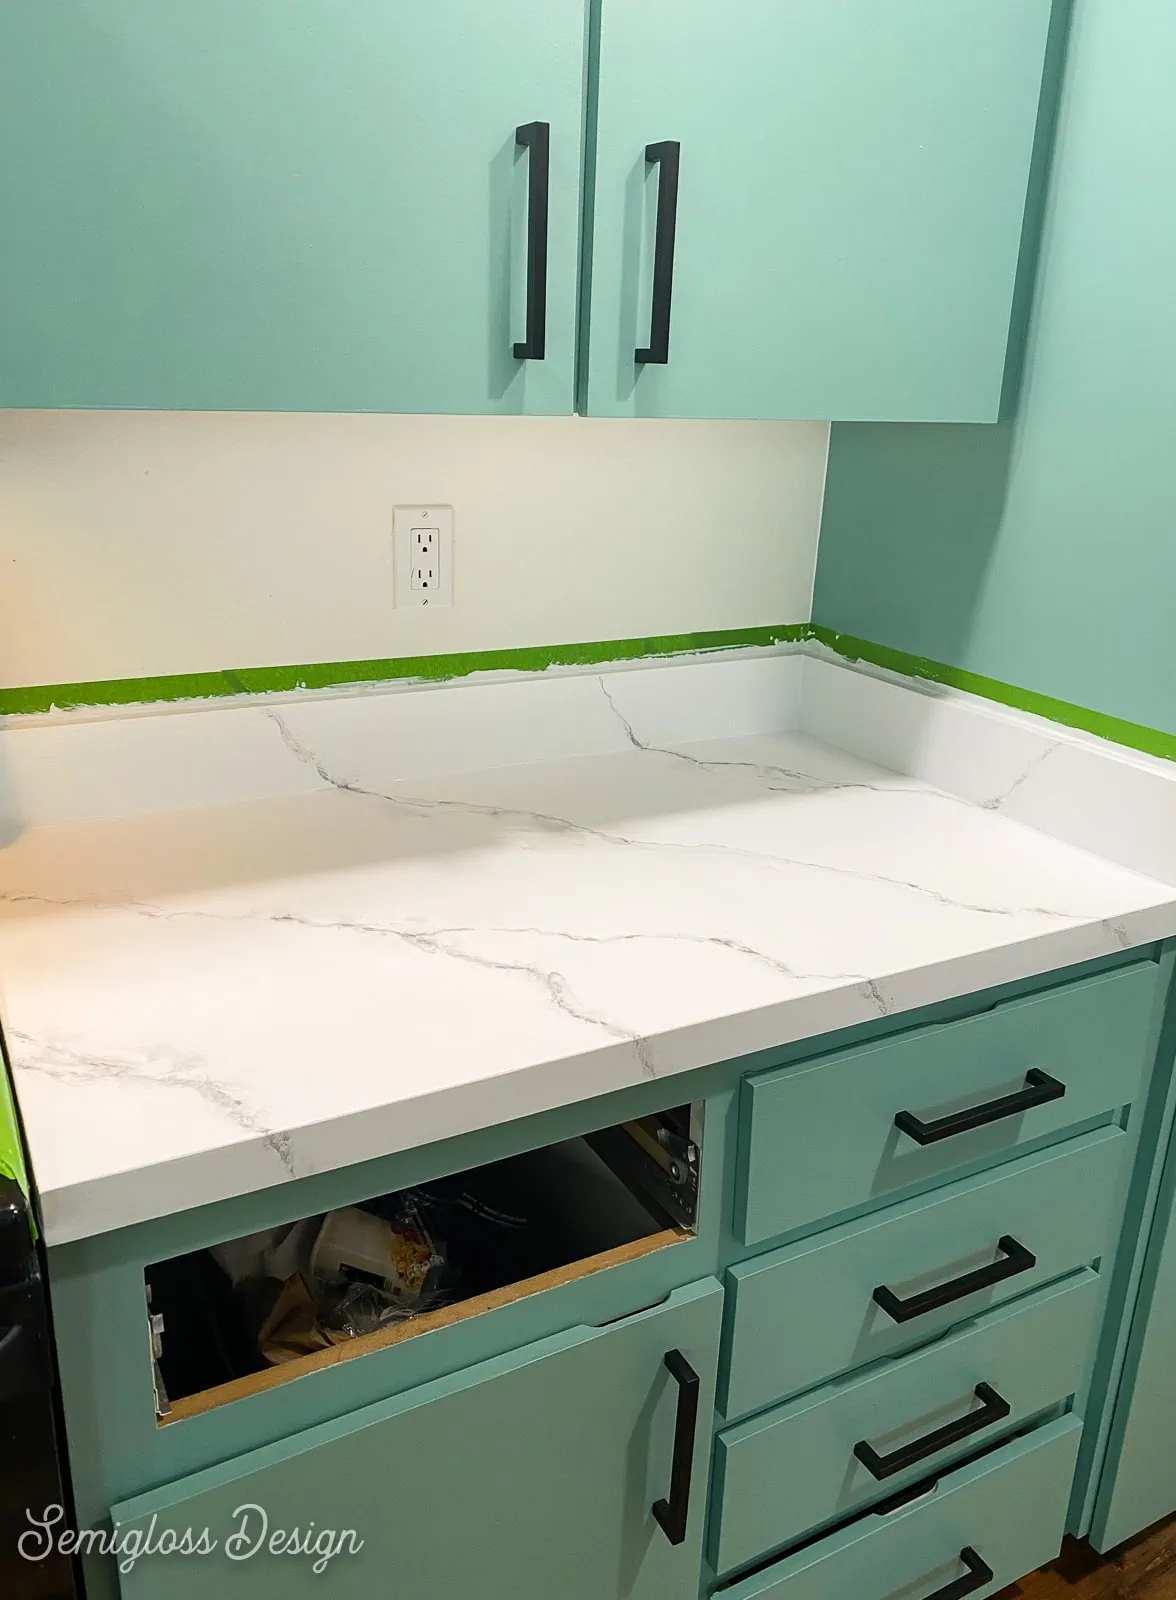
We only used 2 epoxy mixtures for a 17 ft long countertop and bar ledge.
Clean Up and Care
- Let the epoxy fully dry.
- Remove all of the tarps.
- Drips on the edge can be scraped away. (Just be careful and gentle.)
Let the countertop dry for about 2 days before replacing things on the countertop. It’s fully cured after 10 days.
Don’t place hot pots on the surface or cut on them (use a cutting board.)
I’ve also read to protect the surface with a cutting board if you use a crock pot or air fryer.
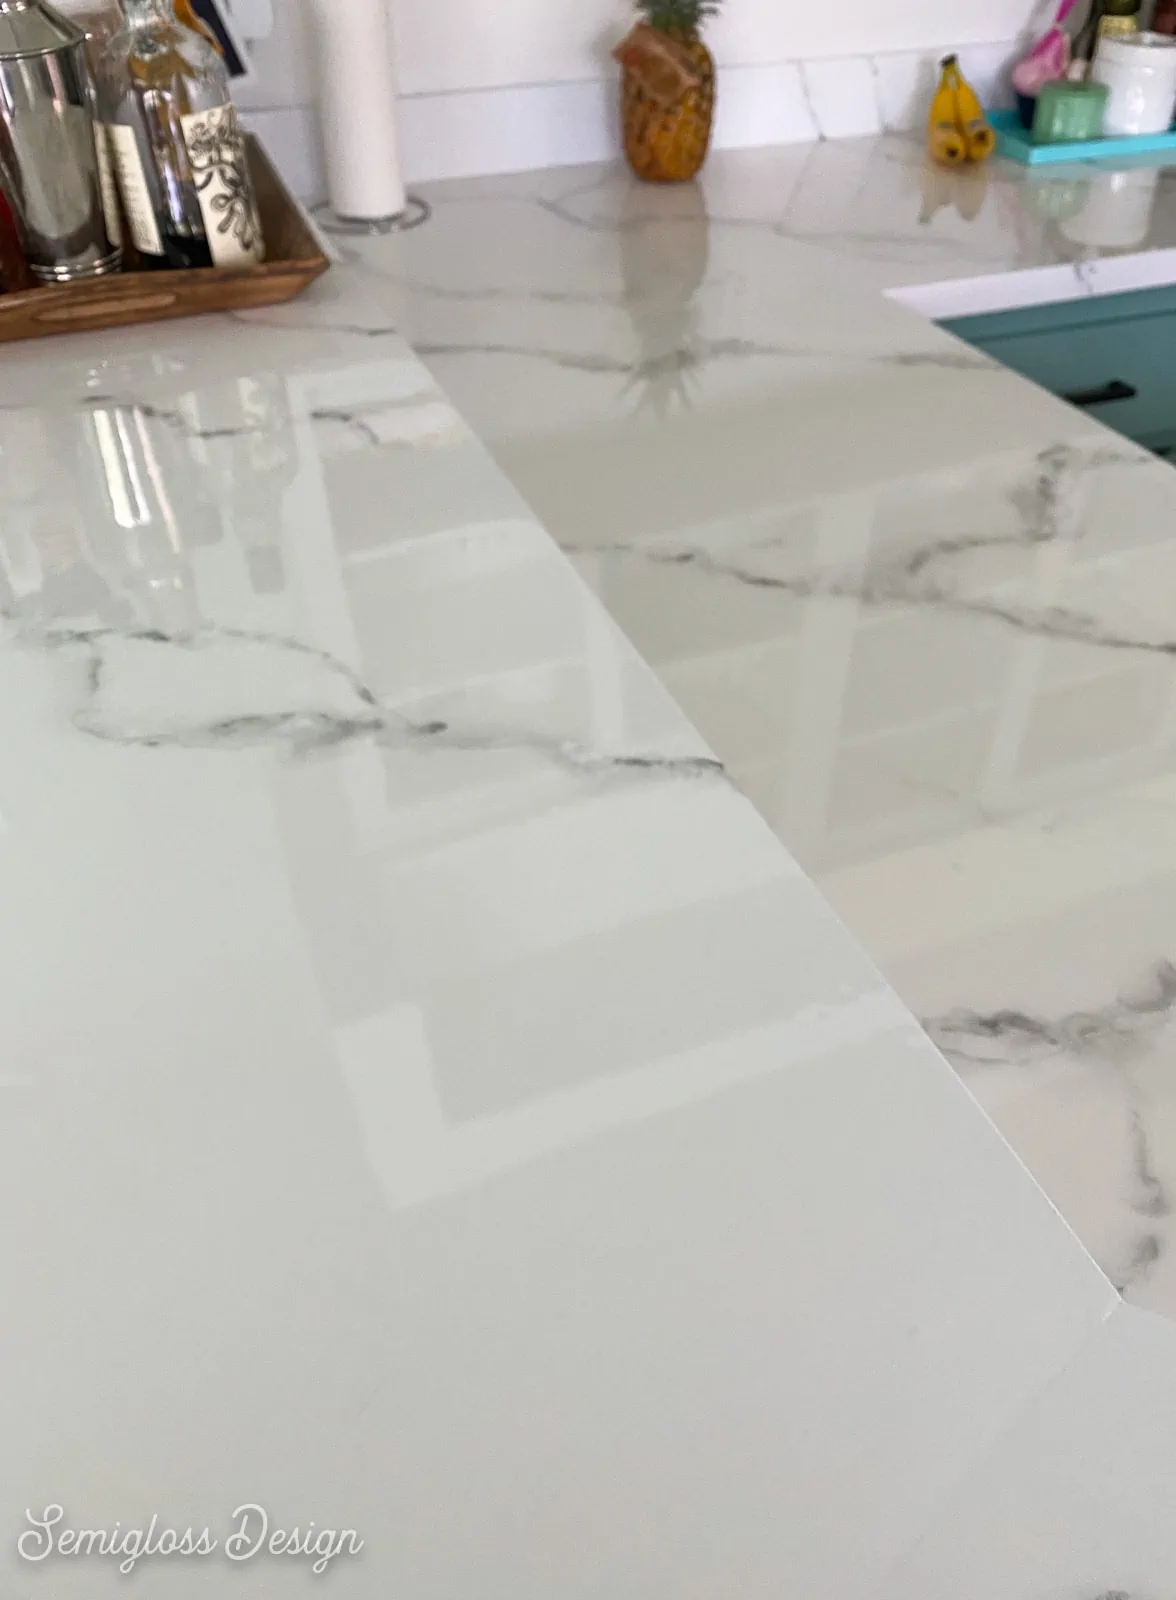
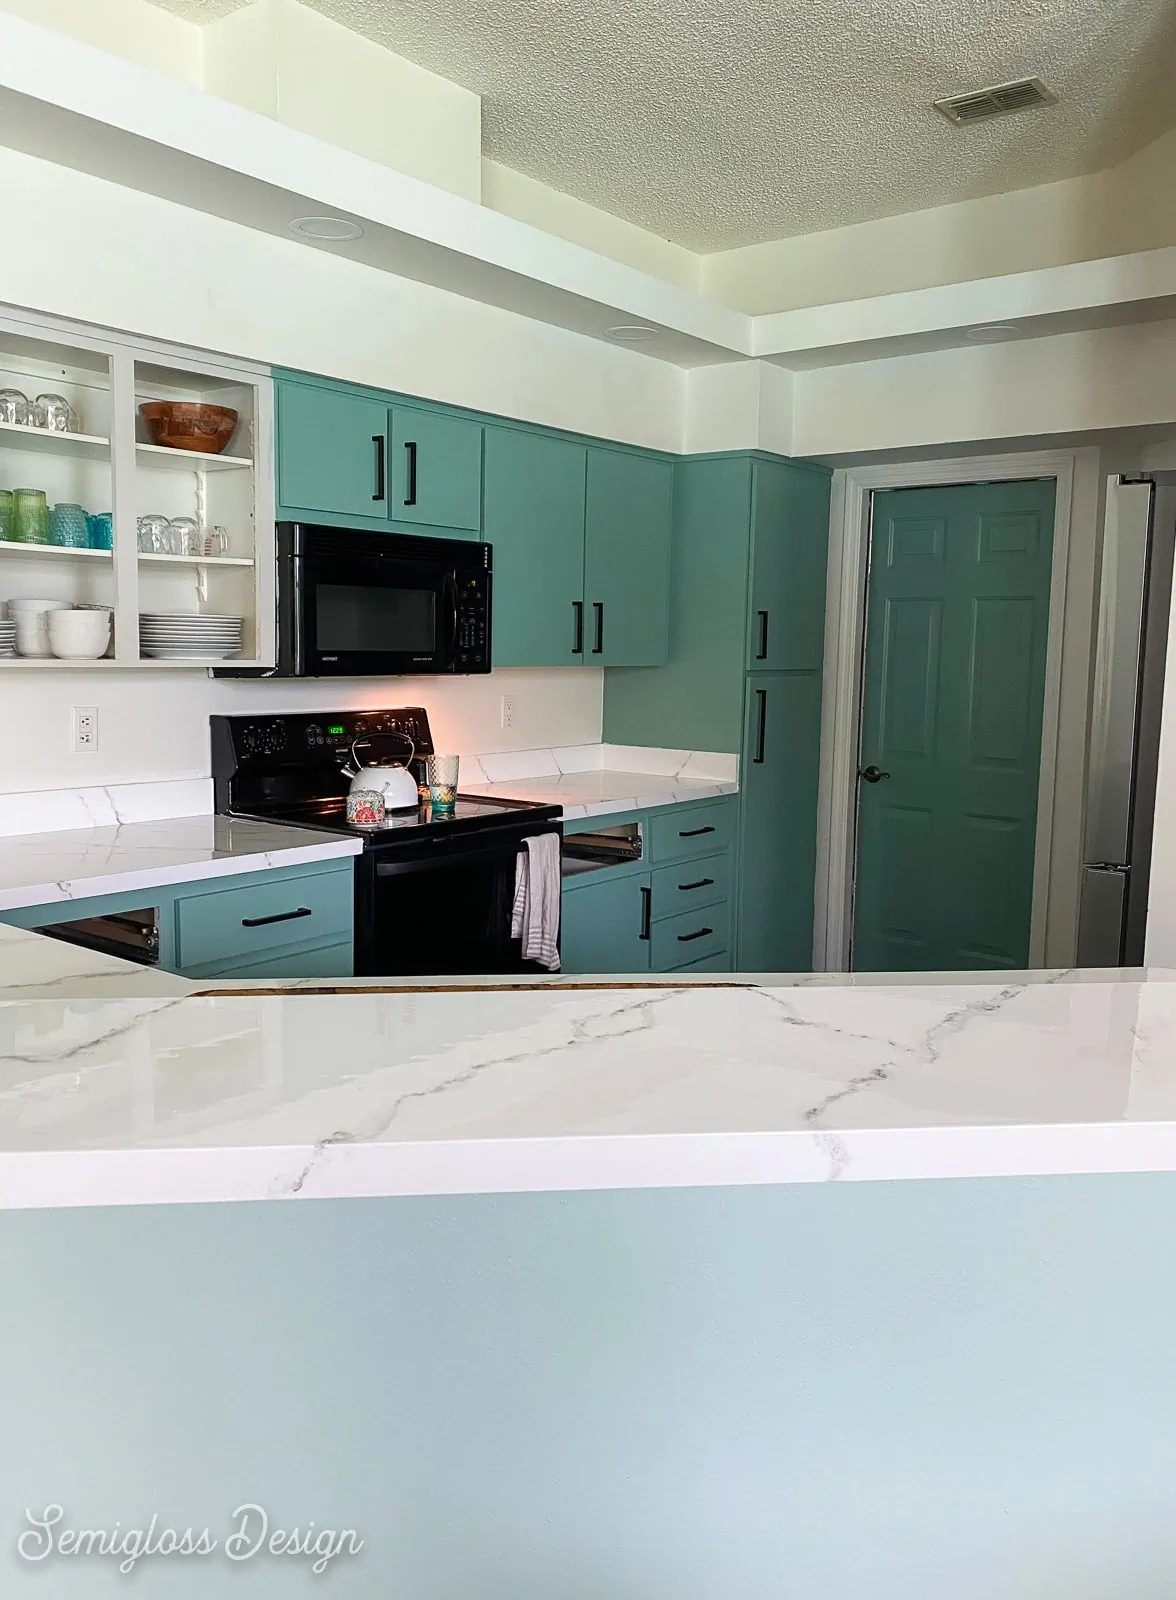
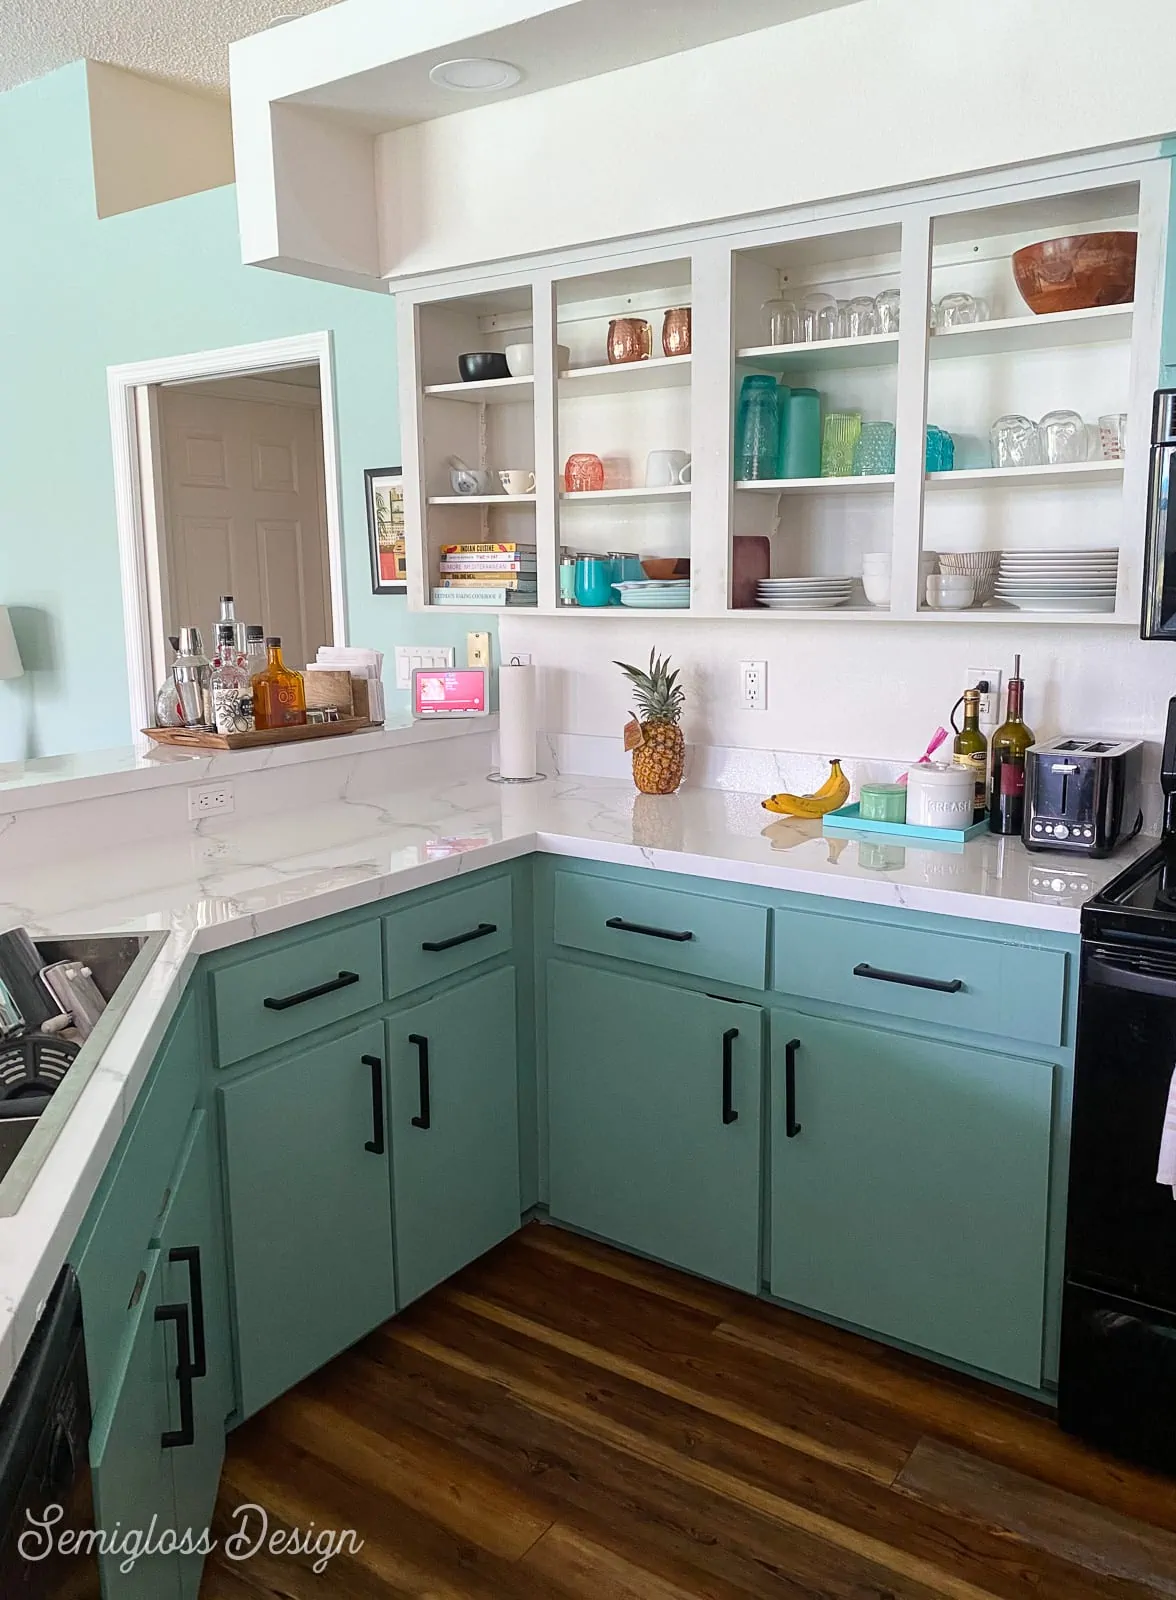
I’m thrilled with how the countertop turned out! This was a super fun process and best of all, the countertops look clean and don’t stain anymore.
The next steps will be removing some cabinets to install open shelving and a simple backsplash.
I’m also thinking about tweaking the cabinet hardware.
You might also like:
Pin for Later!

Emy is a vintage obsessed mama of 2 DIYer who loves sharing affordable solutions for common home problems. You don’t need a giant budget to create a lovely home. Read more…