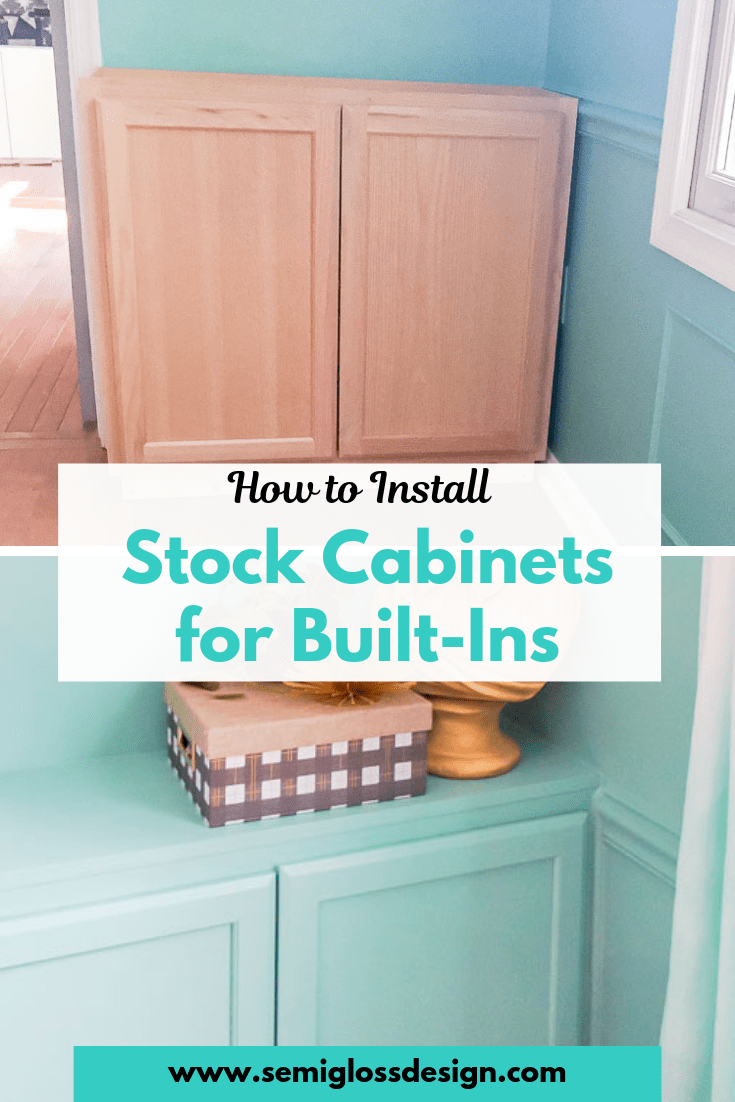
How to Install Cabinets for Built-ins
Learn how to install cabinets for built-ins. My recent dining room makeover included built-in cabinets for extra storage.
And while there are a ton of tutorials for built-ins using stock cabinets, I found it difficult to find out how to install cabinets for the built-ins. Most directions simply direct you to install the cabinets.
However, when you use wall cabinets for base cabinets, it’s not that straightforward, so I’m sharing some tips and tricks that I learned along the way.
How to Install Cabinets for Built-Ins
This is not a tutorial for perfectionists of carpenters. I believe in progress, not perfection, so my flaws are hidden under trim and caulk. When it’s all said and done, no one is the wiser except me.
Supplies Needed
This post contains affiliate links. By purchasing an item through an affiliate link, I earn a small commission at no extra cost to you.
- Stock wall cabinet
- Cabinet panel for any exposed end
- Wood glue
- Clamps
- 2×4’s
- Drill and driver (I have this set and use it all the time!)
- Screws
- Corner clamps
- Nail gun
- Scrap wood
- Trim
- Caulk
- Primer
- Paint
- Oscillating multi-tool
- Pry bar
- Rubber Mallet
- Stud Finder
- Nail gun (This kit is so versatile!)
- Hand sander
- Spackle
- 1 x 12 pine board or plywood for cabinet tops
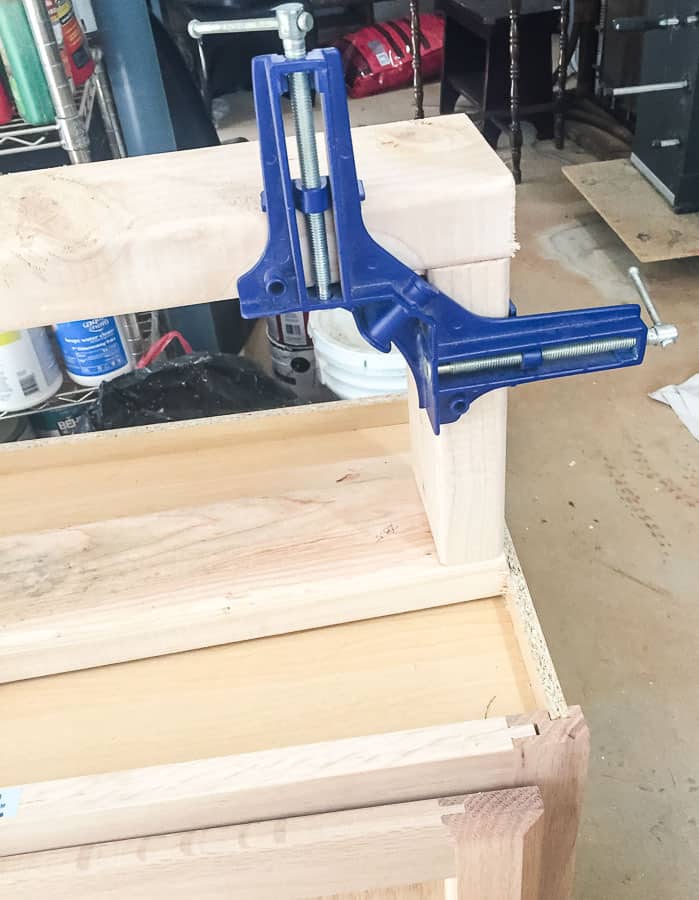
Build a Base for the Cabinets
- Cut 2×4’s to fit make a base for your cabinet. The bottom (and top) of the cabinets have a recessed area for the base, so your measurements will be based on those dimensions. For taller cabinets, use 2x6s.
- Attach them together to form a rectangle. I use corner clamps to square up and attached them with deck screws. Deck screws are my favorite screws to use because they don’t slip and they bite into the wood to bring the pieces together.

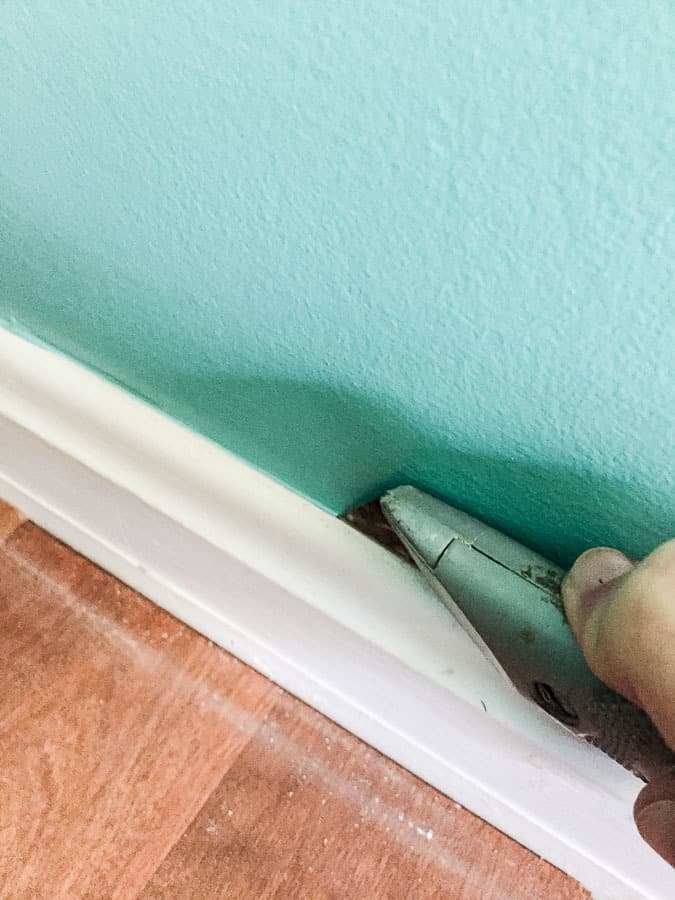
Remove Old Molding and Baseboards from Walls
- Remove the old molding. Cut along the edges with a utility blade to avoid damaging the walls.

- Using a rubber mallet and a pry bar is the easiest way for short lengths of molding.
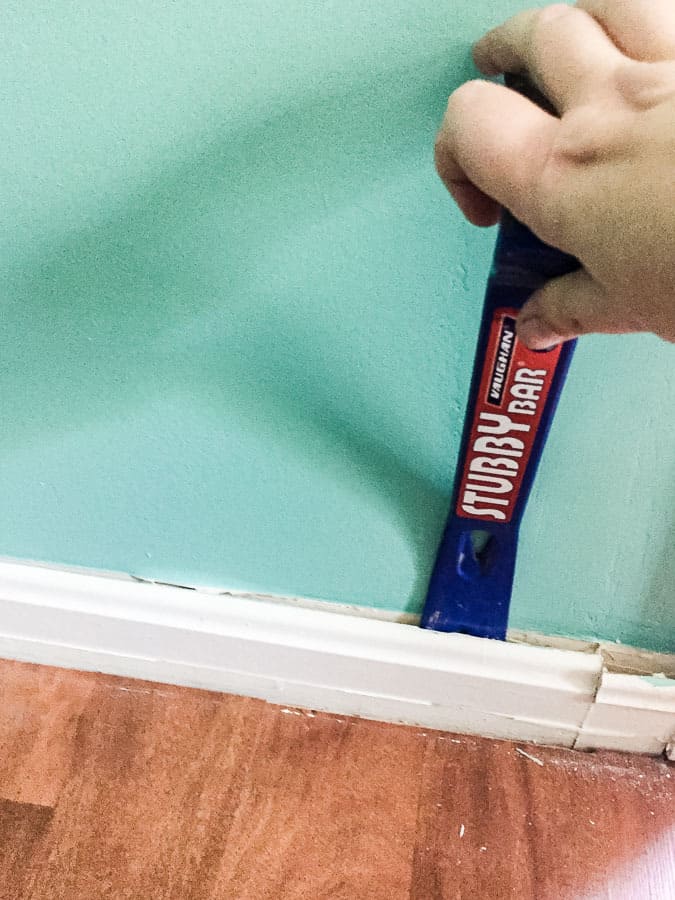
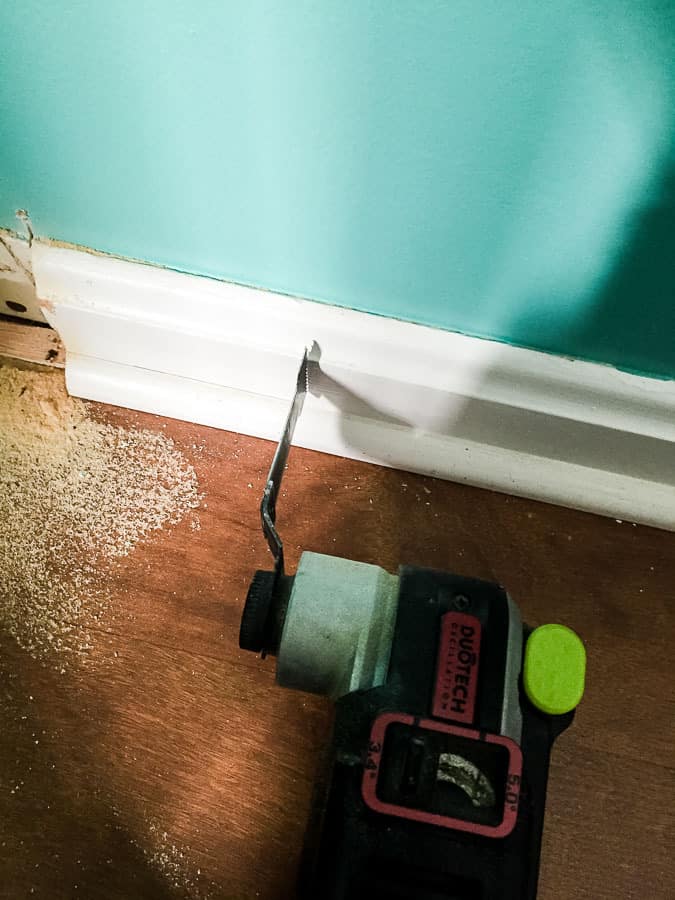
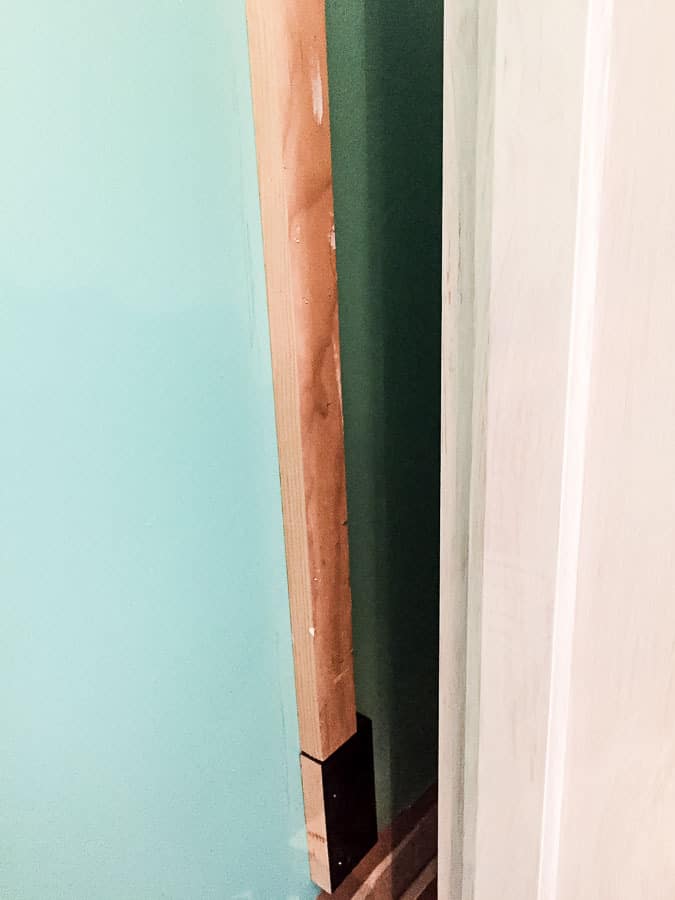
- For longer walls, I cut it instead. The oscillating multi-tool works great for this. It was a little intimidating to cut into the walls at first, but I’m a huge fan. Just saw through the molding until the wall feels soft.
Give yourself about 1/2″ more than you need so that you can angle your cabinets in place. This tool allows you to make tiny cuts as well. I had to go back several times to remove another 1/4″ in order to move the cabinets in place. - The oscillating multi-tool also works to cut through nails in case your baseboard was installed before your flooring as well. Insert mad face.
Prepare the Cabinets
- The cabinets need panels for the sides that will be exposed. Turn the cabinet on it’s side with the exposed side facing up.
- Use a good wood glue to adhere the panel to the cabinet.
- Use clamps where you can and use heavy items to weigh down the panel. I used paint cans and weights.
- Let it dry for about 24 hours.
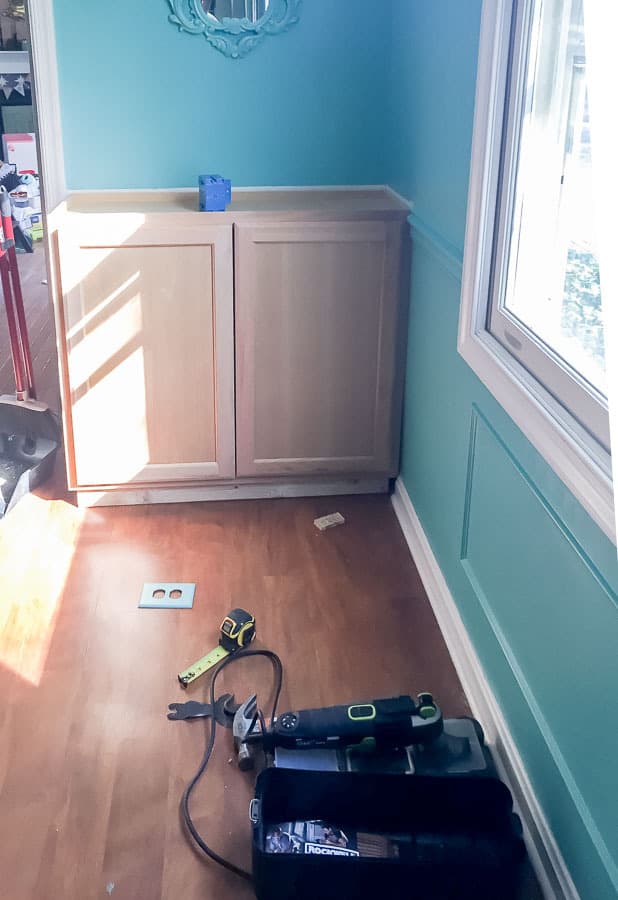
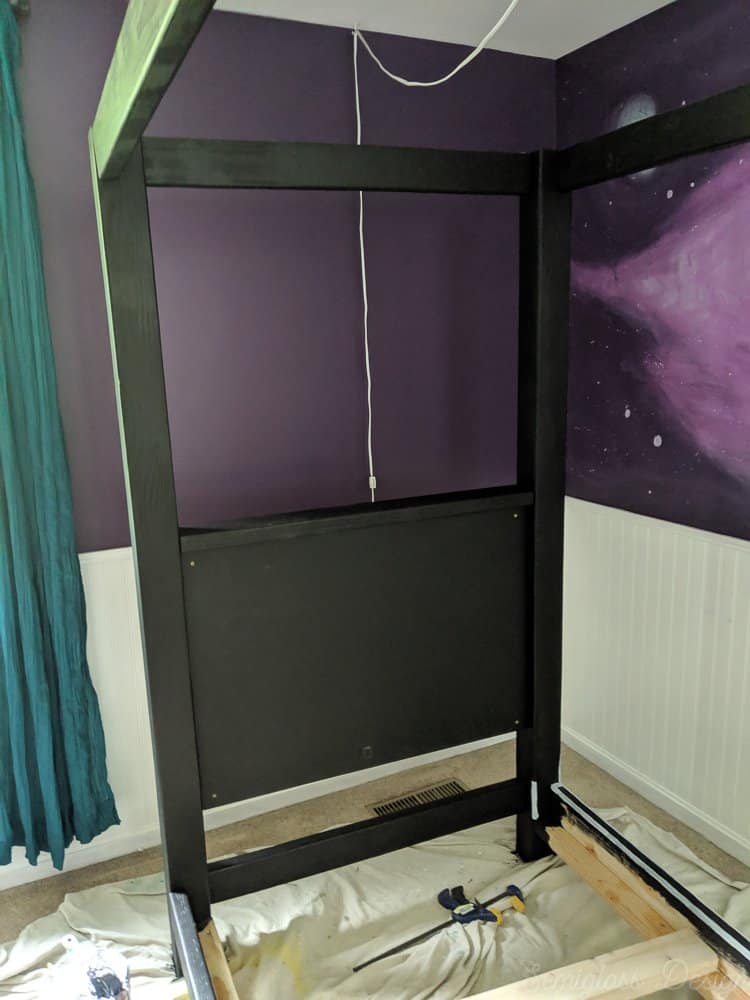
Installing Cabinets for Built-Ins
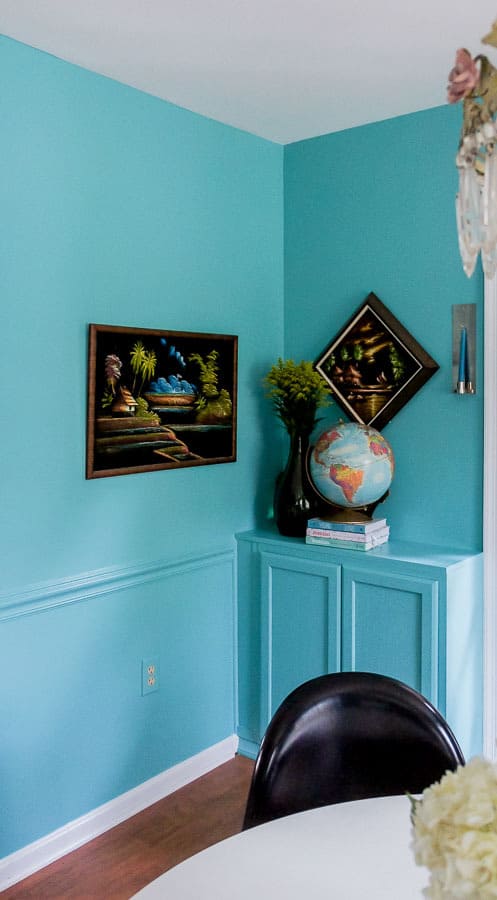
A note about spacing. I wanted my cabinet flush against the door frame for when I build the shelving above the cabinets. There’s a gap on one side of the cabinet that will be filled in another step. Stock cabinetry does not come in the exact dimensions of your walls, so you have to get creative.
- Place your base in place.

- Set the cabinets on top.
- Check for level. I got lucky and this was the one area in our house that was level.
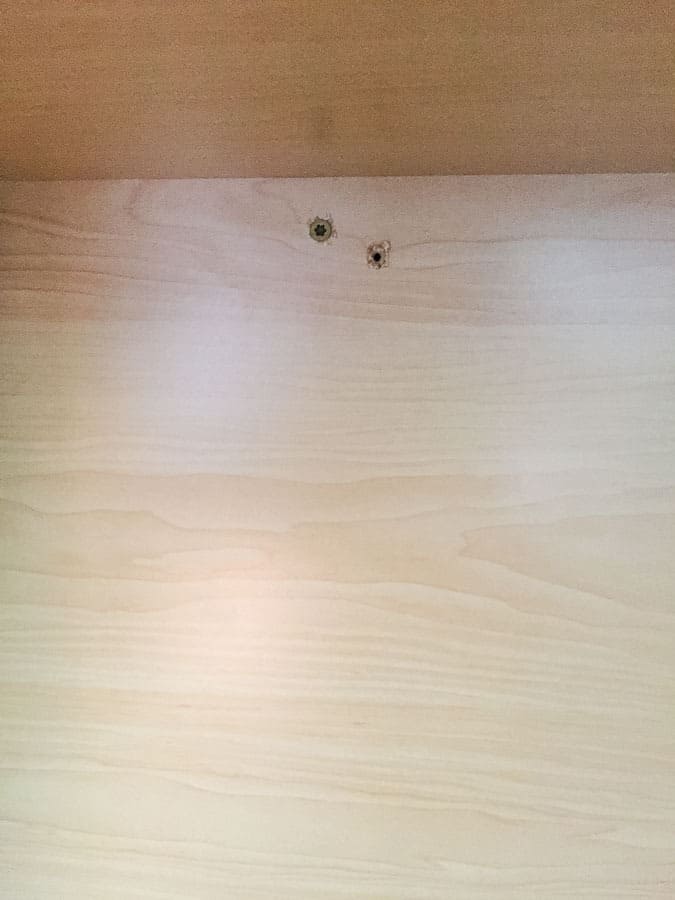
- Use a stud finder to find your studs. Mark them.
- Drill through the back of the cabinet into the studs and attach it with screws. Some cabinets will only have 1 stud to attach them to. Just attach it at the top and bottom. It will be plenty sturdy!
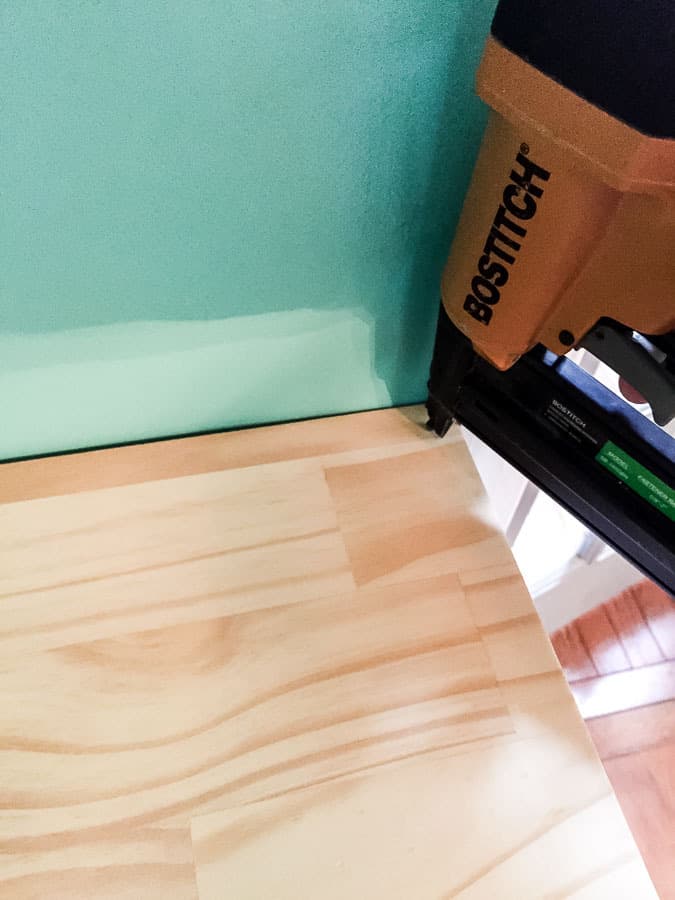
Build and Attach the Top
I used 1 x 12 pine boards for the tops. You can also cut plywood and use edge banding. Or if you can even join wood together using this technique.
- Cut the wood to the right length.
- Sand the top and edges well.
- Sand the corners until it rounds slightly.
- Attach the top to the cabinet with a nail gun.
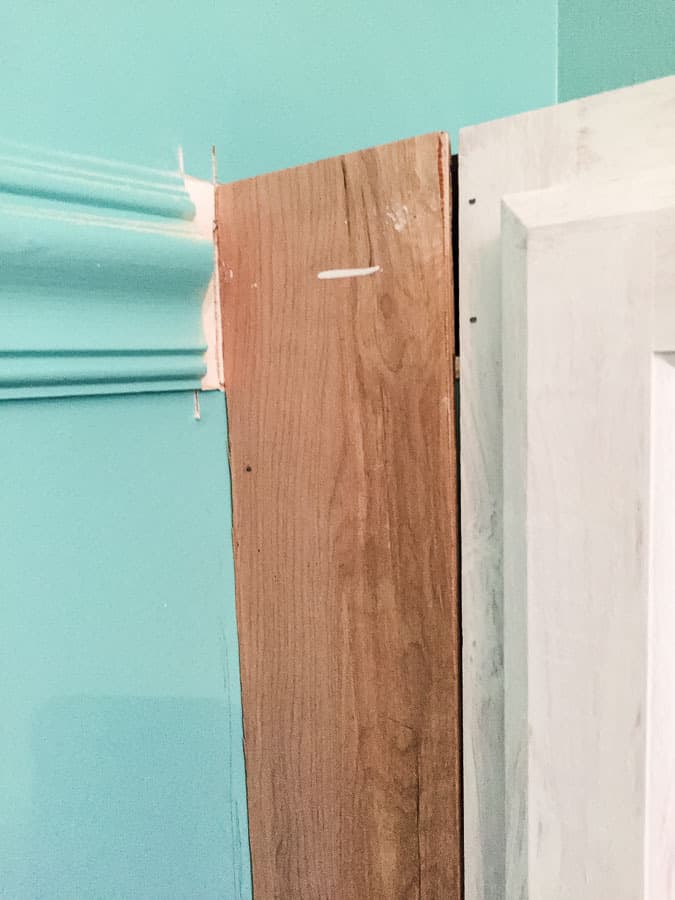
Hide Gaps and Other Unsightly Areas
- The baseboard goes at the bottom. If your wall baseboard is installed lower than the flooring like mine is, don’t worry about matching them up. I used one that would cover the 2×4 base instead. Paint it before you install it. I chose to paint mine the same color as my cabinet and wall to make the piece blend in more since the room is small. Use a nail gun to attach it.
- Next, I installed the scrap wood to cover the gap. I attach small scrap wood to the wall and then attach the scrap wood piece to those pieces and the cabinet.
- Tiny gaps can be filled with caulk. Larger gaps can be filled with small trim. Look for pieces that will look decorative. I used tiny quarter round where needed and flat lattice-type wood in other places.
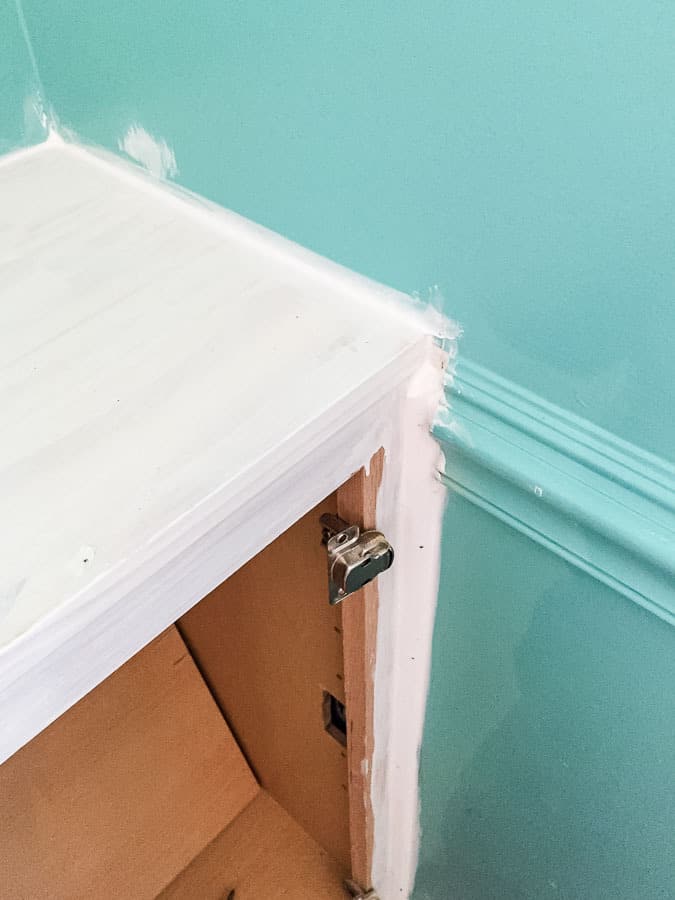
- Caulk every single crack and fill every nail hole with spackle. Caulk works best when you cut a small opening in the top. Use your fingers to smooth it, cleaning your fingers on paper towels between passes. Sand the spackle when it’s dry.
- You might need to remove doors to get to the areas near the wall. Replace them when you’re done.
Paint Your Cabinet
- Sand any splinters or weird spots.
- Since these cabinets are oak, I primed them first to try and lose some of the oak grain texture. The top was also primed.
- Sand lightly after the primer dries. Priming wood causes it to rise. I used 400 grit sandpaper on a hand sander. This helps smooth everything out so that the cabinet is nice to touch. Otherwise, it feels splintery.
- Paint your first coat of paint.
- After painting, you will probably see areas that you missed when caulking. After the paint is dry, caulk those areas.
- Sand lightly using 400 grit sandpaper.
- Apply another coat of paint.
- Attach hardware as desired.

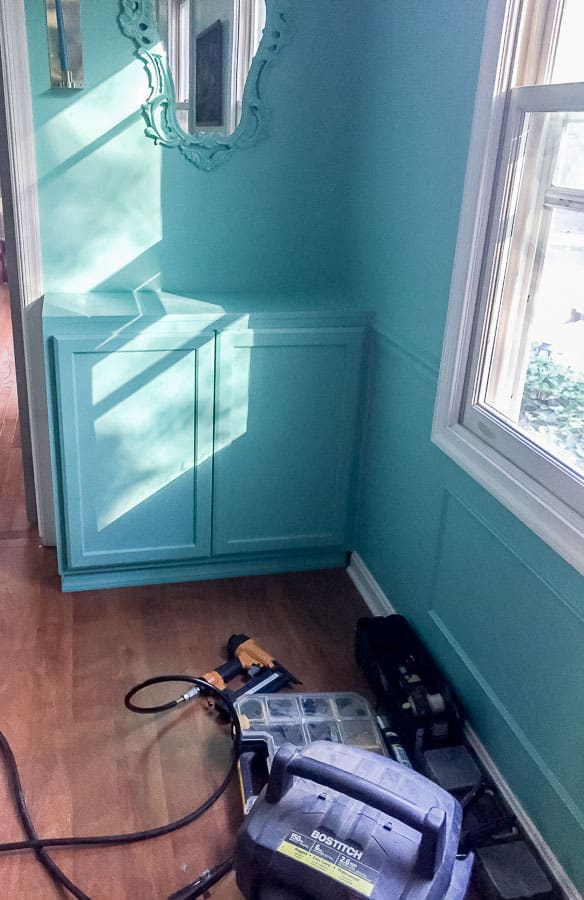
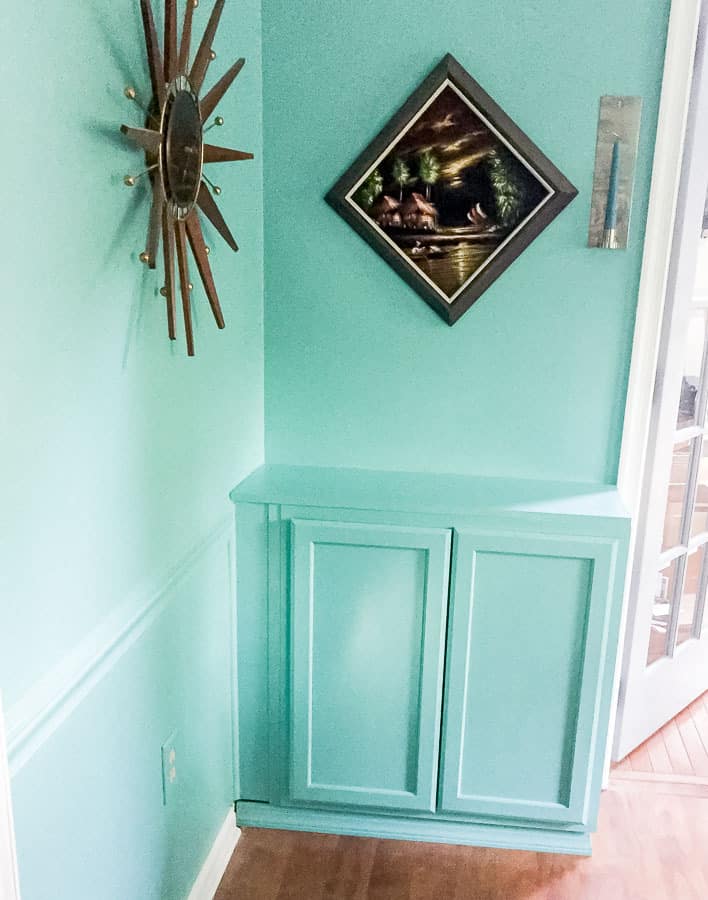
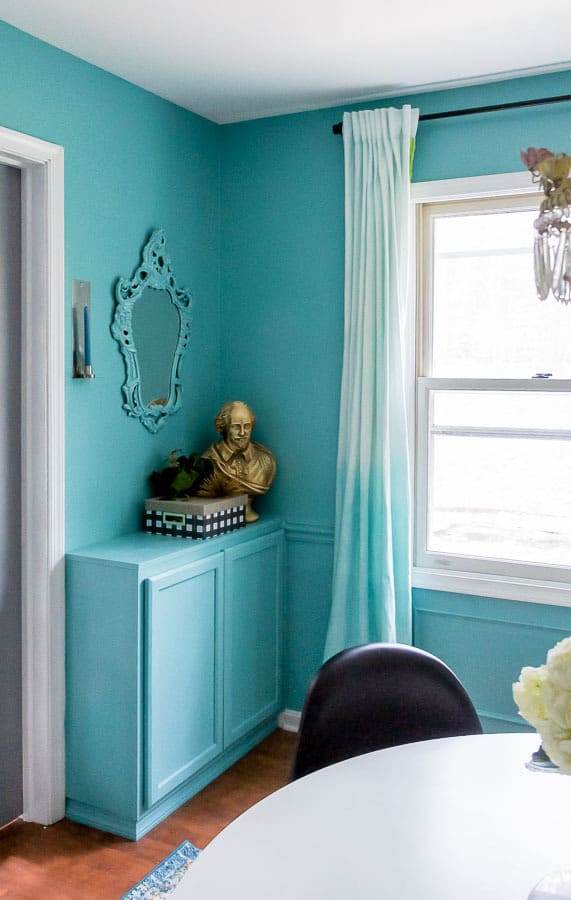
These cabinets add so much storage! I love how they blend into the walls, but white would have looked beautiful as well.
Want to see more of this colorful dining room? Check out my modern, colorful dining room reveal post!
You might also like:
Pin for Later!

Emy is a vintage obsessed mama of 2 DIYer who loves sharing affordable solutions for common home problems. You don’t need a giant budget to create a lovely home. Read more…


such a great project! we have bookshelves we meant to make into built ins for SO long for sawyer. now we’re moving… so maybe in the next house. i do have that little tool or one like it so i will have to break it out!
I can’t wait to see what you do in your new house. 🙂 The oscillating tool is really cool. Once I got the blade on, it was easy to use.
How did you attach the “gap wood” to the cabinets and to the wall? Good job. About to do the same project in my dining room using three cabinets and then an opening so I can make a small desk area.
I attached scrap wood to the wall and the cabinet with a nail gun and then attached the gap wood to those pieces. Trim and caulk helps to disguise the rest.
You could’ve painted it both colors. Paint the base trim white to match the rest of the baseboard in the room. Also paint the outside trim on the doors white. The top could be painted white too for contrast. Add a couple pretty blue and white knobs to the doors if you want.
Or: for even more contrast paint the cabinet white, the door trim blue, maybe stencil something on the top in blue, and add blue and white knobs (or maybe those pretty glass knobs that look antique).