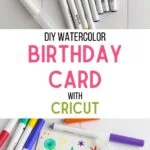
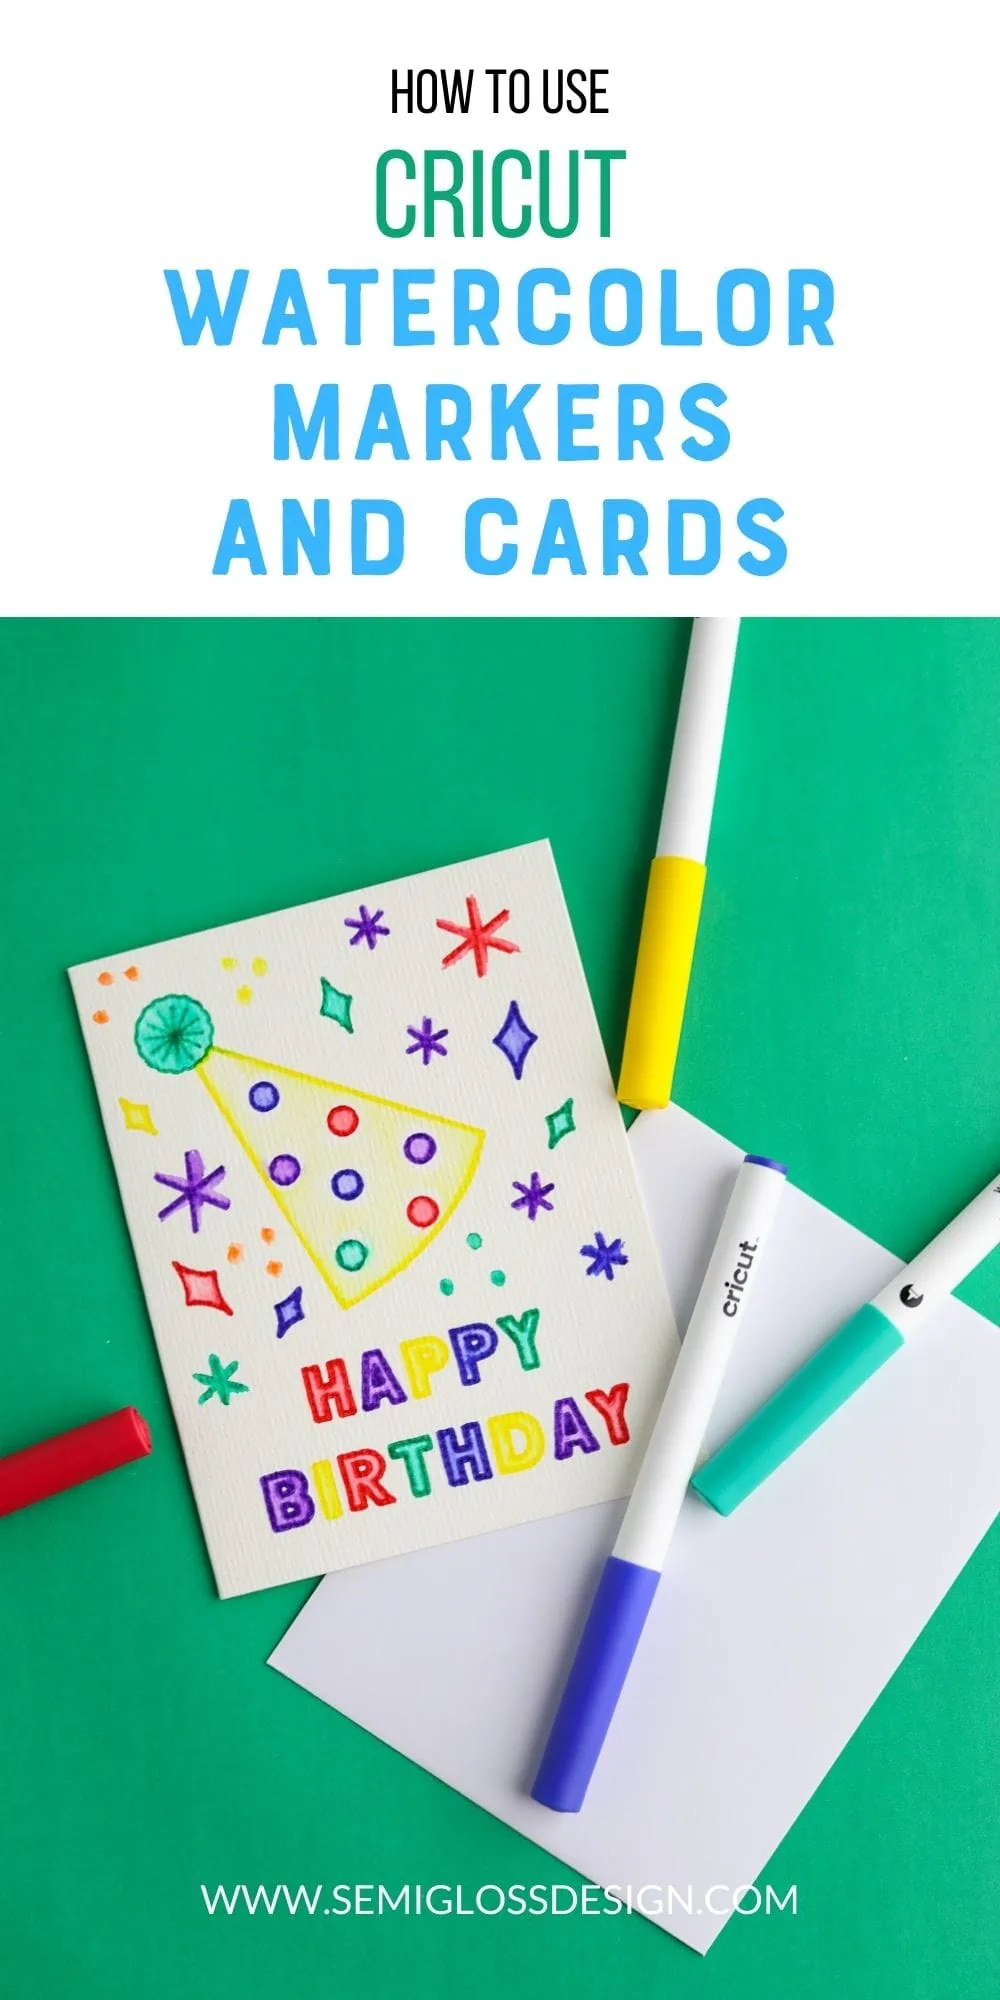
How to Use Cricut Watercolor Markers
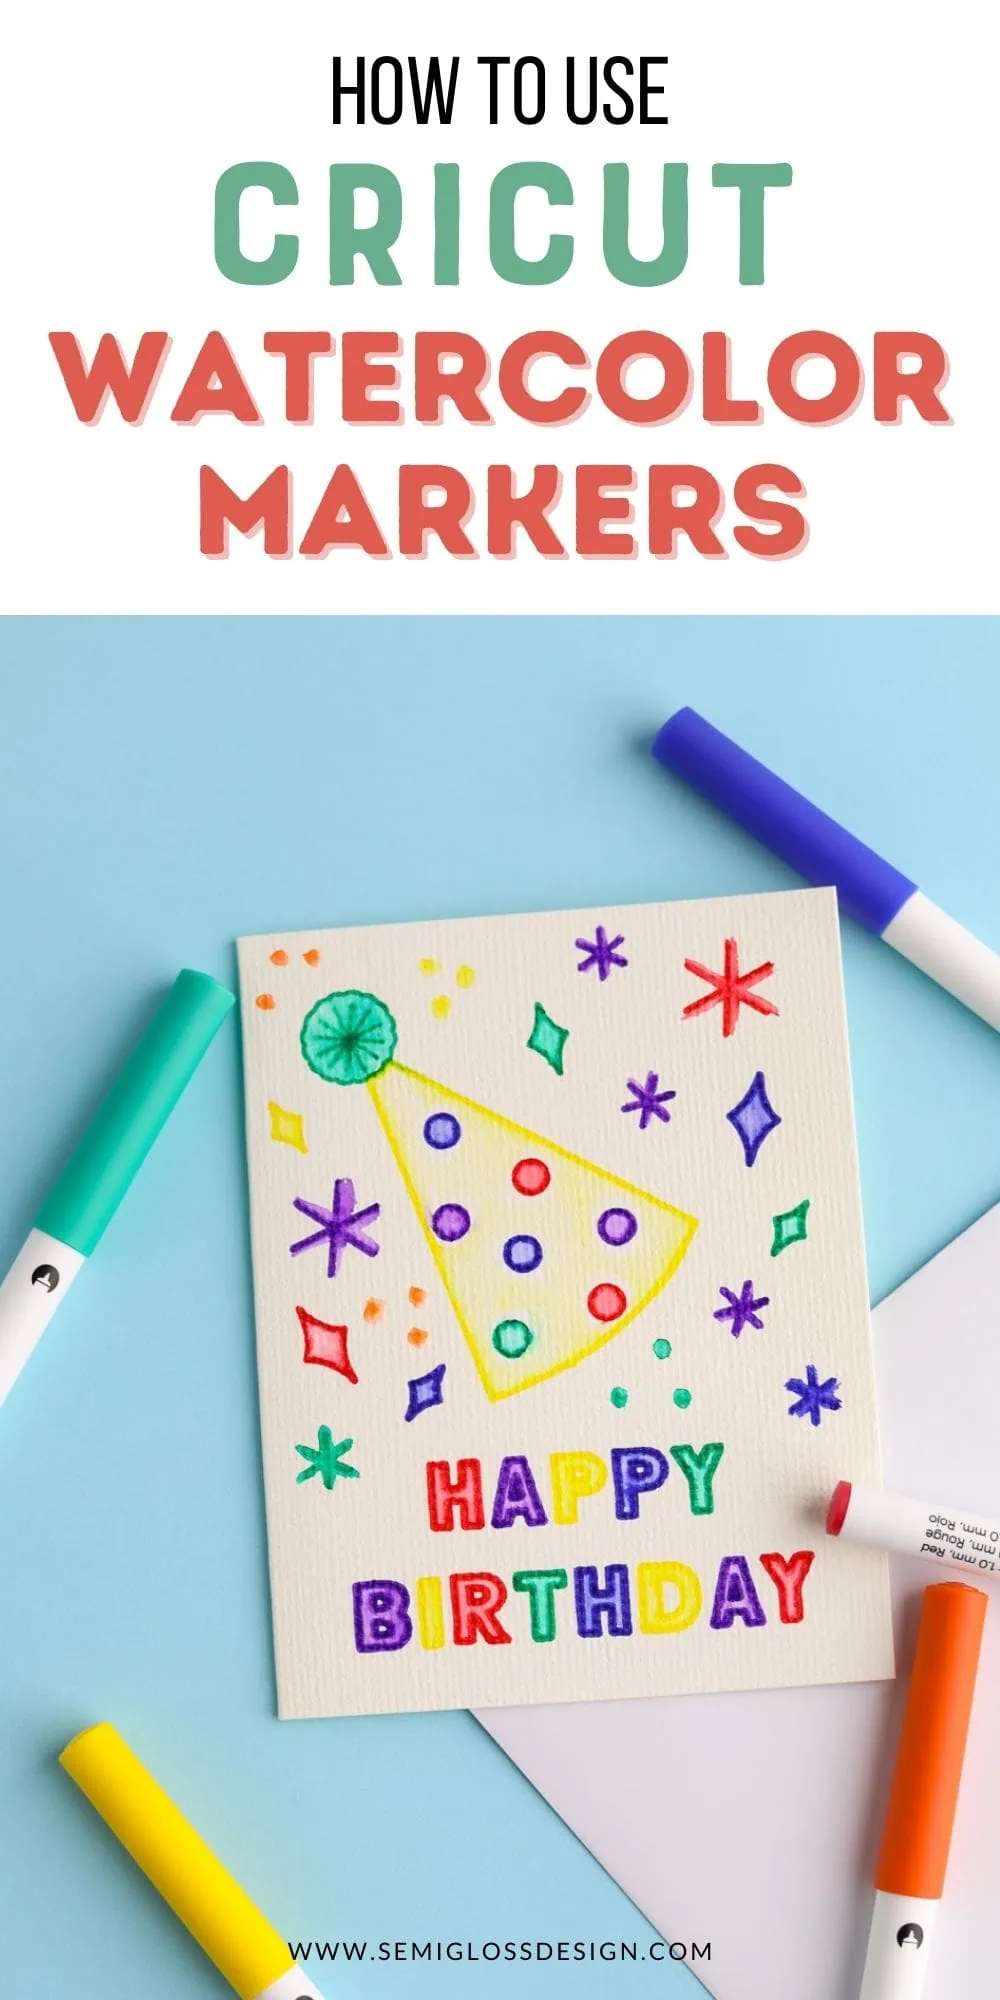
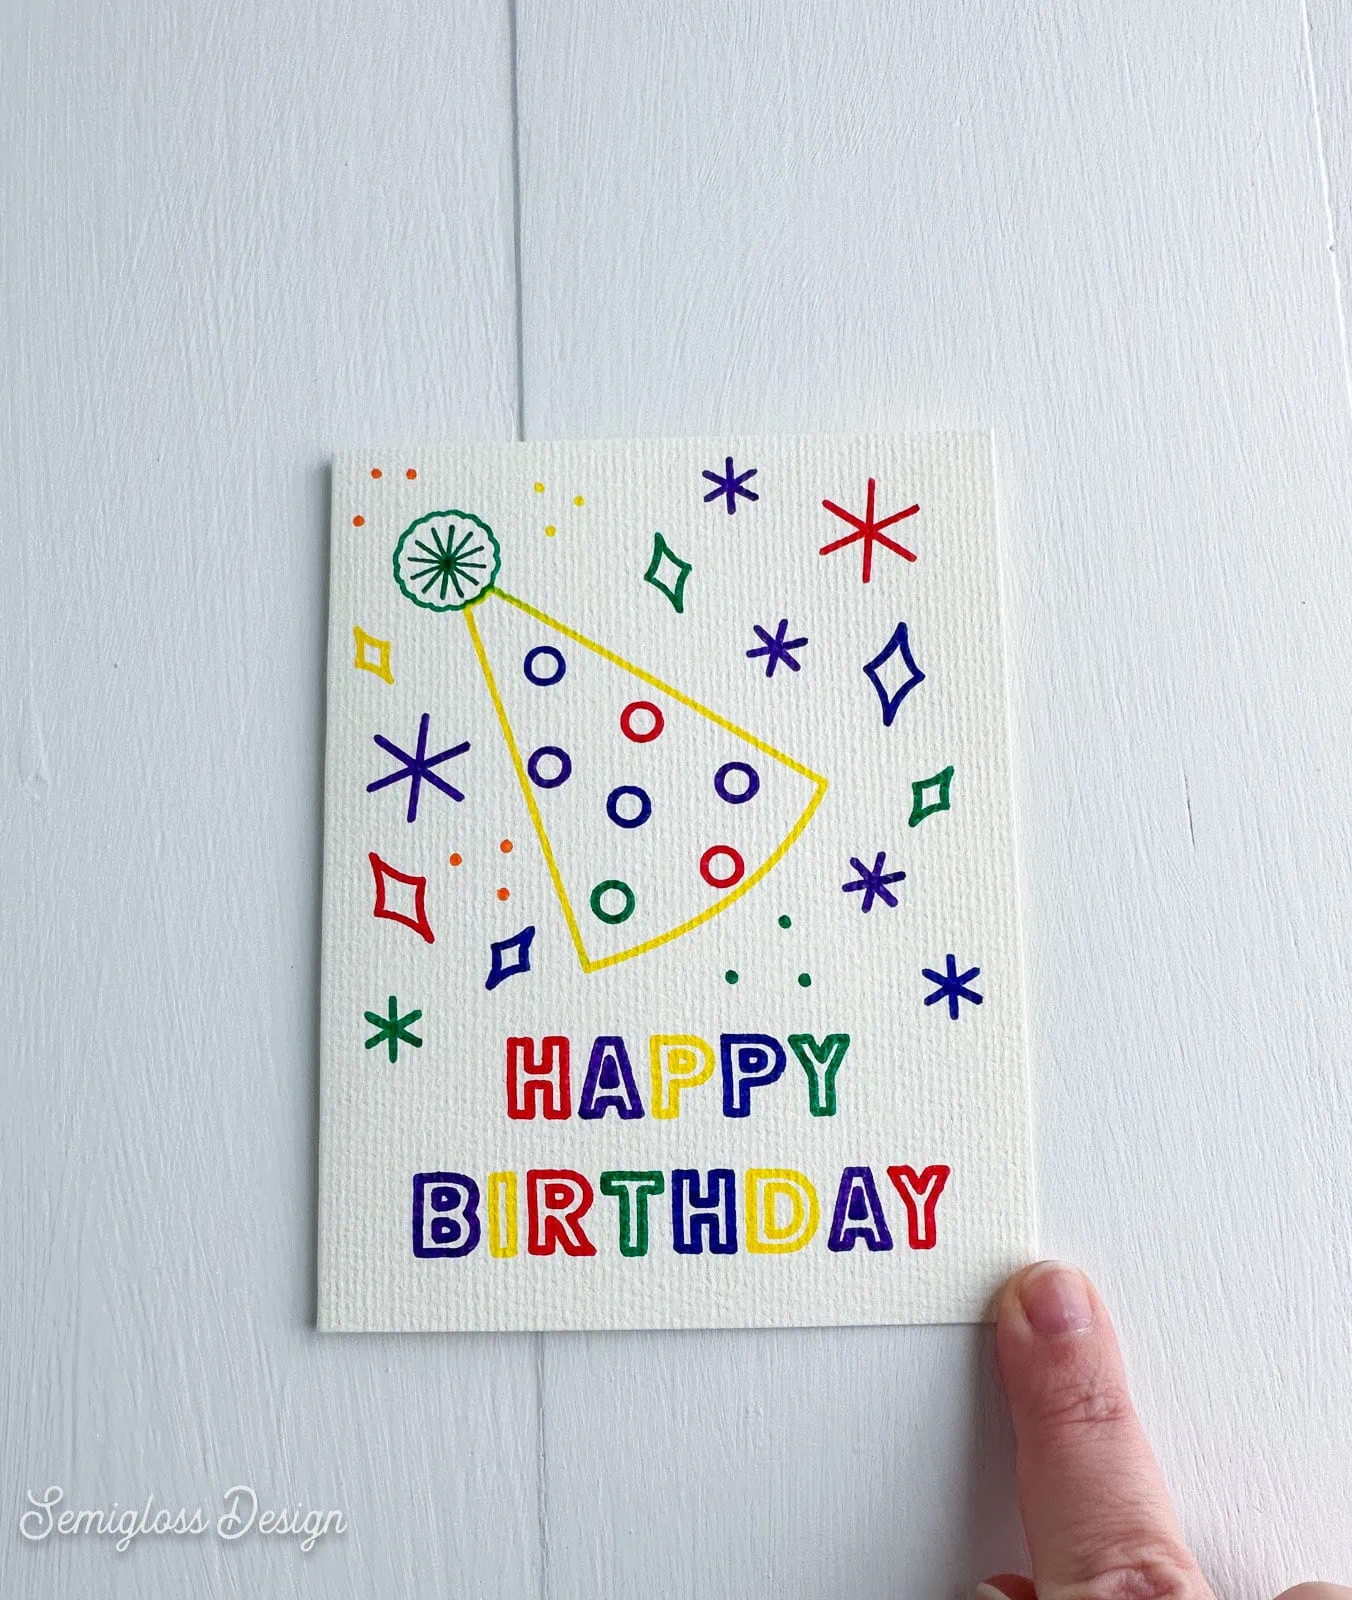
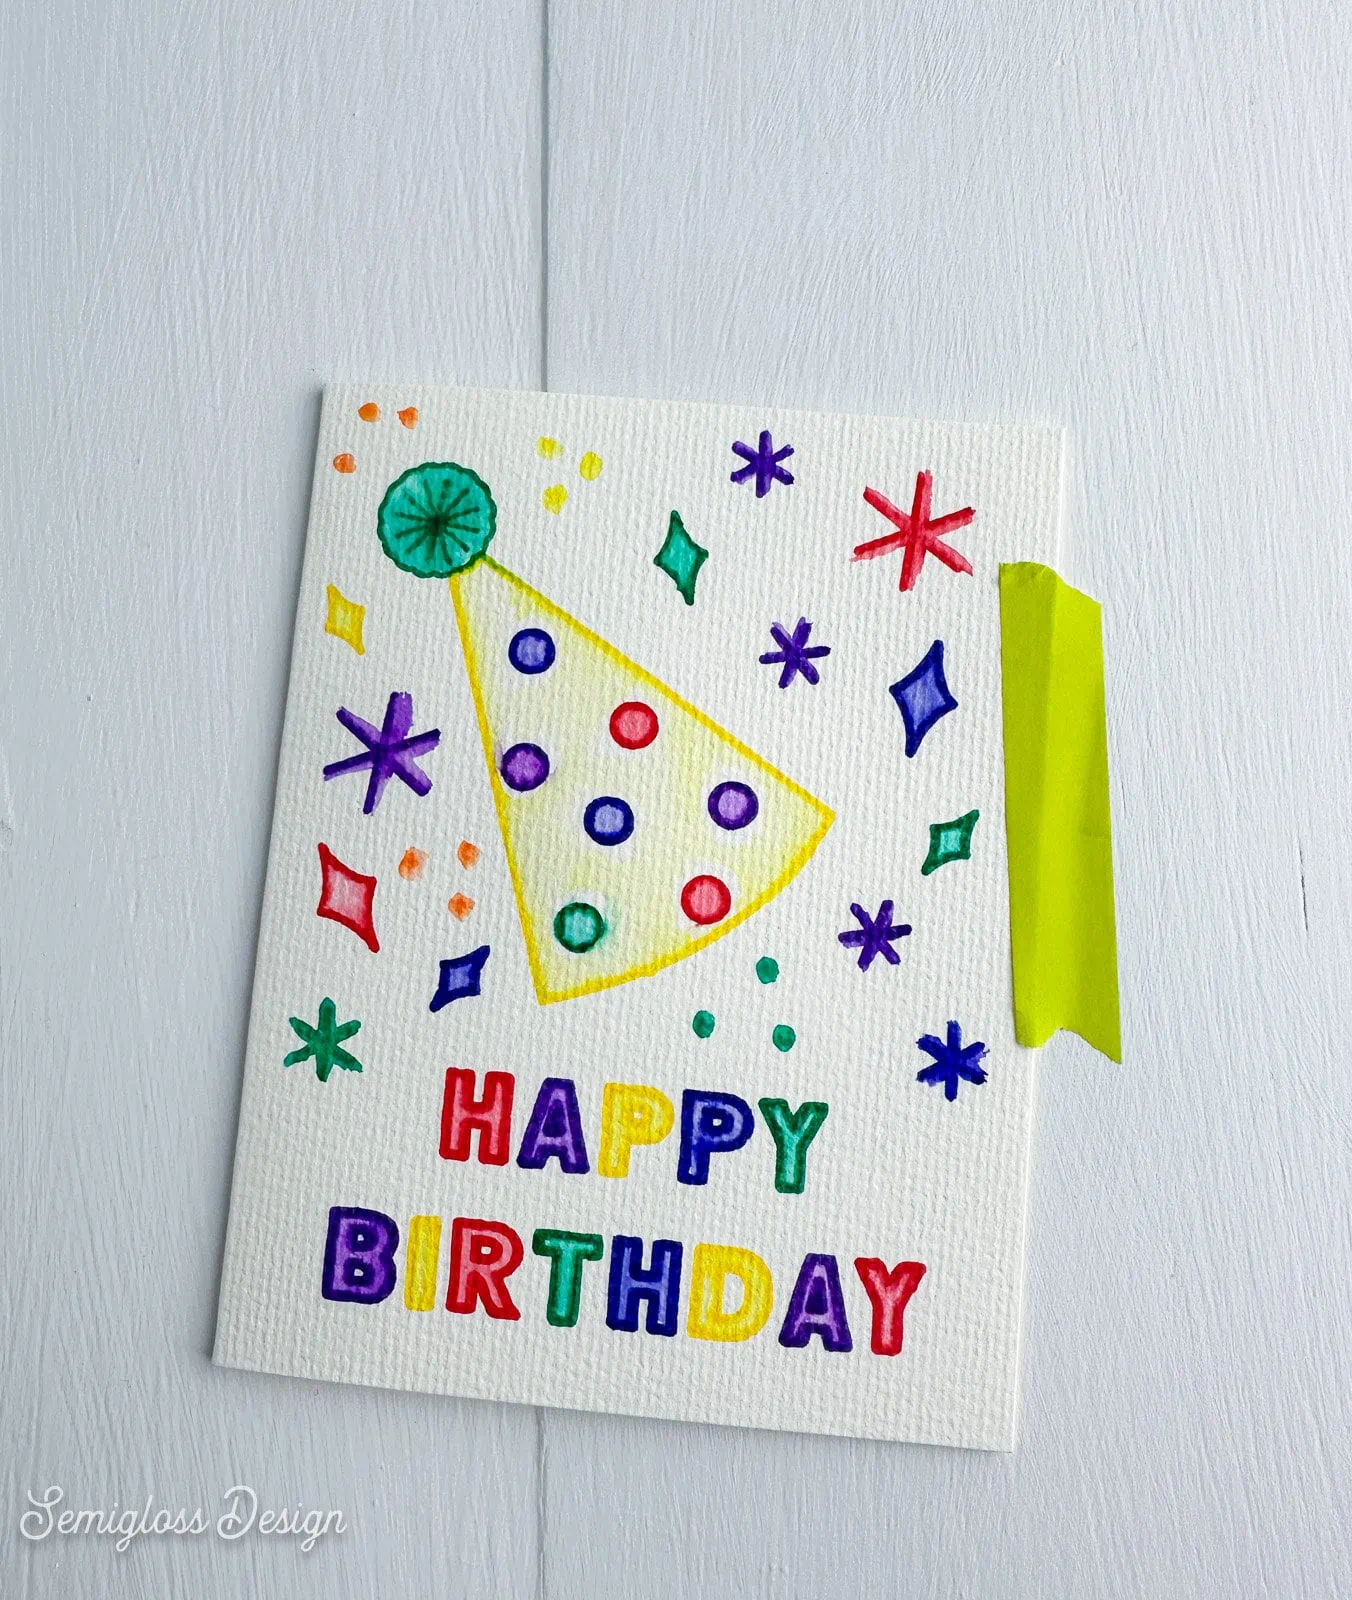
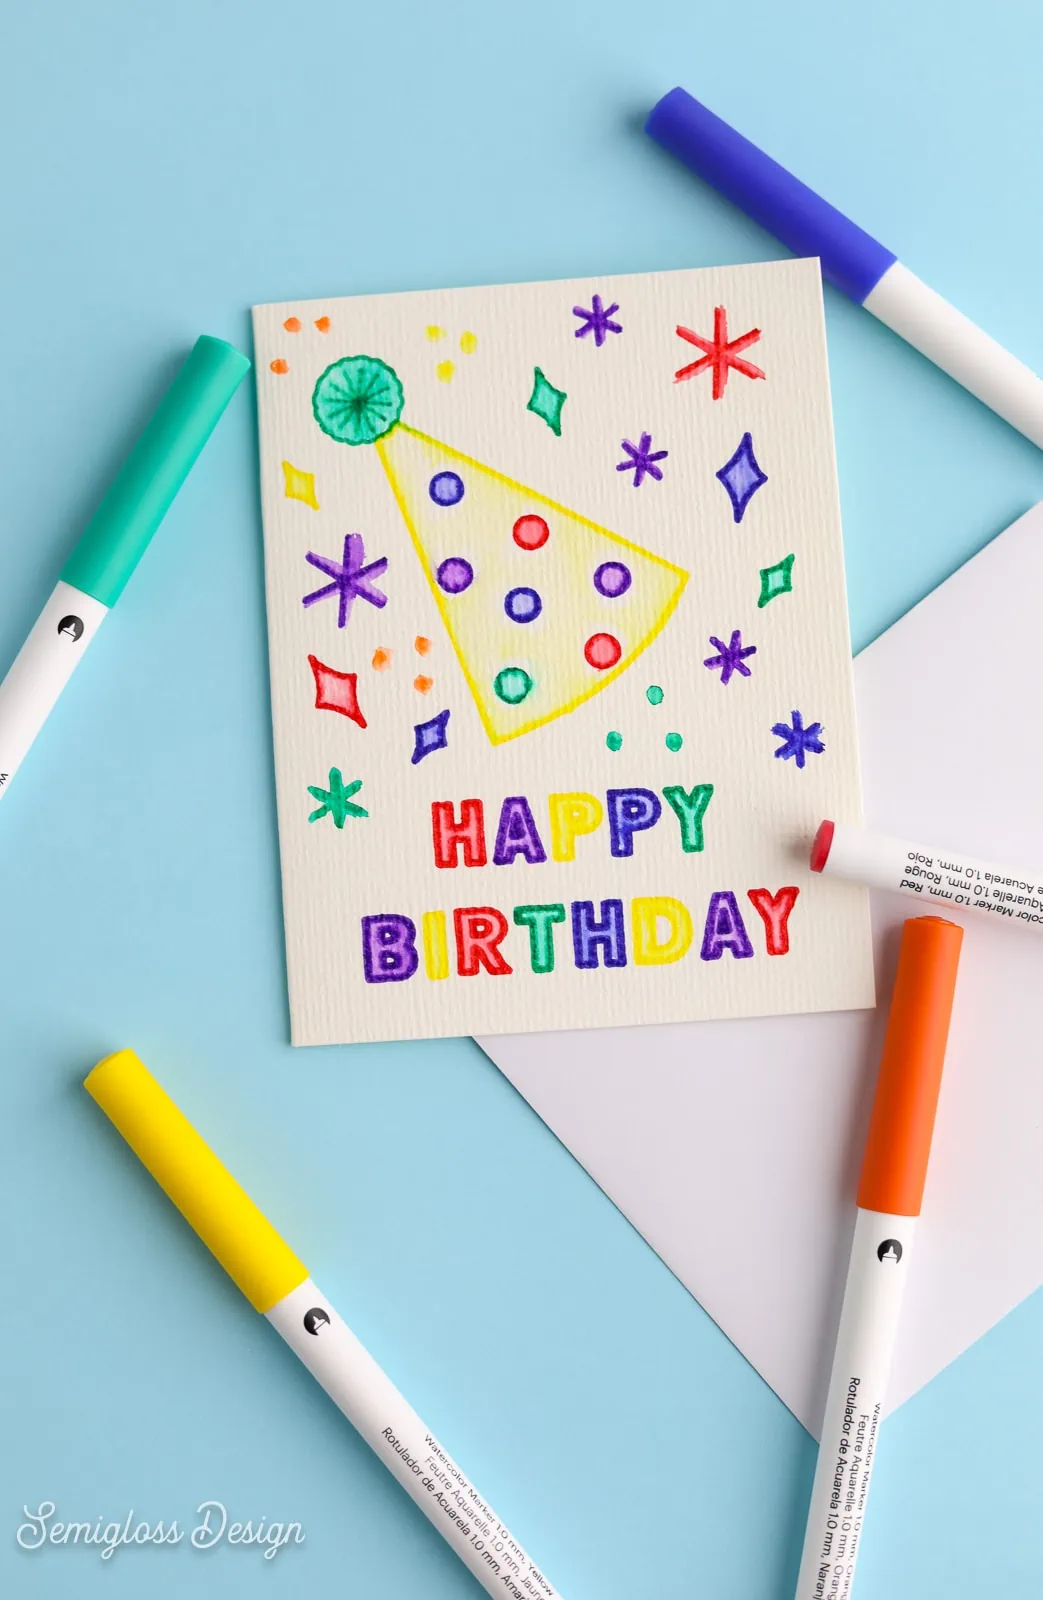
Make a birthday card with Cricut watercolor markers. This cute card features a polka-dot party hat. Get easy tips for painting with watercolor markers.
If you’re new to card-making, be sure to check out this post on making cards with a Cricut.
This post contains affiliate links. By purchasing an item through an affiliate link, I earn a small commission at no extra cost to you. As an Amazon Associate I earn from qualifying purchases.
When I’m not working on home projects or playing with my Cricut, I’m painting with watercolors. So when I saw that Cricut had a set of watercolor markers, I was intrigued to try something that combines two of my favorite things.
I created a cute birthday card to try them out on. (The download link is at the bottom of the post). There are also plenty of ready-made designs if you have a Cricut Access subscription.
All About Cricut Watercolor Markers
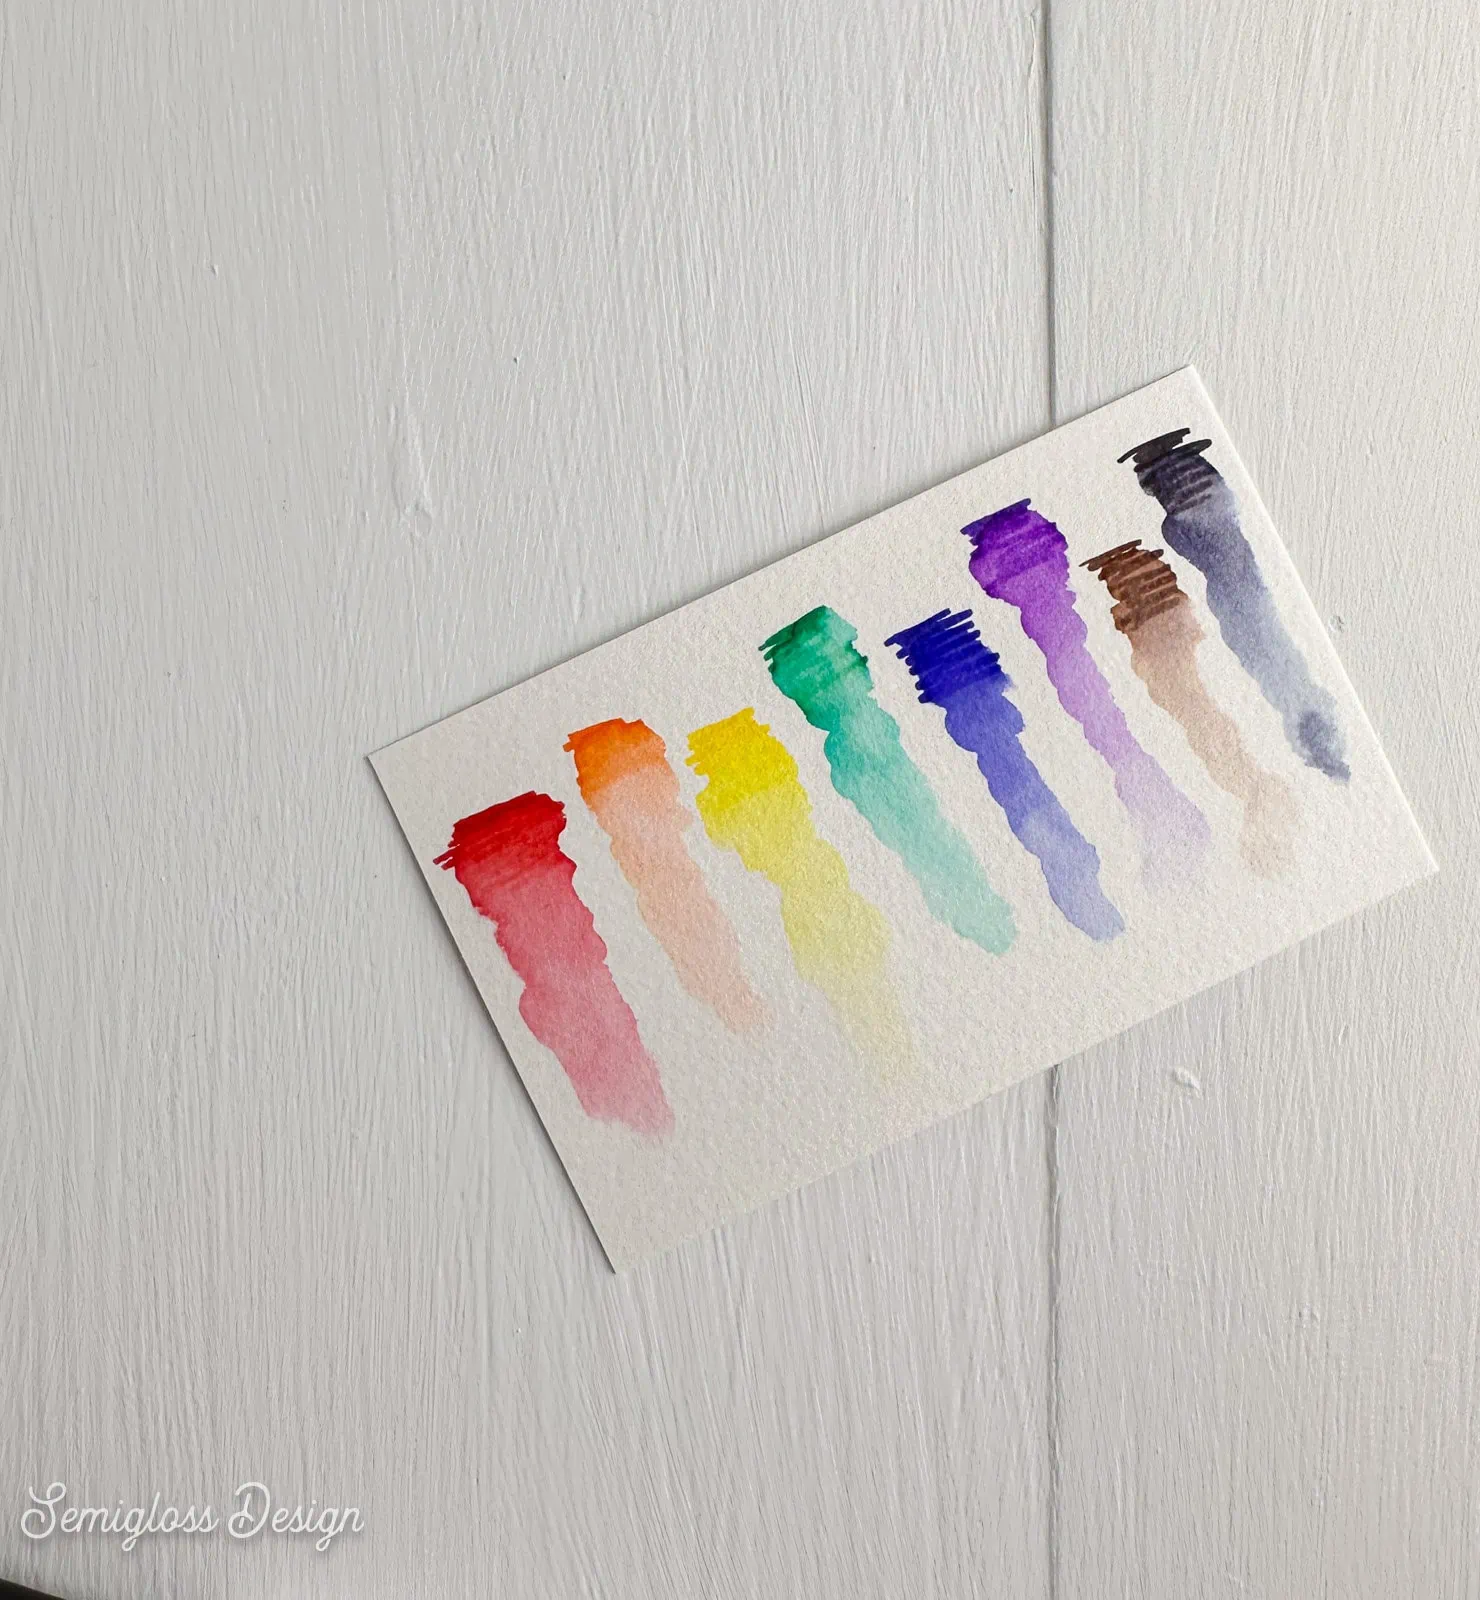
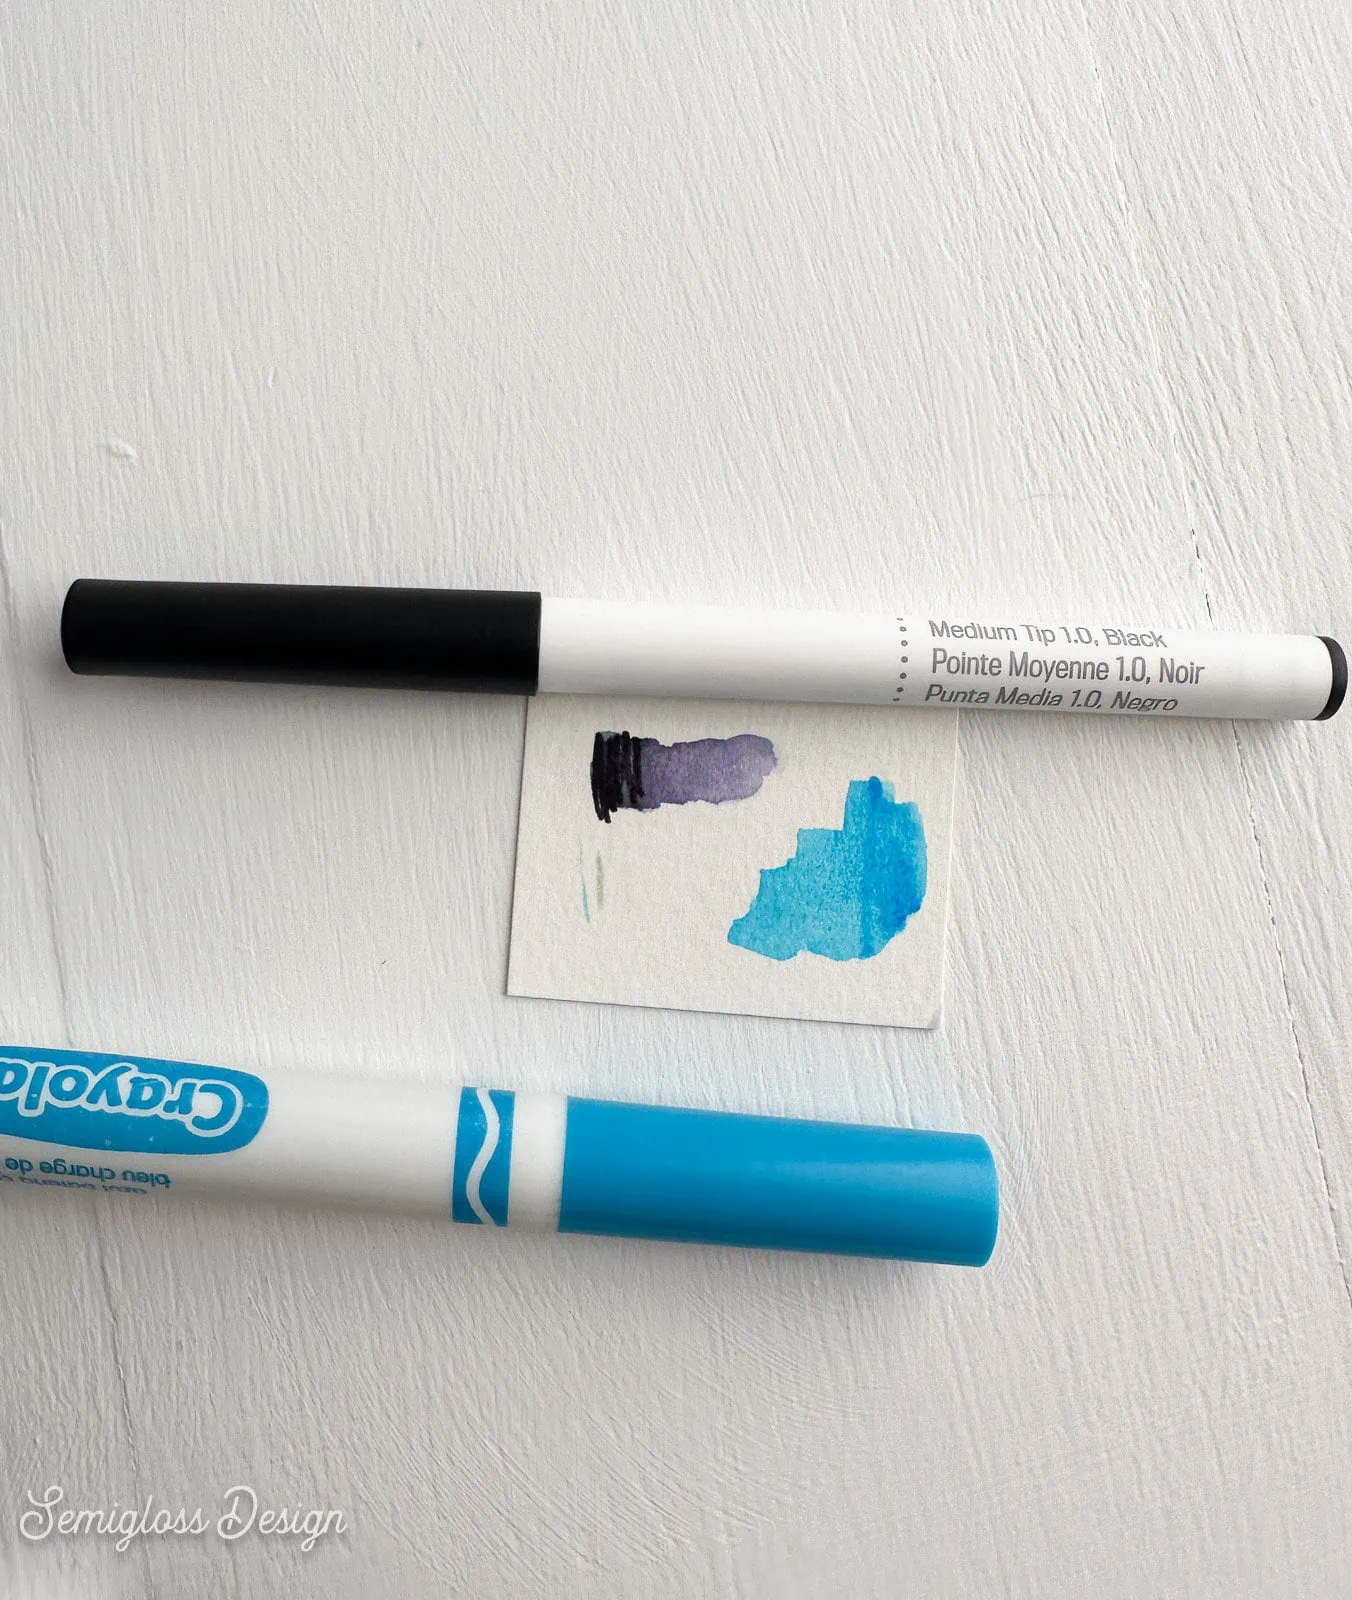
Cricut watercolor markers come in a set of 8 colors and a waterbrush. The colors are basic: red, orange, yellow, green, blue, purple, brown, and black.
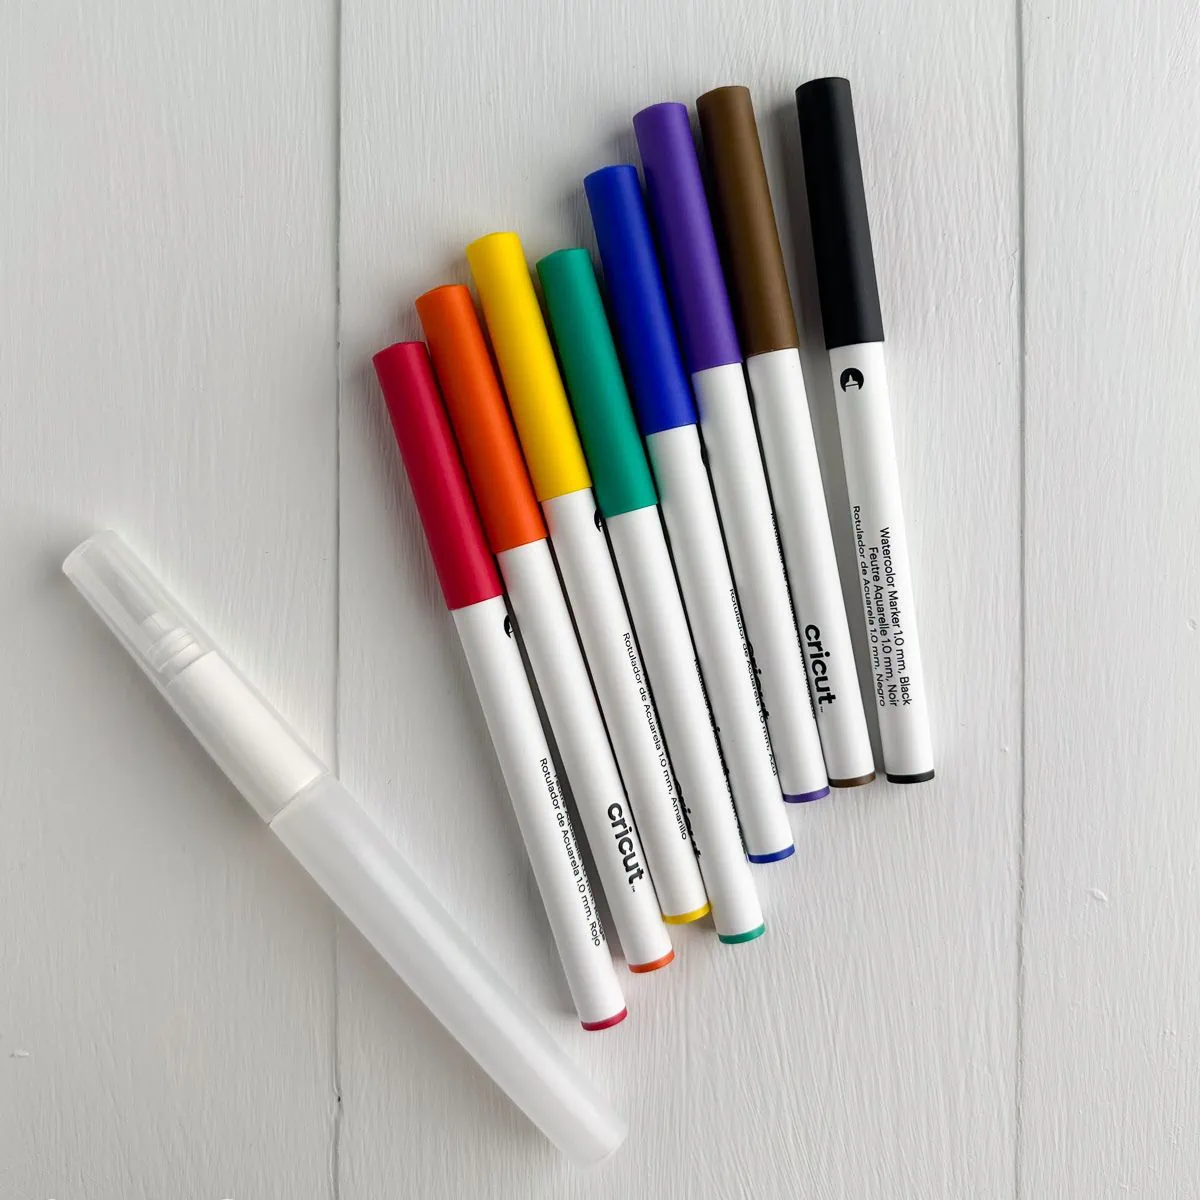
These markers are compatible with Cricut Maker machines, Cricut Explore machines, and the Cricut Venture. There’s also a set that works with the Cricut Joy.
The waterbrush can be filled with water, eliminating the need for a jar of water. This means that it can be used without the possibility of a mess. Just squeeze the handle to release more water.
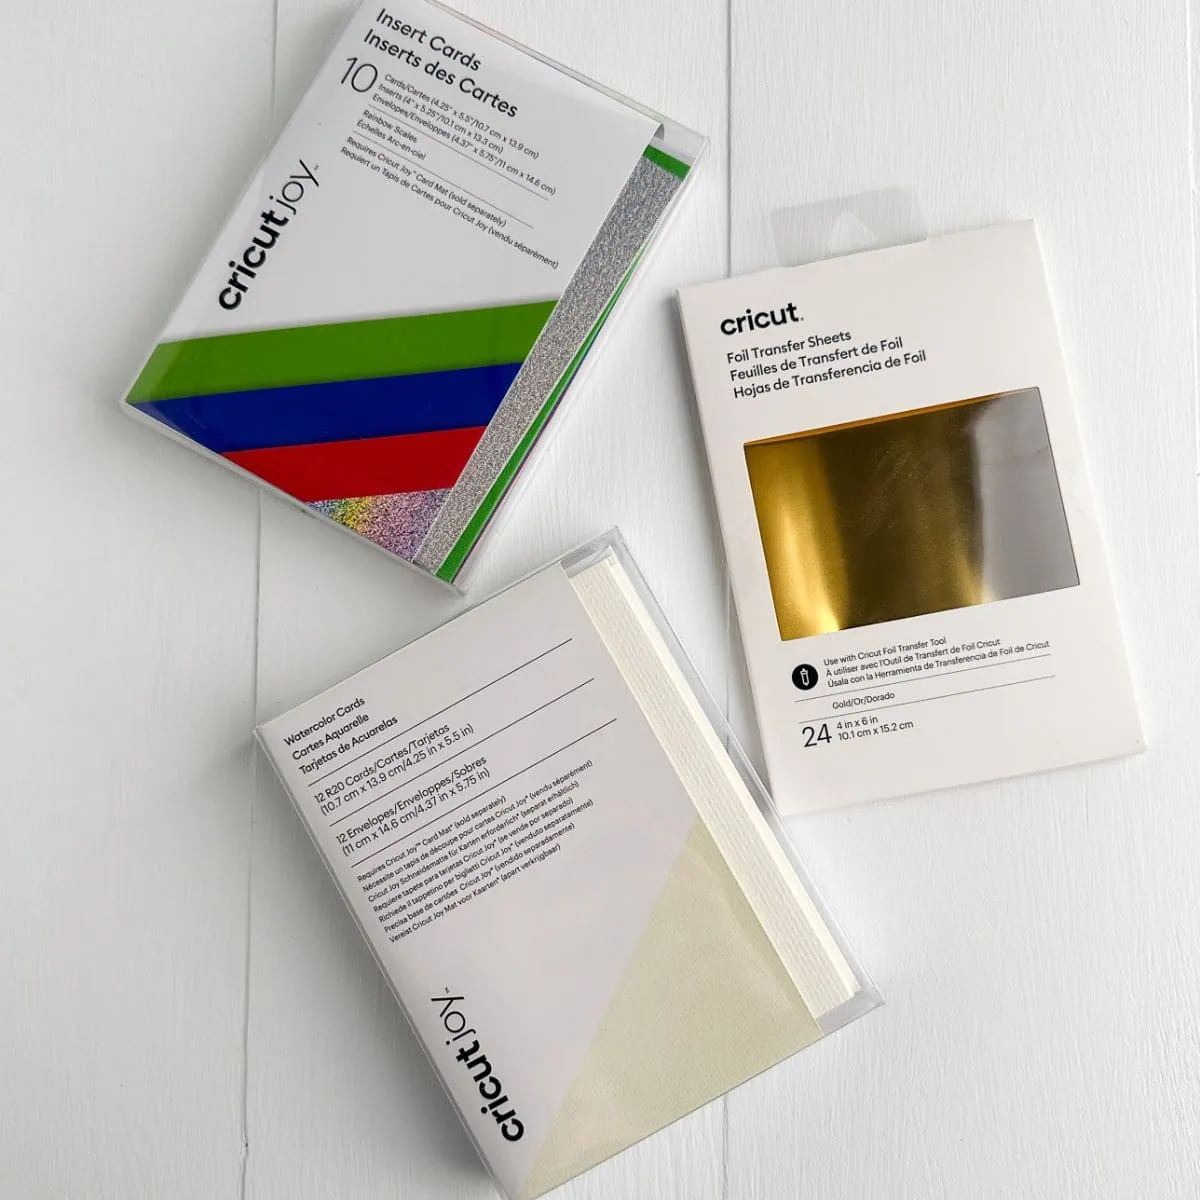
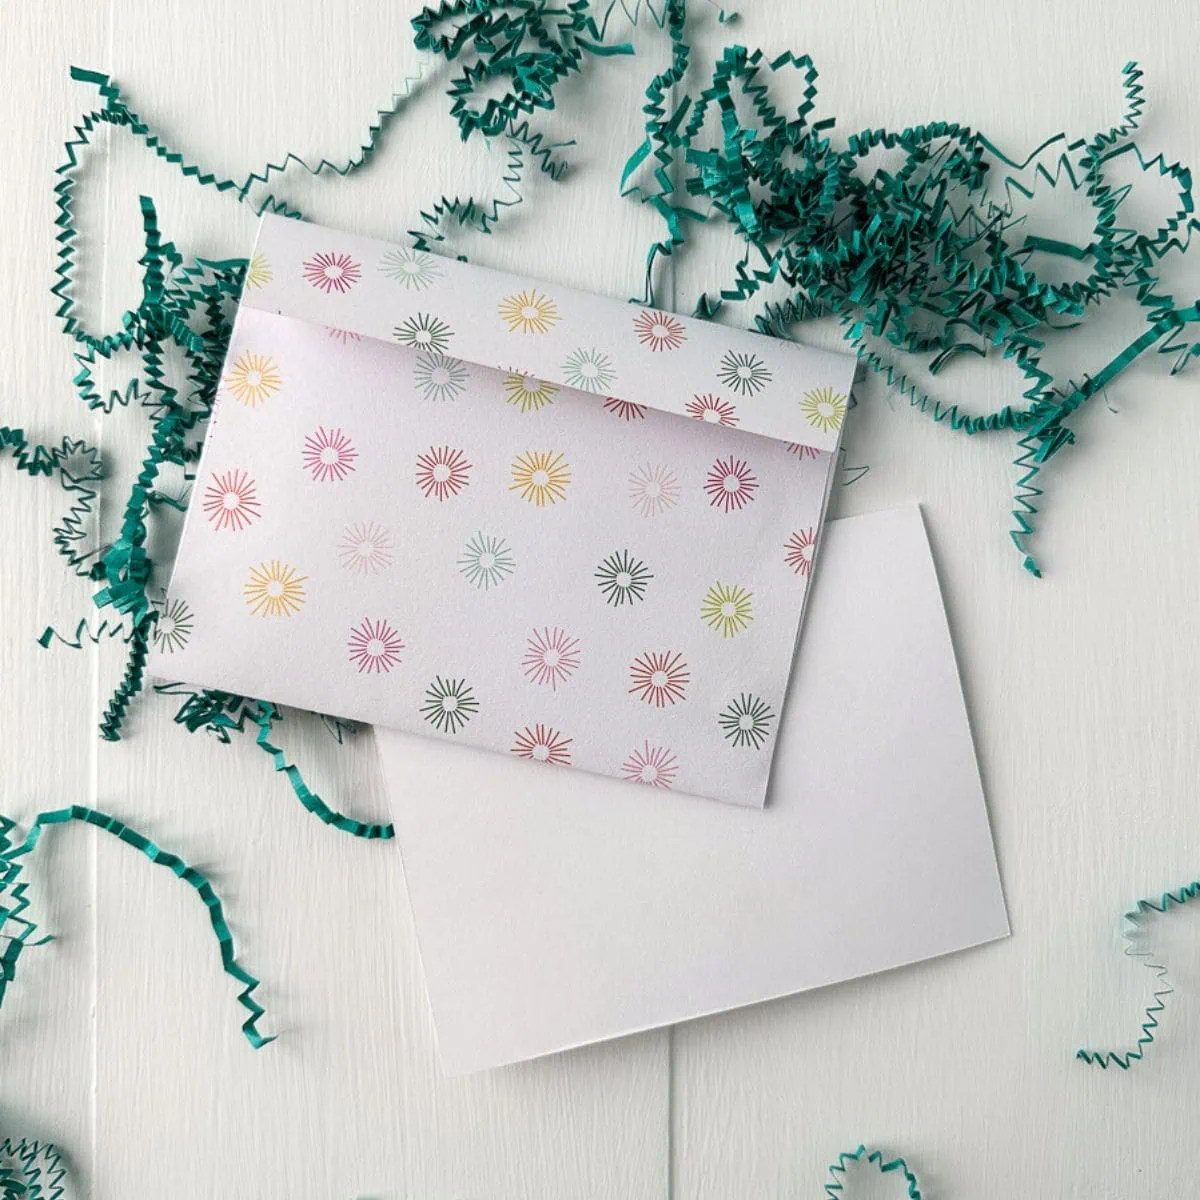
Cricut also offers watercolor cards in 3 sizes:
- R20 – 4.25″ x 5.5″ (12 count)
- R40 – 4.75″ x 6.6″ (10 count)
- S40 – 4.75″ x 4.75″ (12 count)
By the way, the codes (R20, R40, and S40) correspond to the card mat placement.
Each pack contains cards and envelopes.
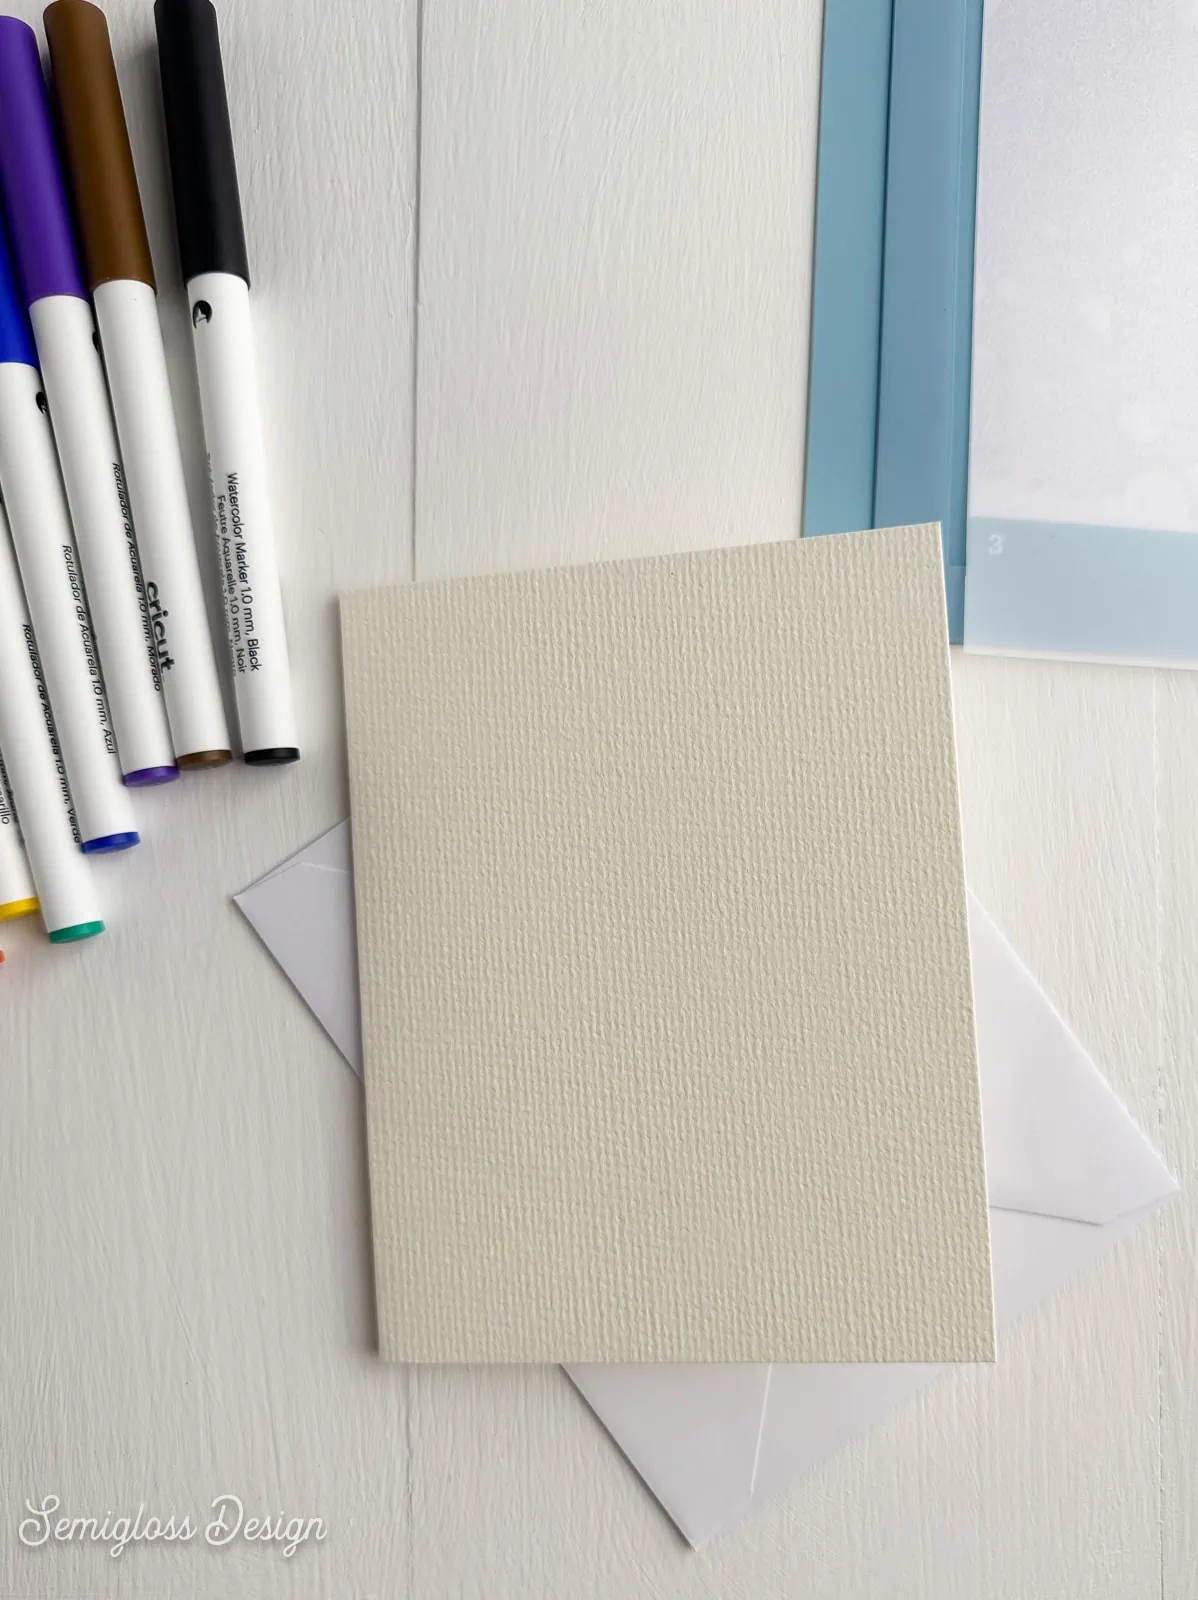
The watercolor paper is a creamy white with a light texture. It’s thick enough to withstand water without warping.
How to Use Cricut Watercolor Markers
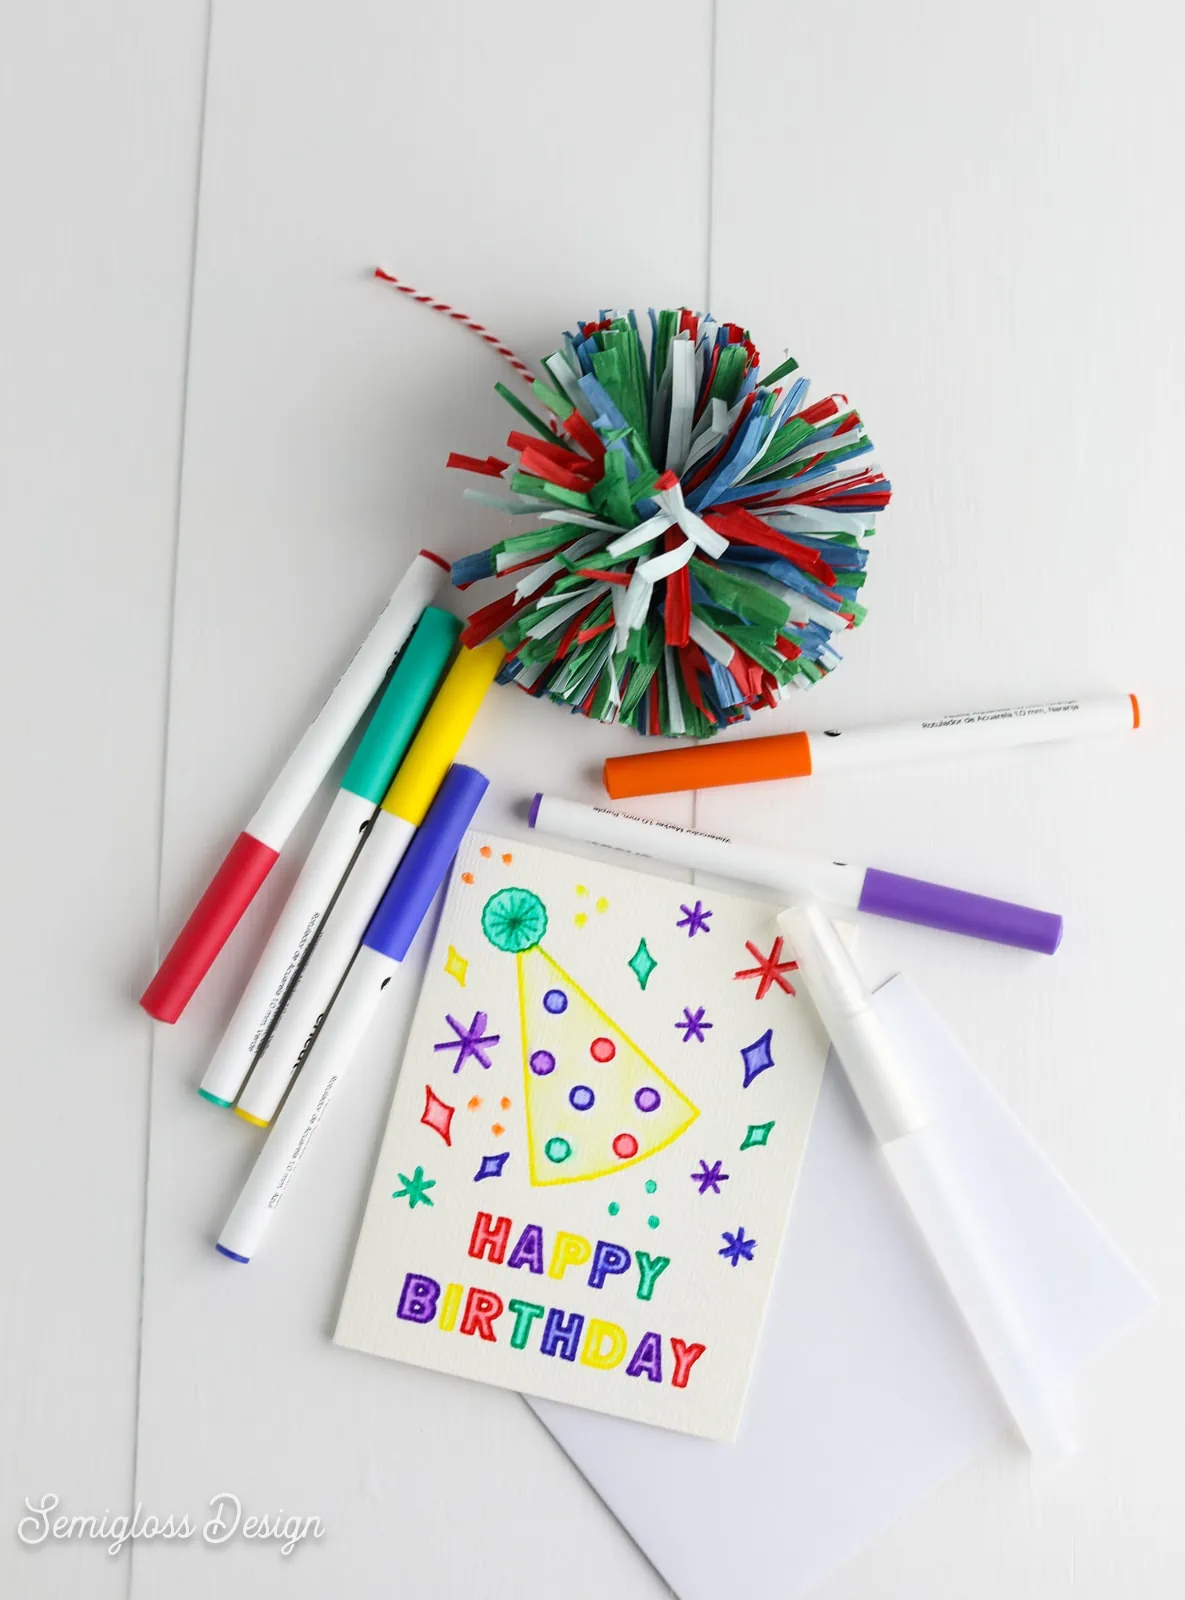
Supplies Needed:
- Cricut (I used my Cricut Maker 3)
- Card Mat
- Cricut Watercolor Markers
- Cricut Watercolor Cards
- Paintbrush (optional)
- Paper towel
- Clean water (optional)
Designing a Card for Cricut Watercolor Markers
Here are a few things to keep in mind if you create your own designs for watercolor markers.
- Set the stroke to 1 point.
- If you’re using software like Adobe Illustrator, make sure to expand any shapes, lines, or text before you create the SVG.
- Keep the design simple.
- If the colors touch, they will bleed when they get wet.
- Large areas need some detail, or they will remain white.
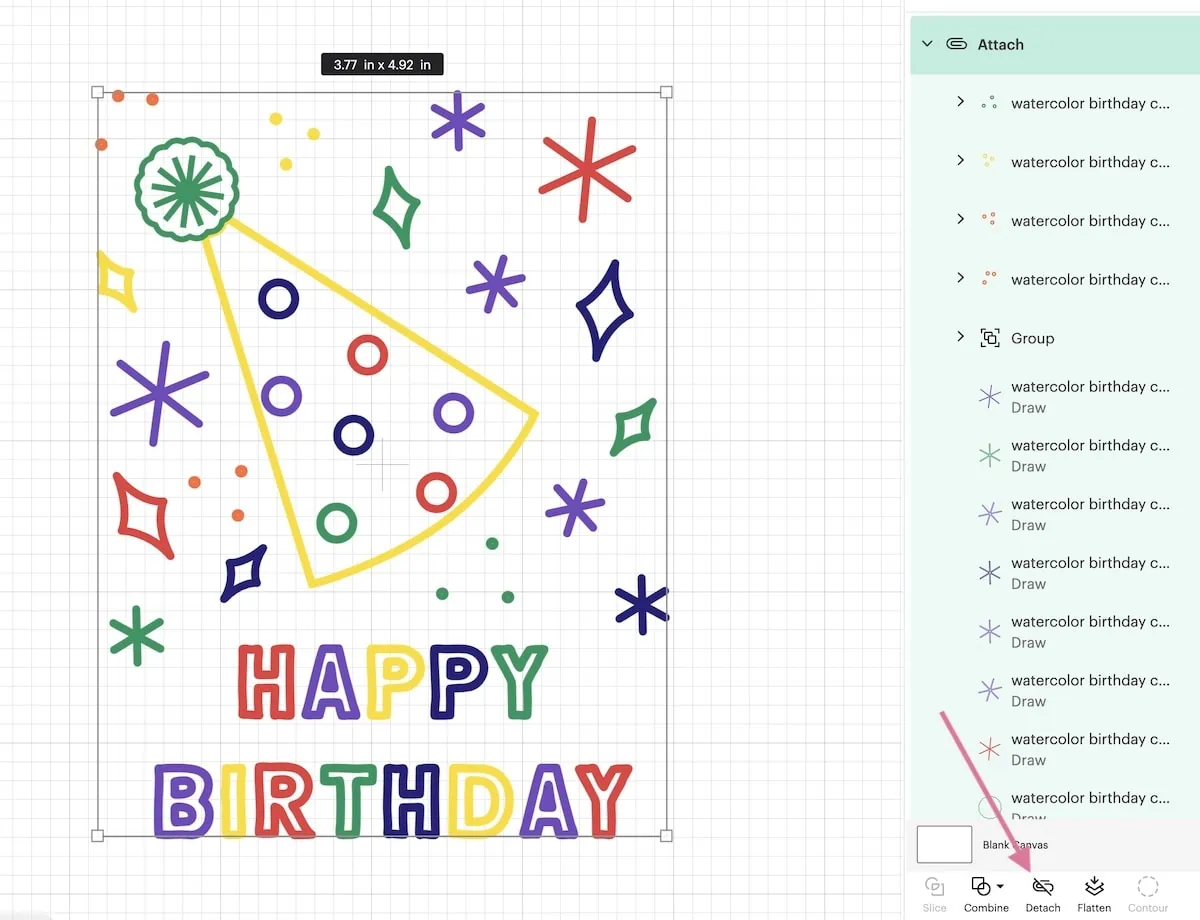
- Group the entire design before exporting it as an SVG file.
Setting Up the Card in Cricut Design Space
- Upload the design as usual.
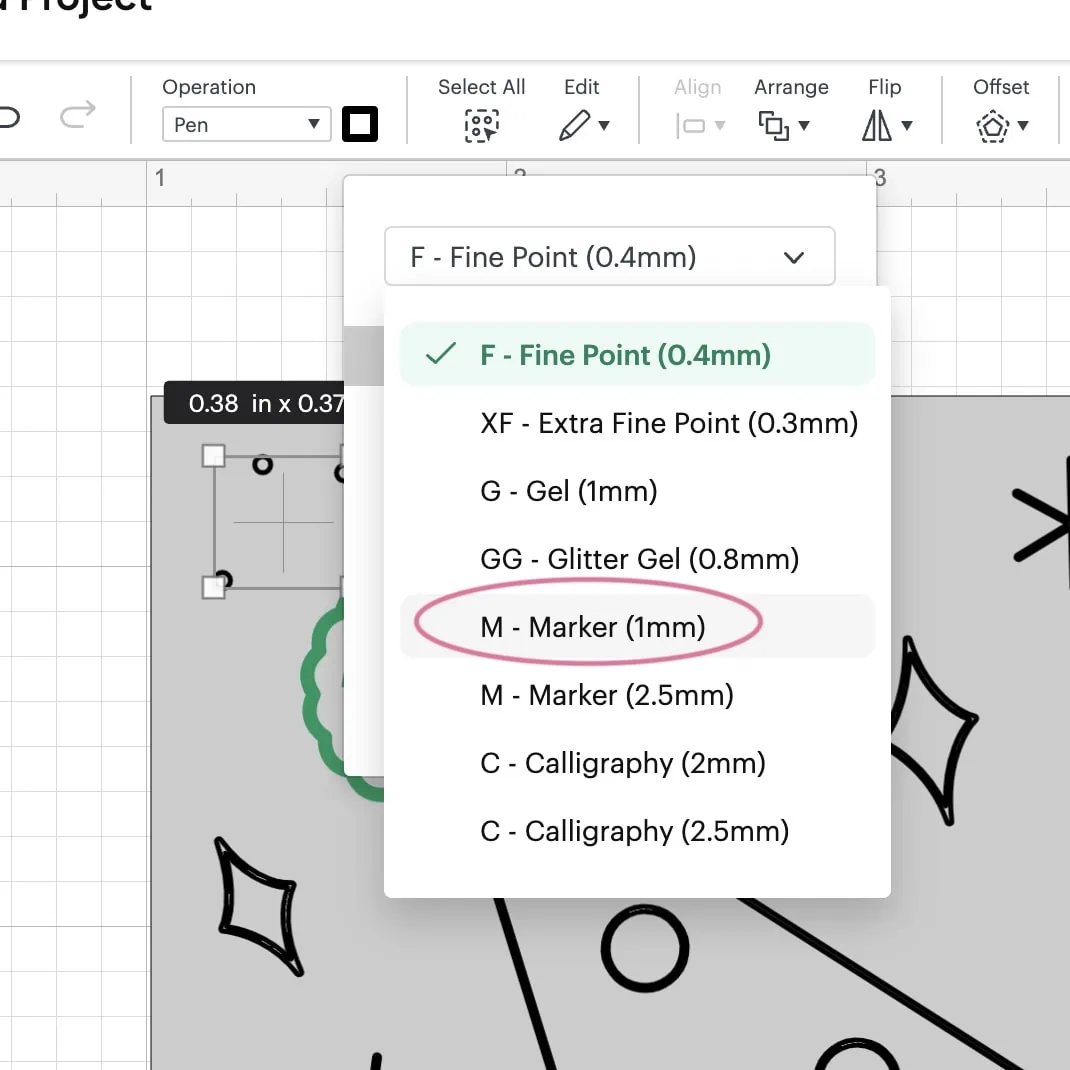
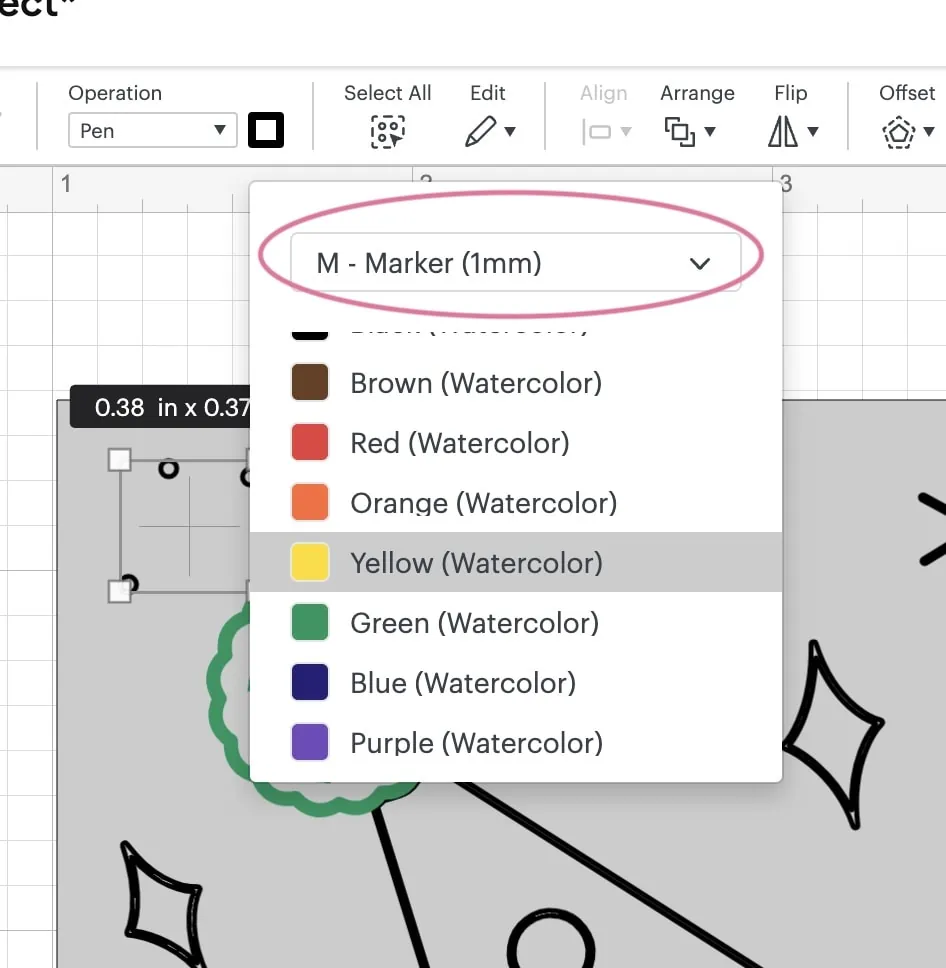
- Every element will need to be changed from basic cut to draw > pen. Click the color square, click the down arrow to see more options select “M – Marker (1mm),” and scroll to the bottom to choose the watercolor marker color.


- Repeat this for every element or element group. (If you do it all at once, it turns everything black.)
- When the document is ready, you can resize it if needed. This file is sized for the R20 size. To resize, draw a rectangle in the correct card size to use as a guide. Change the color to a lighter color and send it to the back. Select everything except for the rectangle and resize it to fit the rectangle, leaving a small margin along the edges. Hide or delete the rectangle.
- Be sure to attach the design so that it stays in the right position.

- When you’re happy with everything, click Make it.
Using the Cricut Maker 3 to Make a Watercolor Card
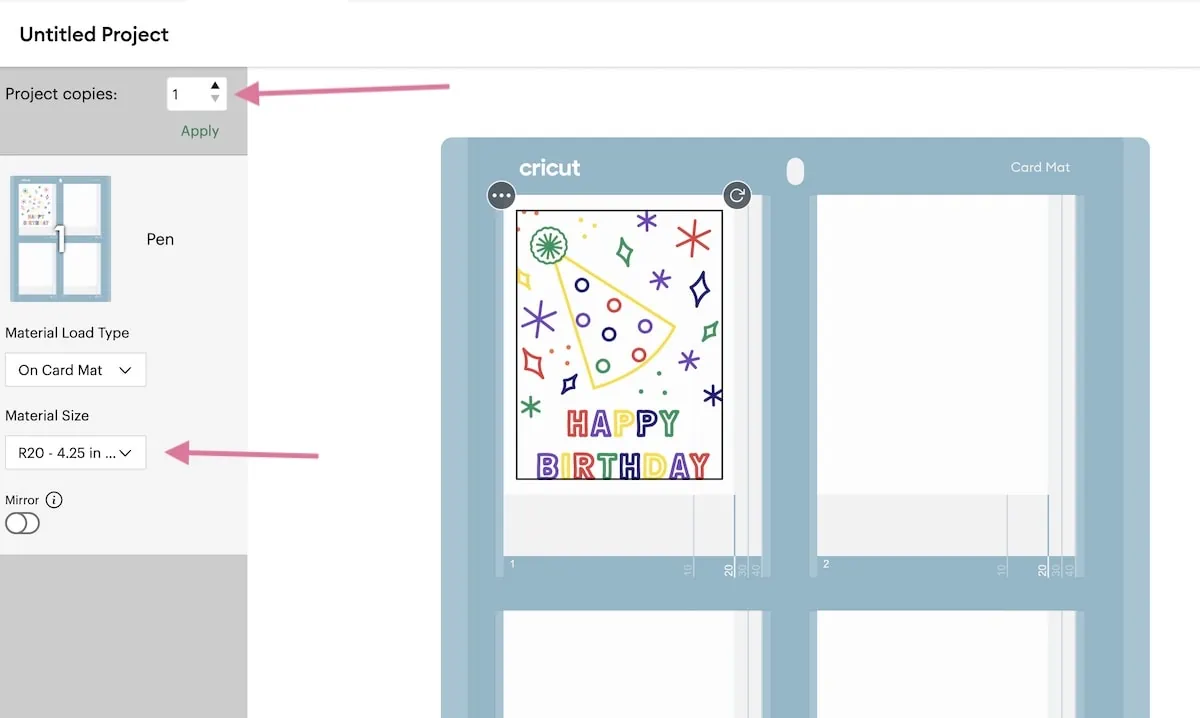
- Select the Card mat from the dialog box.
- If you’re going to make more than one card, select the amount in the drop-down menu.
- You can also choose a different card size on this page. If your size isn’t showing up, you may need to cancel the cut so that you can return to the canvas and resize the design slightly so that it will fit.

- For the materials, select Watercolor Cards under paper.
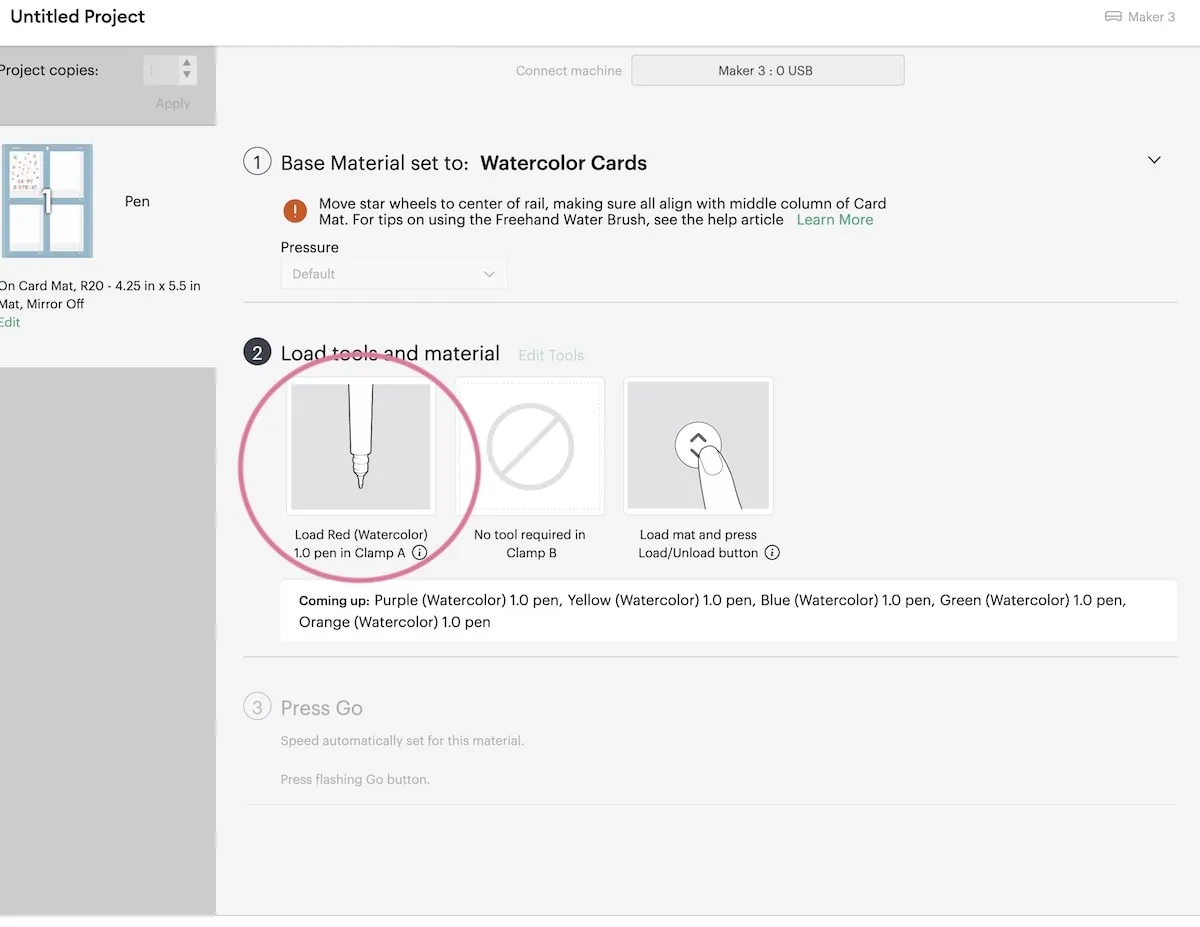
- Move the star wheels to the side so that it doesn’t create marks on the cards.
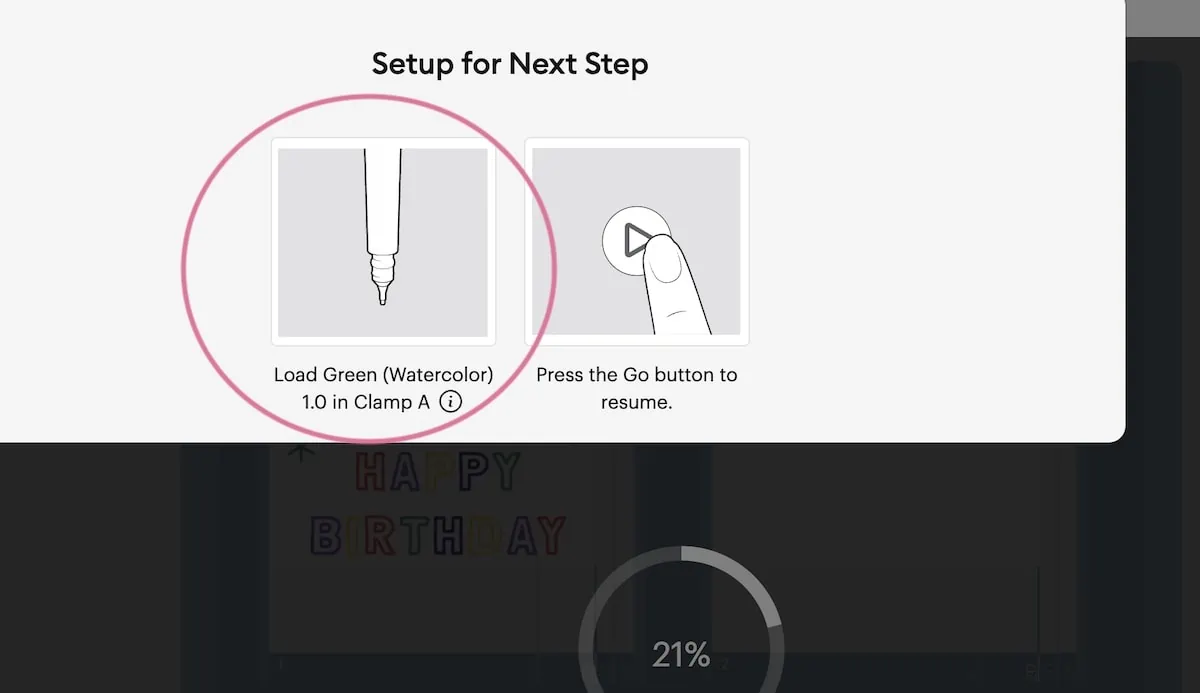
- Insert the correct color of the marker indicated in Clamp A.
 Push the marker down until it clicks. You should not see the arrow on the marker base.
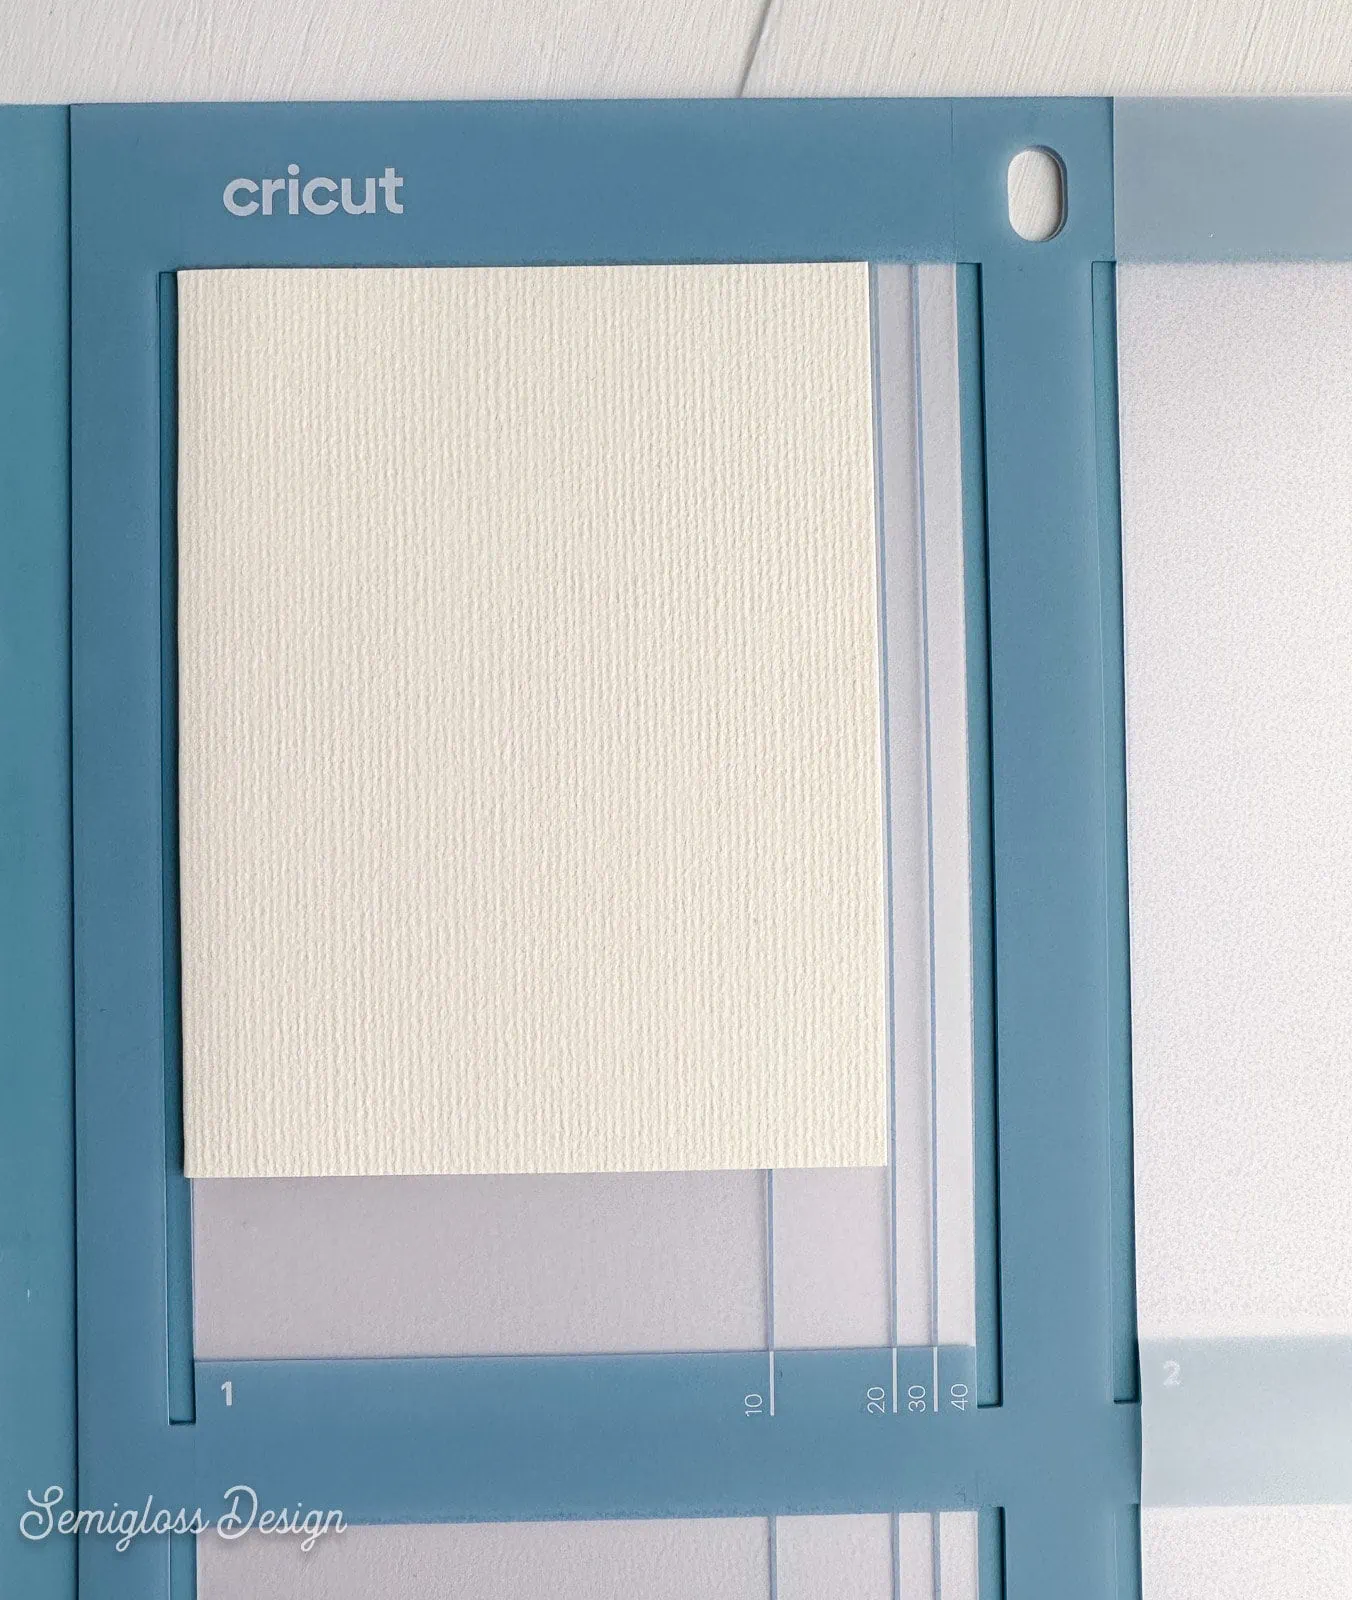
- Insert the card into the card mat. It goes in the first card slot, all the way up and to the right.
- Load the mat and press go when ready.
- Change out the marker color when it tells you to. The software will walk you through every step.

- Continue until it’s finished.
- Unload the mat when it’s done.
- Gently remove the card from the card mat.
 Push the marker down until it clicks. You should not see the arrow on the marker base.
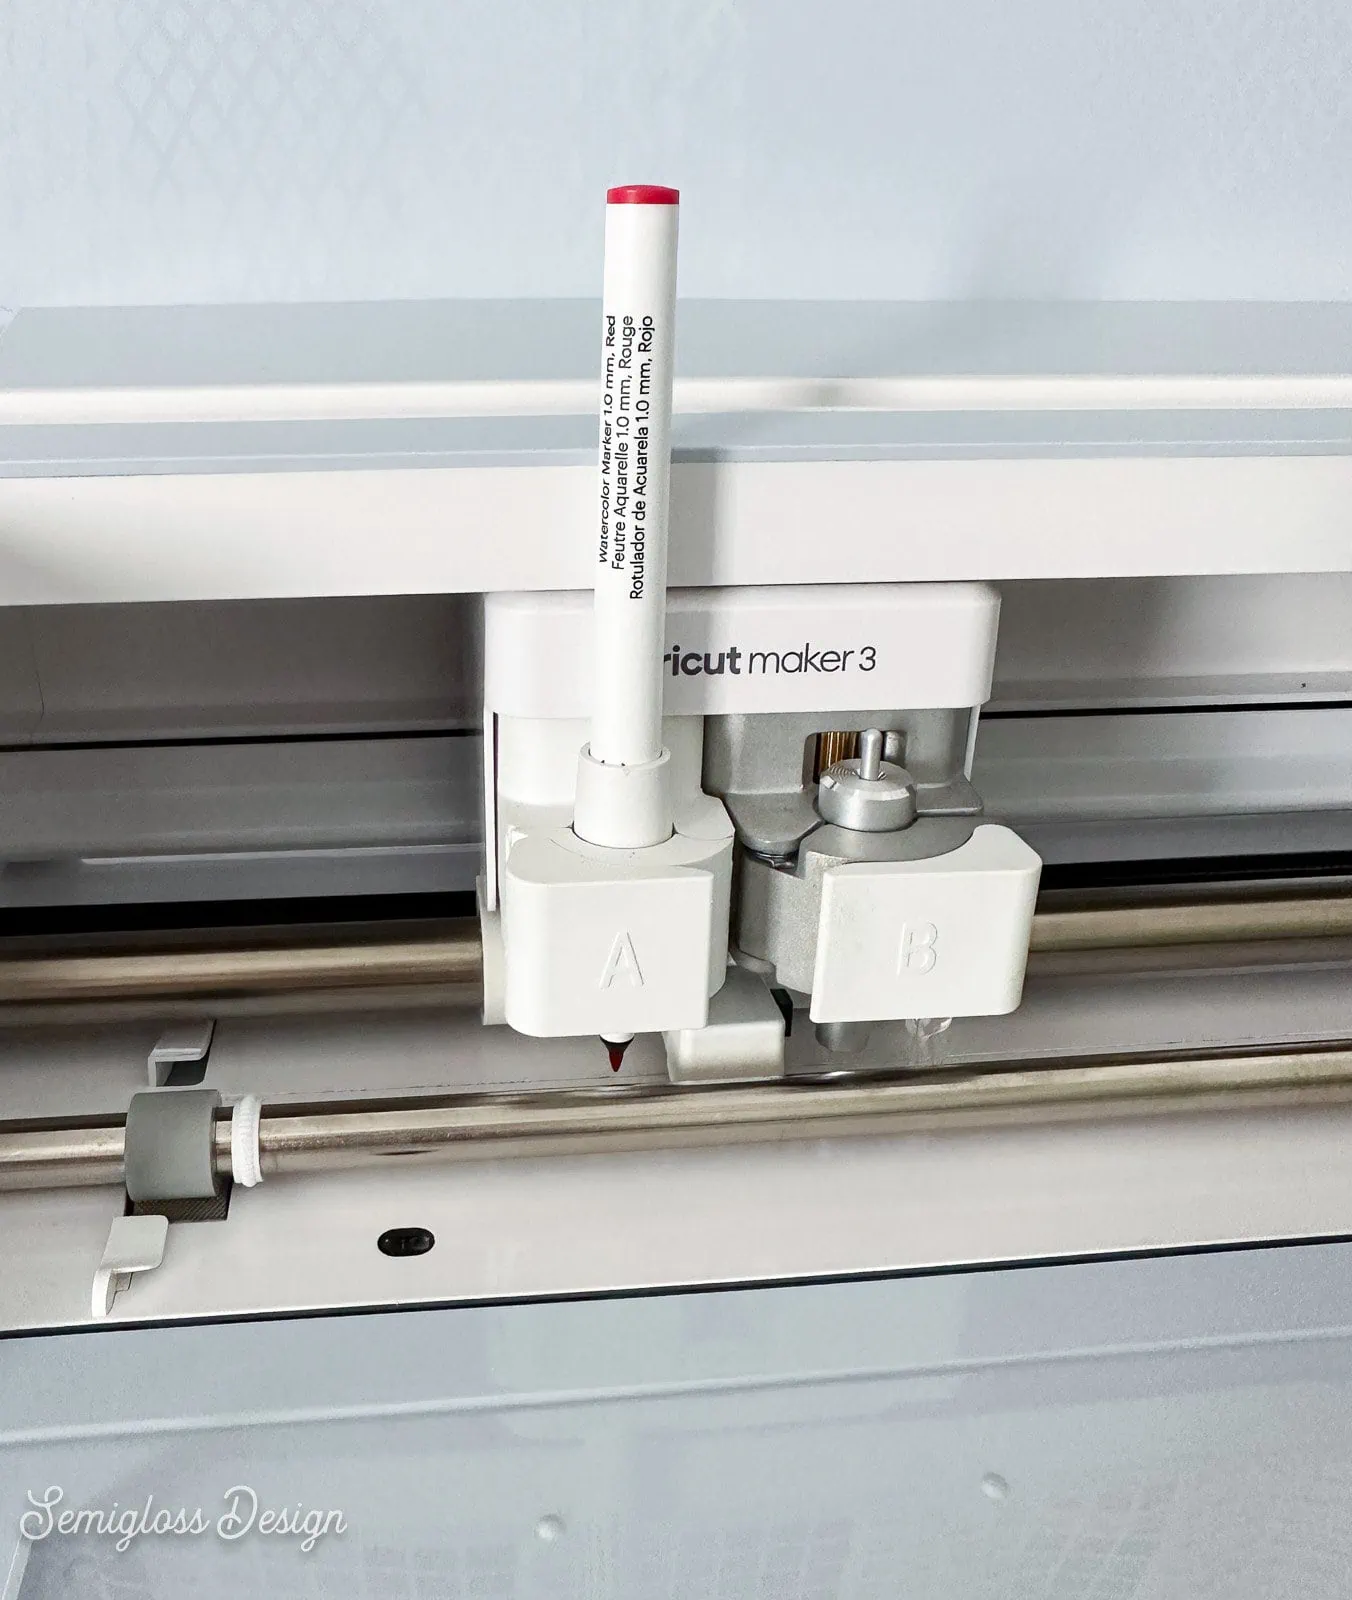

You can hand-write the card envelope or use Cricut pens.
Tips for Painting with Watercolor Markers
After removing the card, it’s time to paint it. If you’ve never painted before, there are a few tricks to make it easier.
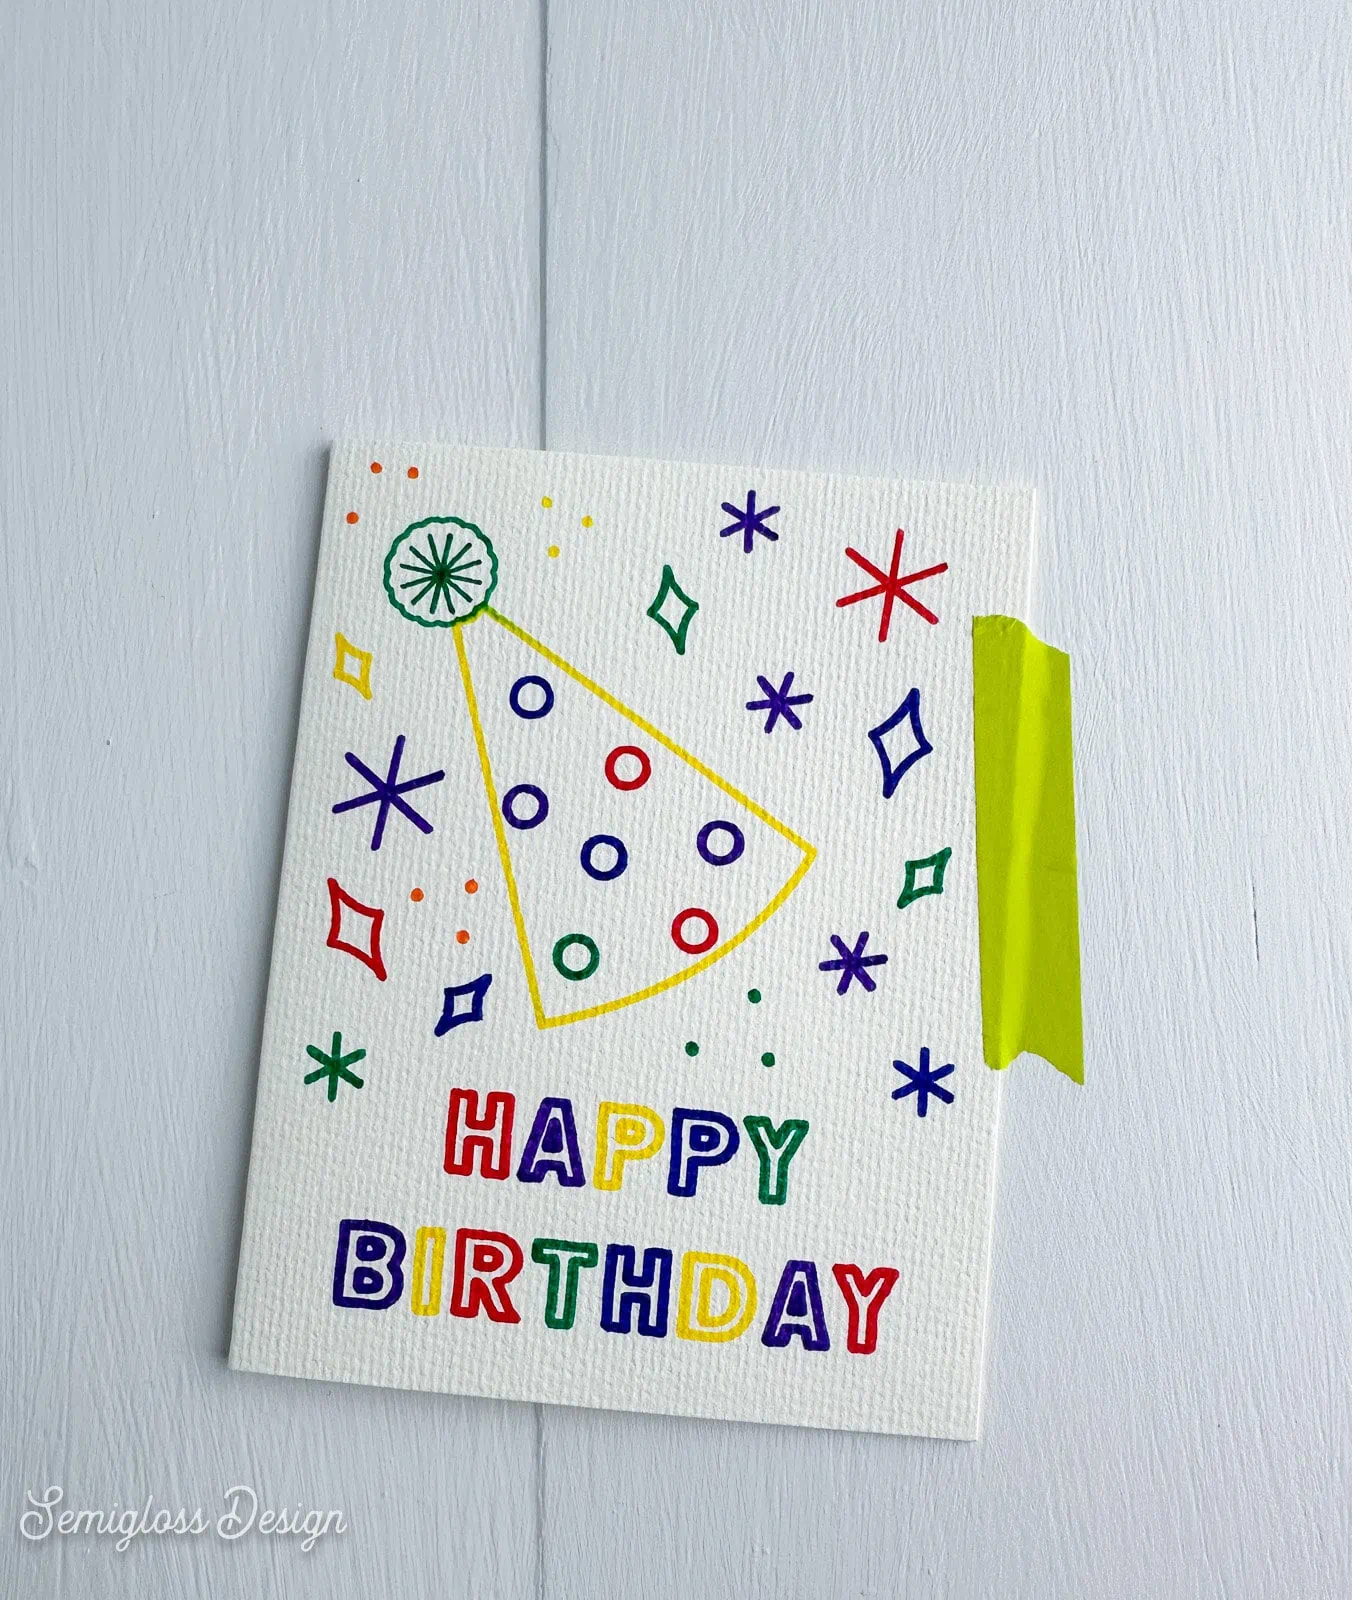
My card kept flopping open, so I used a bit of washi tape to keep it flat while I painted it. Washi tape can be removed without ripping the paper.
- Start with the lightest color first (yellow).
- Touch the wet brush to the marker area and spread the water out. Add more water to dilute the color.
- Keep a paper towel nearby to clean your brush between colors.
- Try not to touch other colors as you paint.
- If you have unwanted white areas, touch the wet brush to the marker area and paint in the white area to spread the color.
- Try using a small paintbrush instead of the waterbrush. Round brushes are perfect for painting small details.
- Let the painted areas dry before painting adjacent colors.
- If you make a mistake, use a clean, wet brush to blot the color. Dry the brush and pick up any excess water.
- Colors can be blended to make new colors. Consider color theory principles to combine colors that mix well. Red and yellow make orange, but red and green make brown.
- It’s okay if it’s a bit messy. Watercolor is supposed to be a bit imperfect.
My Overall Thoughts
I think these watercolor markers and cards are a lot of fun to play with. They allow you to create watercolor designs without art skills.
If you enjoy using them, you may want to try out real watercolors. This is more like the coloring book version.
As an artist, I find these watercolor markers to be a bit limiting. The color palette is not my favorite, and I don’t like that I can’t control color order in the process (light colors should be used first.)
Personally, I find these markers to be a bit overpriced for what they are. These “watercolor markers” are just water-based markers that can be blended with water.
Guess what? All water-based markers can be blended with water. Crayola markers work, and so do all other water-based markers. I really love Tombow Markers. Using non-Cricut branded markers would work with marker adapters.
I’m not a fan of the waterbrush. It was way too large to use on a card this small. And you can’t control the amount of water that comes out, which makes it easy to ruin your card.
I ended up using the smallest round brush from this brush set. I love this set because they are really affordable and versatile.
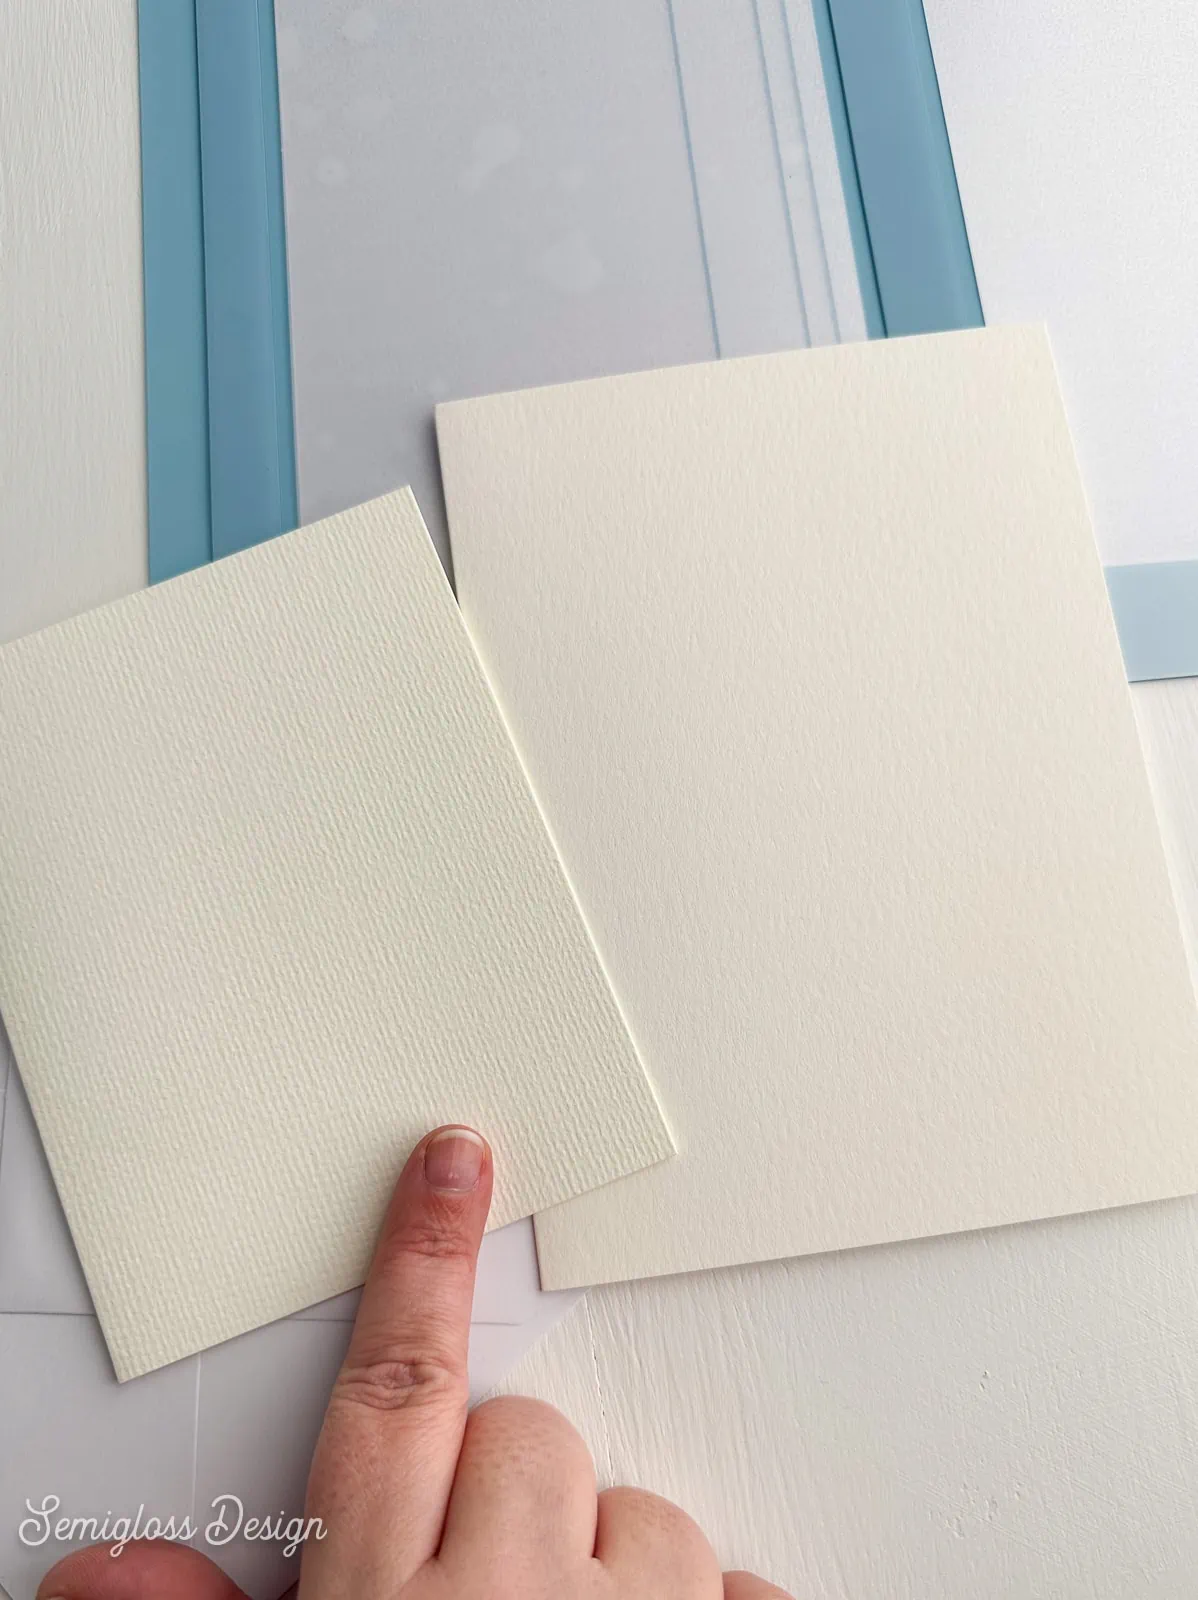
Lastly, I don’t love the watercolor card texture. It looks cheap to me. I prefer this watercolor card set instead because it’s closer to my favorite watercolor paper texture. I’m not even a watercolor paper snob (I use one of the cheapest brands!)
If you use another brand, be sure to resize the design as needed.
That being said, it’s really fun to play with, and I can see kids enjoying painting without the mess. If you have kids, try making coloring pages for them.
You might also like:
Get access to my SVG Library.
Get access to over 50 SVG sets and Cricut cheat sheets. Join my SVG library.
Download a Birthday Card SVG
All downloads are for personal use only. Please do not redistribute or sell files.
Pin for Later!

Emy is a vintage obsessed mama of 2 DIYer who loves sharing affordable solutions for common home problems. You don’t need a giant budget to create a lovely home. Read more…