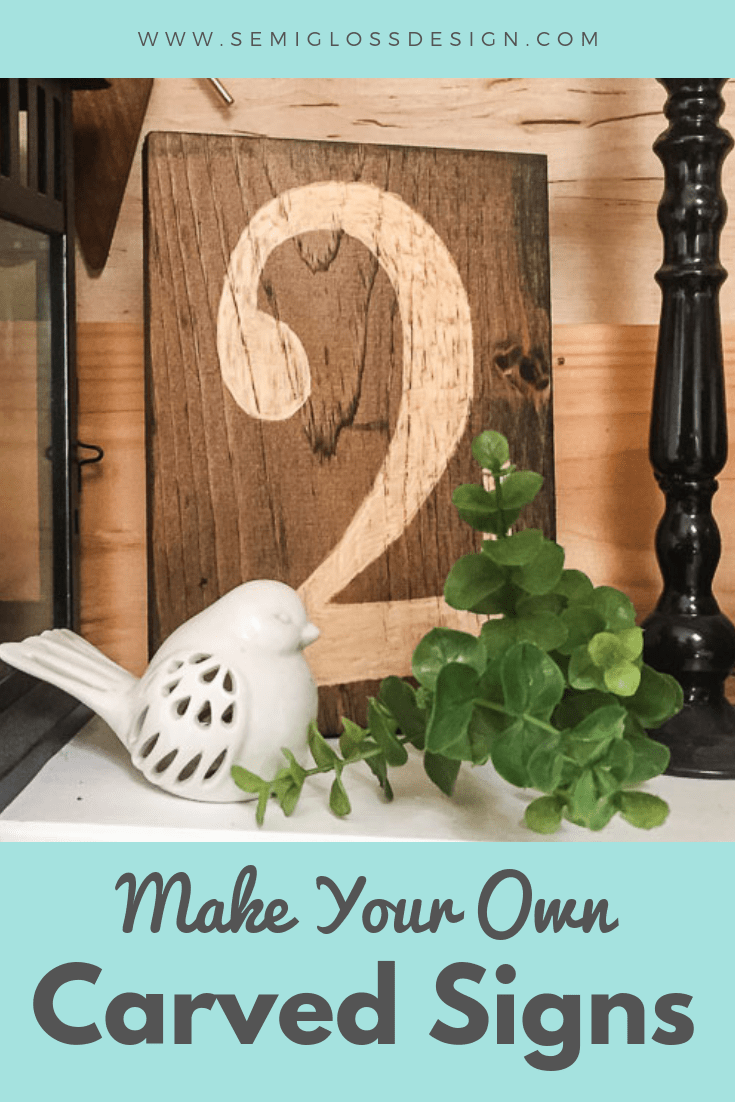
Easy to Make Hand-Carved Signs
Learn how to make hand-carved signs! DIY signs make great wall decor and these typographic wood signs are no exception.
I fell in love over the summer. Not with a person. With a tool.
When I attended a blogging conference, I was given a Dremel Stylo, and it was love at first sight.
My mind was immediately filled with all of the amazing projects that I wanted to make with it.
These DIY typographic hand-carved signs were the first project that I attempted.
This post contains affiliate links. By purchasing an item through an affiliate link, I earn a small commission at no extra cost to you. As an Amazon Associate I earn from qualifying purchases.
Carved Wood Signs Ideas
These hand-carved signs can be customized easily.
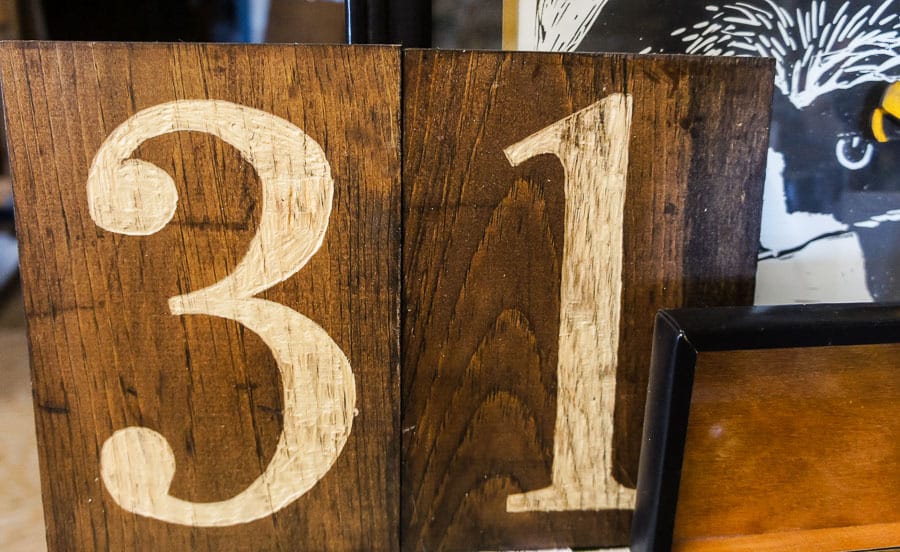
- Special Days: I have some displayed as 31 in my Halloween display in my booth at Sweet Clover this month.
- 25 would be cute for Christmas.
- Your anniversary
- The number of people in your family (4 for us!)
- Initials or monograms
- House address number
- Short words like “Home” or “Eat”
How many signs is too many signs? Asking for a friend…
How to Make Hand-Carved Signs
Supplies Needed
- Dremel
- Scrap Wood (or 1 x 6 cut to about 8″ long)
- Stain
- Print outs of numbers
- Chalk
- Polycrylic
- D Ring Picture Hangers
Print Your Numbers
- Choose a font. I chose a serif font with ball terminals. That means that the font has little legs at the end that sometimes end in balls. I used Times New Roman because the font I actually want doesn’t exist I guess. Try to use a thicker font for best results.
- Enlarge the numbers to fit the size of your wood with about 1/2″ to 1″ left around the edge. It’s okay to stretch out the number to fit. I used Adobe Illustrator, but you can also use canva.
- Turn the numbers to fit more than one on a piece of paper. Make sure that about 1/2″ is left around the edge of the paper.

- Print it out at 100% scale.
- Cut your numbers out. They don’t have to be exactly perfect.


Prepare Your Wood
- If you’re not using scrap wood, cut your wood to size.Sand the edges to remove any splinters.
- Stain the wood or paint it black. (I used previously stained scrap wood.) Don’t forget about the edges.
- After the stain is dry, trace the number onto the wood with chalk.


How to Carve Signs
- Use the engraving cutter bit and start with a speed of 4 on the Dremel Stylo.
- Trace around the edge, going slowly. Don’t press too hard. Let the dremel do the work.

- Continue to fill in the number, letting the lighter wood show through. You can speed it up to 6 when you feel comfortable with the tool.

- When the number has been completely carved, it’s going to look a bit rough. Clean up any areas that need more work.
- Change the bit to a sanding drum and lightly sand the carved wood areas.

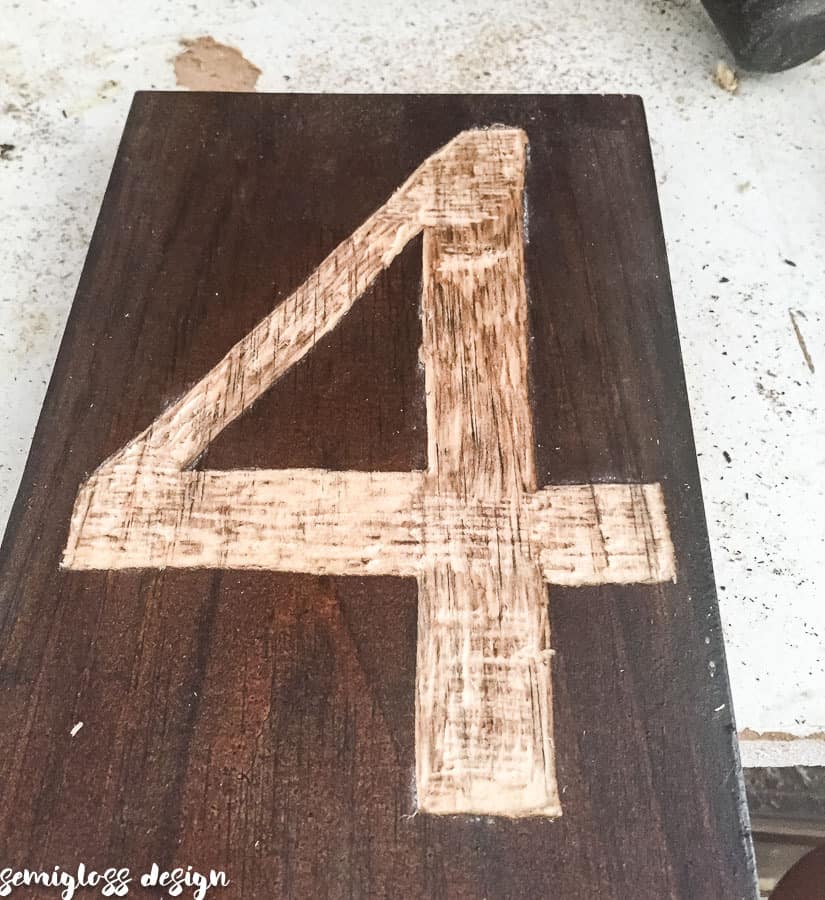
The process is pretty forgiving, but if your hand slips while carving, add a bit of stain the area that you messed up.
Finish Your Hand-Carved Signs
- When you’re finished, add a coat or 2 of polycrylic to protect your work and bring out the color of the stain.
- Flip your sign over and add your hanger. I prefer D-ring picture hangers because they are so easy to install. Just screw them in. It really goes fast when you have 12 signs to add hangers to. Plus, they’re very strong.


These signs would look great as part of a gallery wall.
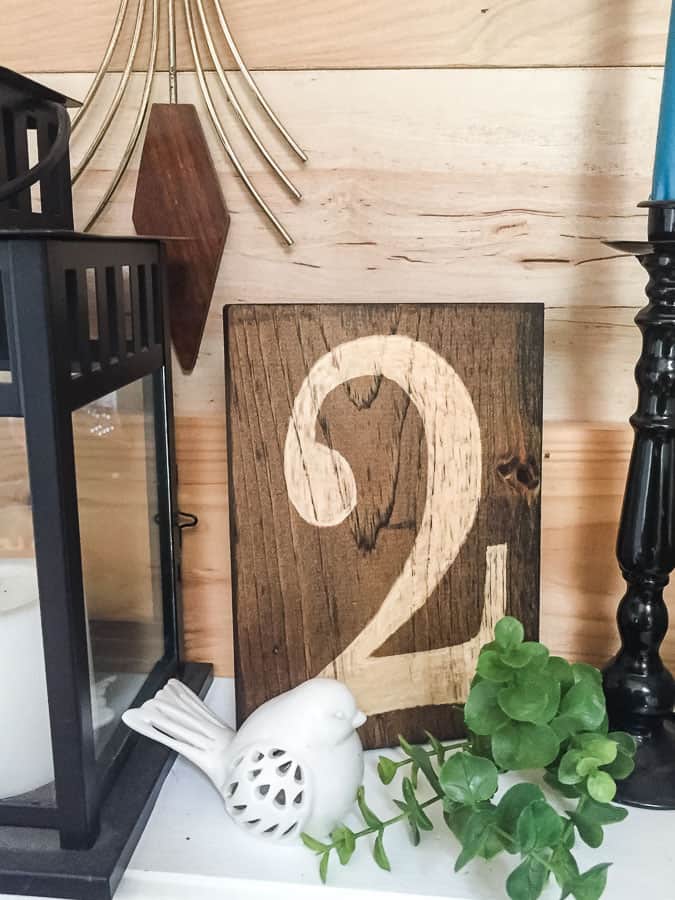
I love how the grain shows through the number!
Check out how to use a dremel to carve a pumpkin for Halloween!
You Might Also Like:
Pin for Later!

Emy is a vintage obsessed mama of 2 DIYer who loves sharing affordable solutions for common home problems. You don’t need a giant budget to create a lovely home. Read more…