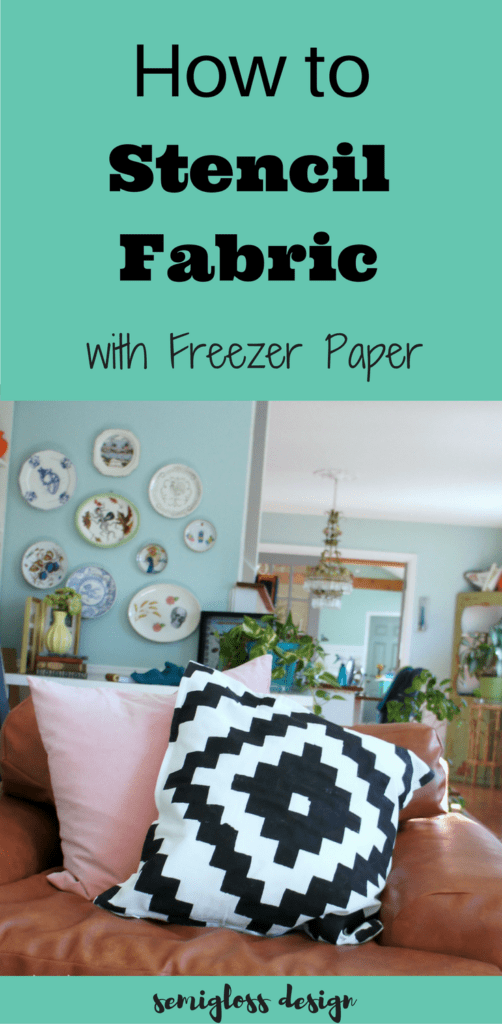
How to Freezer Paper Stencil a Pillow Cover
Learn how to make a freezer paper stencil for a pillow. Freezer paper is great for making stencils because you can iron it onto fabric. It’s also easy to cut.
I used to use this technique to make my son fun clothes when we lived overseas.
You might also be interested in learning how to use a Silhouette to make stencils.
Supplies for Freezer Paper Stencil:
This post contains affiliate links for your shopping convenience. By purchasing items though affiliate links, I earn a small commission at no extra cost to you!
- Pillow cover or fabric
- Freezer paper
- Ruler
- Pencil
- Image
- Scissors (Manicure scissors work great for tiny details.)
- Paint (I used craft paint, but I’ve used latex paint in the past.)
- Fabric medium
- Iron
How to Make Freezer Paper Stencils
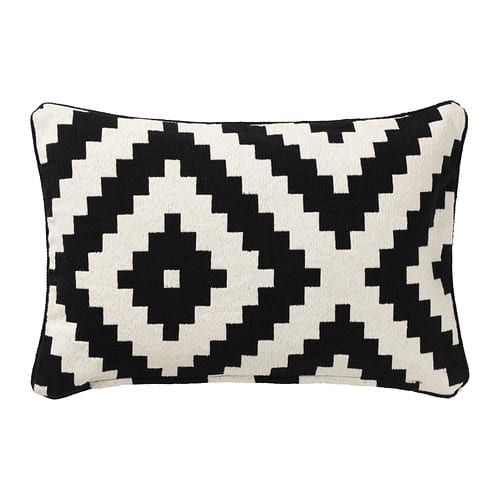
- Find your inspiration. I chose this IKEA pillow as my inspiration. IKEA is already inexpensive, but it’s not the size I wanted. I like square pillows and I already have the feather pillow inserts for them. Plus, I hate how it’s asymmetrical.

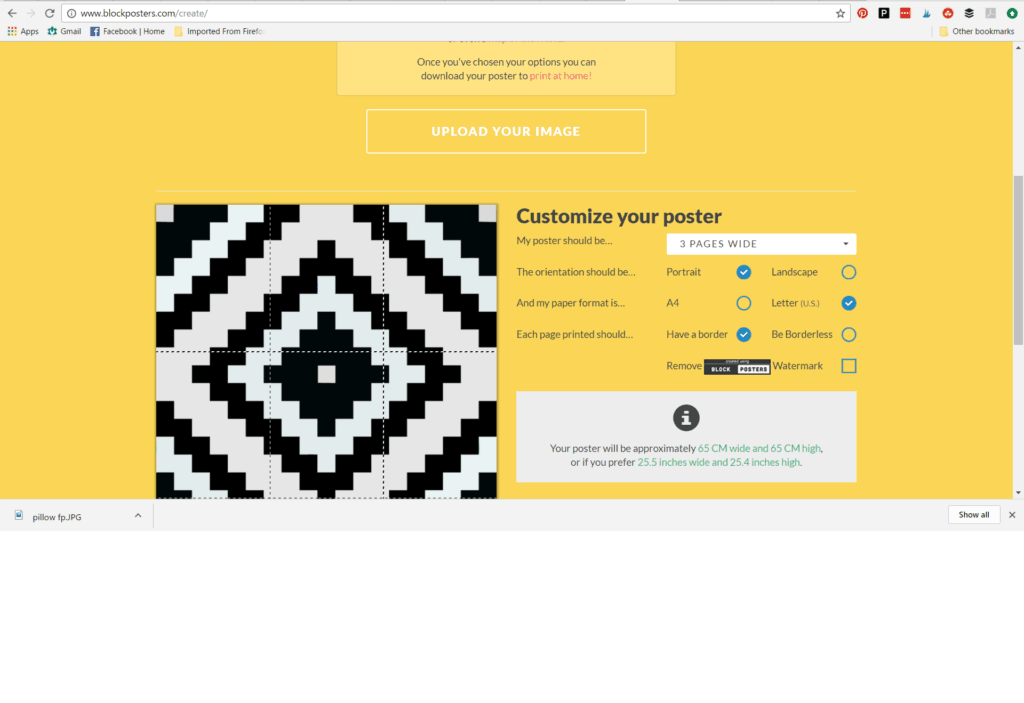
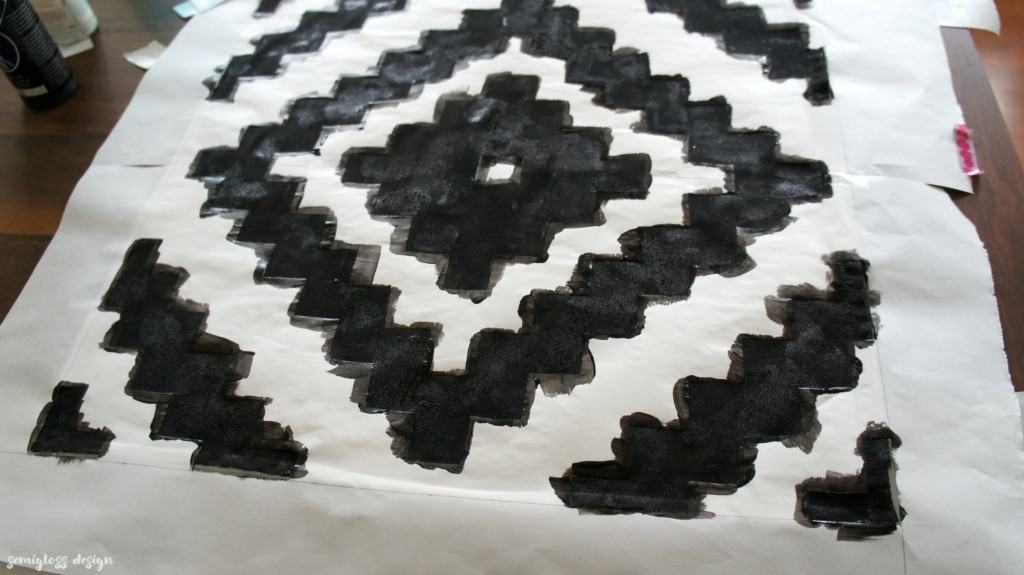
- Draw or print out your design. A single motif would have been much easier than the allover pattern that I chose. I made my design in inkscape and then couldn’t figure out how to print it in the size I needed. So, I ended up using Block Posters, which is a free website that helps you print large scale art at home. Upload your design (must be a jpeg) and it will let you choose how big to print. I wanted my image to equal over 20 inches, so I made the image width 3 pages.

- When it was done, I downloaded the file and printed it. The image was split into 9 pages and the margins needed to be trimmed. After trimming the paper, I taped the pieces together to create one giant image.
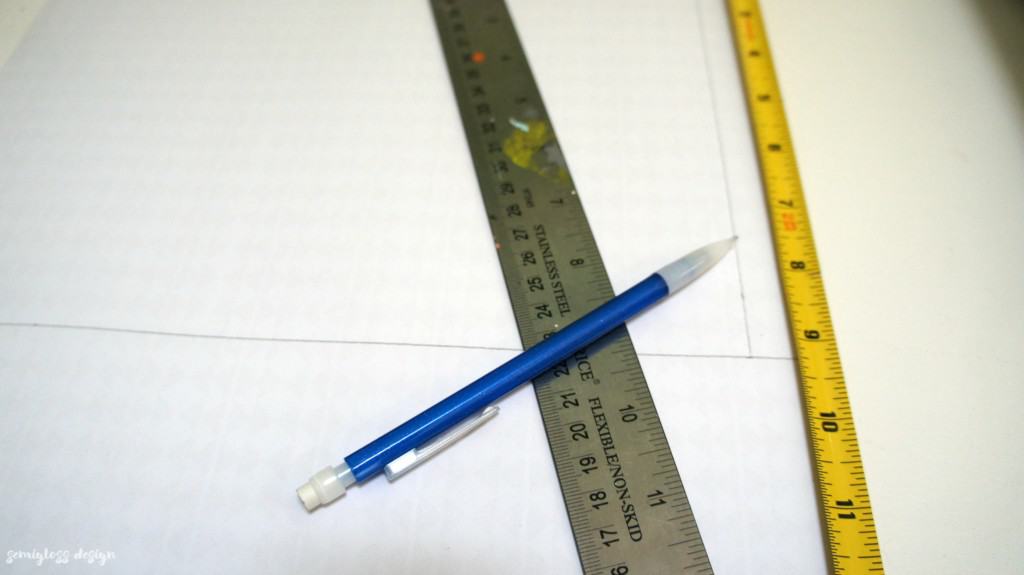
- Lay the freezer paper (SHINY SIDE DOWN) over your design and trace it. I used washi tape to hold the freezer paper in place. My design was bigger than freezer paper, so I needed to tape two pieces together. I drew a 20″ x 20″ square to center the design and started tracing the lines. Using a ruler was taking forever, so I decided to freehand it instead. The process went much faster after that.

- Cut out the areas where you want the color. I scribbed on all of these parts to be able to clearly see where I needed to cut. For my image, I wanted the black areas to be stenciled, so I cut those out. If your image is complicated, leave strips of paper holding everything together. If you look, the 2 center pieces are not attached to the rest of my stencil. I could have added little lines of paper to hold those in place, but since it’s a pretty easy design to line up, I didn’t bother. The strips will be removed in a few steps and will not affect your design.
- Place something inside your pillowcase so that the paint doesn’t bleed through. I used more freezer paper.
- Lay the stencil in place and iron it (medium heat) onto the pillow cover (SHINY SIDE DOWN.) The shiny side has a wax coating on it that will hold it in place on the fabric when heat it applied. Make sure you get all of it. If you left strips of freezer paper holding it together in step 5, cut them off very carefully avoiding the fabric. Run your iron over these spots to make sure they are firmly secure.
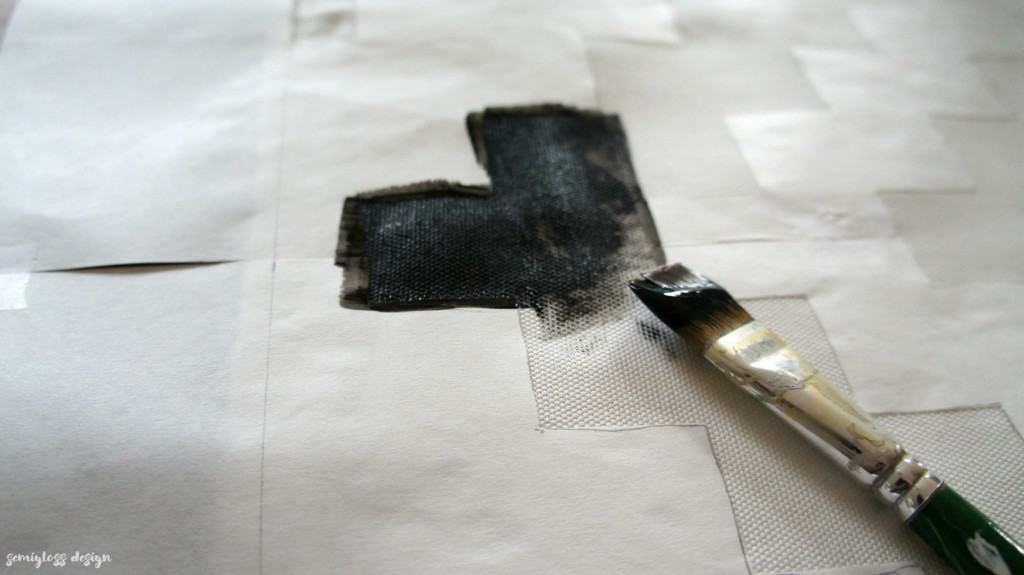
- I used a paper plate to mix paint and fabric medium together. Follow the directions on your bottle.

- Paint in the cut out areas using a paint brush. Be gentle, but make sure you add enough paint.
- Let the stenciled fabric dry.
- Once it’s dry, you can remove the stencil. The freezer paper comes off without damaging the fabric at all. Sometimes the stencil can be used a 2nd time, but it won’t be as perfect.
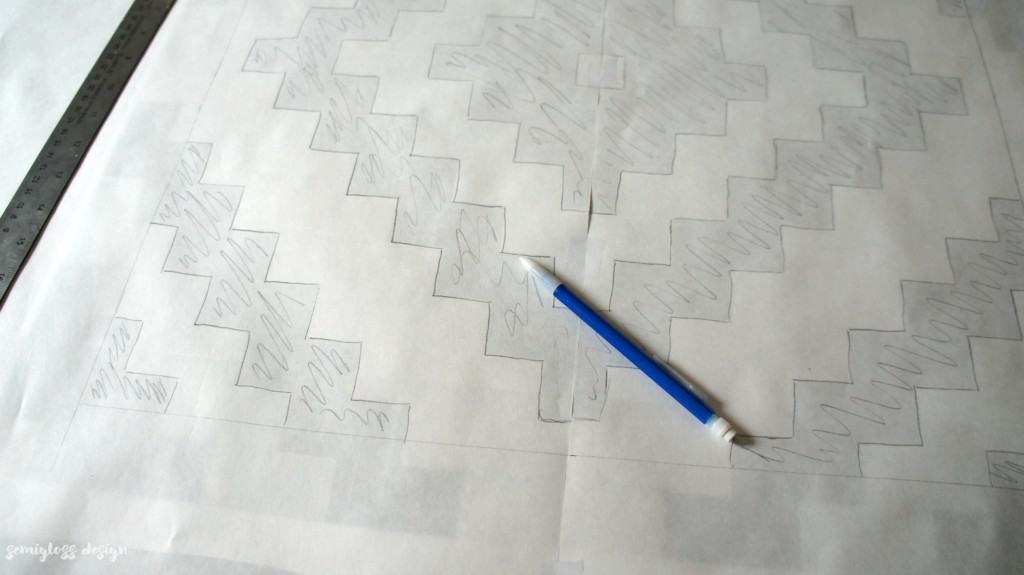 For my image, I wanted the black areas to be stenciled, so I cut those out. If your image is complicated, leave strips of paper holding everything together. If you look, the 2 center pieces are not attached to the rest of my stencil. I could have added little lines of paper to hold those in place, but since it’s a pretty easy design to line up, I didn’t bother. The strips will be removed in a few steps and will not affect your design.


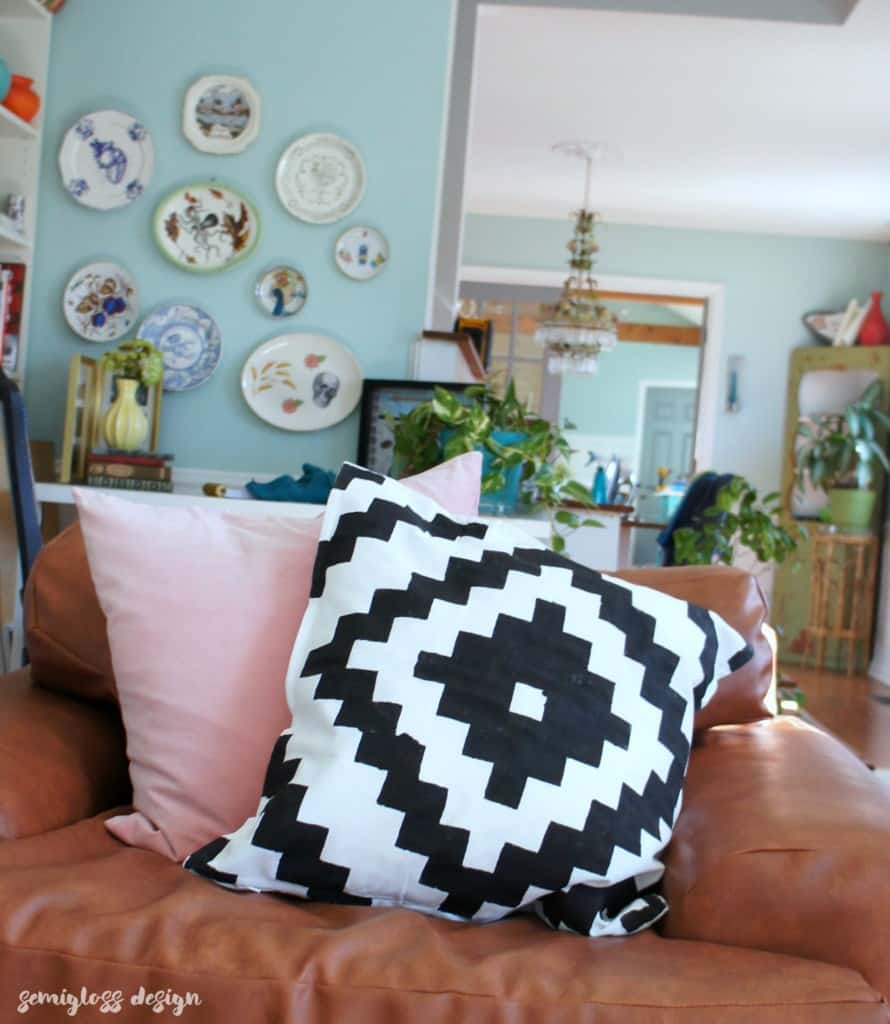
It’s not perfect, but I love it. If perfection is important to you, use a flat fabric weave and be careful not to over-saturate the fabric with paint. I may not be able to make cute clothes for my kids anymore, but I can use those skills for home decor!
What do you want to stencil with freezer paper?

Emy is a vintage obsessed mama of 2 DIYer who loves sharing affordable solutions for common home problems. You don’t need a giant budget to create a lovely home. Read more…