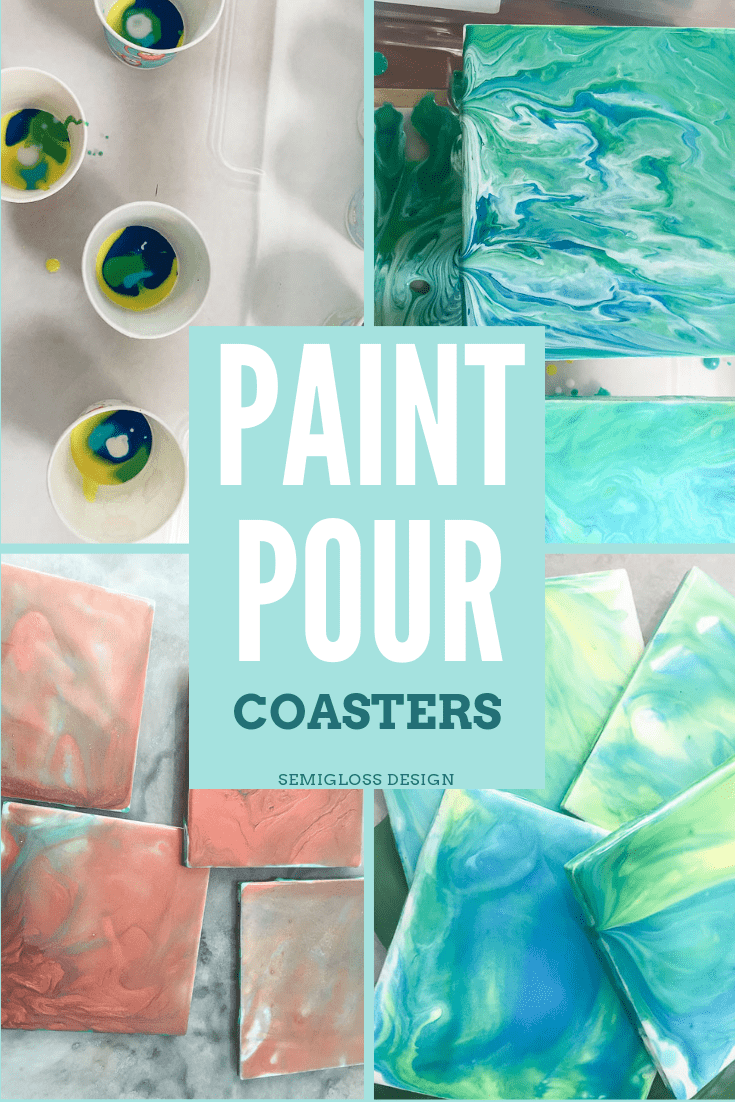
Experiment with Paint Pouring to Make Coasters
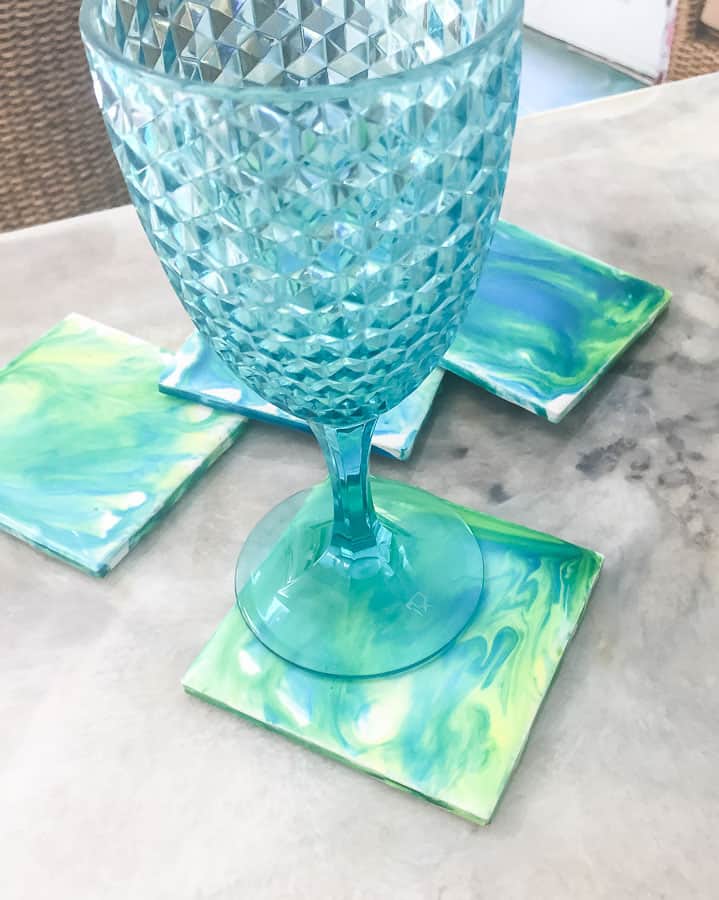
Learn how to use paint pouring to make coasters. These gorgeous DIY coasters feature colorful swirly designs made through the magic of paint pouring. They are the perfect way to try paint pouring on a smaller scale that’s easier to manage.
These coasters would make fantastic gifts for friends, as would these trinket dishes.
I’m obsessed with paint pouring and could spend way too much time watching the videos. They’re so mesmerizing.
But besides art, what else can you use it for? I like art for art’s sake, but I like to create stuff that has a purpose. Then I had it! Making coasters would be a great use for paint pouring.
DecoArt provided me with paint for this project, but all thoughts and opinions are my own. I would never recommend products that I wouldn’t buy or use on my own.
What kind of paint can you use with paint pouring?
Any kind of acrylic paints can be used, although I’ve seen it used with furniture paints like chalk paint as well. Acrylic craft paints are probably the best, just because they are the most affordable paints to use. They come in a variety of colors and are easy to find in stores.
What is a paint pouring medium?
Paint pouring medium helps paint flow better for pouring. A lot of paints are thick, particularly acrylic paints.
Paint pouring medium also helps the paint to dry without cracks.
Making Coasters with Paint Pouring
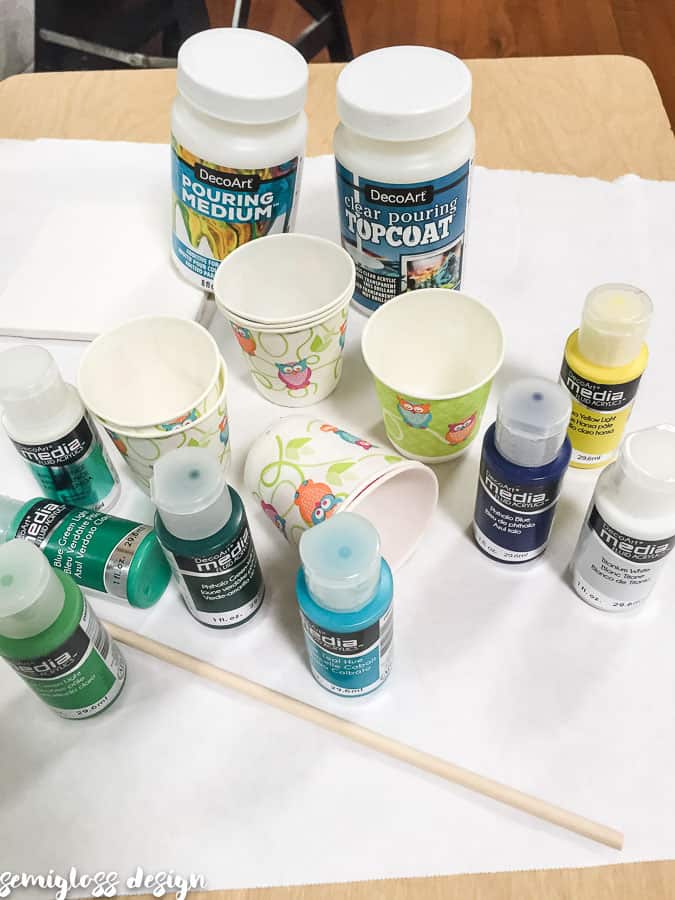
Supplies Needed
This post contains affiliate links. By purchasing an item through an affiliate link, I earn a small commission at no extra cost to you.
- 4″ x 4″ ceramic tiles
- Paint pouring medium
- Acrylic paints (I also used fluid acrylics)
- Stir sticks
- Small Cups for Mixing
- Large plastic bin or box to hold the mess
- Pouring Top Coat
- Felt (for bottom of coasters)
I also used fluid acrylic interference in turquoise, which I would not recommend. It ended up diluting the colors too much, so I added another coat on top of the first one.
Paint Pouring Set Up
- Protect your work area. I chose to use a large plastic bin to hold everything. Using a bin also allowed me to place a lid on top to try to prevent dog hair from coming in. Plastic drop cloths would work as well, if you don’t have pets and have an area where you can leave your tiles to dry for a few days.
- Elevate your tiles. I used upside down cups to elevate my tiles.
- Clean your tiles. Mine were really dirty. Even if yours are look clean, wipe them down.
Paint Pouring Prep
- Start mixing your paint. Each color needs it’s own cup, and you need a larger cup for each pour. I filled each cup about half way with the pouring medium and then added 15 drops of the fluid acrylics since they’re very concentrated. Acrylic paints are a 1:1 ratio.

- Mix each cup with it’s own stir stick.

- Slowly pour each color into a clean cup. Remember that each coaster needs it’s own cup, so I poured each color into 4 different cups, then repeated with the rest of the colors.
- Pour very slowly into each other to prevent the colors from mixing.


Flip Cup Technique
- Take a cup and place the tile on it, shiny side down. Then turn the tile and cup over. Lift the cup and the magic begins.
- If you need better coverage, you can tip the tile to make the medium run in the empty spots.
- Repeat the steps for all the tiles, placing them on the cups to let the excess medium drip off.
- Let dry in a level place. Try to sit them in a place where they are level.


Dirty Pour Method
- Another method you can use instead of flipping the cup, is just pouring the colors onto the coasters from the cup of many colors.

Finishing the Coasters
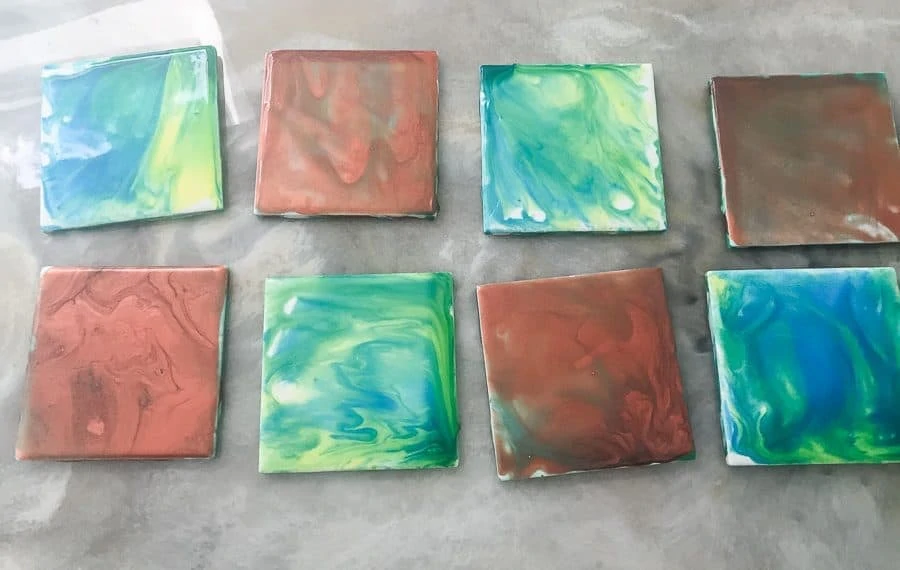
- Let the tiles dry. This is harder than it seems and a fact that most tutorials skip. Maybe it was our 100% humidity, but it took forever to dry. We touched them and found out the hard way. So don’t touch them for between 3-7 days. I would err on the side of 7 if your humidity is crazy. I had the lid on them, but not tightened, so this might have contributed to the long drying time as well.
- Fixing the ones I messed up. After all that time, I had ruined one by touching it and hated how they turned out since I used the fluid acrylic interference, so I made a new batch using copper acrylic paint and turquoise fluid acrylics. The ratio for the acrylic paint was 1:1. I repeated the steps and redid the tiles, letting them dry again for about a week.
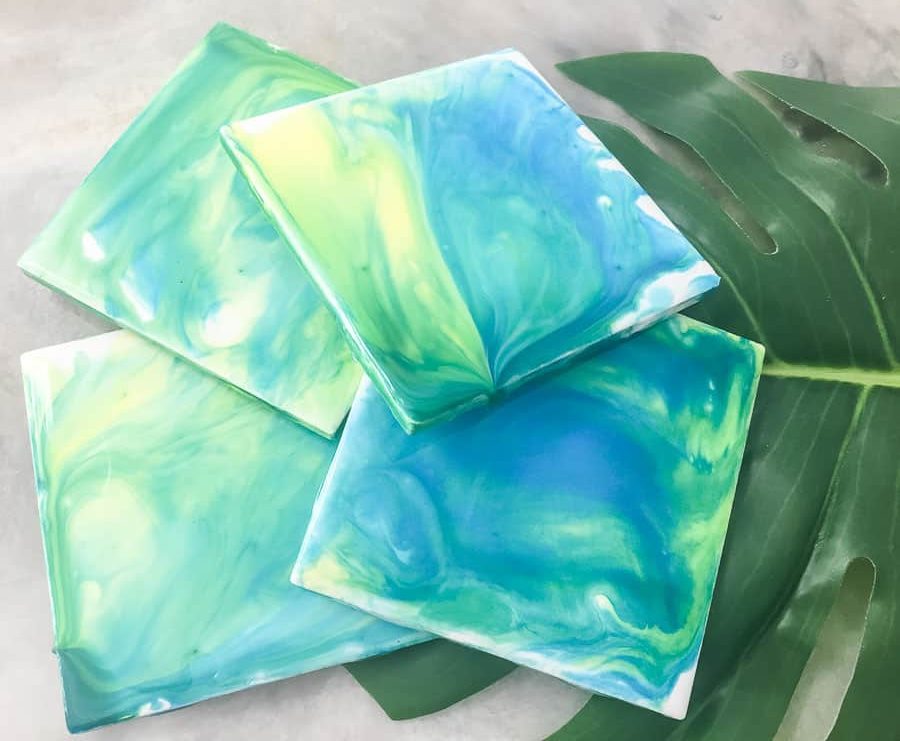
- Add a top coat. Although the finish is pretty hard, I added a top coat. Just pour it over in the same manner, being sure to use enough to completely cover each tile.
- Let dry again. I let them dry for another week.

- Finishing the coasters. Drip can be lightly sanded off. Glue a piece of felt to the bottom of the coaster to prevent the scratchy surface from damaging furniture.


Paint Pouring Tips
- Don’t try to skimp on medium. Use plenty to flood the surface. The same goes for the top coat. It will self level and the excess will pour off.
- Let it dry for much longer than you think.
- If you’re temped to touch it, touch the sides.
- Experiment with colors. I tried to use an analogous color scheme, but I like the results of the copper and turquoise better because they’re complimentary.
- If you hate the results, you can add a new coat on top.
Paint pouring was much easier than I thought it would be, even with my mess ups. It’s a forgiving process and I’m looking forward to experimenting with it some more.
You might also like:
- Alcohol Ink Coasters
- The Best Craft Kits for Adults
- Tropical Leaf Vase
- Retro Starburst Wine Glasses
- Sun Paper Art
- How to Shibori Dye
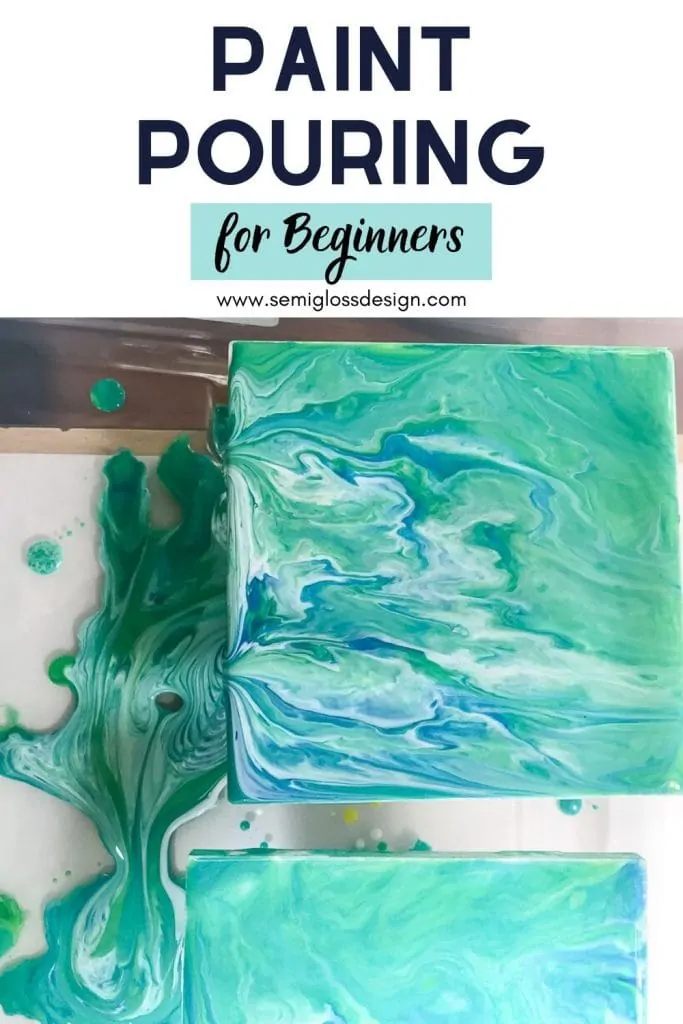
Pin for Later!

Emy is a vintage obsessed mama of 2 DIYer who loves sharing affordable solutions for common home problems. You don’t need a giant budget to create a lovely home. Read more…

I can’t tell, but it looks like you poured the white paint with pour medium before you added the paint. Did you do this? From the looks of it, it seems you basically did a pour like we do on canvas. Please clarify for me!
Thanks the lesson!
Hi Beth,
Yes, it’s the same technique used for paint pouring on canvas. Add the pour medium and then the paint. I’ll go back and make sure this part is a bit more clear.
Have a great weekend!
We just bought a home built in 1907, the kitchen has a crazy island that is painted black. I love the paint poured look and would like to try this but there is no way to tilt the top. Would appreciate any suggestions.
Thanks, Helen
I’ve done a few similar countertop treatments. Both use resin to seal the top and it just drips off the edge onto a tarp. Using alcohol ink might be a good way to go. You can move the color with a hairdryer.
Can you put a hot cup of coffee on the coasters without it sticking..
If you seal it with polycrylic and let it cure, it should work just fine.
Do you have to use acrylic paint? I would love to use up my old latex paints I used for walls in my home. Thoughts for this…..
It’s worth a try!