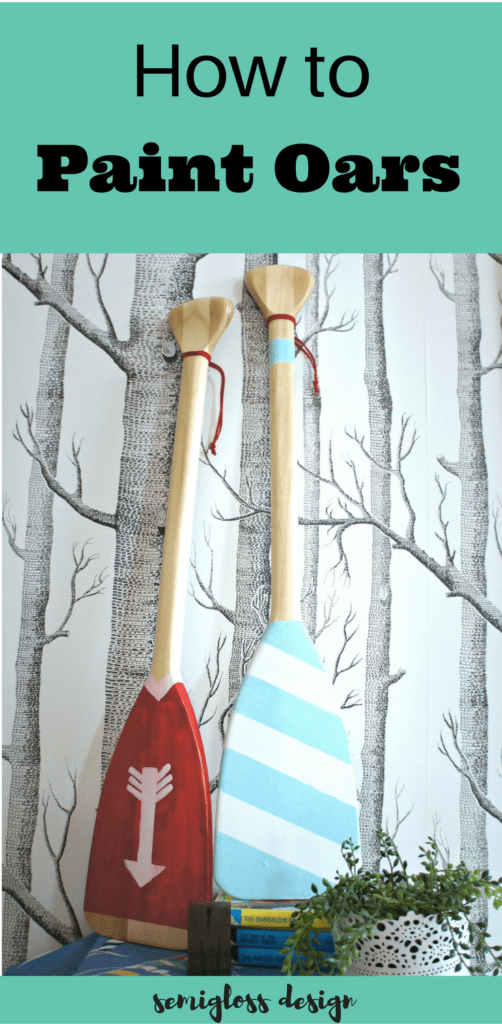
Easy Painted Oars for Decoration
These easy-to-make painted oars are perfect for a nautical look. Learn tips and tricks for painting your own oars.
This post contains affiliate links. By purchasing an item through an affiliate link, I earn a small commission at no extra cost to you.
What kind of paint should I use for painted oars?
I used a variety of paint types for this project, but I prefer chalk paint for a project like this. The coverage is excellent, so you can get away with painting fewer coats of paint.
Acrylic or latex paint can also be used.
Make Painted Oars for Decoration
Supplies for Painting Oars
- Wooden oars
- Paint
- Paintbrushes
- Painter’s tape
- Sandpaper
- Suede cord, twine, or ribbon
Scroll down for the oar coloring sheet.
Prep Work for Painted Oars
- Figure out your oar design. This part was so much fun. I’ve made coloring sheets to download and print out for planning your oars. (It makes a fun coloring sheet!)

- Tape out your designs. Once you have your designs figured out, start taping out your design. (You can see that I drew mine out before I made these.) I used frog tape and rubbed the edges well.

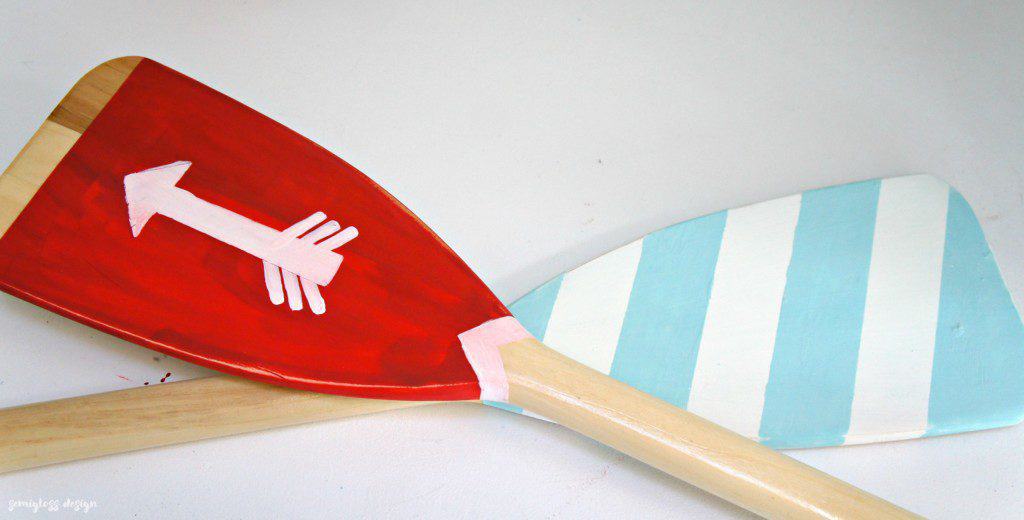
- Stripes are the easiest to tape off, but more complicated designs are also possible. An arrow is just a piece of tape and a triangle.


Painting the Wooden Oars
- Paint the first color. For the first oar, I wanted light blue and white stripes, so I painted a base of white first. I used chalk paint because it adheres well, requiring fewer coats of paint. The sides of the oars are painted, but I didn’t bother with the backs since they’re decorative.

- Let the paint dry and add another coat if necessary.
- Stripes. Once the paint is dry, add tape for stripes or other designs. Paint the stripes your chosen color.

- Add hand-painted details if desired. I painted the arrow white and added the quivers.

- Sand to age the oars a bit. When the oars were completely dry, I gently sanded them to give them a slightly worn appearance. This smooths out the edges where the tape was applied and helps to soften any mistakes.

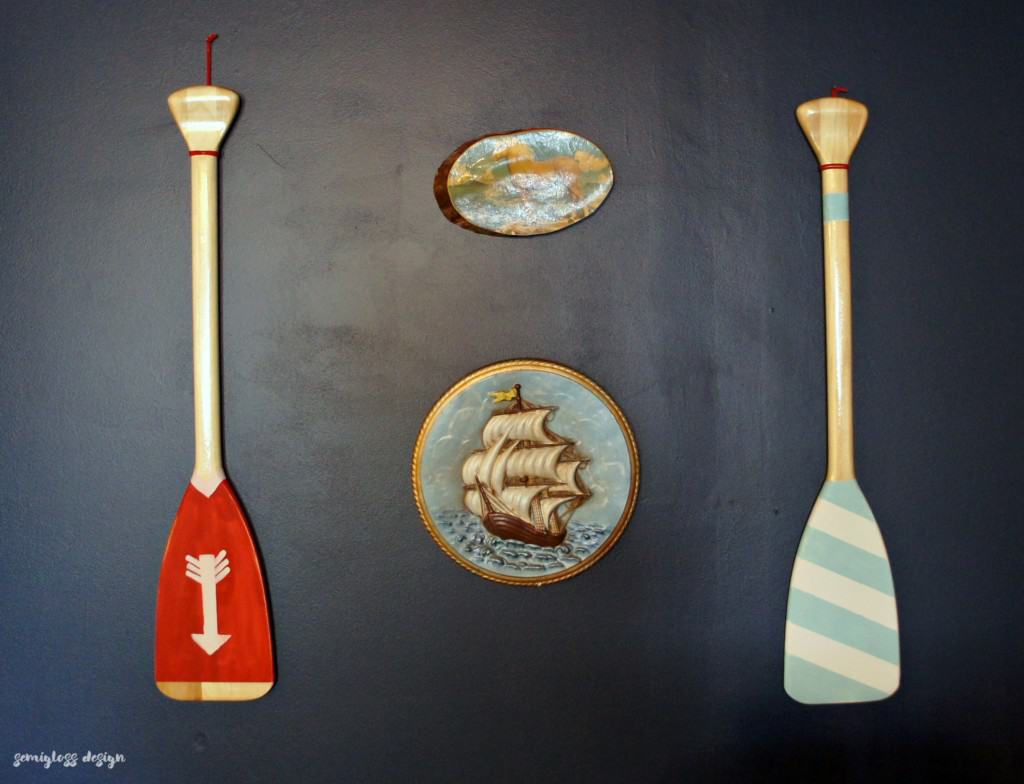
- Add a loop for hanging. I added a loop of suede cord around the handle for hanging the oars. This was the easiest way to hang them.


I love how they look on my navy wall. My walls don’t look that crazy in person, but then again, it’s a basement, so we keep it pretty dark for watching movies.
Download the Oar Coloring Sheet
Pin for Later!

Emy is a vintage obsessed mama of 2 DIYer who loves sharing affordable solutions for common home problems. You don’t need a giant budget to create a lovely home. Read more…


they turned out great! i love the stripes in aqua and white!
Thanks Cassie! I like the stripes a lot too.
These are so cute!!! I love the little “coloring sheet” you made too! That would be perfect popped in a frame as well! 😀
Thanks Brynne! I never thought about using the coloring sheet as art. That’s a fun idea!
I love it! We painted oars for the Fall One Room Challenge and they were so much fun!
Thanks Ariel. I need more projects like these: easy and fun.
This turned out awesome!!!! I really love the colors you chosen and I like that you placed them on a dark wall. Sooooo good!
Thanks Jess! I’m hoping to find more art to hang with them. I love the dark wall too. It disguises the giant TV. 😉
painted oars! What a fun idea!
Thanks Mila!
Such a great project! Love the oar designs and colors you used.
Thanks Kathy! I had a lot of fun with this project!
These are so fun! I cannot wait to see the rest of the room!
Thanks Diane! I should be able to post it next week. 🙂
Wonderful DIY project! Love the stripe version 🙂