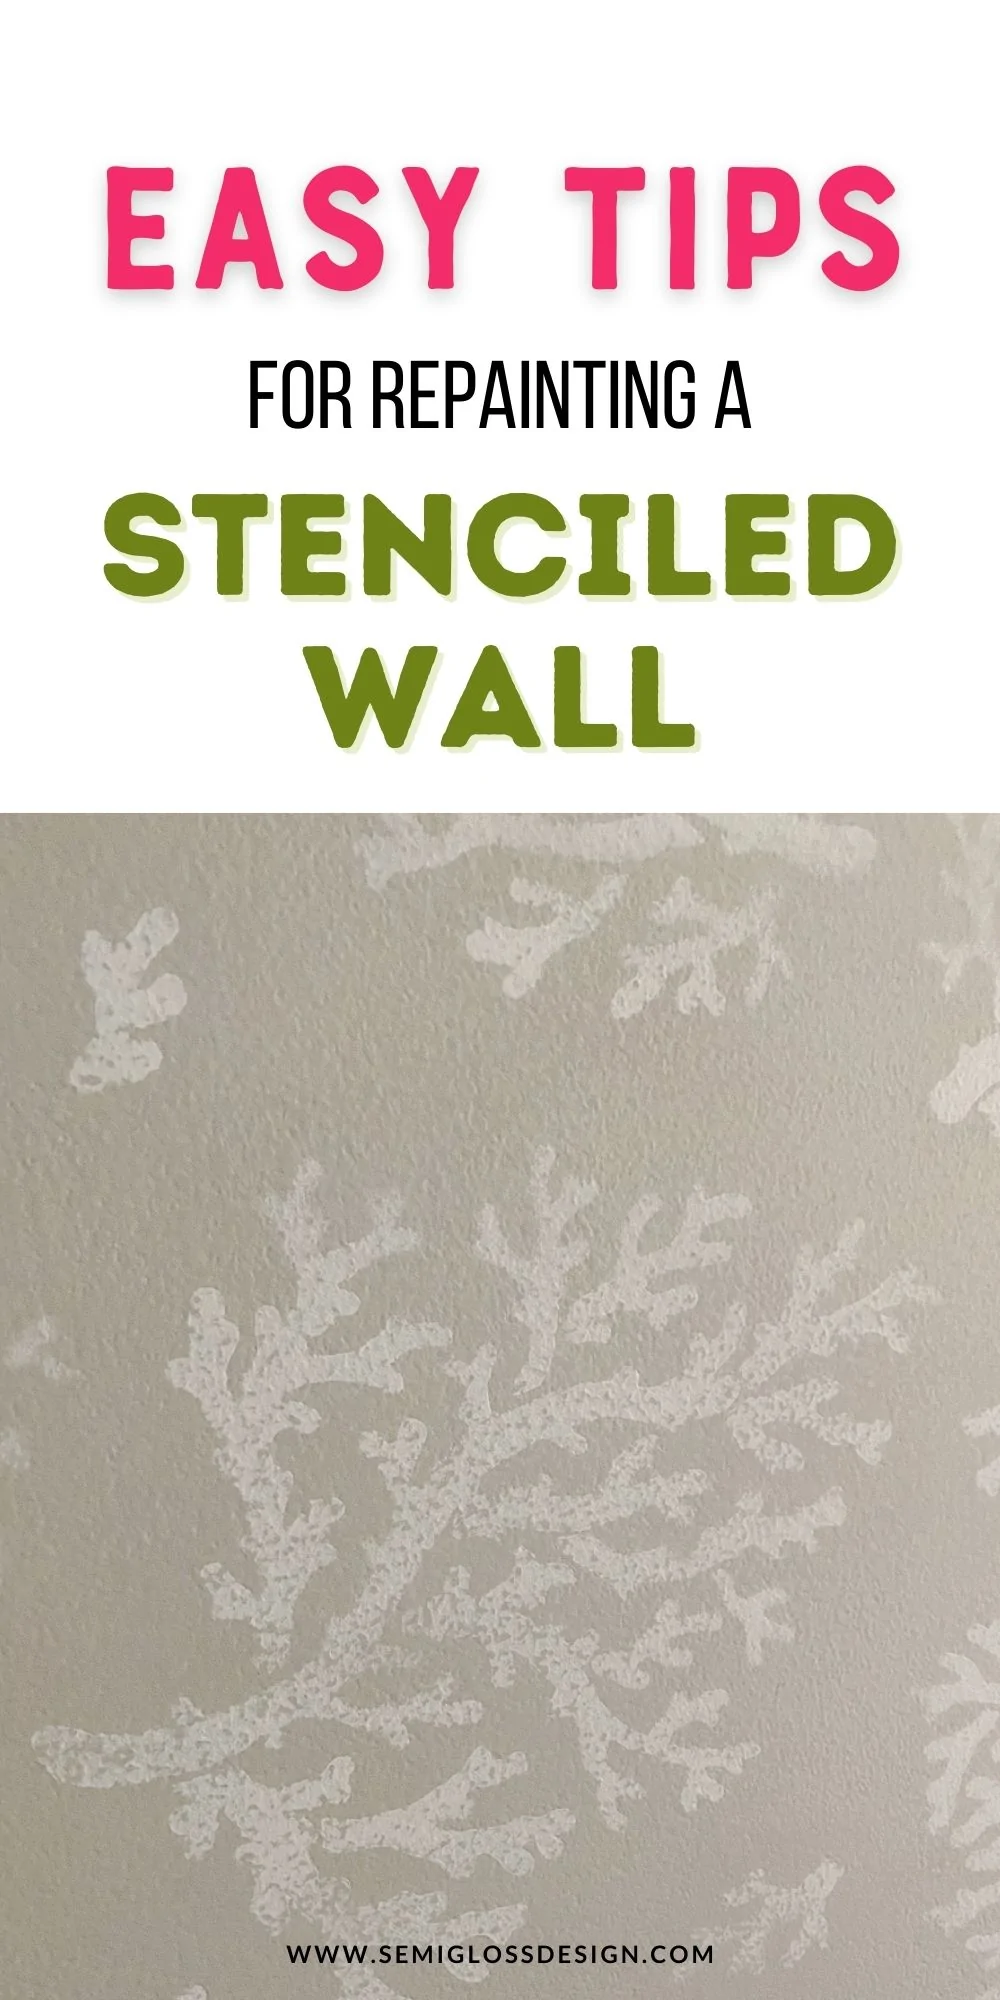
How to Paint Over Stenciled Walls
Learn how to paint over stenciled walls. Get easy tips for repainting stenciled walls without the stenciled design showing through the new paint.
You might also like this post on painting a room for beginners.
This post contains affiliate links. By purchasing an item through an affiliate link, I earn a small commission at no extra cost to you. As an Amazon Associate I earn from qualifying purchases.
Remember when stenciled walls were all the rage? I do! I was obsessed with this easy way to add patterns to my walls.
When it came time to sell my house, I knew that the stenciled walls in the first-floor bathroom were going to have to go. It was actually a project that I had been putting off.
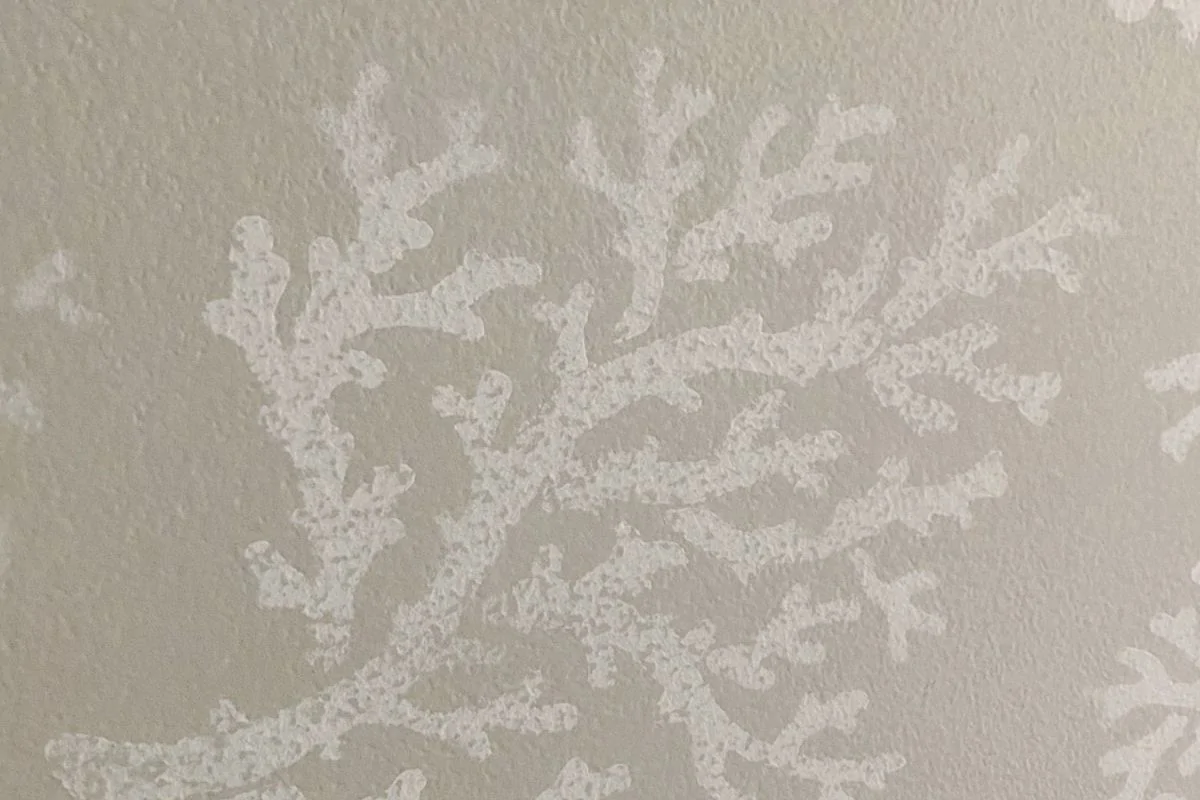
The thing about stenciled walls is that they leave a visible texture around the edges.

That meant that I couldn’t just paint over the stencil and be done with it because the stencil shape would show through.
My previous house had painted striped walls, so I was familiar with this process of sanding the walls and wasn’t looking forward to it.
While the process is a bit messy, it was worth it to get perfectly smooth walls.
How to Paint Over Stenciled Walls
Supplies Needed:
- Electric sander and sand paper
- Personal protection
- Microfiber cloth
- Spackle or joint compound if repairs are needed*
- Primer
- Plastic tarps and tape (optional)
*If you’re new to DIY, learn how to repair walls here.
Notes about supplies:
Electric sander
Since the entire bathroom was covered in stencils, I opted to use my electric sander. I love my sander because the dust collection is pretty good on it. (Not perfect but pretty good.)
It also reduced the amount of time that I needed to spend sanding.
If the stencils have a prominent edge, use 80-grit sandpaper. Be careful not to wear away the wall though.
In most cases, 120-grit sandpaper works fine.
Personal Protection
To reduce dust in the rest of the house, I shut the door, but this also meant that the sander seemed a lot louder. Protect your ears with ear protection.
It gets pretty dusty, you might also want eye protection and a mask.
Spackle and Primer
When you’re repainting a room, it’s always a good idea to repair any damage and fill nail holes.
By the way, I like the kind that goes on pink and turns white when it dries. No guessing!
Joint compound is used for larger repairs, but spackle works great for filling tiny nail holes.
Primer is necessary to seal spackle and joint compound since it’s porous and absorbs paint weird.
I like this brand of primer for this kind of work. It’s pretty cheap and is water-based so clean-up is easy.
However, I know that stores have been having a hard time keeping it in stock, so if you can’t find it, just use a water-based primer and you will be fine.
Prep Work Directions
- Remove anything that you don’t want to get dusty. For this bathroom, that meant towels, art, and the shower curtain.
- Remove anything that will be in the way of sanding the walls. I removed the towel bars, the mirror, and the shelving to make this job easier.
- Tarp off the floor if desired. If the walls are open to other spaces, it’s probably a good idea to tarp those areas off to minimize dust. If possible, shut the door to keep the dust contained in one room.
Sanding the Stenciled Walls
- Start in a corner and work your way around the room sanding the stencils.
- Pay attention to the edges of the stencil as you work.
- The stencil will probably still be visible, but you shouldn’t be able to feel it when you rub your hands across the surface. (Close your eyes if necessary.)

Cleaning the Dust
If you have repairs, you can wait to clean the dust.
- When you’re finished sanding, walk away and give the dust a while to settle. An hour or two should work.
- Use a microfiber cloth to clean up the dust. If there’s a lot of dust, you can get the microfiber cloth damp.
- For tall walls, you can also use a Swiffer.
- Sweep up as must dust from the floors as possible. Use a damp mop to remove any remaining dust.
Repairing Damage or Filling Nail Holes
If your walls are in good condition, you can go ahead and paint as usual. If not, it’s time to repair the walls.
- Fill nail holes with spackle and let it dry. (Small holes take less than an hour usually.)
- Larger repairs might need drywalls mesh and several coats of joint compound. These types of repairs might need days to dry.
- Once the spackle (or joint compound) dries, lightly sand the spot until it’s smooth.
- Clean any dust.
- Prime the spot so that it doesn’t show through the paint. (Spackle and joint compound absorb paint differently and will look different.)
- When the primer is dry, you can paint the wall as usual.
Learn more about my favorite painting tools here.
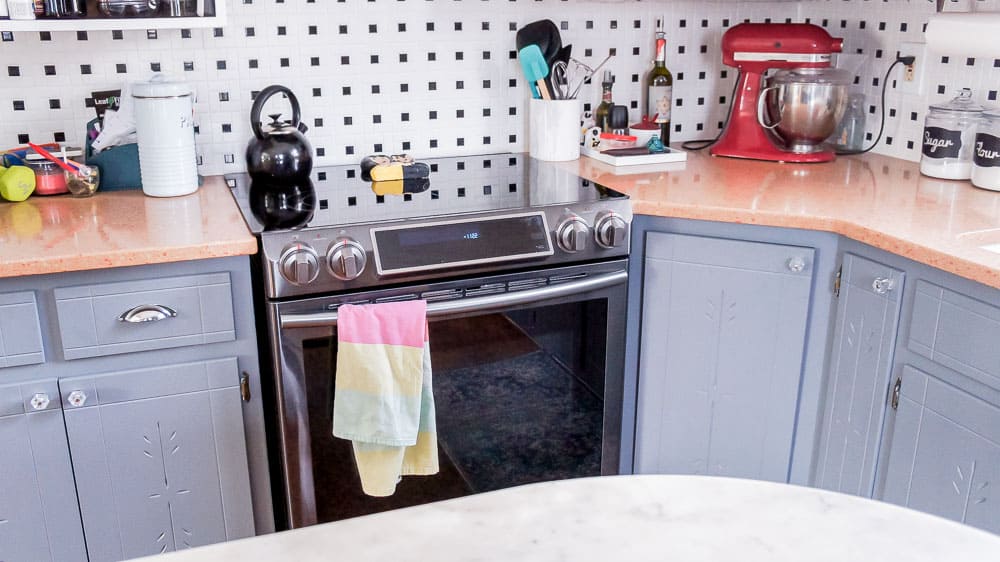
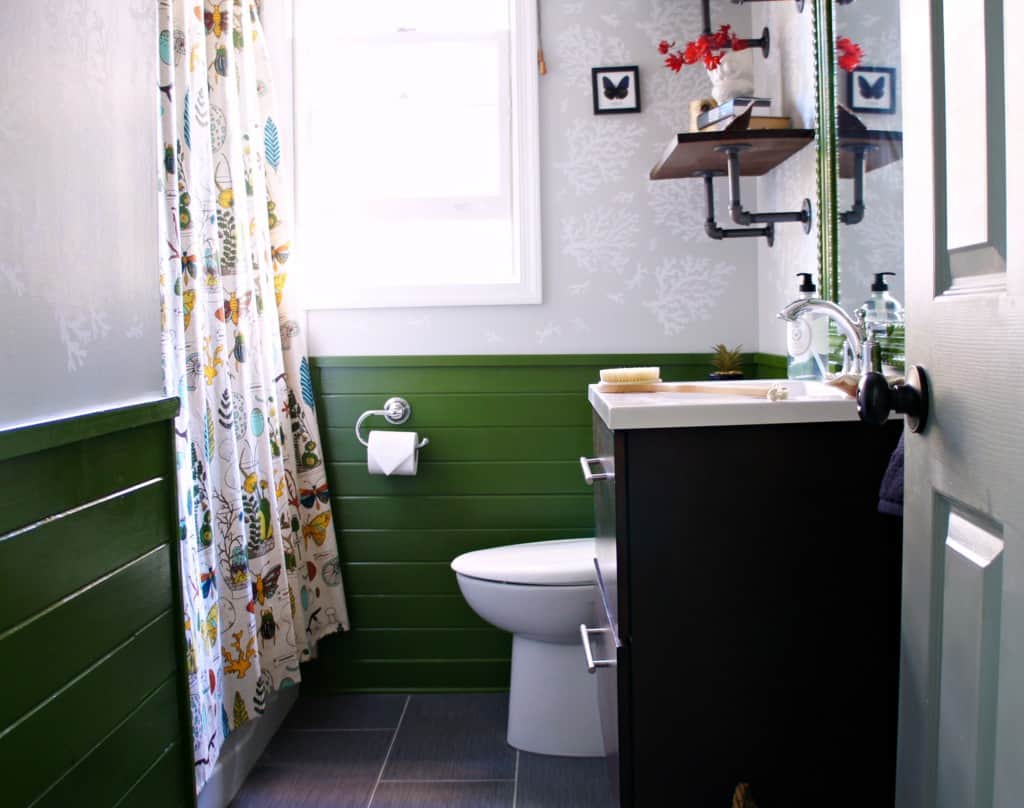
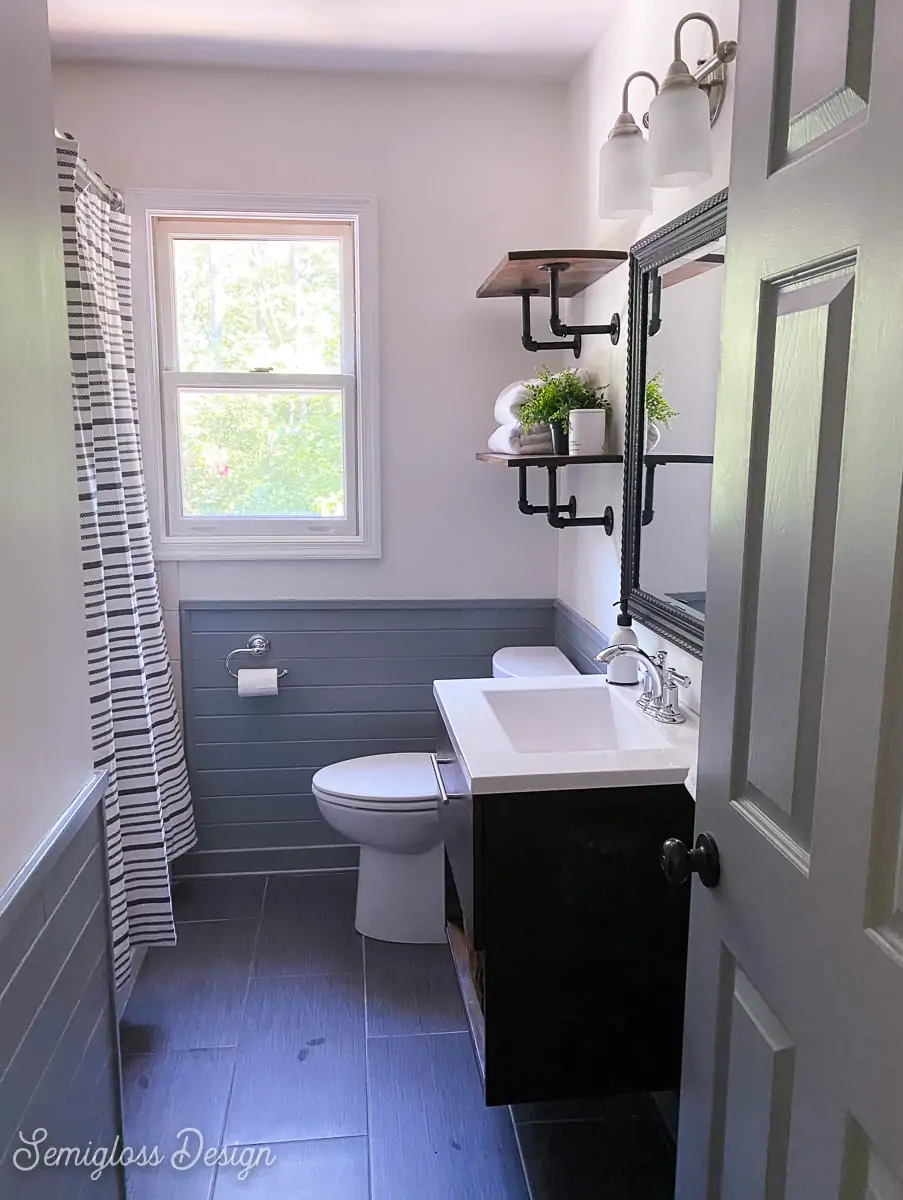
Here’s the finished room before we sold it. No coral stencil in sight!
You might also like:
- How to Choose White Paint
- How to Remove a Chair Rail
- How to Remove a Wallpaper Border
- DIY Scalloped Accent Wall
- How to Remove a Popcorn Ceiling
Pin for Later!

Emy is a vintage obsessed mama of 2 DIYer who loves sharing affordable solutions for common home problems. You don’t need a giant budget to create a lovely home. Read more…