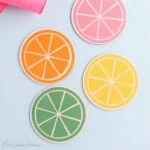
DIY Infusible Ink Coasters with Sublimation Blanks
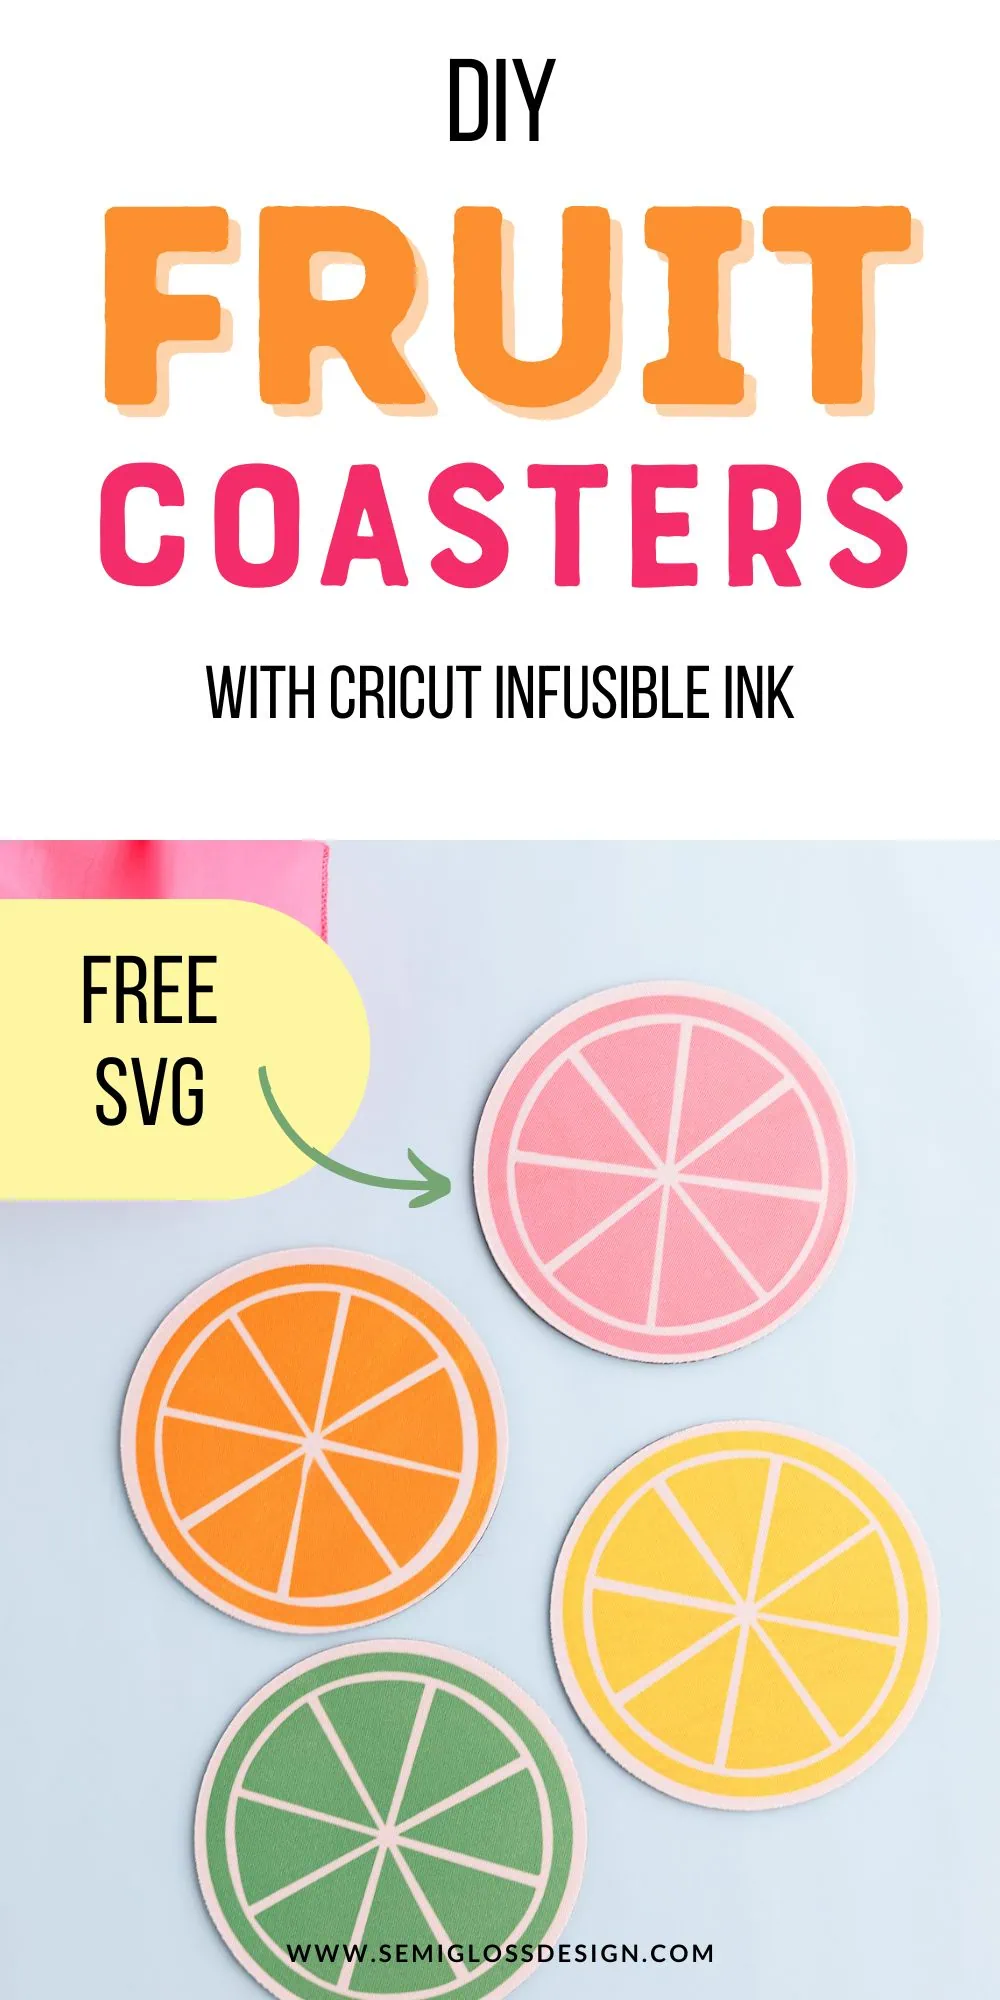
These DIY infusible ink coasters use are so easy to make. Featuring bold fruit designs, these cute coasters make a great gift.
If you’re new to Cricut, be sure to check out my guide on using a Cricut Maker for the first time.

This post contains affiliate links. By purchasing an item through an affiliate link, I earn a small commission at no extra cost to you. As an Amazon Associate I earn from qualifying purchases.
This project combines 2 of my current obsessions: fruit and coasters. Fruit is one of my favorite things to paint and I love making coasters.
These cute fruit coasters are perfect for hot summer days (or really any day.) They also make a great gift.
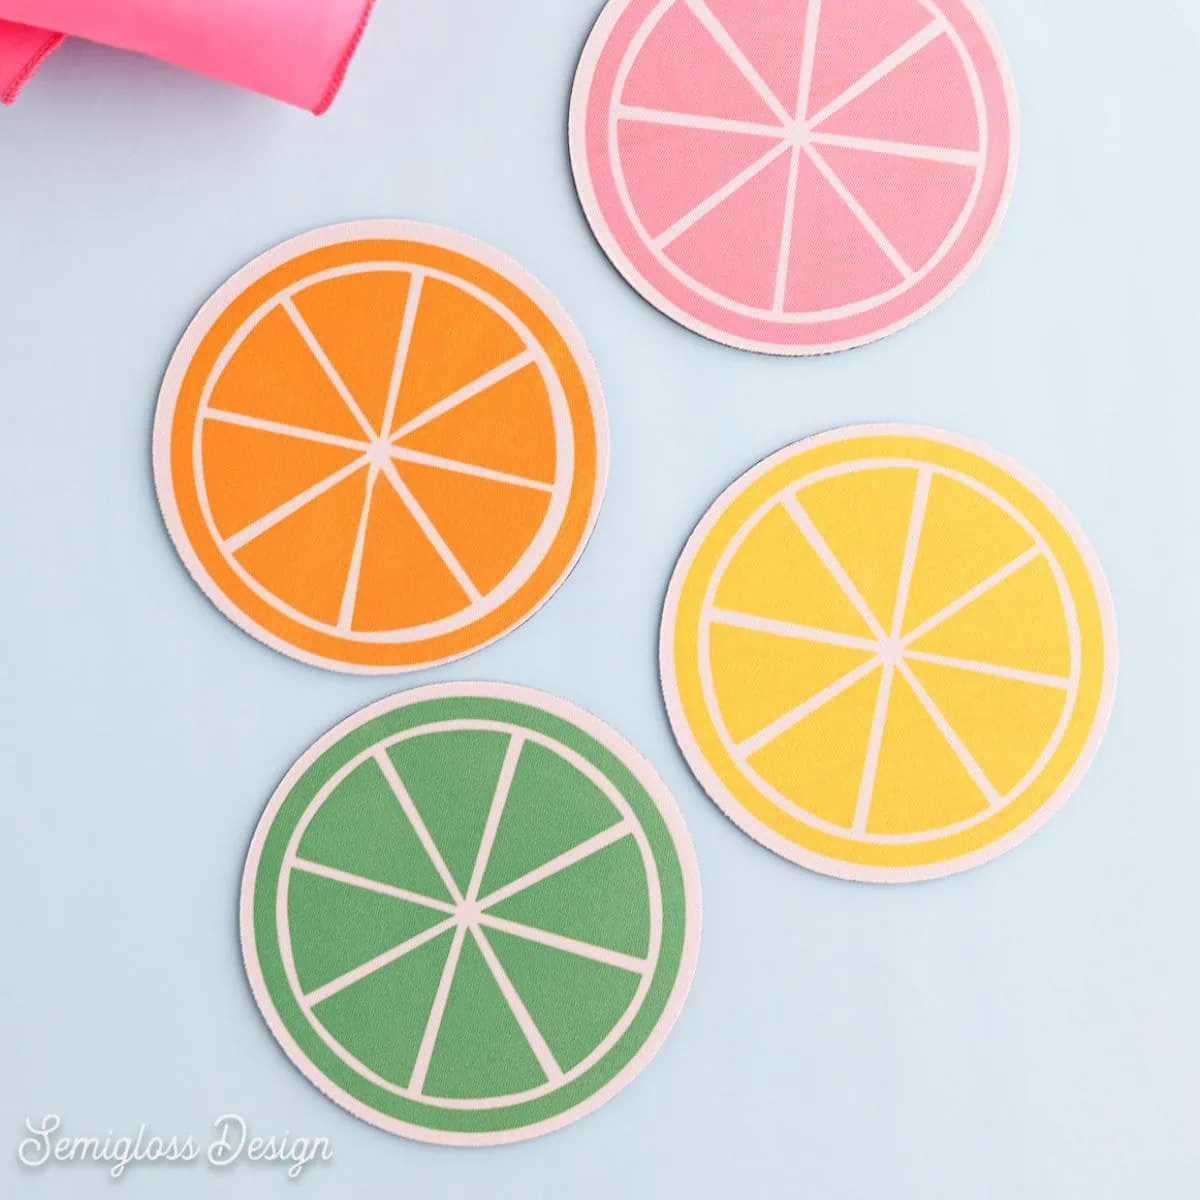
I used sublimation coasters that are made of a soft fabric similar to a koozie or a mousepad.
Even though I’m dying to buy a sublimation printer, these use infusible ink, which can be purchased at any craft store. No expensive printer needed.
DIY Infusible Ink Coasters
Supplies Needed:
- Cricut (I used my Cricut Maker 3)
- Infusible Ink in rose pink, true yellow, tangerine, and green
- Coaster Sublimation Blanks
- Heat Resistant Tape
- Easy Press
- Easy Press Mat
- SVG (link at the bottom of post)
Notes About Supplies
Cricut
Any Cricut can cut infusible ink.
Infusible Ink
Infusible ink must be used with compatible blanks. It works with Cricut and sublimation blanks. The colors are limited, so they aren’t a true match. For instance, I would have loved a lime green.
Please note that the sheets are pale. The colors are much more vibrant when heated.
Coaster Sublimation Blanks
I used these soft coasters. When I ordered them, I thought they would be similar to the Cricut coasters, but I’m pretty happy with them. The soft fabric soaks up condensation, making them the most functional coasters ever.

(There are a million sublimation blanks online. If you choose other blanks, be sure that they work with sublimation; sometimes, non-compatible listings show up.)
Easy Press
I used my Easy Press, but you can use a heat press if you have one. Household irons don’t get hot enough to work with infusible ink, so the colors turn out faded and dull.
I resisted buying an Easy Press for a long time, but I’m glad I did. It works great with infusible ink and iron-on vinyl. Read more about how to use an Easy Press here.
Cricut Settings For Sublimation Coasters
Standard Grip Mat
Ink Side Up
Mirror the Design
Material: Infusible Ink
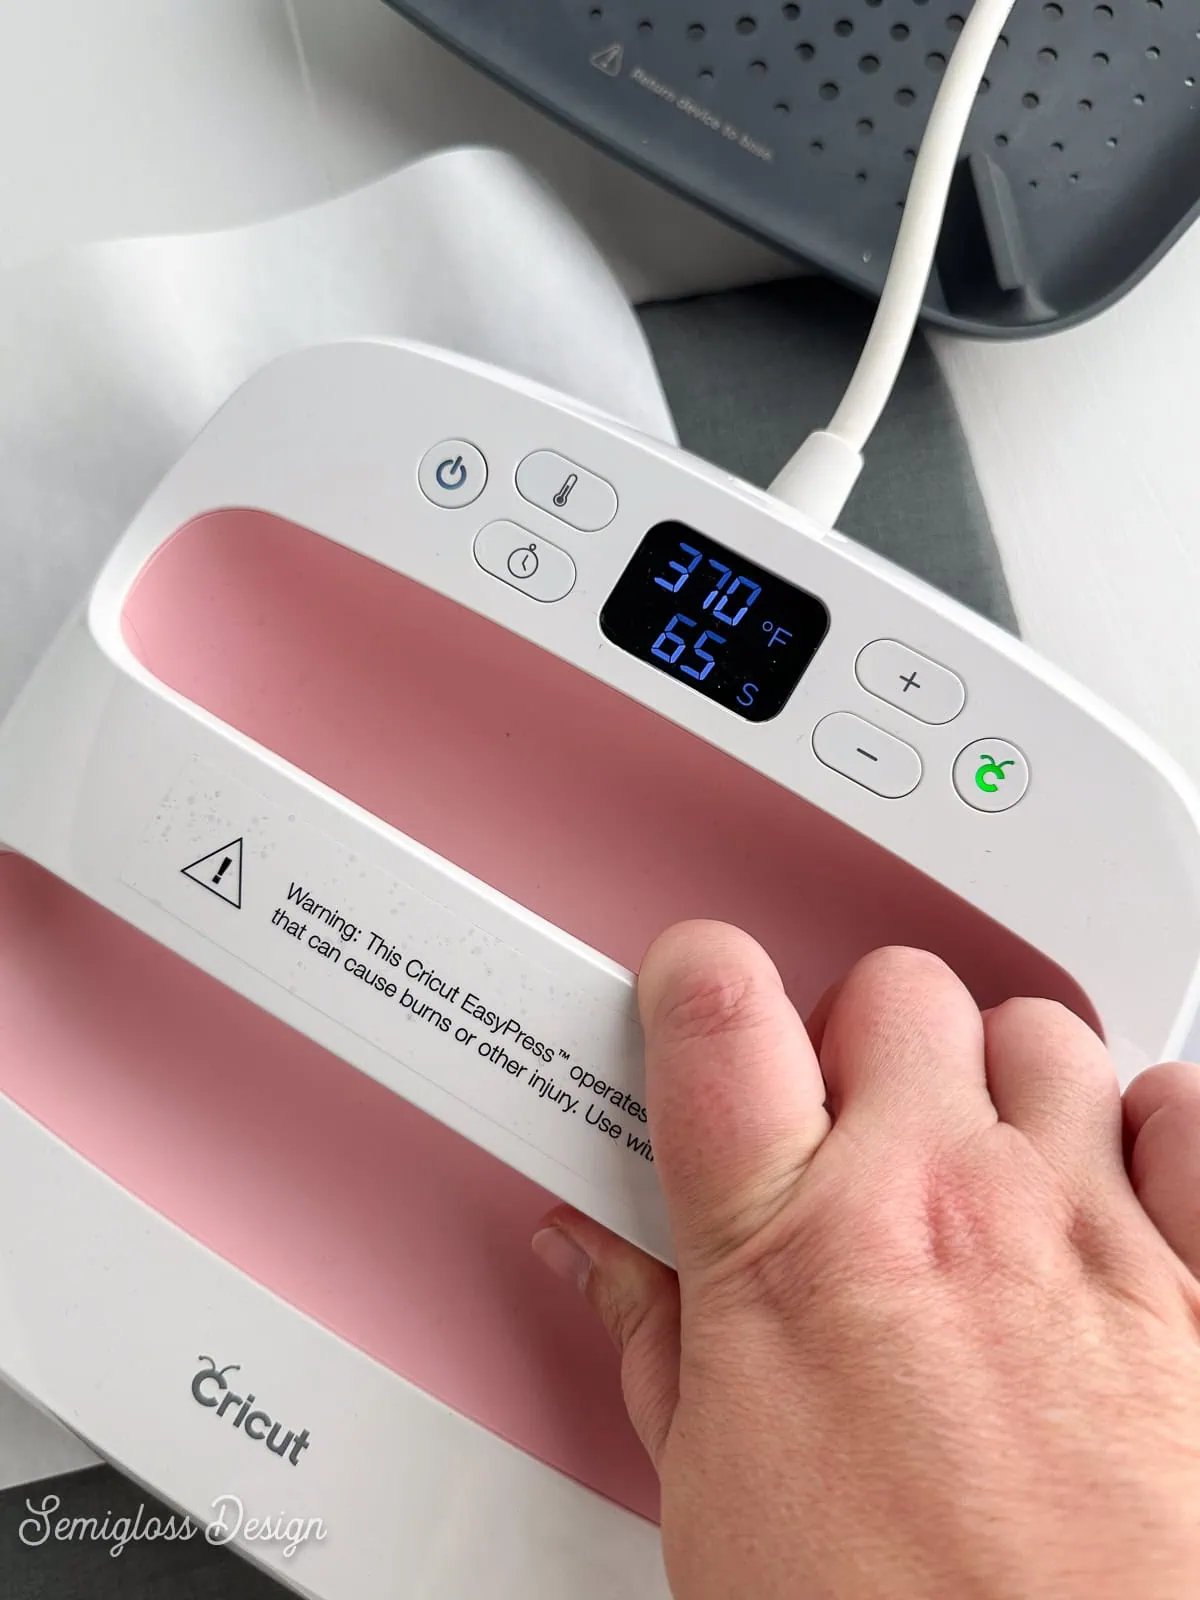
EASY PRESS SETTING for Sublimation Blanks*
370º
70 seconds
Ink side down to the surface
*If using different blanks, check the listing for the correct setting.
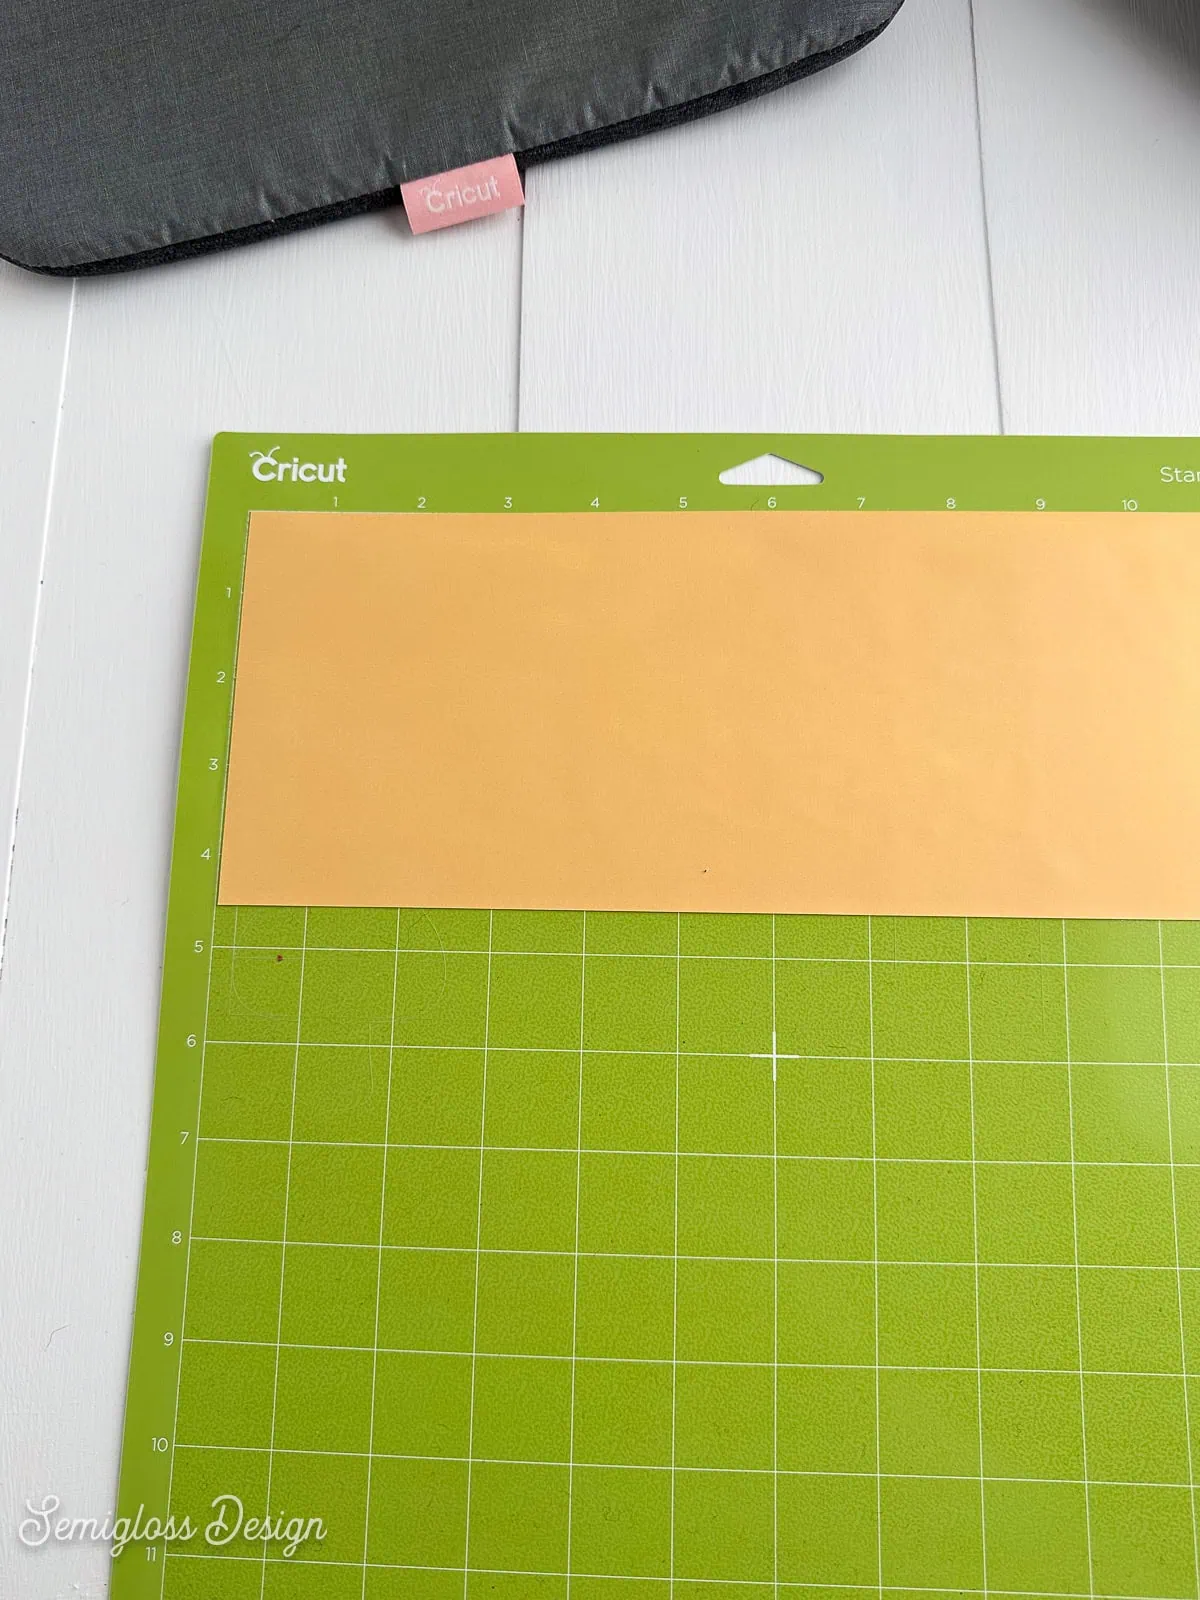
Cutting the Infusible Ink
- Upload the SVG as usual.
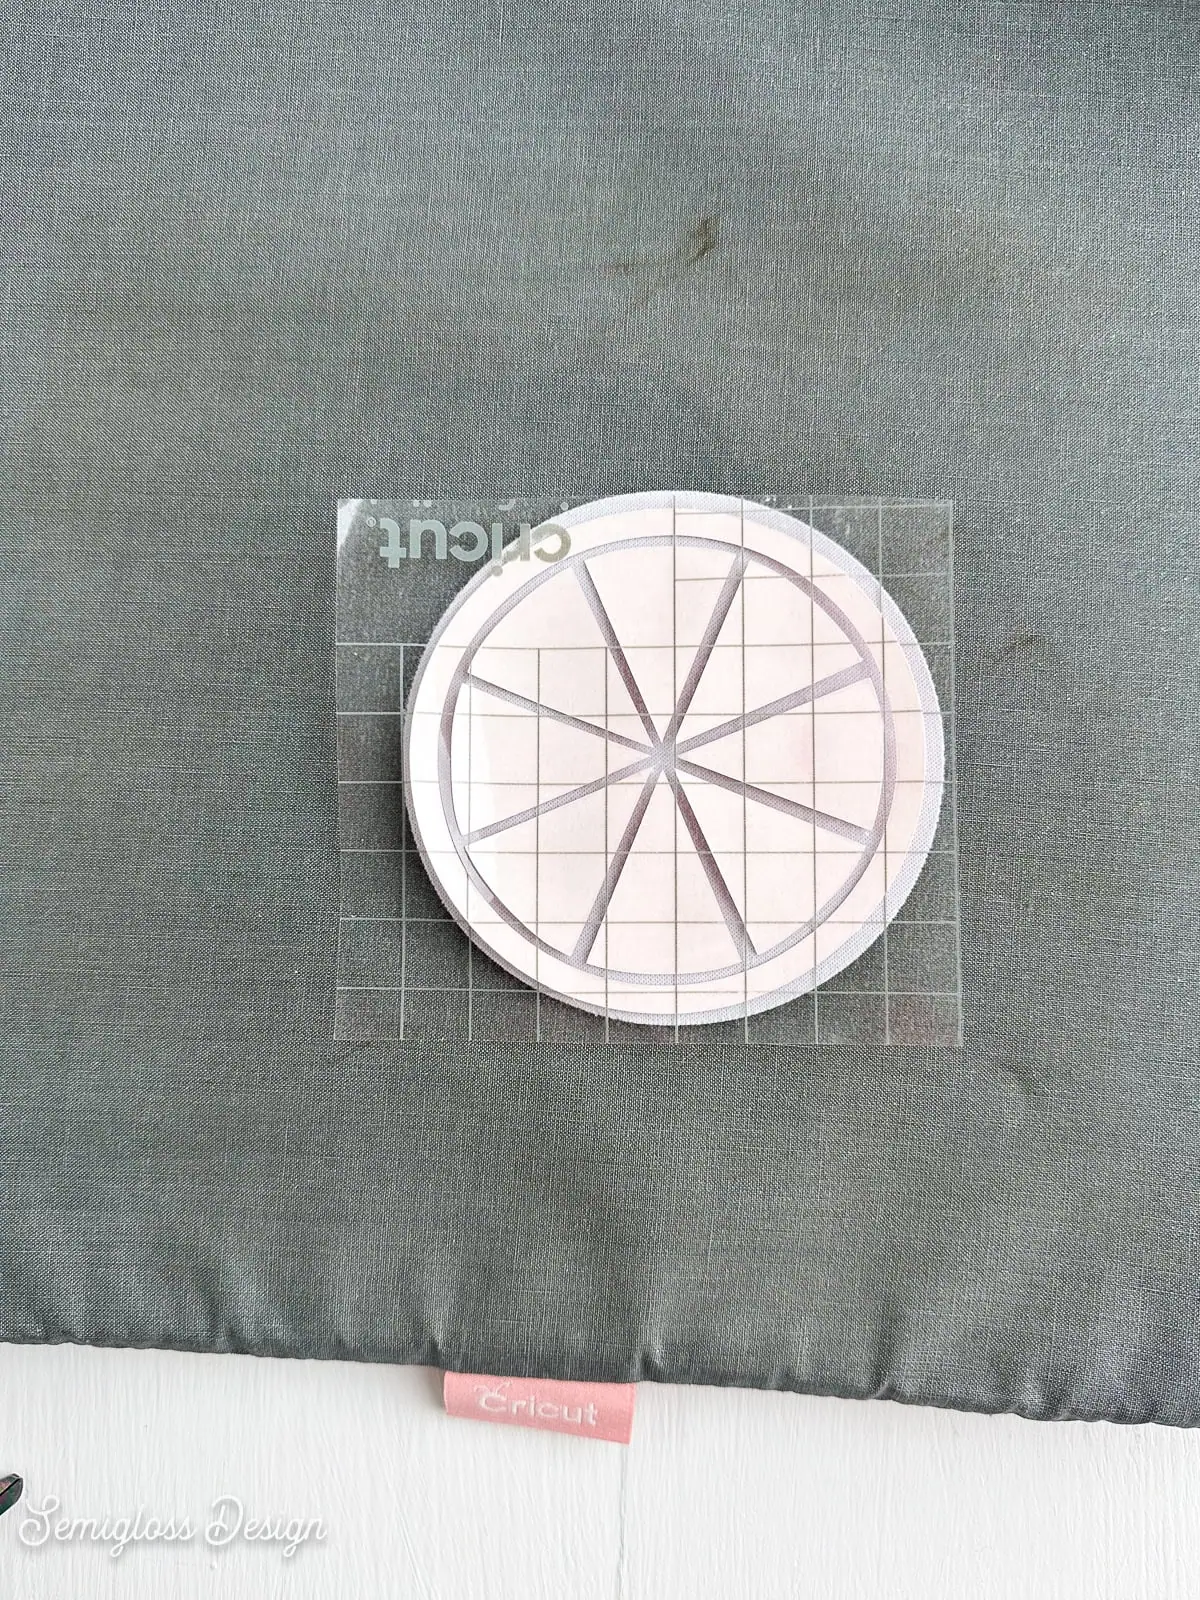
- Resize if needed. My coasters are 4″, and I left them sized at 3.7″ to leave a white edge.
- Ungroup the file.
- Select each shape and click Attach.
- Click Make it.
- Cut a piece of infusible ink sheet to size and place it on a standard grip mat, ink side up. Smooth it out to ensure that it sticks well.
- Use painter’s tape to secure the infusible ink sheet to
 the mat if needed. It will rip the ink, so be sure to keep it along the edges only.
 - In Cricut Design Space, mirror the design if needed. (This design doesn’t need to be mirrored, but I added it in case you make your own design.)
- Select Infusible Ink sheets for the material.
- Load the mat.
- Press start on the machine to cut.
- Unload the mat and reload the infusible ink on the mat for each color.
 the mat if needed. It will rip the ink, so be sure to keep it along the edges only.
Assembling the Coasters
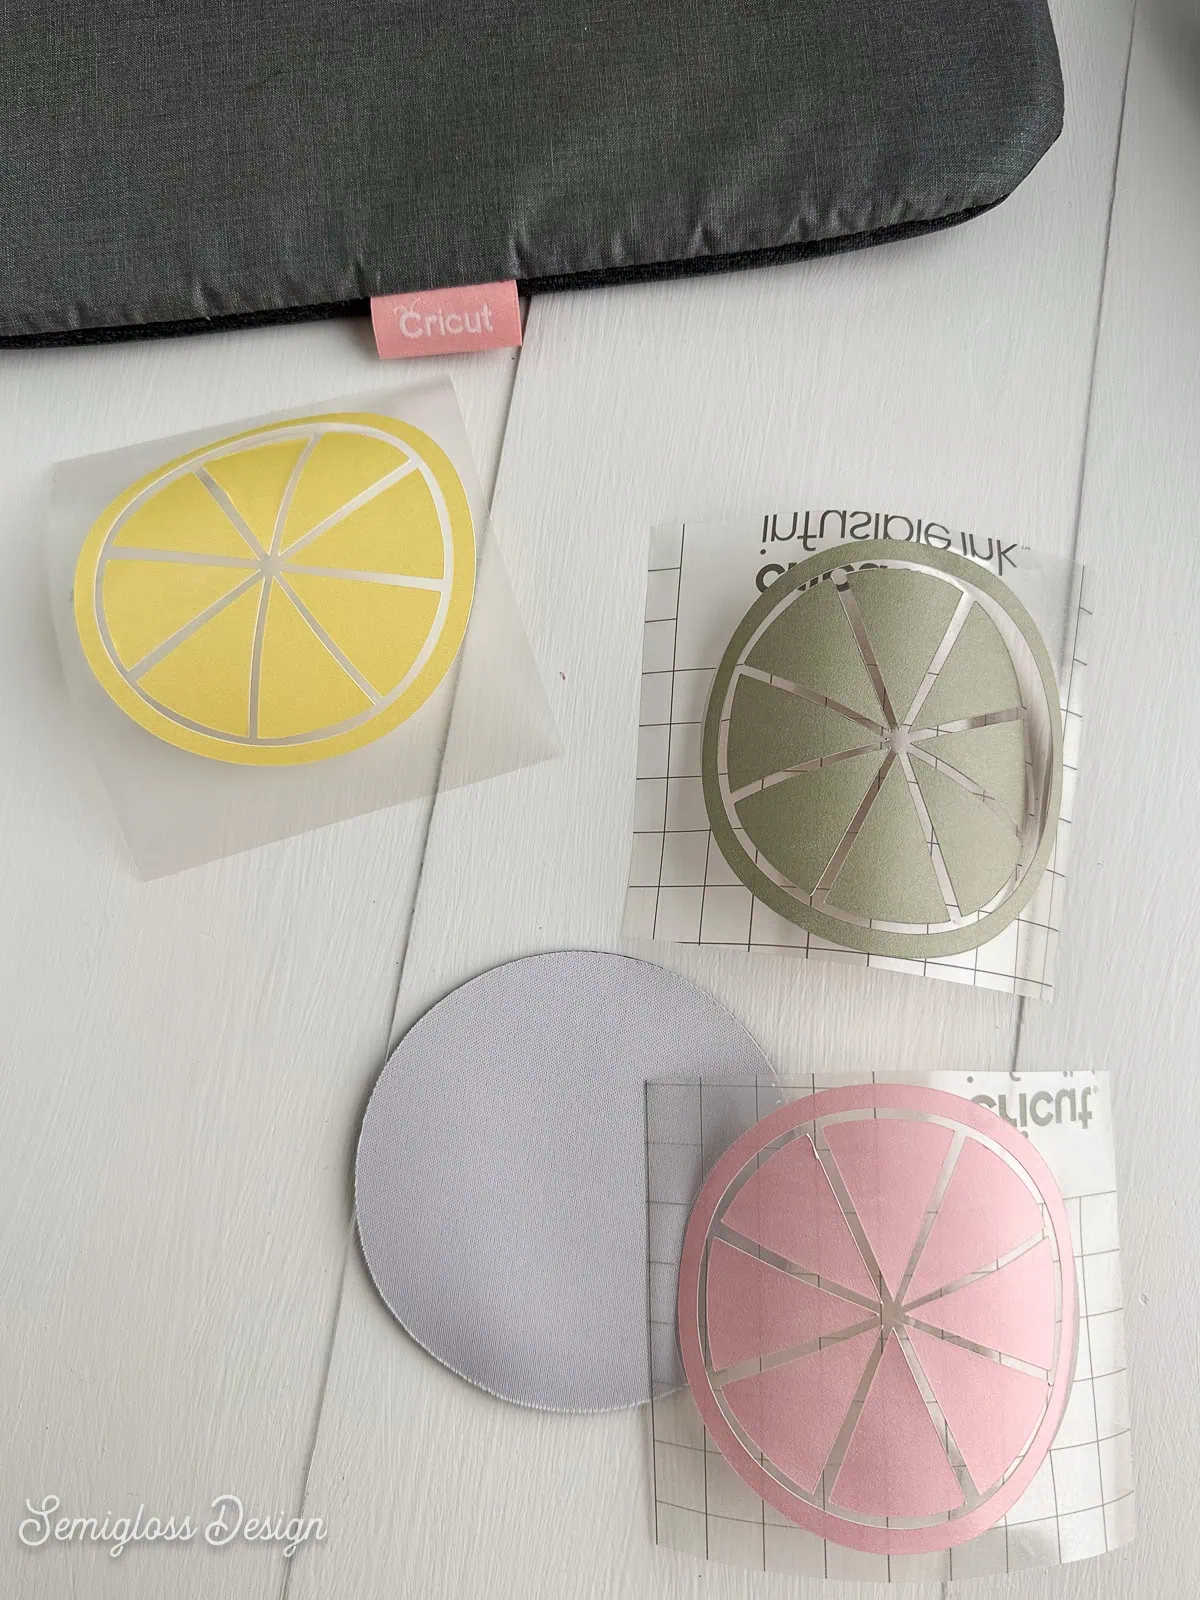
Using the pick tool when weeding infusible ink is not recommended, but if you do, be careful. (I used it to get to tiny parts.)
- Weed the infusible ink sheets. The outside piece comes away easily, but the inner ring is more difficult. It came away after picking at it a bit.
- If pieces were cut all the way through, they can be taped back in place with heat-resistant tape on the back.
- Turn on the EasyPress, heat it to 370º, and set the timer to 70 seconds.
- Preheat a blank coaster for about 10 seconds when the Easy Press is hot.
- Remove the Easy Press and replace it.
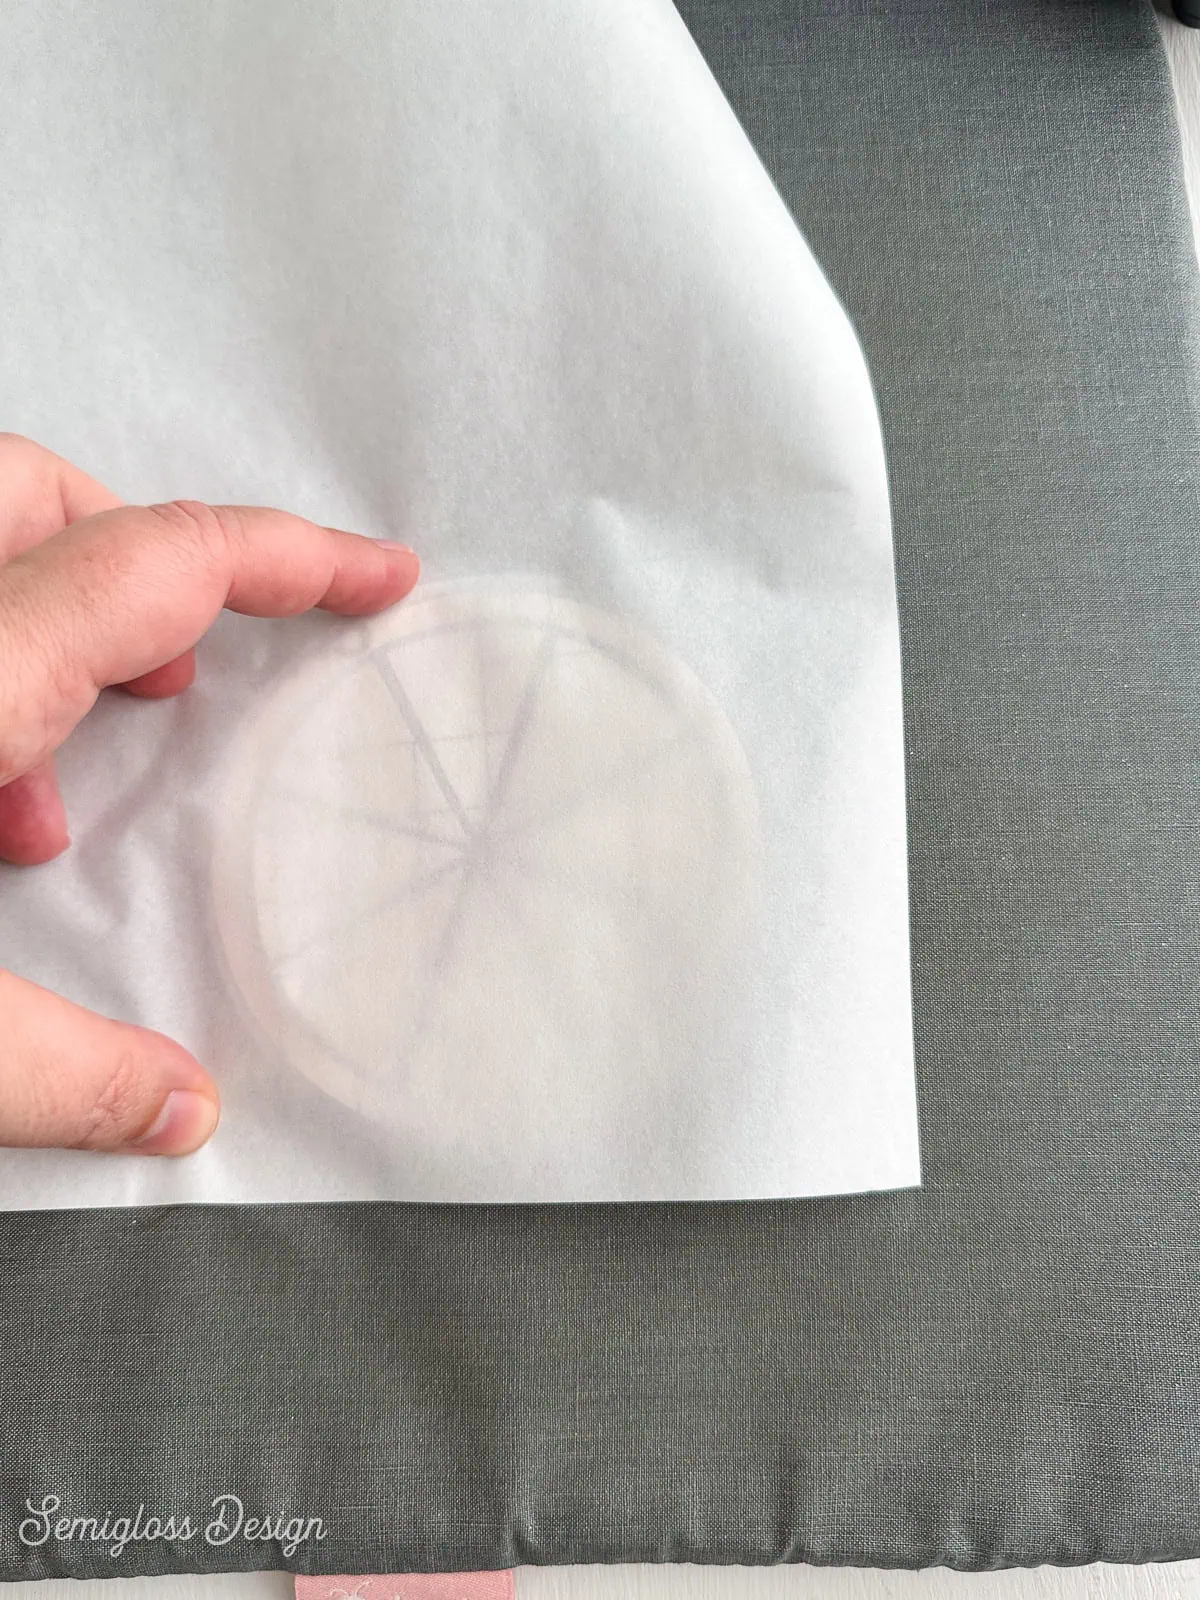
- Place the weeded infusible ink design onto the coaster, ink-side-down.
- If needed, use heat transfer tape to keep the design in place. You can tape it to the Easy Press mat.
- Cover the coaster and infusible ink design with parchment paper. (The parchment paper is included with the infusible ink.)
- Place the Easy Press on the coaster and push the start button.
- Press firmly until the timer goes off.
- Remove the Easy Press and place it in the cradle.
- The infusible ink sheet and coaster will be hot, so be careful removing them.
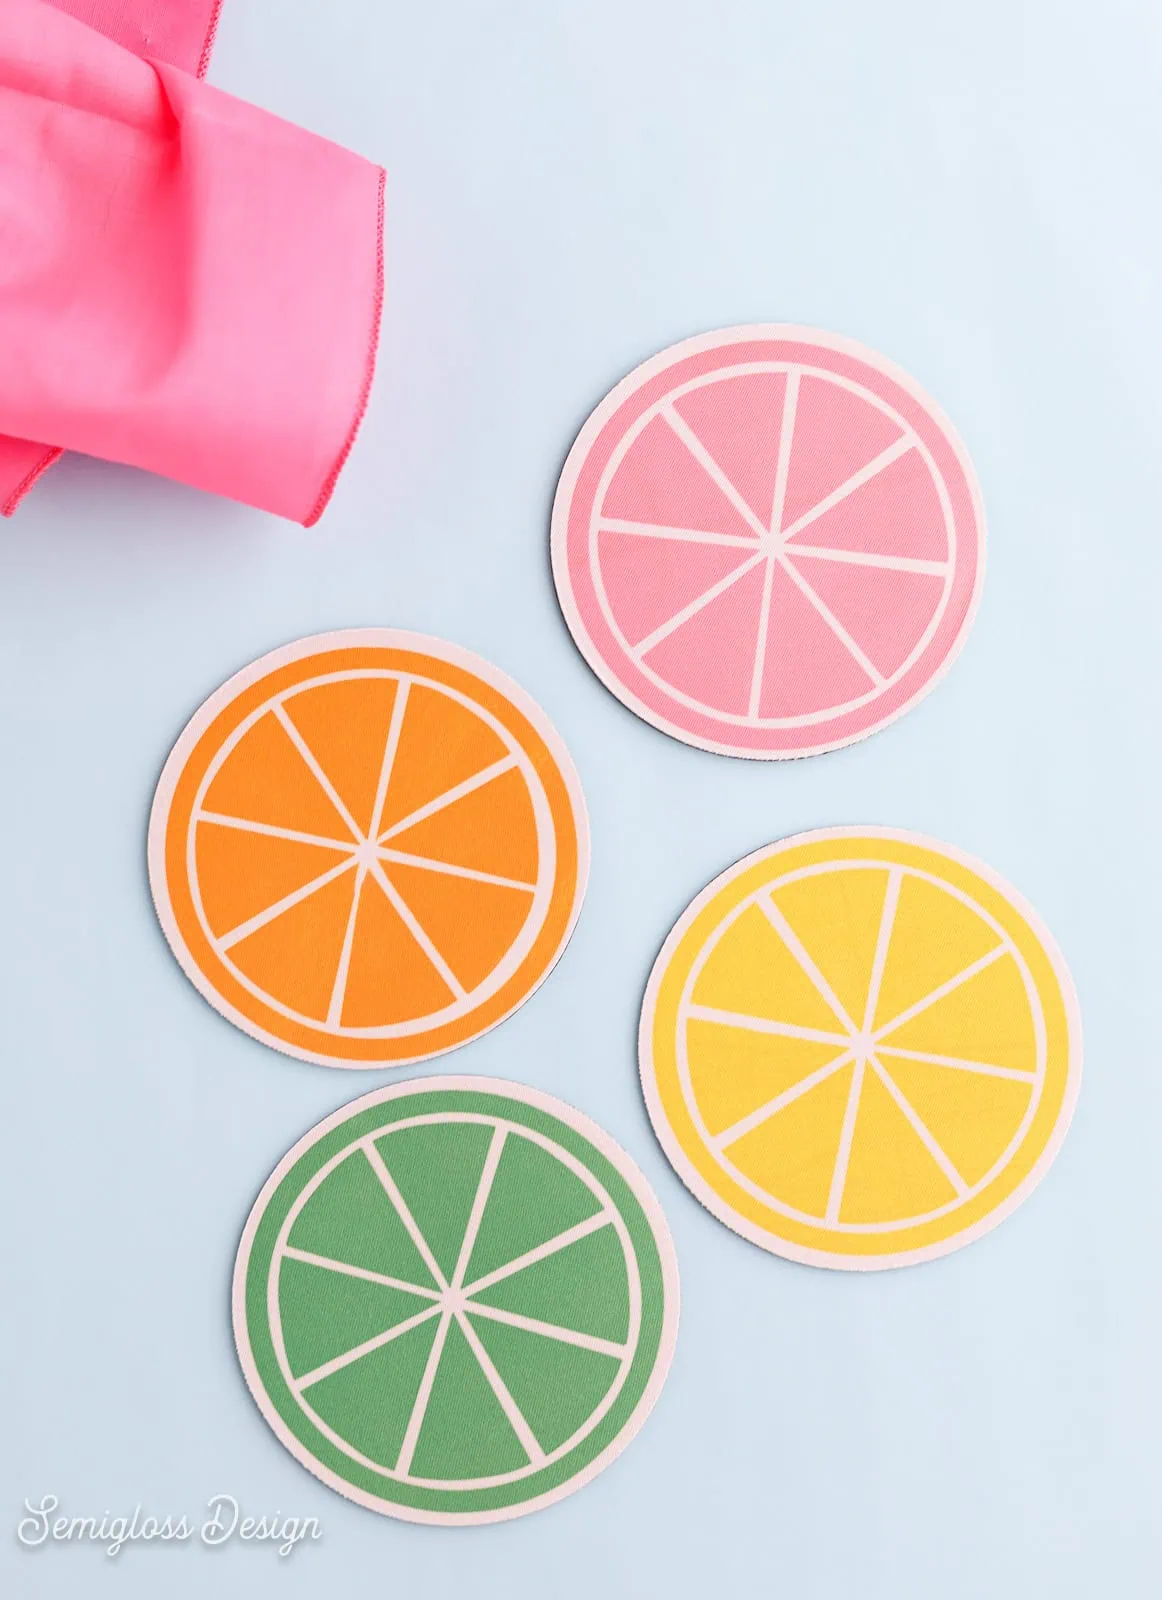
- Remove the infusible ink sheet and admire your work.
- Continue for the other coasters.
- Enjoy!


You might also like:
Get access to my SVG Library.
Get access to over 50 SVG sets and Cricut cheat sheets. Join my SVG library.
Download Fruit Coaster SVGs
All downloads are for personal use only. Please do not redistribute or sell files.

Pin for Later!

Emy is a vintage obsessed mama of 2 DIYer who loves sharing affordable solutions for common home problems. You don’t need a giant budget to create a lovely home. Read more…