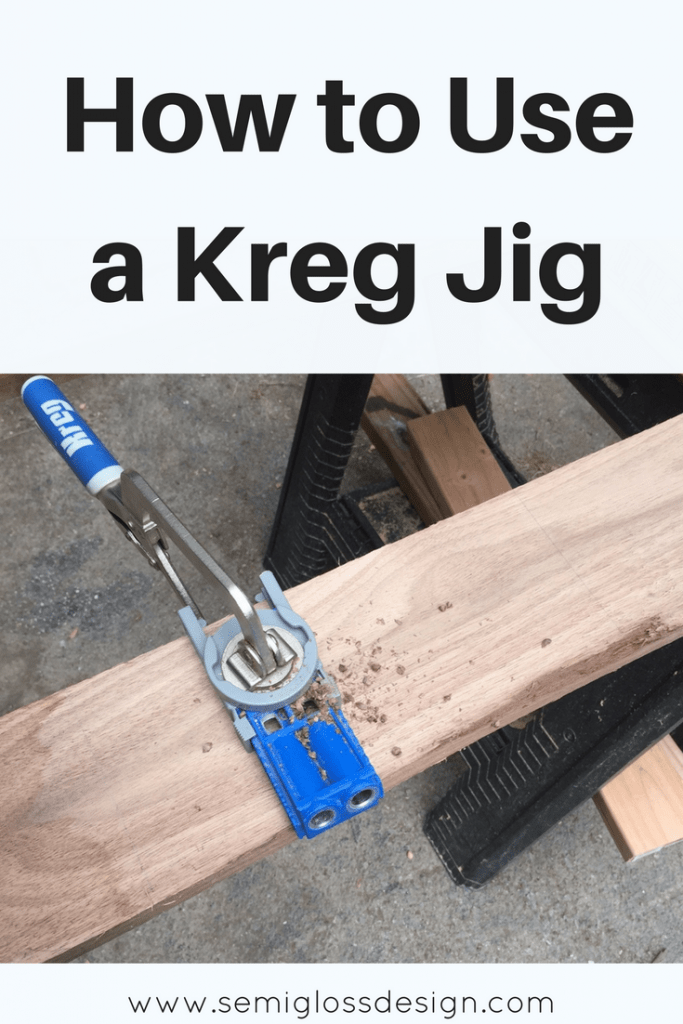
When I bought my kreg jig, I had no idea how much I would love it. Sure, DIY bloggers everywhere sing it’s praises, but would I find it useful? After over 2 years of using it, I’ve found that I love it.
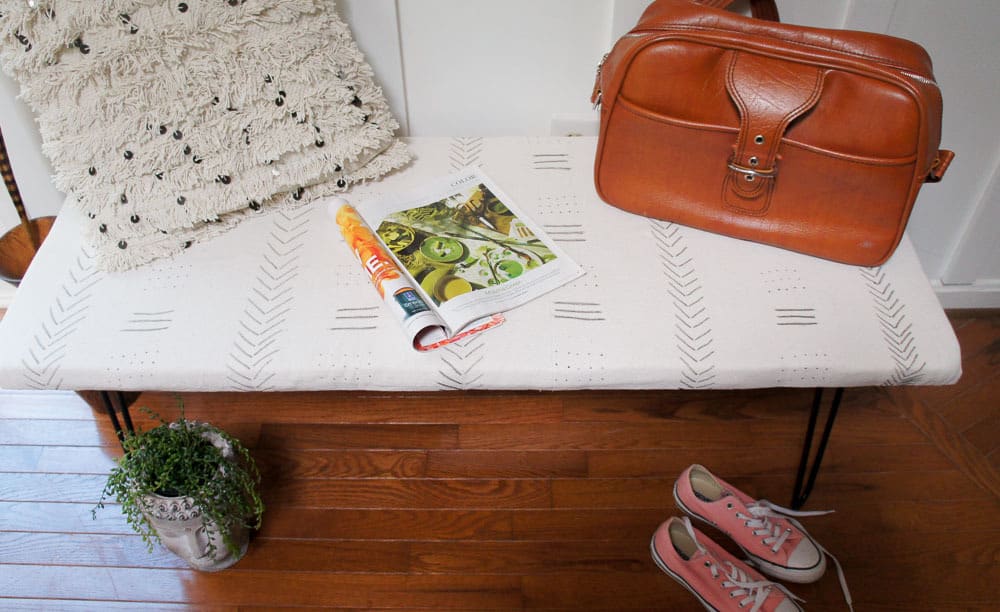
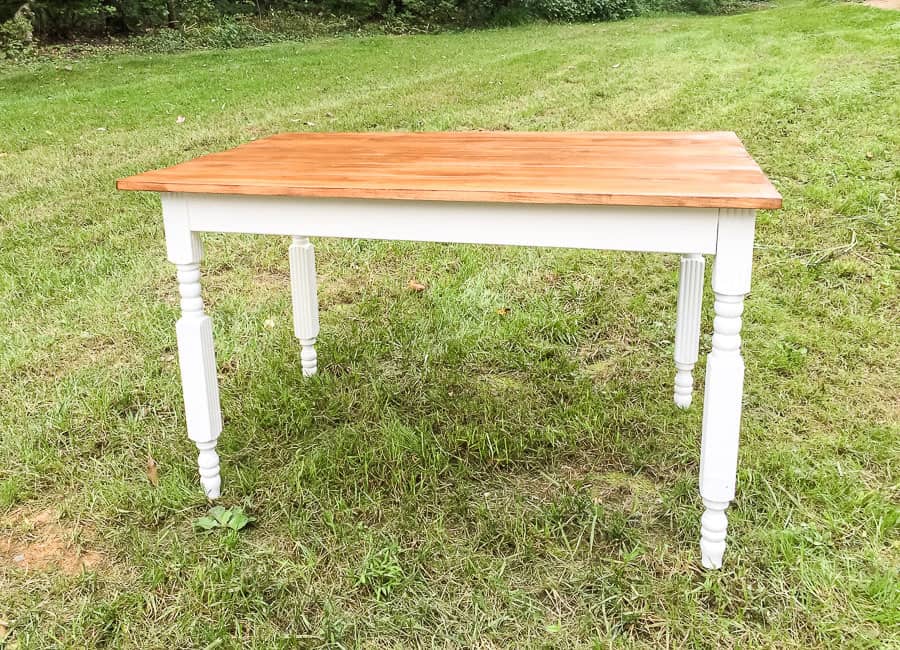
We used it to build our farmhouse table, the bar in our sunroom, a cabinet in our kitchen (that still needs to be finished) and countless other projects.
Over the weekend, we built a bathroom countertop, and as I worked on it, I felt it would be helpful to write a guide on using a kreg jig to make pocket holes.
This post contains affiliate links. By purchasing an item through an affiliate link, I earn a small commission at no extra cost to you. As an Amazon Associate I earn from qualifying purchases.
Using a Kreg Jig FAQs
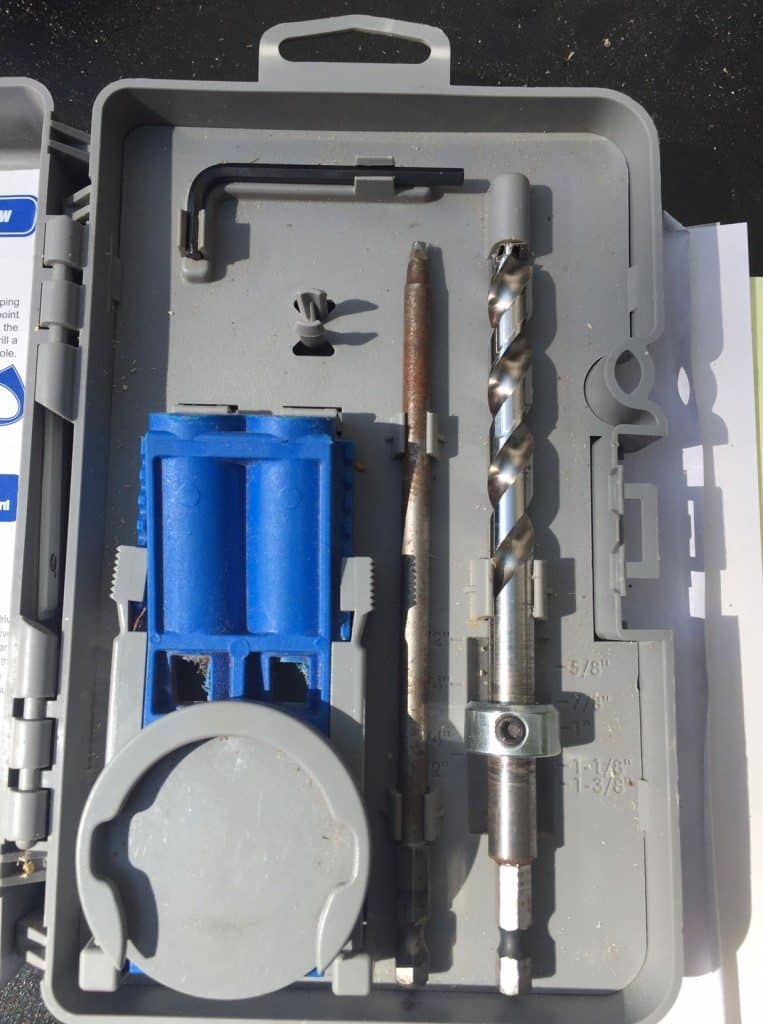
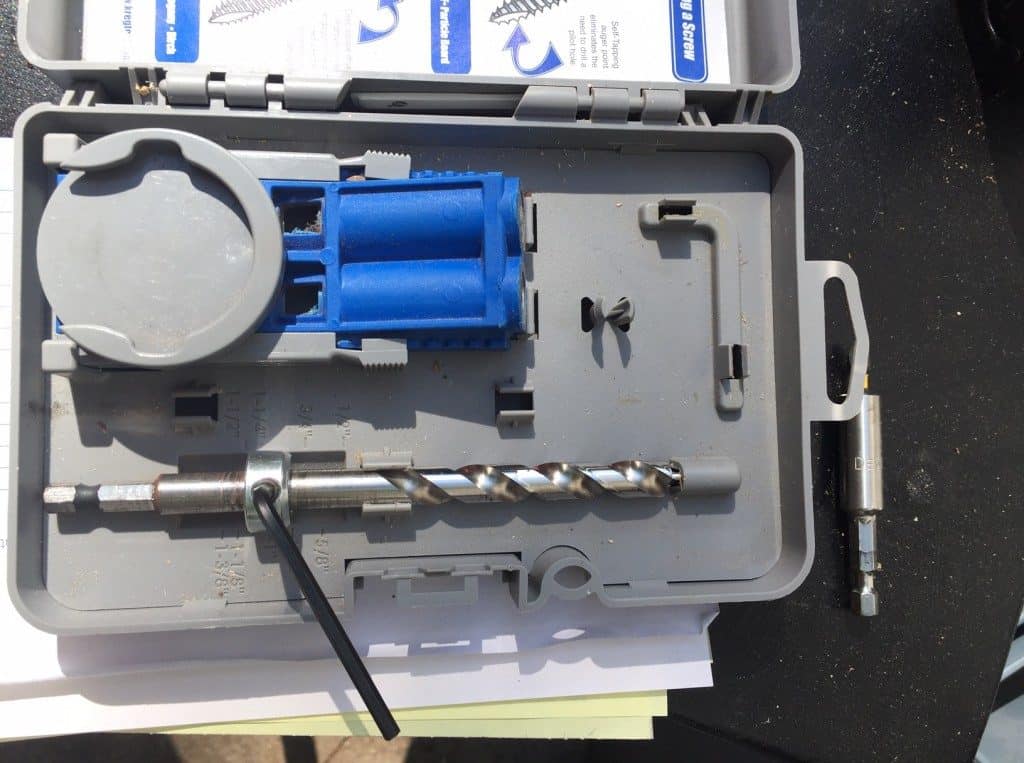
About the Kreg R3 System
We bought ours without knowing how useful it would be, so we bought a smaller kit and a clamp. Even though it’s not the large kit, it gets the job done.
The kit comes with a sample pack of screws. So far, I haven’t found that other screws work with the kreg jig. I’m partial to deck screws when building, so this bums me out a lot.
The heads on other screws are too large to fit in the pocket holes. I find that we use 1 1/4″ screws the most because we use them a lot for 1″ wood.
What is a kreg jig?
A kreg jig is a pocket hole jig. It allows you to make pocket holes without much thought or fuss.
Pocket holes are holes that drilled at at angle and can be filled. The pocket holes turn out perfect every time with a kreg jig.
What are pocket holes?
Pocket holes are used to join 2 pieces of wood without visible screws. They can be used to join 2 pieces to make a flat surface (like a table top), or to join 2 pieces to form a perpendicular angle (like an L or a cube).
Pocket holes are the best way to join wood, in my opinion. You get a strong surface without using glue.
Why would you want pocket holes?
Pocket holes allow you to join wood without screws showing. Hiding your screw heads takes your work from amateur hour to building pro!
A kreg jig is also very useful for joining smaller pieces of wood together to create one large piece (like a tabletop or countertop.) It creates a very strong joint, which is really important for furniture.
It’s also useful for joining corners, particularly when you’re using thinner or weaker wood that you wouldn’t want to screw straight into, like plywood.
Can you use regular screws with a Kreg Jig?
Unfortunately, no. You have to use the kreg jig brand screws because other screws don’t fit.
Luckily, the screws are good quality!
They remind me of my favorite deck screws because they have a smooth shaft that creates tighter joints.
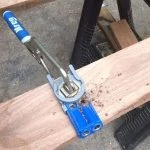
How to Use a Kreg Jig R3 to Make Pocket Holes
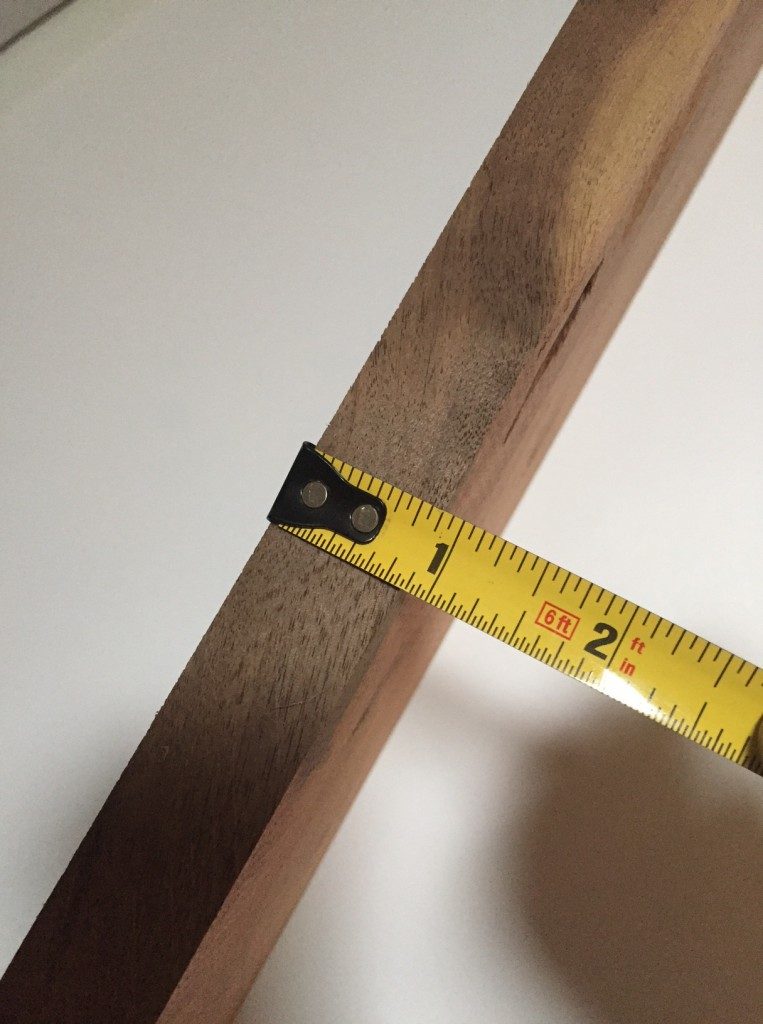
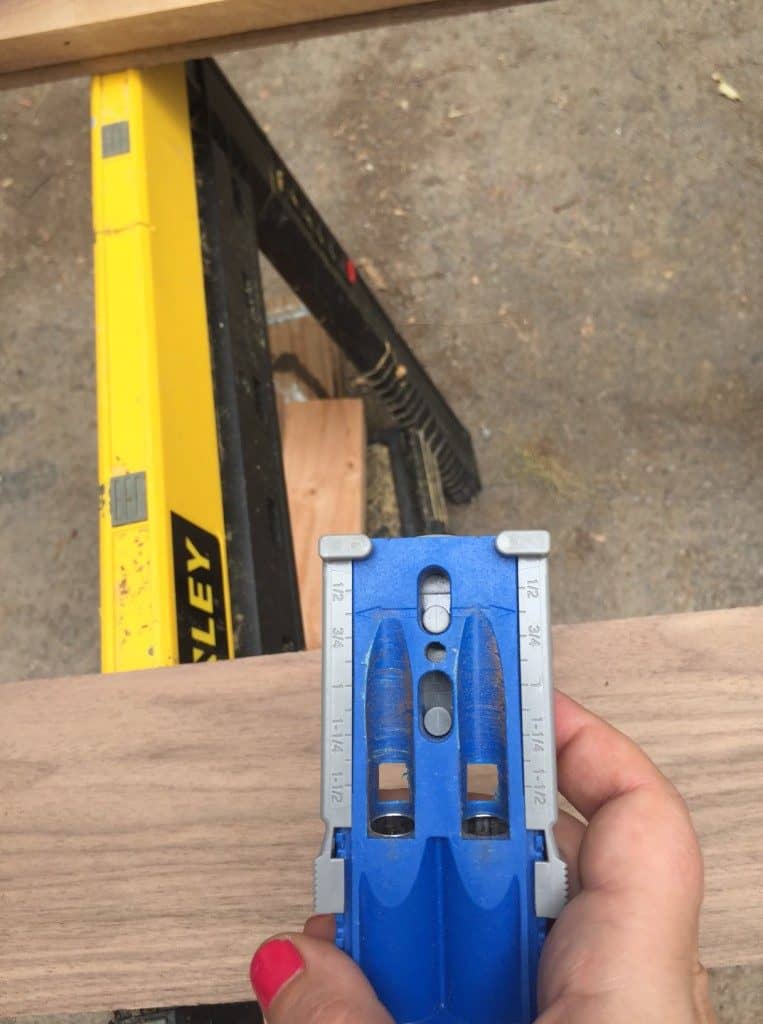
Measure the thickness of your wood. My wood was 3/4″ thick. Don’t make assumptions here. If you buy a 1×4, it’s not a true 1″ x 4″. It’s typically about 3/4″ x 3 1/2″.
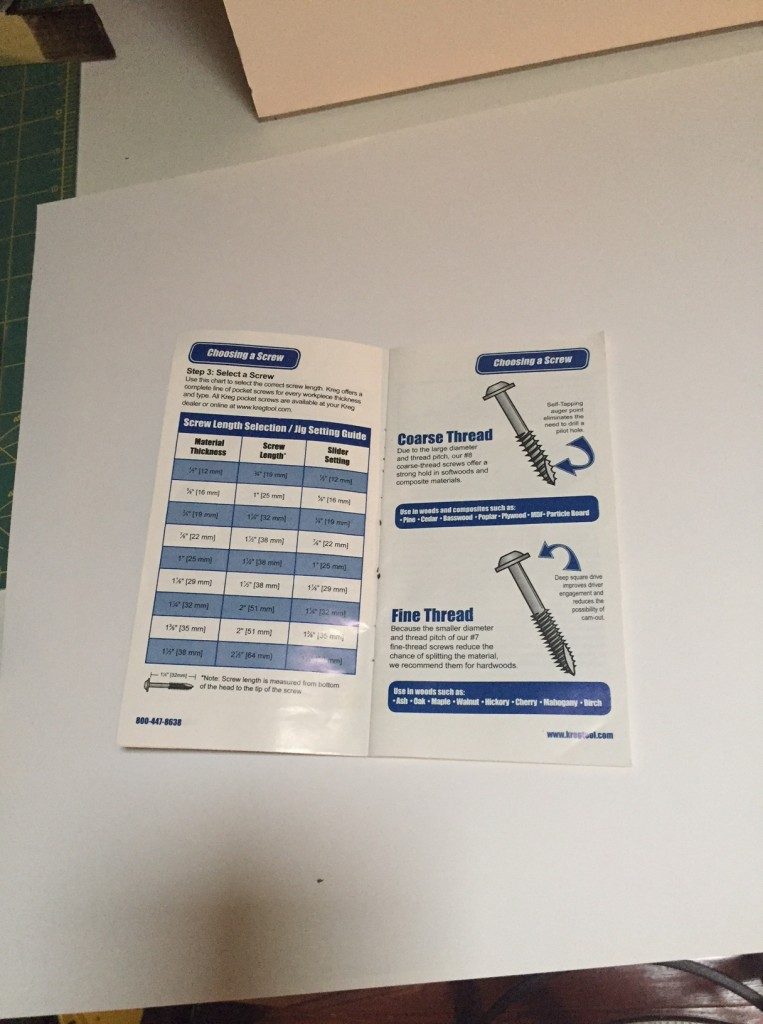
Cross reference the handy chart that comes in the book with your kit. It tells you the setting that you need for your kreg jig and the length of screws needed. You will use this chart every time you use it, so don’t lose it!
Adjust the drill bit to the correct depth based on the wood thickness. Use the allen wrench to loosen the depth collar and move it to the correct spot as indicated by the case. Then tighten it with the allen wrench. Mine needed to be 3/4″, so I moved it until the edge lined up with the 3/4″ mark.
Adjust the jig to the correct depth. Be sure to use the arrow and not the top line like I did by mistake! You will have to redrill all the holes. Push each side up or down until it’s in the right place. (This part took me forever to figure out.)
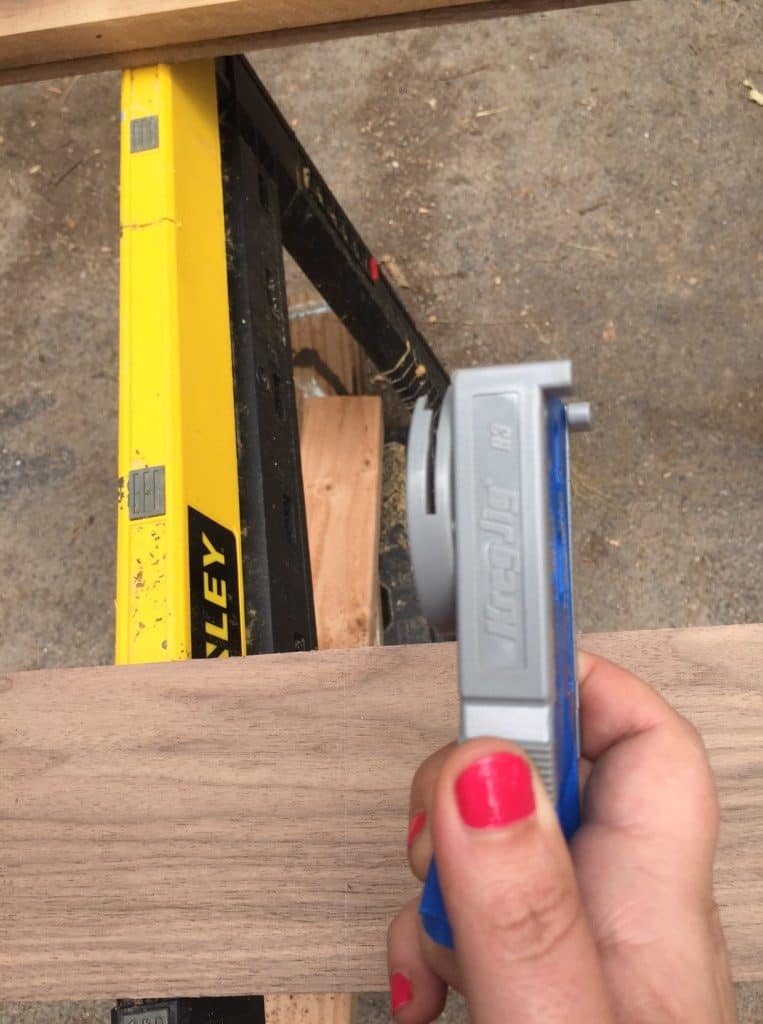
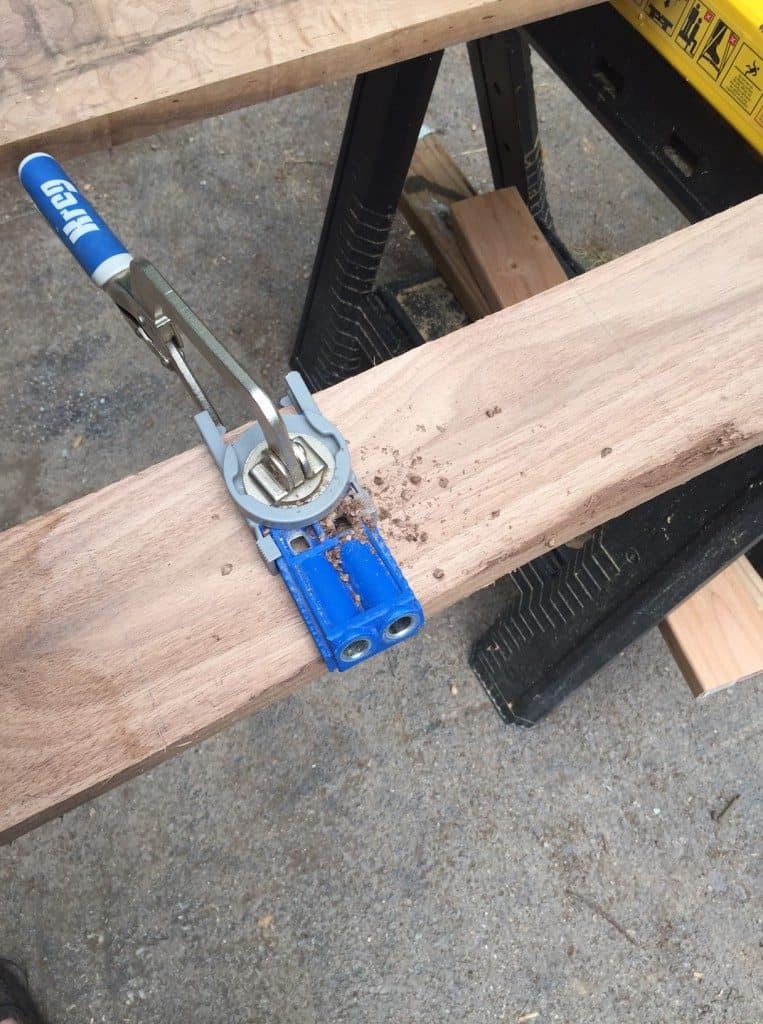
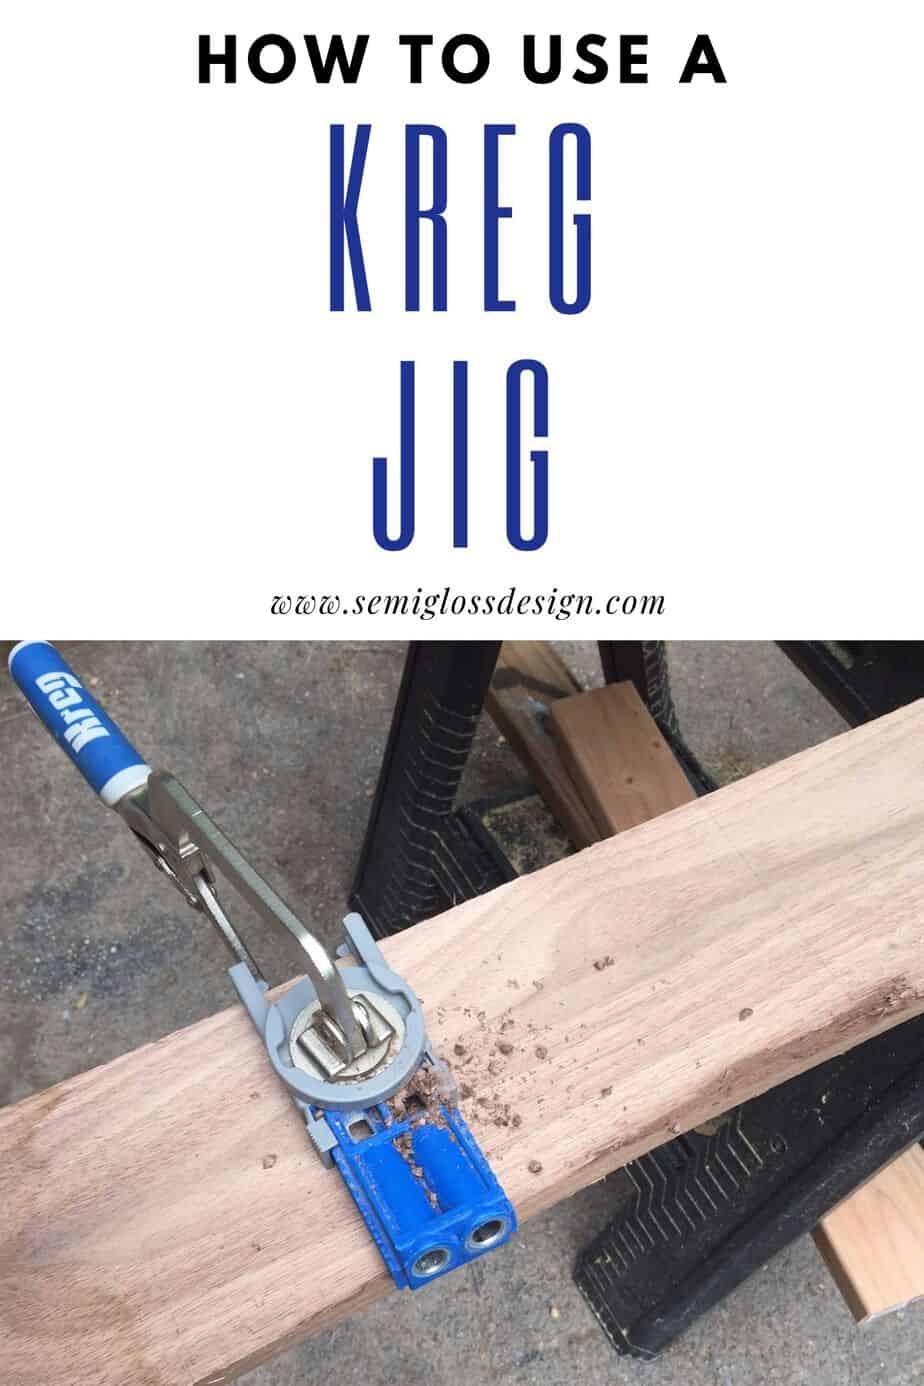
Clamp the jig in the right spot. For the countertop we were building, we placed it about 3″ from where we were going to cut it, and about every 6″ after that.
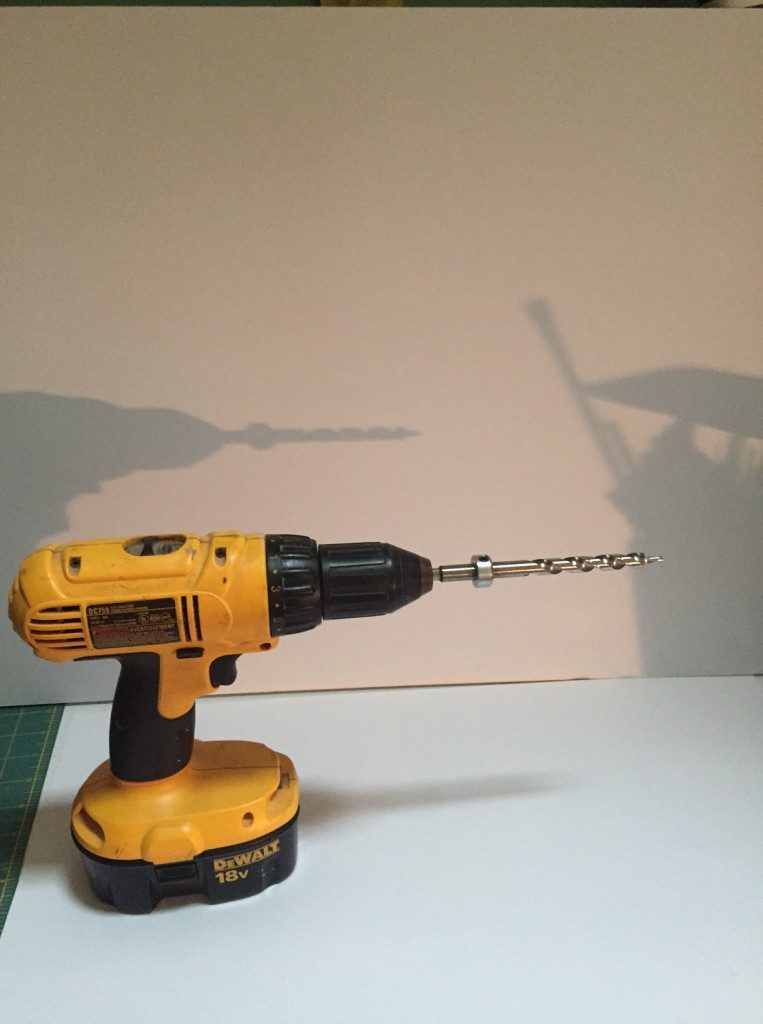
Attach the drill bit to your drill.
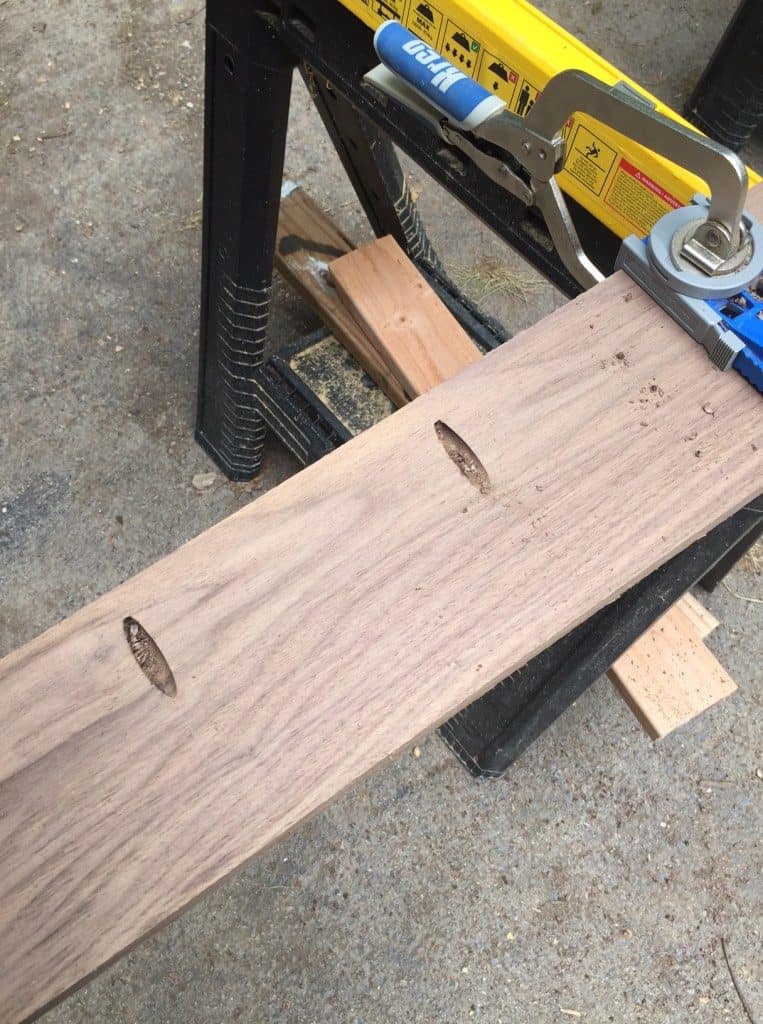
Drill the pocket holes using the jig. The jig has 2 holes, but I normally just choose one.
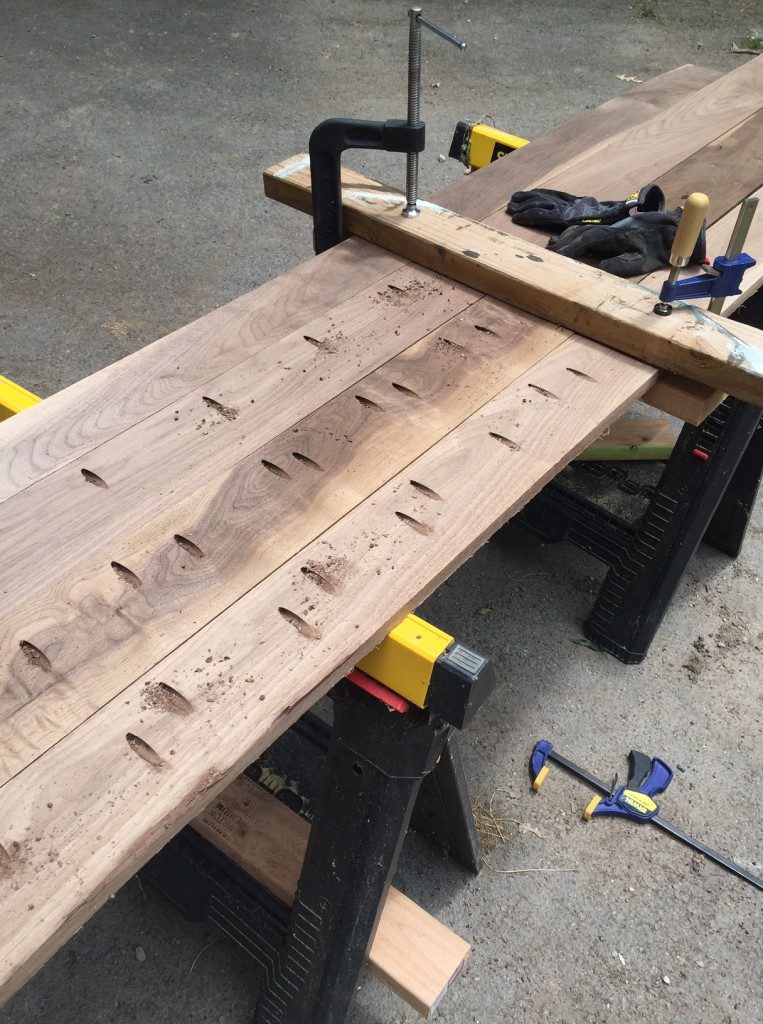
Repeat for all of your holes.
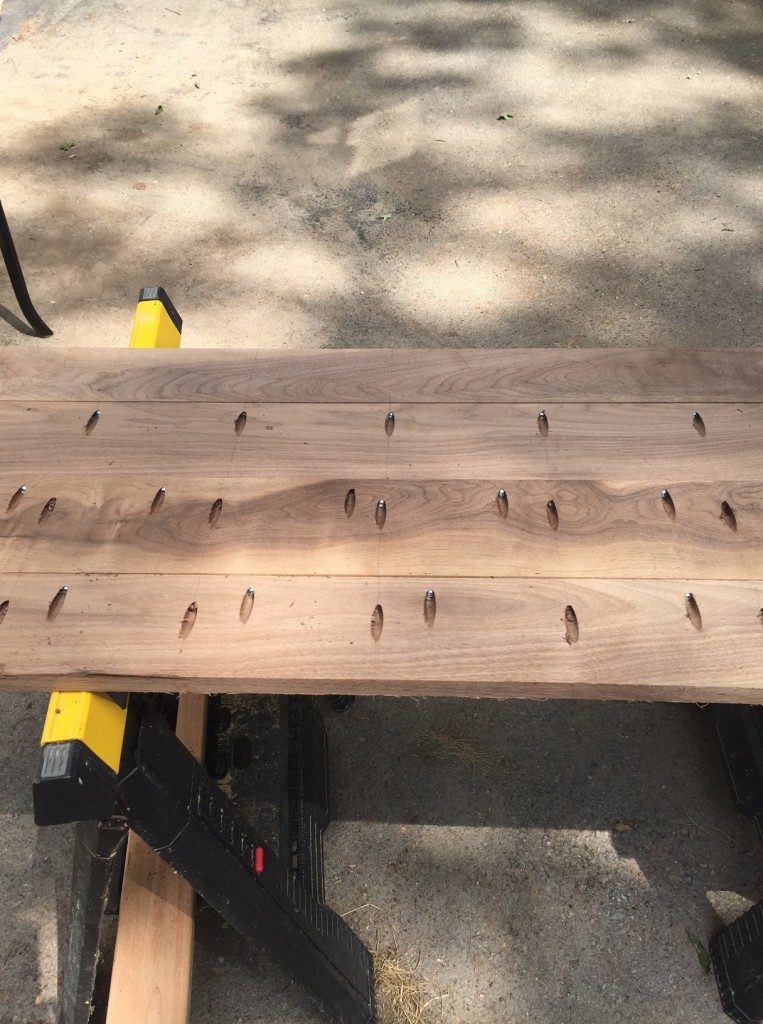
Screw the wood together. When you are finished drilling all of the holes, change the drill bit to the driver and screw in the right length of screws. The guide will tell you the right length. Be sure not to over-tighten because wood needs a little breathing room to expand. We used clamps to keep the wood nice and tight.
Repeat for the rest of your holes.
You can see where I messed up and set the kreg jig using the top as the guide instead of the arrow. The correct length of screws would have been too short at this setting. Longer screws would poke through the beautiful top. Luckily, it doesn’t matter what the underneath of a countertop looks like!
Using a kreg jig is much easier than I ever imagined and it makes DIY projects look more professional. Now that you know how to use a kreg jig, you’ll be making beautiful projects in no time!
Emy is a vintage obsessed mama of 2 DIYer who loves sharing affordable solutions for common home problems. You don’t need a giant budget to create a lovely home. Read more…
The article was very friendly to read! Bought a Kreg Jig today and was a little bit confused about its using process. Your detailed and easy information make it solved! Thanks Emy, for such helpful post! 🙂
I’m so glad my post helped you. The kreg jig seems so intimidating at first. 🙂
Thank you for this post. I was looking at my Kreg jig and reading the directions but was still a bit uncertain even after watching 3 or 4 youtube videos. Your explanation was the best!