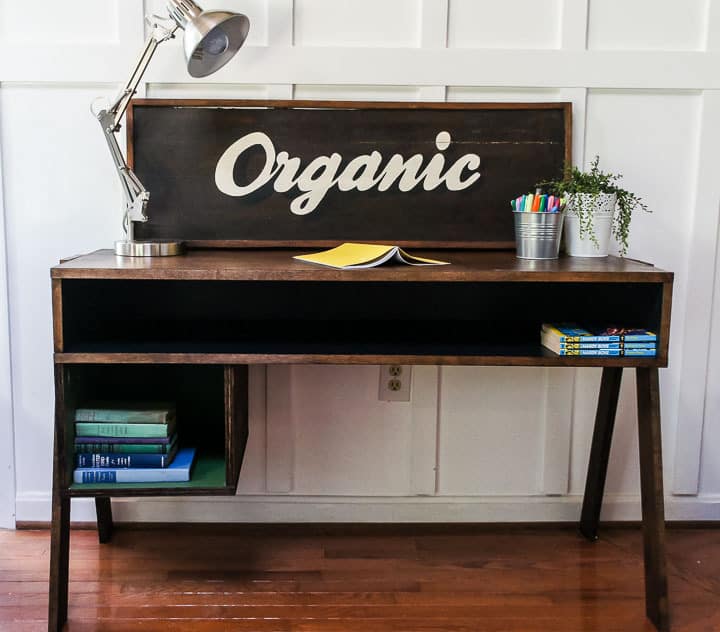
This simple desk is made from a sheet of plywood. This DIY desk features a midcentury modern design with cubbies for storage space. If you love vintage furniture, you will love this desk!
This easy to make desk is inspired by a vintage desk that I sold, much to my son’s chagrin. Luckily for him, I made him one that is (almost) just as cool.
It’s a tale as old as time. The shoemaker’s kids with no shoes. The furniture flipper’s kid with no desk. It just ain’t right. Particularly when said kid fell in love with a recent desk that I brought home and I sold it anyways.
Some moms are so mean.
In my defense, the desk he loved was far too large for his tiny room. I was very inspired by the MCM beauty and drew up plans to build him a simple version of that gorgeous desk.
Want to learn how to make your own simple desk from a sheet of plywood?
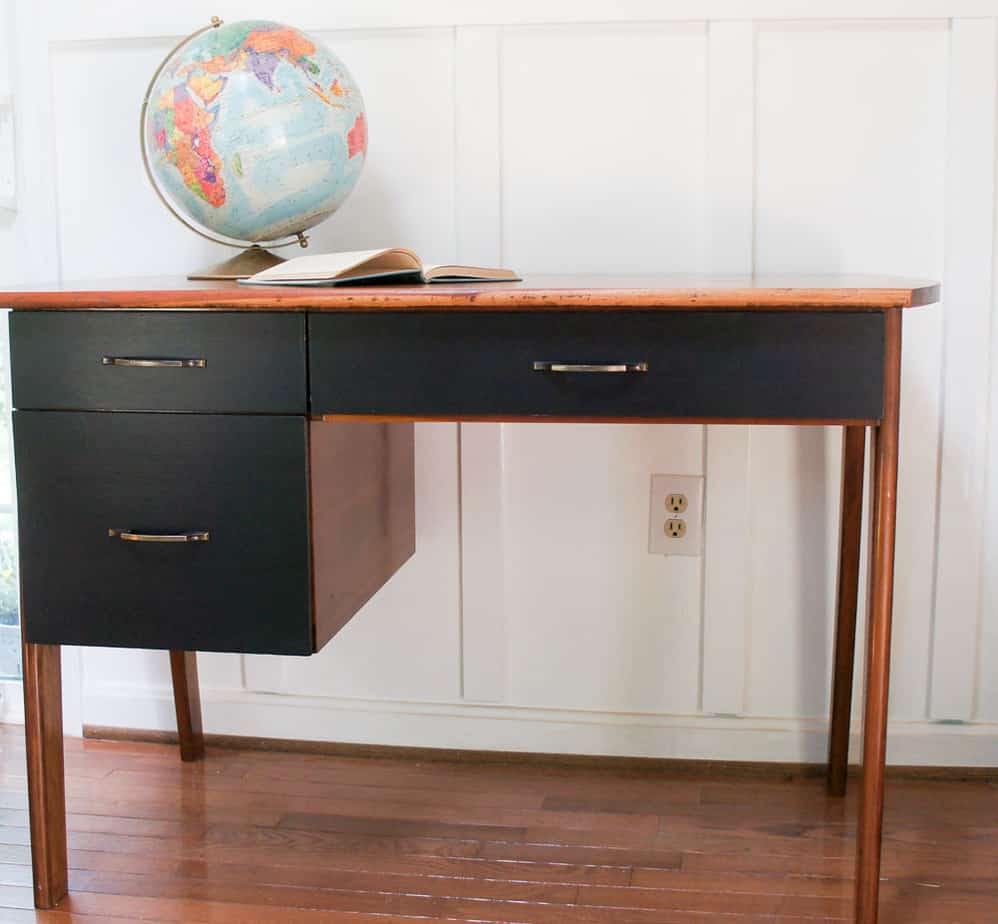
The Inspiration Desk
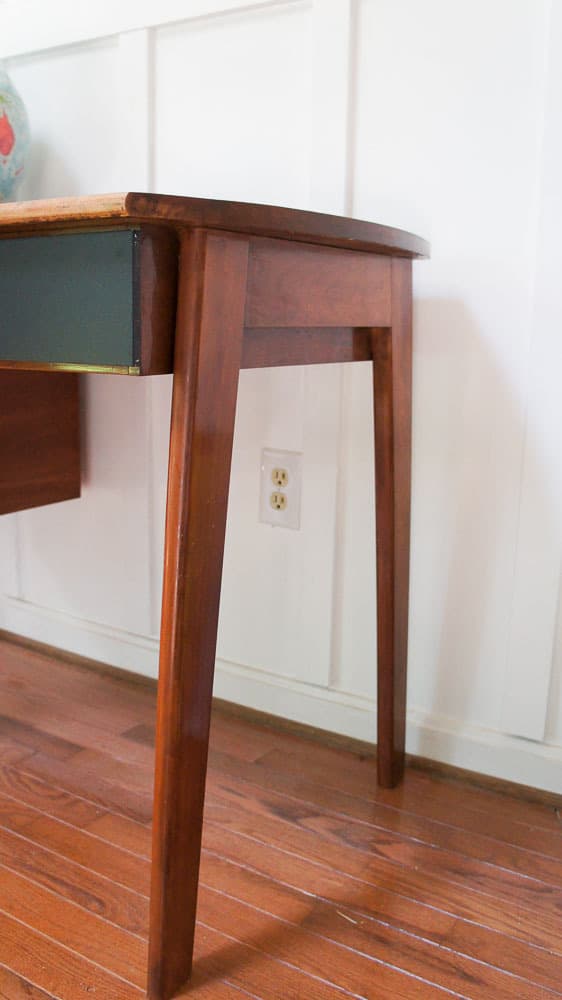
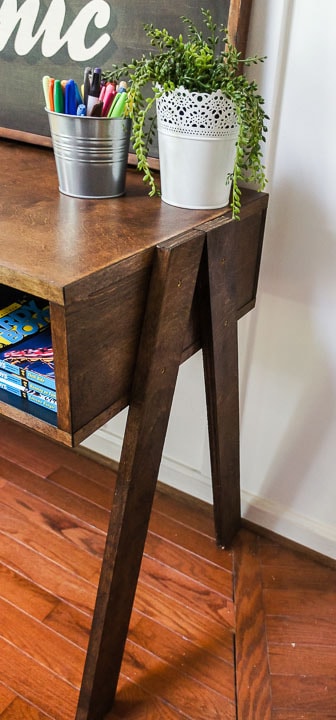
Look at dem legs.
MCM furniture makes me swoon. Look at those sleek lines.
My version is a pared down, simple version.
How to Make a Simple Desk
This post contains affiliate links. By purchasing an item through an affiliate link, I earn a small commission at no extra cost to you.
You can either get the nice people at the hardware store to cut your wood or you can cut it yourself at home. We chose to cut it ourselves at home since there were so many cuts. Note: if you don’t have a table saw, it’s still possible to cut your wood with a circular saw and a guide, which is how we do it.
Sand the edges to avoid splinters.
Separate your wood into cubby parts. I wanted the cubbies on the desk to be painted, so I primed the wood first. Each cubby is a different color, so I painted the pieces for the long skinny one in a dark navy (Clark and Kensington Nein Nein Nein – it’s a few years old) and the smaller cubby in my favorite shade of oops paint. It’s very similar to the Annie Sloan Amsterdam Green color though.
Once they were dry, I added pocket holes with a kreg jig to the top of the sides for the small cubby.
Now it’s time to assemble. Apply a thin line of glue along the back of the bottom piece.
Add the back to the desk and use corner clamps to line it up well. Use more clamps if necessary. Wipe away excess glue.
Once clamped, attach the desk with the pneumatic nail gun.
I created the smaller cubby at the same time using the same steps of gluing and nailing the back to the bottom piece.
Let the glue dry for at least 30 minutes before removing the clamps.
Attach the sides in the same way for each cubby, but nail from the sides as well. Make sure that the pocket holes in the small cubby face up.
Attach the desk top to the sides and back in the same manner. (The small cubby will not have a top.)
When everything is dry, add the plywood edging. It’s really easy to use and hides the plywood edges to make it look like a solid piece of wood. I found it easiest to roll it out to the right length and gently fold it at the edge where it needs to be cut to “mark” it. Then just cut it with scissors. Set the iron to “Cotton” (no steam) and just iron it in place, holding the iron in place for a few seconds until it stuck. You can use a towel or foil if you’re concerned about getting your iron dirty.
Now it’s time to stain the outside of the desk. Normally, I like to use wood conditioner, but I forgot. Luckily the plywood stained beautifully without it! I used Minwax Dark Walnut, but Special Walnut would have been lovely as well. Stain the legs while you’re doing this.
Attaching the Desk Cubbies and Legs
I left the bottom unstained so that I could stain in once it was installed. Flip the piece to where the bottom is exposed and set the cubby on it upside down.
Attach the cubby with the pocket holes.
Find the center on the side of the desk and mark it with chalk if you stained it dark. Then line up the legs and screw them in place with deck screws. Deck screws really pull wood together nicely, so they’re my favorite to use. Plus, they’re harder to strip.
Fill screw holes and pocket holes with wood filler if desired.
Touch up any stain that still needs to be stained.
Seal with a few coats of your favorite top coat. I used polycrylic applied with a sponge.
Flip over your desk and enjoy it.
I love the legs!
Now my kid has a simple desk of his own, just in time to start high school.
Emy is a vintage obsessed mama of 2 DIYer who loves sharing affordable solutions for common home problems. You don’t need a giant budget to create a lovely home. Read more…
I absolutely love this desk. Thank you so much for posting the instructions. Once I get my power tool skills down this desk will be one of my first projects!


I absolutely love this desk. Thank you so much for posting the instructions. Once I get my power tool skills down this desk will be one of my first projects!
Thanks!