The Easy Way to Create a DIY Weathered Wood Stain on Furniture
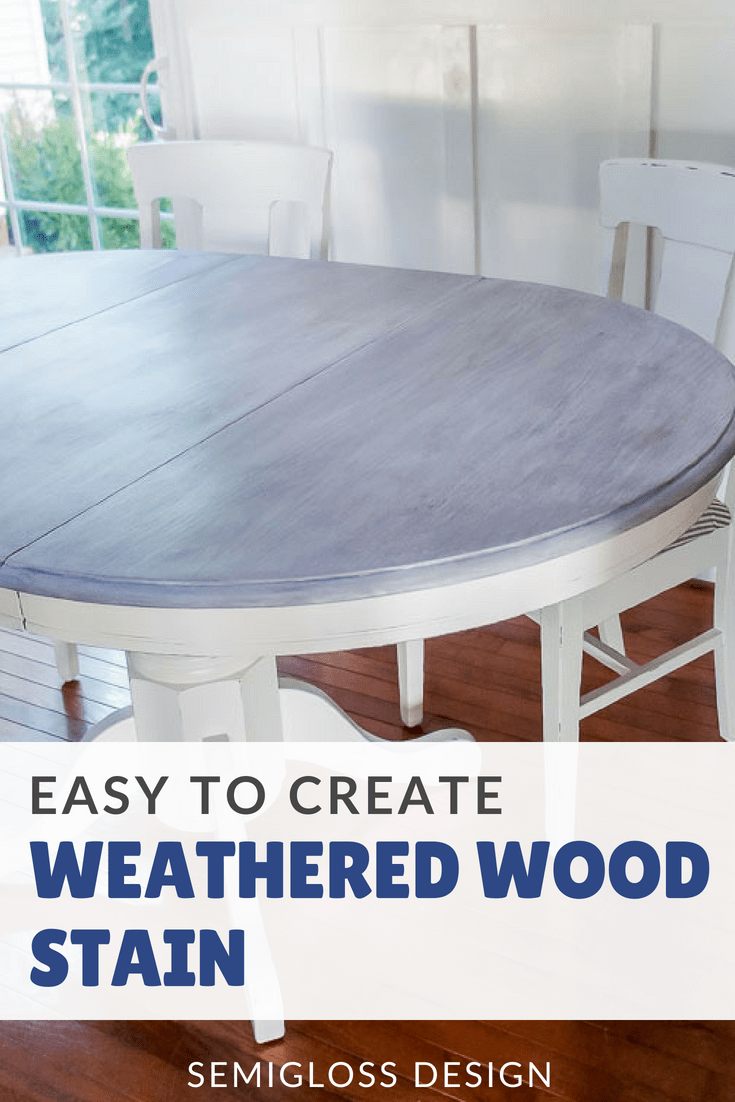
This weathered wood stain technique is so easy to recreate on furniture pieces. The softened gray wood stain is perfect for a beachy look or even a farmhouse look.
If you like furniture makeovers, you might like my ultimate guide to painting furniture.
I hate when I’m looking up directions for something and it requires special products. Even with 2 day shipping, I want it NOW.
When the mood strikes to create, I don’t want to spend my time hunting down specialty items or waiting for them to ship.
This weathered wood stain tutorial uses easy to find products that you might already have in your garage. And if not, they can be found in any hardware store.
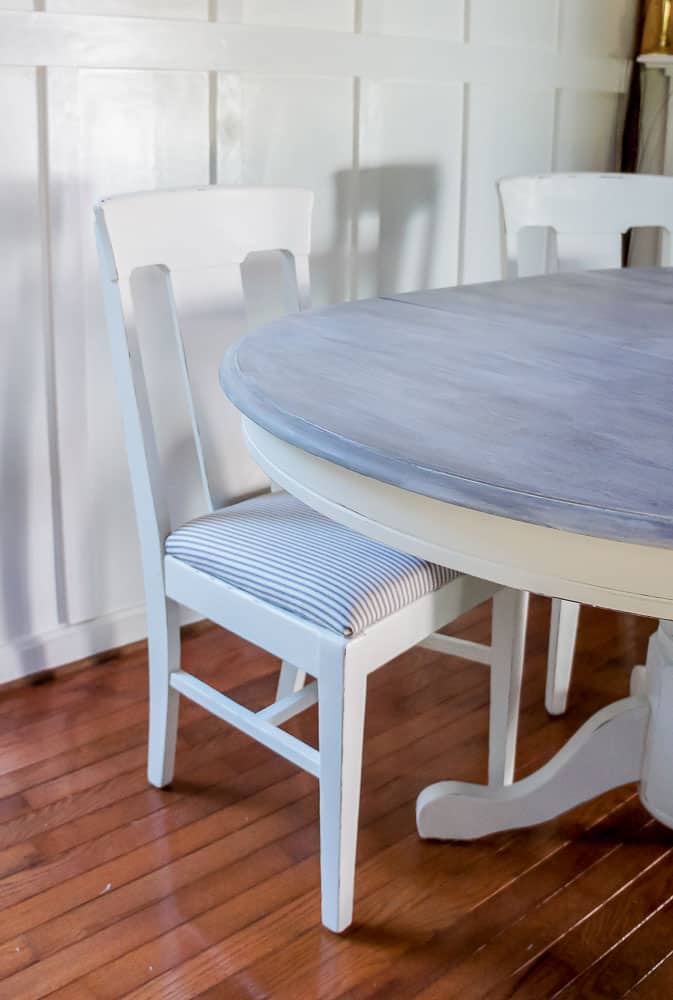
This driftwood inspired finish on this dining table is perfect for a coastal look.
DIY Weathered Wood Stain FAQs
What is weathered wood?
Weathered wood is wood that has been outside subjected to the weather for a long time. It results in a beautiful gray color.
However, leaving wood outside for long periods of time isn’t possible for most furniture. If I left this table outside for a few months, it would fall apart because the wood would warp.
And in reality, weathered wood can be pretty gross and dirty. We have a pile of lumber that has weathered naturally and it always needs to be cleaned and sanded to make it usable.
No one wants moldy wood, which is the reality of real weathered wood.
So making a weathered wood stain is desirable. This look is also known as a driftwood stain finish and is perfect for a beachy, farmhouse look.
Can you put a dark stain over a light stain?
If your wood is already finished, it has a topcoat that will not allow the stain to penetrate. It needs to be sanded, but I would suggest stripping the finish for the best results.
The only time dark stain works over lighter stain is if you use gel stain. This technique does NOT use gel stain.
Can you stain pine wood?
Yes, but I suggest using a wood conditioner for best results. Just paint it on and stain it within a few hours.
Pine has yellow undertones, so the finished results will slightly vary. You might need more coats of gray to combat the yellow.
How to Create a Weathered Wood Stain on Furniture
Supplies Needed
This post contains affiliate links. By purchasing an item through an affiliate link, I earn a small commission at no extra cost to you.
- Citristrip
- Mineral spirits
- Plastic scraper
- Orbital sander
- Sandpaper
- Minwax Stain Classic Gray
- Minwax Whitewash Pickling Stain*
- Foam Brush
- Polycrylic in Clear Satin
- Automotive detailing sponge
*Don’t have Minwax Whitewash? Water down some water paint and use that instead. It should work similarly since the Whitewash is water-based anyways.
Start with Raw Wood: Strip the Paint or Stain
If you’re using raw wood, skip the stripping step, but make sure that your wood is nice and smooth with sandpaper.
Even if you’re going for a rustic look, no one likes splinters.
- Strip the wood. I like citristrip. Just paint it on with a disposable brush and let it sit for about 20 minutes. You can apply plastic to the surface if it’s hot outside and the gel starts to dry out.
- If your wood is painted, it will start to bubble when it’s ready. Stained wood needs longer for it to penetrate the wood.*
- Use a plastic scraper to remove the layers of paint. Dispose of the paint in a box or bucket.
- Reapply the citristrip if necessary and repeat the scraping until it’s clean.
- Clean the citristrip with mineral spirits and a disposable rag.
- When it’s dry, you can sand to remove any leftover bits of paint or stain. Start with 80 grit sandpaper and work your way to 220 grit to make the surface smooth.
*Alternatively, you can also just sand. This works best for stained surfaces. Start with 80 grit sandpaper and work your way to 220, changing out the sandpaper as you go.
Read more about stripping paint from furniture.
Creating a Weathered Gray Wood Stain
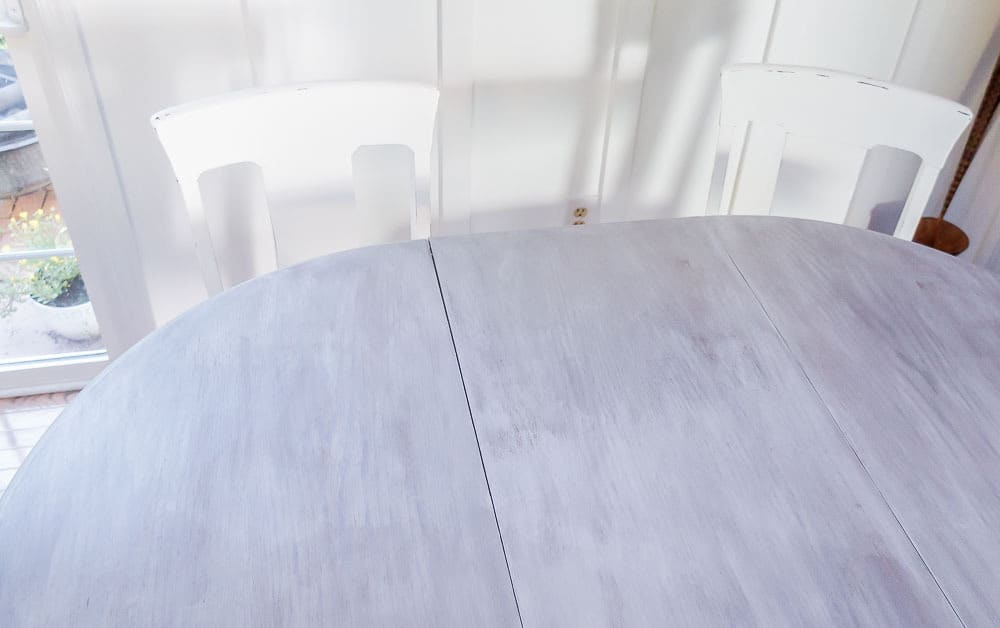
The key to this weathered furniture technique is layering colors of wood stain.
You can use as many layers as you want to get the desired effect. This also makes it harder to mess it up.
If you hate the results, add another wood stain layer and see how you feel.
Keep in mind that it looks better when you step away from it and look at it as a whole than up close.
You’re mimicking naturally weathered wood, so it will not be perfect. Any imperfections make it look more realistic.
How to Weather Wood
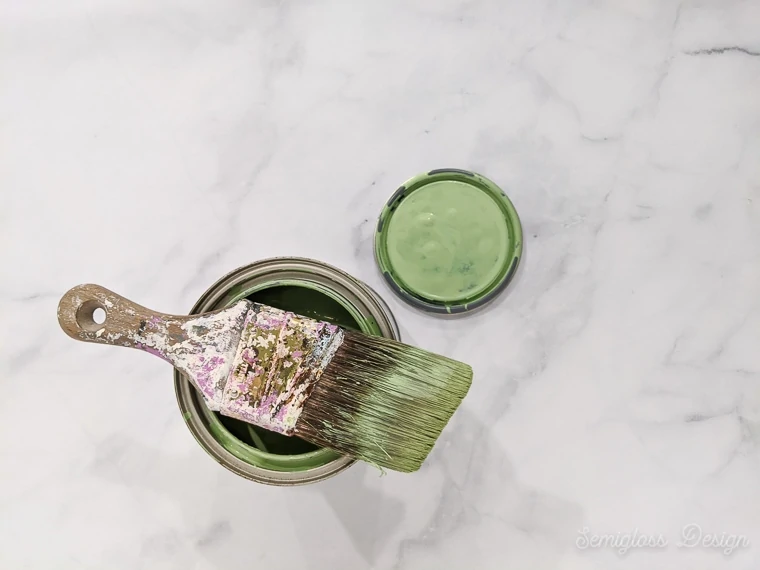
Apply the gray wood stain.
- Apply a coat of Minwax Classic Gray Stain using a foam brush. I worked in sections so that it didn’t dry too fast. Apply in the direction of the wood grain.

- When 1 section was coated in stain, it’s time to wipe it off with a rag. I like to use old t-shirts that I cut into squares. Remove as much excess stain as possible.
- Continue onto the next section and repeat until your wood is done. If you have places where the wood meets, it will stain darker if you overlap because stain is transparent.
- Let this coat dry.


Apply the white wash.
- Apply a coat of Minwax Whitewash. This stain is water based, so you have to work much faster, in smaller sections.
- Wipe off your first area.

- Apply the next section and be careful not to overlap.
- Wipe this area off, being careful not to overlap onto already stained areas. It will leave darker white marks.
- Continue until your wood is finished.


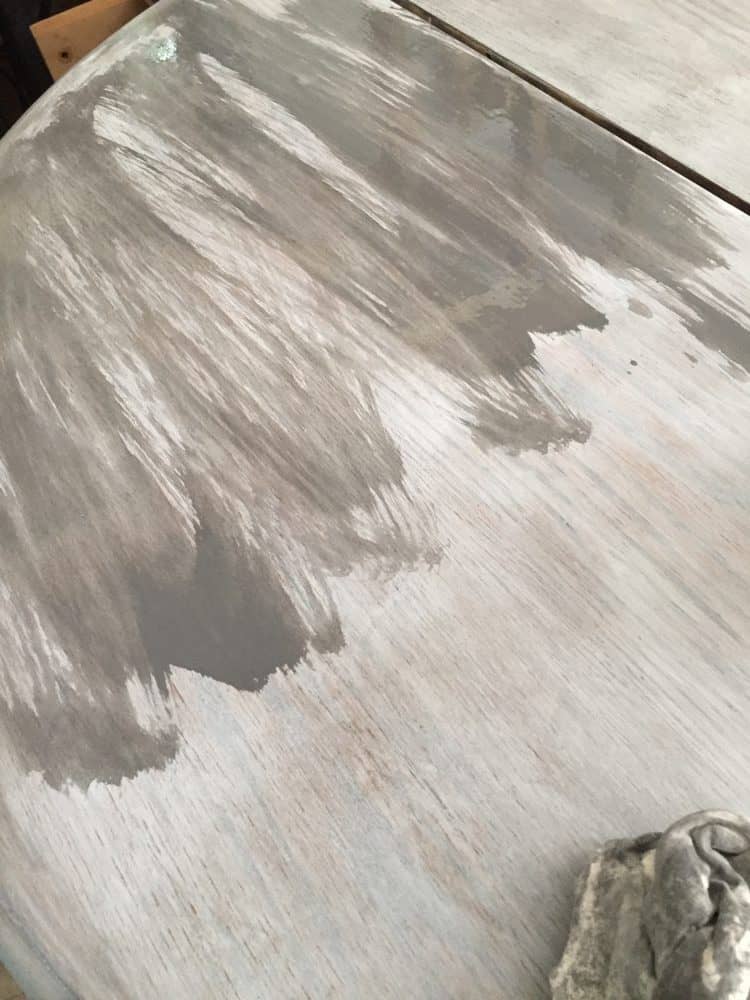
I hated the results, so I kept going with another coat of Minwax Classic Gray Stain. Wipe the gray stain away like before.
If you like it at this point, move on to the topcoat section.
If it needs more work, add another coat of stain. Gray makes it darker and white makes it lighter.
Let your final coat of stain dry overnight.
Apply the Top Coat
Apply a coat of polycrylic with an automotive sponge. Polycrylic will not yellow over time, so it’s my favorite top coat.
Wear gloves for this if you want. Just dip it in and wipe it on. It creates a smoother finish than a brush. Let it dry.
Repeat 3-4 times.
If you find that your finish feels bumpy, let it dry and sand it very lightly with 400 grit sandpaper. This will smooth it back out.
Add a few more coats of polycrylic.
Why use an automotive sponge for polycrylic?
It provided a much smoother application of polycrylic.
The coats are thin, so they dry fast.
No brush strokes!
You can use a foam brush to apply polycrylic, but I still find that the finish is uneven and streaky.
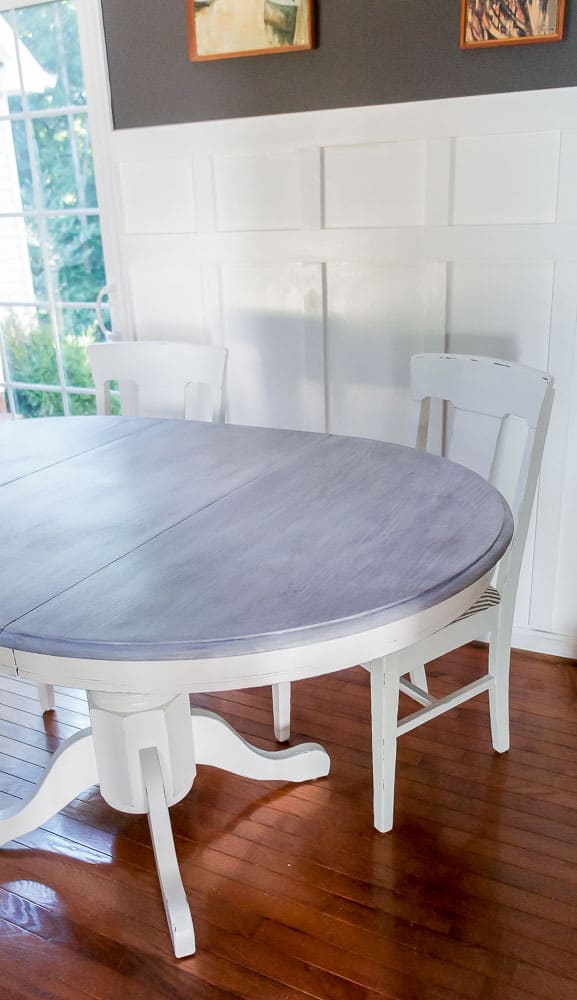
The base of this dining table was primed and painted with Valspar chalky paint in kid gloves, then lightly distressed.
Then it was finished with a few coats of polycrylic as well. The sponge method works very nicely on chairs.
Check out my tips for painting dark furniture white!
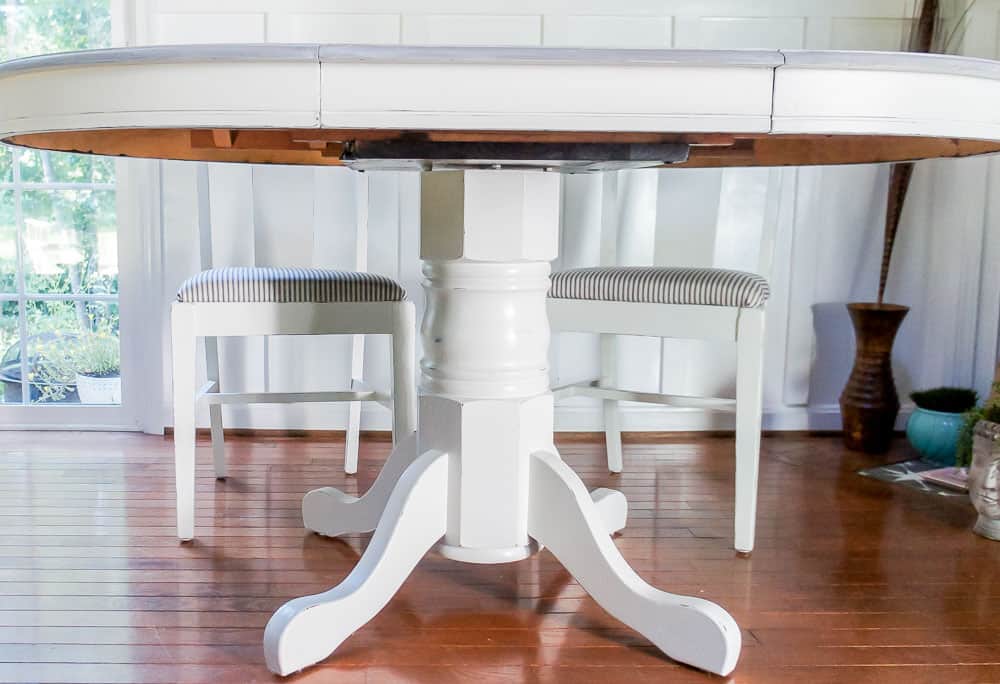
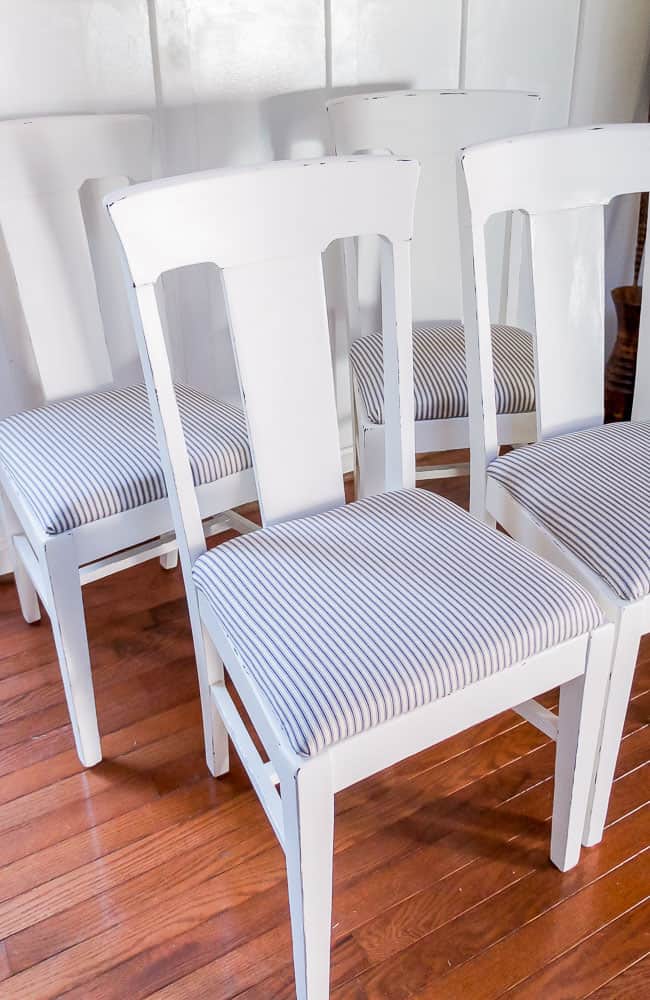
The chairs were reupholstered in classic ticking fabric for the perfect, beachy look that is perfect in almost any home.
This set isn’t my normal style, but it’s so classic that it could work nicely with almost any decor.
Change the accessories and chandelier for different looks.
I love the weathered grey wood stain!
Check out my other furniture makeovers here!
You might also like:
- How to Distress Furniture
- How to Refinish a Table
- How to Paint Furniture White
- Tips for Using Dark Wax on Furniture
Pin for Later!

Emy is a vintage obsessed mama of 2 DIYer who loves sharing affordable solutions for common home problems. You don’t need a giant budget to create a lovely home. Read more…
I love this! I’ve been looking for ideas for my kitchen table. I’m looking for a more refined look, so I would be doing less weathering and distressing. My table is maple, would you recommend wood conditioner?
Maple is harder to stain than most woods. Use a wood conditioner, but you might want to consider using a gel stain instead of a normal stain. Maple can be splotchy when it’s stained, so the thicker, more opaque stains hide the unevenness better.