Easy Tips to Refinish a Table
Learn how to refinish a table. This old console table had seen better days, but with a little bit of elbow grease, I was able to transform it.

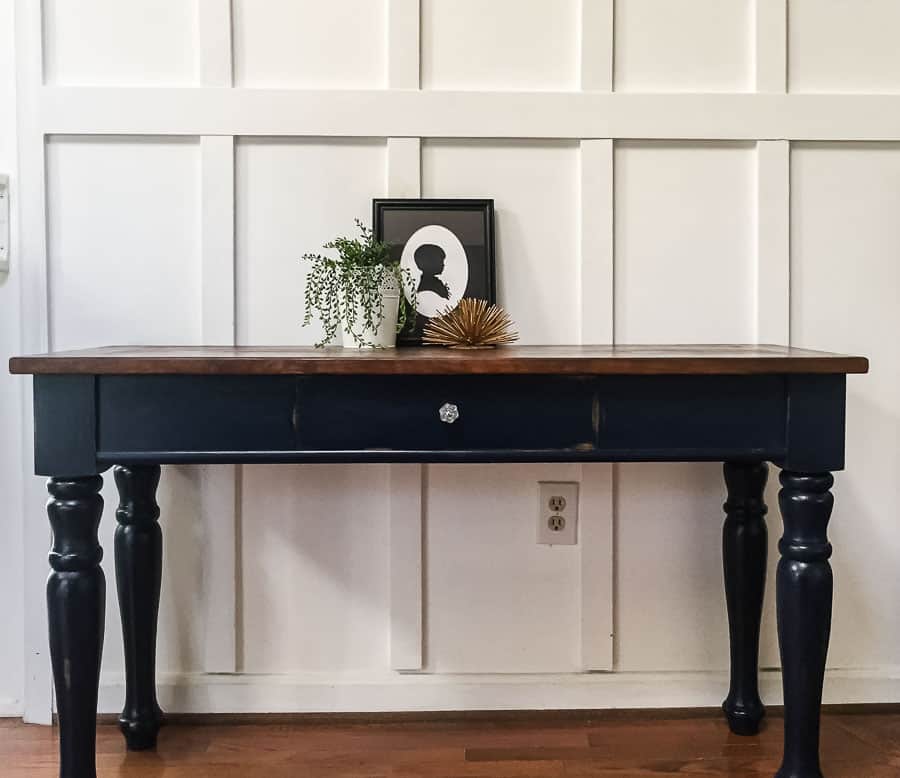
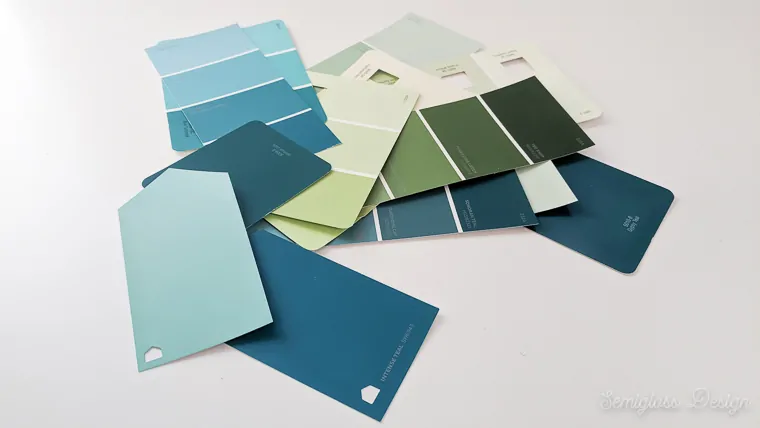
Stain is one of my favorite ways to give furniture a new look. For instance, this driftwood stain completely changed the look of this table! When I bought this console table, I knew that it had potential, but it turned out even better than I hoped.
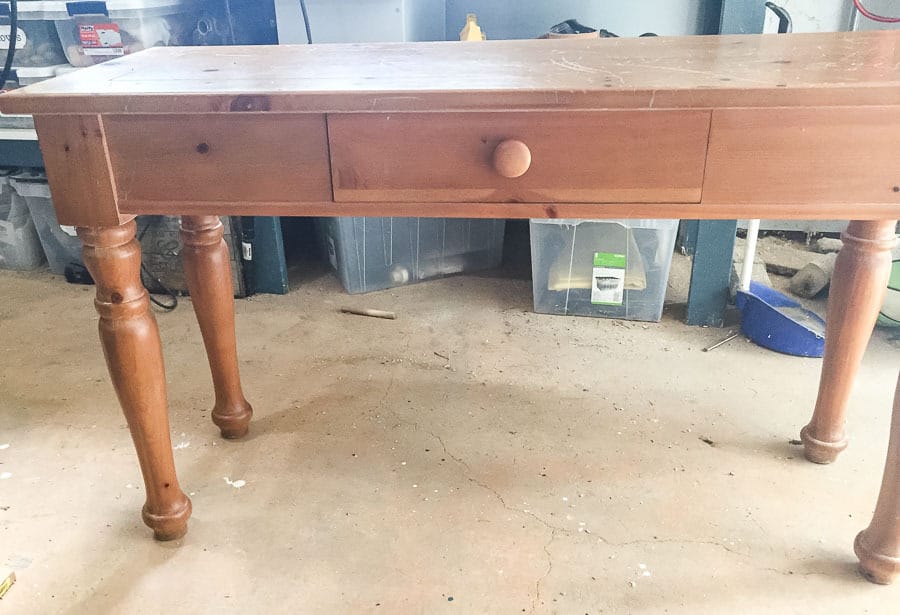
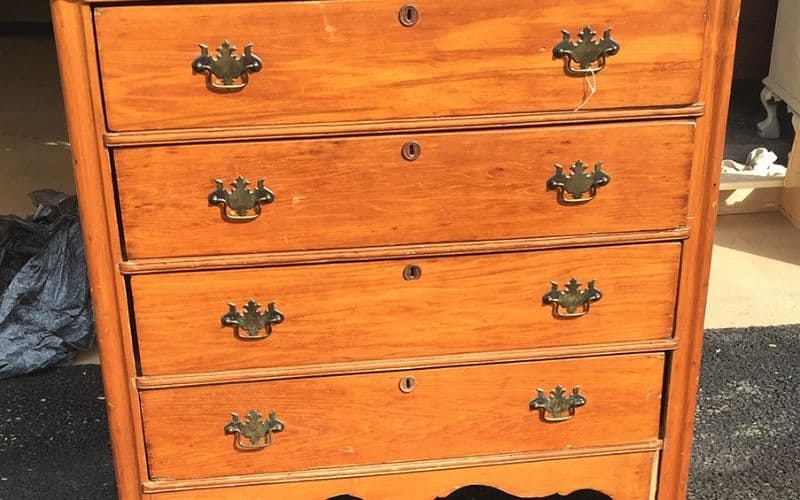
Here’s the before shot of the table.
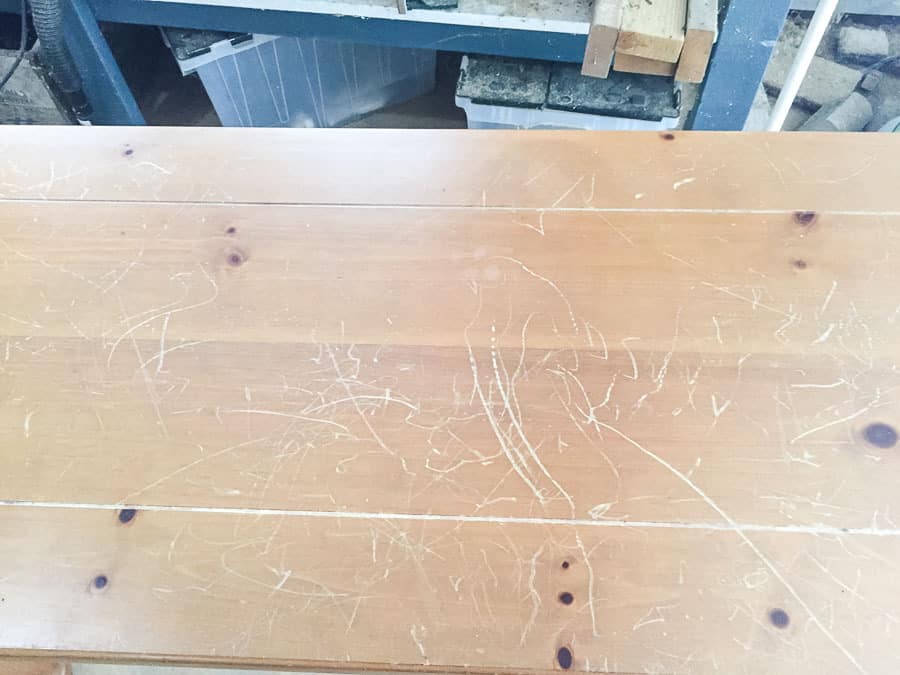
The tabletop had seen better days, with large gouges in it. Initially, I had plans to paint the whole thing, but when I started sanding, the gouges smoothed out so nicely that I decided the refinish the top instead.
How to Restain a Table Top
Supplies Needed
This post contains affiliate links. By purchasing an item through an affiliate link, I earn a small commission at no extra cost to you.
- Sander
- Sand paper in several grits (80, 120, and 220)
- Gel stain (Antique Walnut)
- Paint brush
- Polycrylic (clear matte)
Sanding isn’t dangerous, but it can be messy. Wear a mask and eye protection if dust bothers you. Wear gloves if your tabletop is large. Gloves help protect your hands from getting sore.
Removing the Old Stain from the Tabletop
If you’re removing old stain, step away from the stripper. Sanding the tabletop is much easier (and less messy) than using stripper.
A good sander will strip the finish in no time at all. I highly recommend the Dewalt sander. It’s powerful and can eat right through old paint and stain. Plus, the dust catcher actually works, so this sander makes less of a mess than other sanders.
You might also like this post on how to strip paint from furniture.
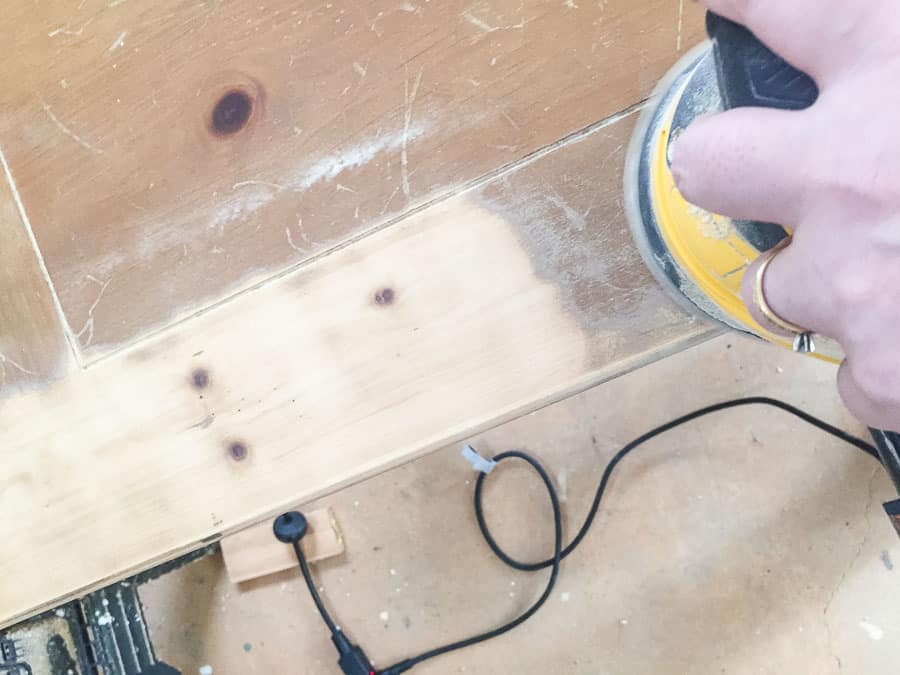
- Start sanding with 80-grit sandpaper. I find it goes faster if I put a little extra pressure on one side. Pay more attention to the areas with gouges. Try to smooth them out with the sander.

- A large tabletop can feel intimidating, so I break the area up into smaller sections and work from there.
- Don’t forget about the sides. The edges on this table are softly rounded, which are really easy to sand. For more detailed edges, you’ll want to use a Dremel.
- Once your entire piece is sanded, go back and sand the tabletop with 120 grit. Rub your hand over the wood and feel for any rough spots. Rough spots take the stain differently and won’t feel as nice.
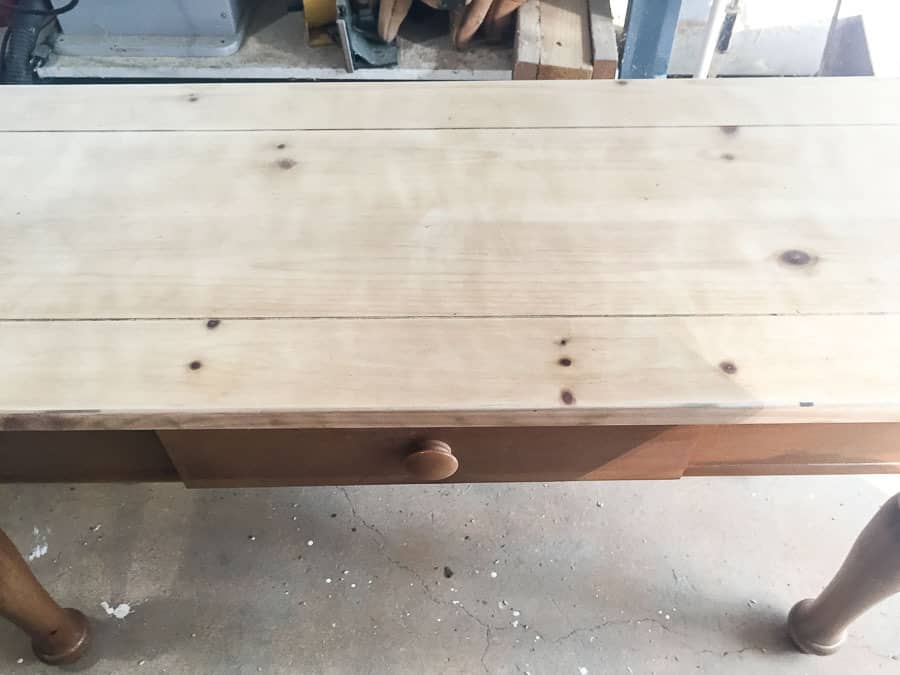
- Finish the entire top with 220-grit sandpaper. Your table should feel silky smooth when you’re finished with it. It’s kind of a pain to sand it 3 times, but your tabletop will look and feel much prettier with the extra prep work.
Applying the New Stain
- After sanding, clean the entire table. Start by brushing the visible dust off and then clean the table with a wet rag to remove any lingering dust.
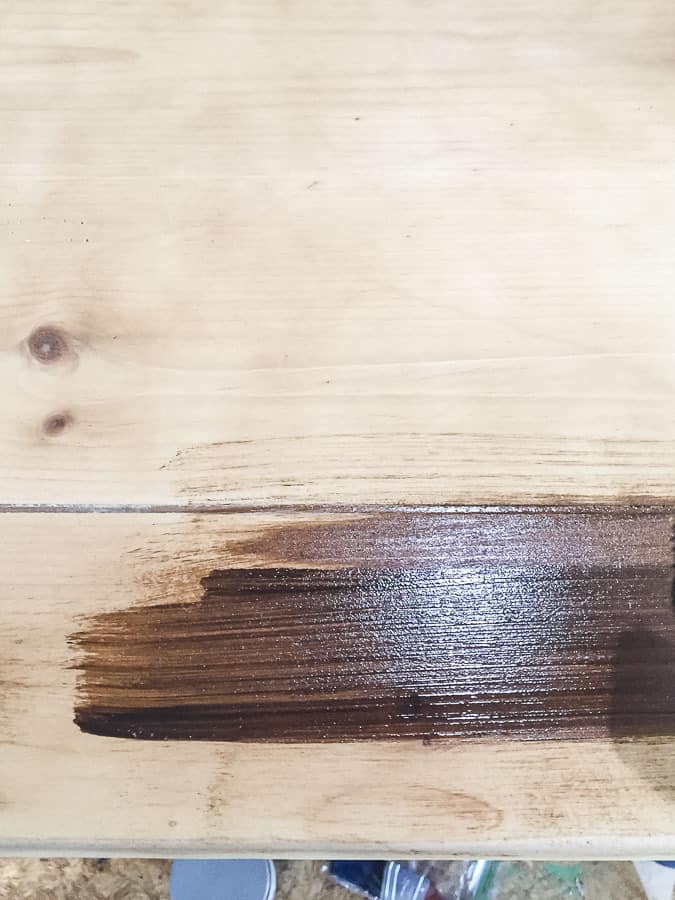
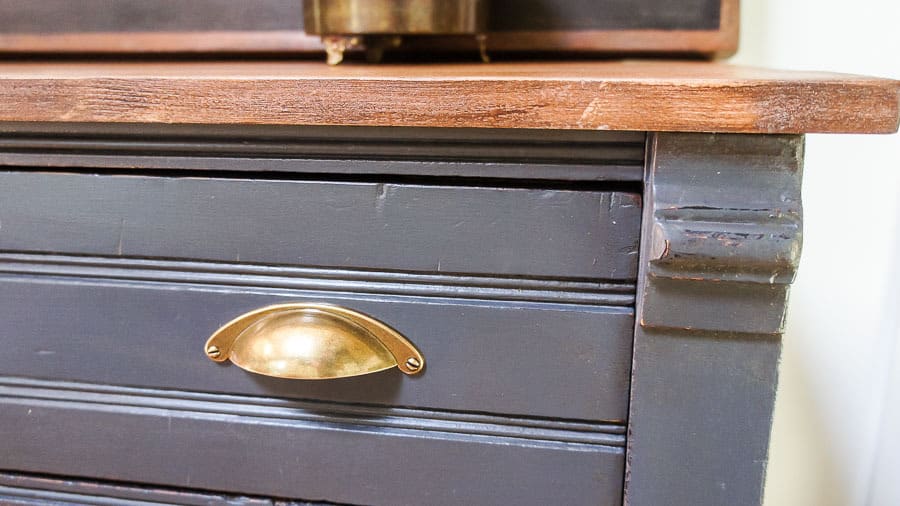
- Once the table is dry, you can apply the gel stain. As you’re brushing it on, use the brush to distribute the gel stain to other parts of the wood. Use long strokes to minimize the stopping and starting points. You’re basically painting the gel stain on, so avoid large pools of the stain. If needed, use a dry brush to remove excess stain.

- Apply stain in this manner to the entire table. Don’t forget the sides!
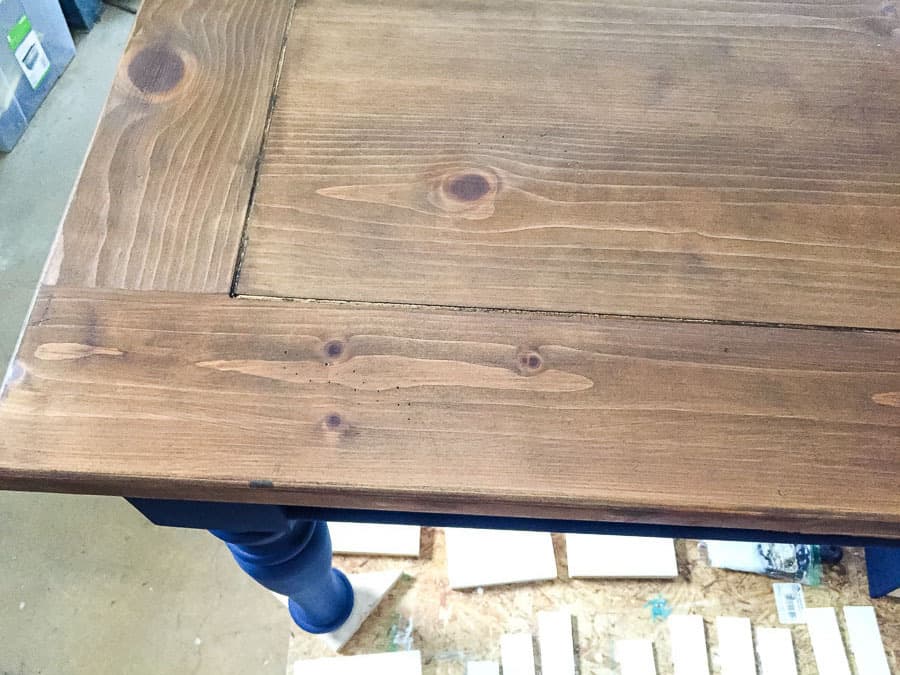
- Let it dry for a day and apply another coat if desired. With gel stain, the first coat is pretty translucent. The 2nd coat goes on more opaque, but it really makes the color rich. Let dry for another day.
*If you want to use oil-based stain, use a foam brush to apply a wood conditioner to the wood first. The stain must be applied within one hour of this step. After about 15 minutes, apply the stain with a foam brush. Remove any excess with a clean, lint-free rag. Let it dry for a day and reapply as needed.
Applying the Top Coat
- When the stain is dry, brush on a thin coat of polycrylic. I like polycrylic because it’s water-based and easier to clean up. It doesn’t yellow over light surfaces. But most importantly, it’s one of the few top coats that can be used in high humidity without turning into a big, goopy mess. If your polycrylic is turning into a goopy mess, it has gotten too thick. It’s probably time for a new can. (Buy smaller cans for this reason.)
- After the first coat is dry, lightly sand the surface by hand with 400 grit sand paper. Even after all of that sanding, the top coat stage tends to bring up the grain of the wood. Lightly sanding it will smooth it out and ensure that your top coat is silky smooth.
- Apply another coat.
- If it’s a high-traffic surface, such as a dining room table, apply one to two additional coats after this. Sand between coats if needed.
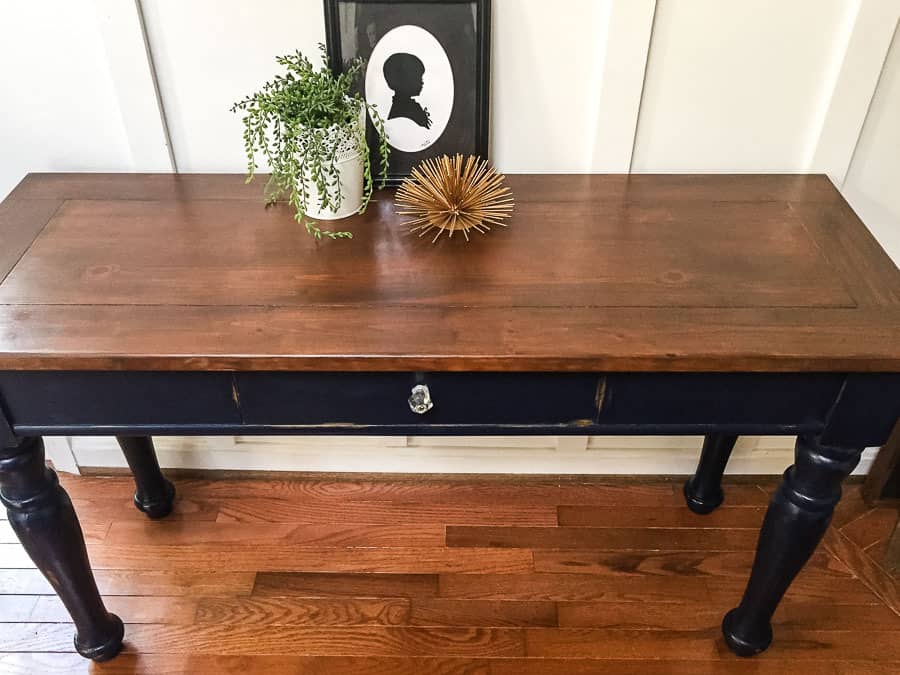
The body of this table is painted in Country Chic Peacoat, which is the perfect navy blue. It’s a dark navy. Want to learn how I distressed this console table?
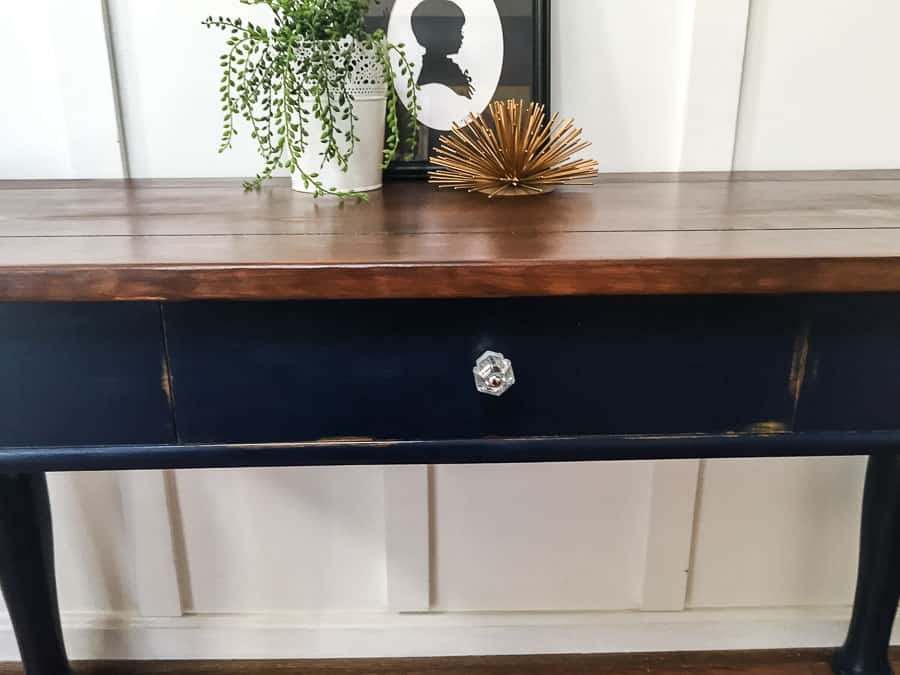
I love how the stain looks with the navy paint.
You might also like:
Pin for Later!


Emy is a vintage obsessed mama of 2 DIYer who loves sharing affordable solutions for common home problems. You don’t need a giant budget to create a lovely home. Read more…


I have a table I want to refinish and mine has a groove cut into it like this console. Do you think the orbital sander could sand this groove out and leave just a smooth looking top? Or am I asking for trouble here? This is my first refinishing! Thanks!
It would take forever to sand the groove with an orbital sander. A belt sander would be much quicker. Our belt sander is broken, so sometimes I try to use the orbital sander like one to smooth uneven planks. It never does the job 100% and it takes forever.
Maybe consider adding a new piece of wood to the top instead. Hope that helps!
Thanks so much for answering. That does help me to plan what I need to do.