Tricks and Tips When Using Dark Wax for Antiquing Furniture
Learn how to use dark wax for antiquing furniture. Get easy tips for using antiquing wax on furniture without overdoing it.
You might also like this post on getting a smooth finish with polycrylic.

This post contains affiliate links. By purchasing an item through an affiliate link, I earn a small commission at no extra cost to you.
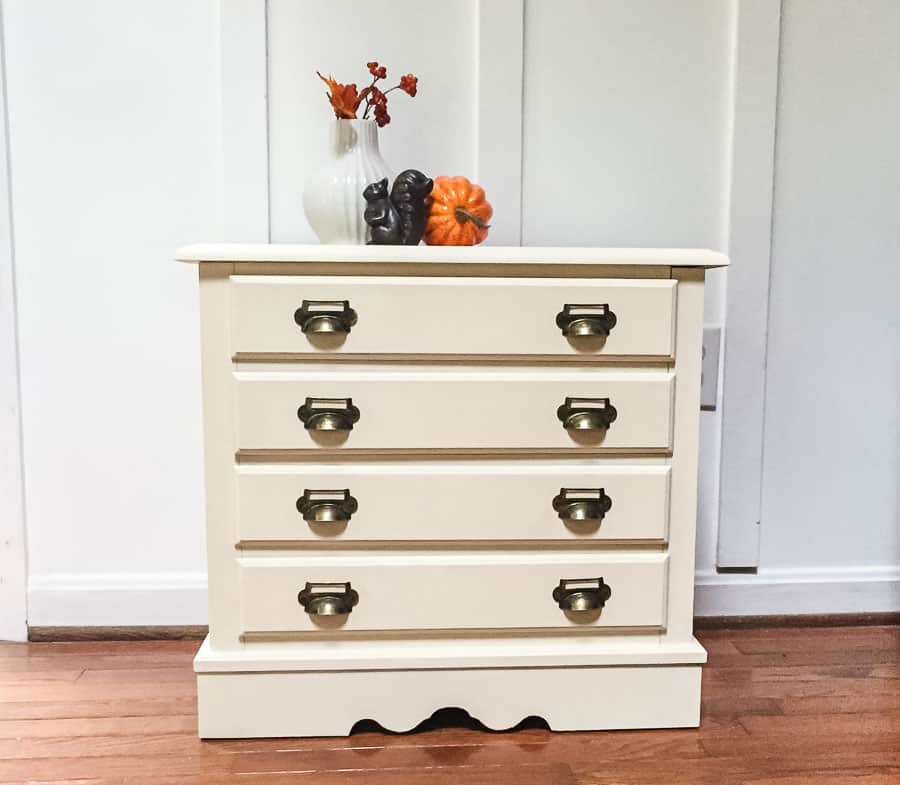
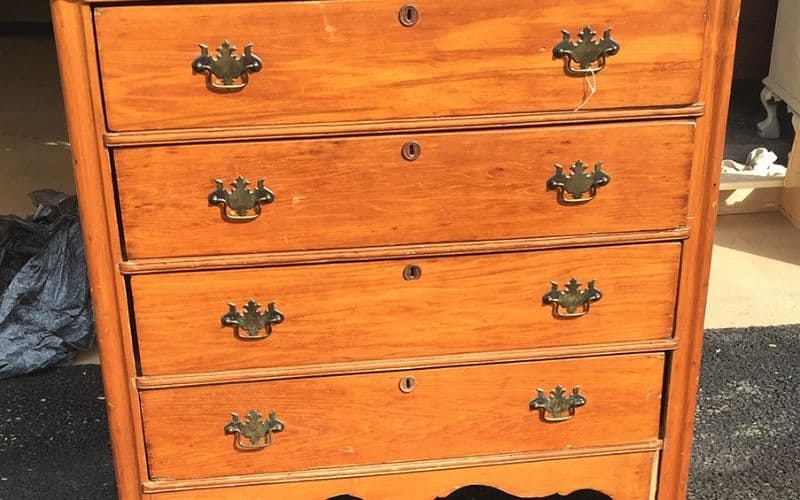
I have an Eastlake dresser with the prettiest details. After months of it not selling, I decided to give it a small makeover.
I wanted to make the details stand out, so I decided that the dresser needed to be distressed and antiqued.
Here’s how it looked before I gave it a small makeover. The top was whitewashed.

How to Use Dark Wax for Antiquing Furniture
SUPPLIES NEEDED
- Start with a painted piece of furniture. This dresser was painted with General Finishes in Queenstown Gray, but wax works well over chalk paints as well.
I lightly distressed the dresser edges using sandpaper in places where normal wear would occur, like protruding trim and edges. - Use a dime sized amount of the clear wax onto the dresser.

- Apply with a chip brush (I used the wrong brush – use an inexpensive chip brush instead!)
Brush the wax over the entire piece. Apply more as needed, but err on the side of less wax. This wax is so nice to work with. It spreads easily. - Let dry for about 30 minutes.
- Apply the dark wax over the surfaces that you just waxed with light wax. (If you apply dark wax without the lighter wax first, the dark wax gets into the paint too much and is harder to work with.)
- Brush on in the same manner. Pay special attention to areas that would naturally look darker with age or wear on it’s own.
For the drawers, I applied dark wax in the trim areas and around the edges.
On the body of the dresser, I paid attention to detailed trim and places where the trim meets.
- In some places, I pounced the brush to create a more textured look.

- Let dry for about 30 minutes. The wax should feel a bit sticky.
- Buff with a clean lint free rag. I like to buff in a circular motion.


The effect is subtly aged, without looking dirty.
Tips for Working with Dark Wax for Antiquing

- Don’t skip the light wax as the first step. Dark wax will stain the paint and be harder to remove if you hate the results.
- Less is more. I have the same approach to distressing. When you apply too much wax, it just looks dirty, instead of old.
- If you apply too much wax, it can be removed by applying light wax and buffing it off. If you still hate it, use mineral spirits or furniture cleaner to thin the wax.
- Keep your dark and light wax chip brushes separates. Label them “dark” and “light”. I like to store mine in zip lock baggies when not in use. This keeps the dust off of the wax.
- Too subtle? Add another coat of dark wax.
Using Gel Stain on the Dresser Top
This dresser also received a coat of gel stain in Antique Walnut. Since the top had a top coat on it, I lightly sanded it before I applied gel stain to the wood using a foam brush.
Check out this post about how to refinish a table top!


I used a clean lint-free rag to rub my stain in. This results in a lighter color that I love with the existing gray paint. I repeated this twice, allowing each coat to dry. I love how it built up the color.
The stain looks so pretty with the gray!

After it dried, I applied 3 thin coats of polycrylic sealer.

The change is subtle on a darker color, but you can see it in any cracks and crevices on the piece. I love how it turned out.

You might also like:
Pin for Later!

Emy is a vintage obsessed mama of 2 DIYer who loves sharing affordable solutions for common home problems. You don’t need a giant budget to create a lovely home. Read more…