
How to Print on Anything
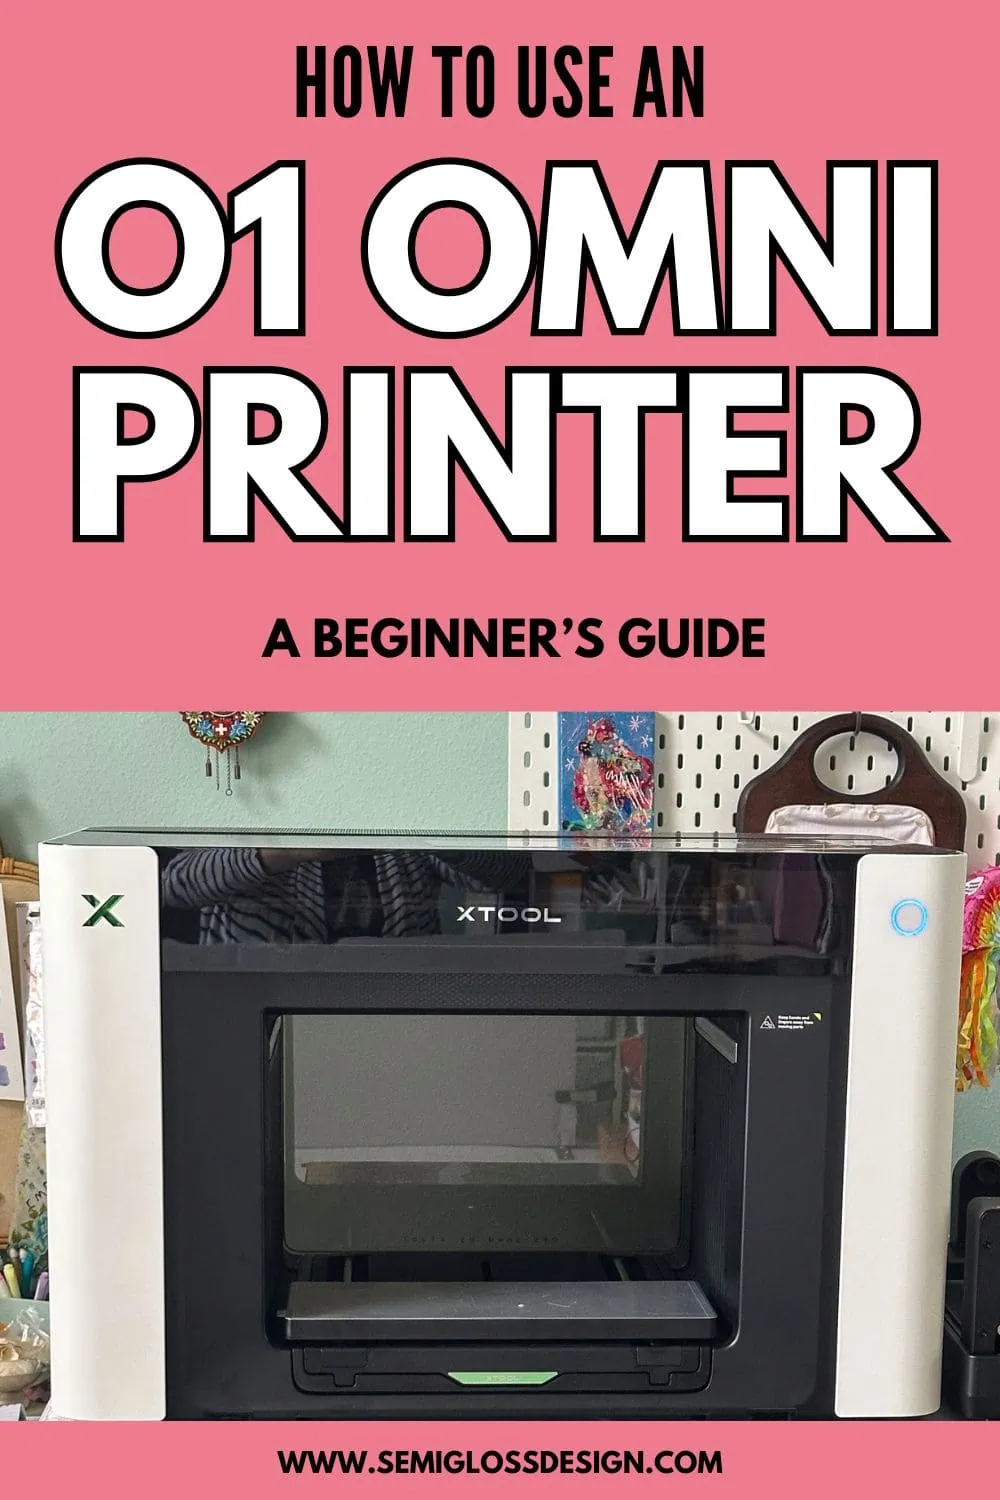
Learn how to print on anything using the xTool O1 Omni UV and DTF printer. This printer makes it so easy to create beautiful, professional-looking products from home.
This is a sponsored post. xTool provided me with the O1 Omni Printer and accessories. All opinions are my own.
This post contains affiliate links. By purchasing an item through an affiliate link, I earn a small commission at no extra cost to you. As an Amazon Associate I earn from qualifying purchases.
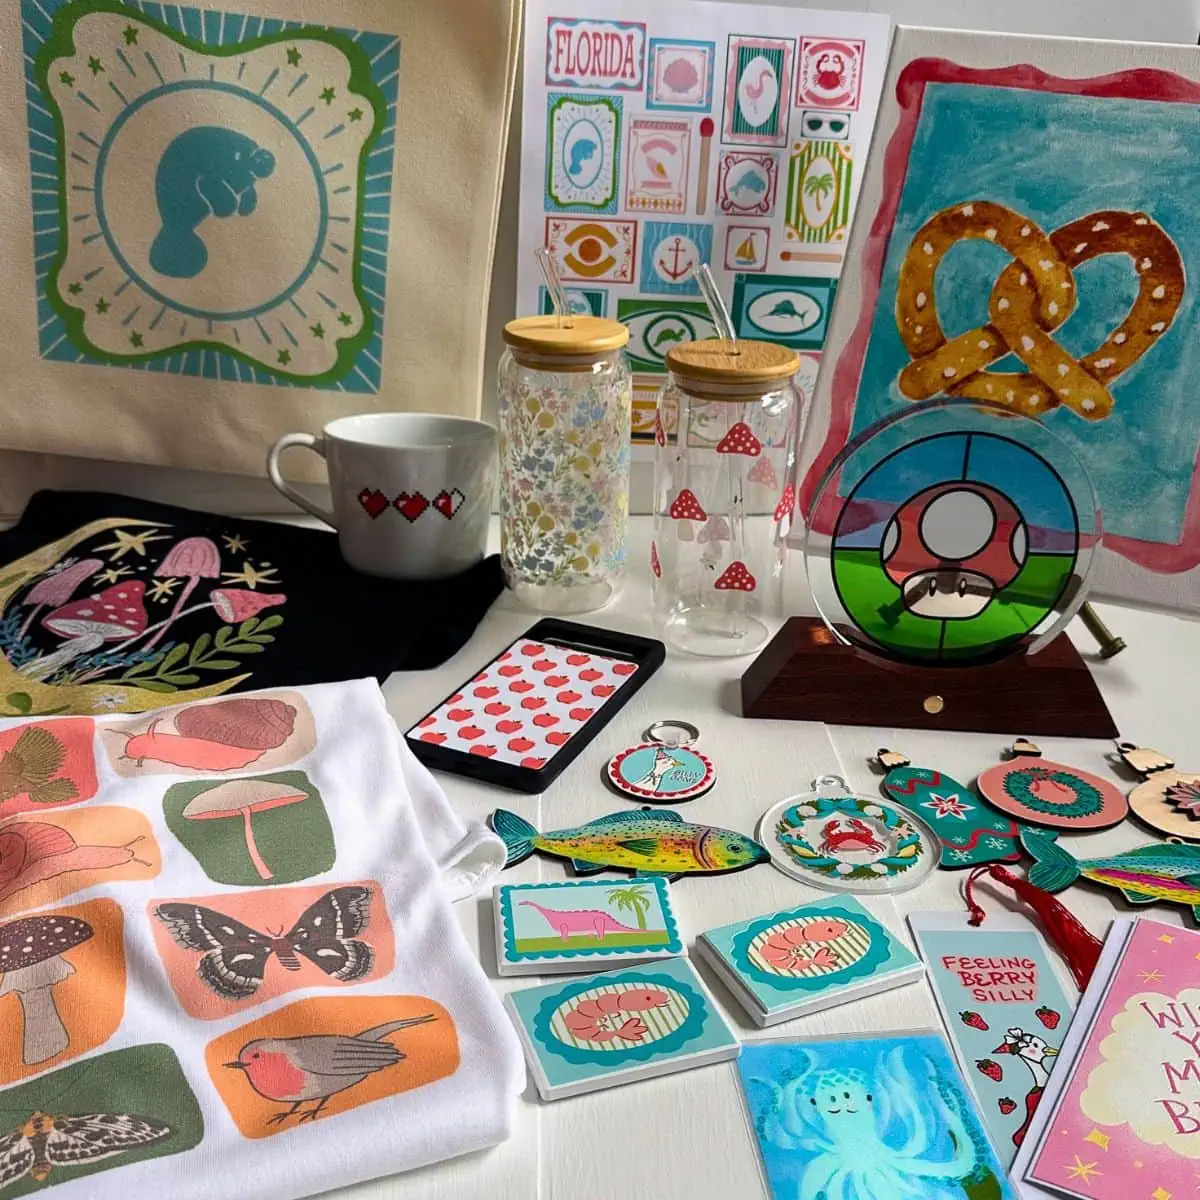
I’ve spent the last couple of weeks playing with the xTool O1 Omni printer, and I am having so much fun printing on everything. It’s truly possible to print on almost anything.
Besides being a blogger, I’m an artist who is just starting to make products to sell. So far, I’ve dabbled with print-on-demand and selling the original versions.
I love that the xTool O1 Omni printer gives me a bit more control and scalability. For me, this printer is a game-changer. Seeing my art on products has been so rewarding and encouraging. It lets me make my own products to sell and take a more hands-on approach than POD allows.
Every time I print something, I run around the house showing everyone how cute it is. I’m sure my family is getting annoyed by now, so now I get to tell you how cute everything I’ve made is.
Even if you don’t want to sell products, this printer is great for making gifts. Everyone I know is receiving something printed this year. And just think about all of the ornaments I can make!
Enough about me. Let’s talk about the xTool O1 Omni Printer.
This is not a review yet. I want to use the O1 to print more items before I write a comprehensive review. Spoiler alert, though: I’m loving this machine.
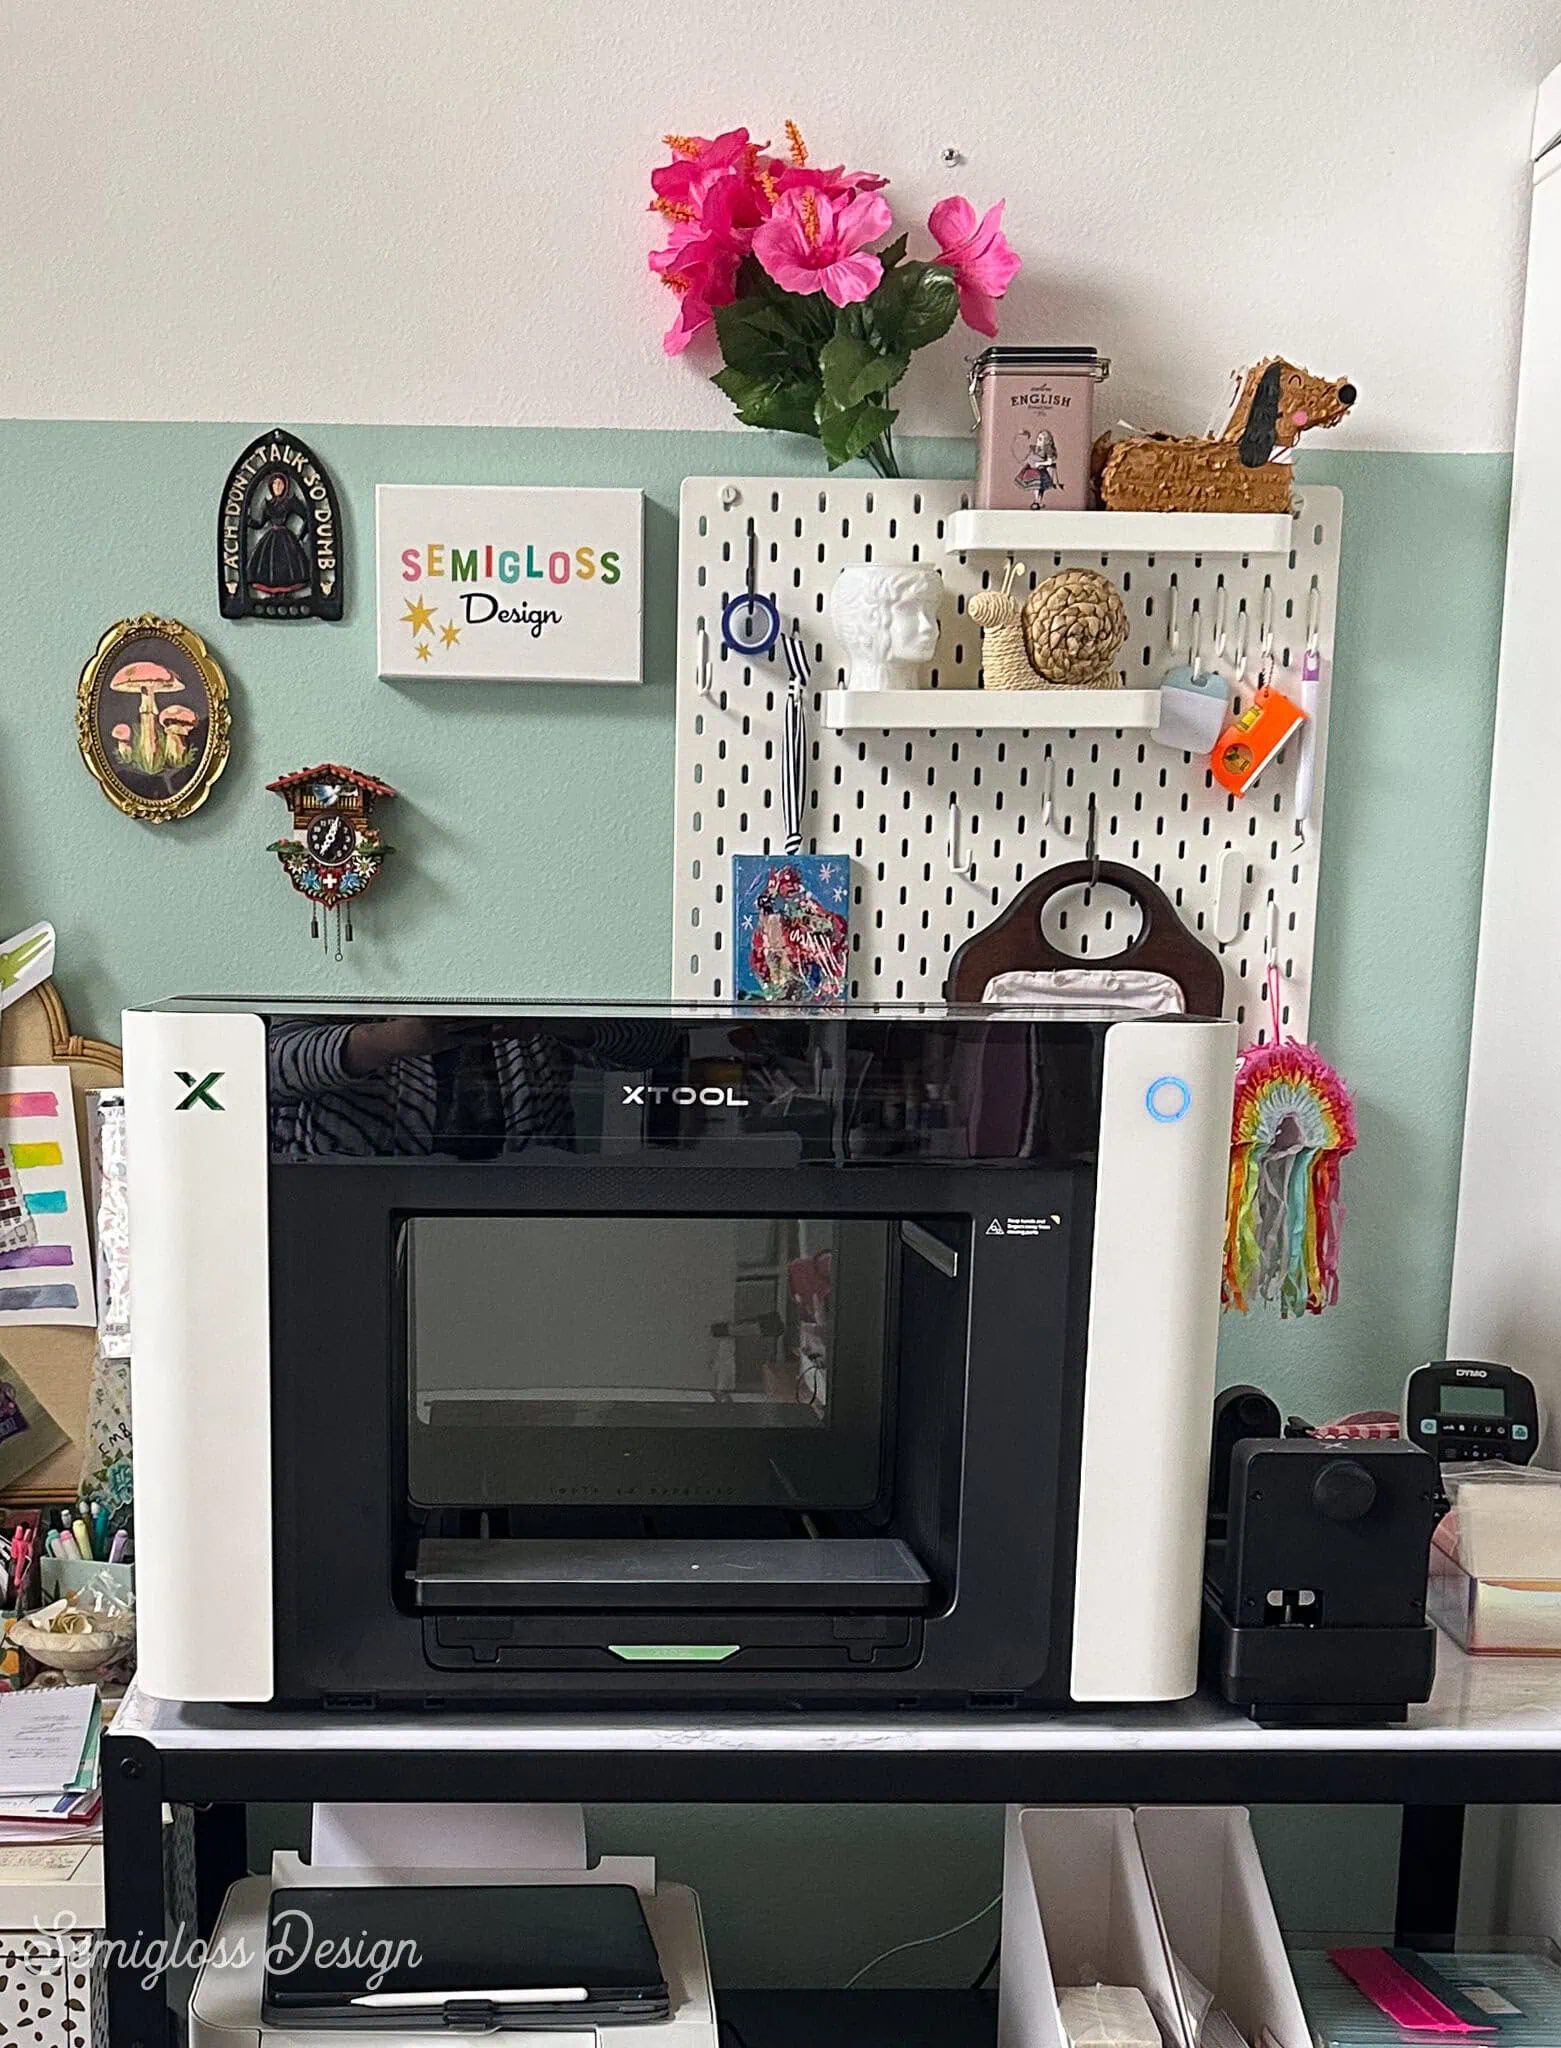
All About the xTool O1 Omni Printer(DT and UV Version)
The O1 Omni Printer is available in 3 different versions (Single UV, Dual UV, and the DT and UV version). I chose the DT and UV version so that I could print on ALL THE THINGS.
That’s a lot of acronyms. So let’s talk about what it even means.
The O1 Omni uses an Epson printhead, so the quality is amazing. After printing, the ink is cured with ultraviolet (UV) light.
DT refers to “Direct to Garment” or “Direct to Film.” These are different processes for printing on fabric. You can also make sticker decals with this process using the LM1 laminator (tutorial coming soon).
Basically, the O1 Omni can print on:
- anything flat (using the UV function)
- round cups and tumblers (using the UV function and the OR1 rotary attachment)
- fabric (using the DTG function and the garment tray – included)
- fabric (using the DTF function with film, powder, heat press, and curing oven – not included)
- decals (using the DTF function with the LM1 laminator and laminating film)
This is probably still confusing, but it will help when I share what I’ve made so far.
And believe it or not, it does even more. There are all kinds of specialty techniques and finishes. It also works with most xTool laser cutters.
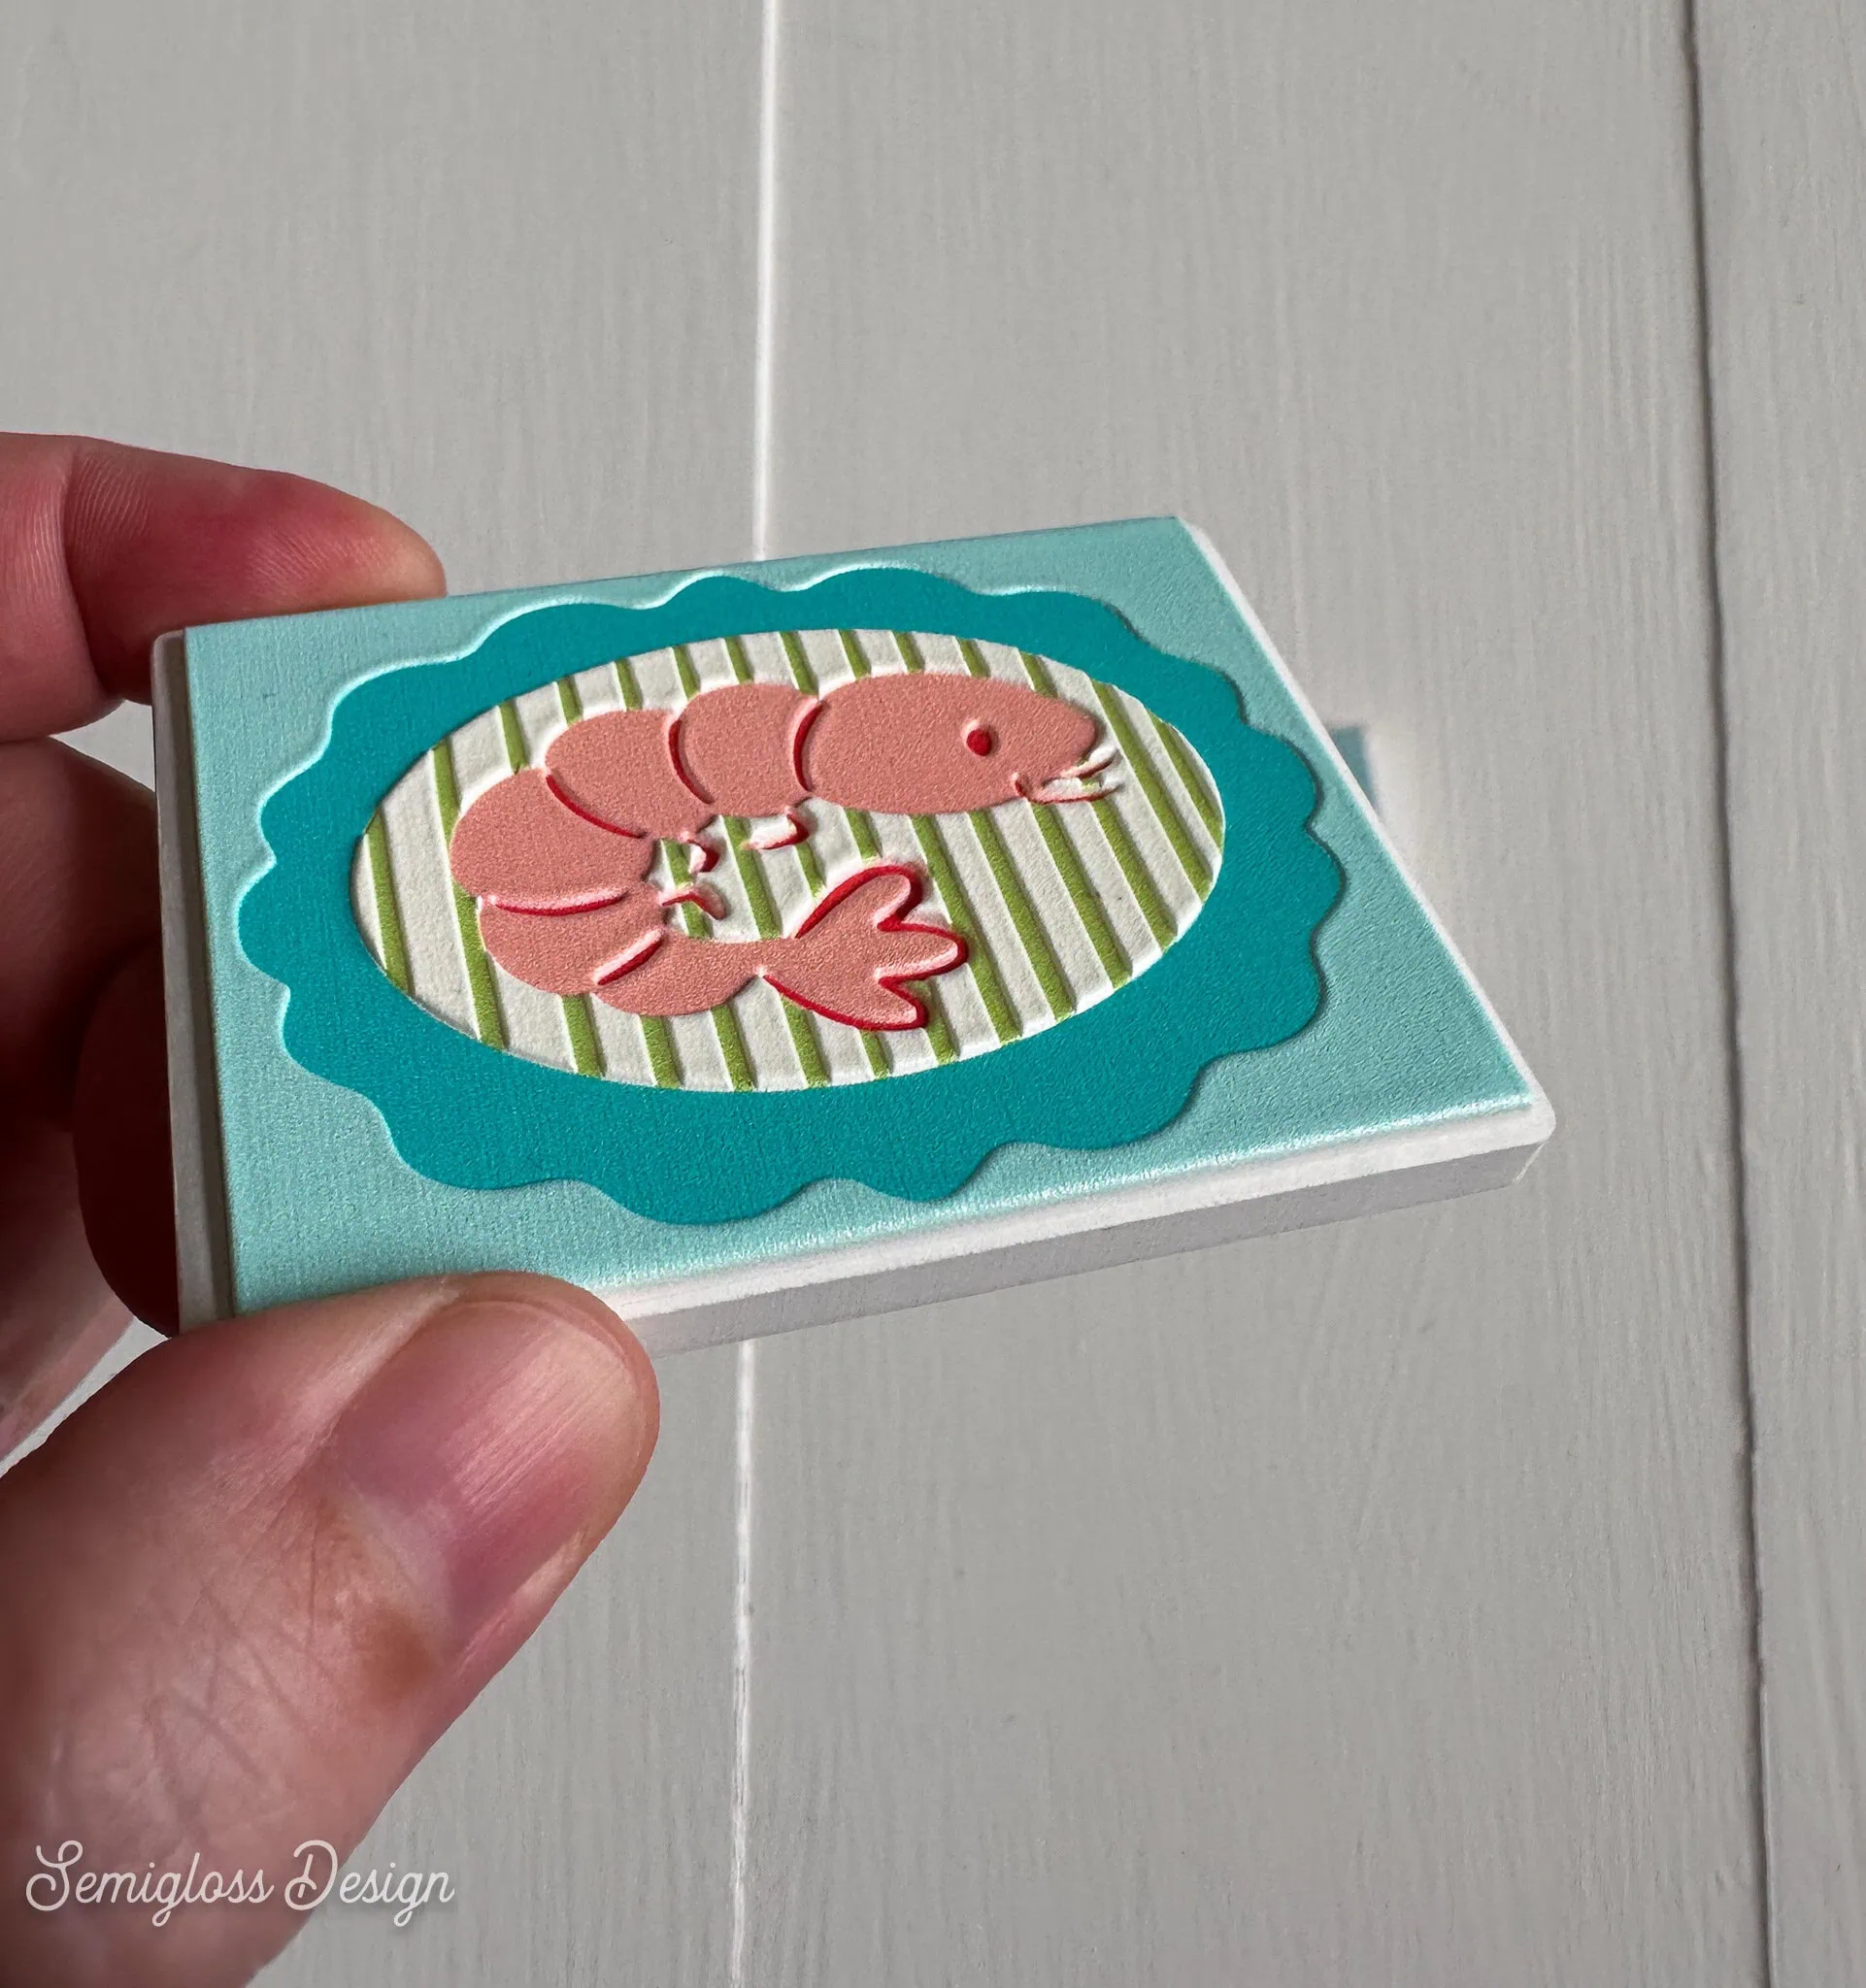
It can even print a texture on items, which feels like magic. It’s even more impressive in person.
It Prints on Anything (Almost)
Here is a list of things I’ve printed so far:
- ceramic magnets
- cardstock (birthday card)
- plastic (light switch cover)
- phone case
- metal bookmark
- wooden ornaments (cut with my M1 laser cutter)
- an acrylic ornament blank
- canvas
- keychain
- sticker paper
- glass tumbler cans
- glass trophy light
- T-shirts (both white and black!)
- tote bag
- wooden sign
- mug (DTF transfer)
- lenticular card
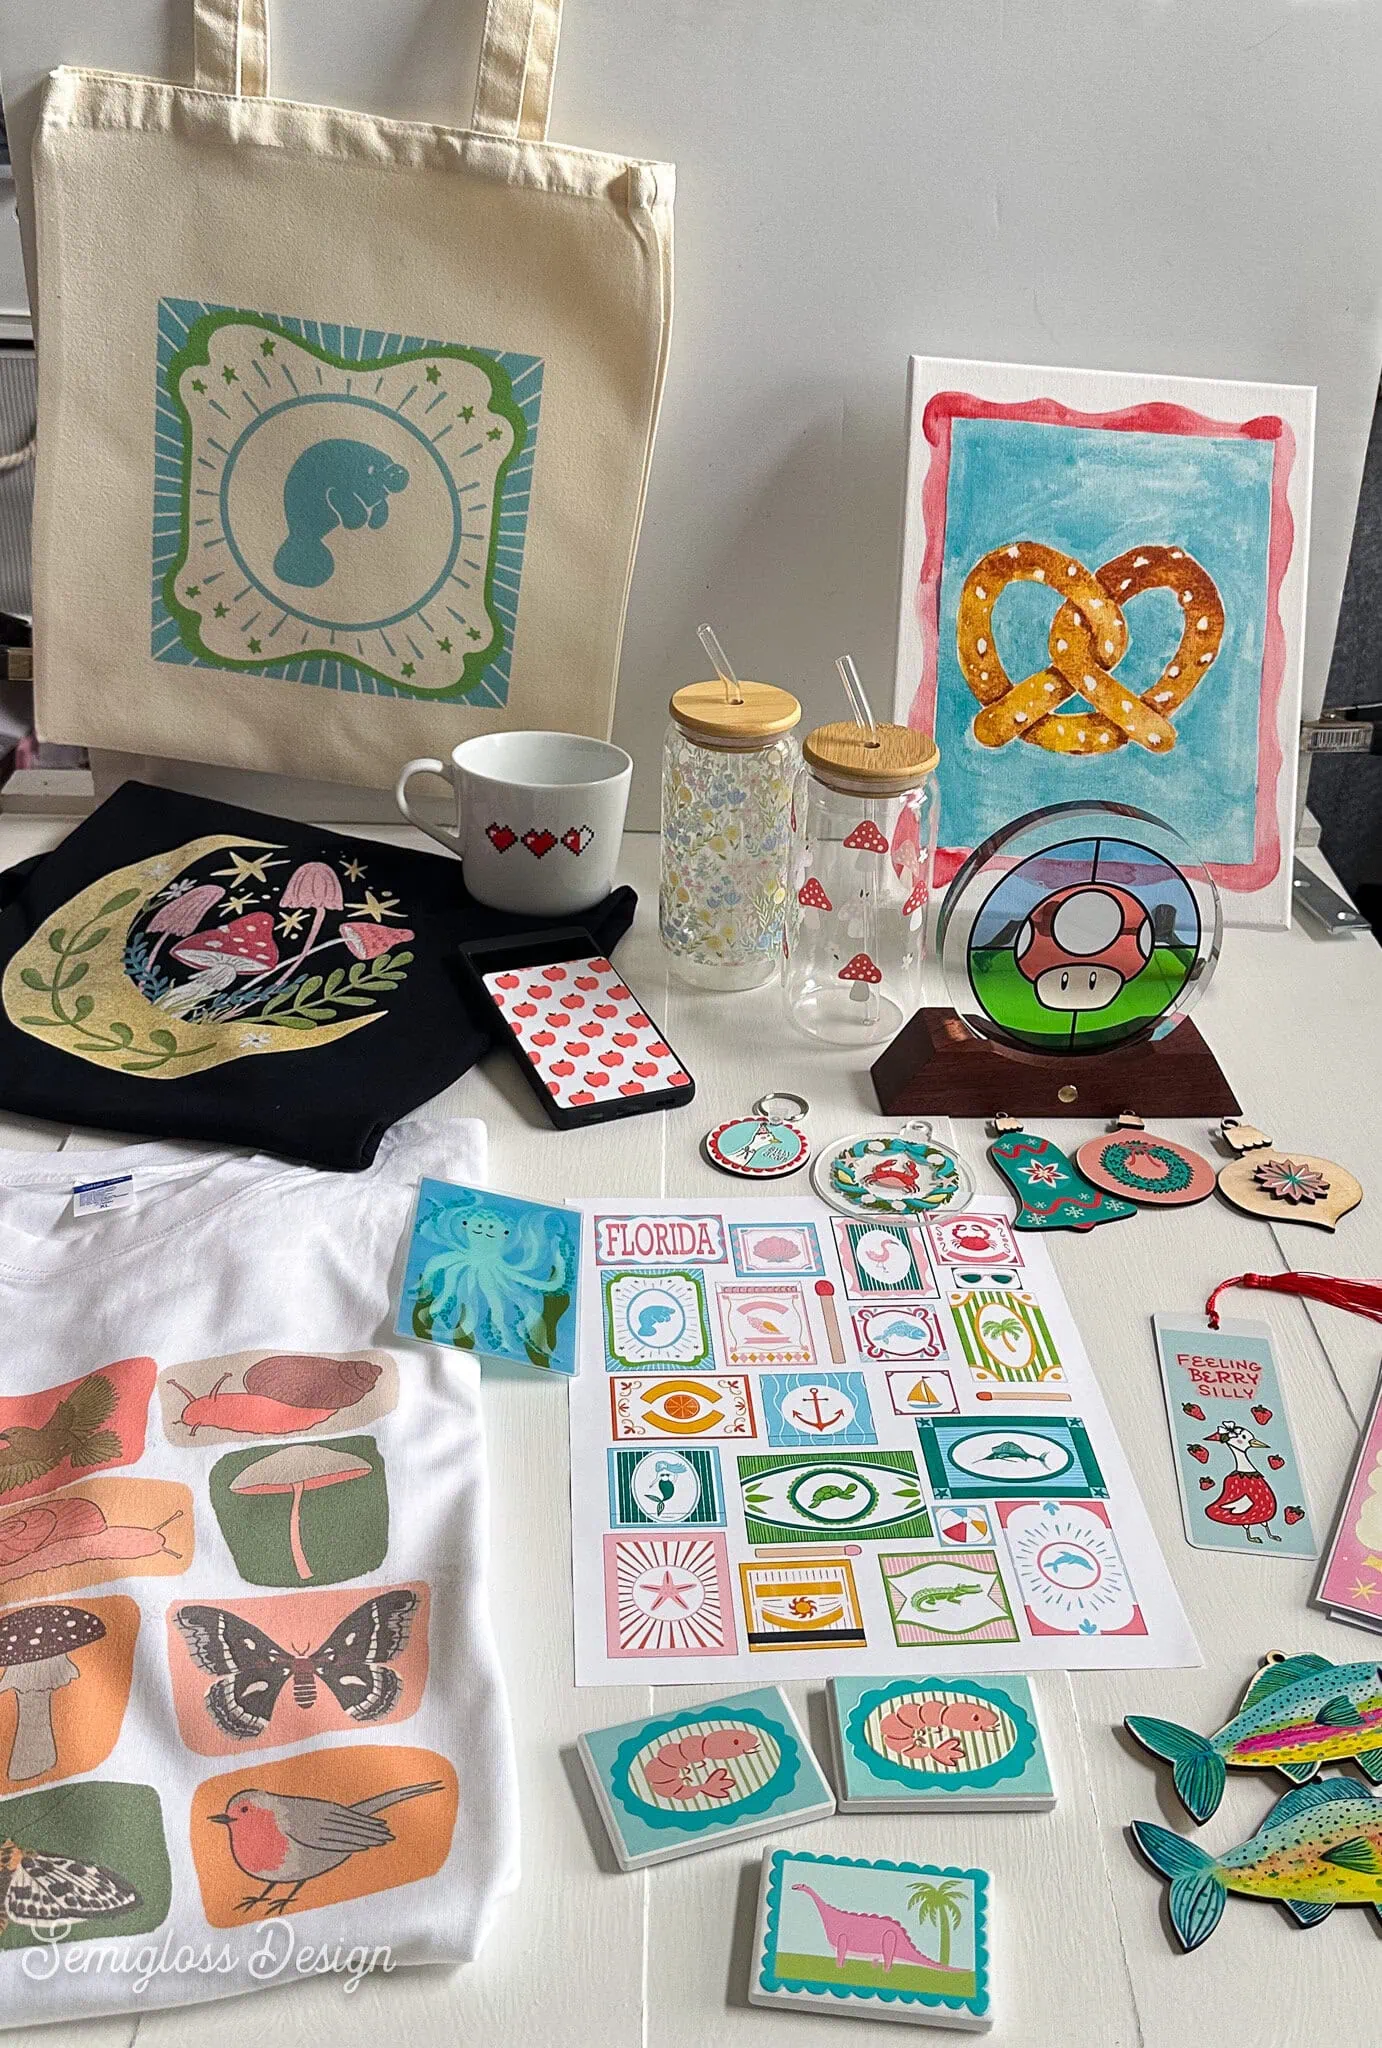
Don’t worry, I’ll share details about everything later on.
It will make you look at everything in your home a bit differently. What doesn’t need a fun design printed on it?
How to Use the xTool O1 Omni
With any new tool, I’m always equally excited and intimidated. Luckily, the xTool Omni O1 is really easy to use. It comes with 3 free ceramic magnets, which are great for experimenting with right away.
Notes: When starting the software, you may be prompted to update the firmware. This is common with a new product. The xTool team is actively working to improve everything based on early customer feedback. The software may look a bit different than my photos.
Once the machine is set up, it’s easy to use! Setup took about 1.5 hours, but don’t let that intimidate you. Nothing was difficult. The xTool Studio software walks you through everything with easy-to-follow videos.
The printer needs a very sturdy table because it’s pretty heavy. It also needs space behind the machine to use the large baseplate.
Directions for Making Your First UV Printed Project
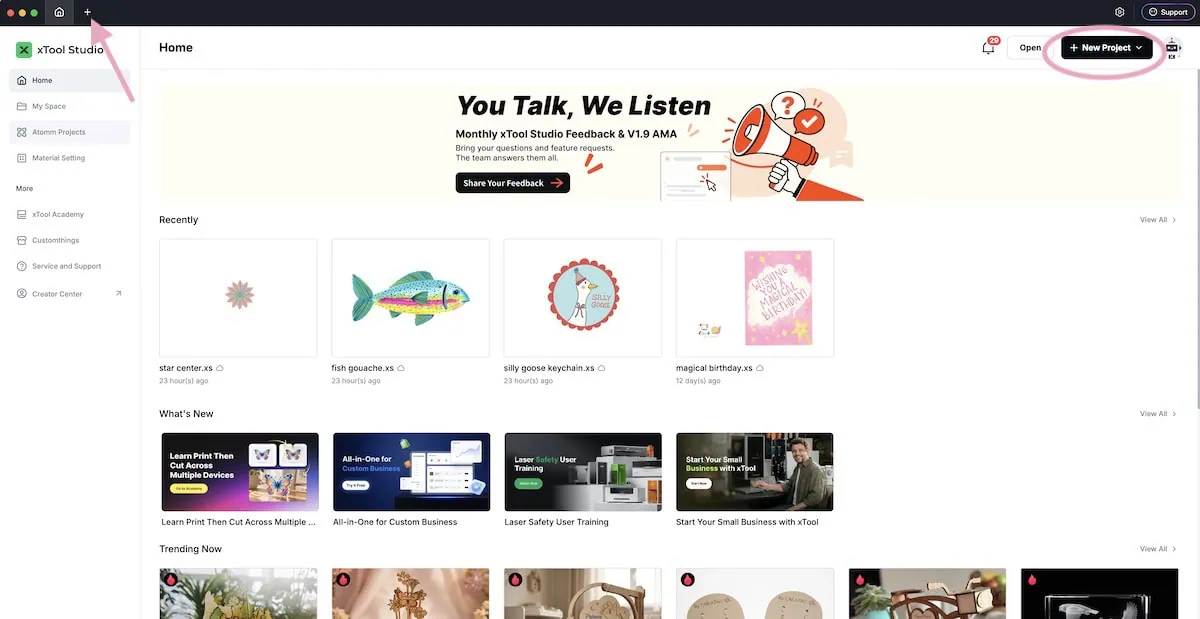
- Open a new project in xTool Studio.

- Press the button on the front of the machine to bring out the platform. Switch the baseplate if needed. There are small and large versions to accommodate different object sizes.
- Place the item on the baseplate, making sure that it’s level.
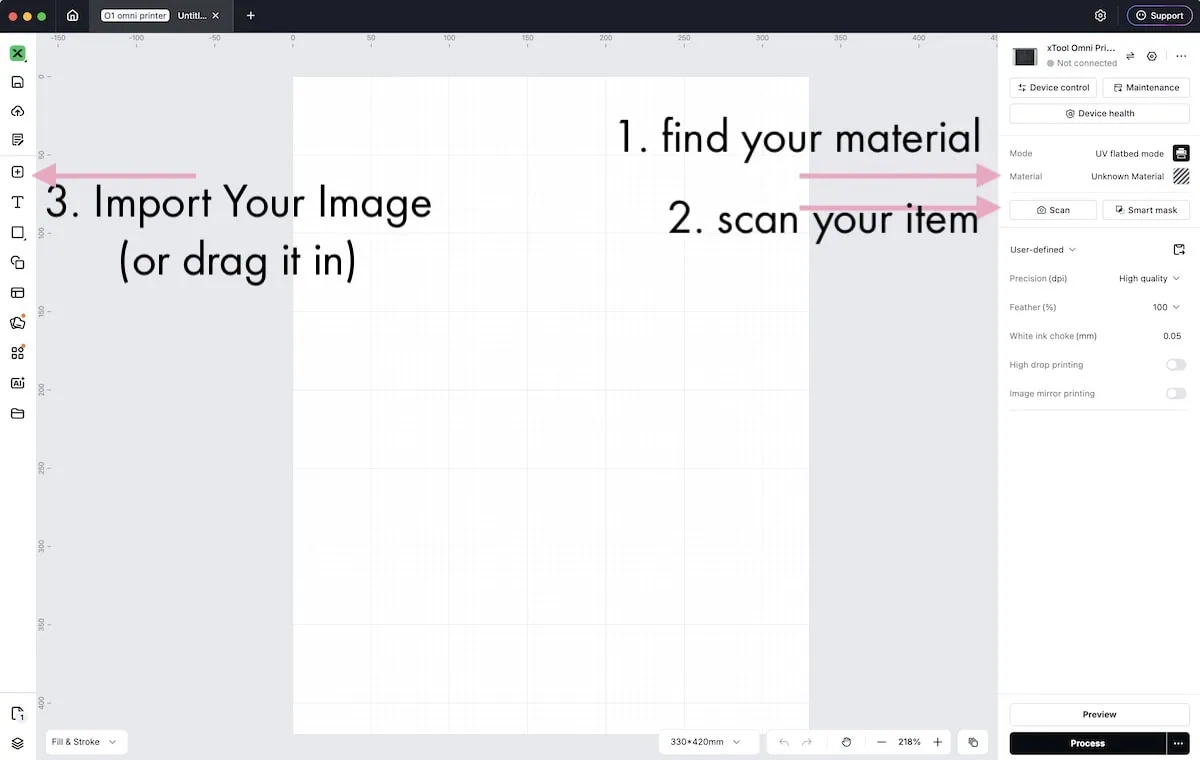
- If the item you’re printing is common, search for it under Material. This can help with getting the settings correct. If it’s not in there, no worries.

- Press Scan to scan your item. Scanning takes a few minutes to measure the highest point. It basically takes a photo of your item, which makes placing the image really easy!

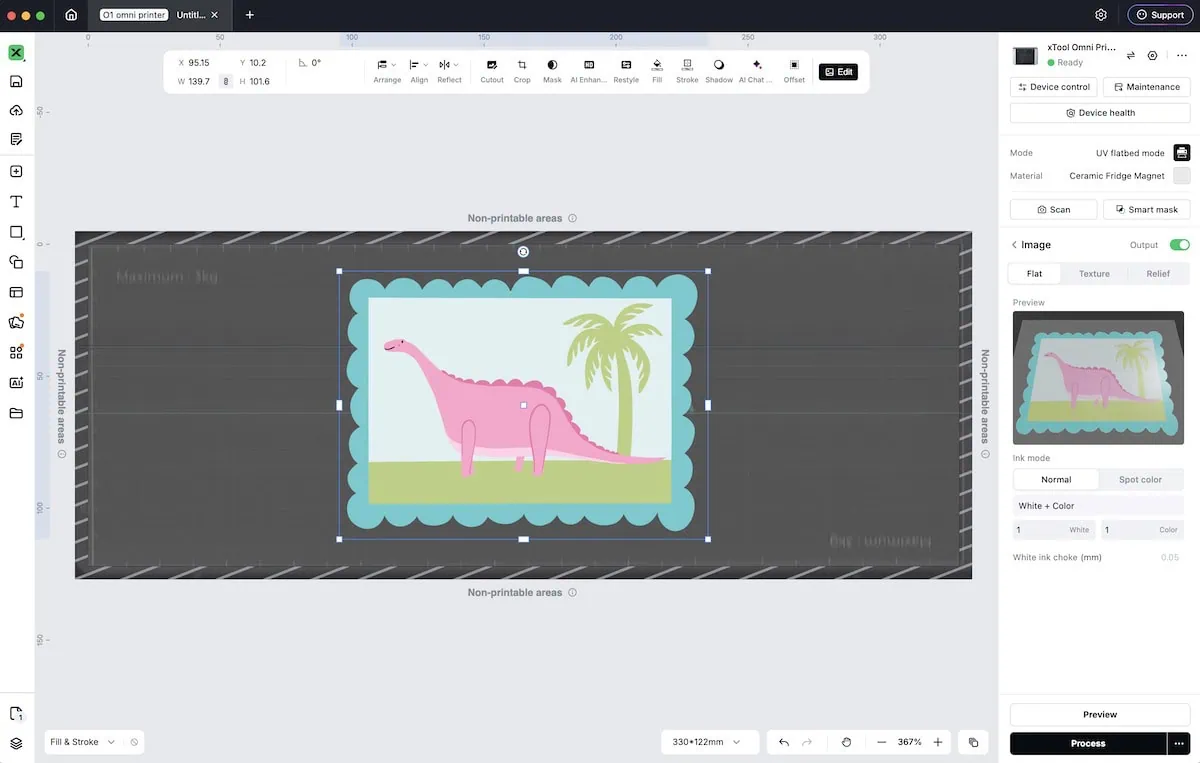
- Upload the image. Resize as needed.

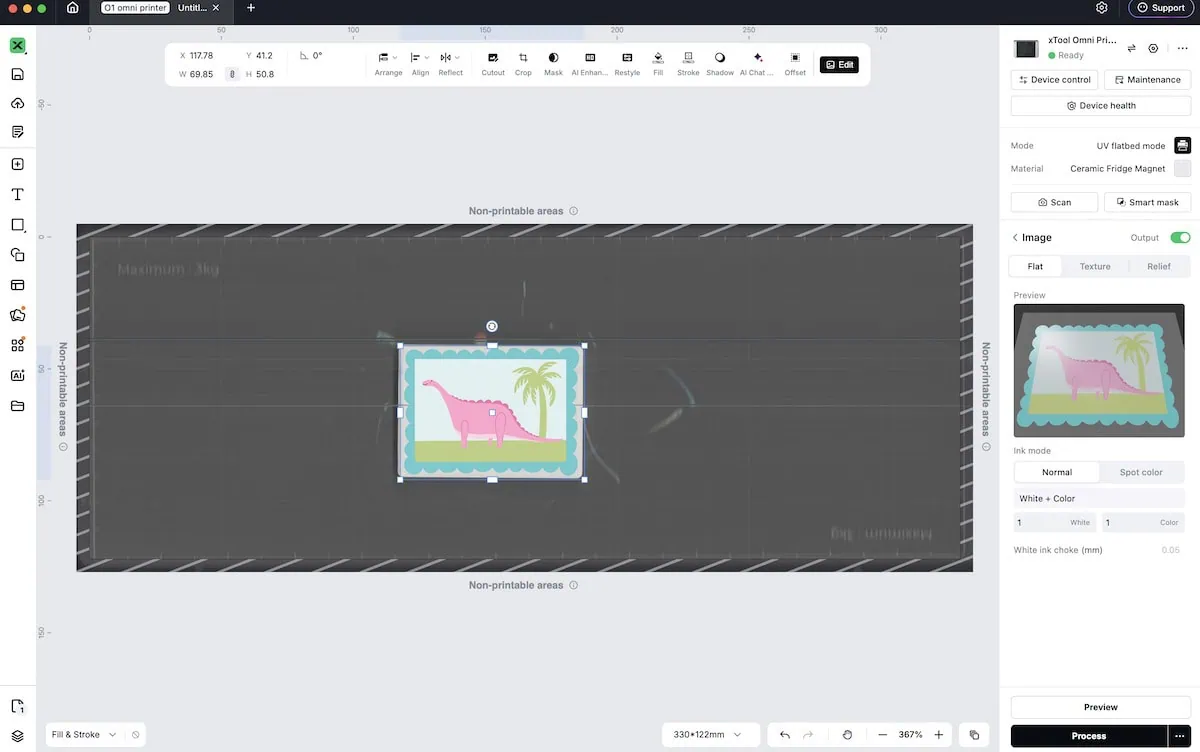
- Place the image where you want it. You can rotate it if needed. Even when it looks straight, I often need to rotate it by 0.5 to 1 degree.
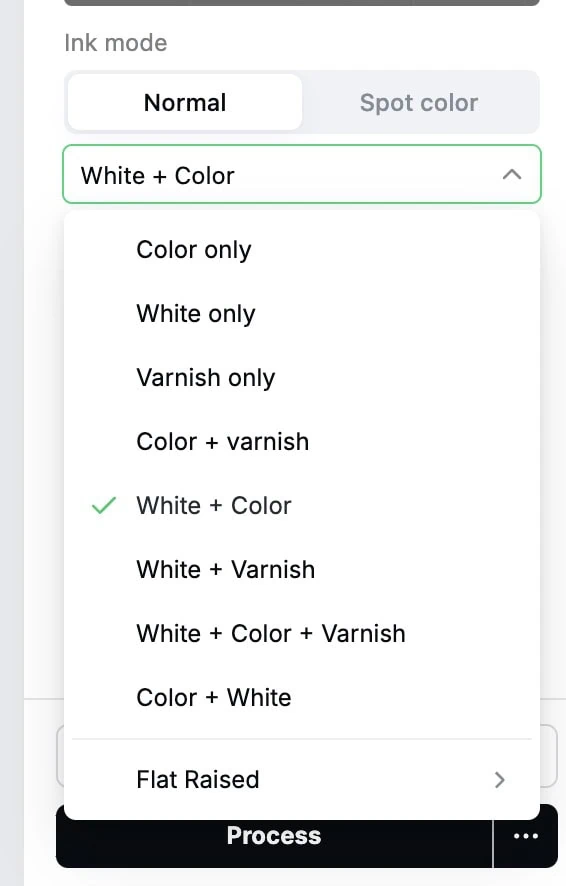
- In Ink Mode, you can change the ink processes and ink layer numbers. You can add layers of white or varnish to get a better finish. A white layer under color allows you to print on darker items. It can also create a better base for the ink to stick to.

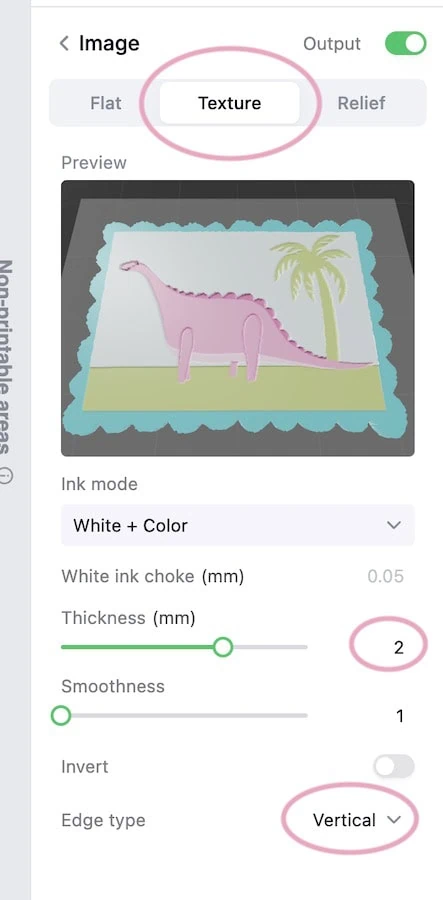
- It’s also possible to add a texture. It’s set to 2 mm by default, but even a 1mm texture is impressive!

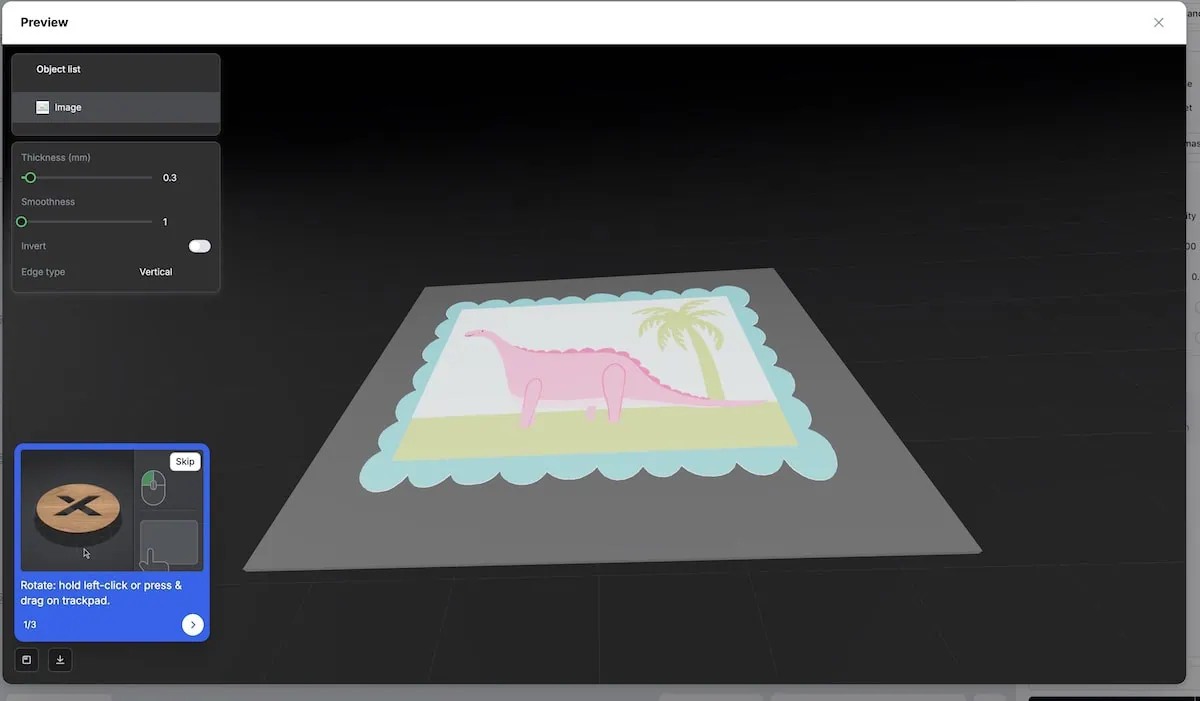
- Preview using the preview button. Scroll around to see how it will look.

- Select Process.

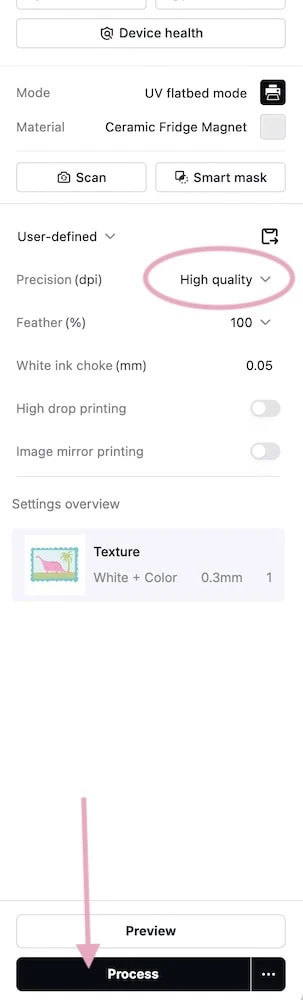
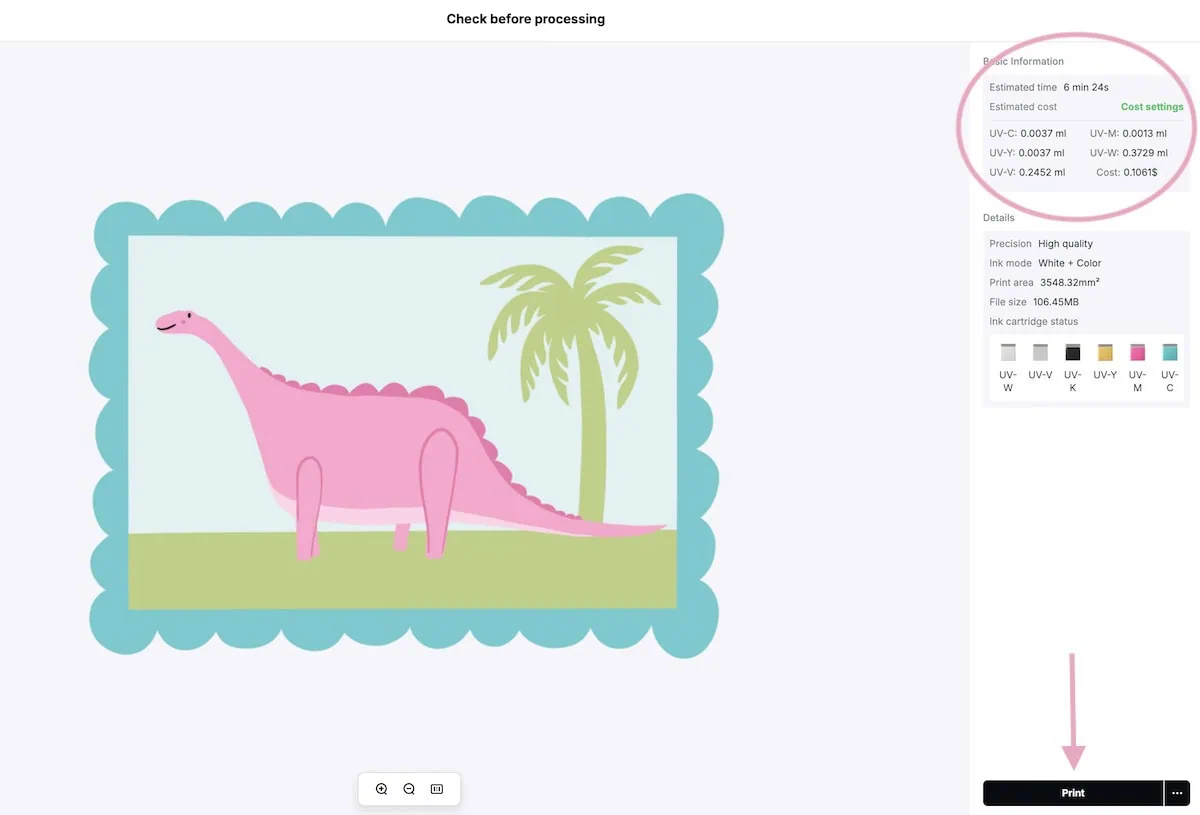
- The estimated print time and cost of ink used will appear at the top of the screen. The time estimate is accurate. (Yes, it can take a while, but it allows me to get other things done while I’m printing.) Most items only cost a few cents to print. This is a handy feature if you’re planning to sell your items. You can save time by choosing “standard” instead of “high quality” print under Precision (see screenshot above).

- When you’re happy with everything, press Print.
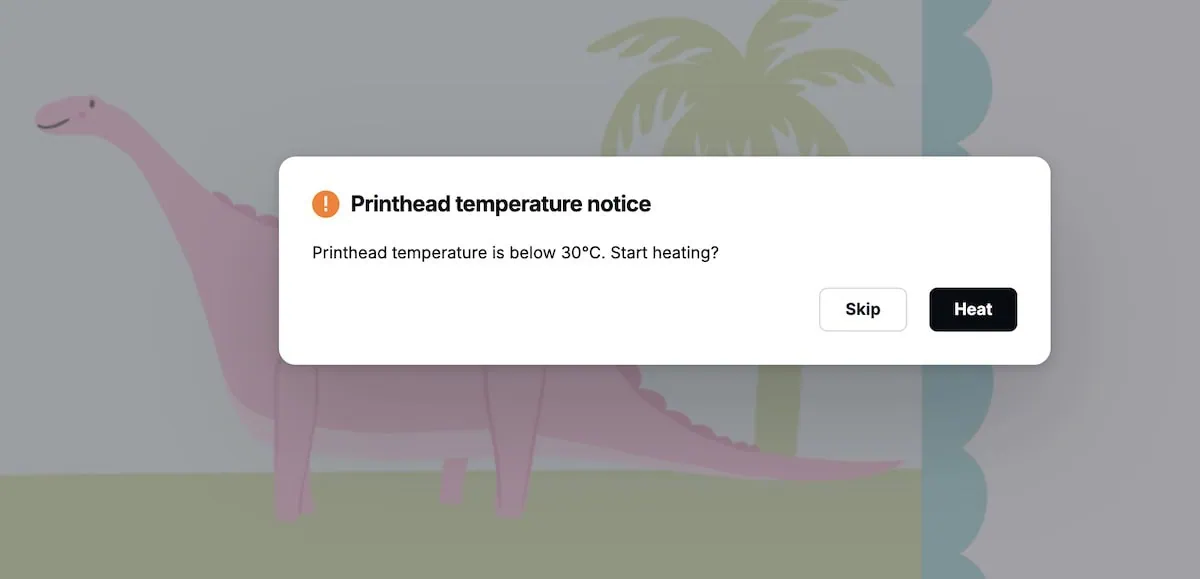
- If you haven’t printed in a while, the ink may need to be heated. Don’t skip this step. Press Heat to start the process. This time is not included in the print time estimate. It can take up to 10 minutes, but it usually only takes 2-3 minutes.

- It’s normal for the printhead to need cleaning too. A clean printhead means a better print.
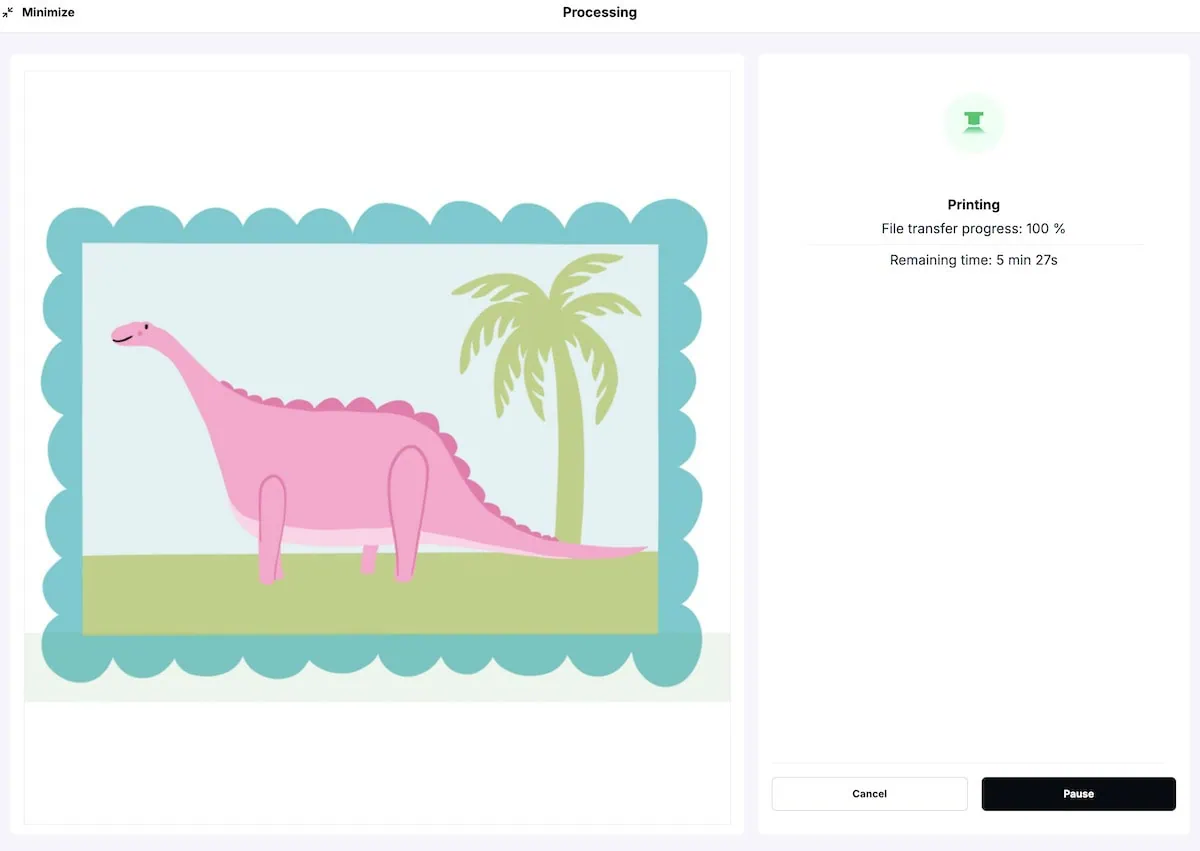
- As the machine prints, the screen has a light green bar over the image to indicate the process. It also shows a countdown.

- When it’s done, the plate will return to the bottom. When it’s finished, press the button on the front of the machine to slide the baseplate out. Most UV-printed surfaces are dry and ready to handle immediately.
The hardest part is waiting. Or choosing what to print next.
My First xTool O1 Omni Projects
Let’s look at some of the stuff I’ve printed so far. It’s hard to choose a favorite…
All art besides the Mario mushroom and pixel hearts is my original work.
Magnets
These magnets were the first thing I printed. It’s just a silly shrimp illustration. I printed it again and added texture. The printed version is lovely, but the textured version is magical.
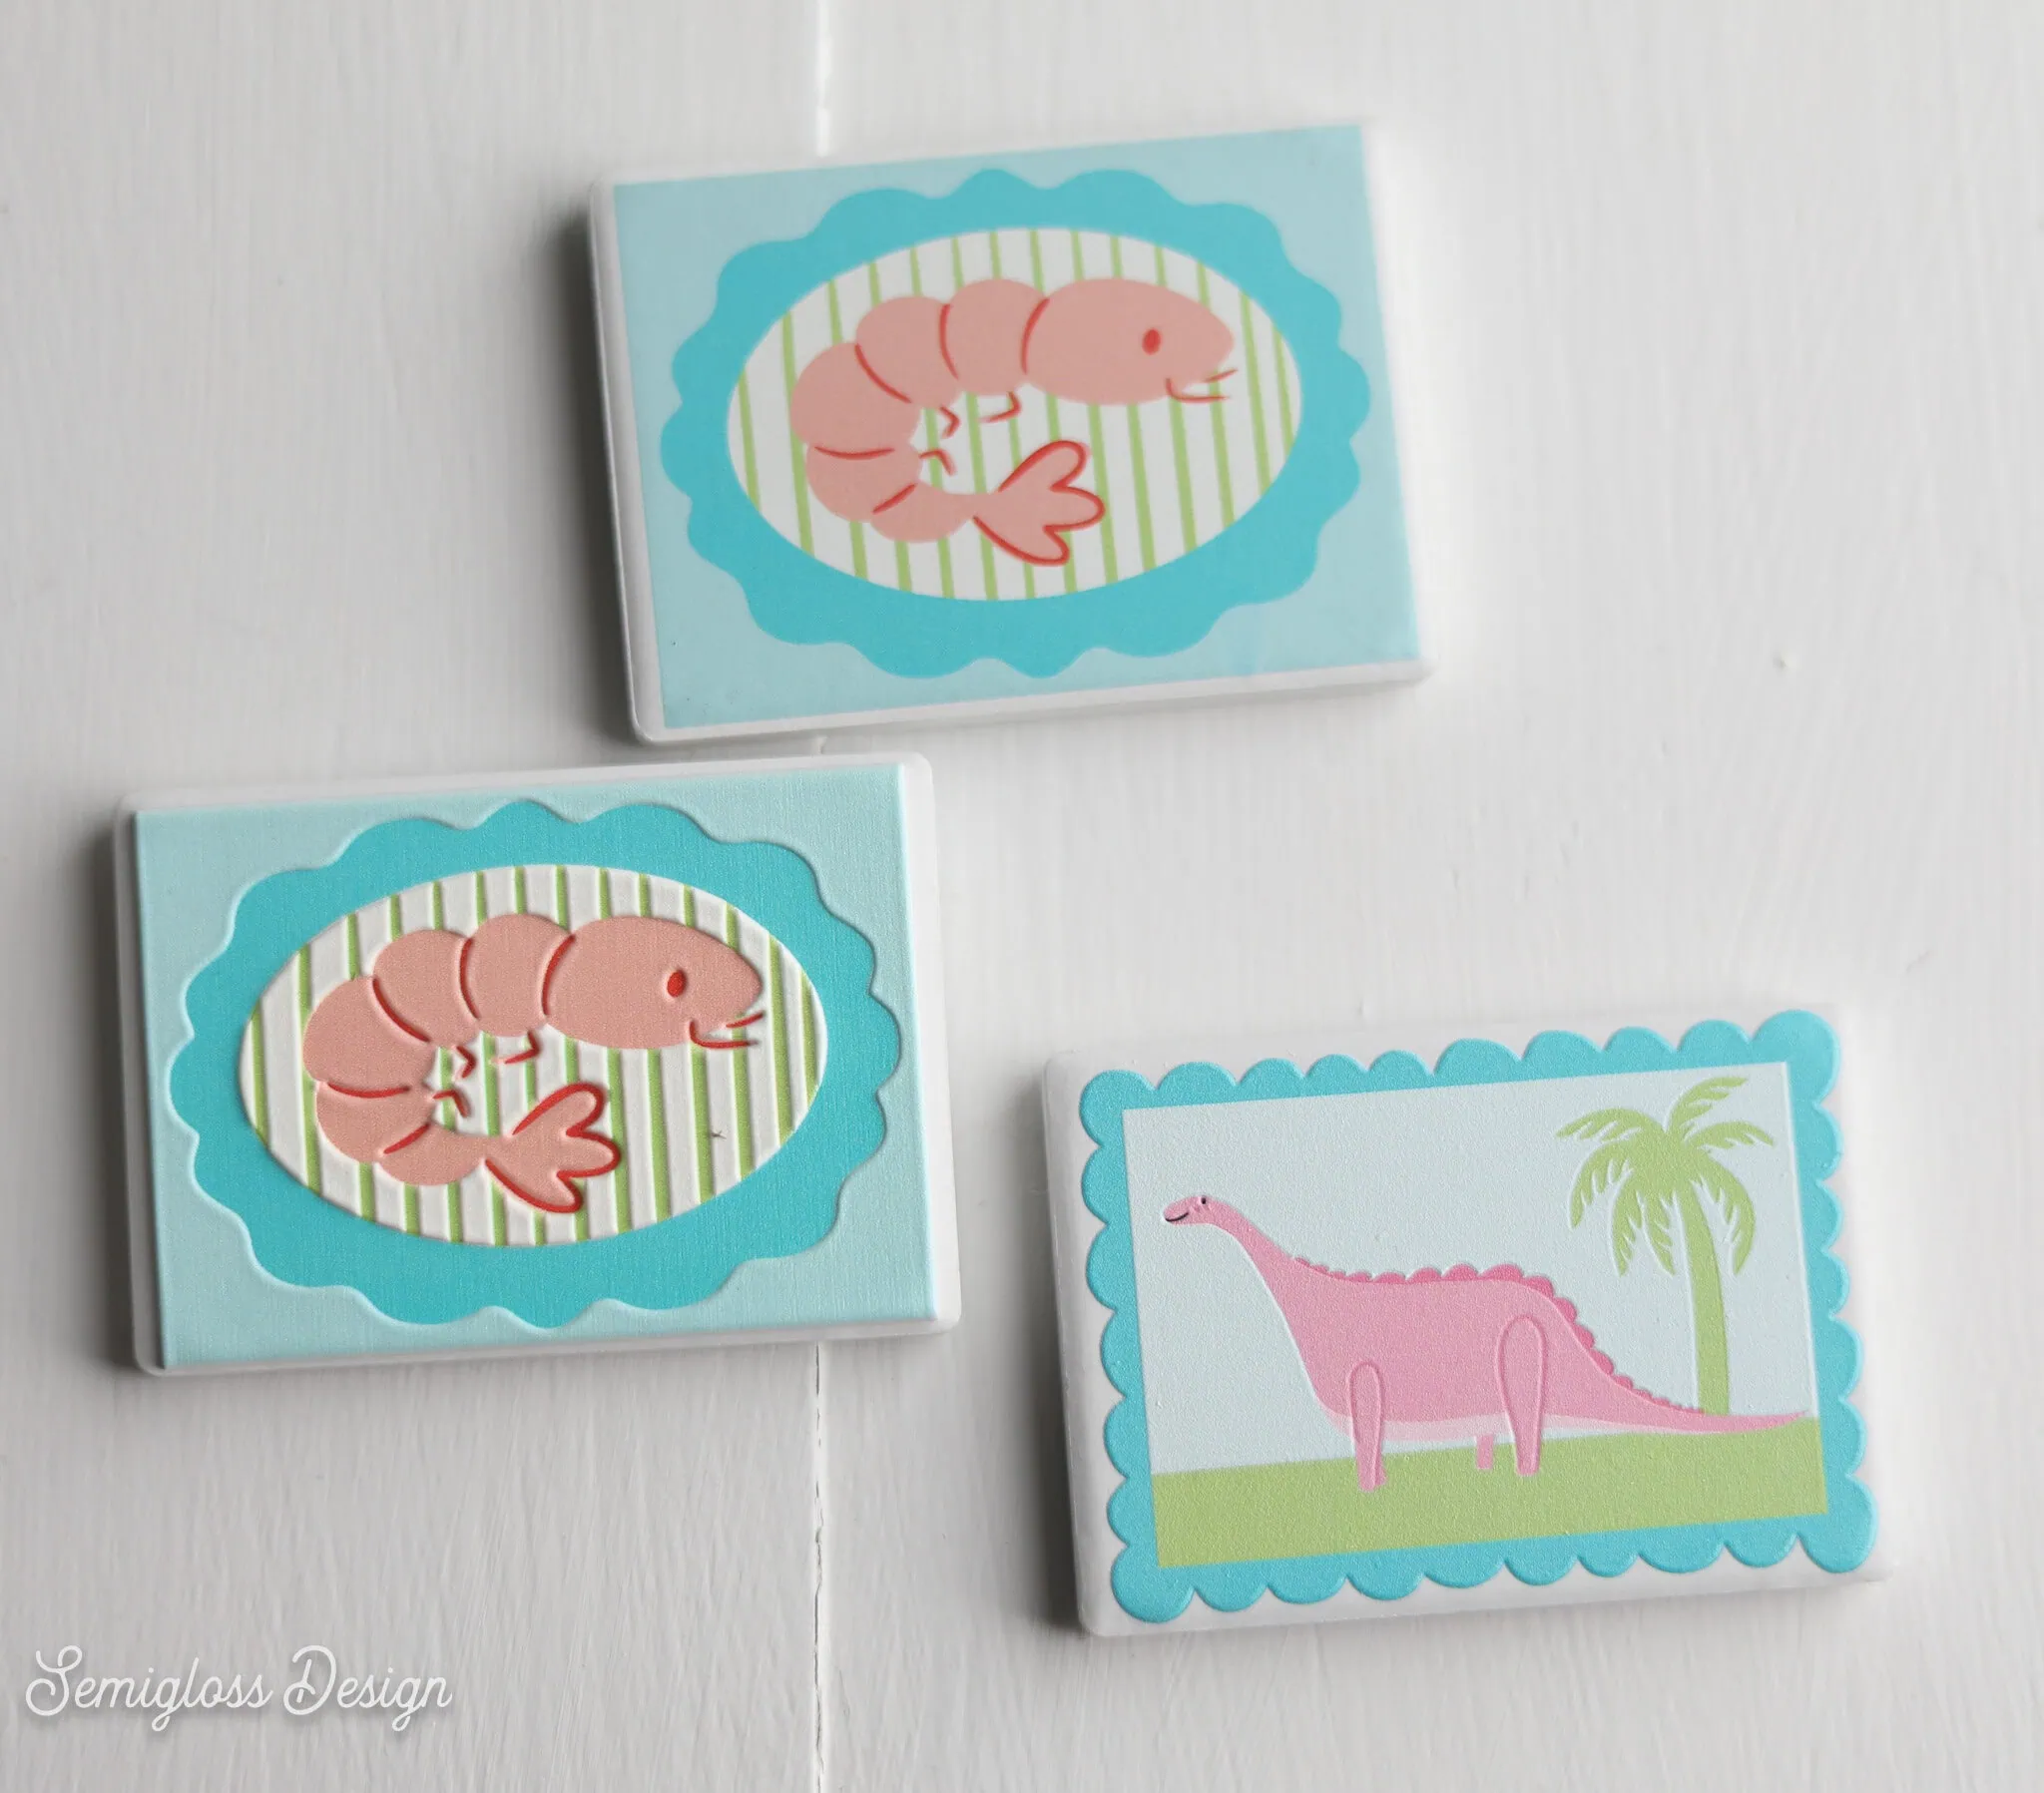
The pink dinosaur is my take on a souvenir magnet for our town. It’s a prominent feature that I drive by almost every day.
Cardstock (birthday card)
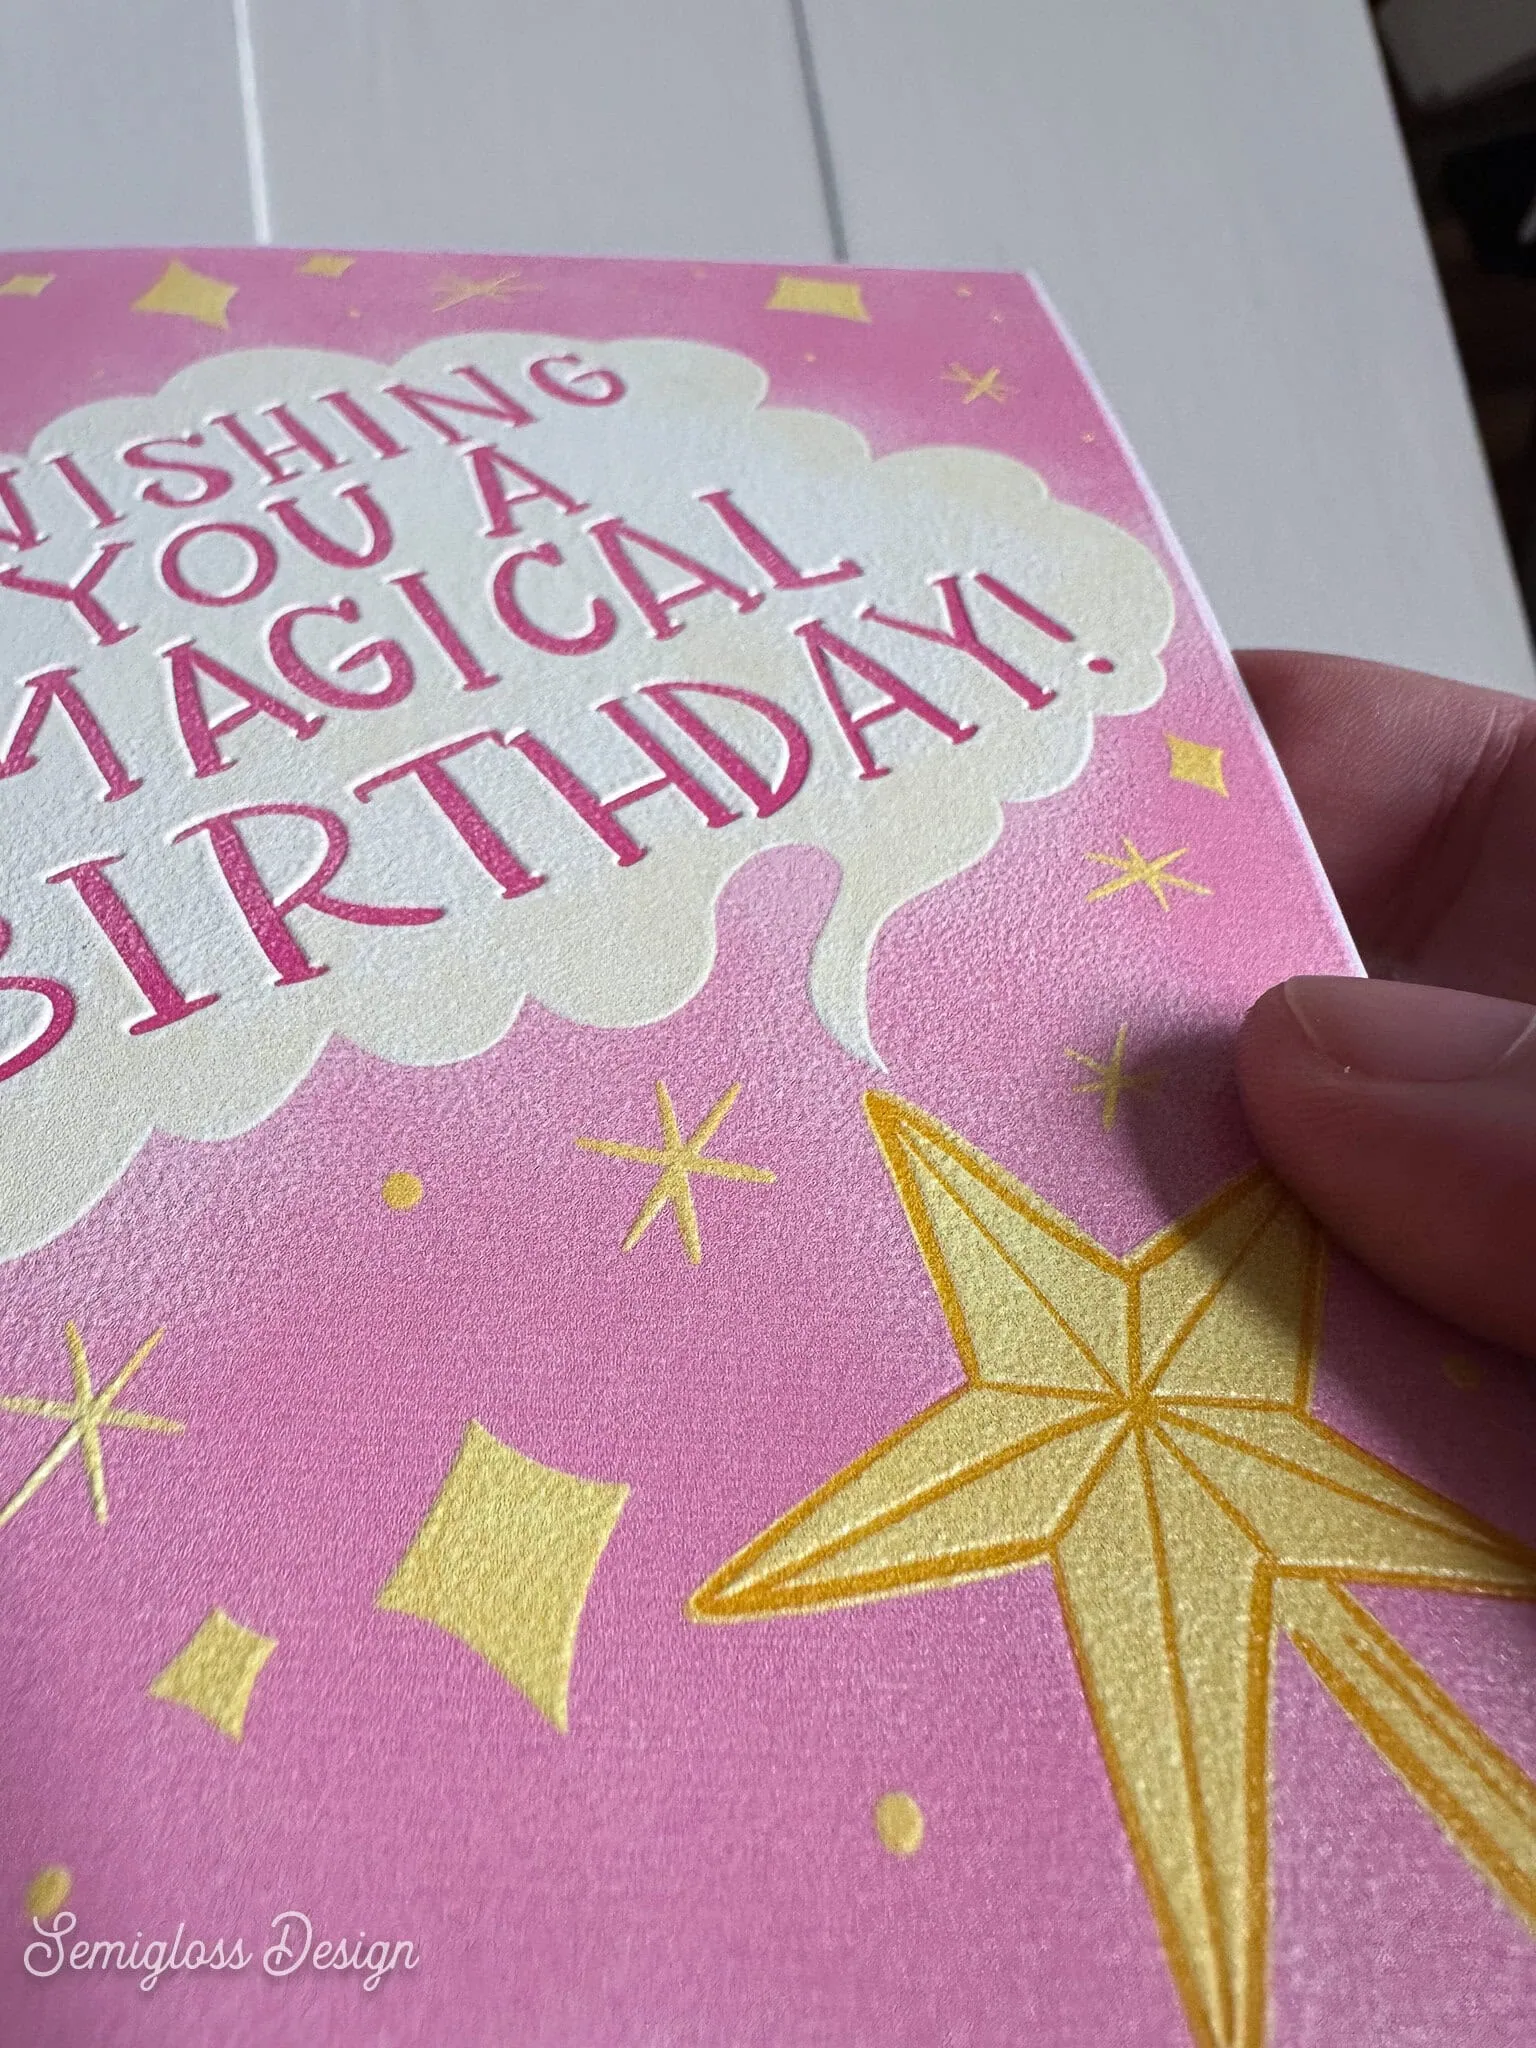
I used a very thin texture on this card to make it more special.
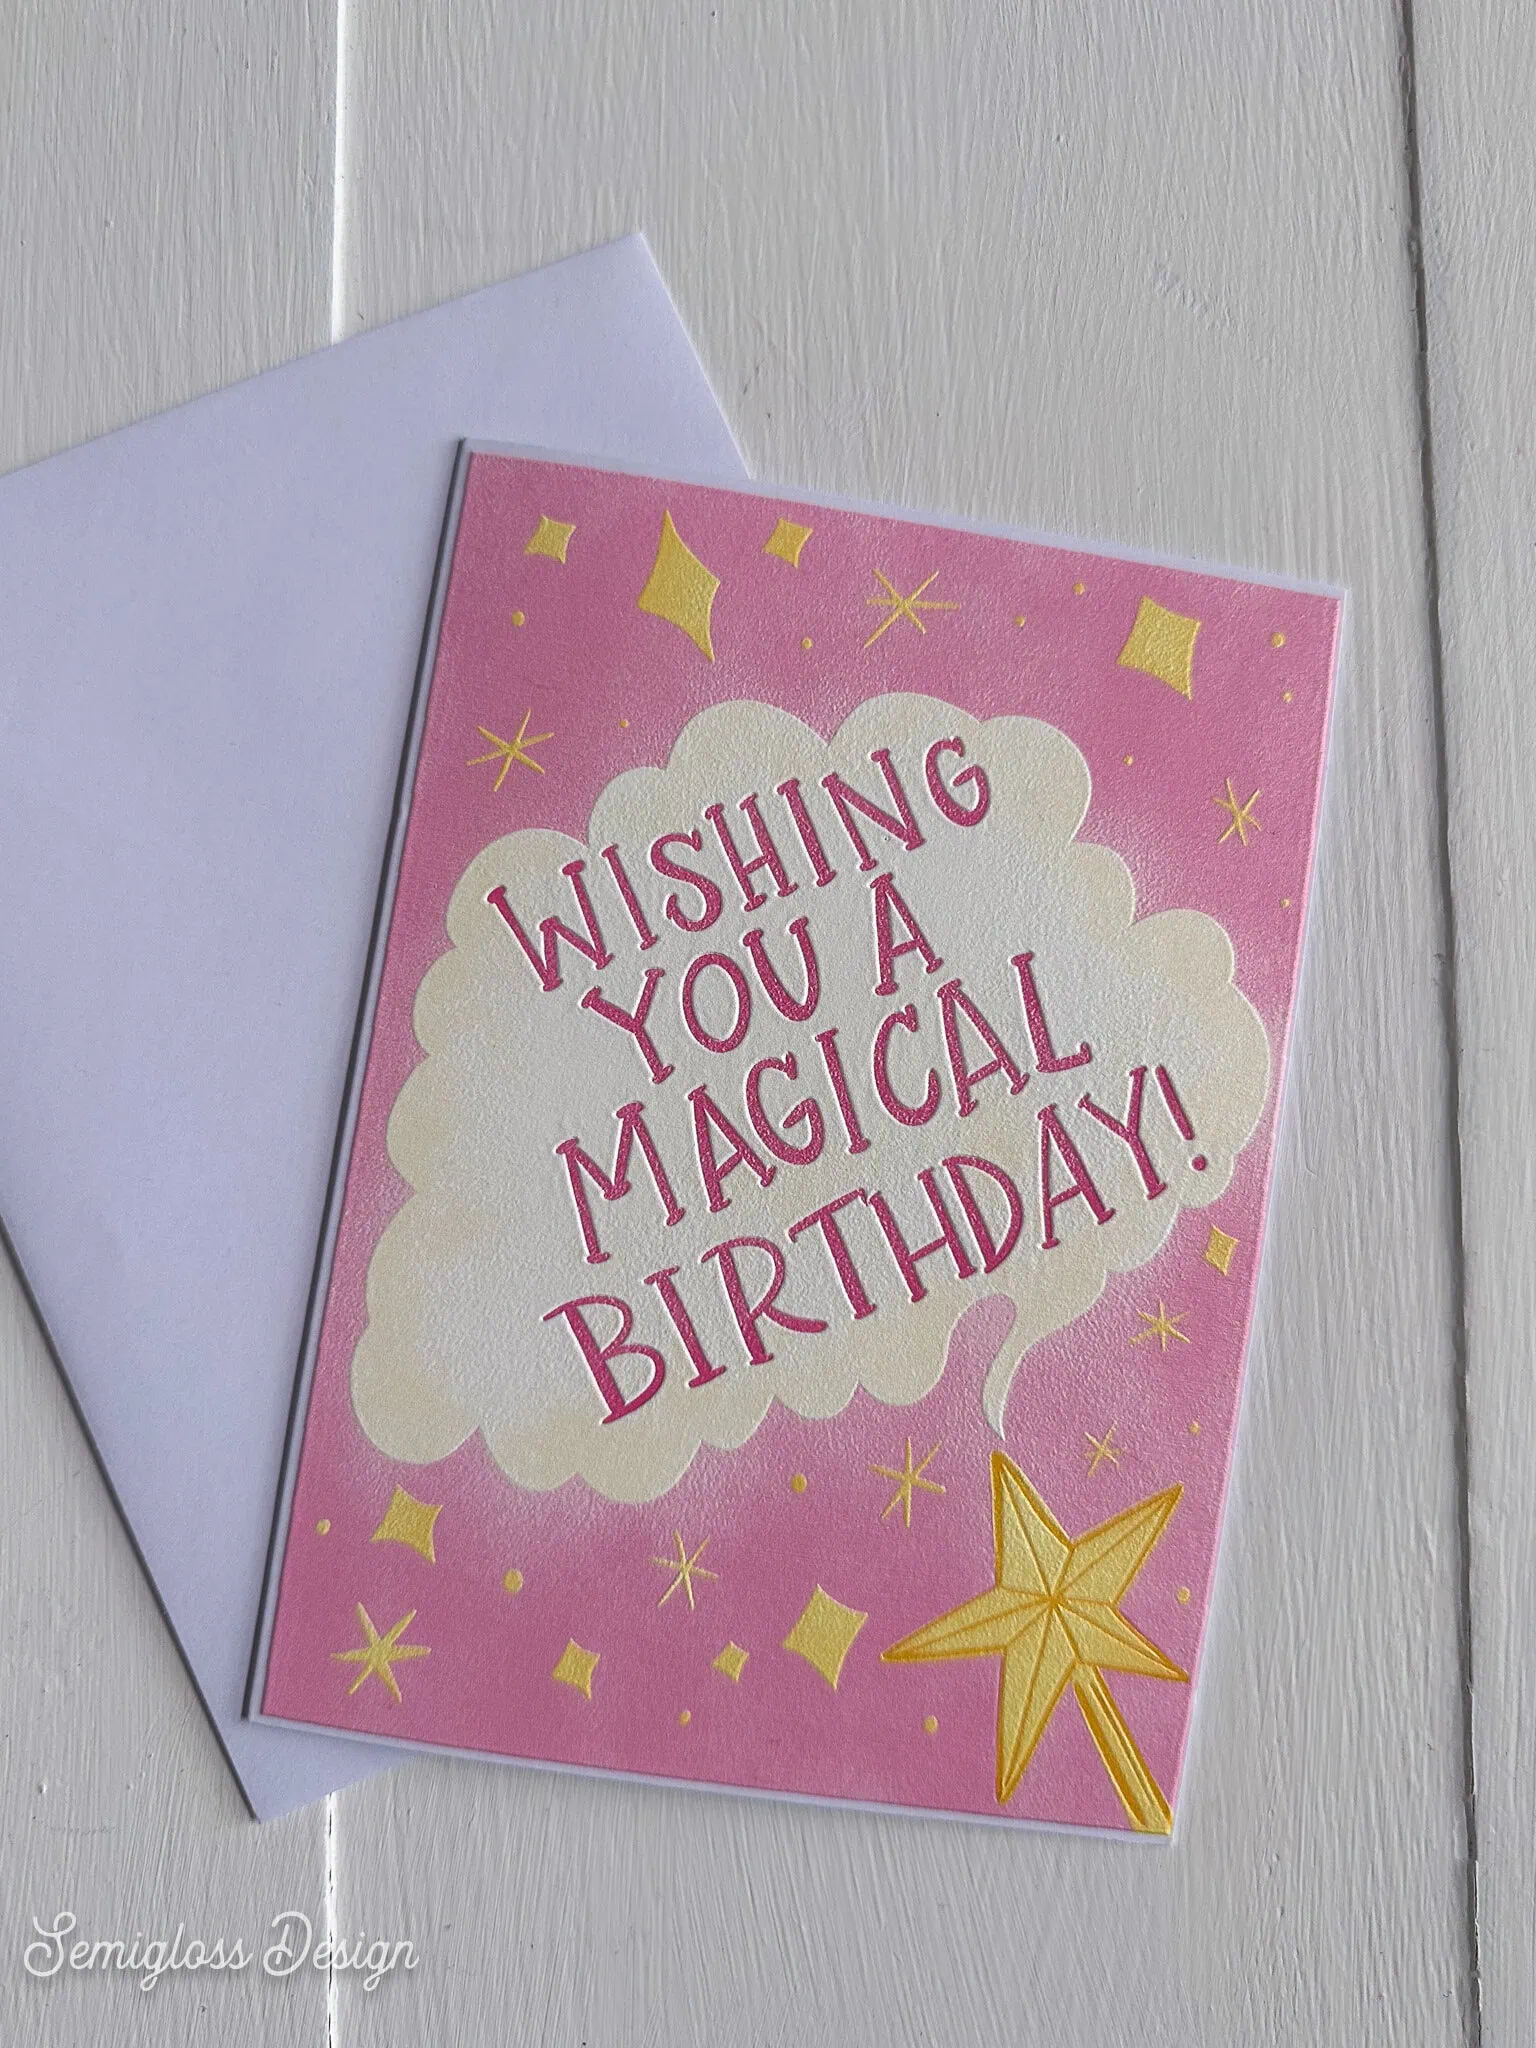
The xTool Studio software helps you select areas to add texture. You can also upload multiple layers to ensure accuracy when adding texture or changing the ink process. For instance, I could upload a layer with stars and wand to make them raised.
Plastic (light switch cover)
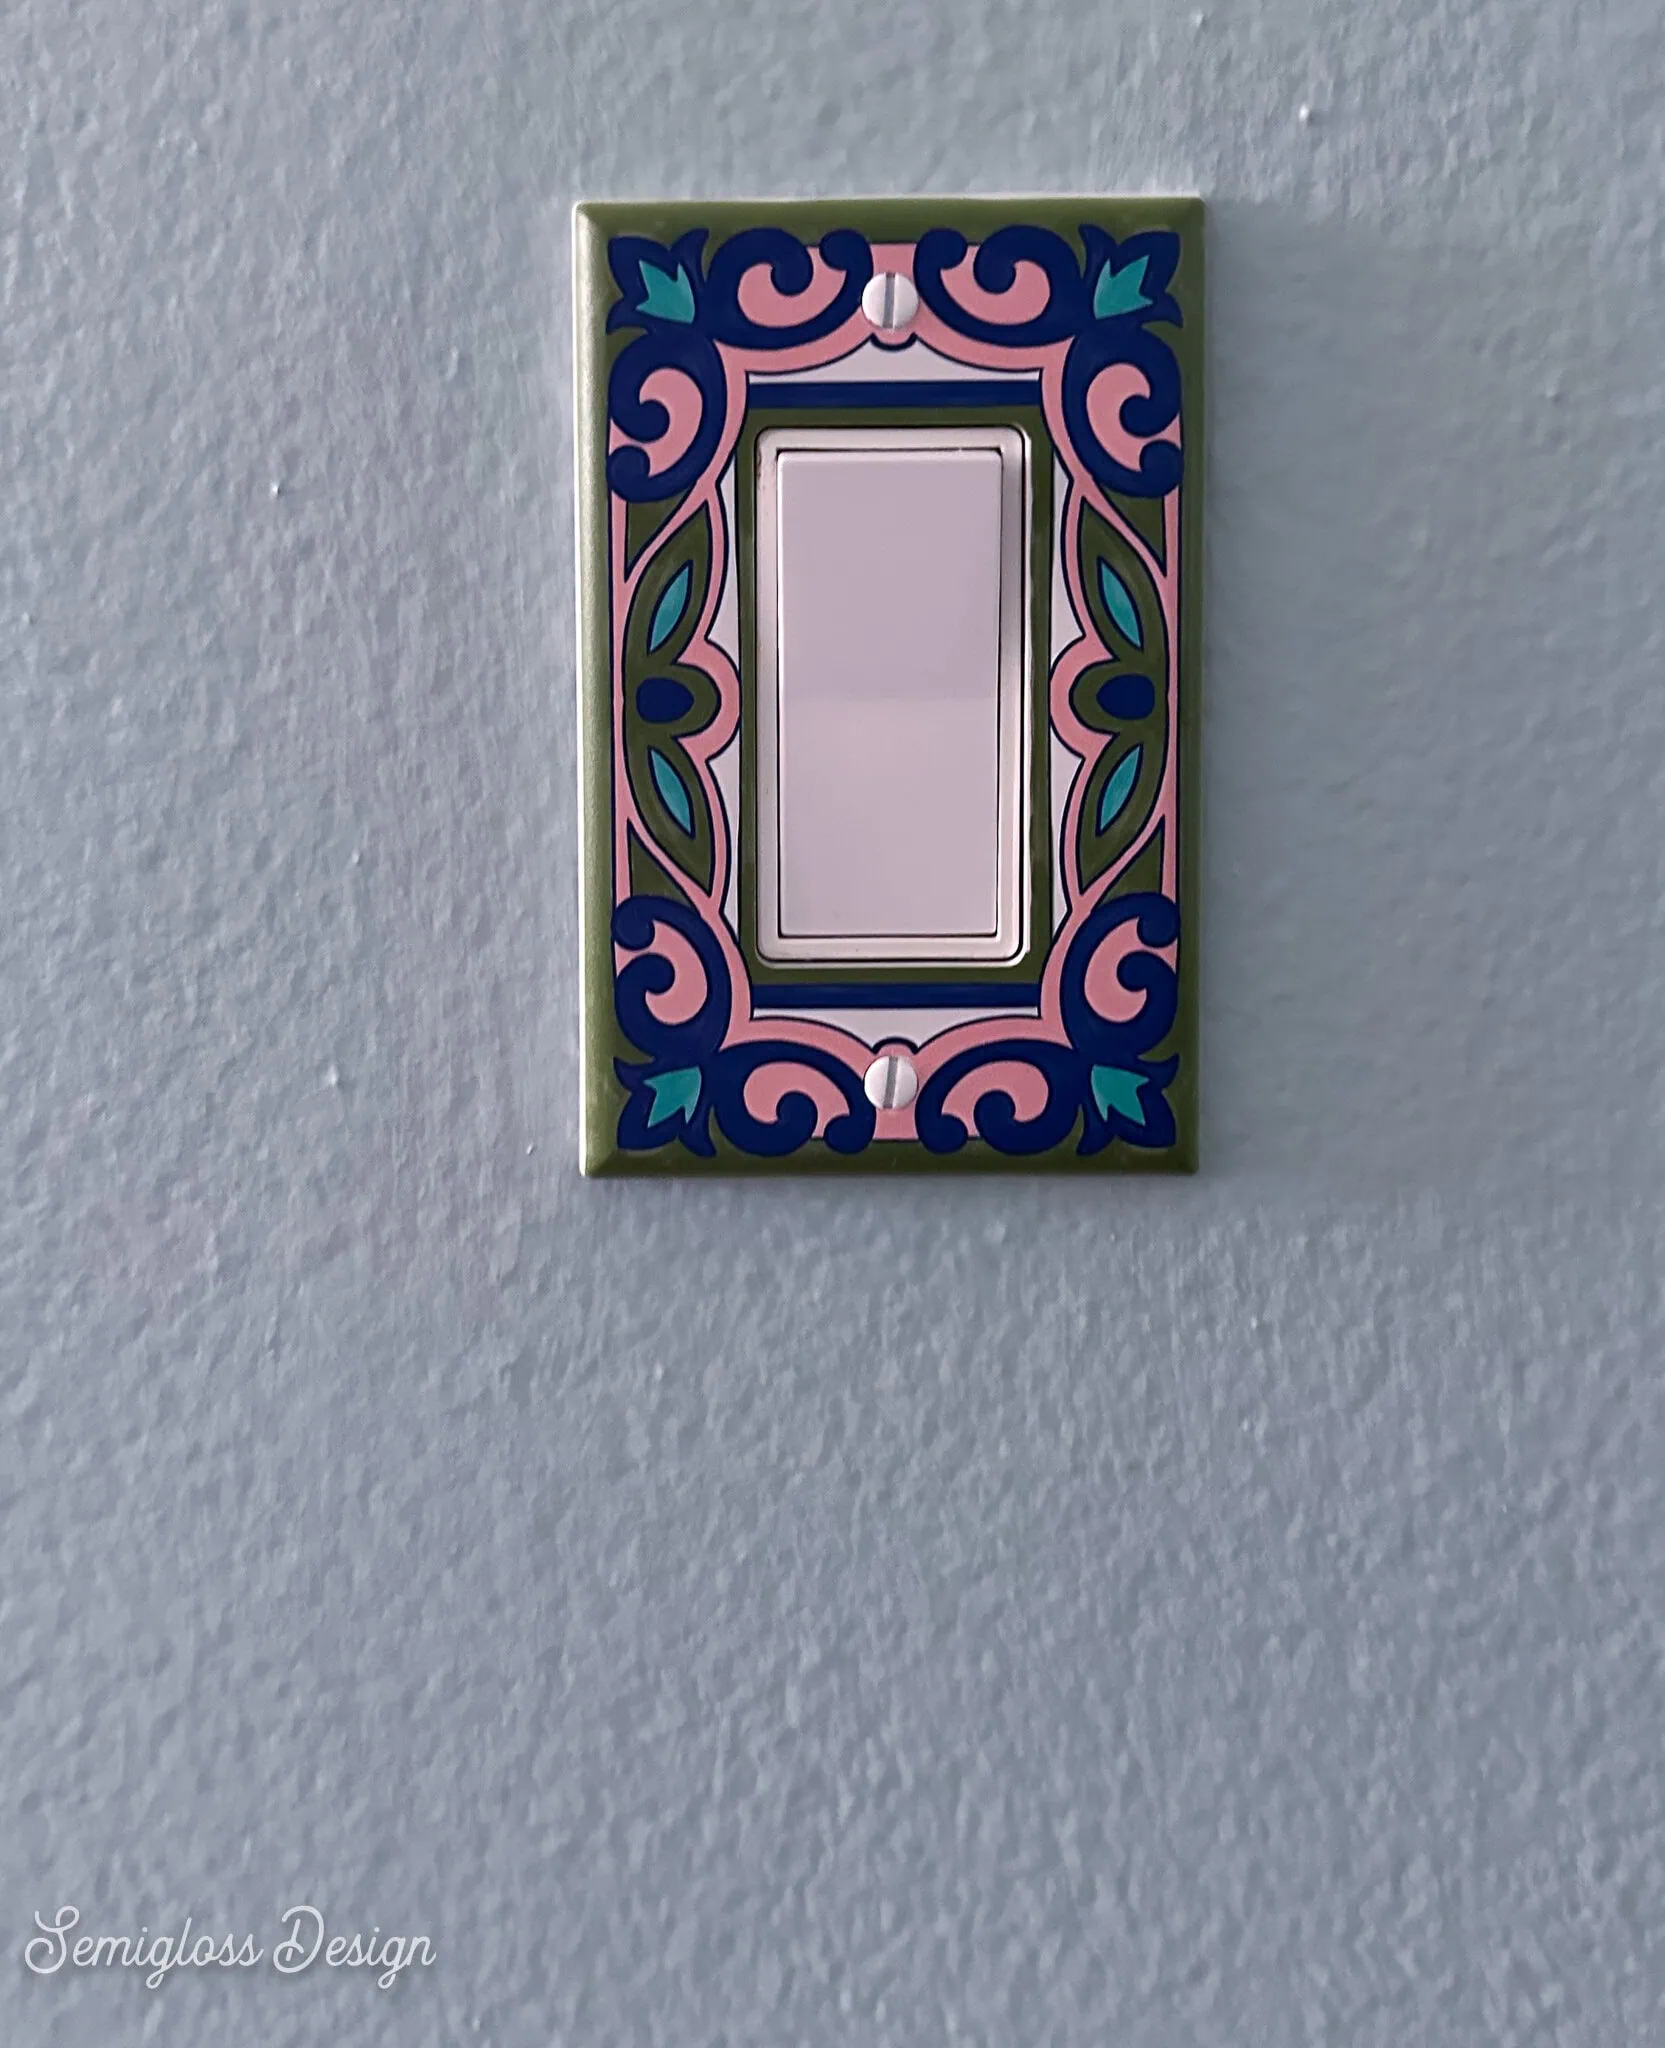
I designed this light switch cover to look like tile. I can’t wait to make more versions.
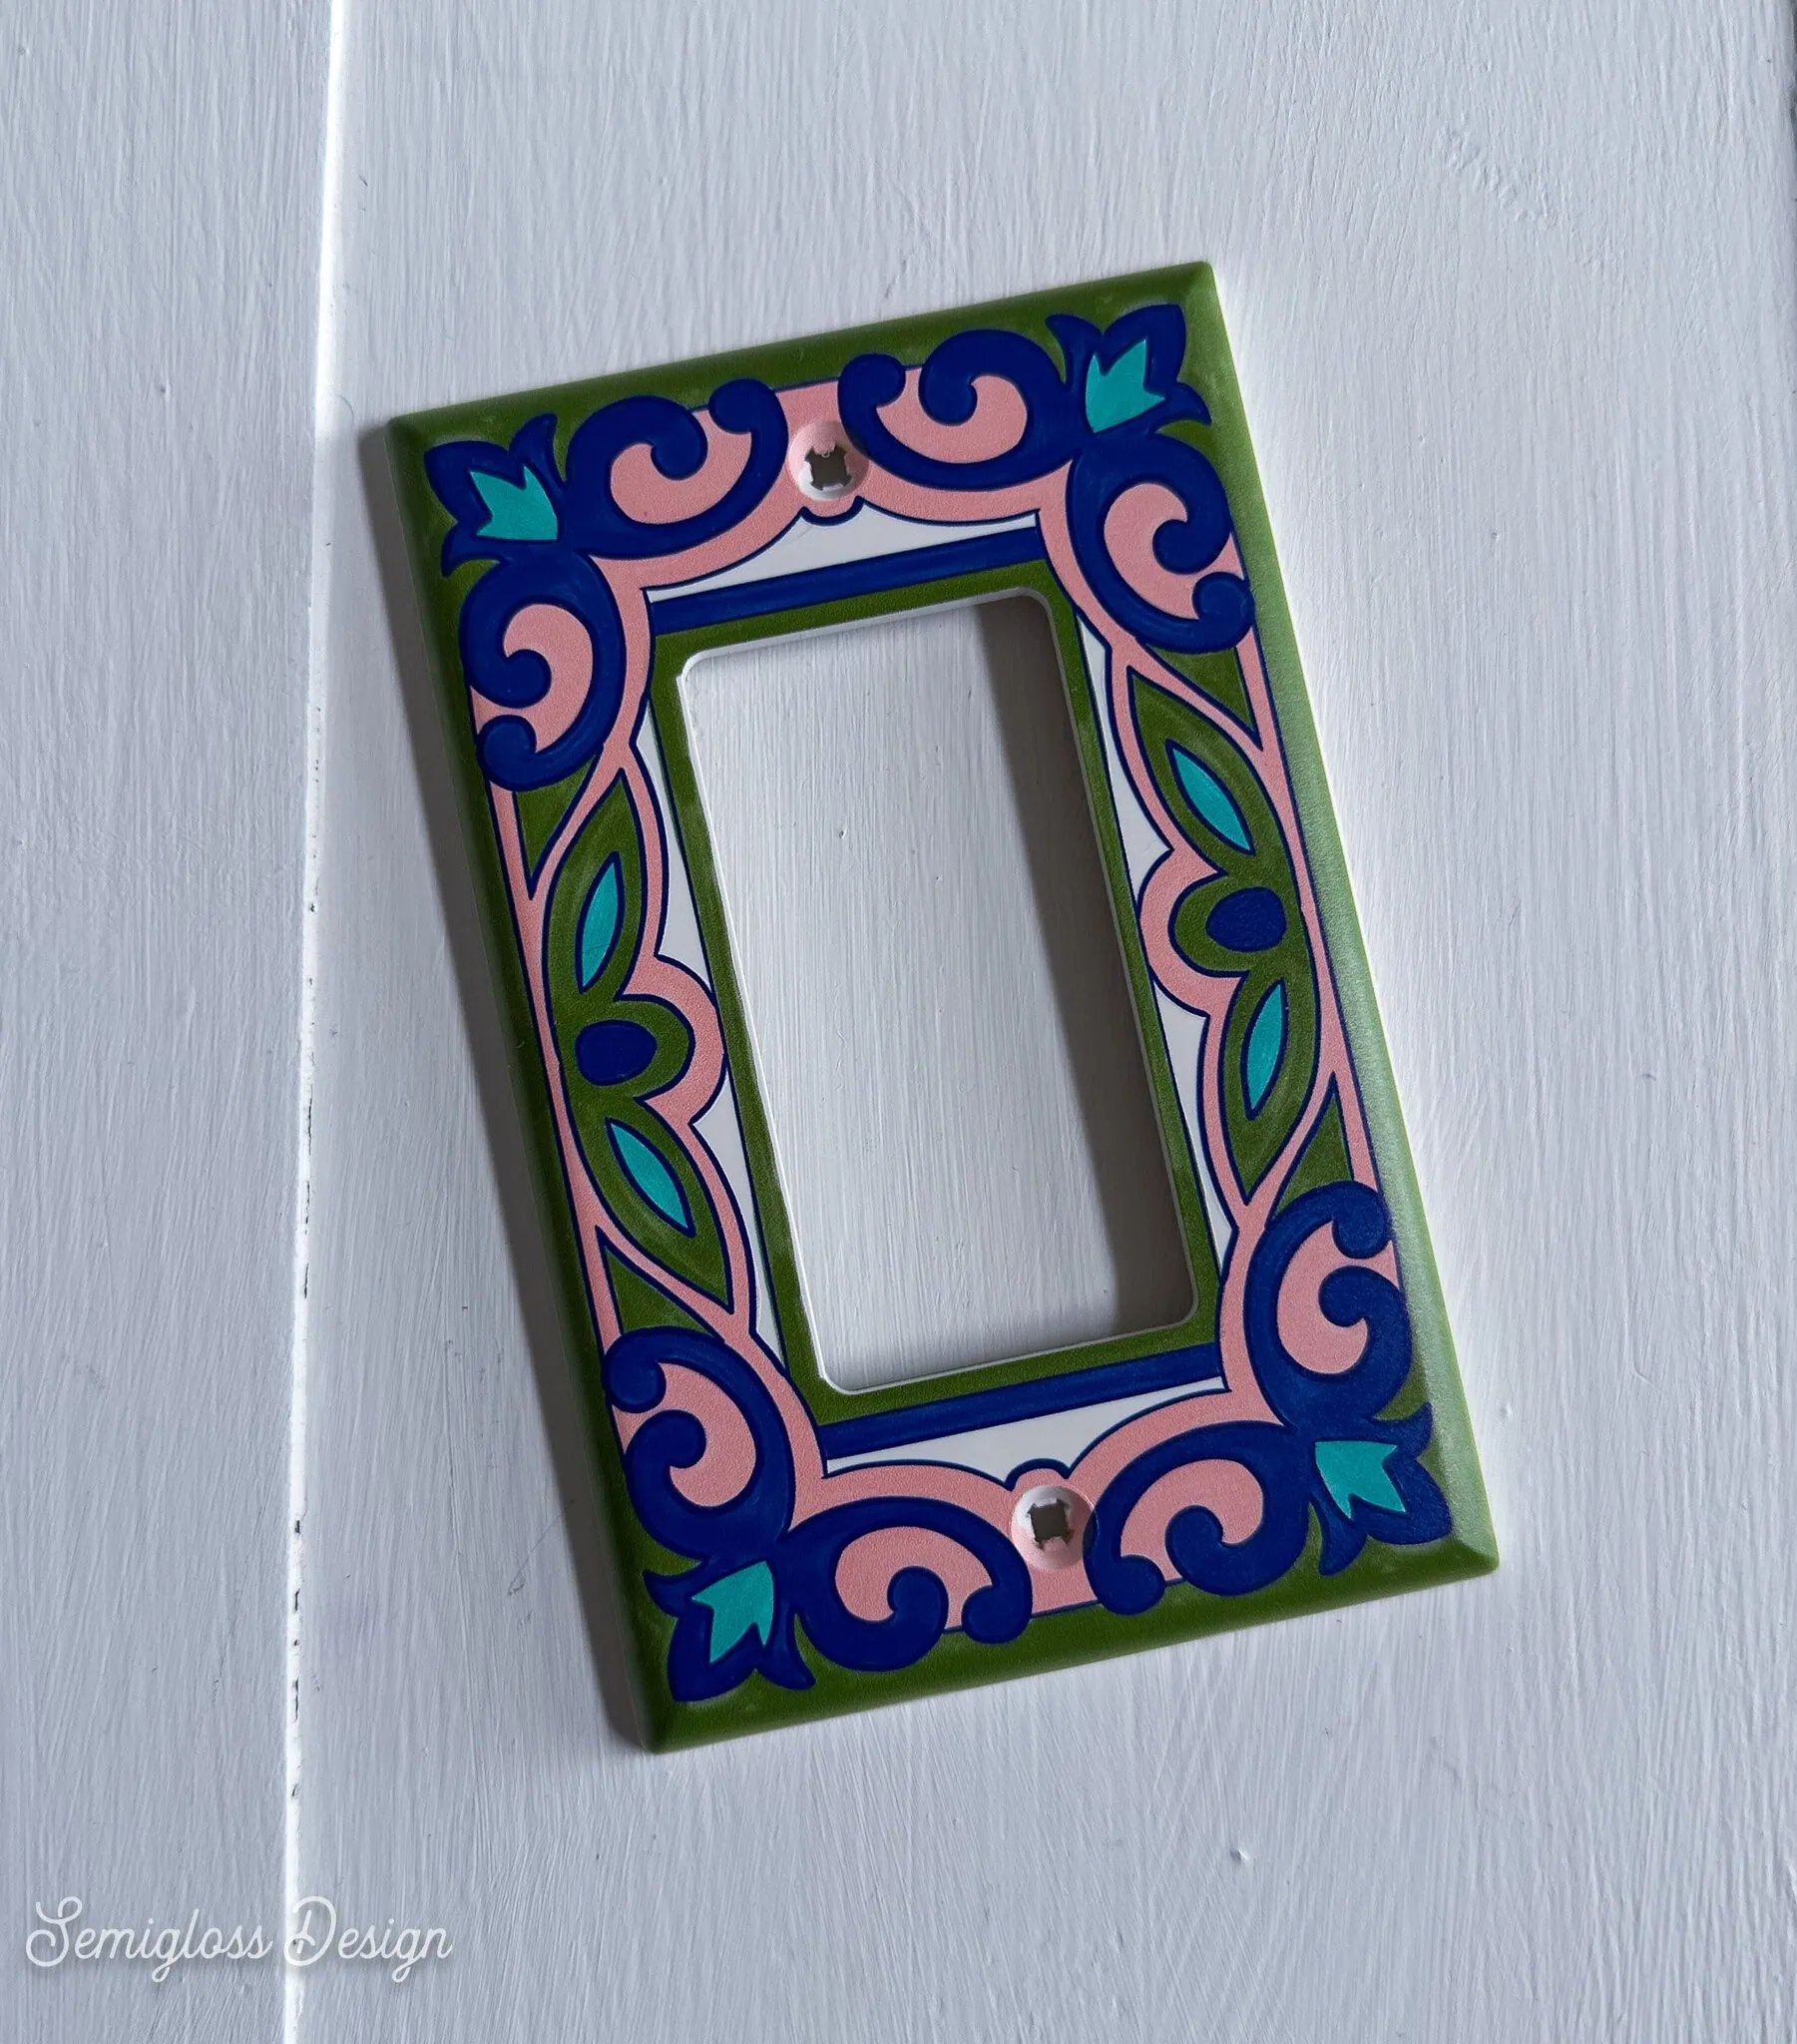
Yes, I’m obsessed with making my own light switch covers. There are so few cute ones available! Why not make your own?
Phone case
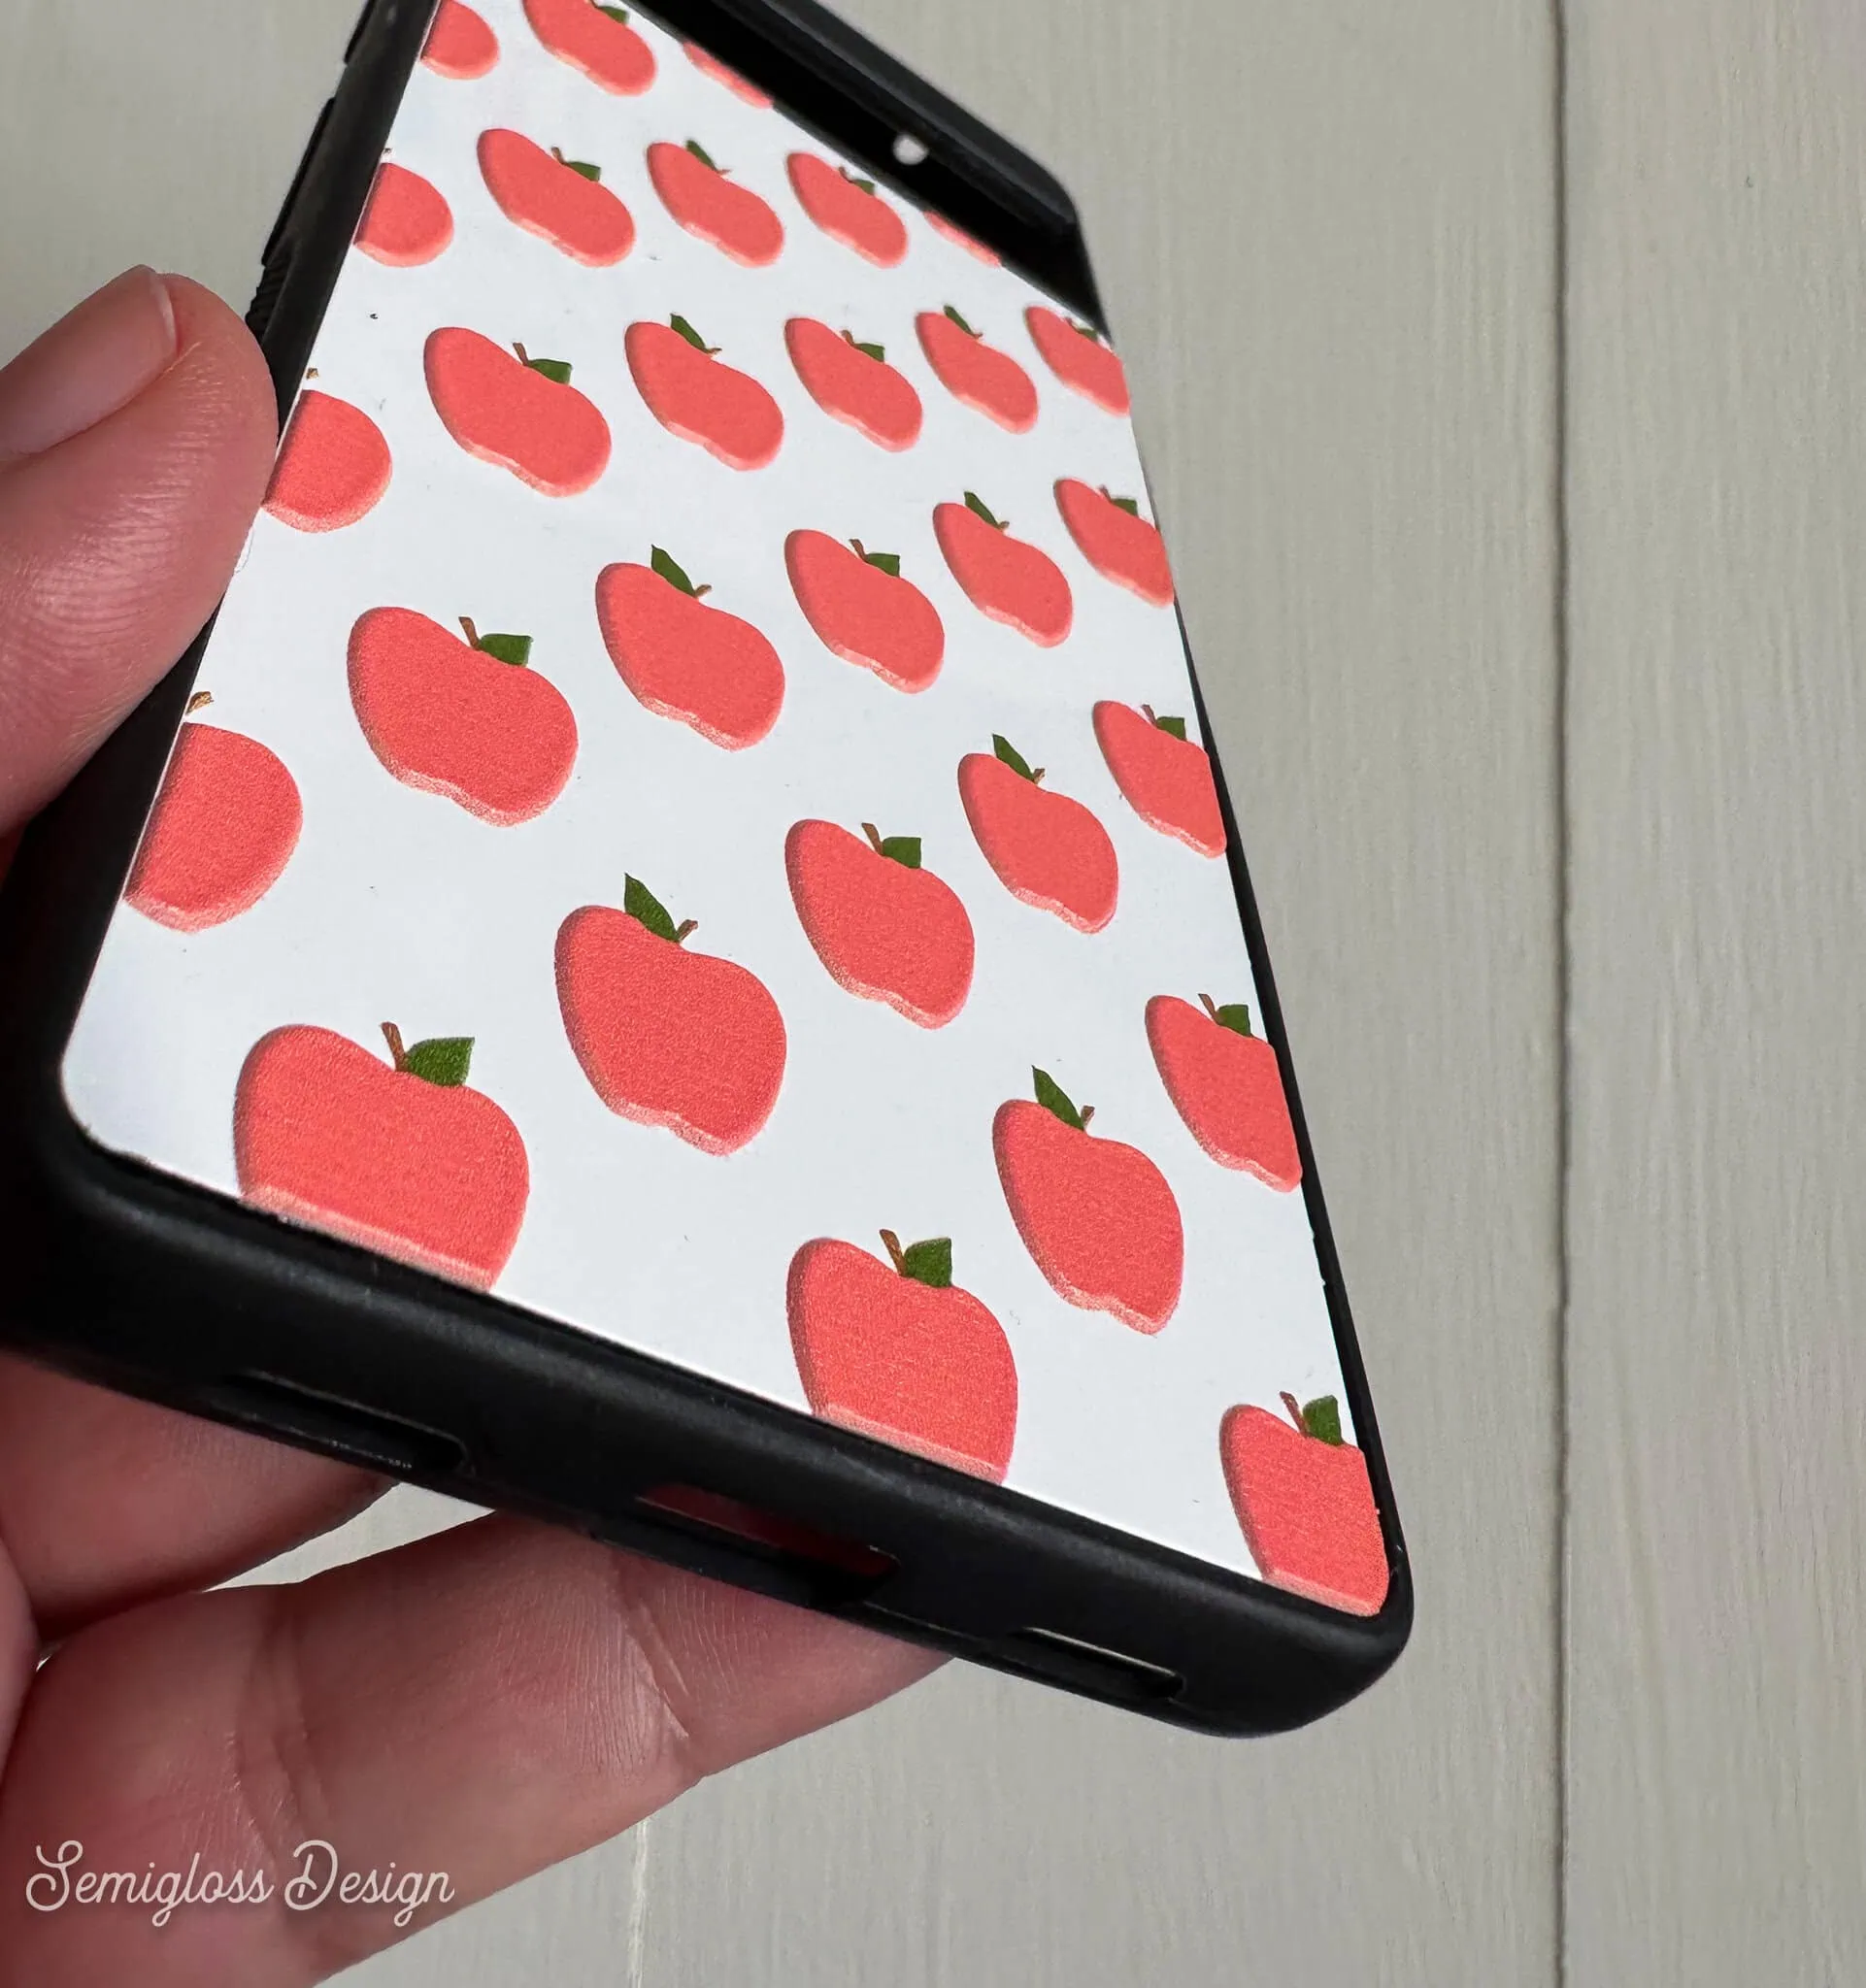
This is a sublimation phone case blank for the Google Pixel phone. My family all use Pixel phones, and there is a real lack of cute cases for them. My youngest is obsessed with apples, so I made him a cute apple case.
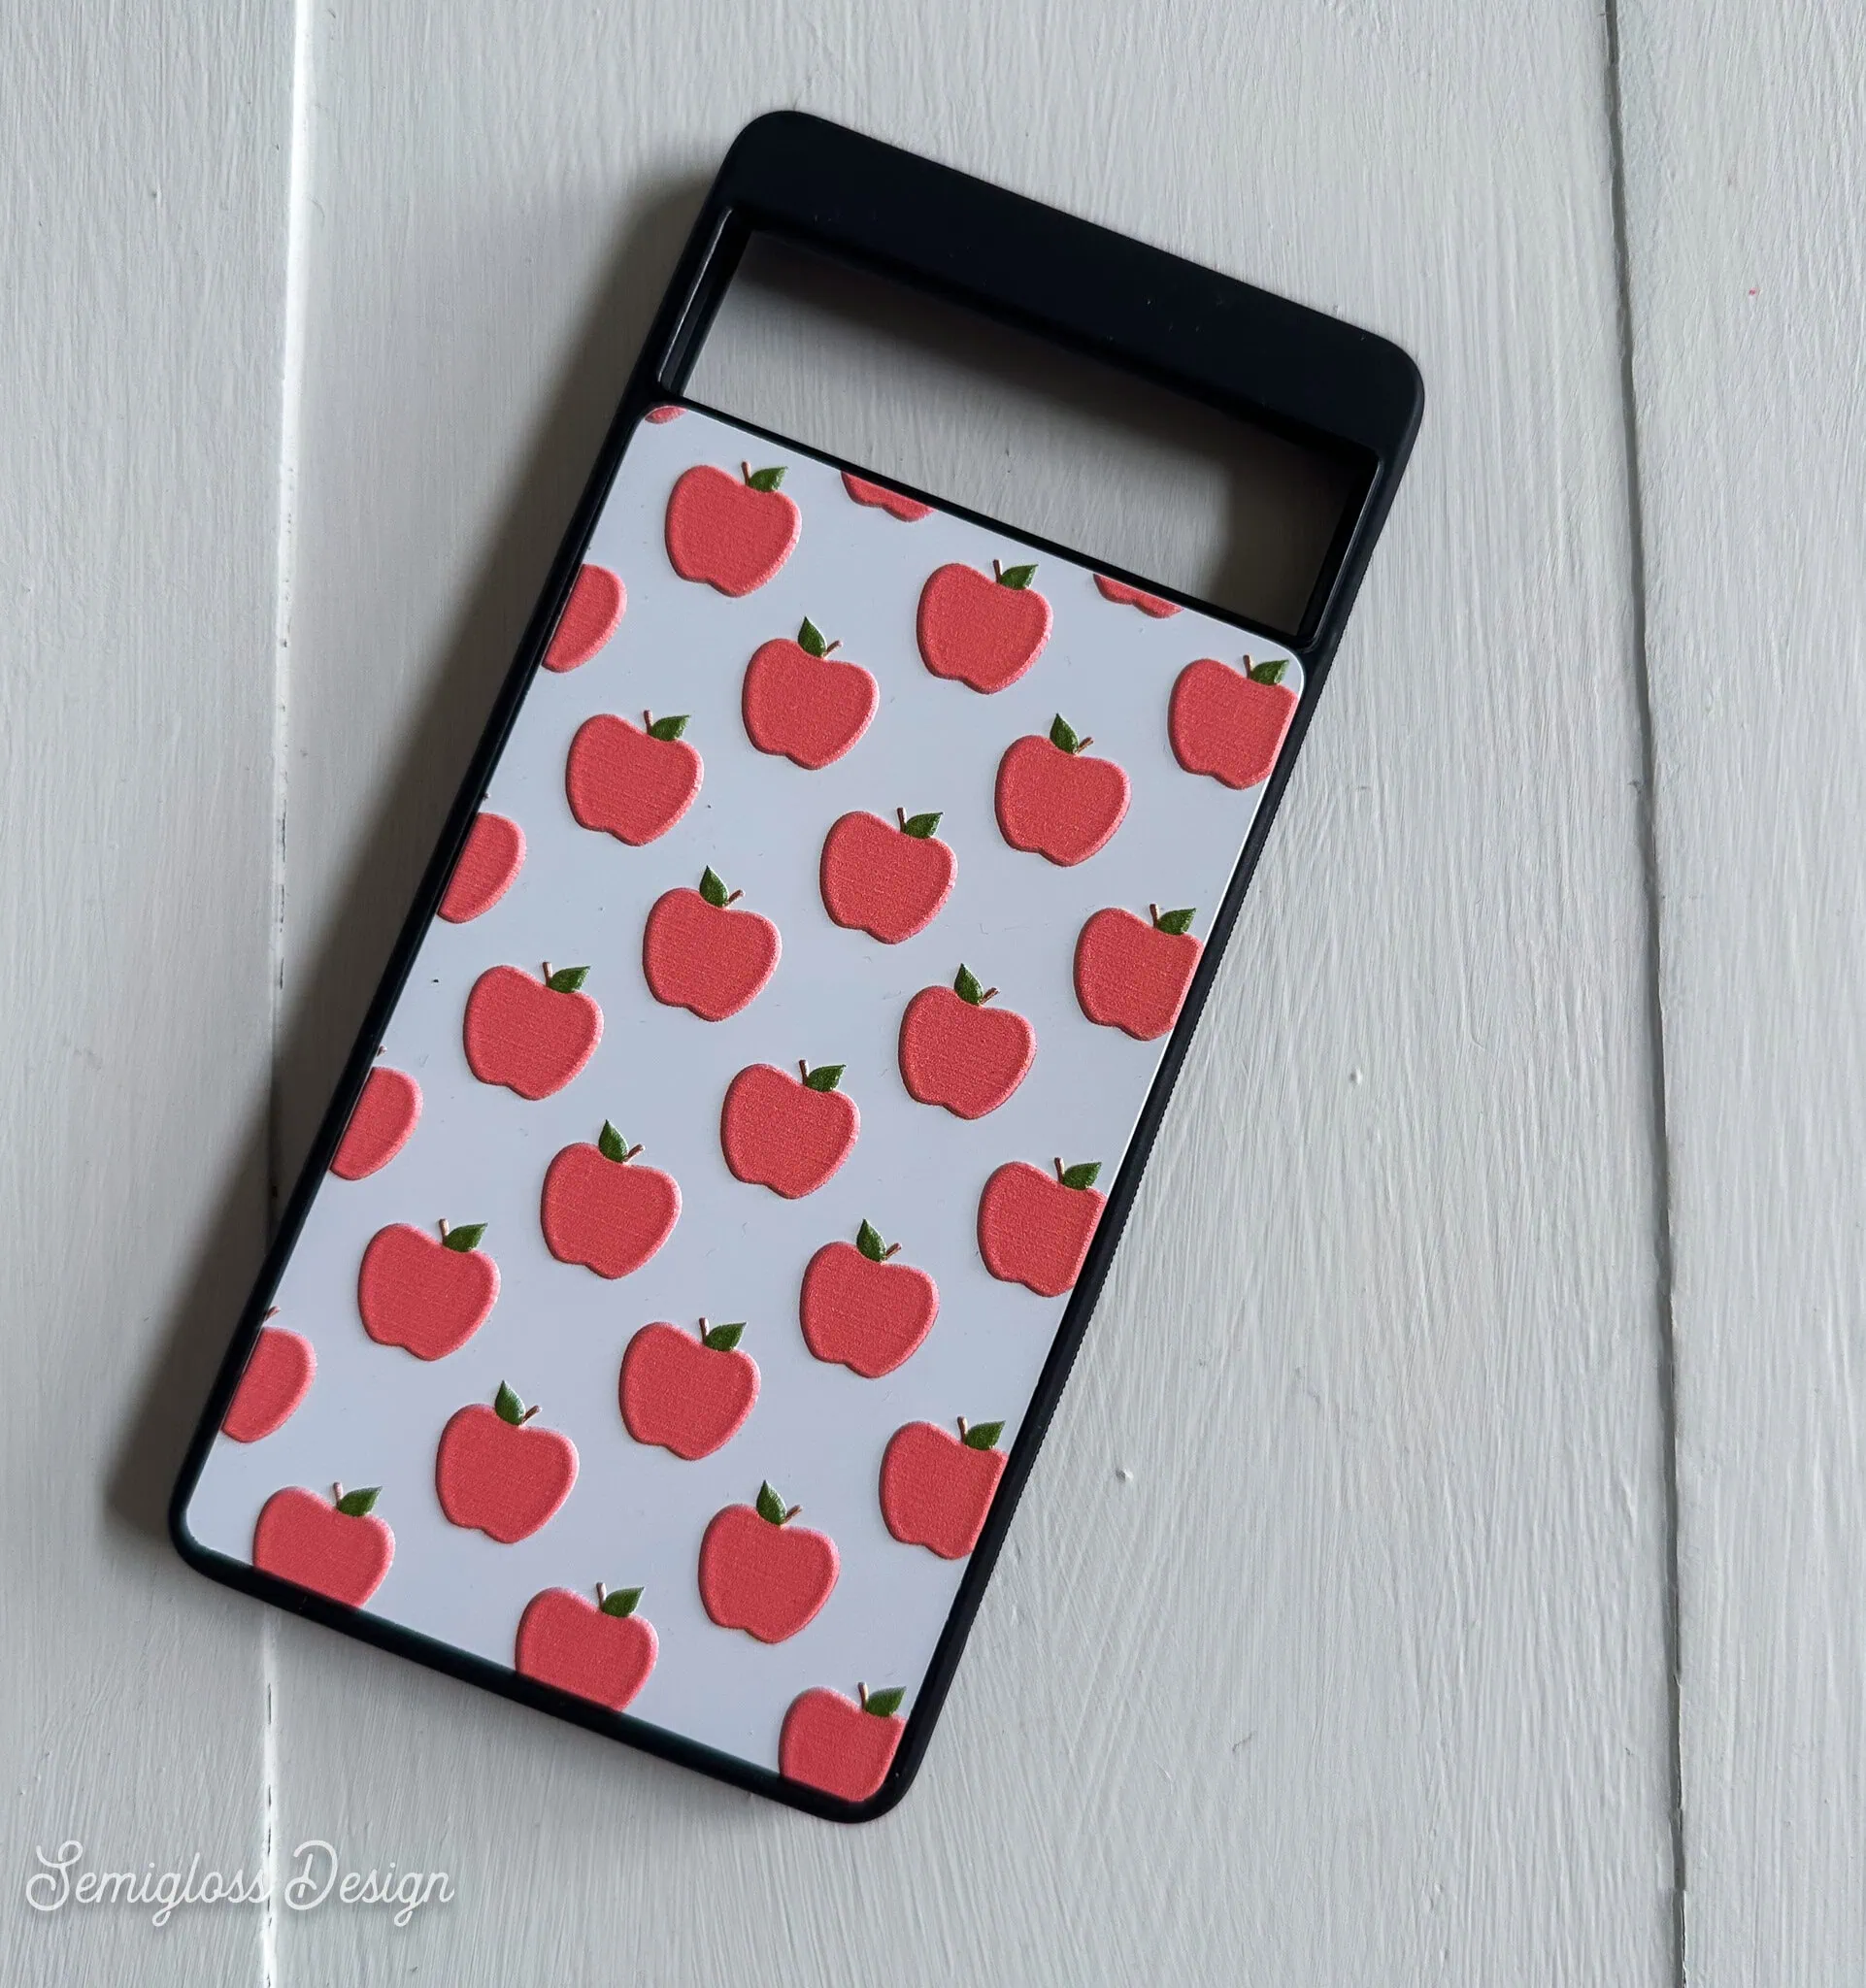
I added texture to the apples.
Bookmark
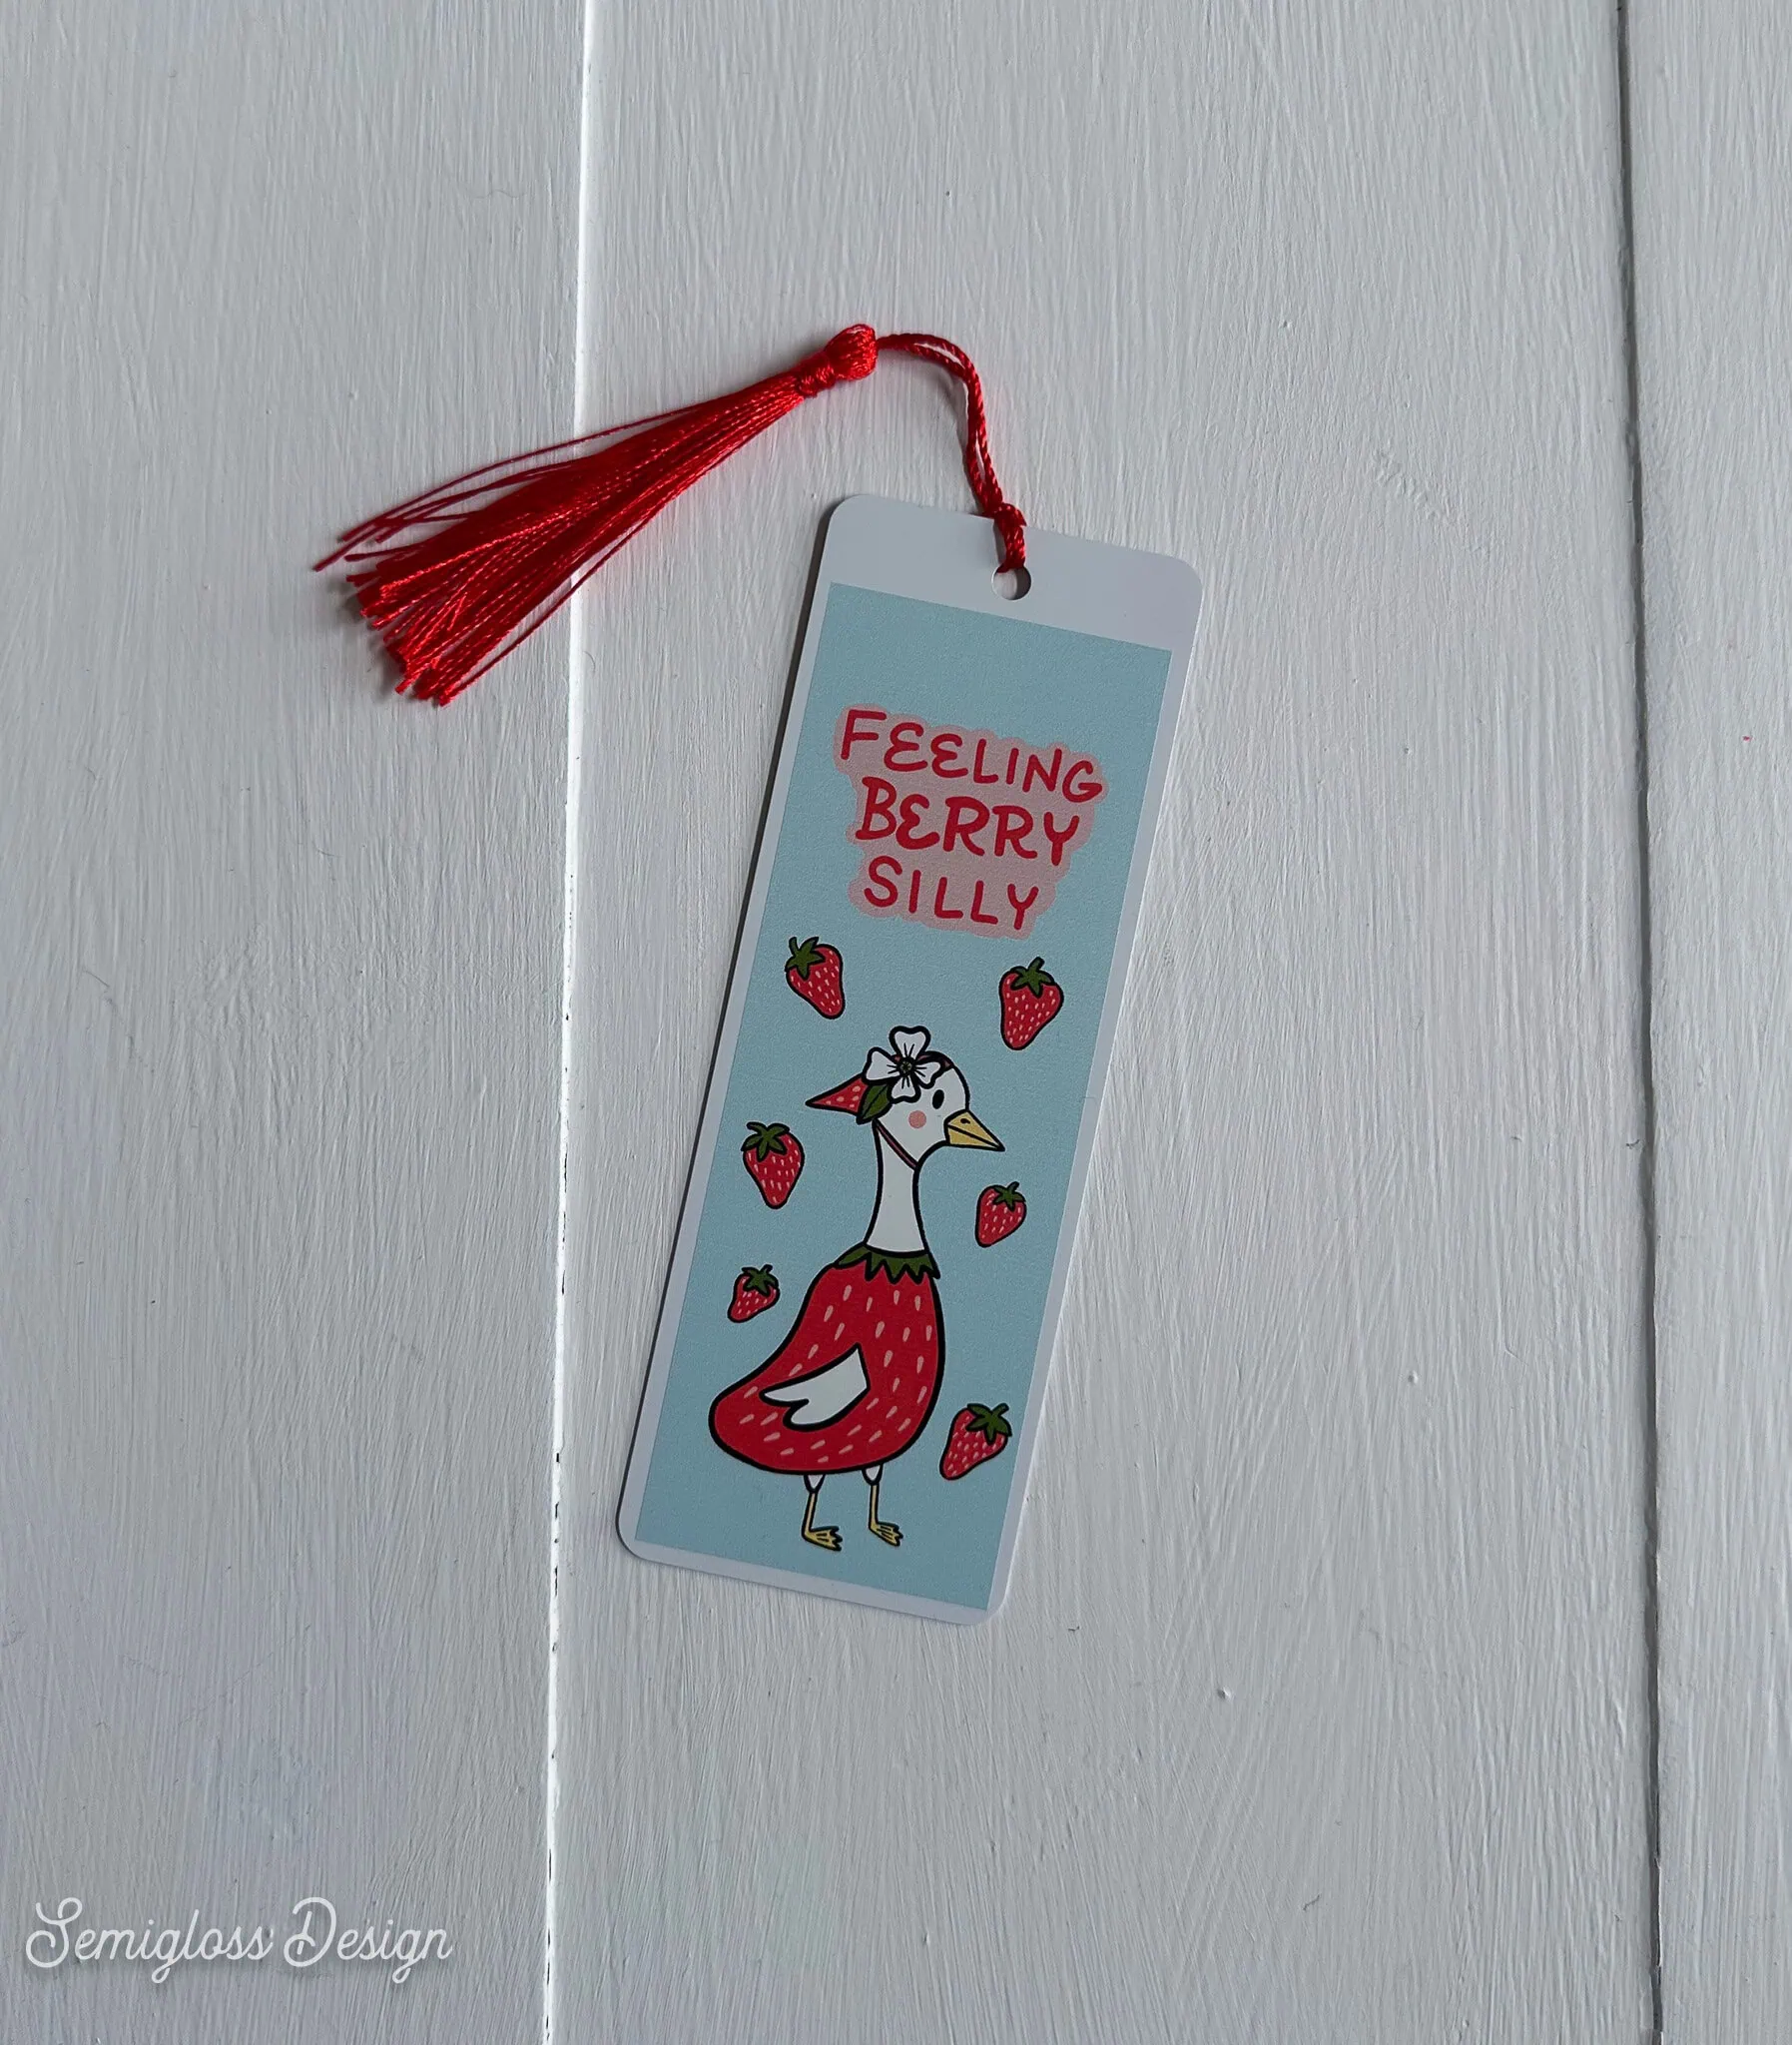
This bookmark is made on a metal sublimation bookmark.
Wooden ornaments (cut with my M1 laser cutter)
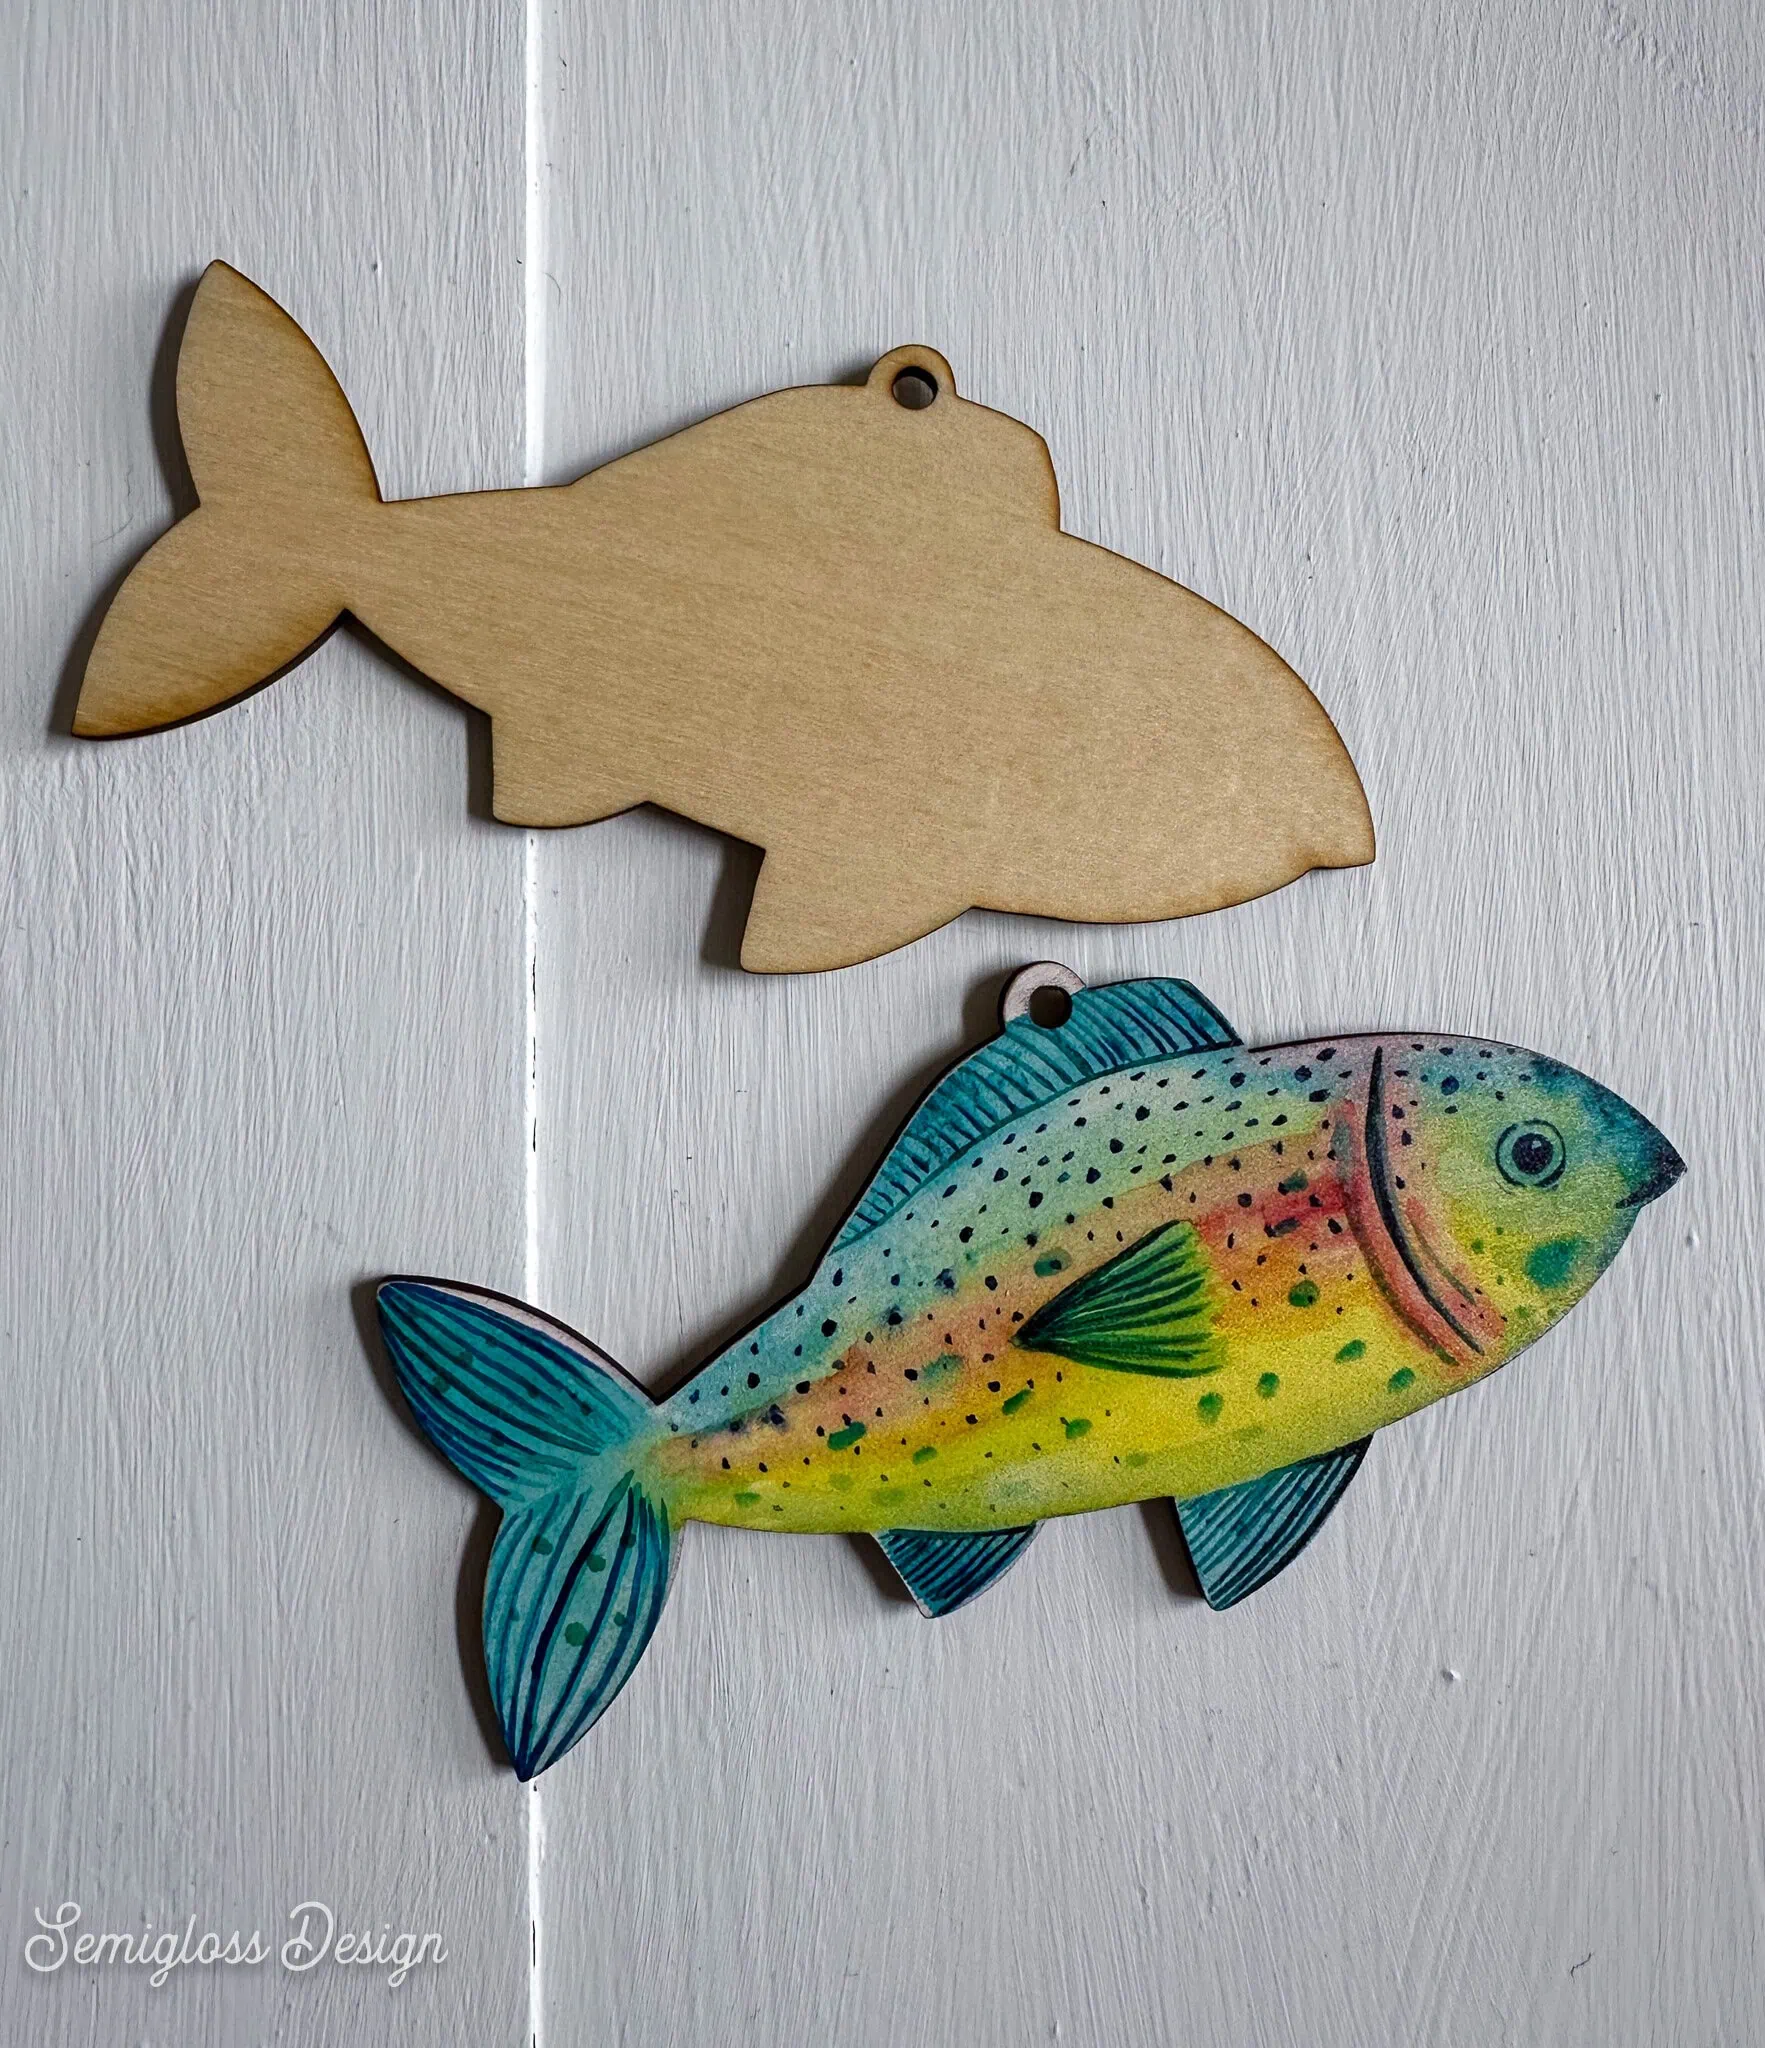
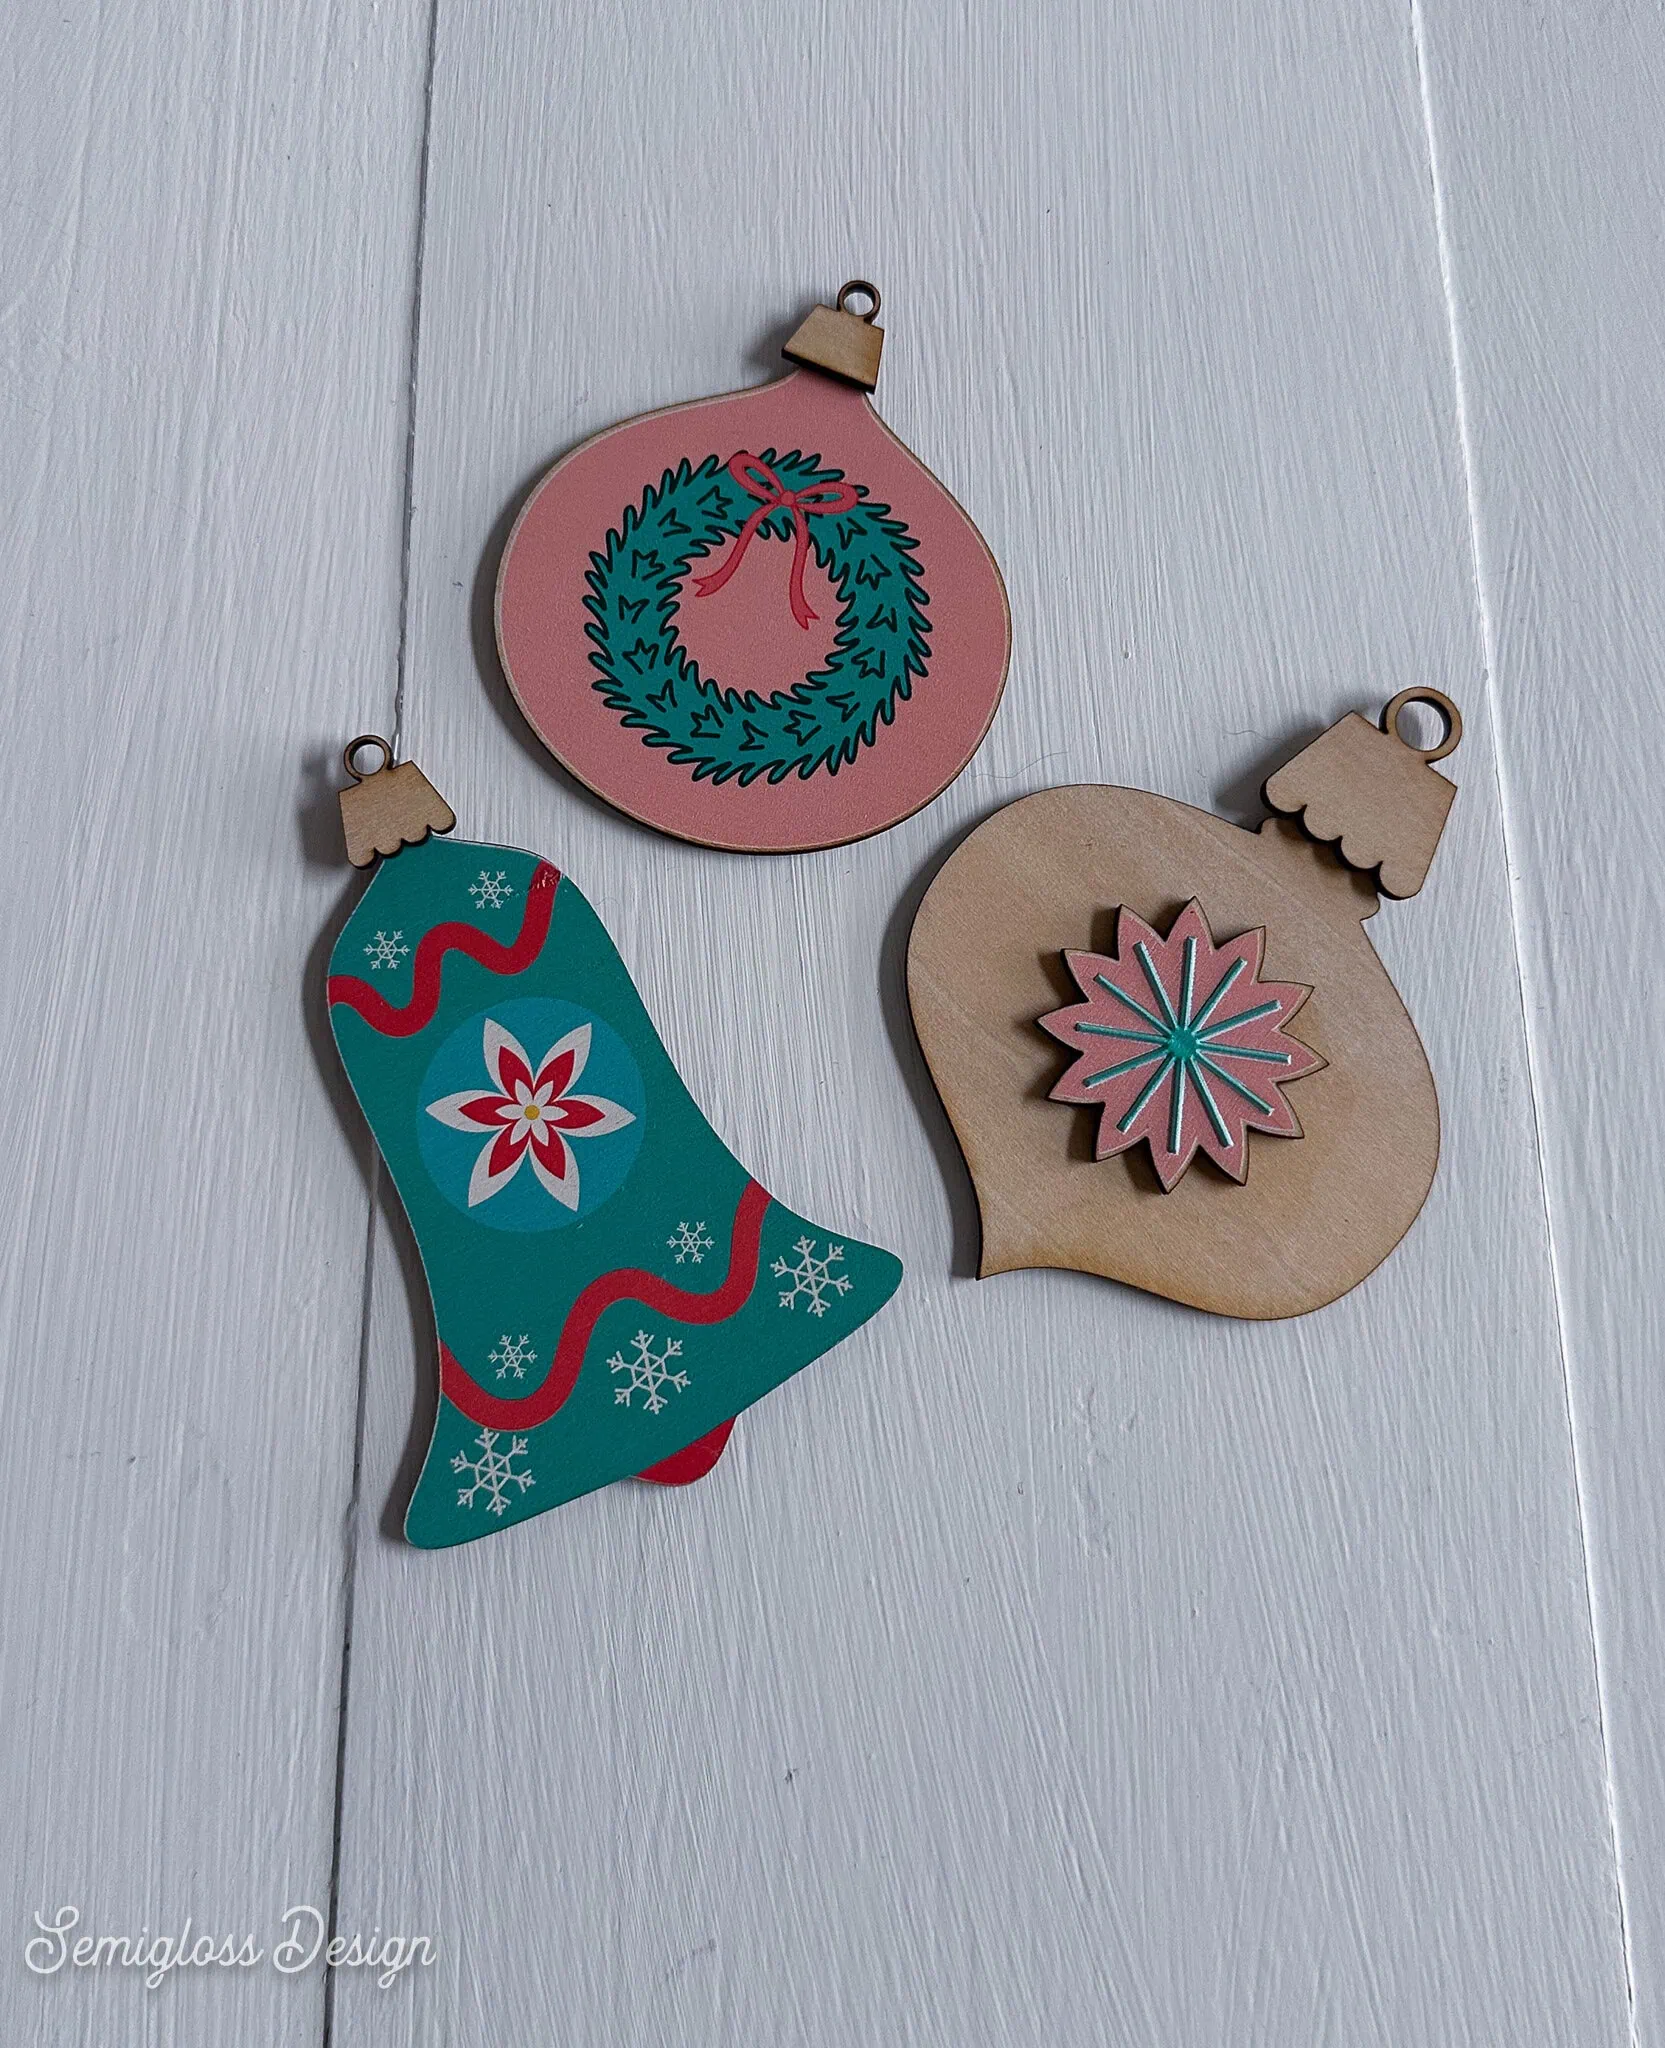
Christmas crafting is on my mind, so I used my laser cutter to cut wooden ornament shapes, and then I added hand-painted watercolor images to the fish. They turned out so much better than I expected!
I drew the vintage ornaments on my iPad. I can’t wait to make more of these.
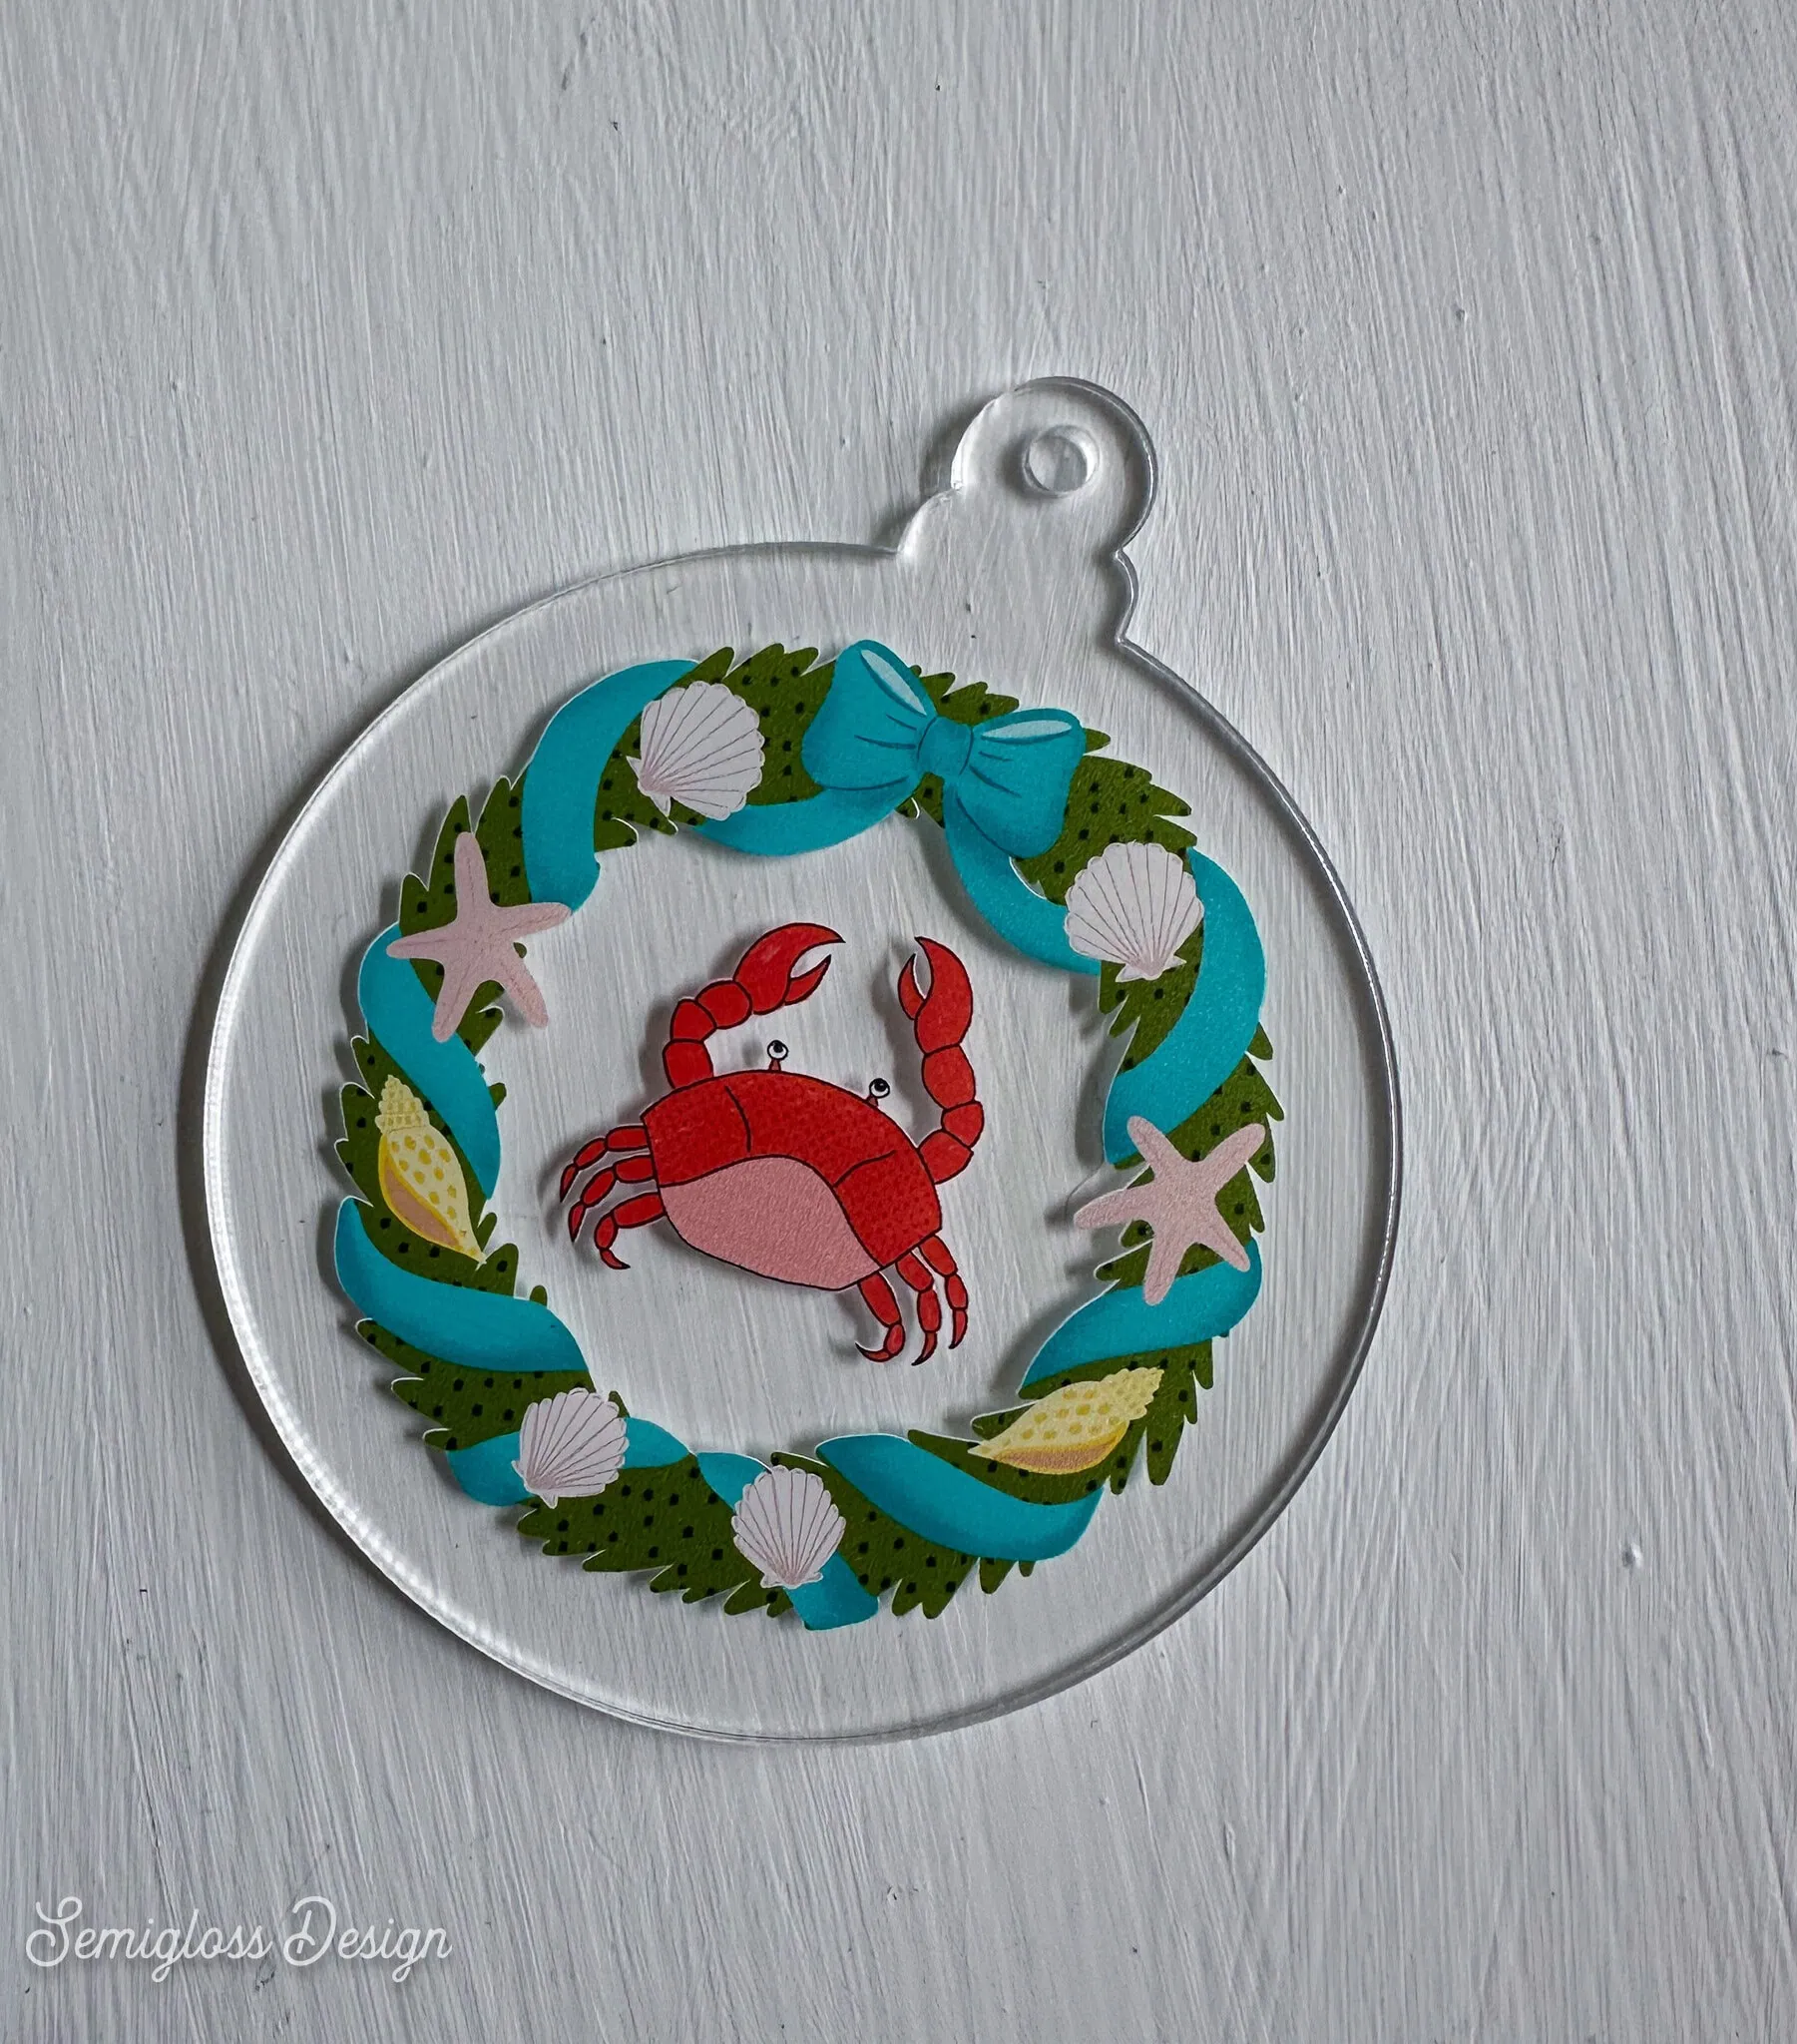
Acrylic ornament blank
These acrylic ornament blanks are so much fun to print on. They come in a variety of shapes, too. It shows off even the tiniest of details!
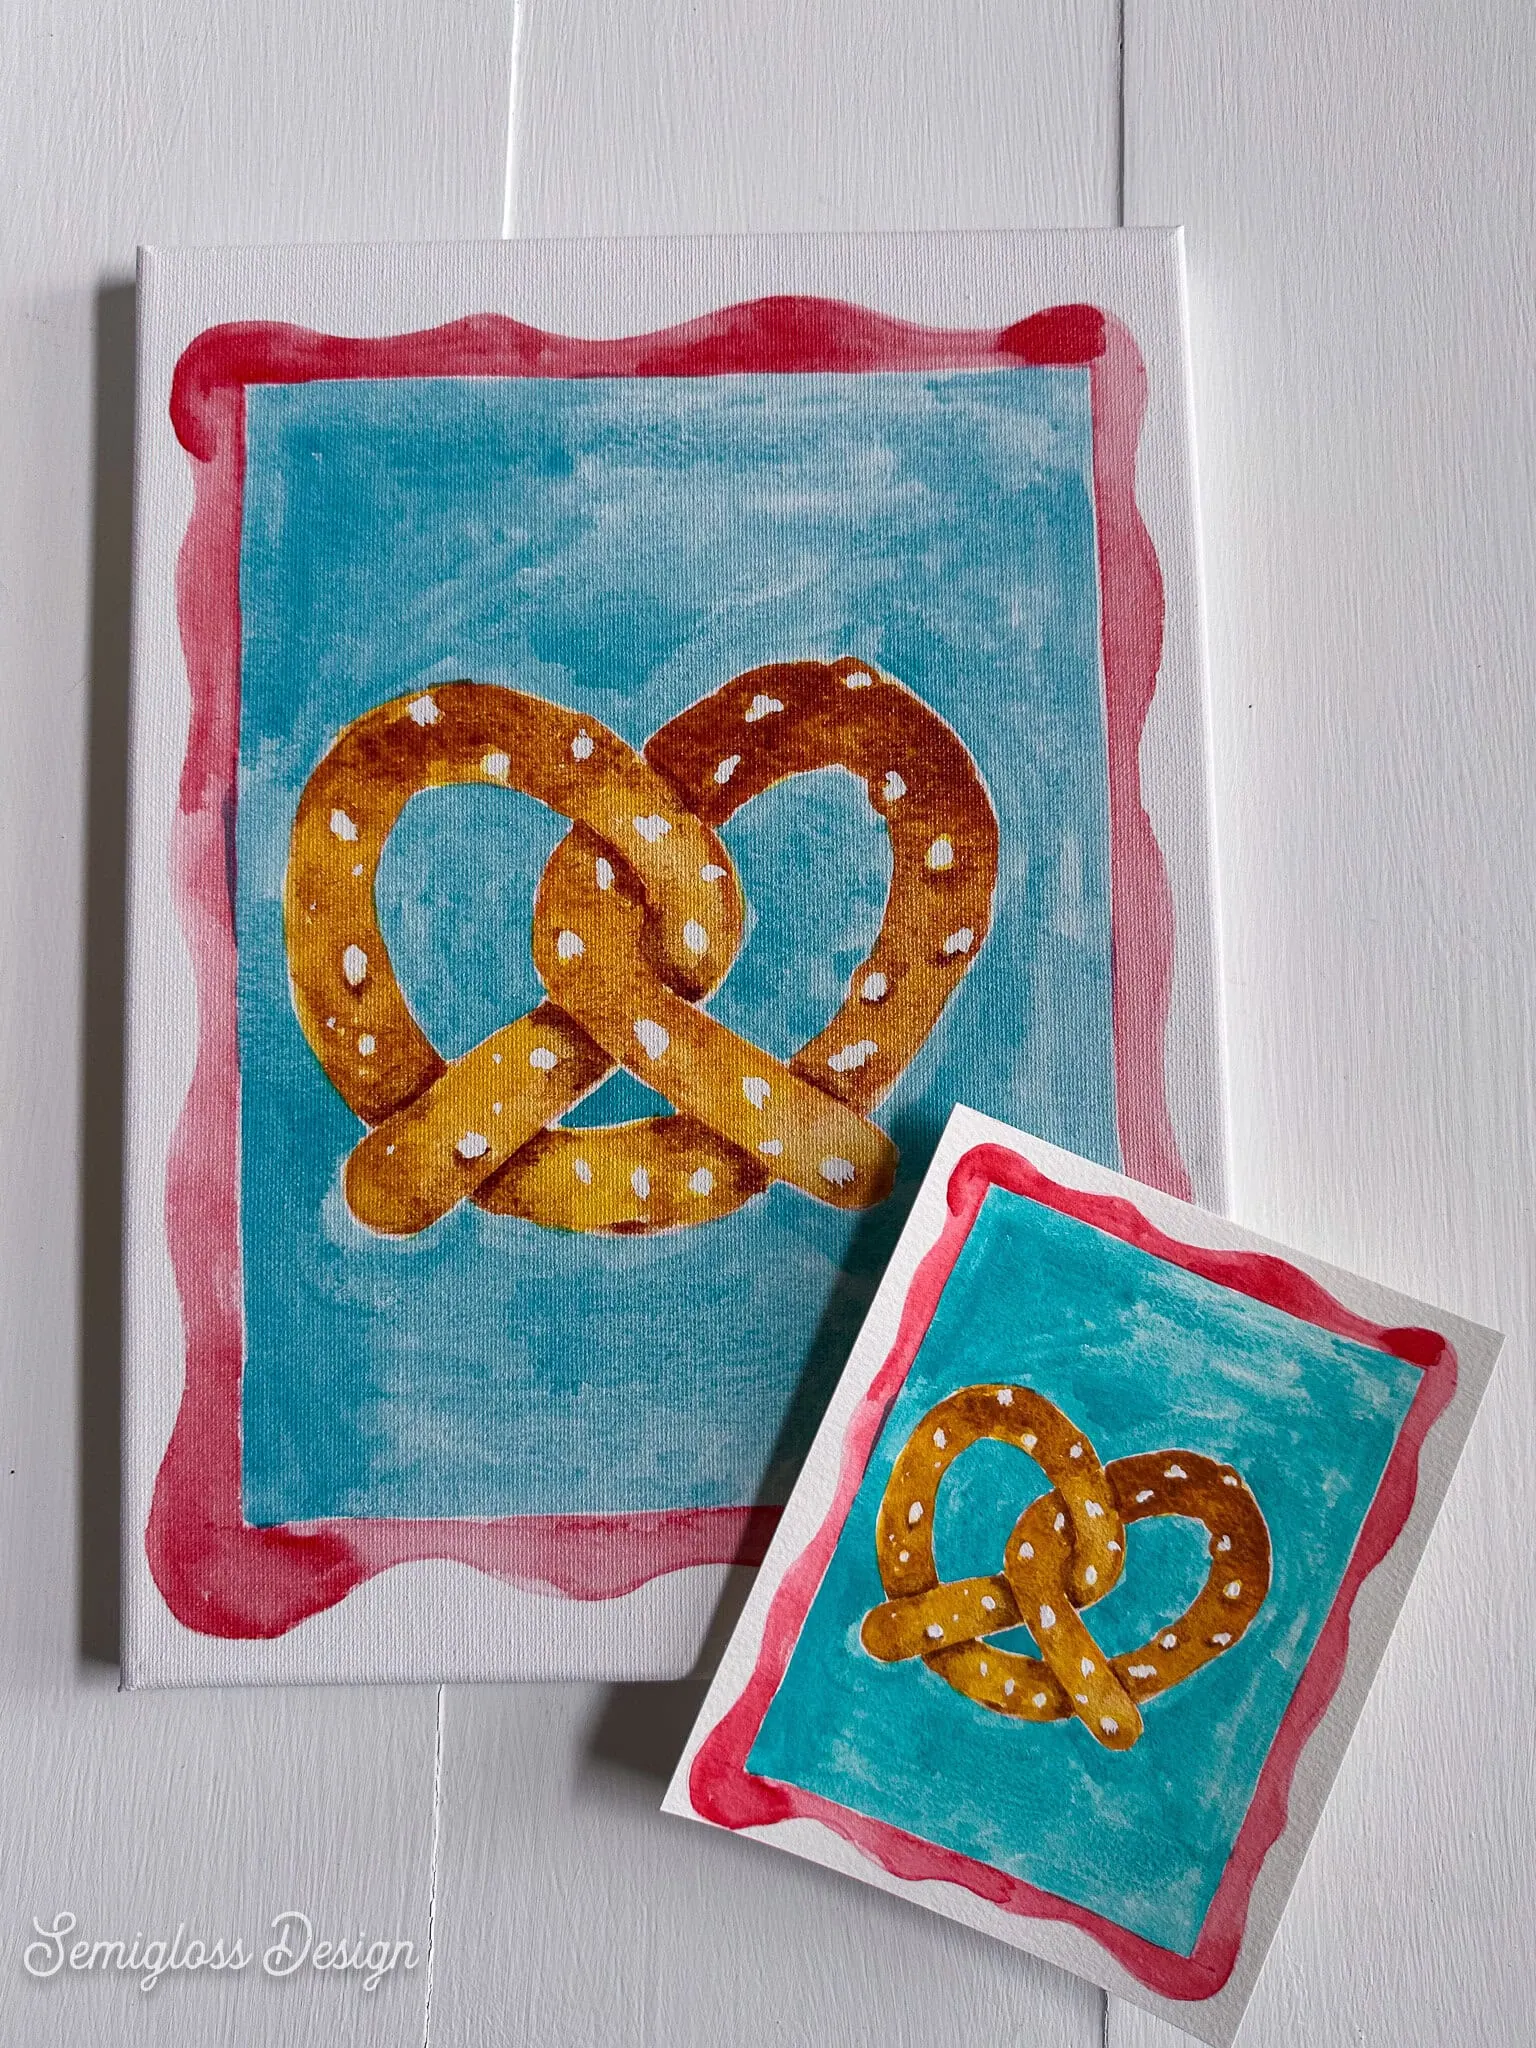
Canvas
I wanted to test watercolor texture to see how it looked printed. I scanned the smaller image at a higher resolution so I could enlarge it. Then I printed it onto the canvas. It turned out so much better than I thought it would! Watercolor texture can be tricky on products, but it’s so pretty.
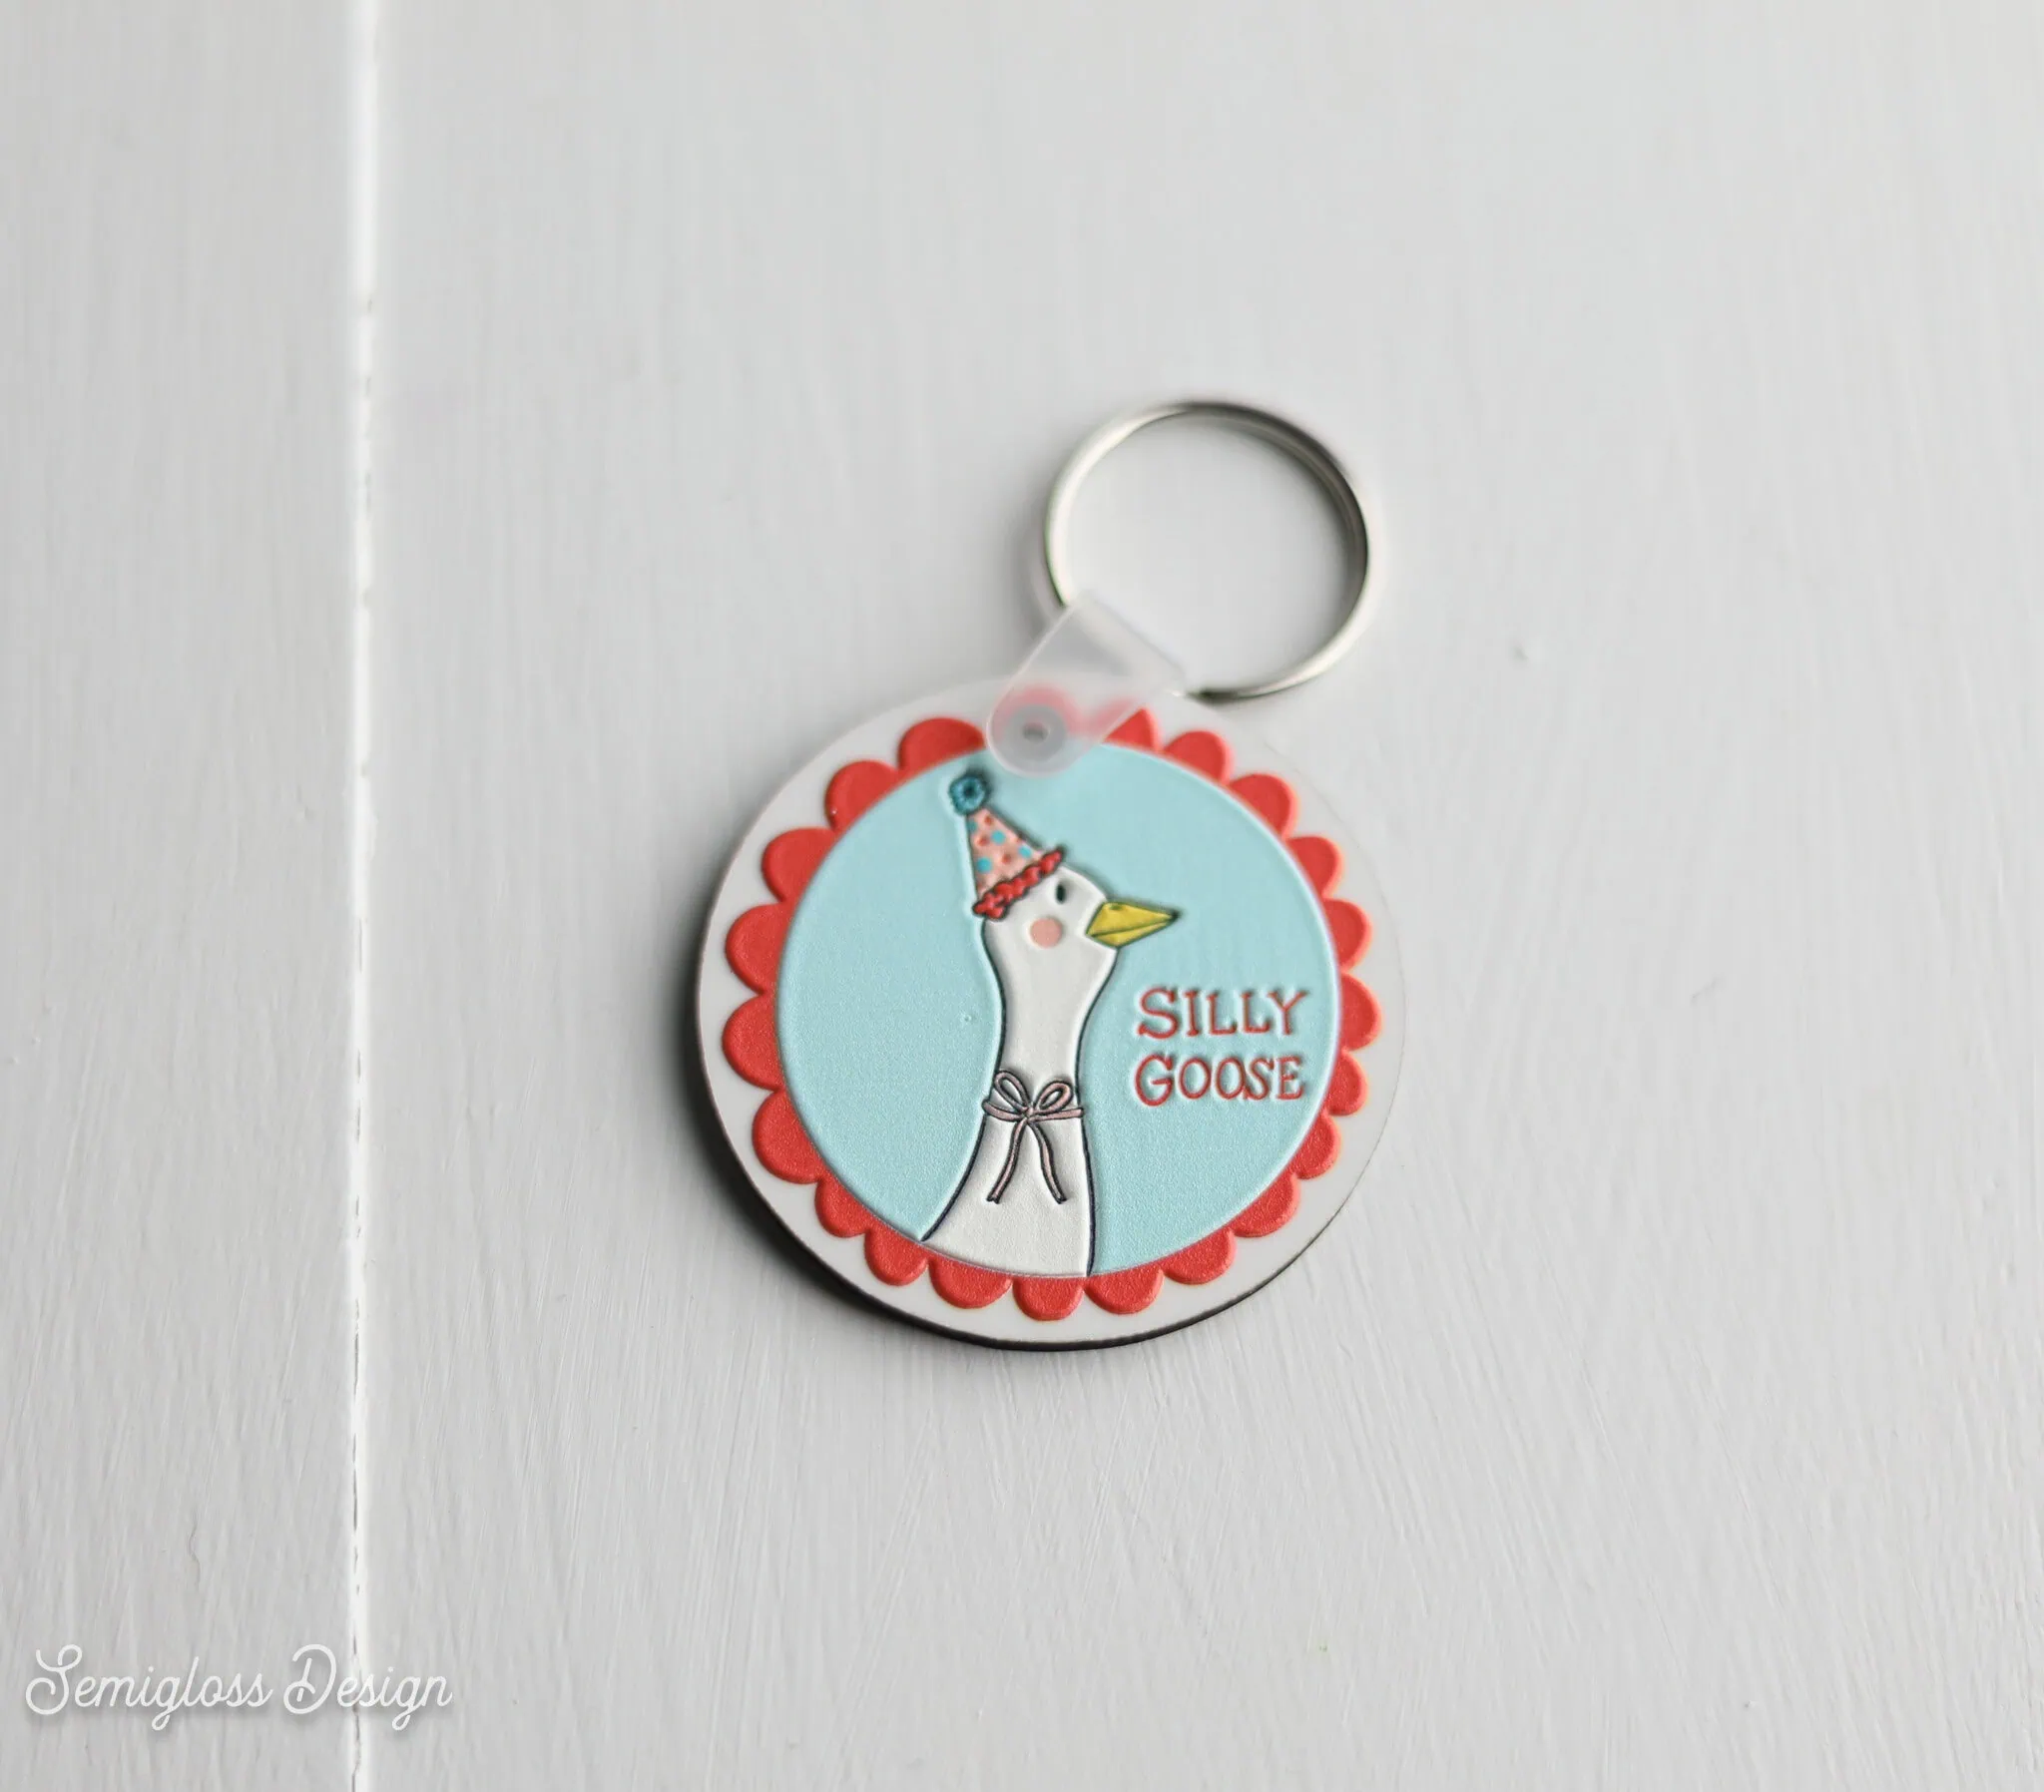
Keychain
This small keychain brings me so much joy. I printed a very silly goose onto this sublimation keychain blank and added a bit of texture.
Sticker Paper
I love making stickers, so I had to test how it looked on waterproof sticker paper. It looks great because it uses a high-quality printer. These stickers can be cut by hand, but I’ll be playing with a few other options in an upcoming tutorial.
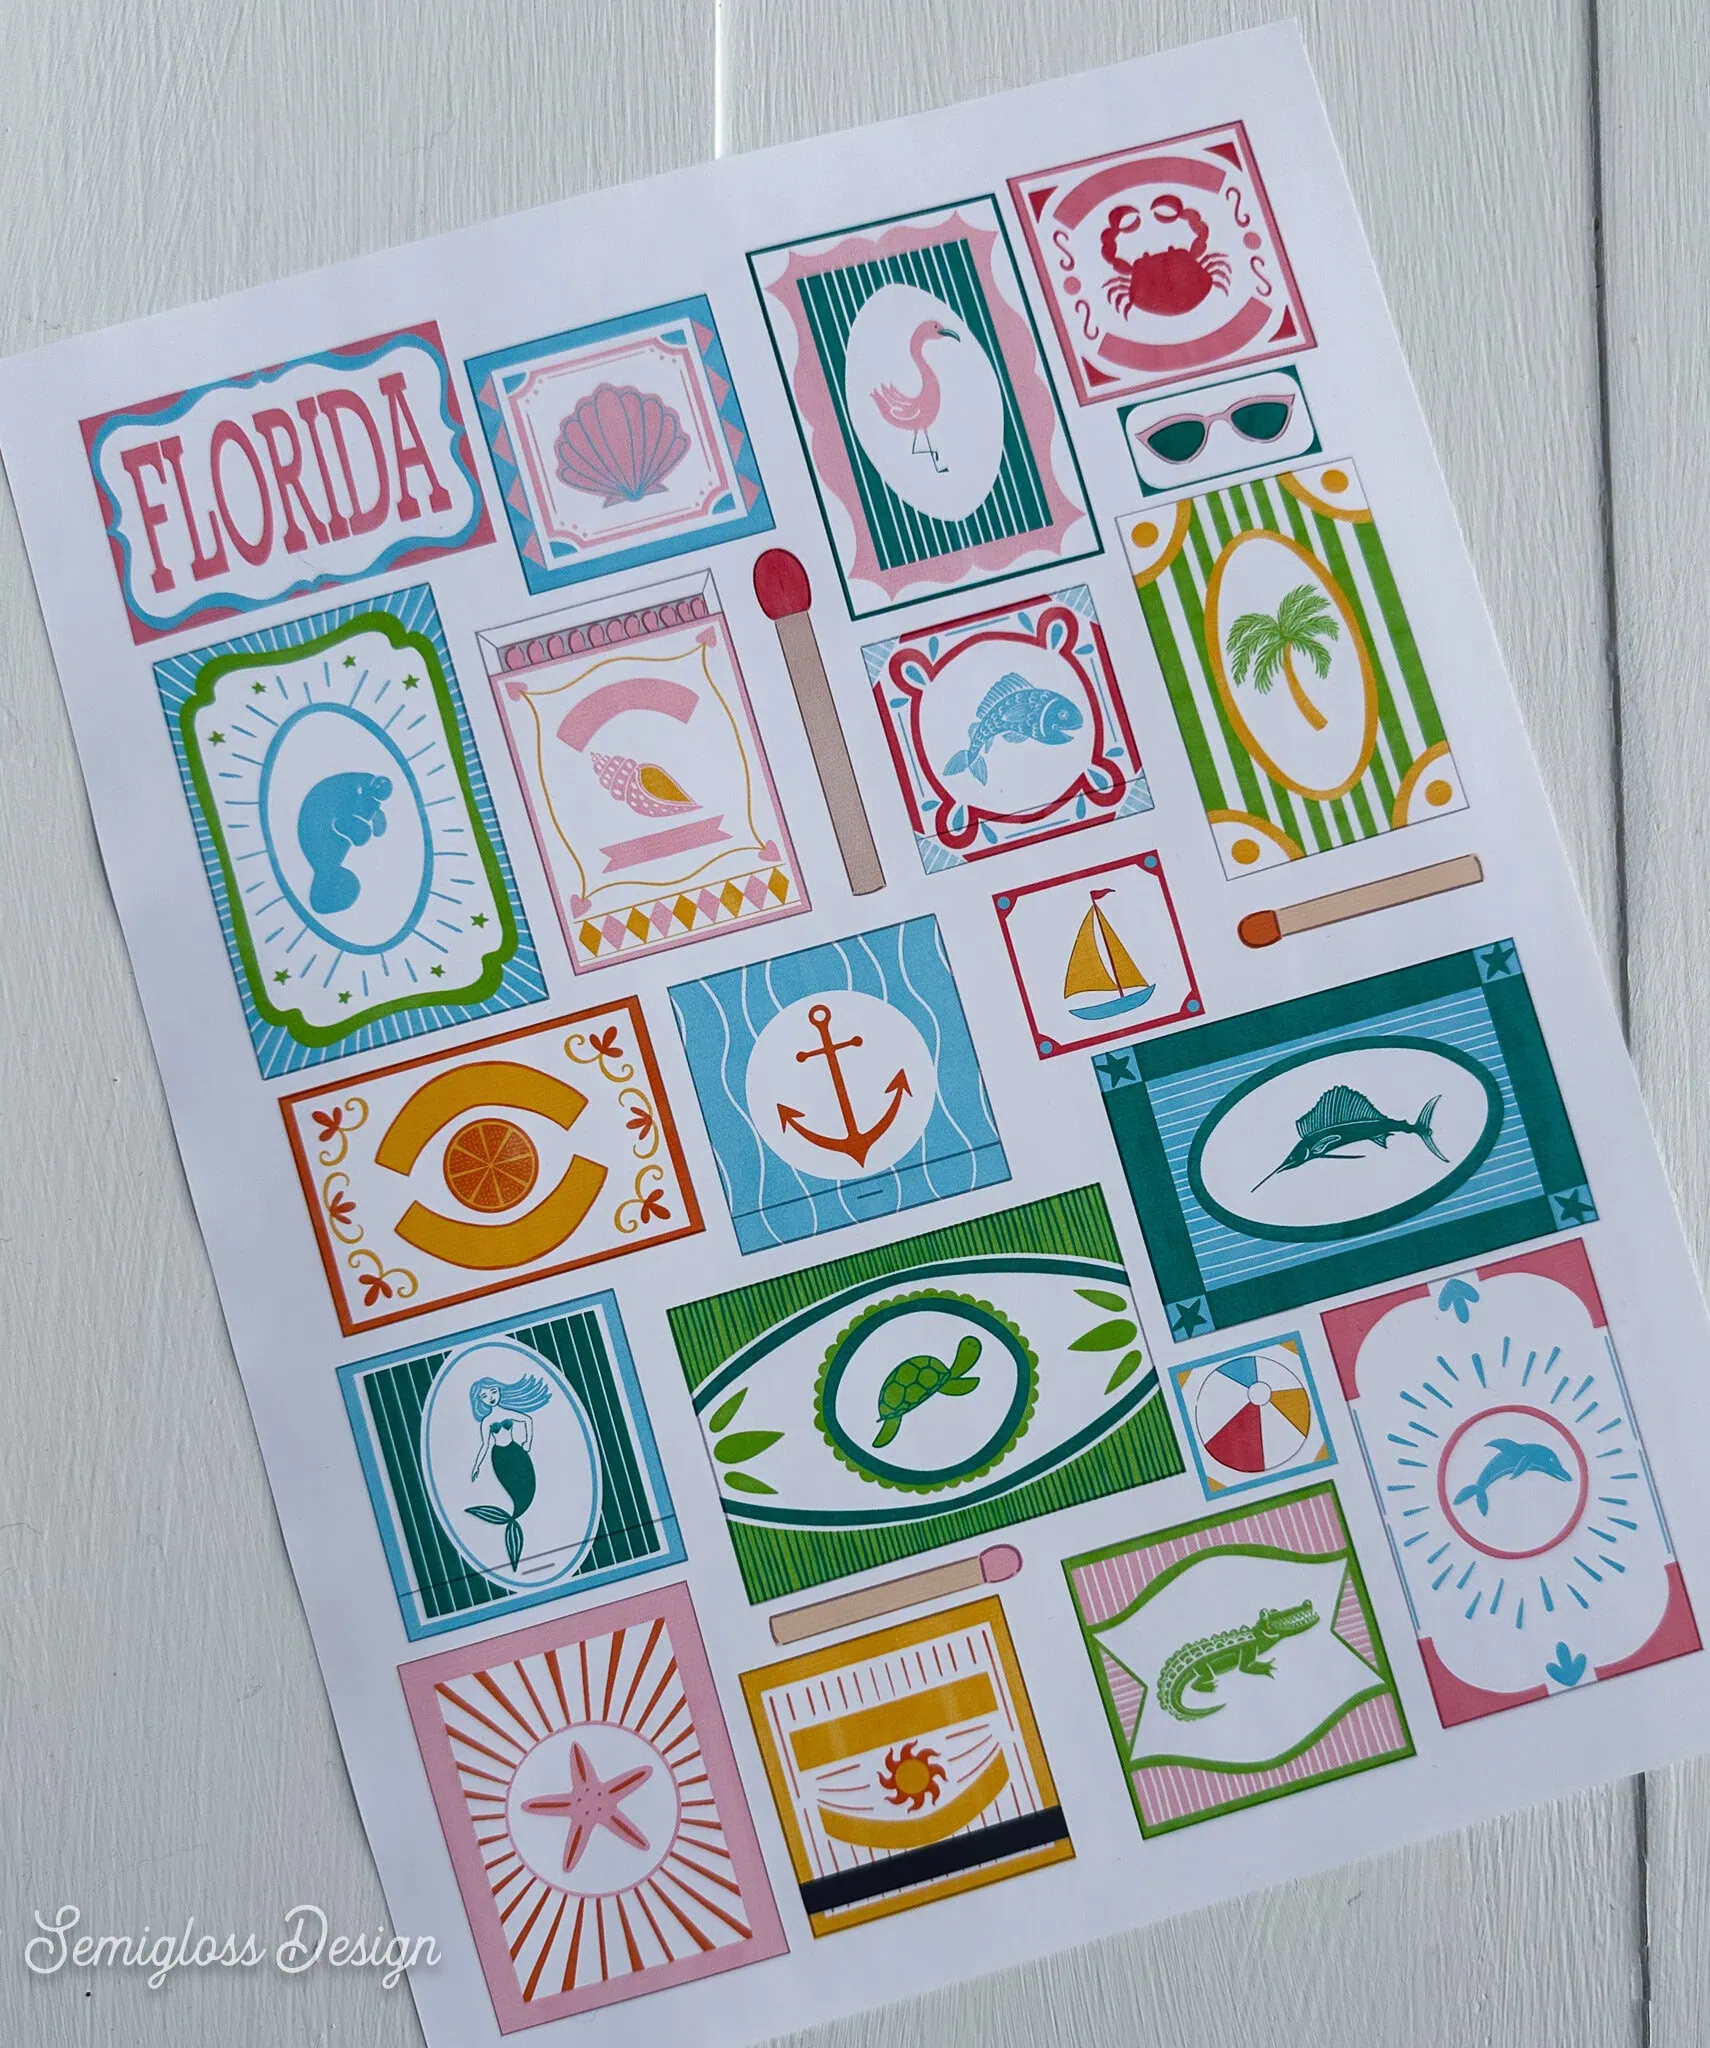
The O1 Omni is great for making stickers because the UV ink is waterproof. So there’s no need to laminate regular sticker paper.
Glass Tumbler Cans
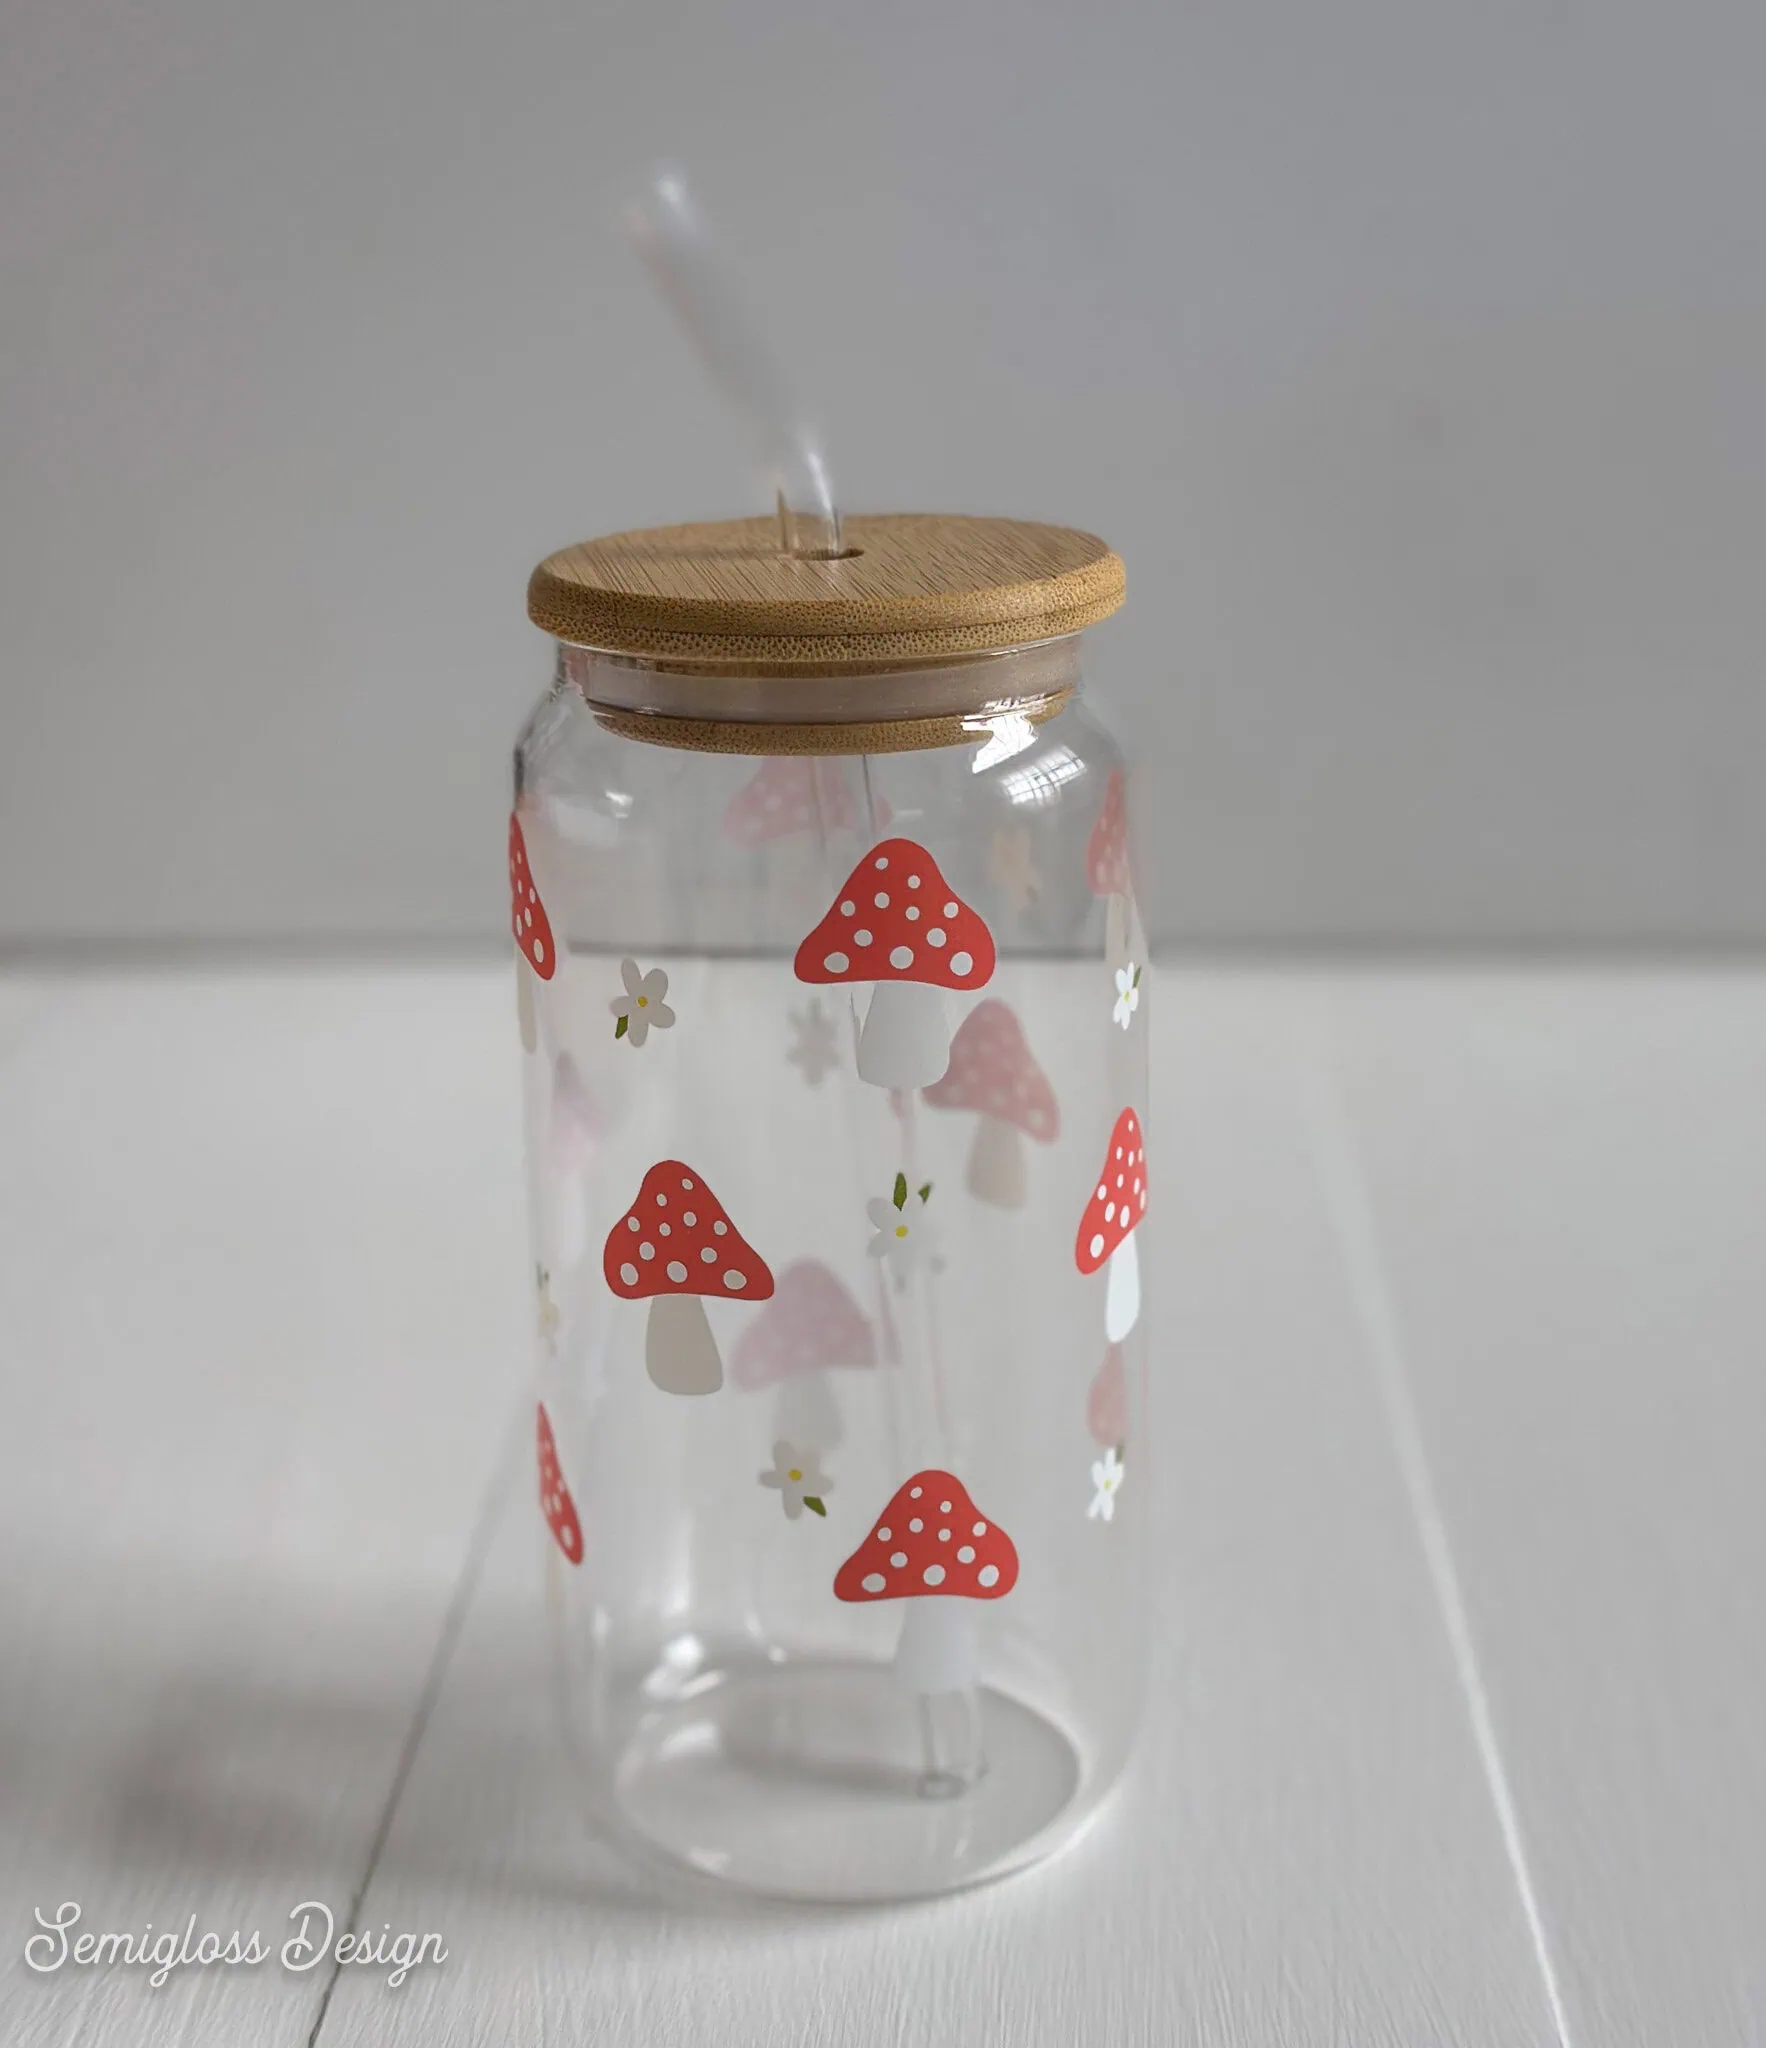
This was a fun experiment. I used the OR1 rotary attachment with the Omni O1. My first tumbler used a seamless pattern, and I had a hard time aligning it perfectly. You can see the white offset under the flower pattern. I don’t hate the white offset, though. I often add a white offset intentionally.
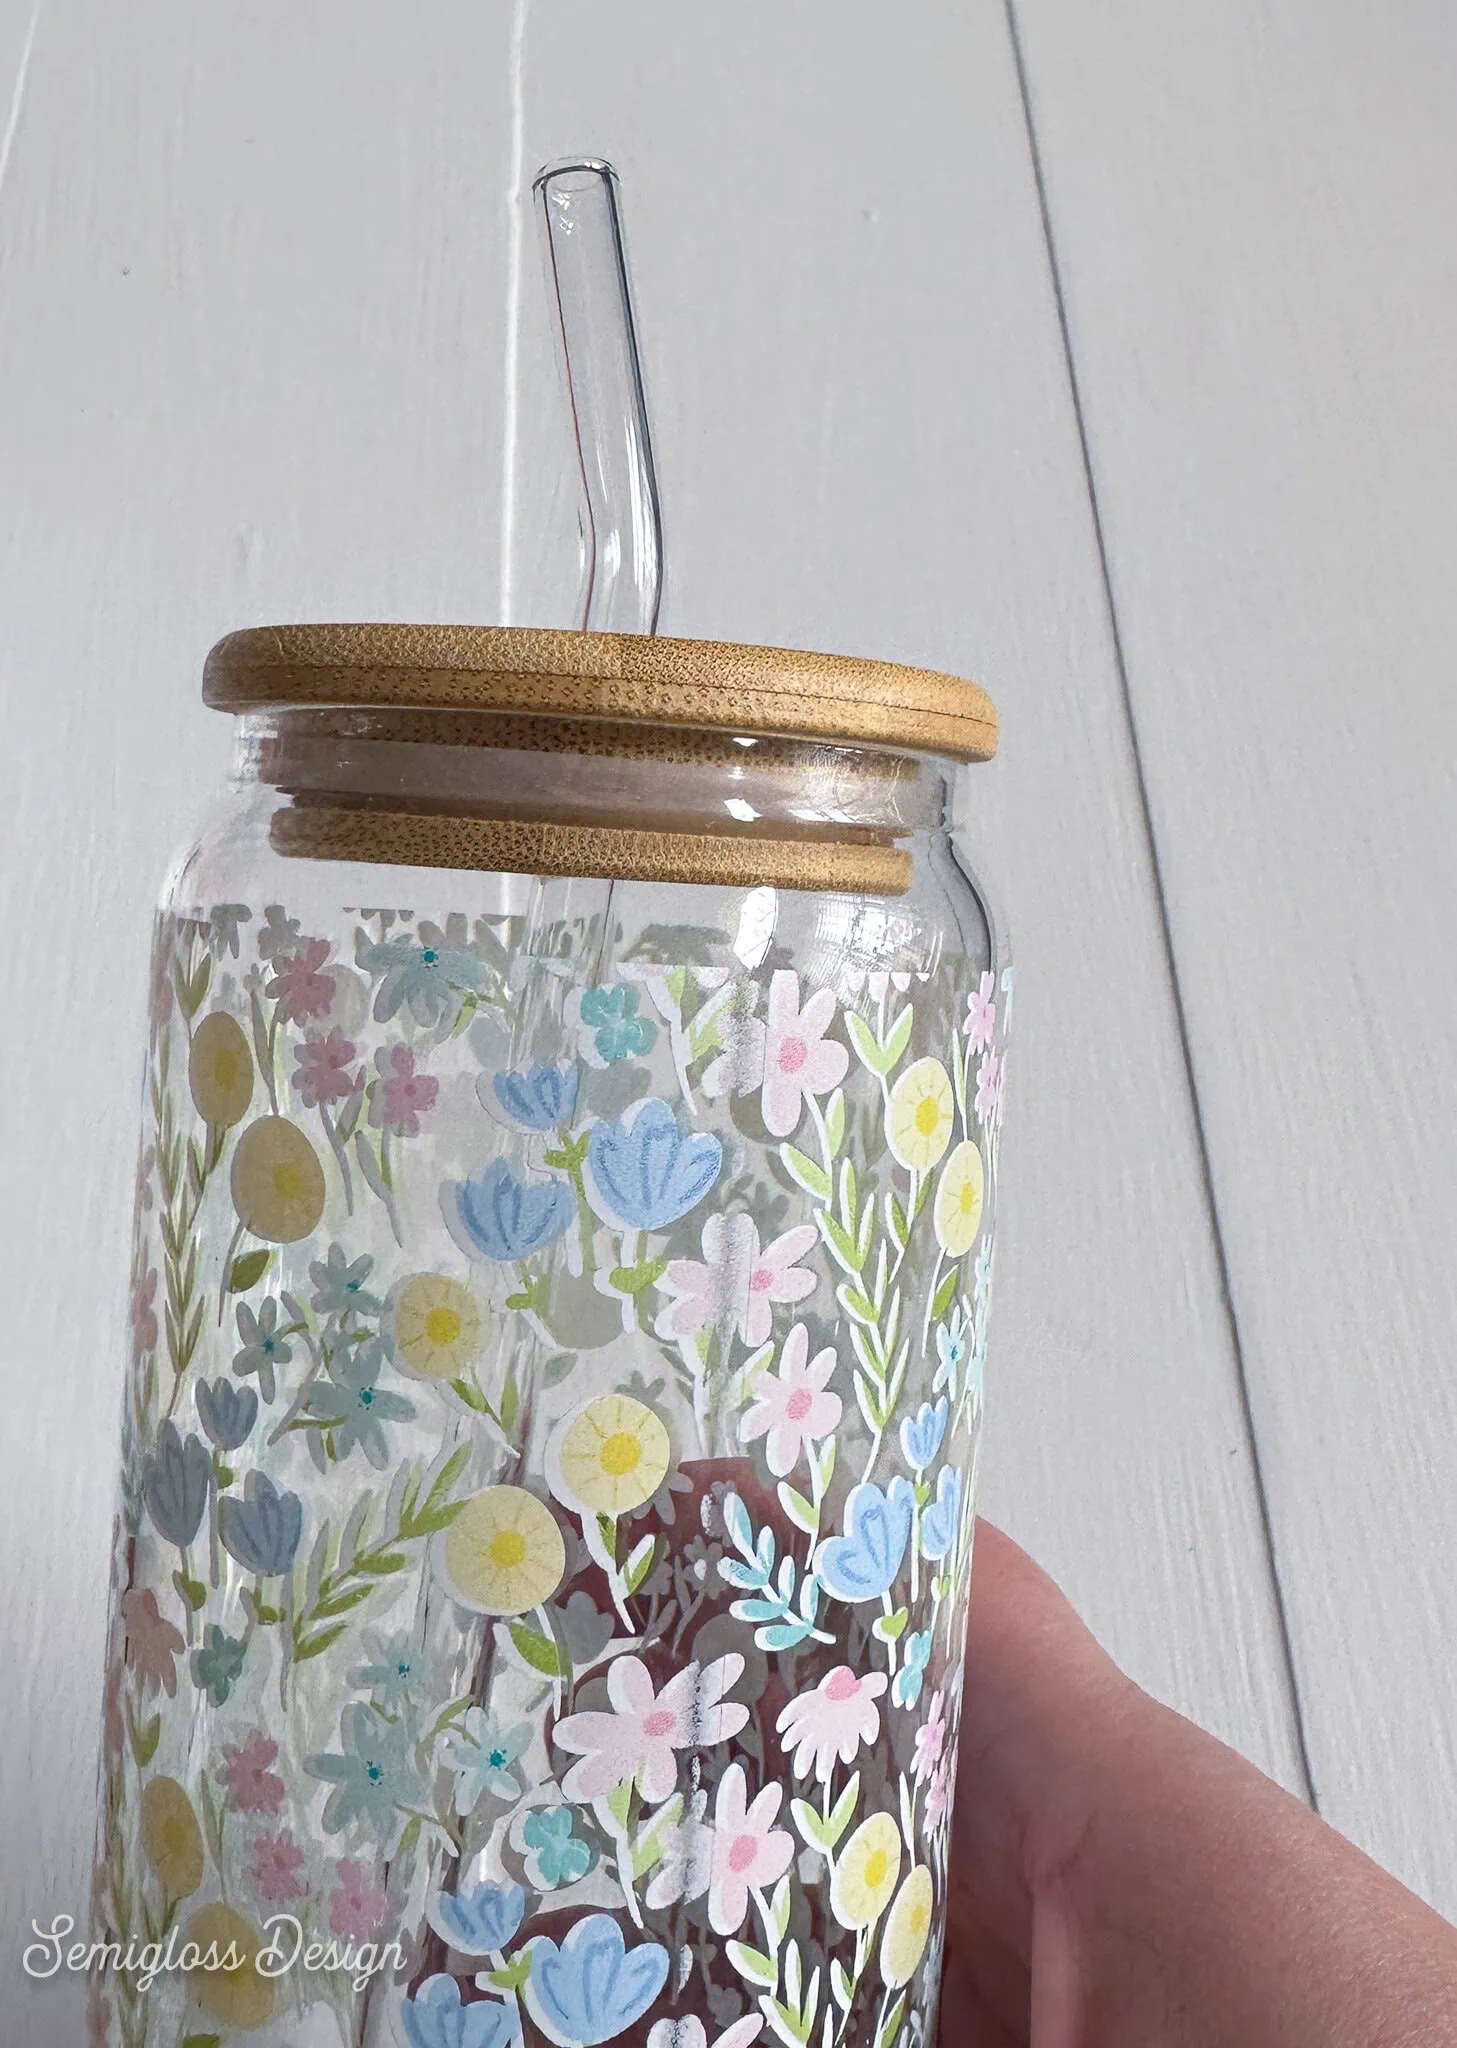
The next design used a cheater seamless pattern. There might be a better name for it, but it’s what I’m calling it. I designed it to be “seamless”, without a line running through the design. So even if it doesn’t line up perfectly, you can’t tell.
Glass Trophy Light
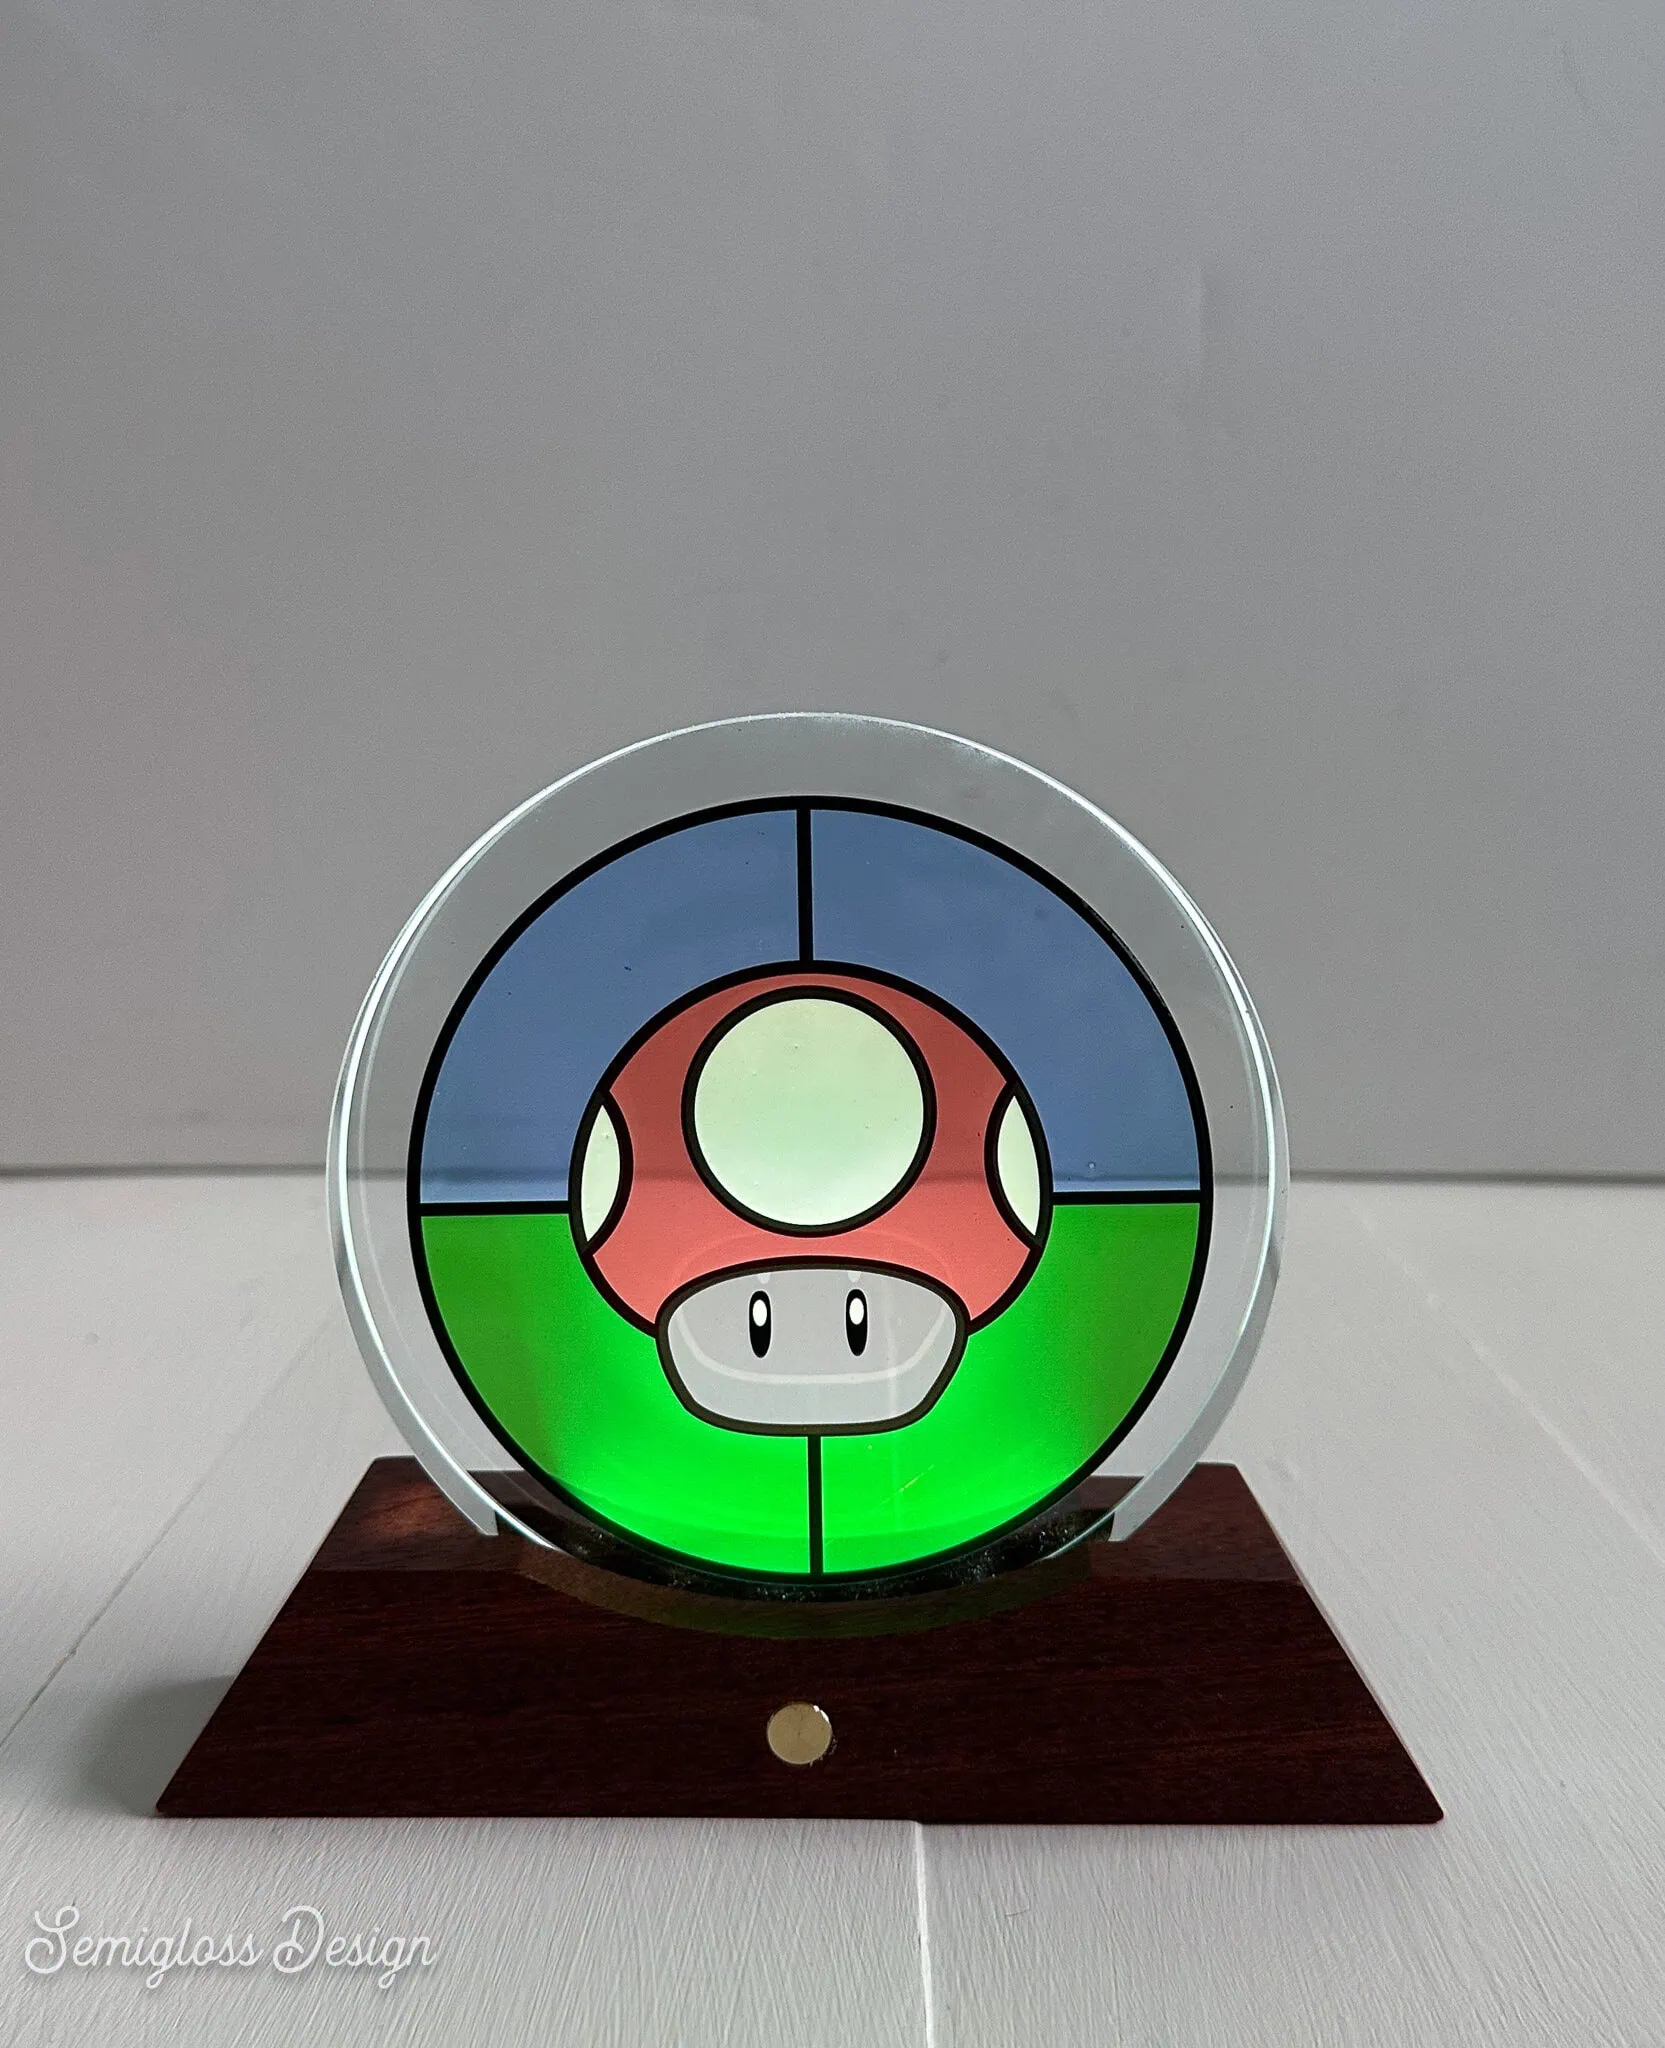
xTool kindly sent me a box of fun items to try for printing, and it included several trophy lights. I don’t have a use for a trophy right now, so I decided to make it into a fun light for my husband. He’s building a video game, and I wanted to add some vibes to his office.
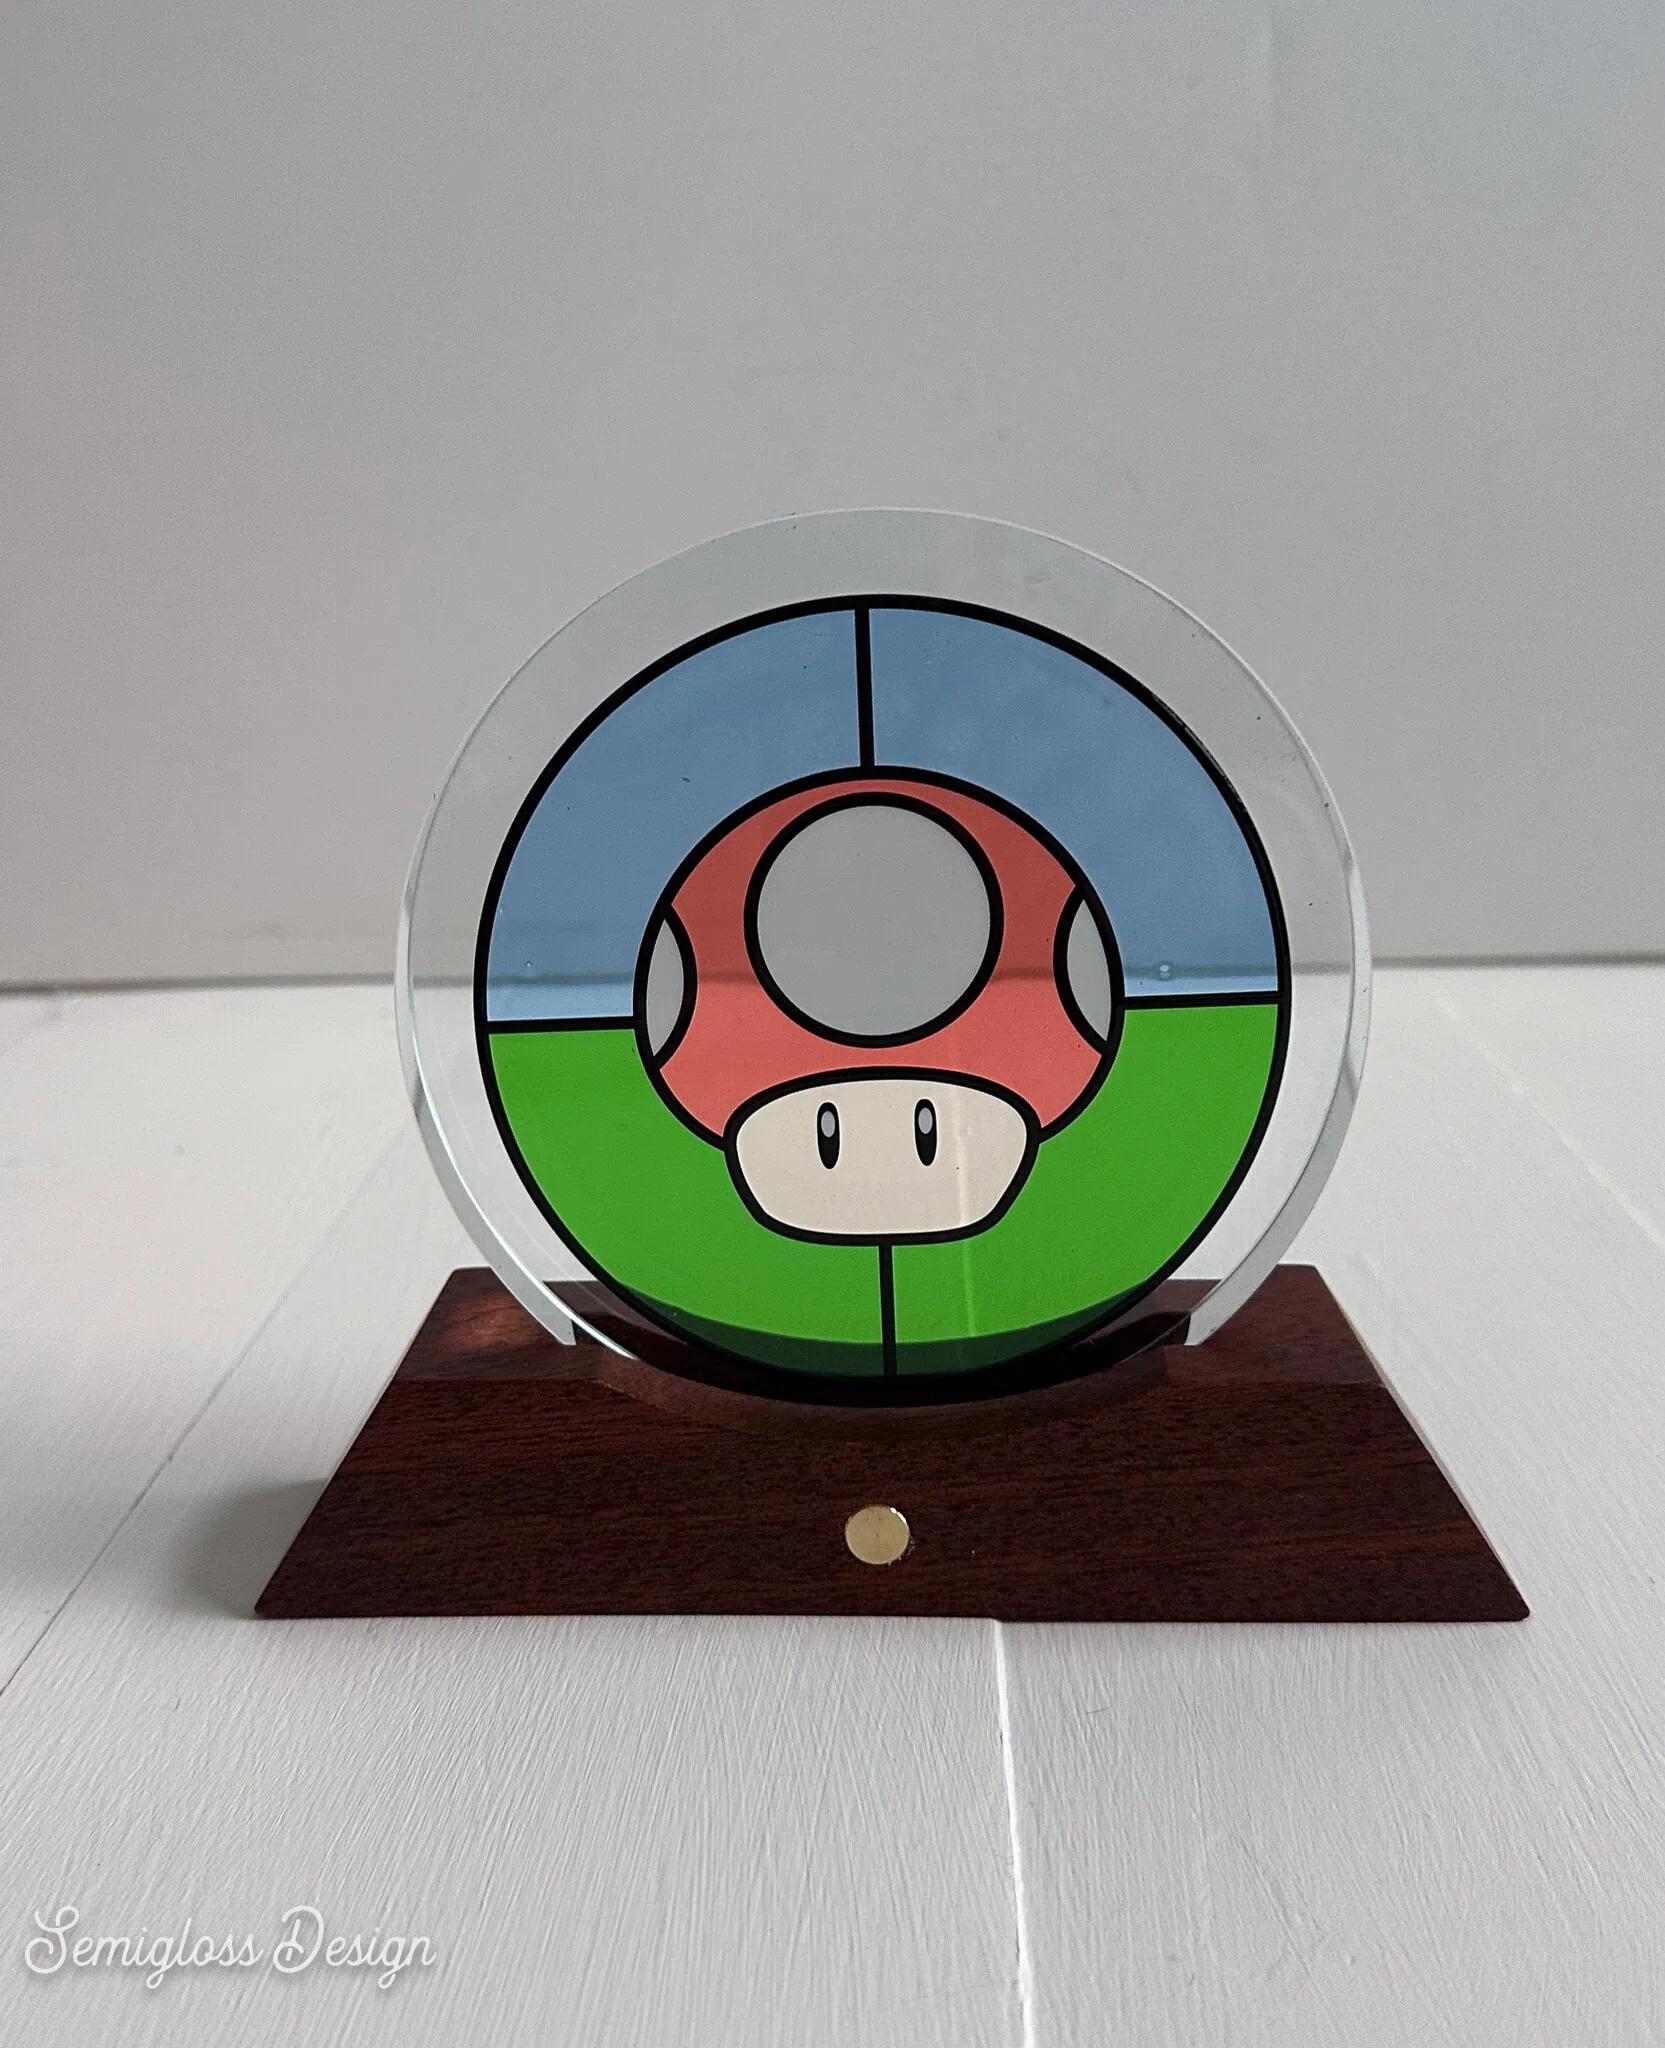
While the software comes with AI generators to make stained light images, I’m not an AI fan. So I used my other AI (Adobe Illustrator) to create this mushroom from Mario. I set the line work to have white behind the color so it looks solid. The colored parts were printed with color ink only to let light to shine through and glow. I love how it turned out.
T-shirts (both white and black!)
Wow, wow, wow! This process was so cool. I’m working on a tutorial for making T-shirts.
I printed on T-shirts using both white and black shirts, and I was so impressed with the results. I can’t wait to make more shirts.
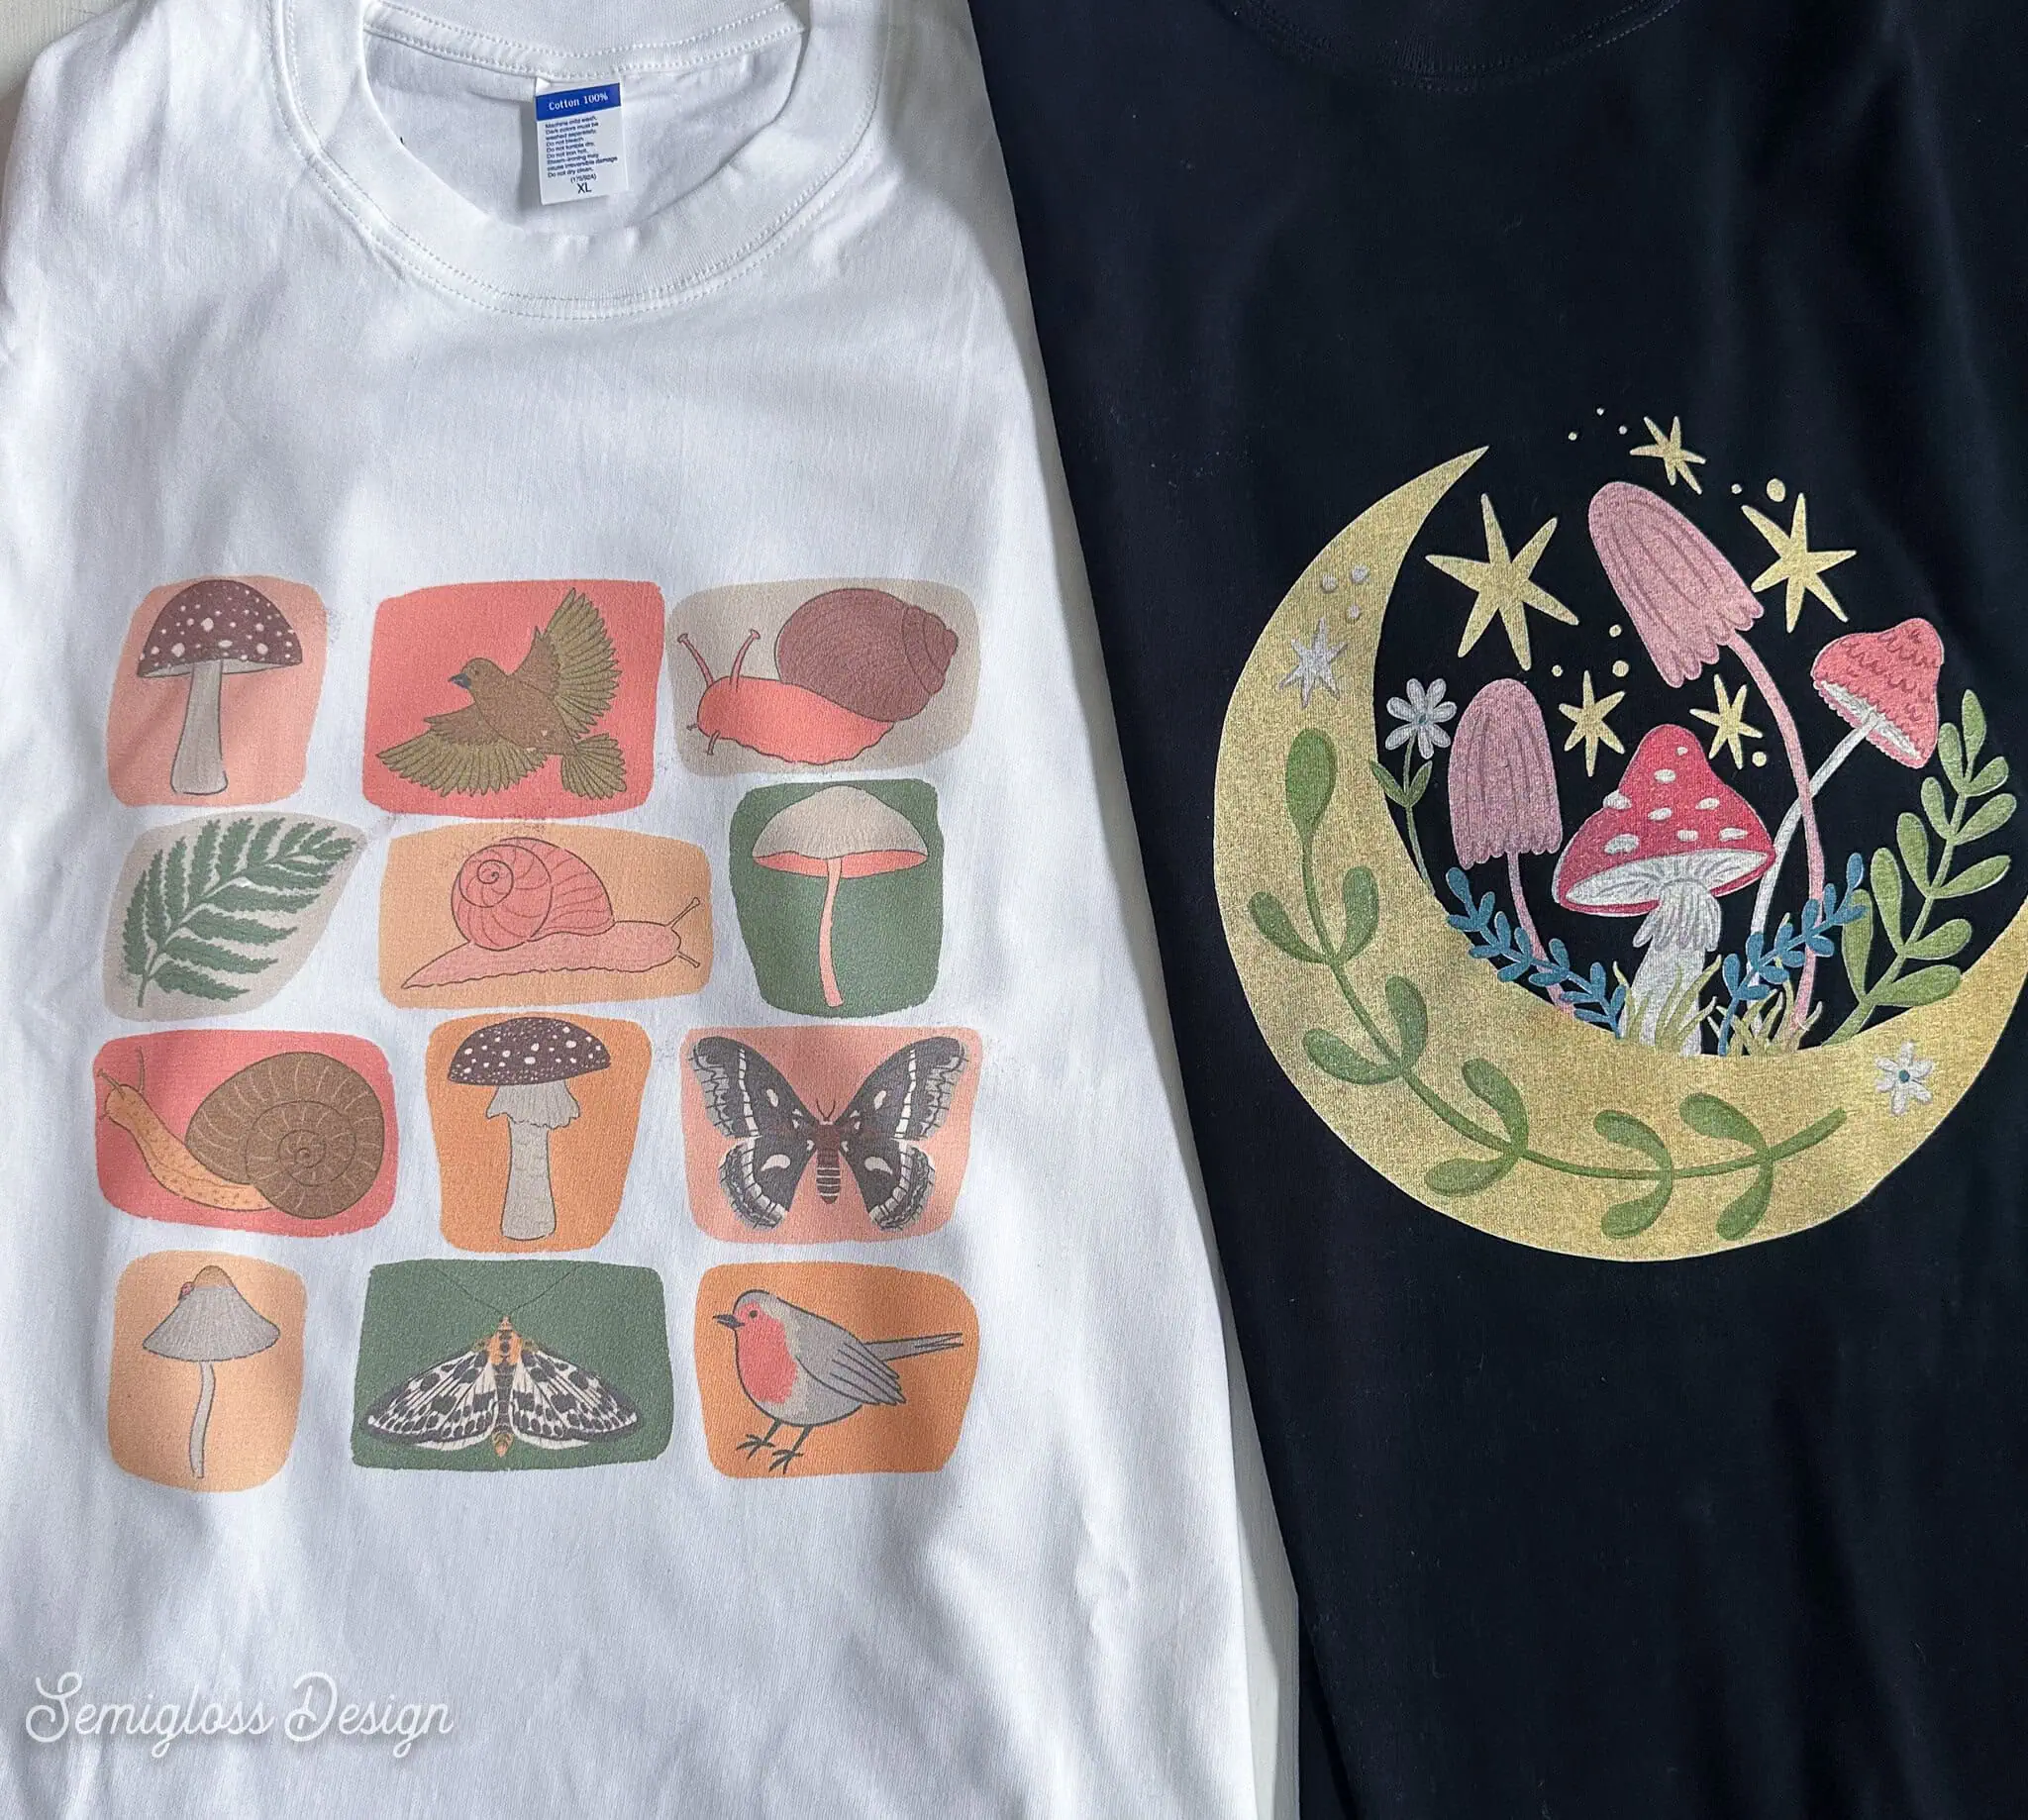
Fabric items must be pressed with a heat press (not included). This makes the ink permanent.
Tote Bag
Who doesn’t love a good tote bag?
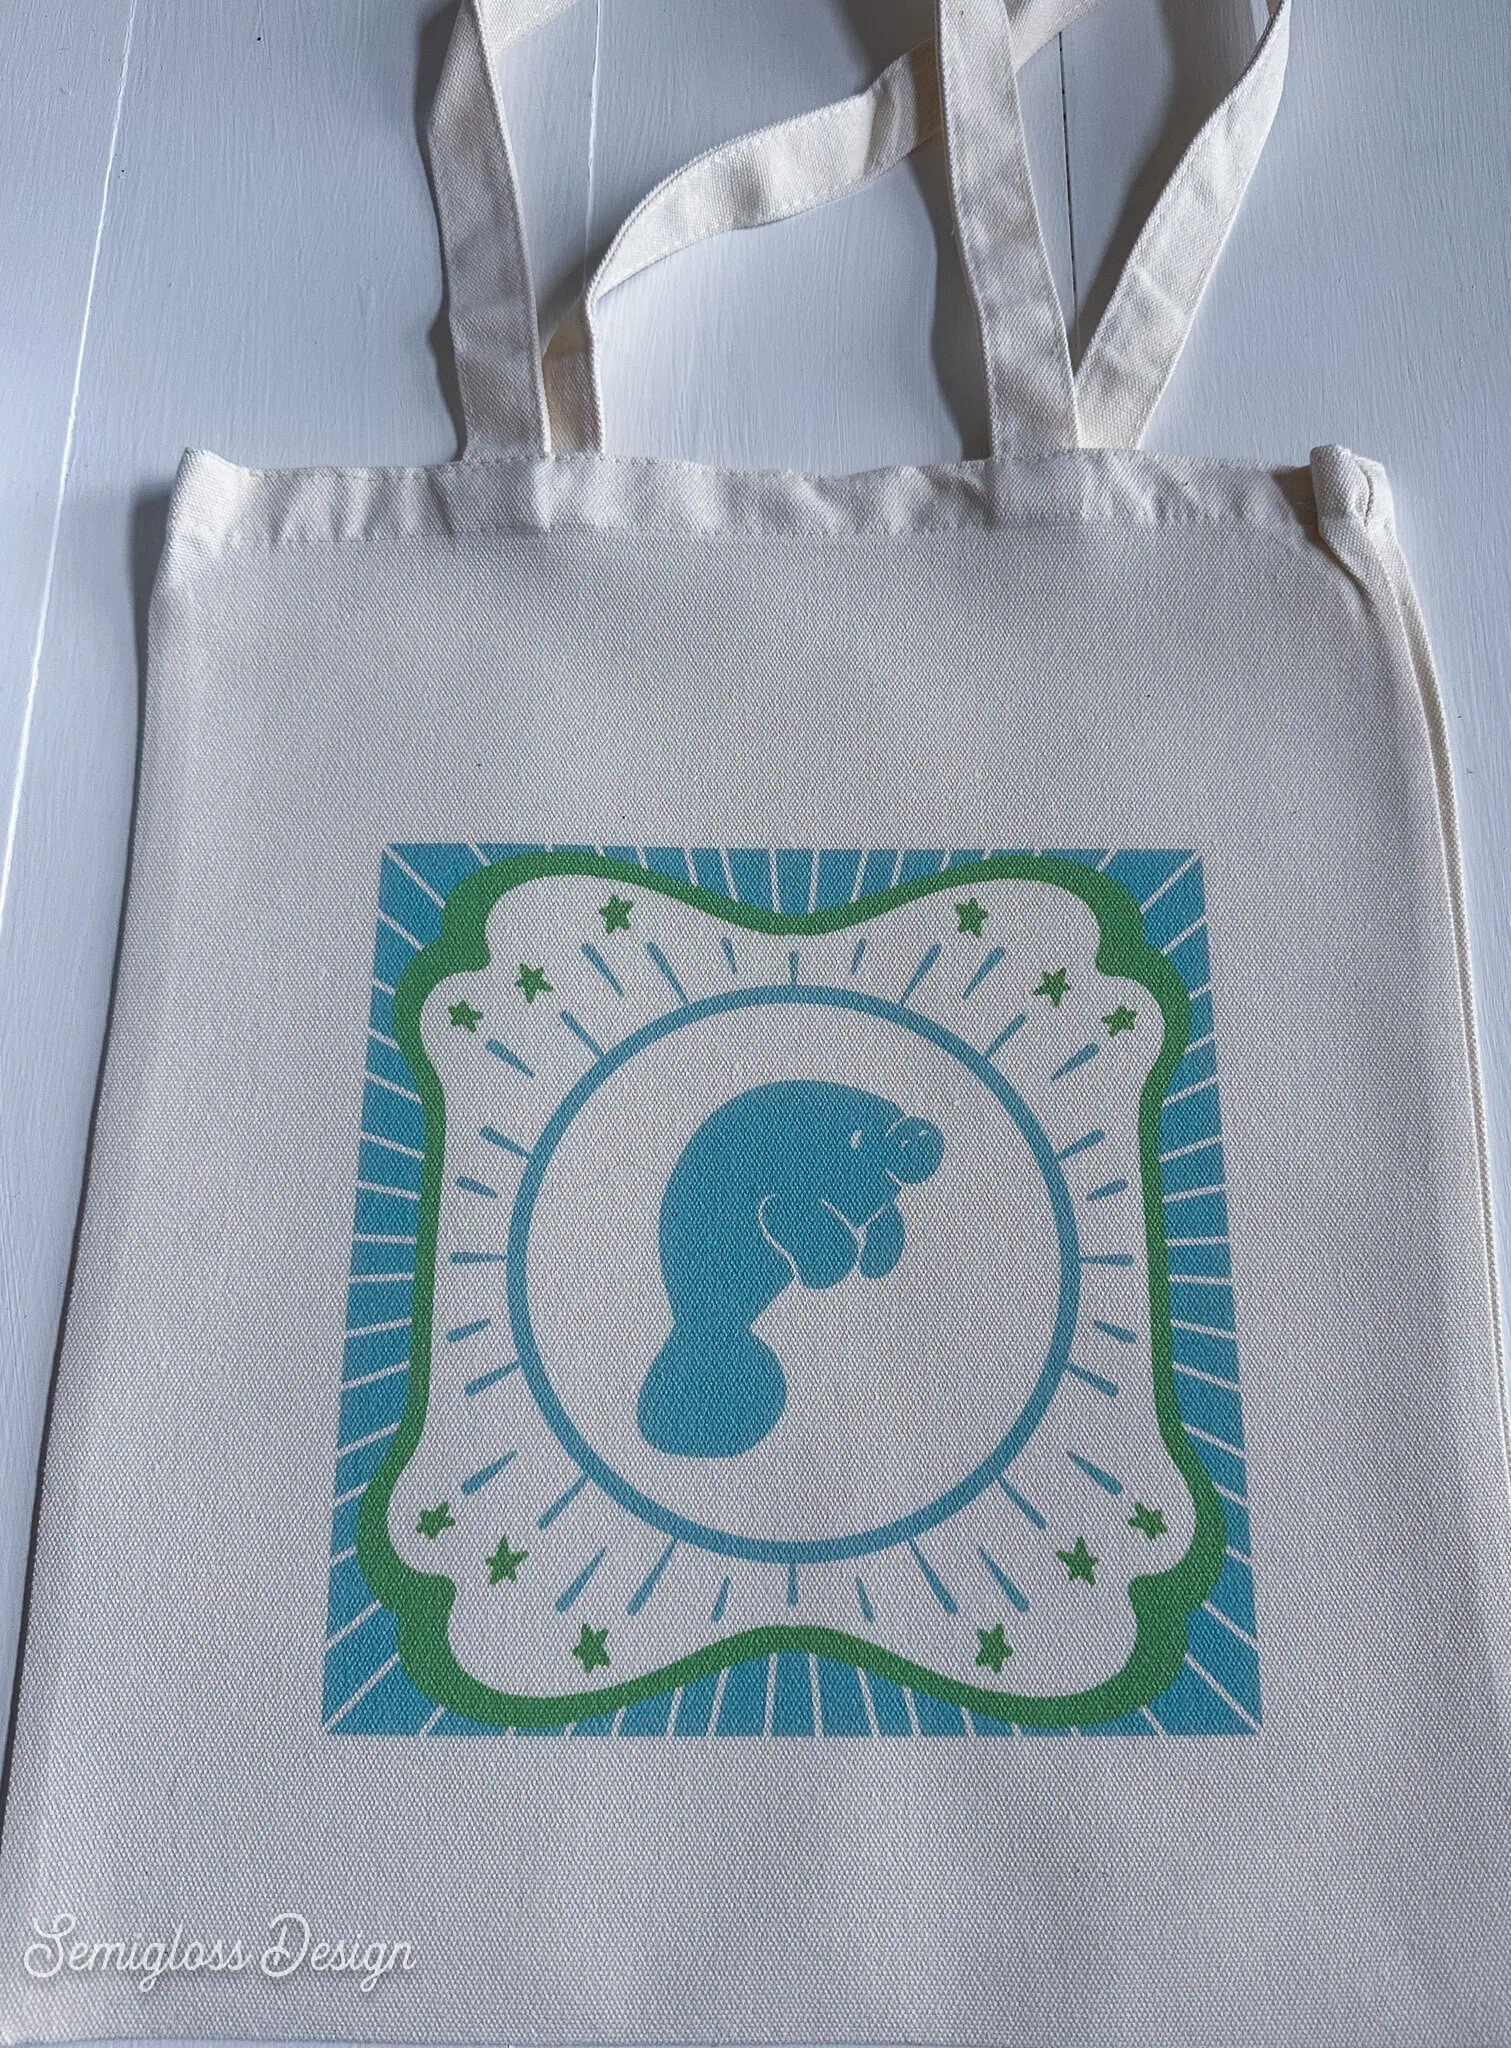
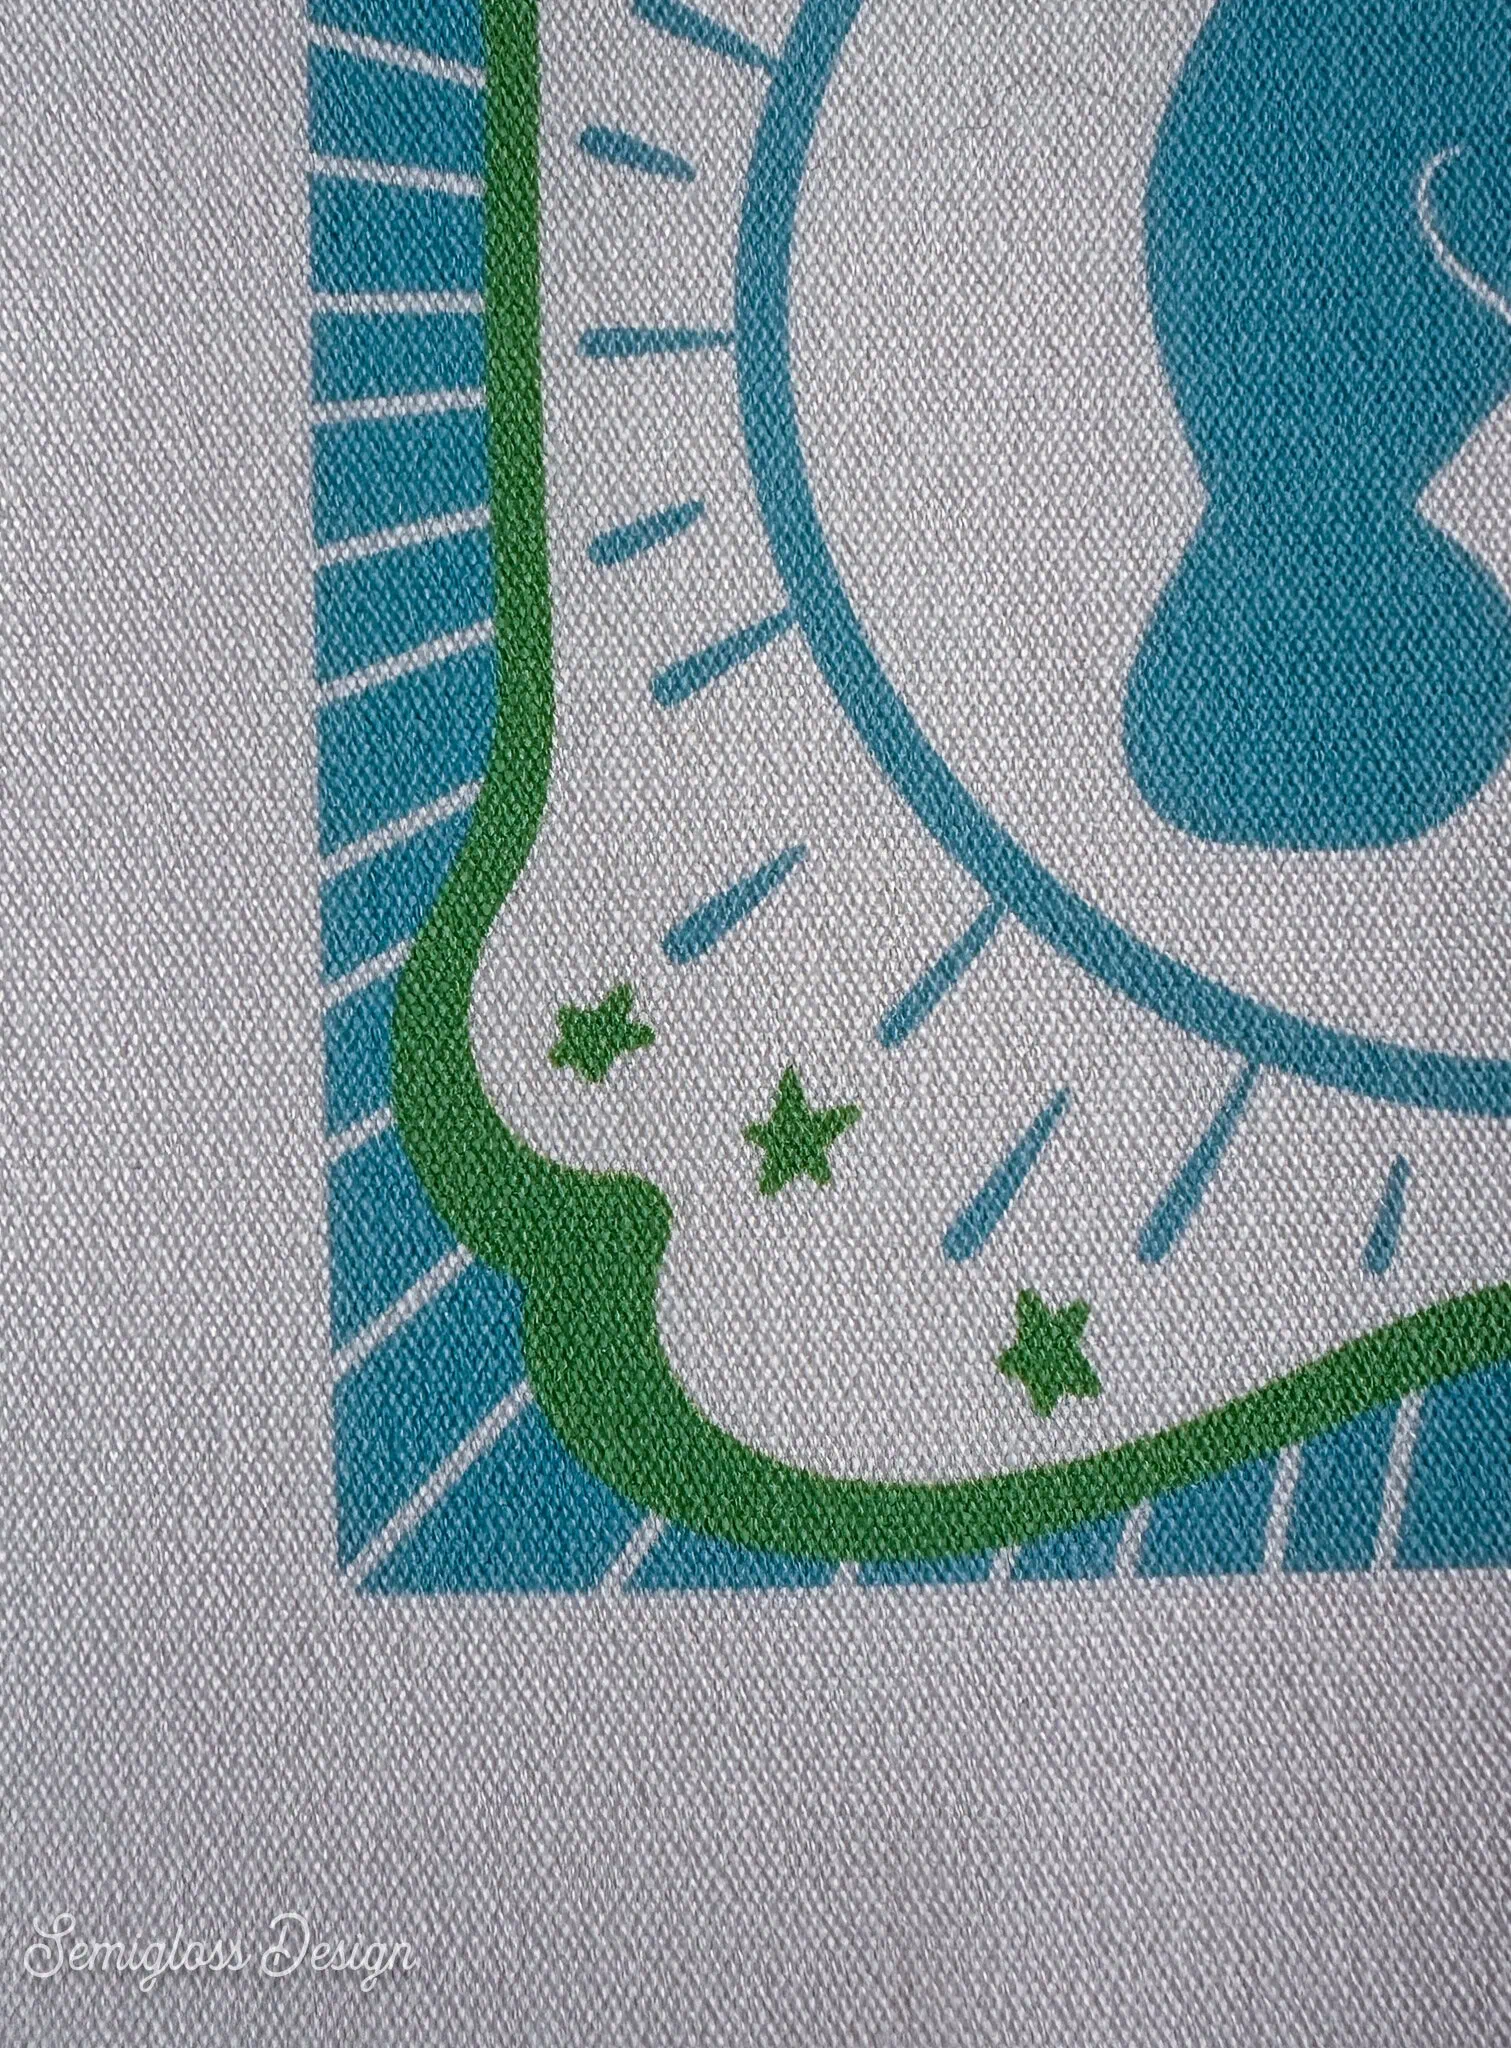
This bag didn’t fit well in the garment tray. And since I know the ink will mist if the surface isn’t flat, I used painter’s tape to hold the tray down. It worked! And I love my manatee tote bag.
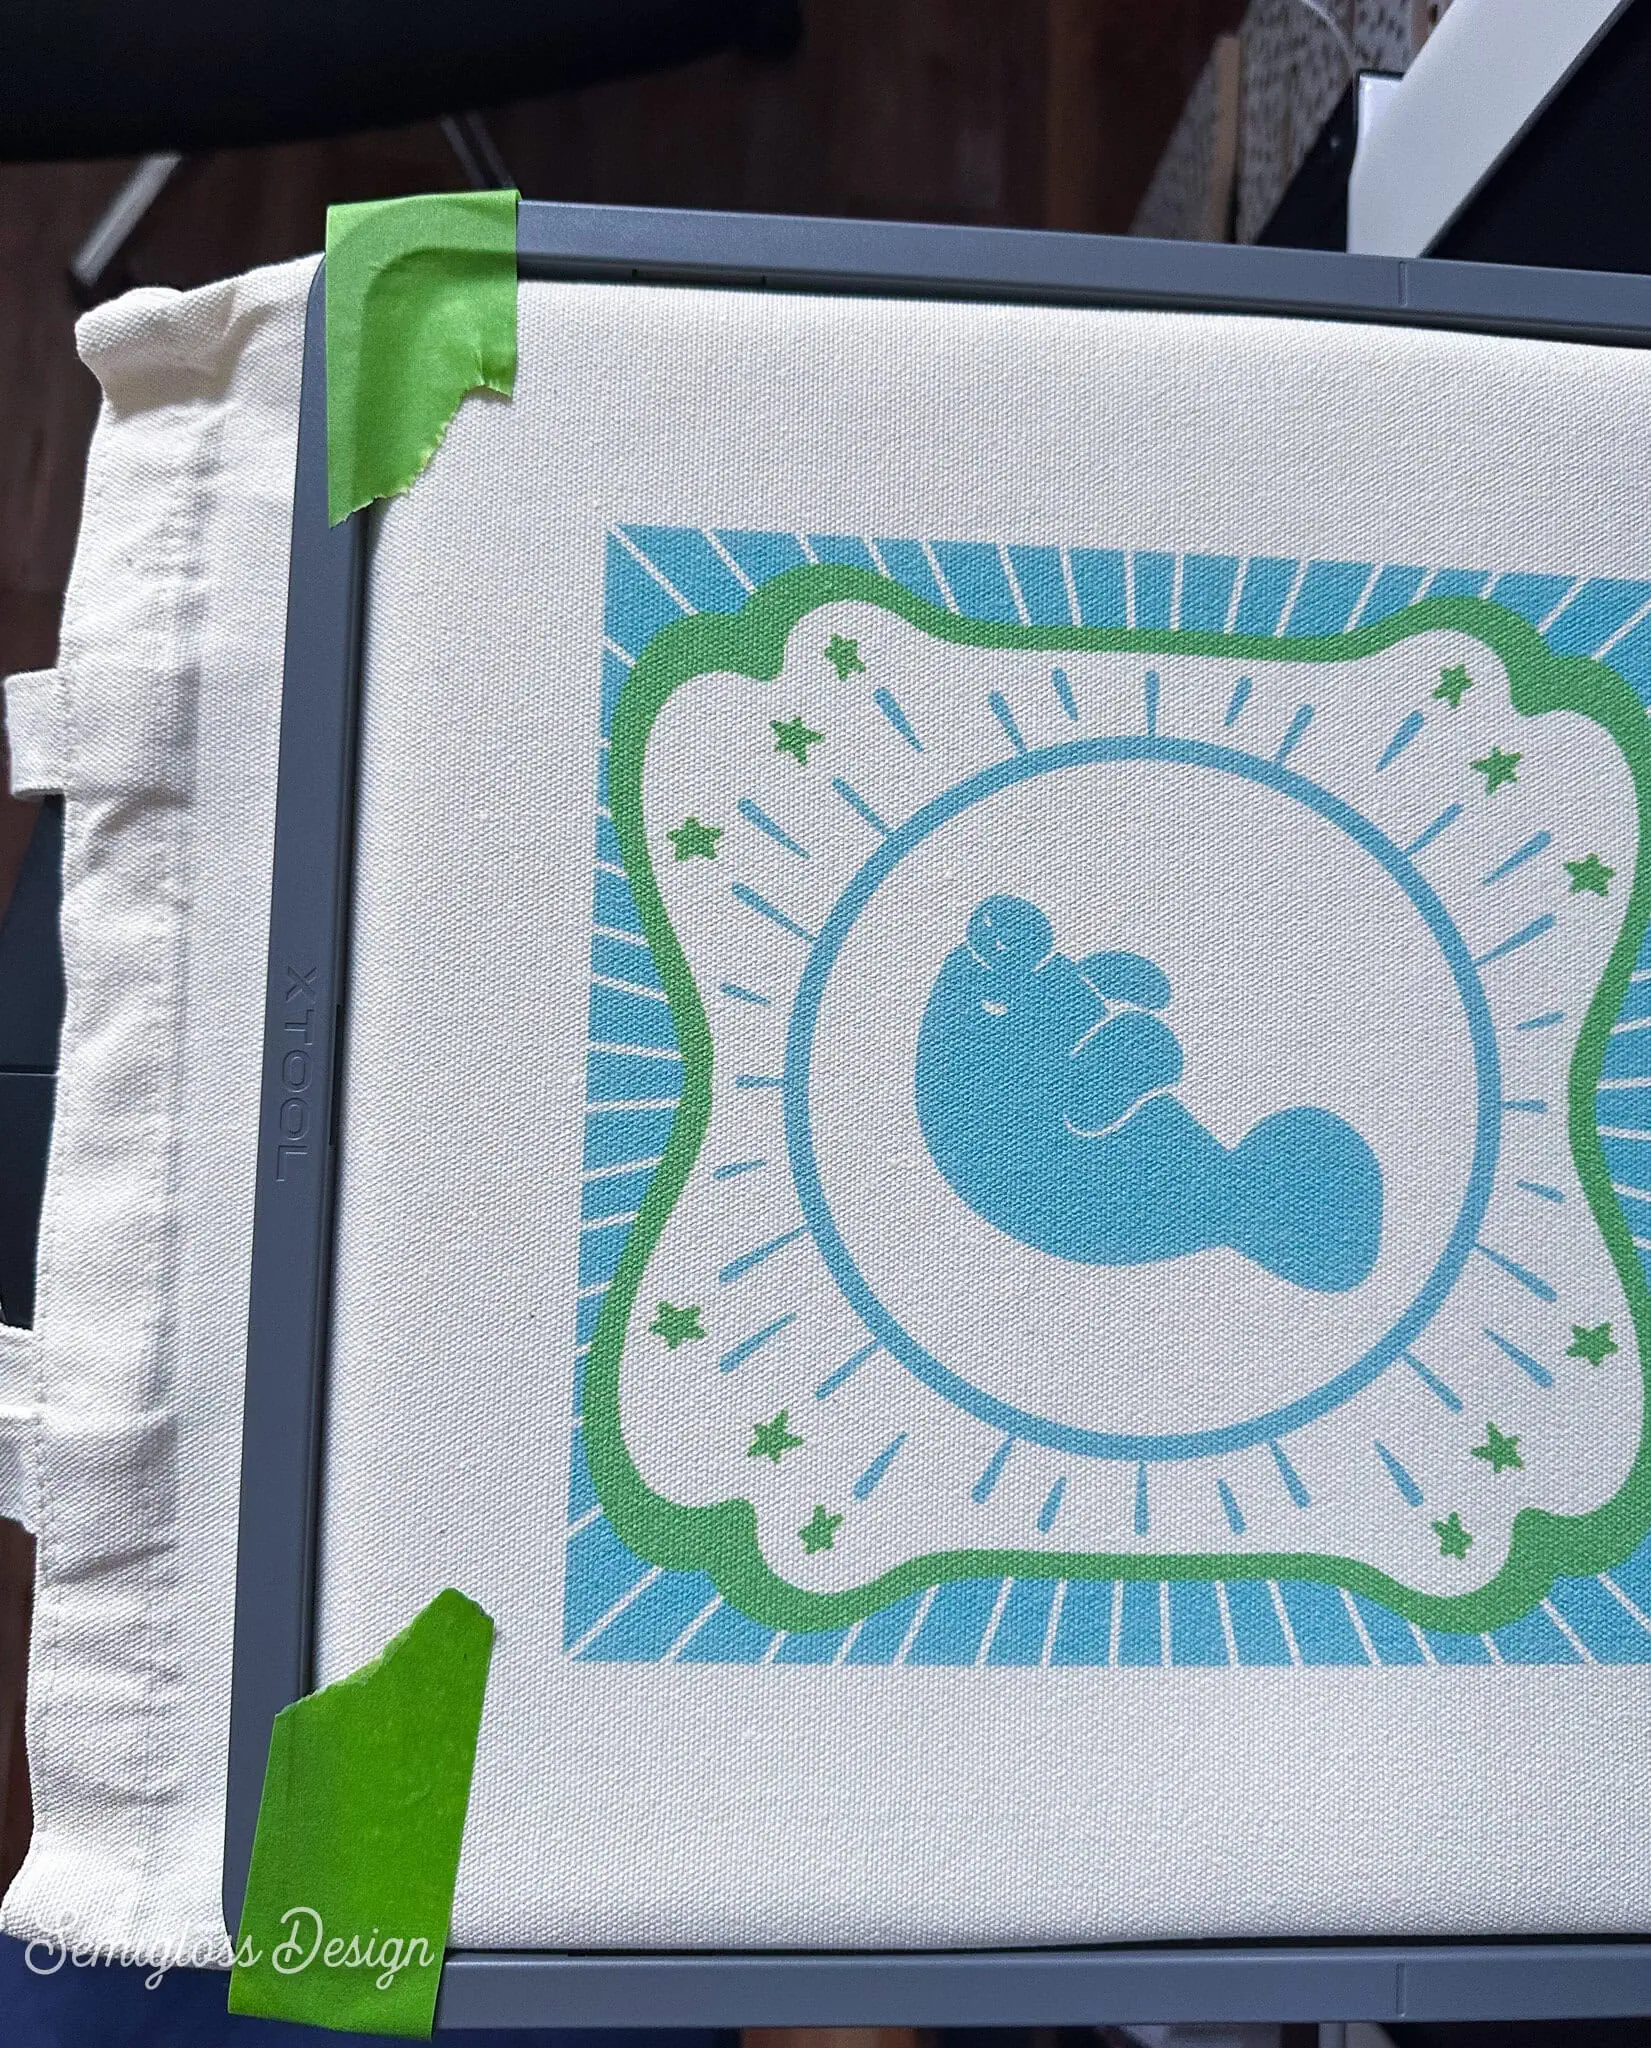
Also, look at the print quality. This canvas bag has a lot of texture, and the lines are so crisp!
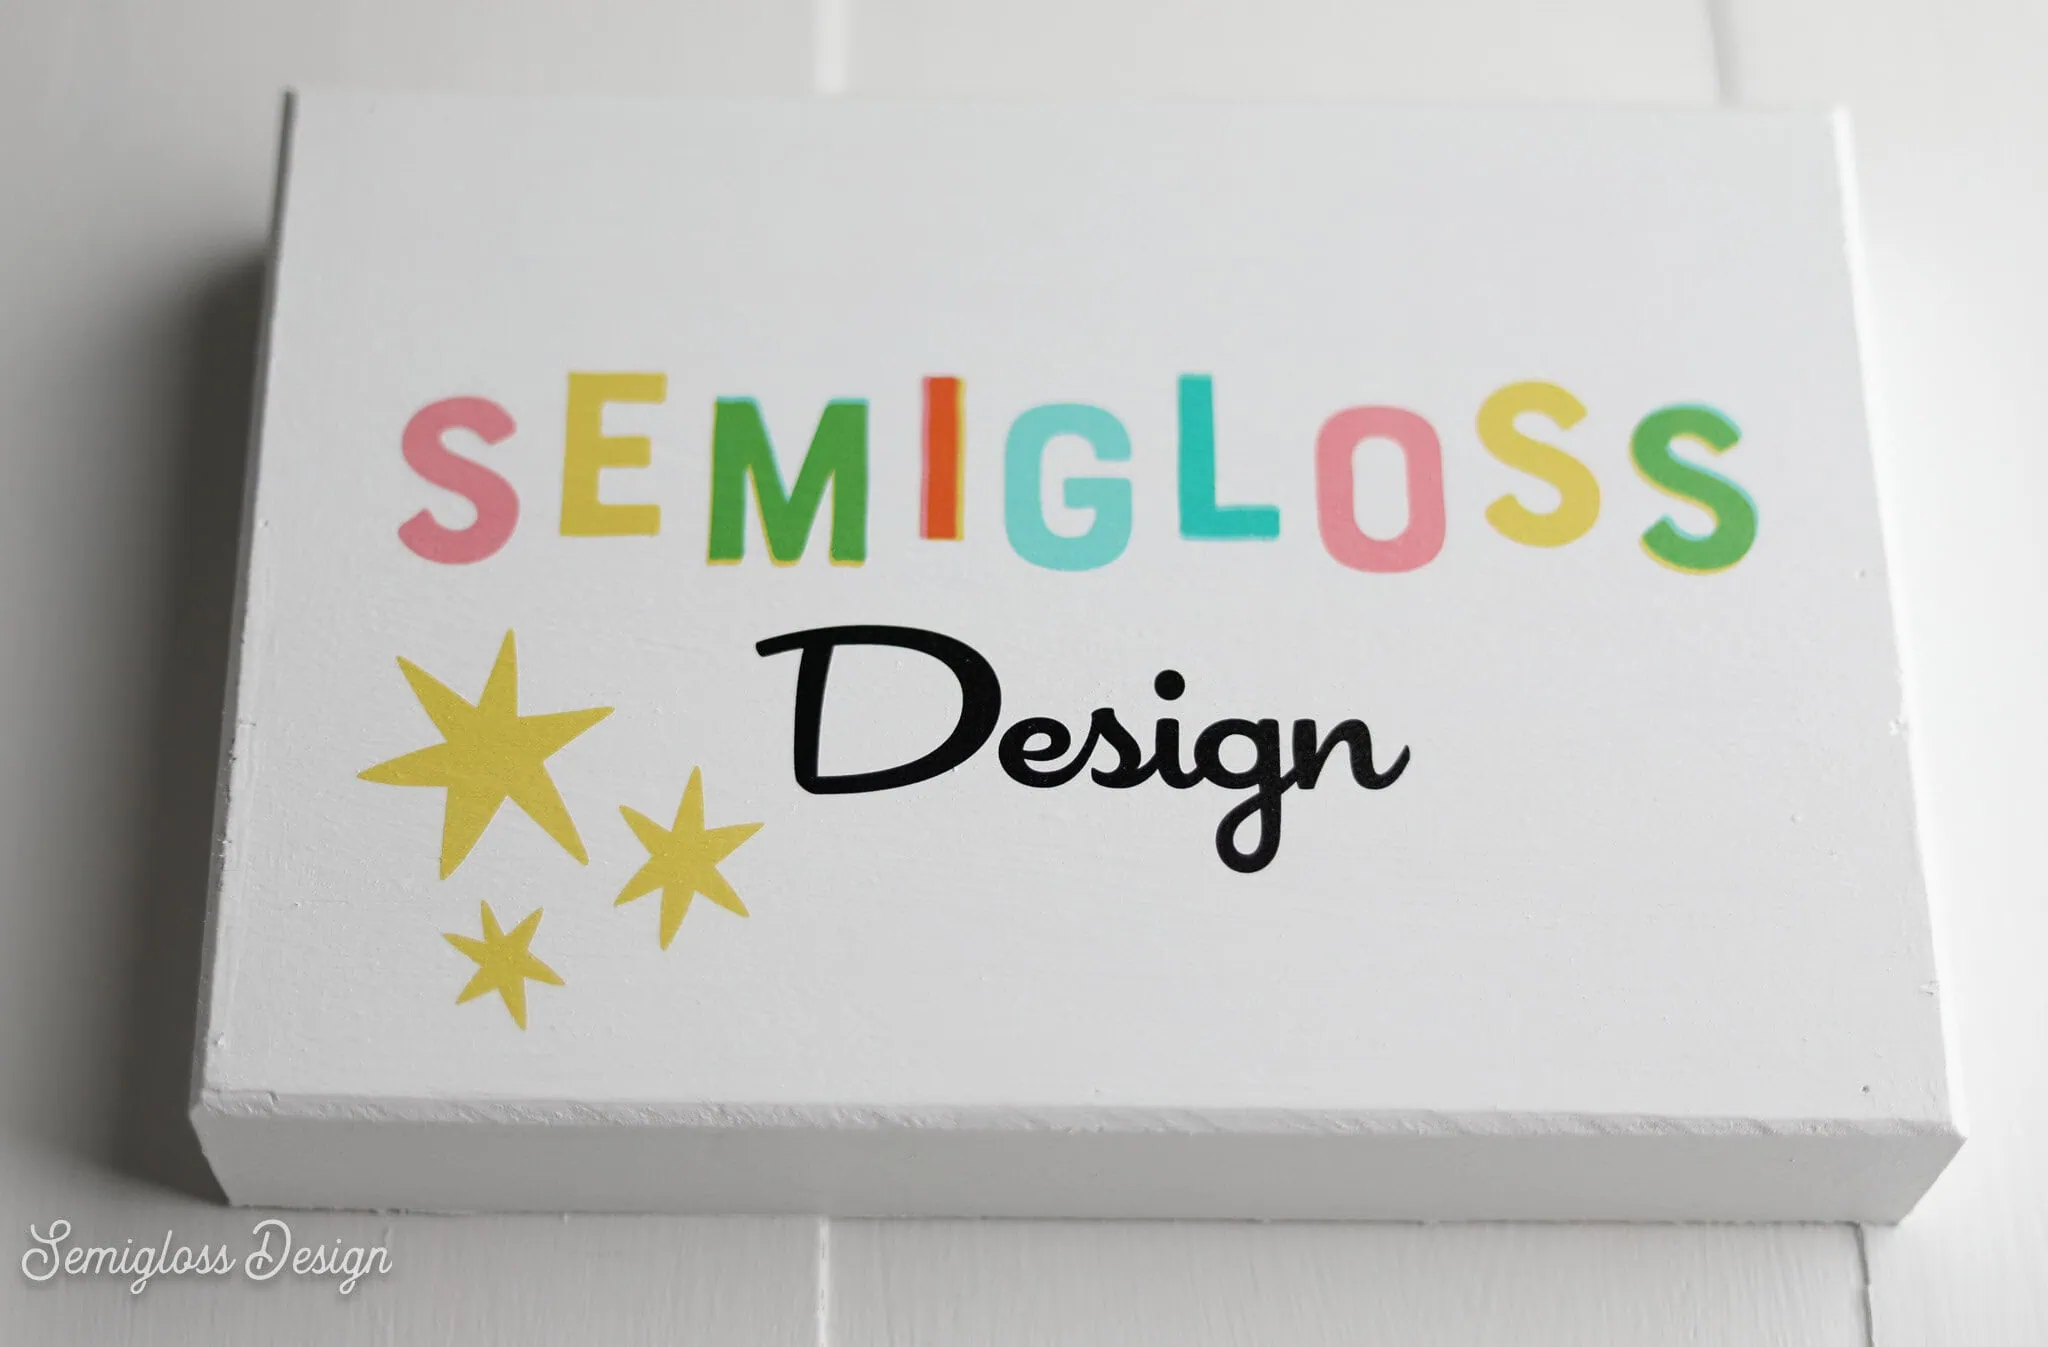
Wooden Sign
I used a wooden cradle frame to create a sign for my office with my logo. It looks so good! I painted the sign white before printing.
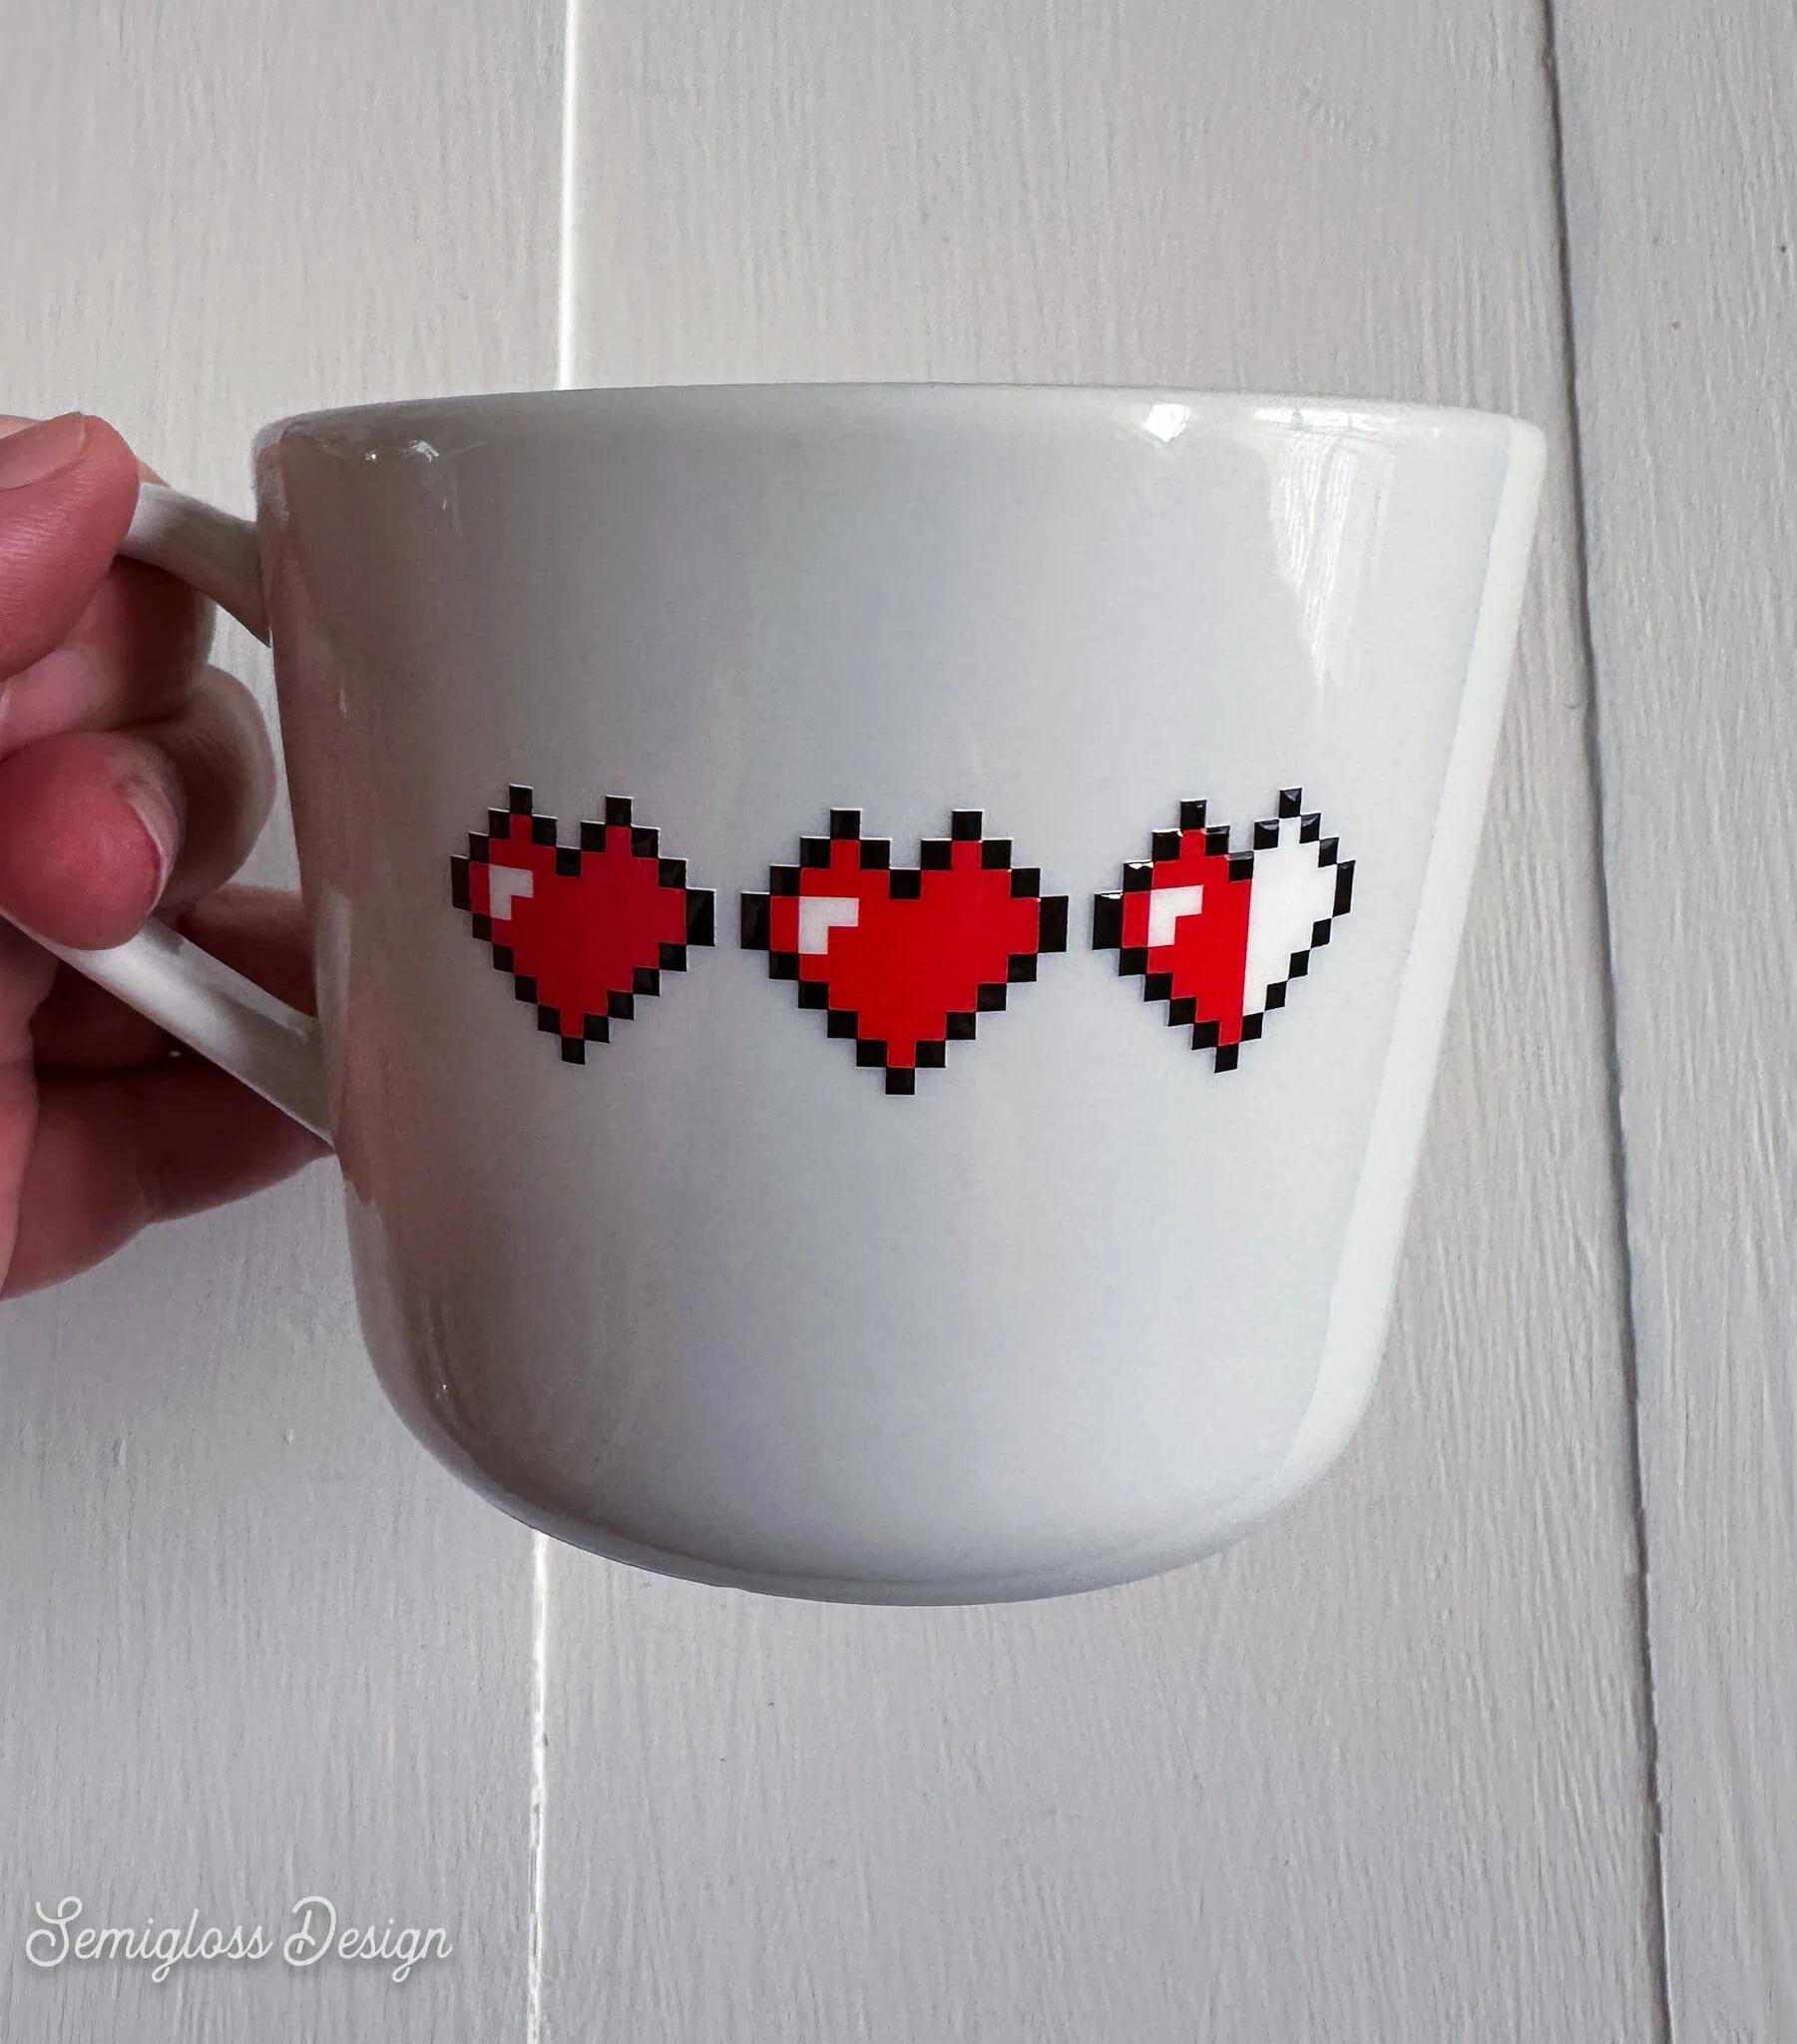
Mug (DTF transfer)
This process was really intimidating, but also so fun! I used the LM1 laminator and laminating film to create this DTF transfer, which is basically a sticker. It deserves its own tutorial, as well.
Lenticular card
This silly little card is something I illustrated to show a dancing octopus. I think these would be fun to make and include in birthday cards.
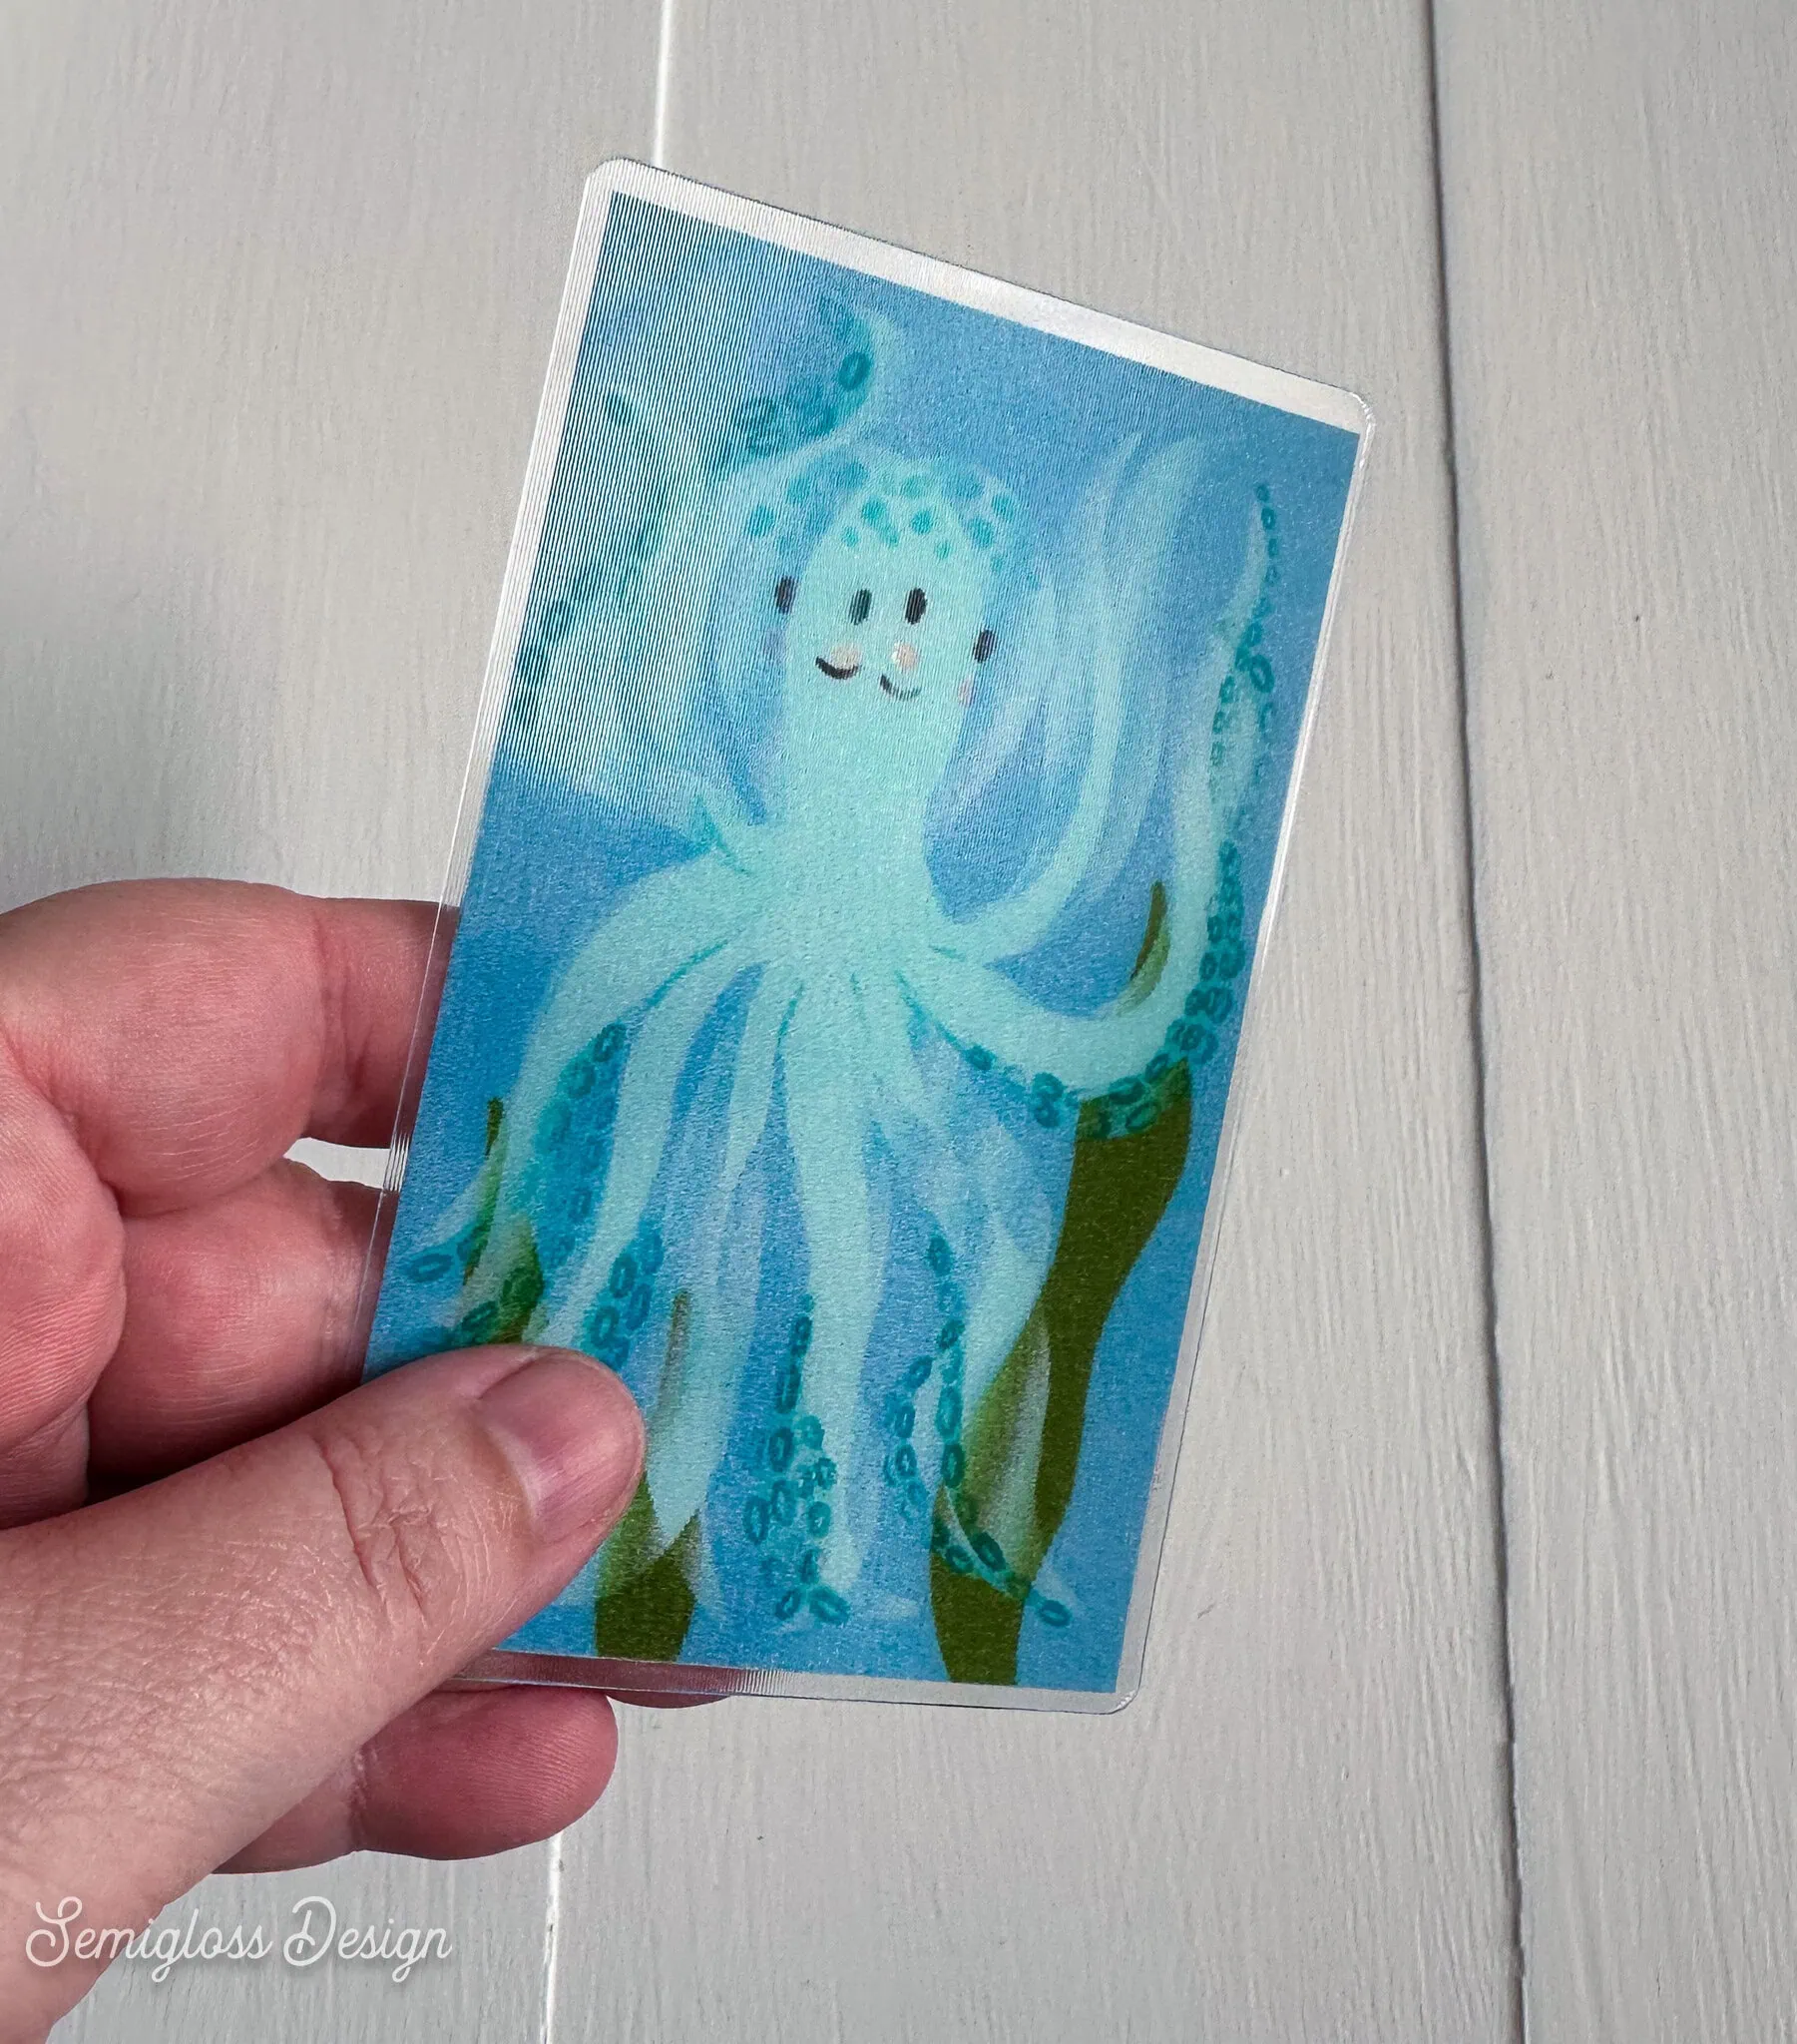
You can include between 2 to 20 animation frames. Mine has 2, so it’s a little weird. It probably needs its own tutorial because the one I watched WAY overcomplicated the process. It’s not that hard.
What would you print with a DT and UV printer?
Pin for Later!

Emy is a vintage obsessed mama of 2 DIYer who loves sharing affordable solutions for common home problems. You don’t need a giant budget to create a lovely home. Read more…