
Making Stickers with the xTool C1 Color Cutter
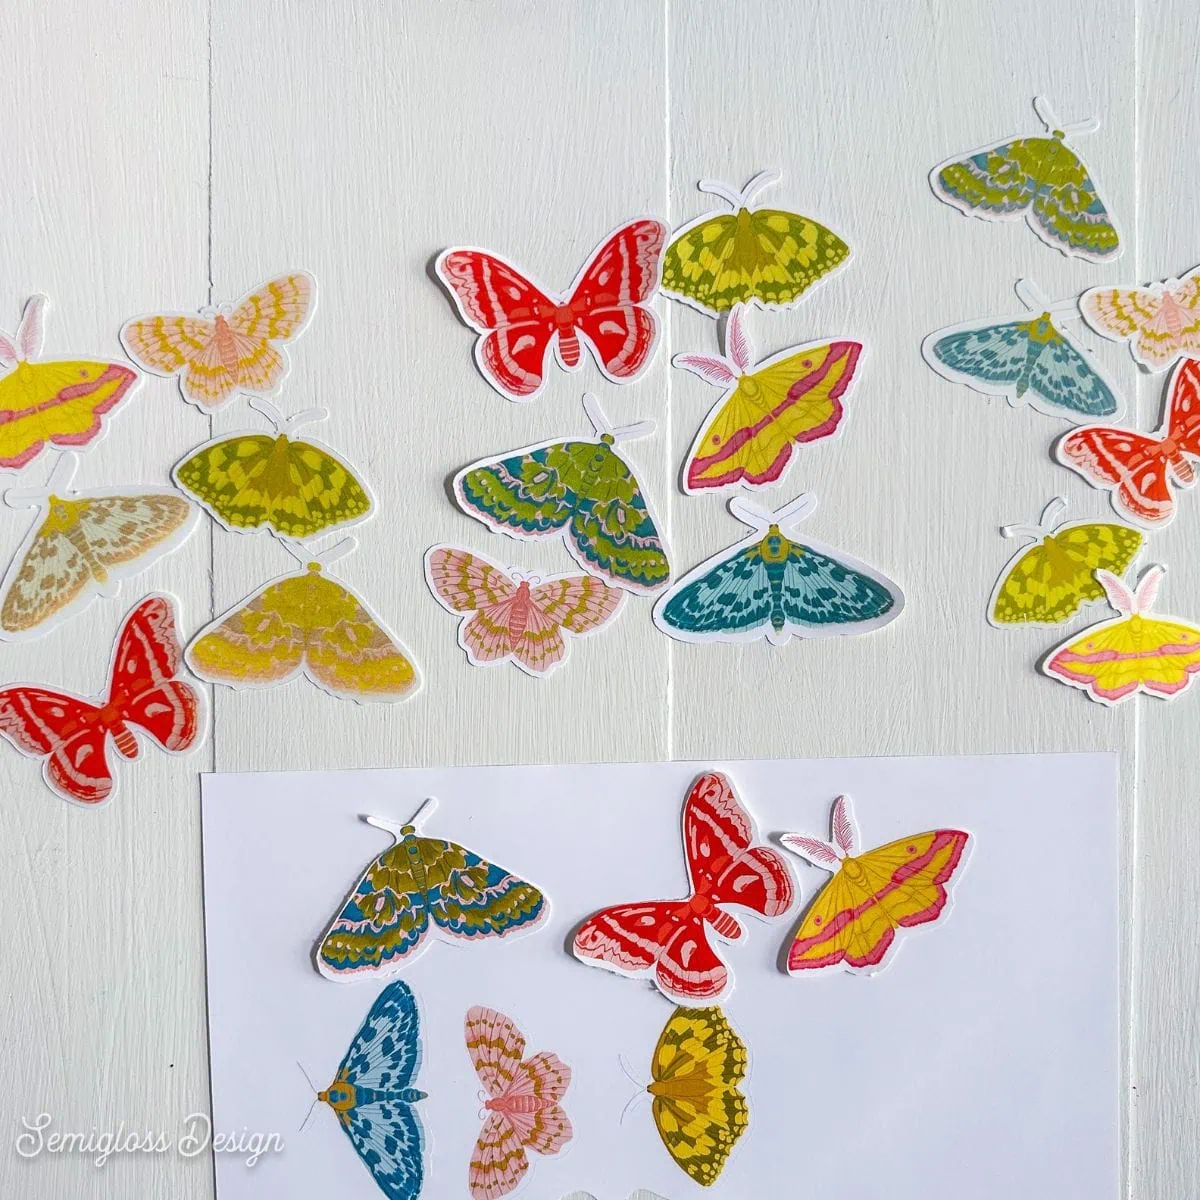
Learn how to make stickers with the xTool C1 Color Cutter. Skip using a separate printer with this full-color cutting machine. Making stickers just got easier.
This post contains affiliate links. By purchasing an item through an affiliate link, I earn a small commission at no extra cost to you. As an Amazon Associate I earn from qualifying purchases.
xTool sent me the C1 Color Cutter to review. All thoughts and opinions are my own.
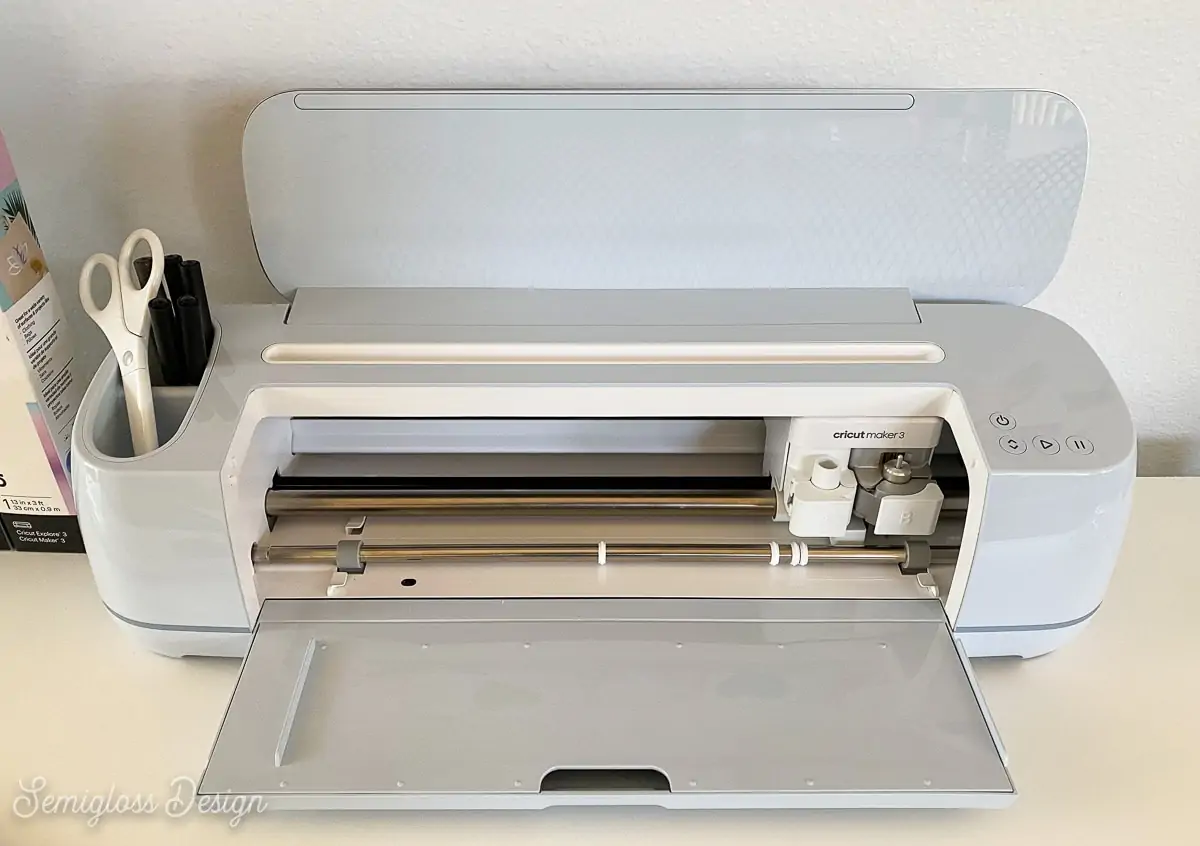
I have a love-hate relationship with my Cricut. It was mostly love until I started making my own stickers and had to use the print-and-cut feature. That’s when the problems started.
Sometimes it would work perfectly. Other times, not so much. I wasted so much sticker paper. Not to mention the registration marks and size, which changed every single time I uploaded a design.
So when I heard about the xTool C1 Color Cutter, I jumped at the chance to try it out. I had just spent several hours making stickers for the xTool O1 Omni, and it was already a huge improvement to my usual method.
The C1 color cutter that prints and cuts sounds like a dream come true.
All About the xTool C1 Color Cutter
The xTool C1 Color Cutter is a cutting machine with a printer. It does everything a cutting machine can do, but better. And it prints!
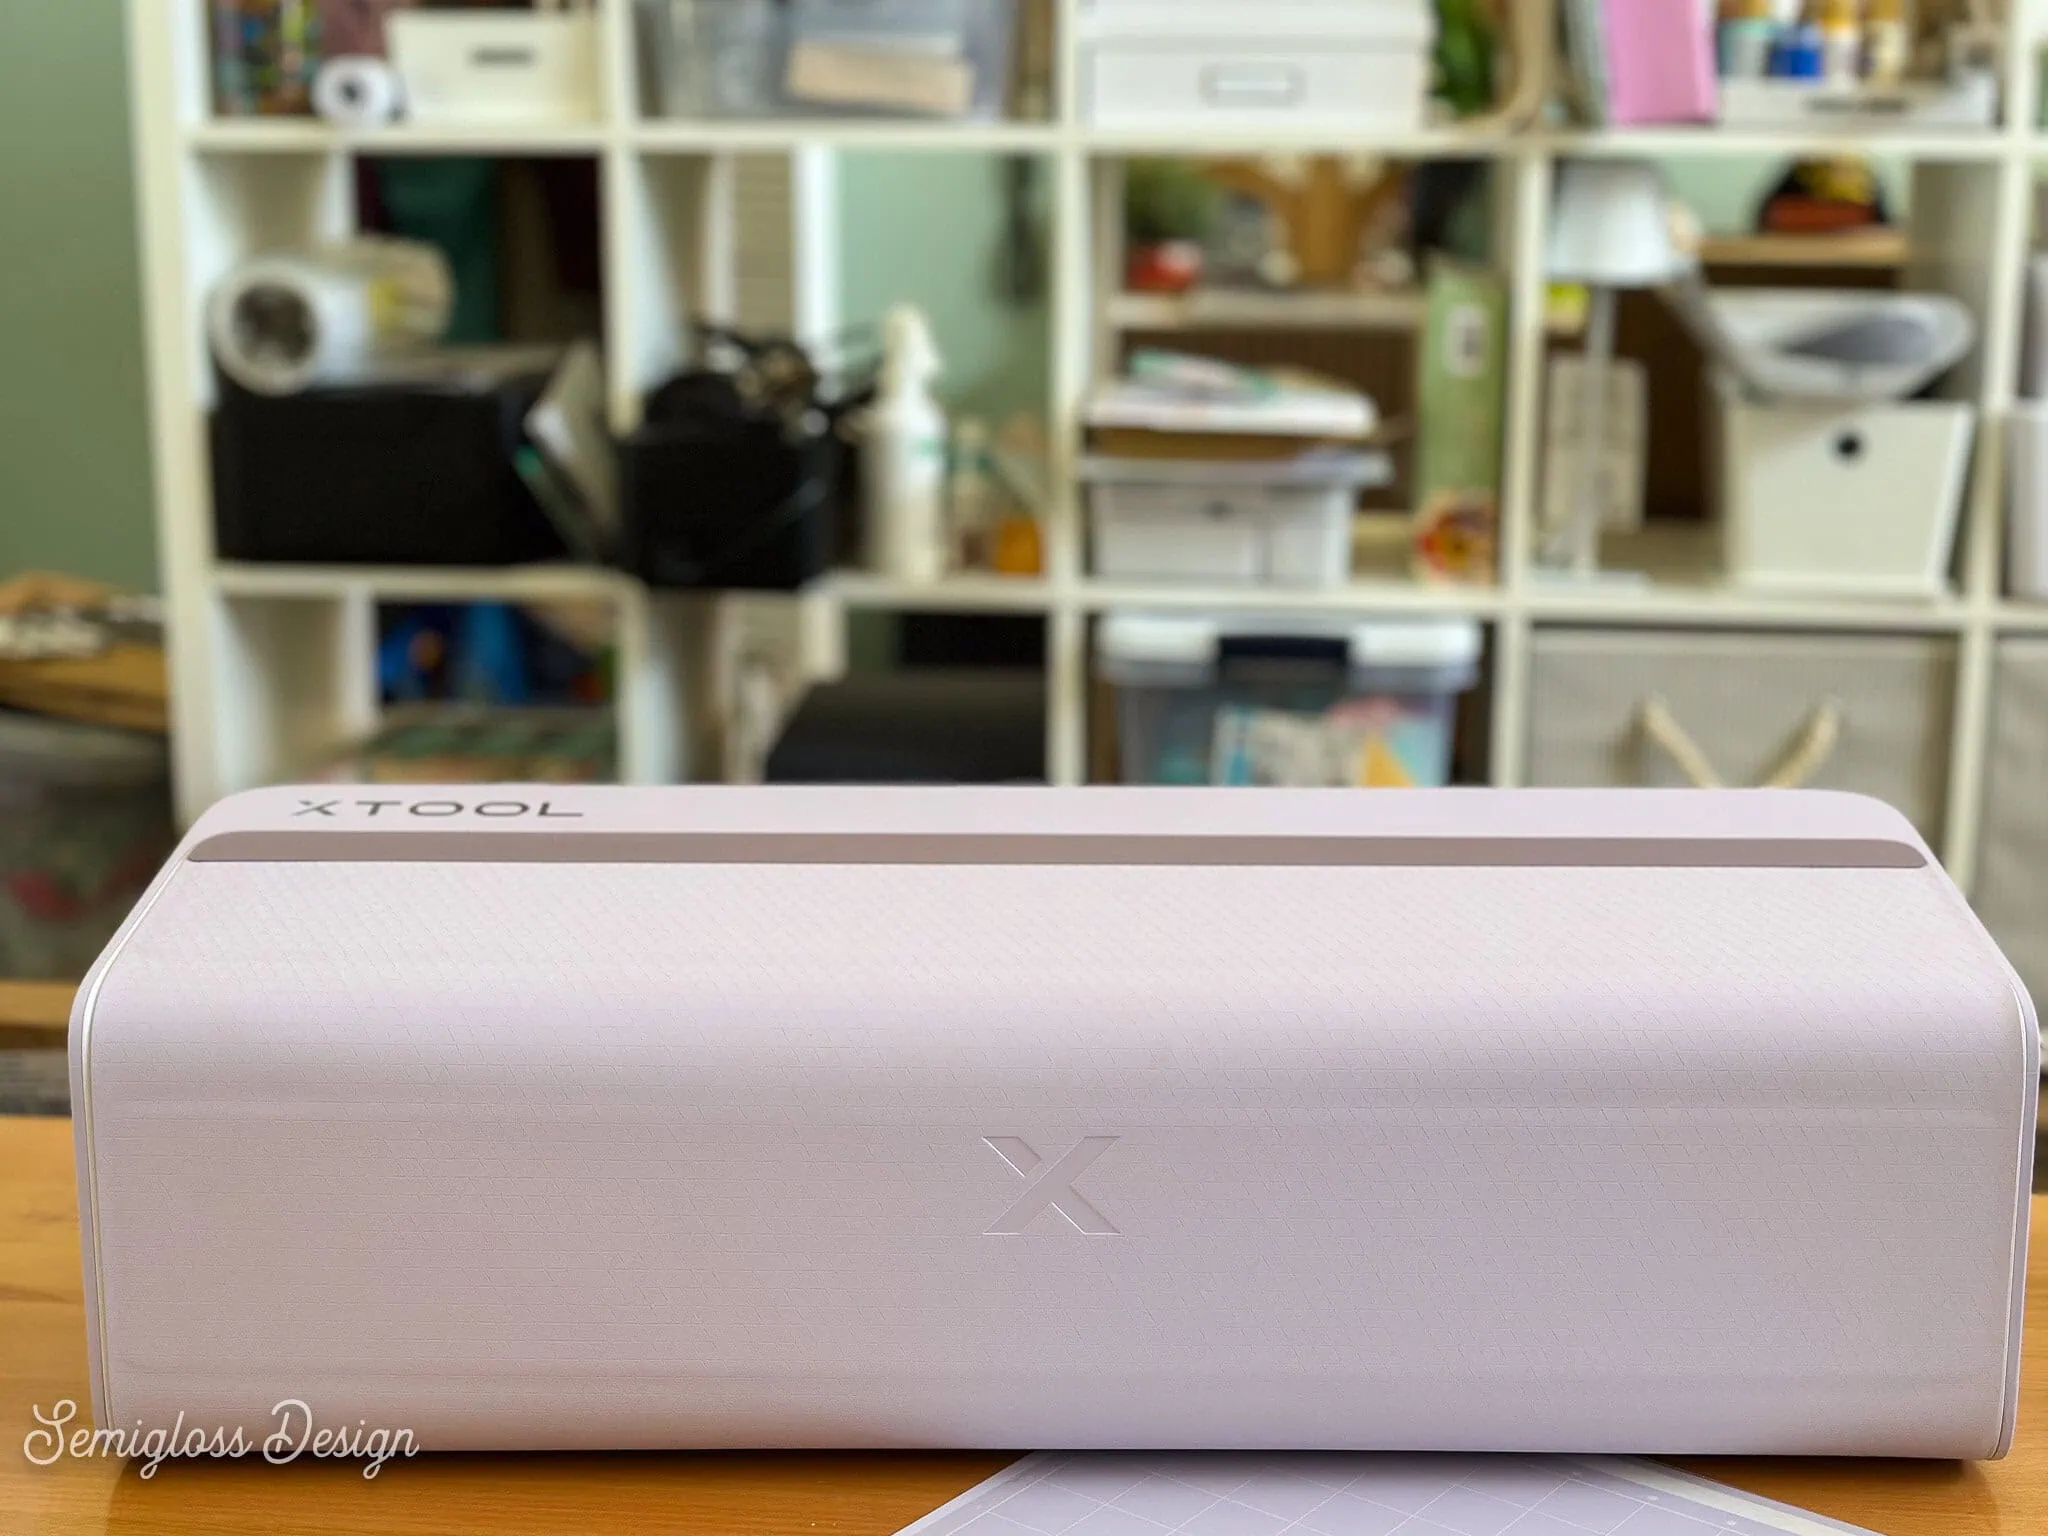
C1 Color Cutter Features
- No registration marks that waste paper. The mat has the registration marks instead.
- Cut and Scan technology lets you print with a different printer if you want.
- It also lets you use scraps because you can see where to place your image.
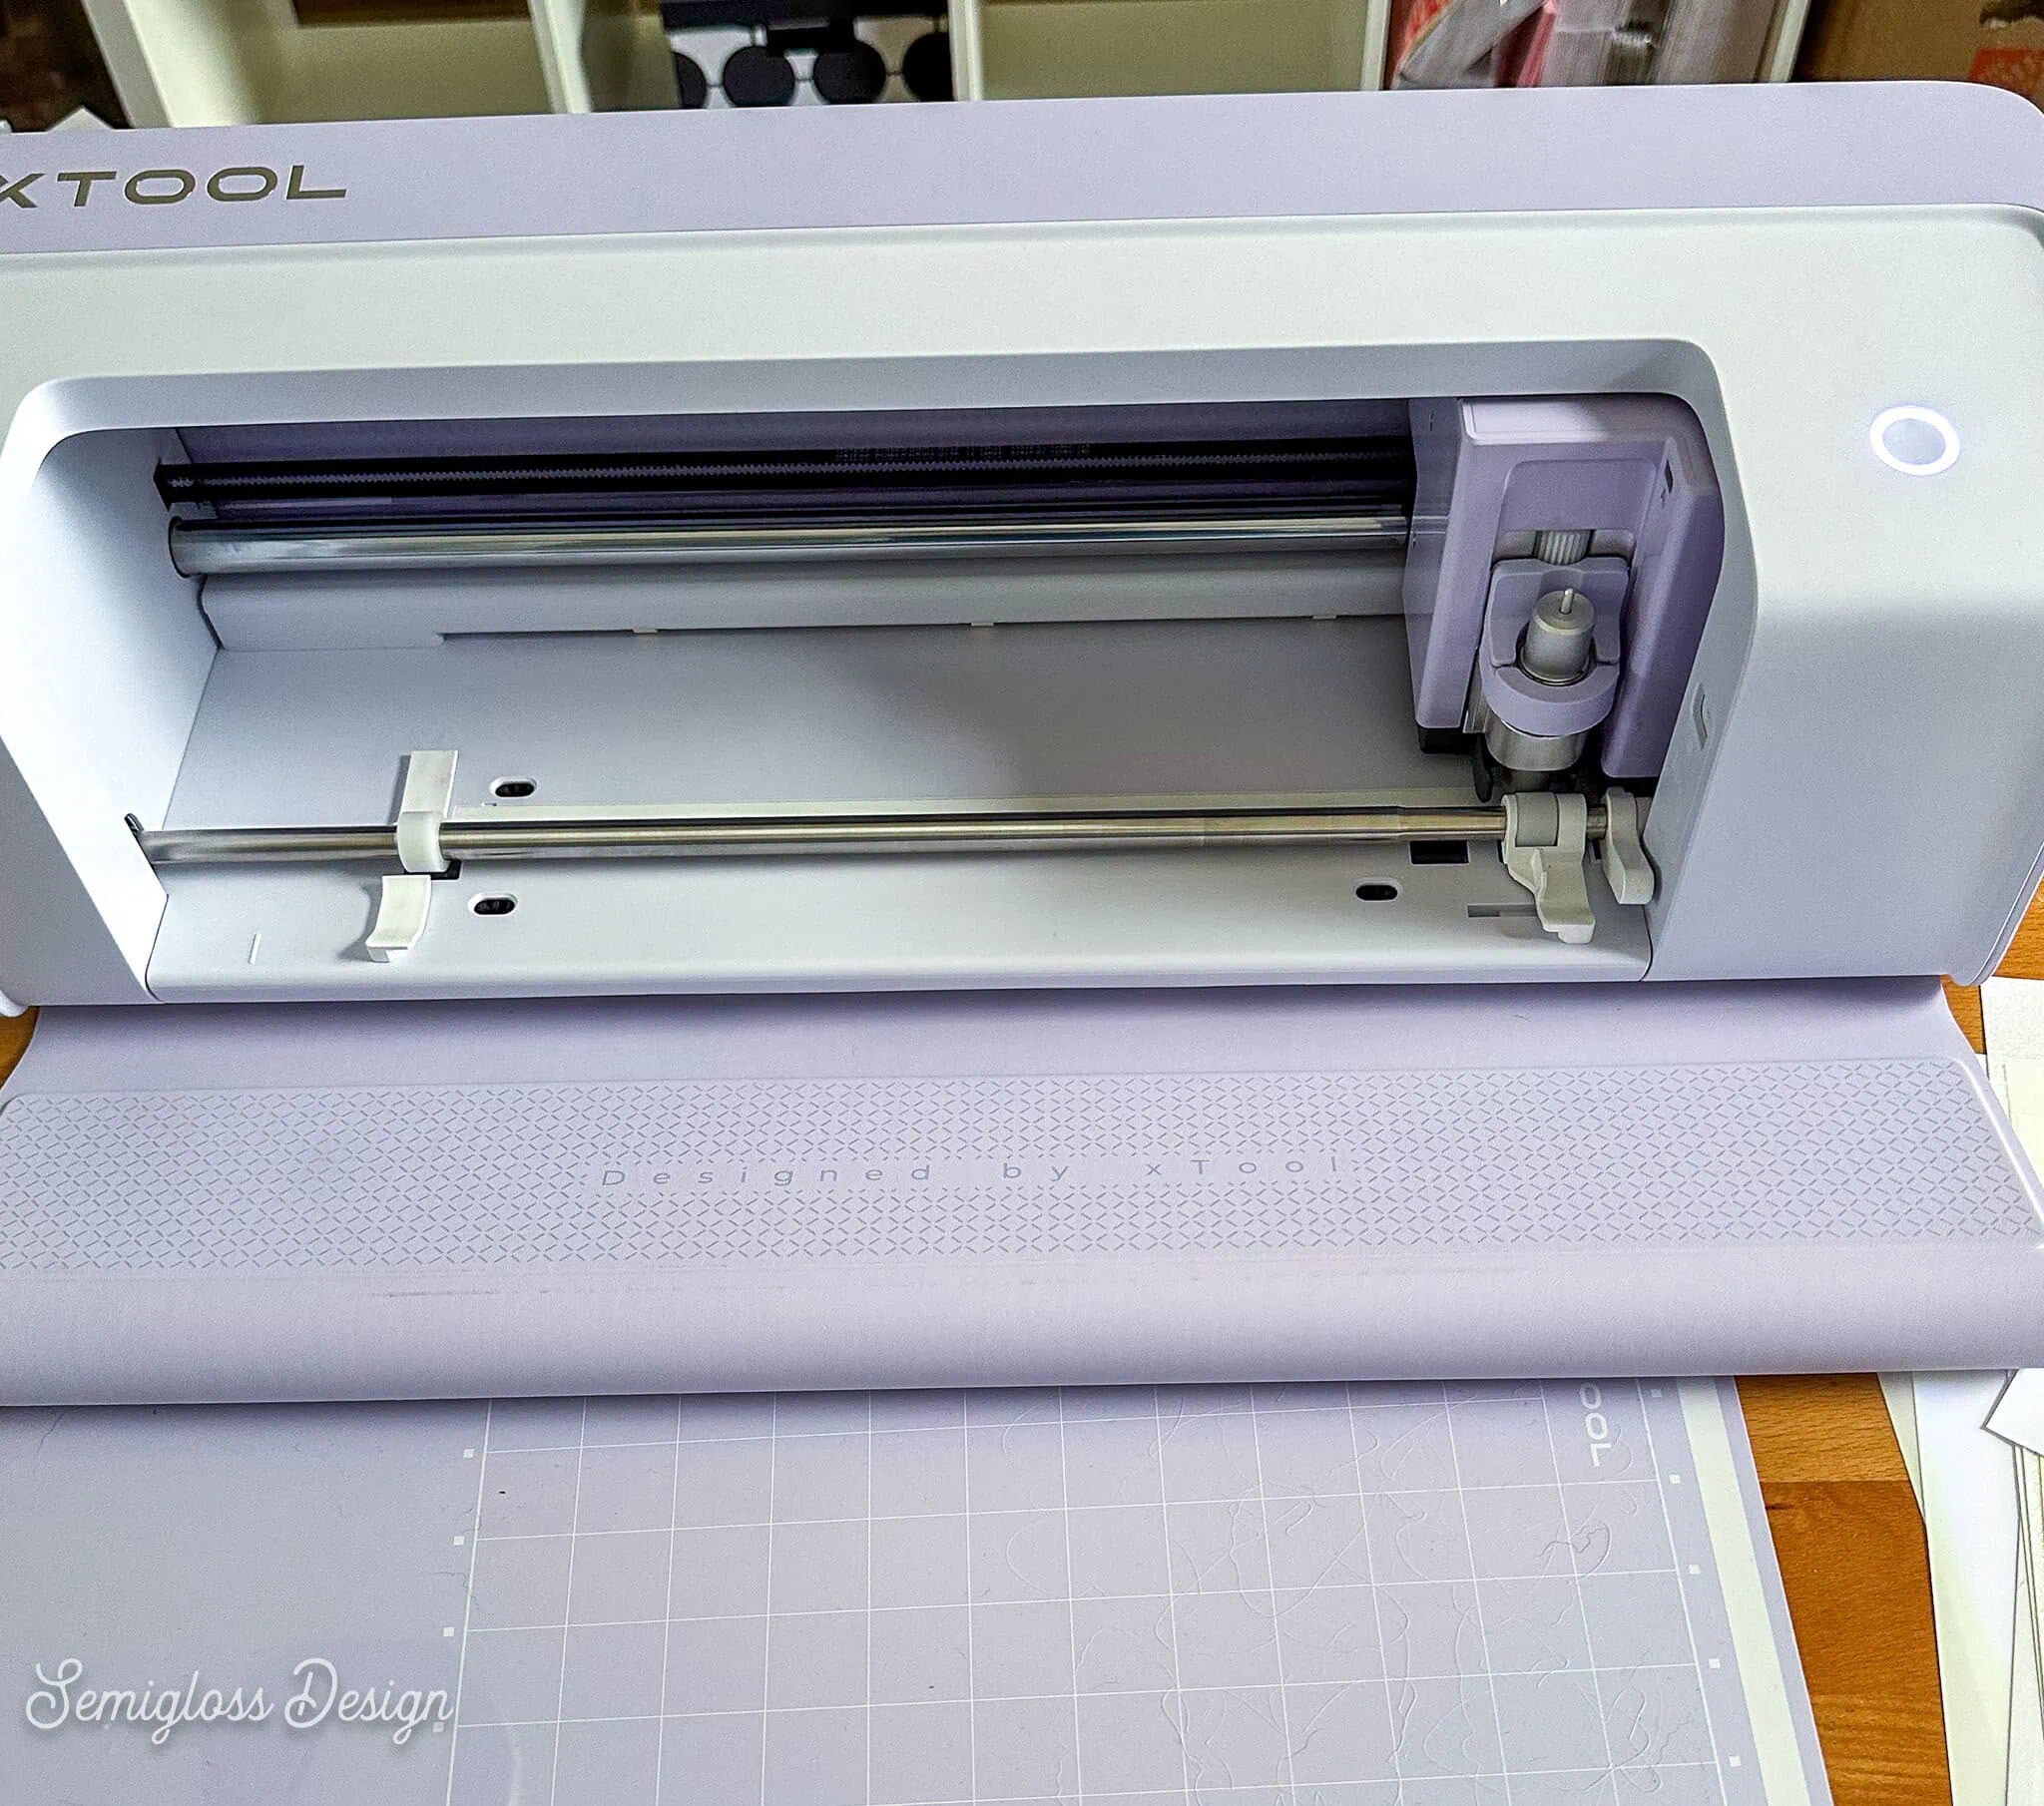
- The mat self-loads.
- DURA ink is waterproof and fade-resistant.
- Prints on multiple materials.
- Cut multiple colors at once
- Easy blade swap
- Low noise
- Versatile tools available
Ease of Setup
Setup is really easy. Download and install the software, then follow the setup videos. It’s even easy to set up Bluetooth, so that you don’t have to keep your machine plugged into your computer via USB.
I love that it will even walk you through making your first project. No excuses for keeping it in the box!
Ease of Using the xTool Studio Software
I love this software, and I love that you use it for all the machines. It’s pretty robust, and I find that it’s intuitive to use.
Speed and Noise
It prints much faster than the O1 Omni (or about as fast as a standard inkjet printer).
What I love is how quiet it is. My dog likes to sit beside me while I work, but if I’m using my Cricut, she walks away, glaring at me for interrupting her sleep.
The C1 Color Cutter is much quieter, so I hope she will appreciate it.
Can You Print from Your Own Printer?
Yes. You can use your own printer. I love the quality of my Epson EcoTank and how affordable the ink is.
With the Scan and Cut feature, you can load the design, scan it, and cut it. See the instructions below.
Is the Ink Waterproof?
The DURA paper says that it’s waterproof after 24 hours. I tested the DURA paper and my normal sticker paper (waterproof matte from Online Labels) by brushing a bit of water on the stickers, and neither one bled.
That means laminating isn’t totally necessary. I love the added protection of laminate, but it’s another step in making stickers. So it’s up to you whether you want to add laminate.
Sticker Papers Available
xTool has a ton of fun sticker papers available. Here’s what’s available so far.
- Sparkle Sticker Paper
- Pearlescent
- DURA Glossy
- DURA Matte
- Transparent
- Transparent holographic
- Holographic
- Holographic Confetti
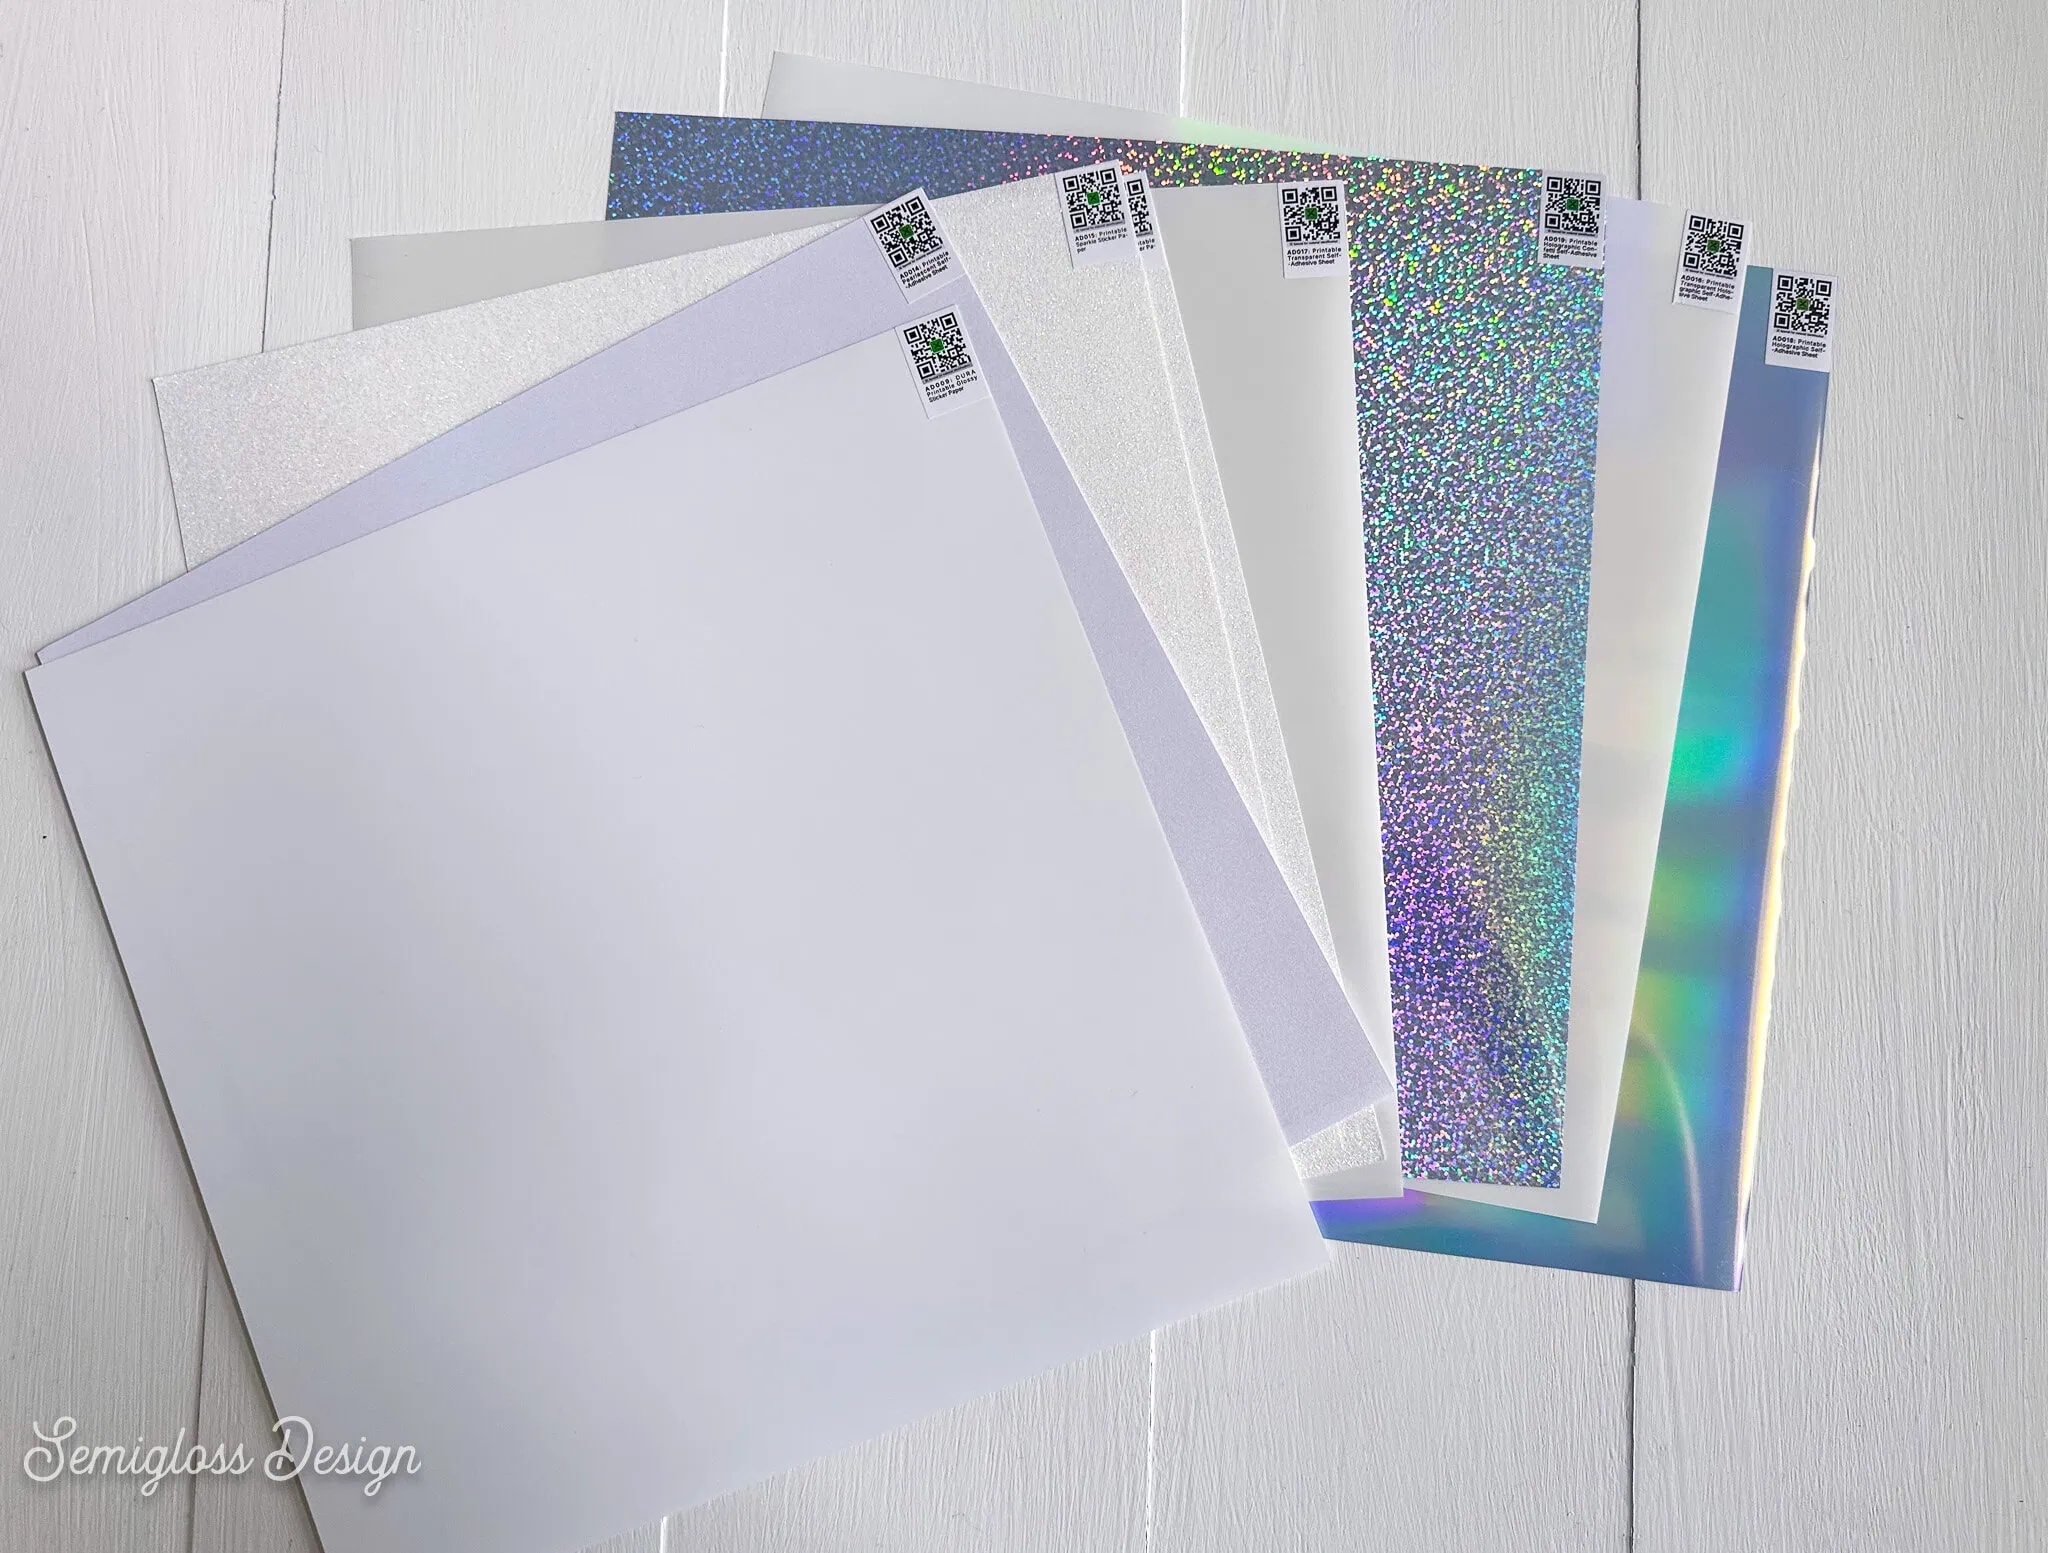
These papers have QR codes that the machine scans to automatically apply the settings.
I can’t wait to try matte paper. It’s my favorite.
Making Stickers with the xTool C1 Color Cutter
I tested several things when making my stickers. I’ll tell you a little about each test and my personal preferences. I kept the quality at Best for all of the prints.
Keep in mind that it’s totally normal for colors to appear different on different types of paper.
- Using the Dura paper (set to vivid – the default)
- Using the Dura paper (set to anti-bleed)
- Using my Waterproof Matte Paper
- Using my own printer and my usual paper
- Kiss cut
- Printing an image with flat color (versus the textured moth illustrations)
- Trying Different Paper Types
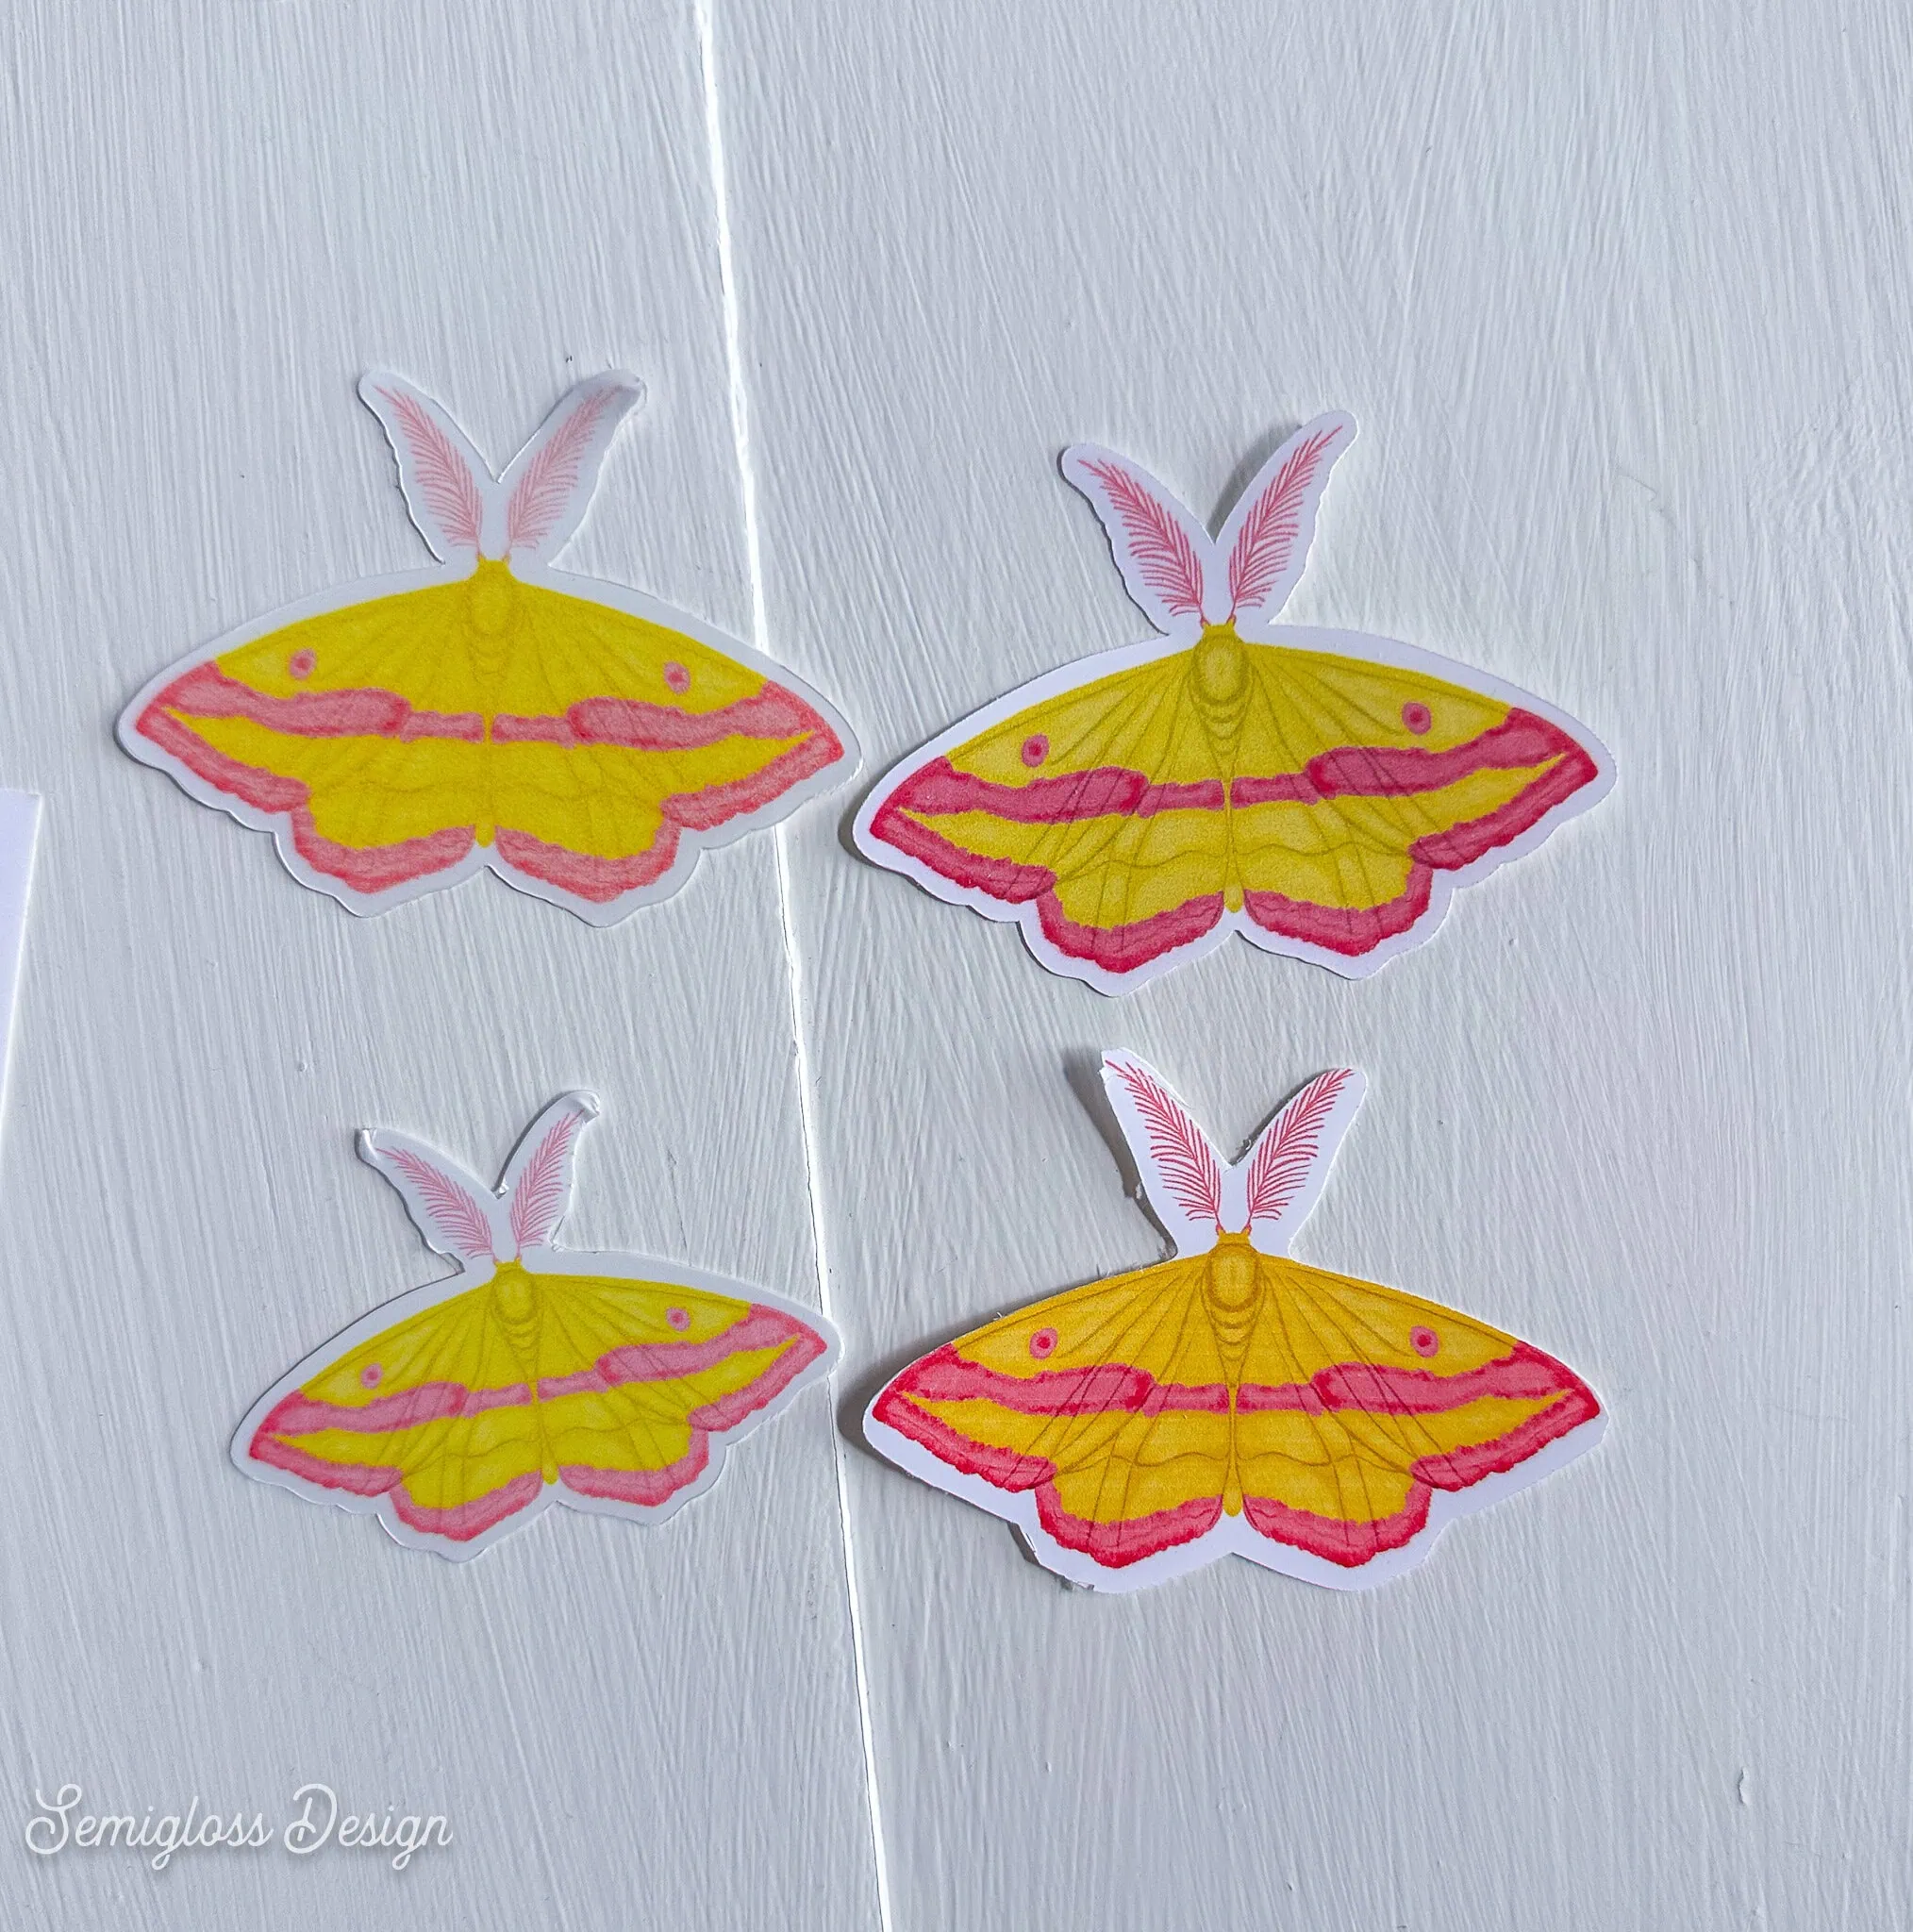
Using the Dura Paper (Set to Vivid)
I tested the Dura paper first and wasn’t very pleased with the results. The colors were completely wrong.
xTool Studio suggested setting it to Anti-Bleed, so I tried that the next time.
I also cleaned the printhead since it had been a few days since I set up the machine. It’s very possible this is why they turned out so badly. Every other print looked great!
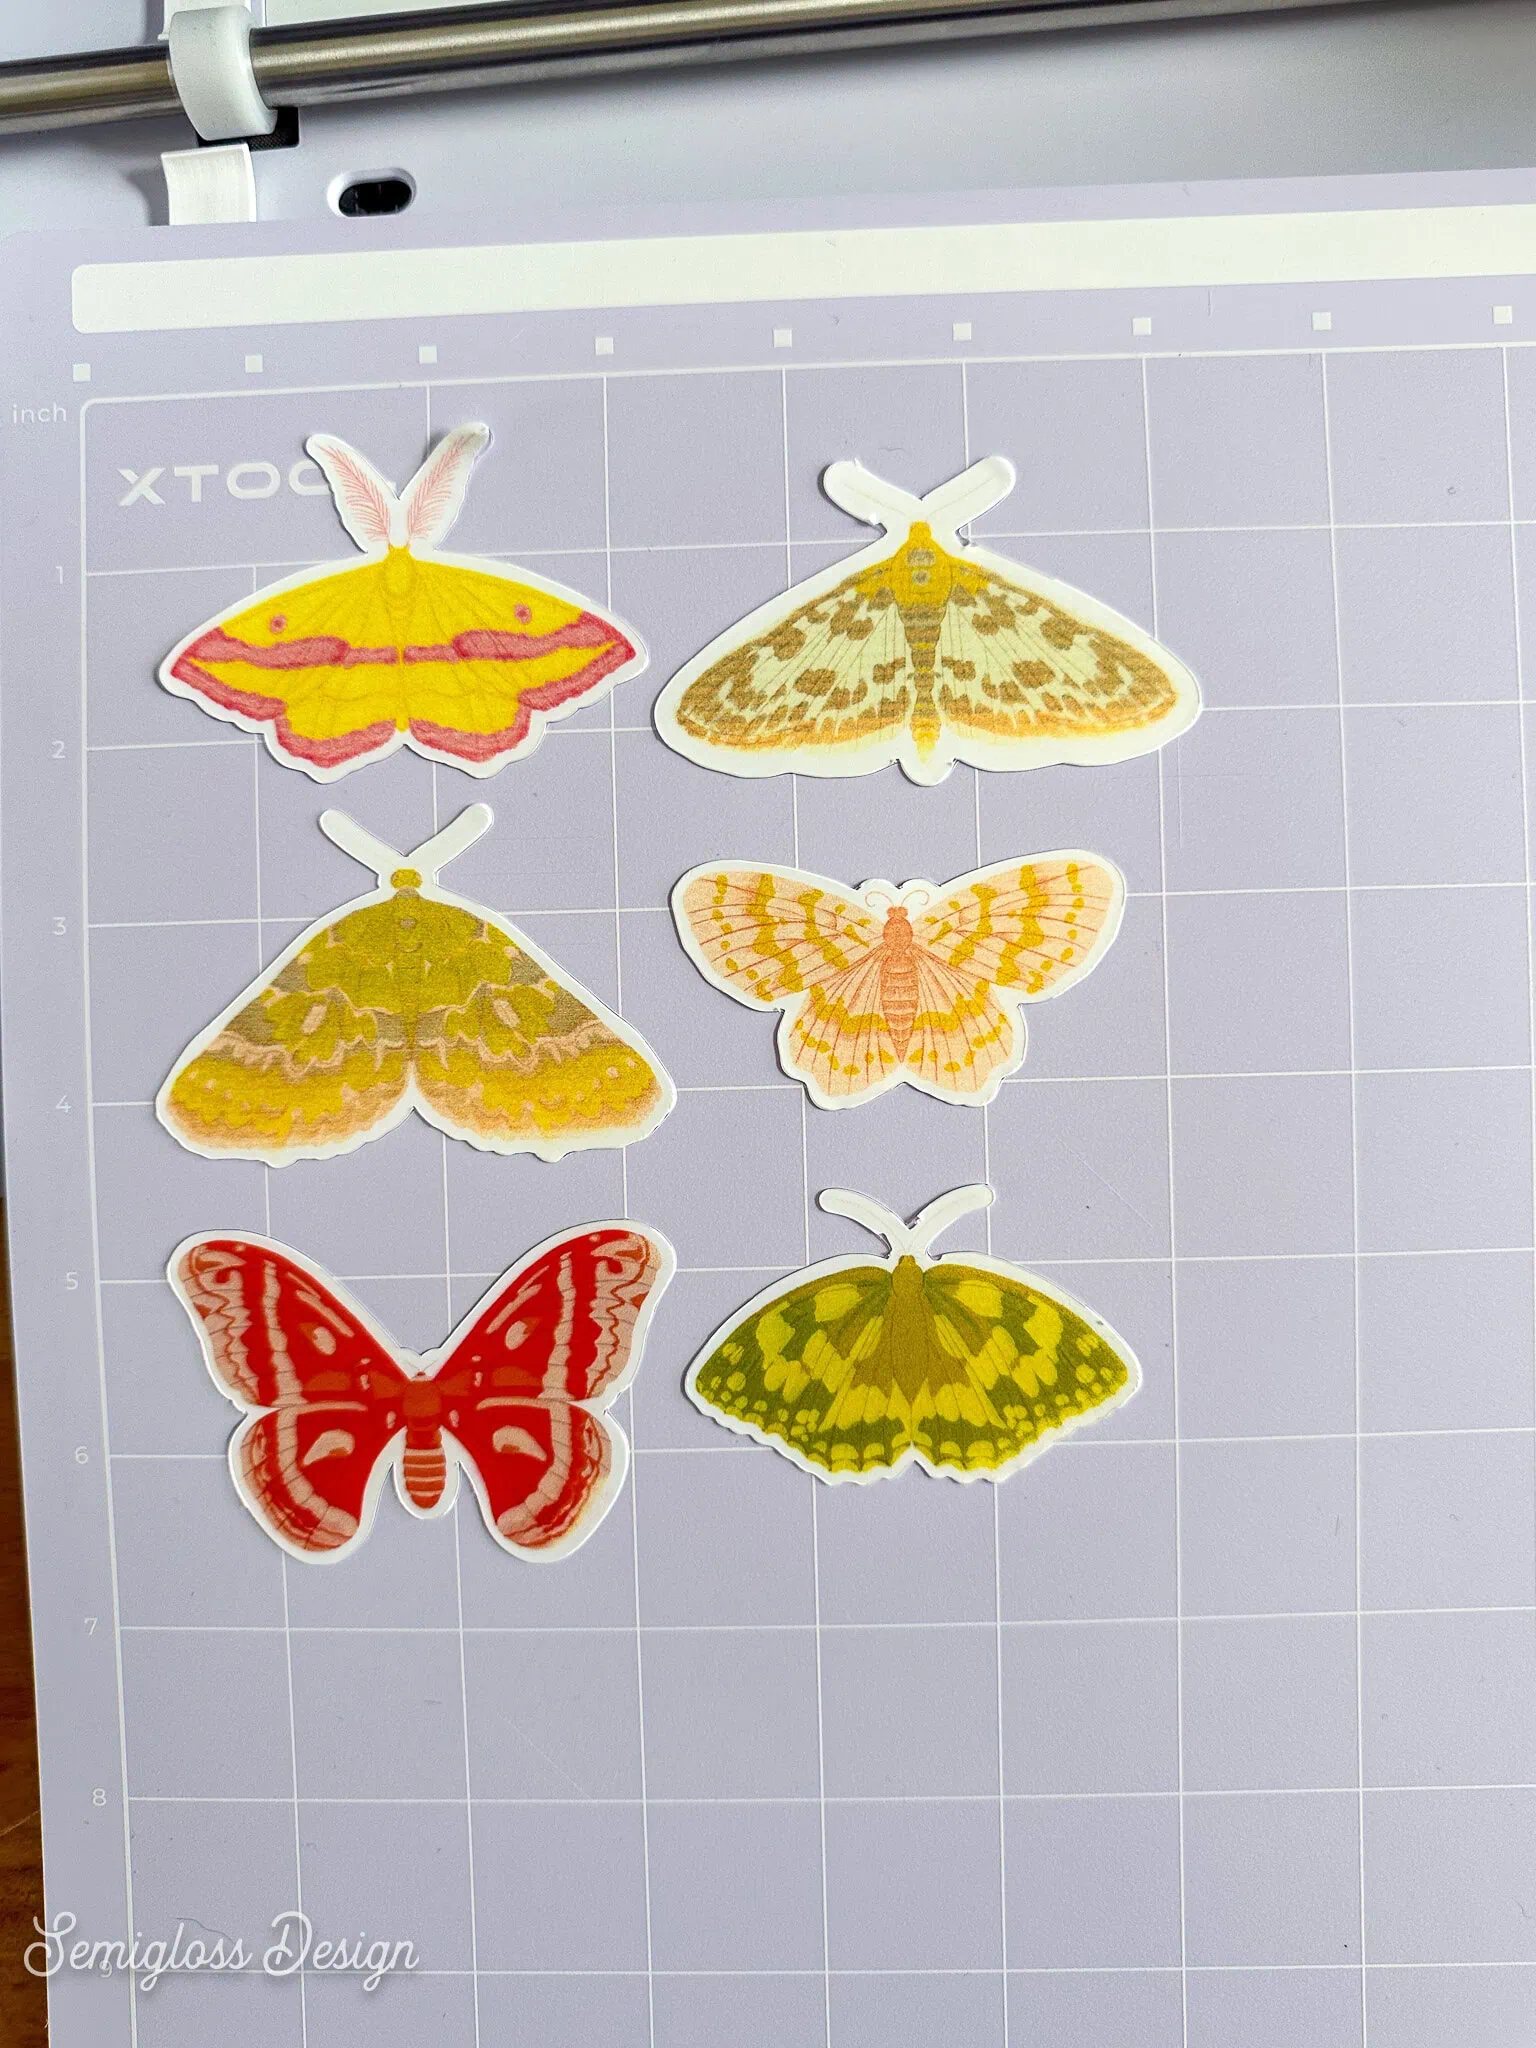
Using the Dura Paper (Set to Anti-Bleed)
The colors turned out much better, but they were still not as vibrant as I like. I’m not the biggest fan of glossy paper, though.
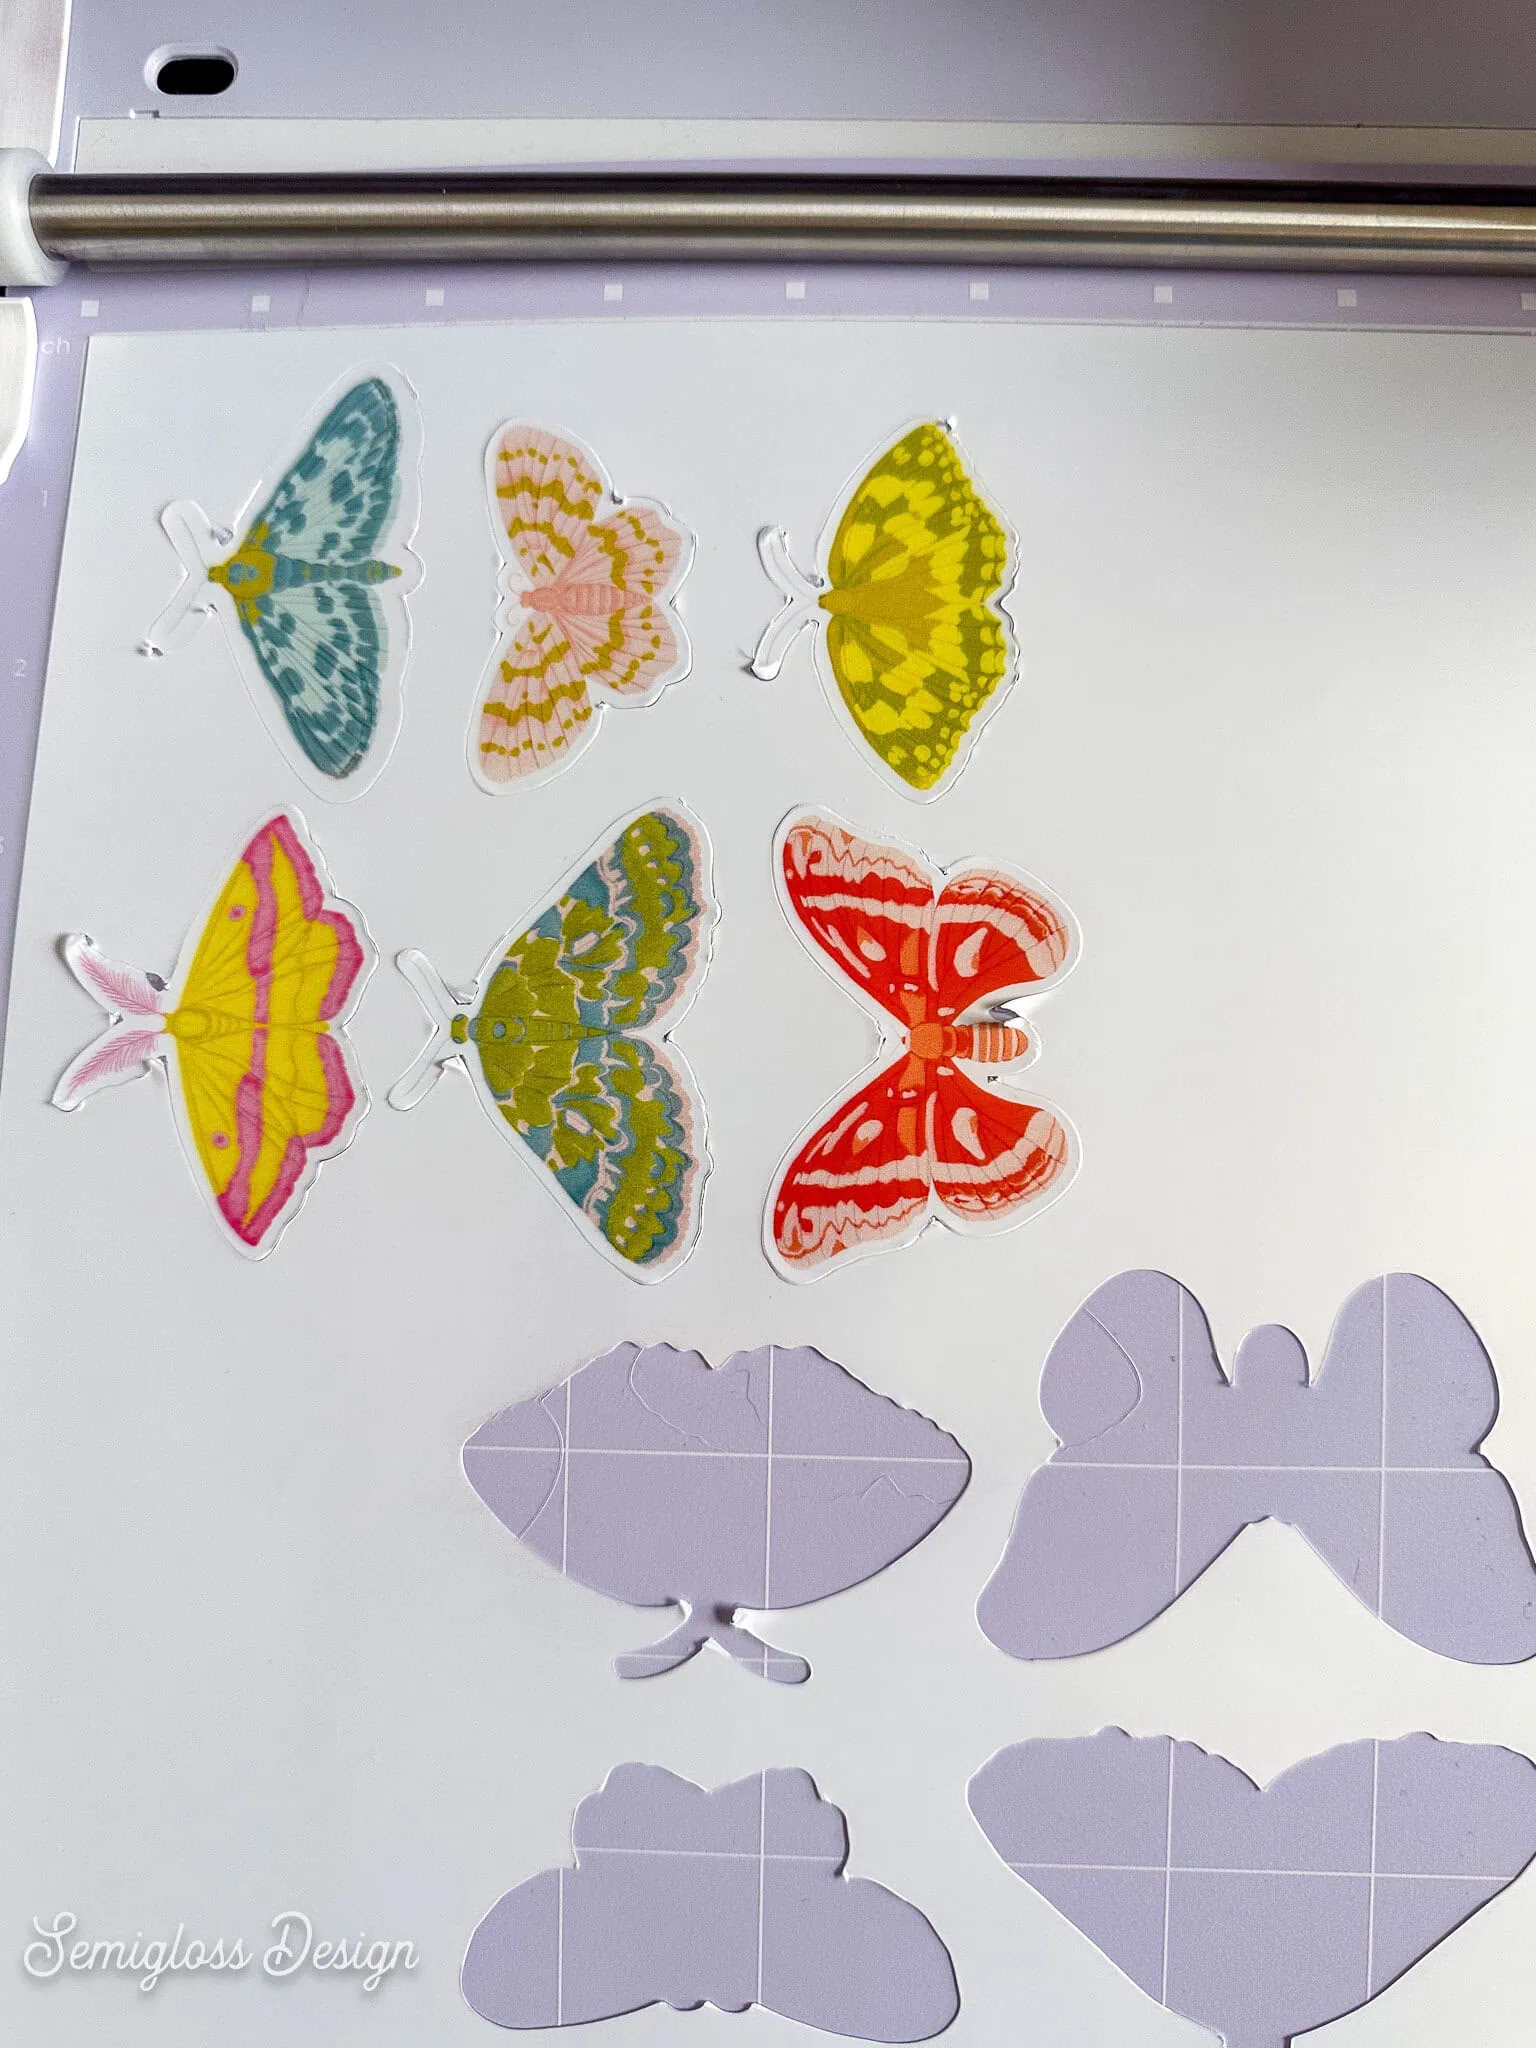
Using my Waterproof Matte Paper
This is my usual sticker paper (Waterproof Matte from Online Labels), and it turned out much more vibrant.
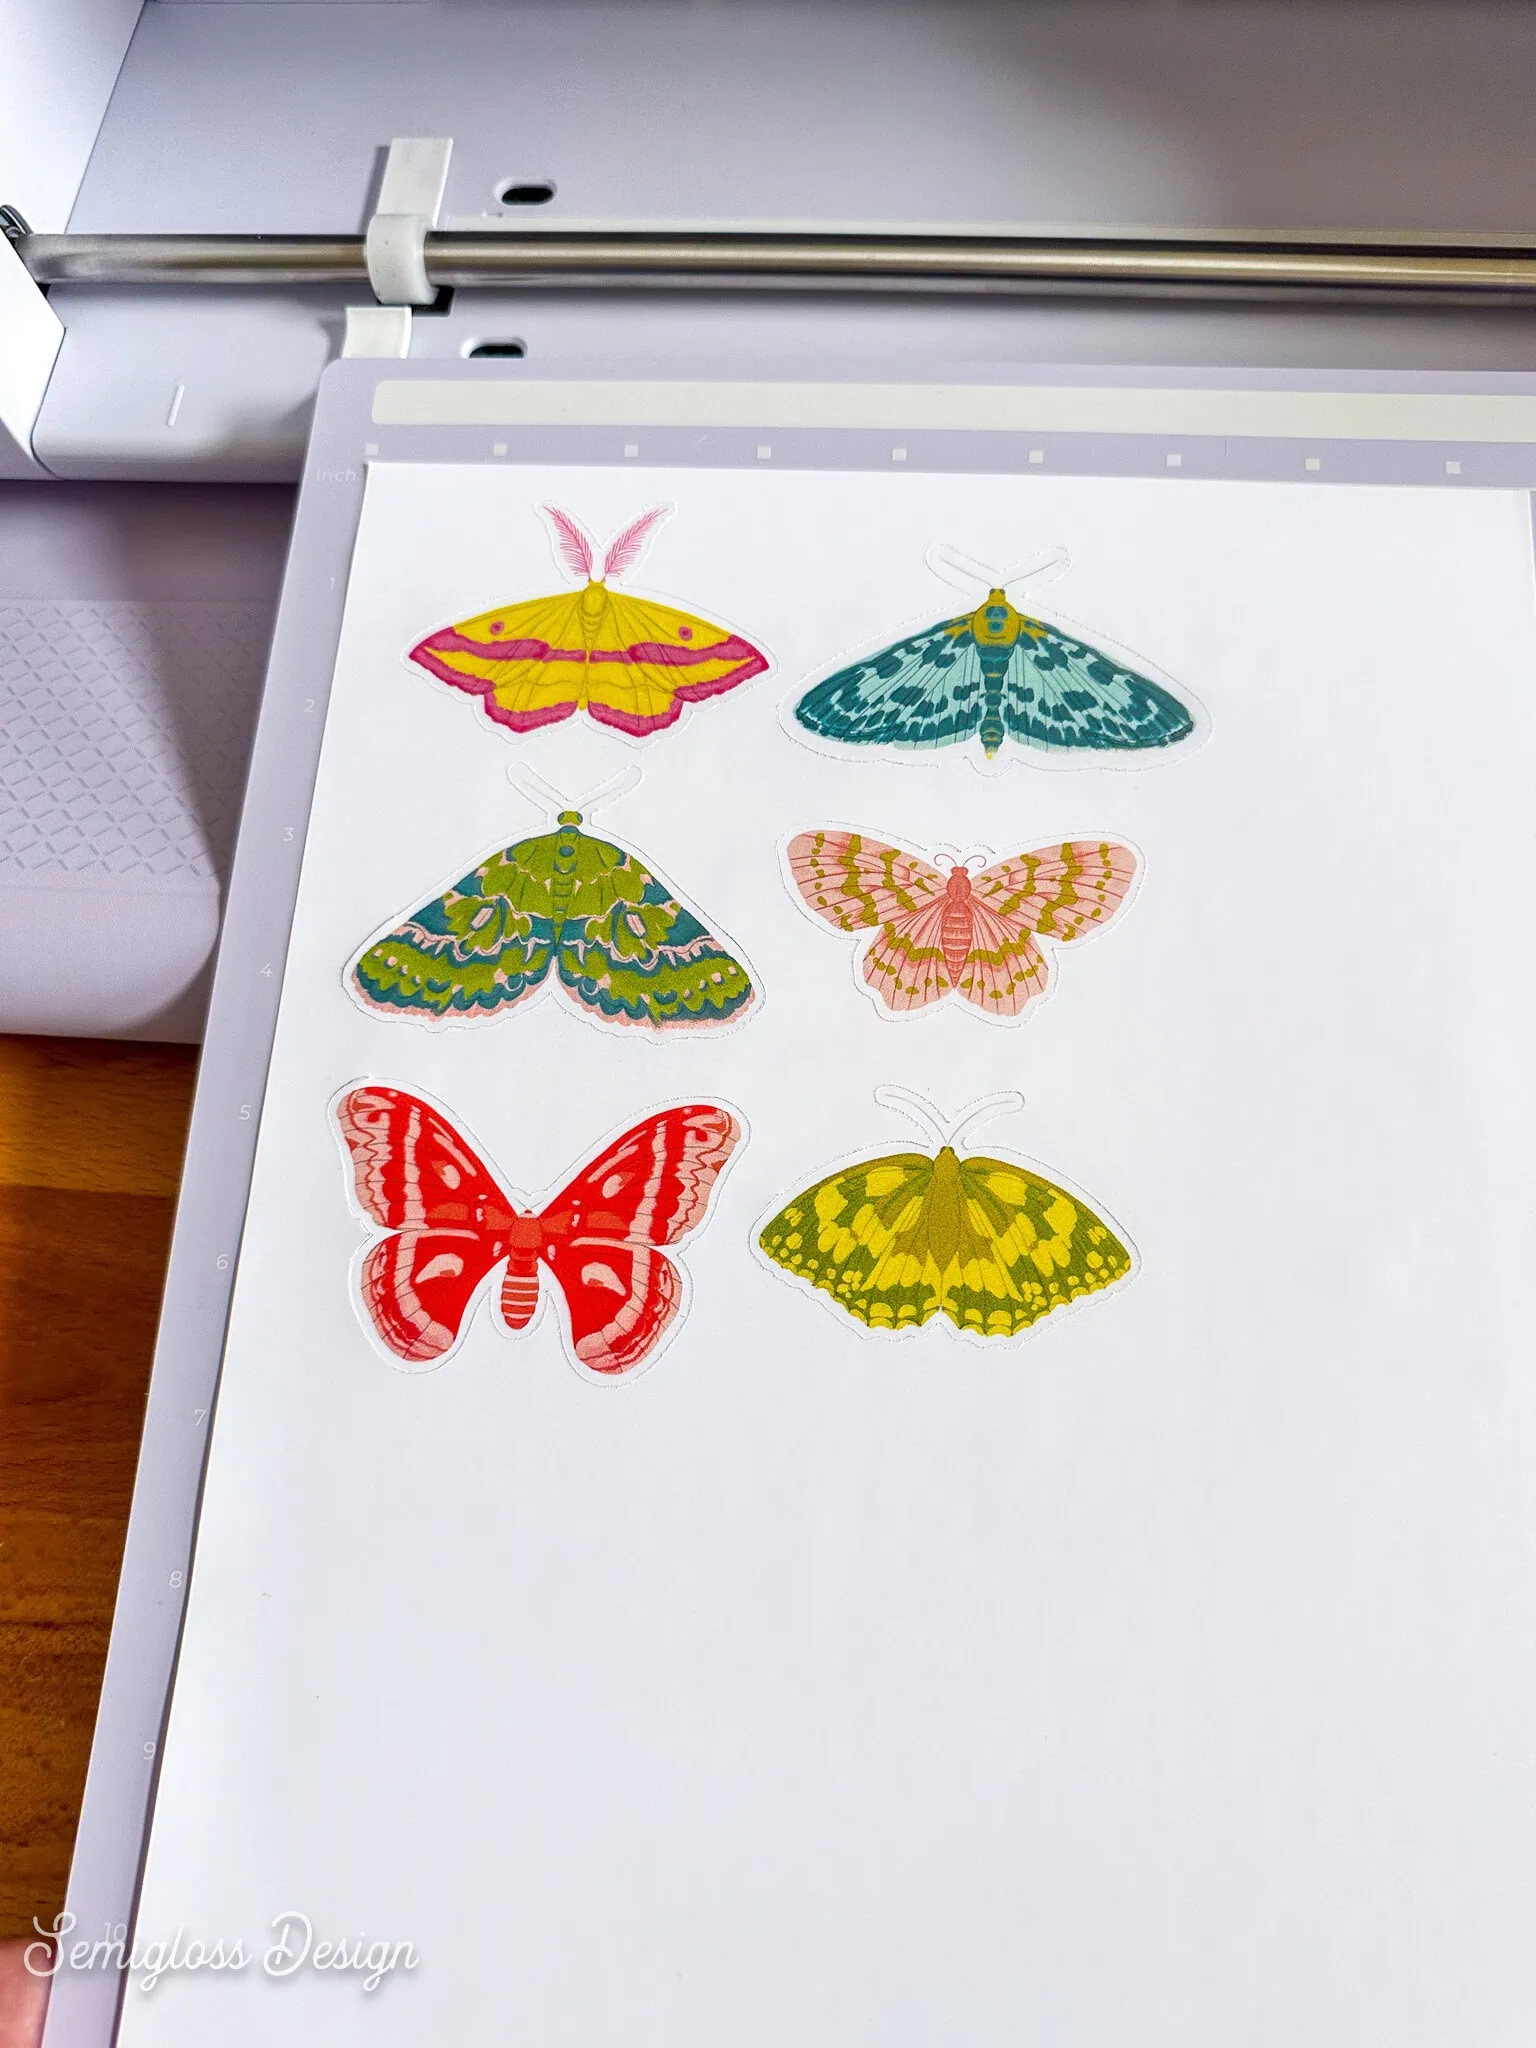
Using My Own Printer
These were the best and showed the most detail. The moth illustrations were made with textured brushes that show up the best when printed on my own printer.
For some reason, it didn’t cut deep enough, so they ended up as kiss-cut. (This is why I recommend checking the cut setting each time.)
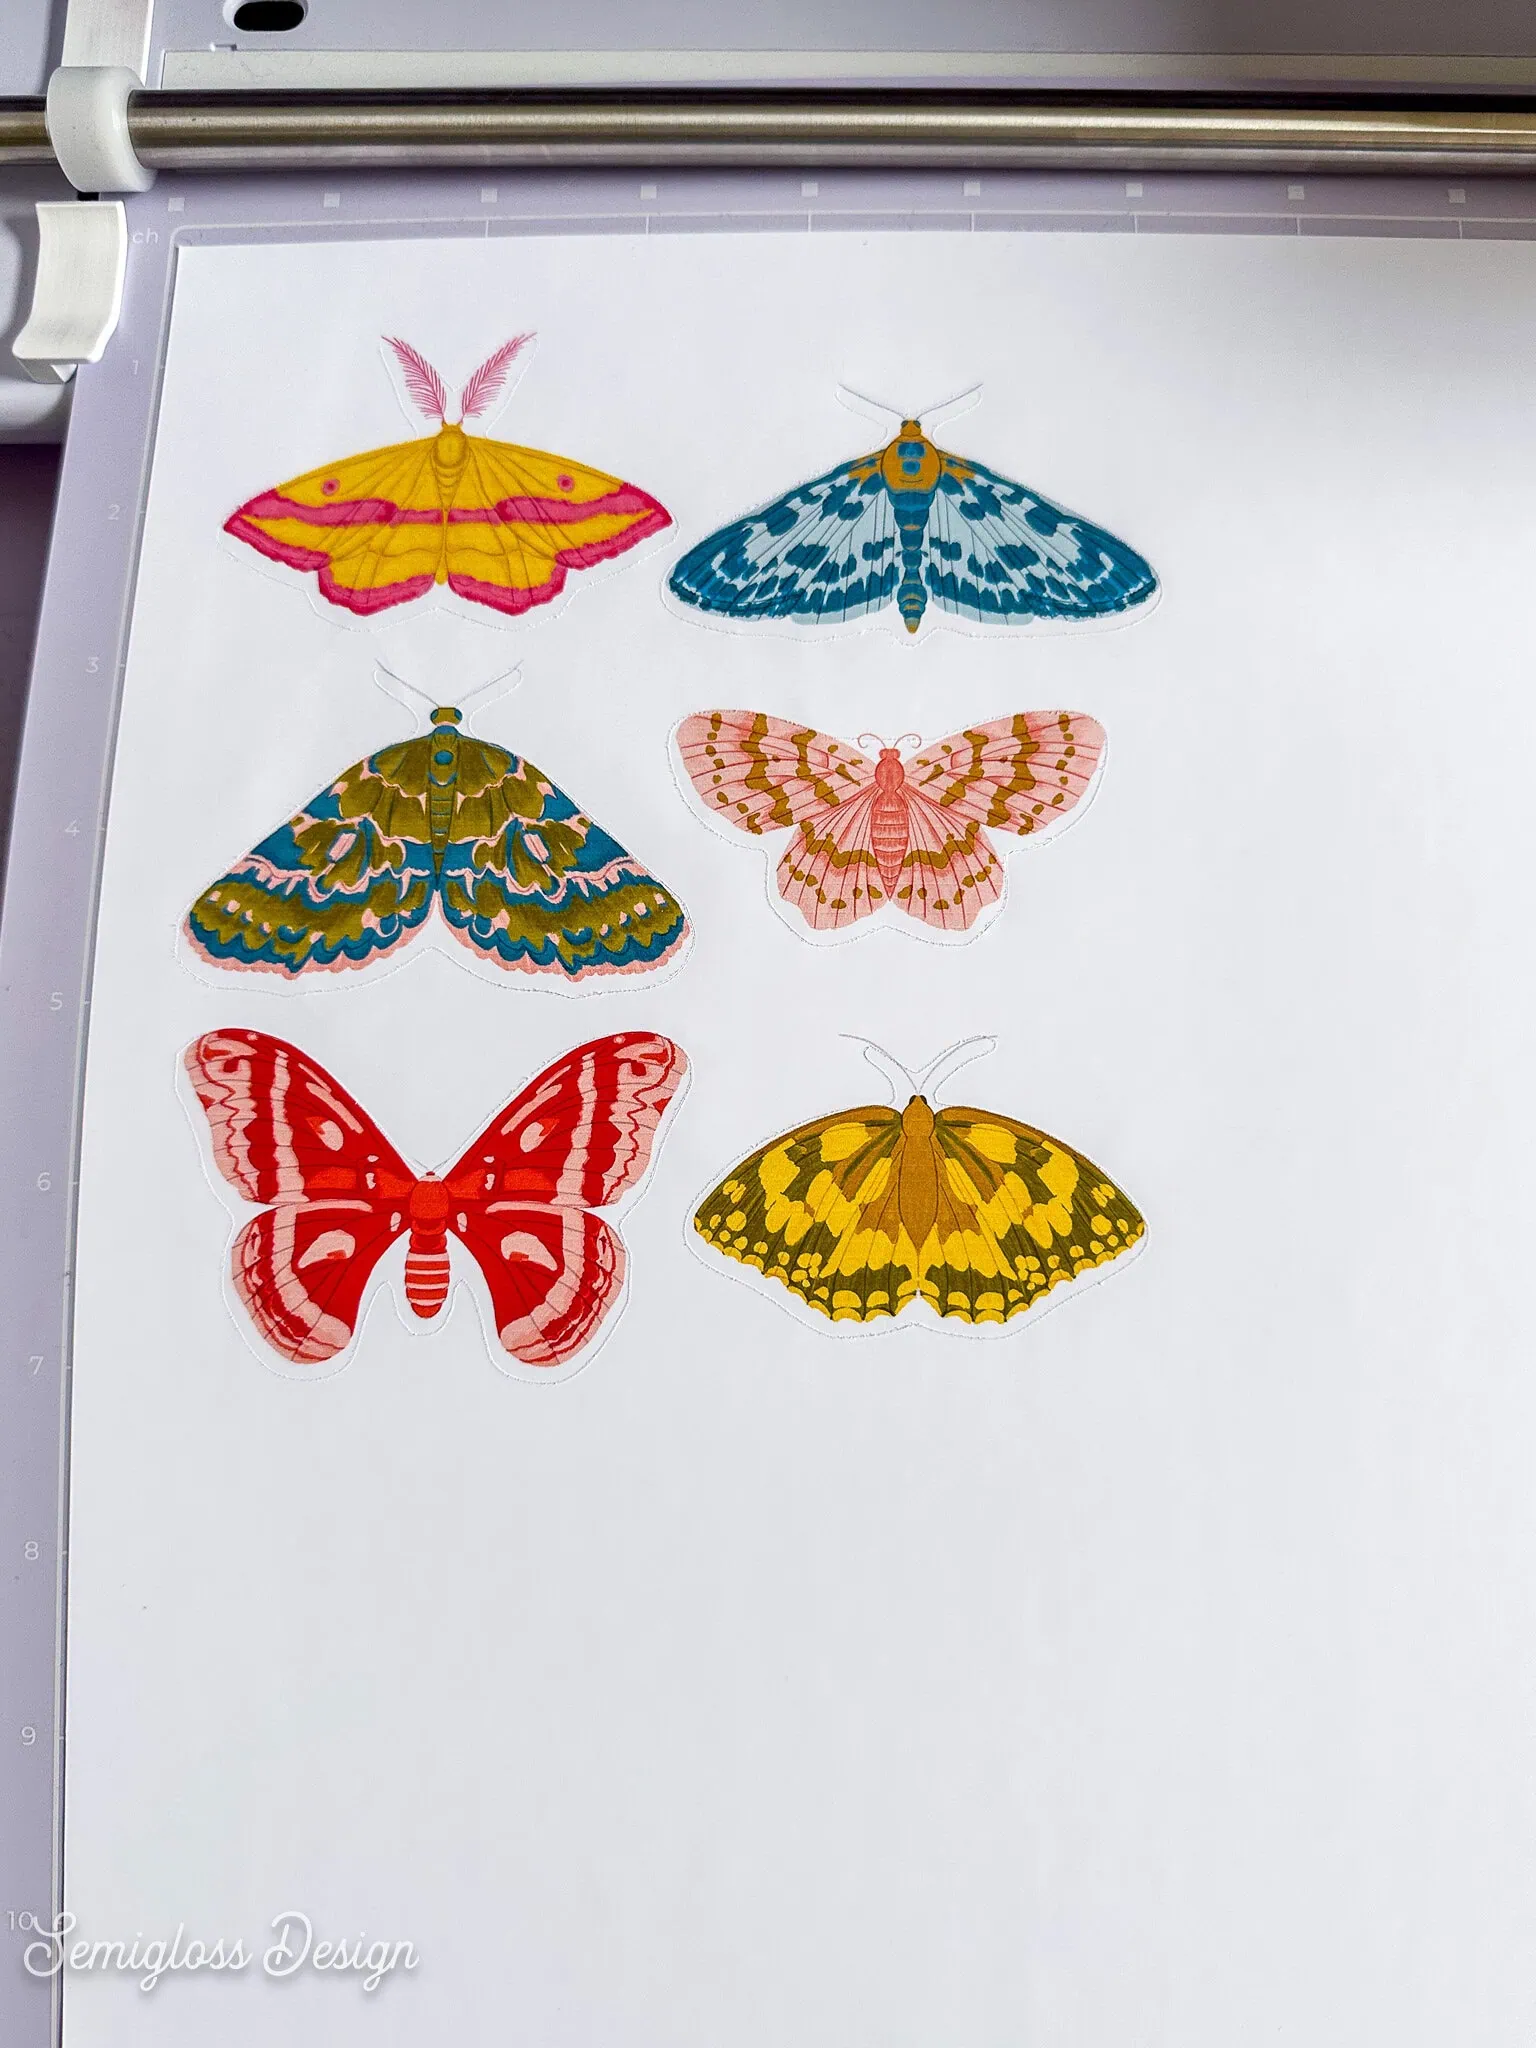
Because of this, I also decided to test illustrations with flat color instead of texture.
Printing Stickers with Flat Color
I did one more test with a file that I had made stickers with before. It has flat color. I love how it turned out. The quality is great, and the color is a bit truer than the version I printed with my printer.
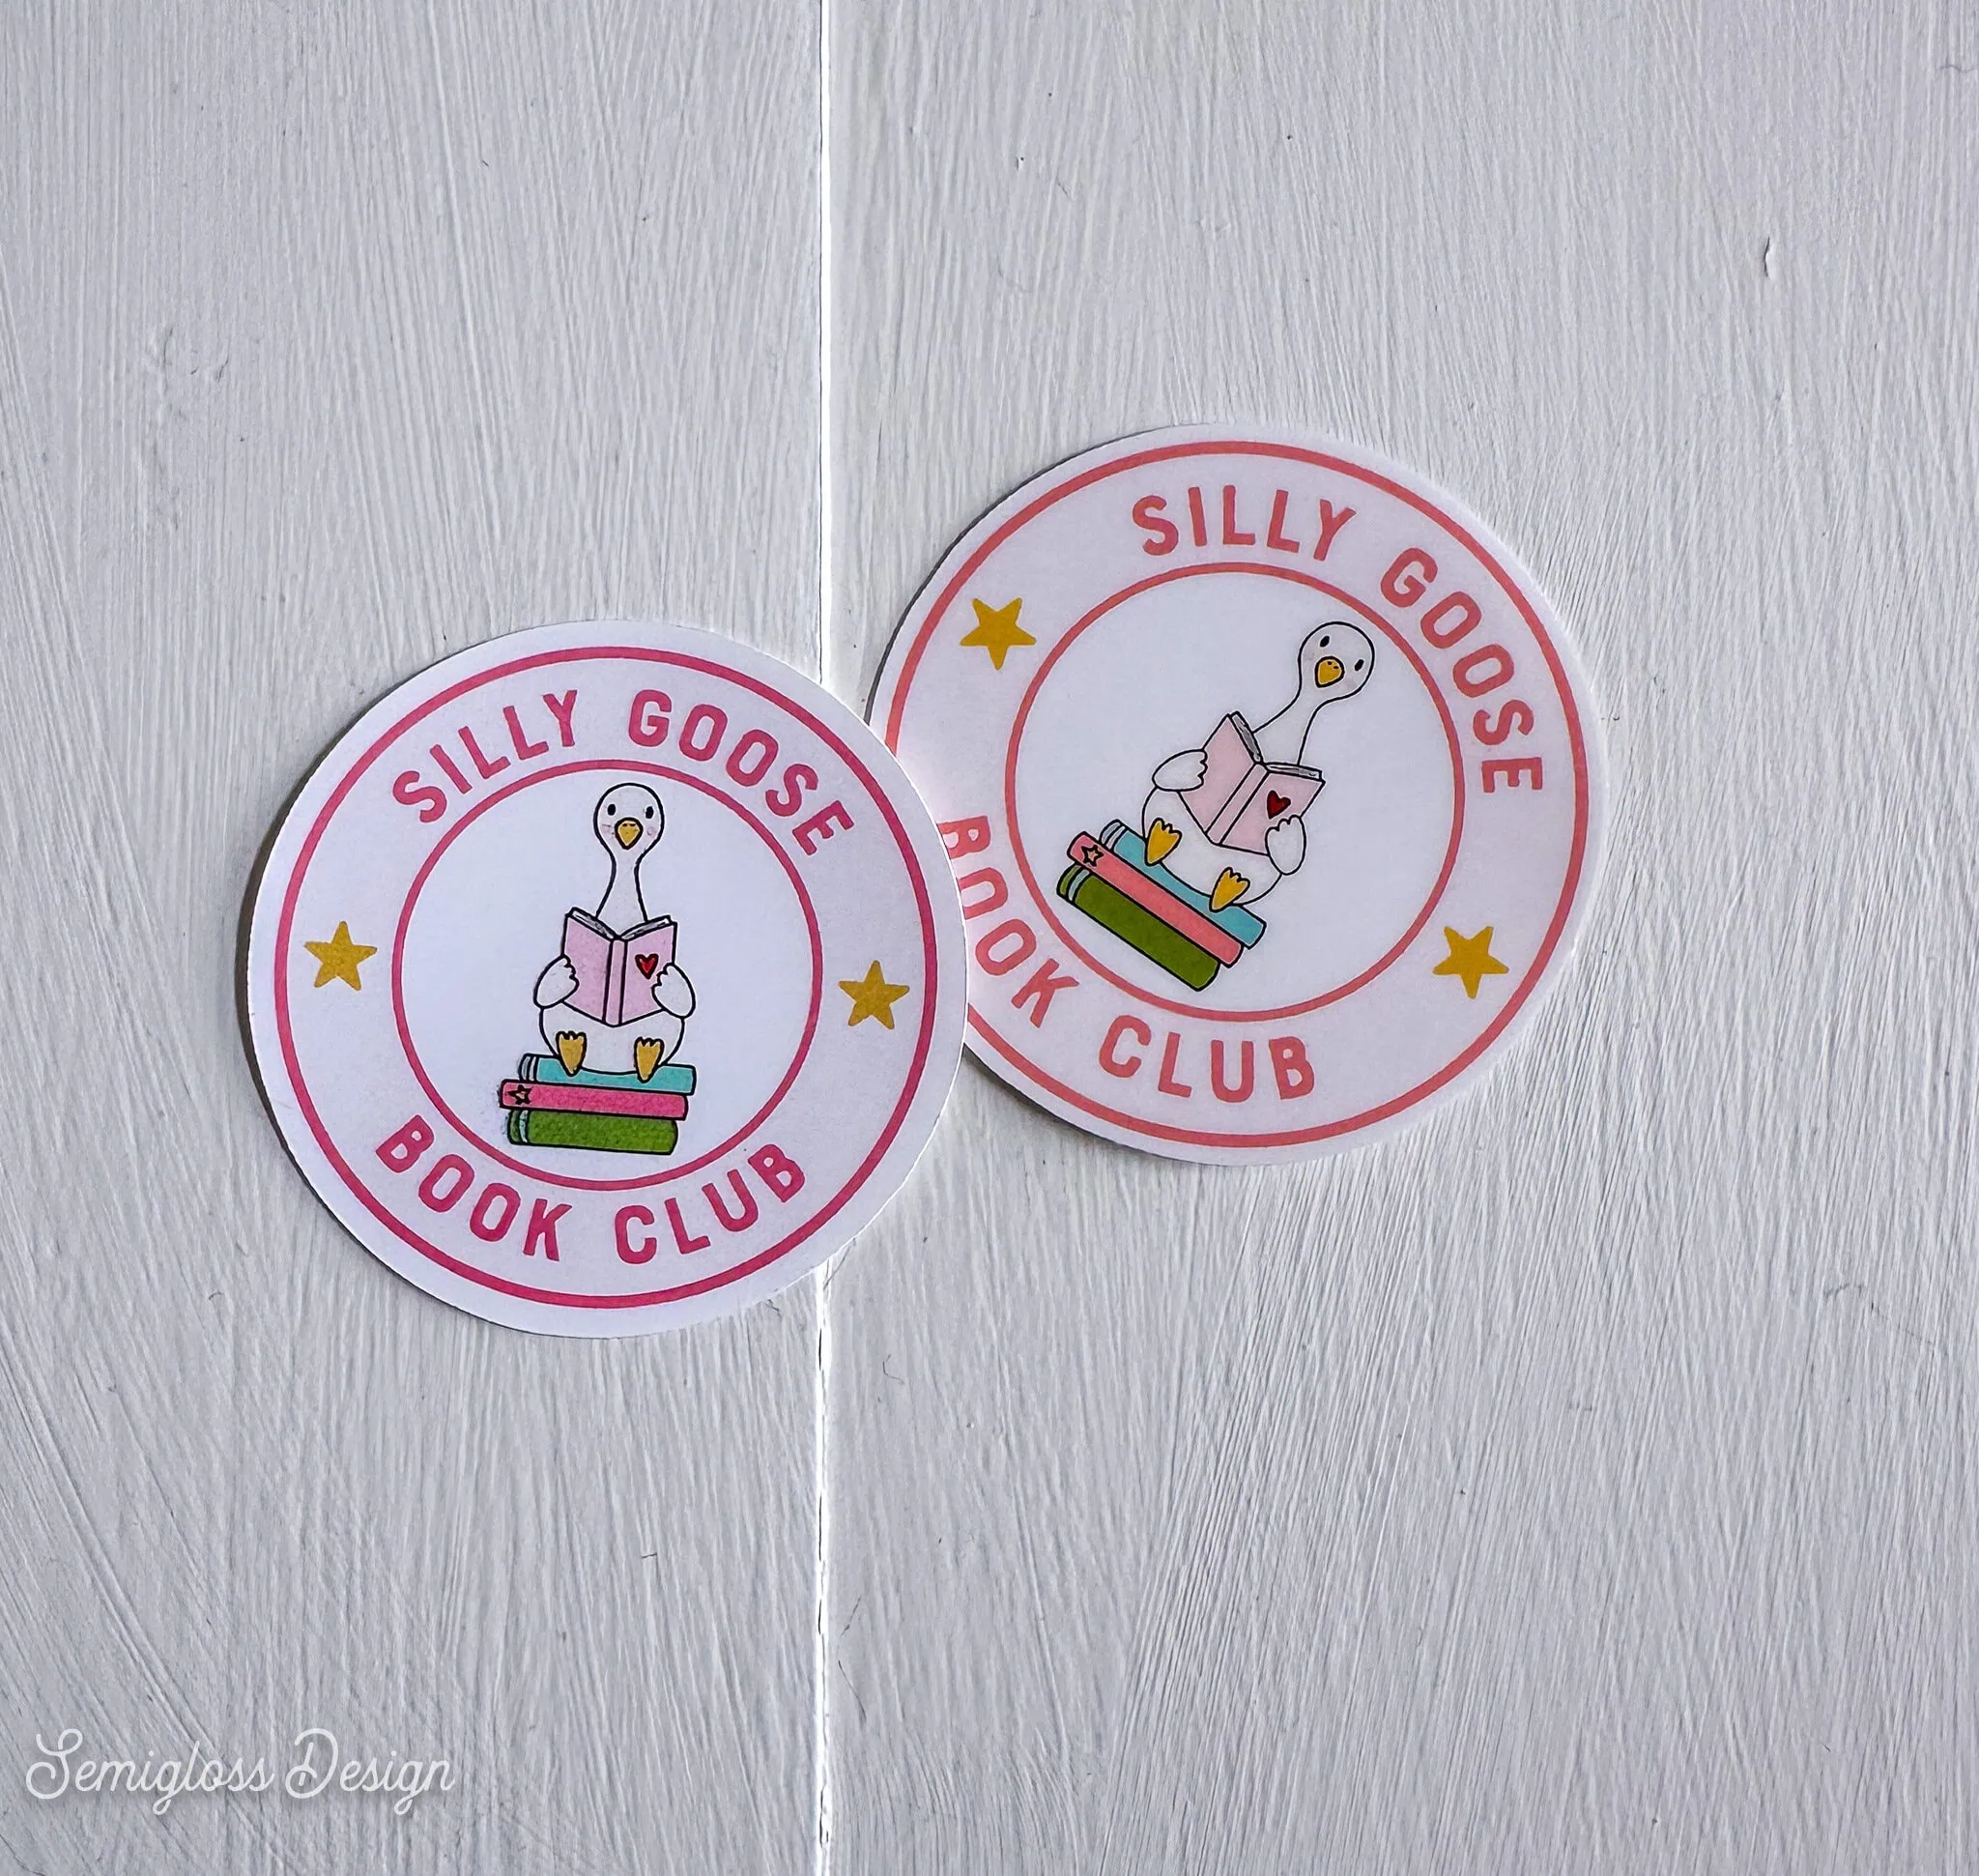
The one on the left was printed with the C1 Color cutter. The one on the right was printed with an Epson printer and laminated. I like the version printed on the C1 better!
Kiss Cut
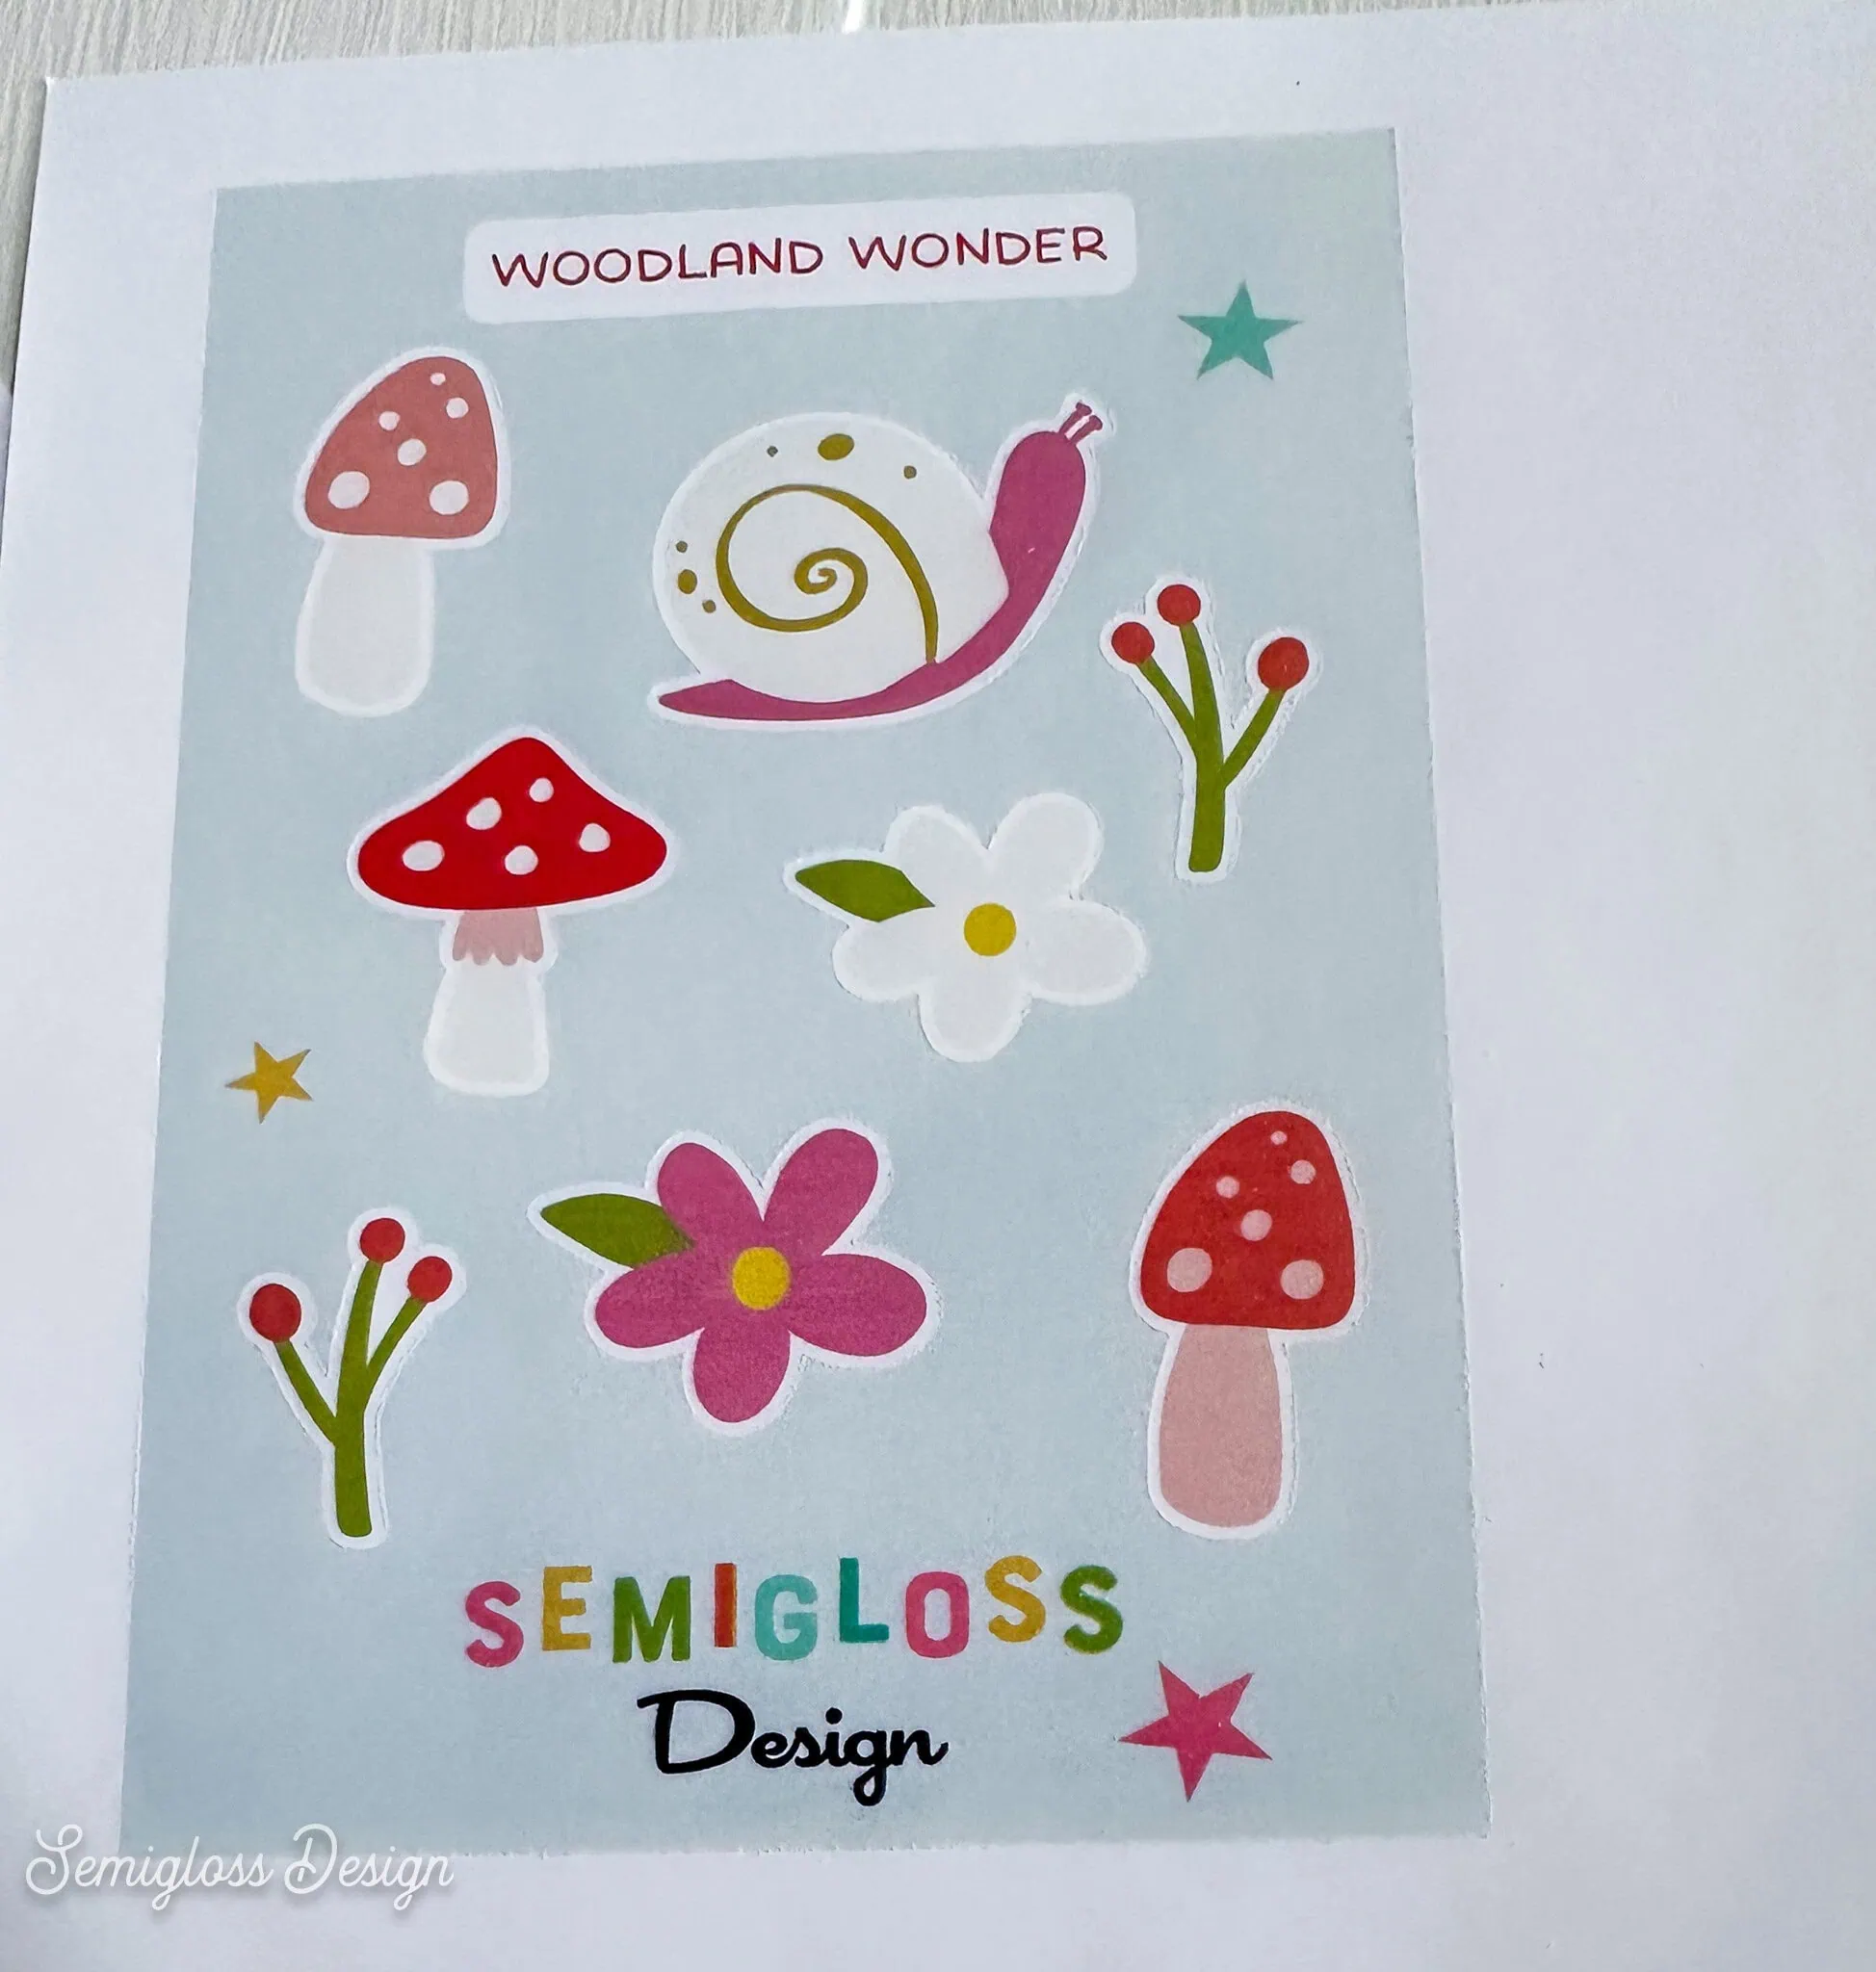
I created a simple design to make a sticker sheet and printed it on my waterproof matte paper. It printed nicely, and it was easy to figure out the different cut settings. However, the background was set to die-cut, and it somehow ended up as a kiss cut. I think this was a software bug that has since been fixed.
Different Paper Types After Updating the Software
I wanted to try one more test using the different papers.
Before I did that, though, I realized I needed to update the software. Keep in mind that this is a new machine and the software will be updated a lot at first to work out the bugs. And this time, it was even easier. Everything printed much better, but that may be because I used a simple, flat-color image.
Testing takes time, but it’s worth it. If you’re a sticker maker, I highly recommend taking a few hours to test papers and settings to find your favorites.
Here’s how the stickers look. The small one in the left corner was printed on my matte paper from Online Labels. I lowered the DPI to see if it would make a difference. (Sometimes lowering the DPI can show more details for printing.)
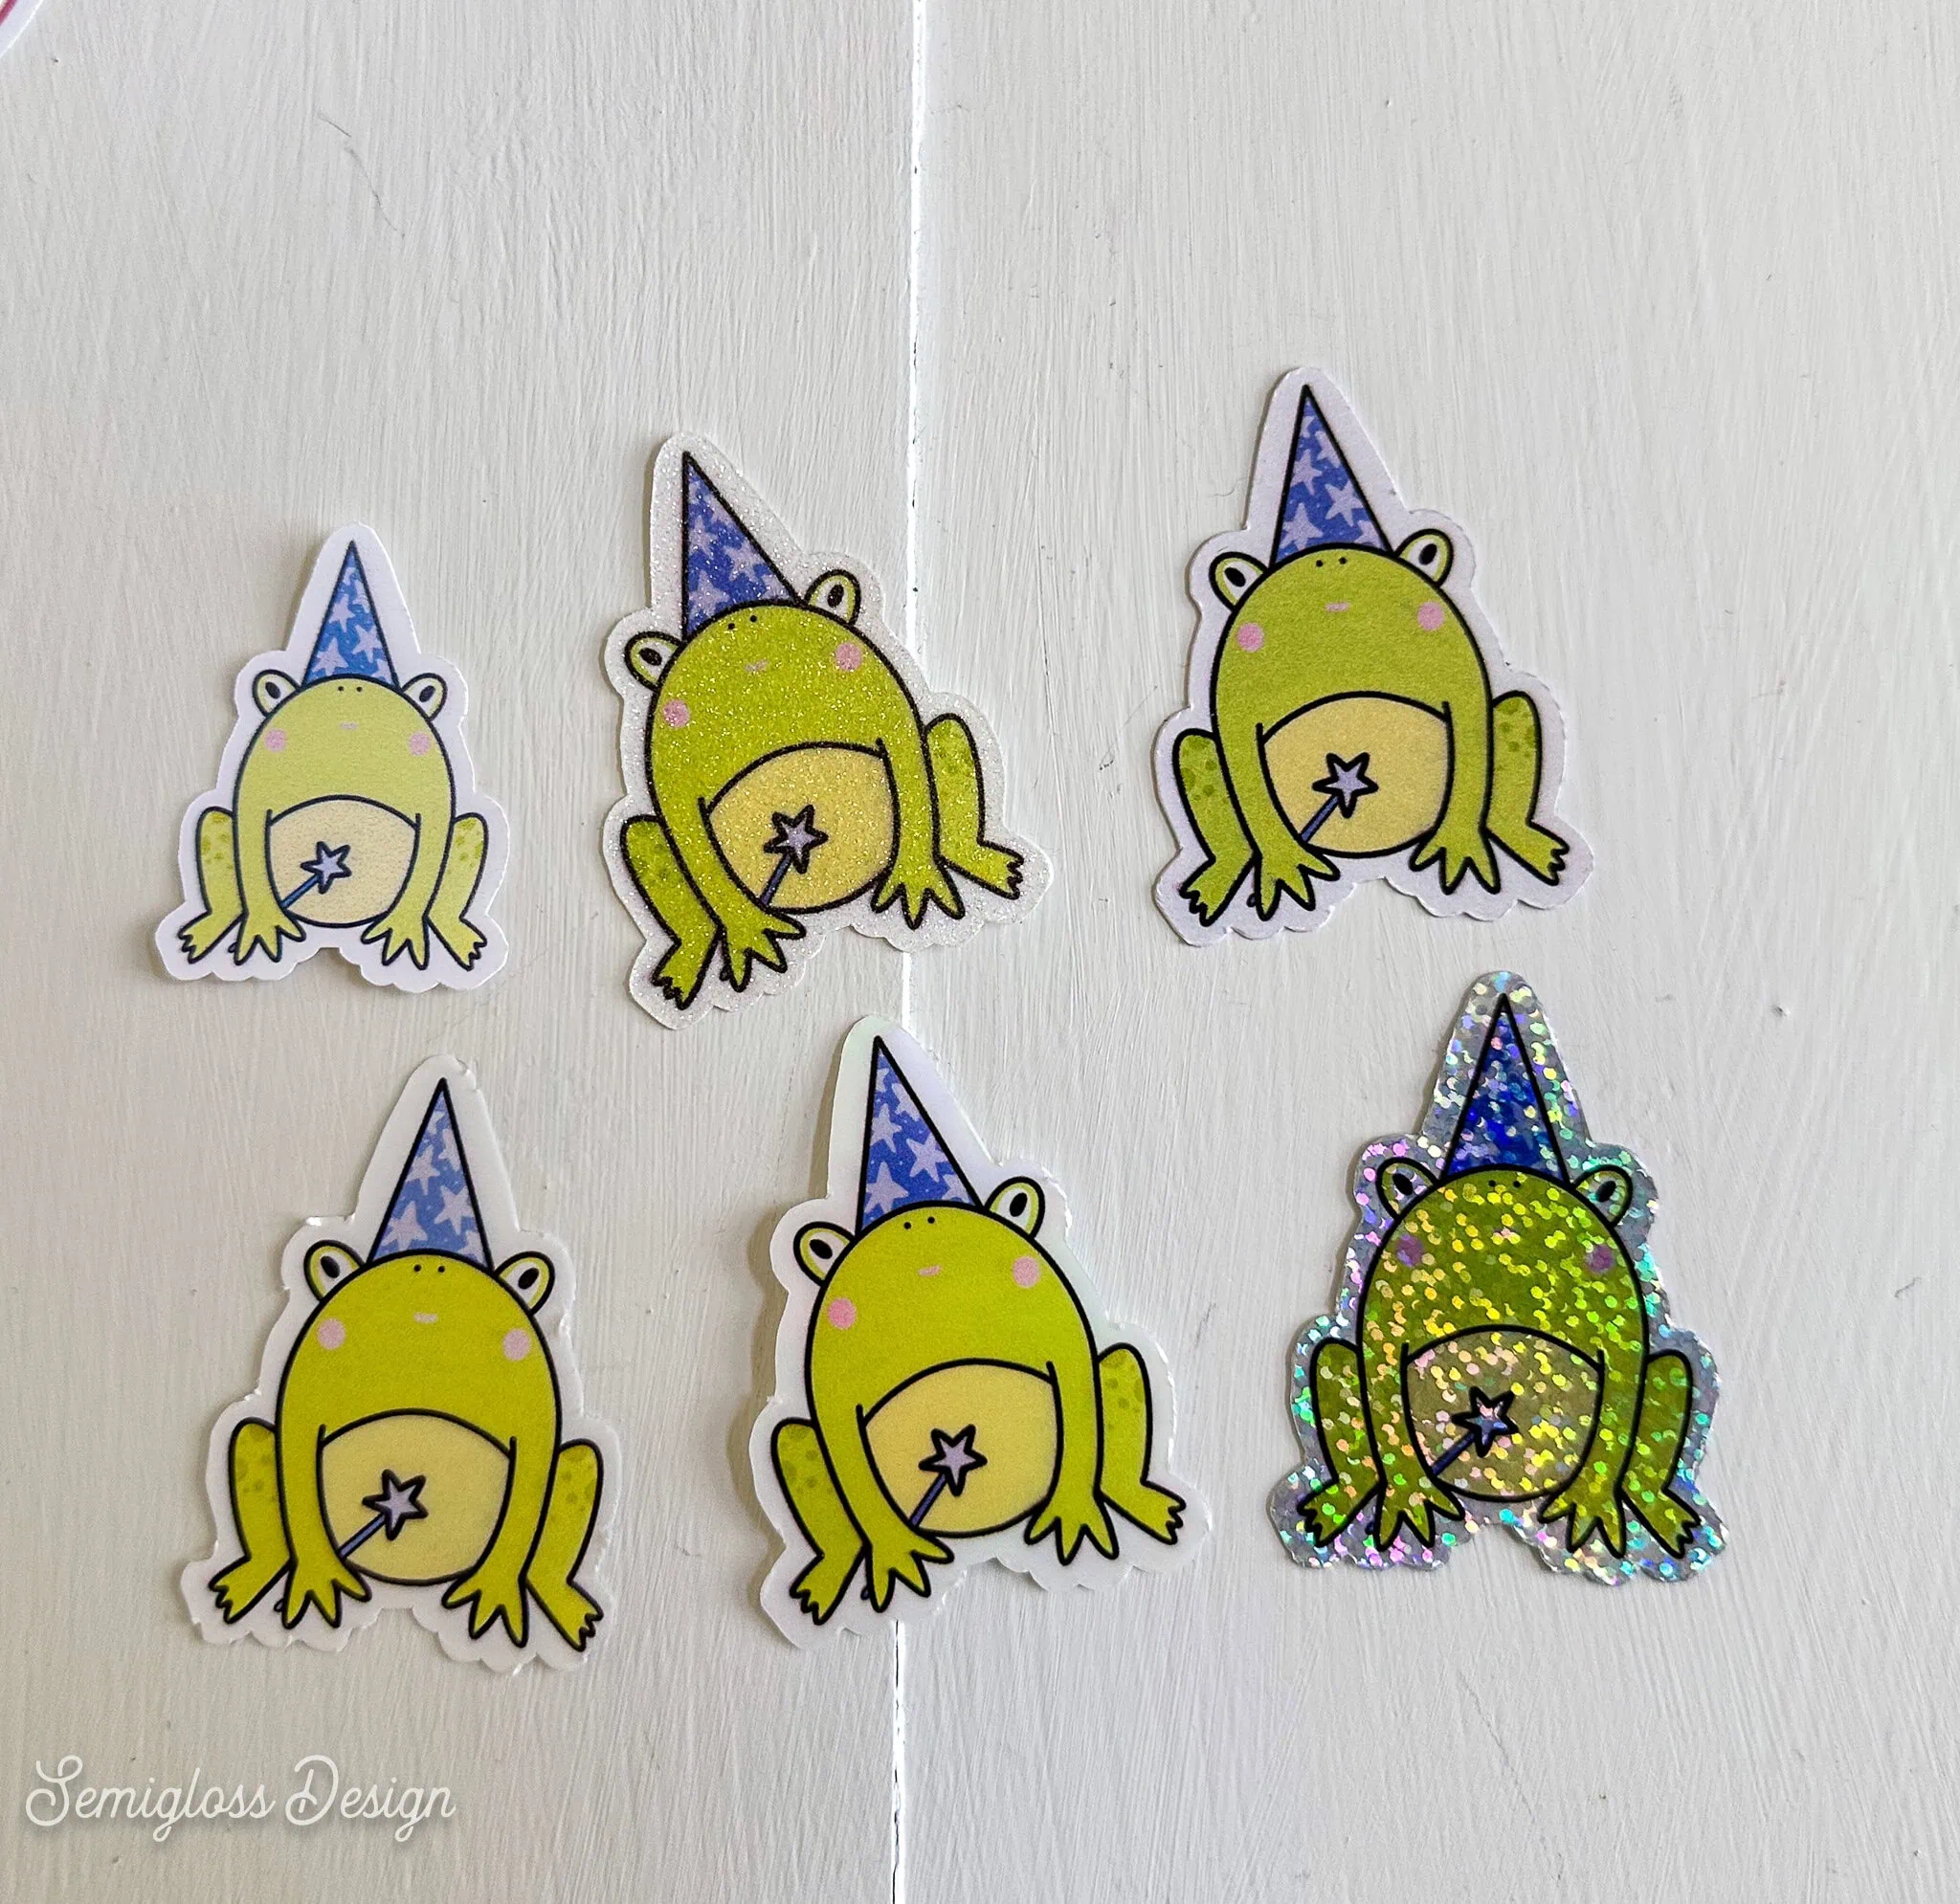
Next, I tried the sparkle paper. I LOVE this paper. It has a glitter paper texture that is really cool to print on.
I tried the pearlescent paper next. It’s subtle, but very pretty.
I tried the DURA gloss with anti-bleed for the print setting, and I liked it more than I expected. However, the blade tore the paper a bit.
Next, I tried the transparent holographic paper. The holographic look is pretty subtle.
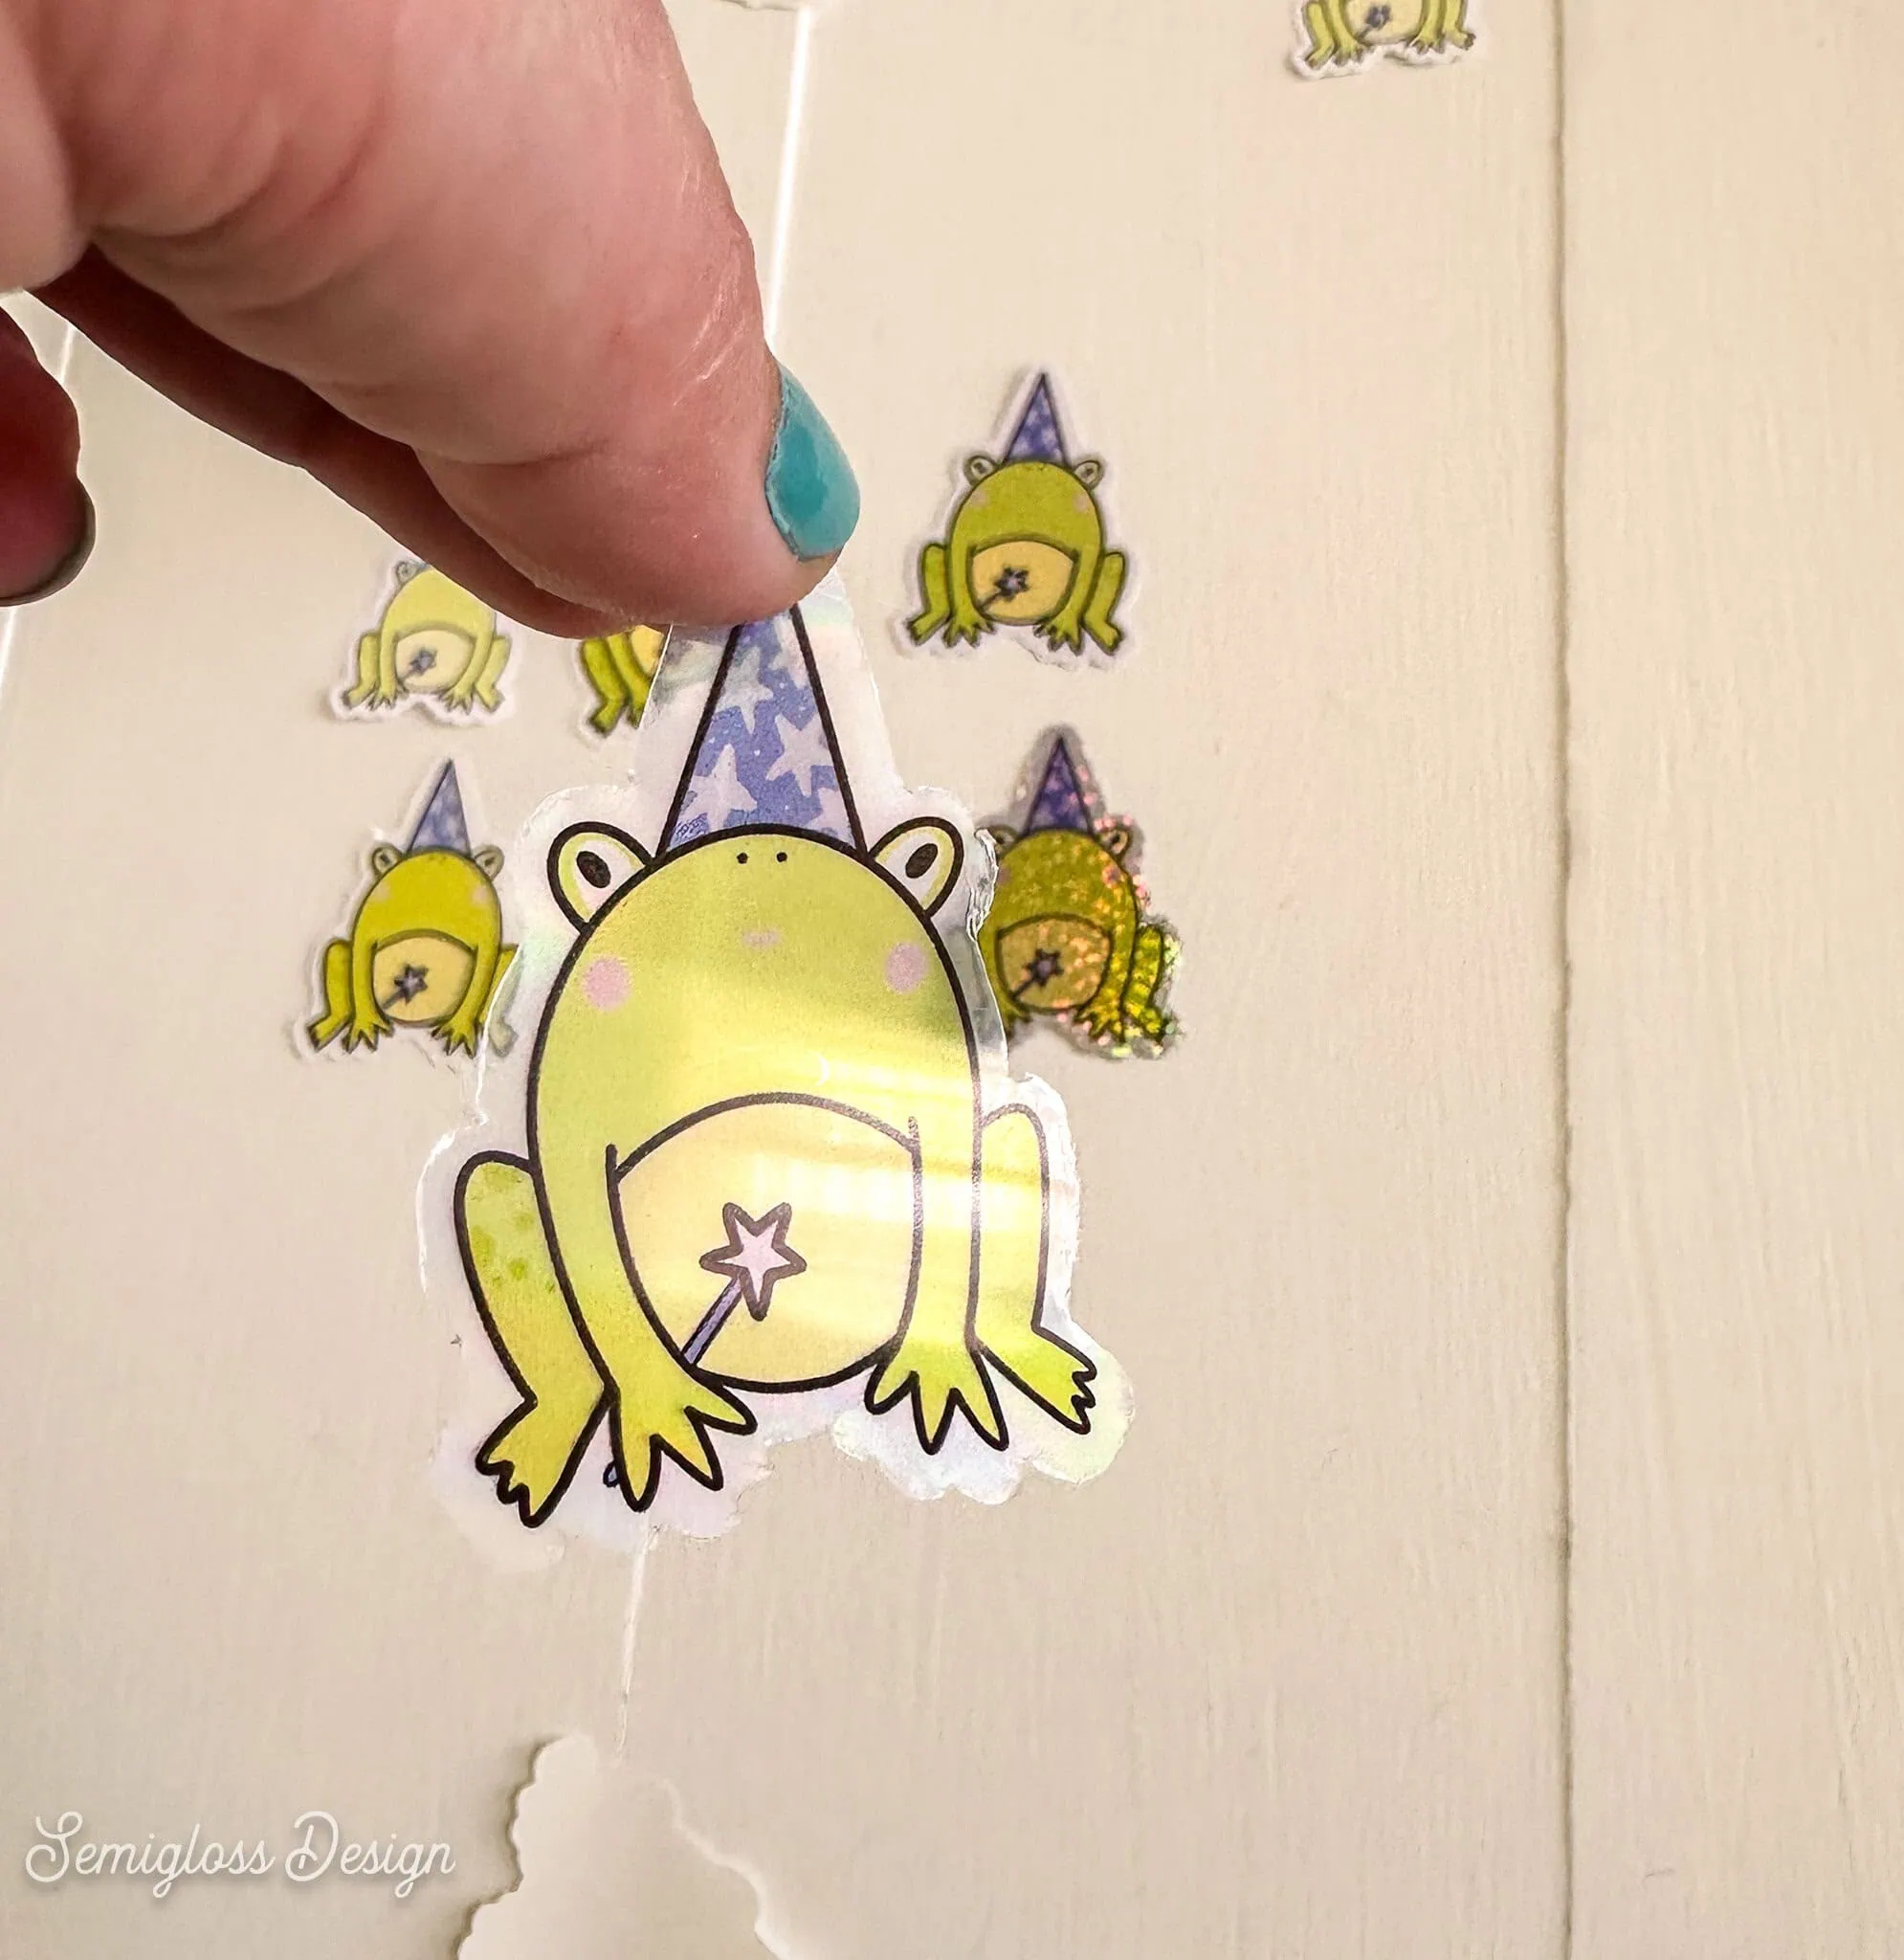
Last, I tried the holographic confetti, and I loved this one too. I guess I love very glittery finishes.
Directions for Making Stickers
I’m working with an early version of the software for this machine. Menus and wording may change in the future.
By the way, if you can’t find an option I’m talking about, click off the sticker image. Or click on the image and see if it shows up.
The only other supplies you need are sticker paper and the designs.
- Open xTool Studio and start a new project.
- Connect your machine.
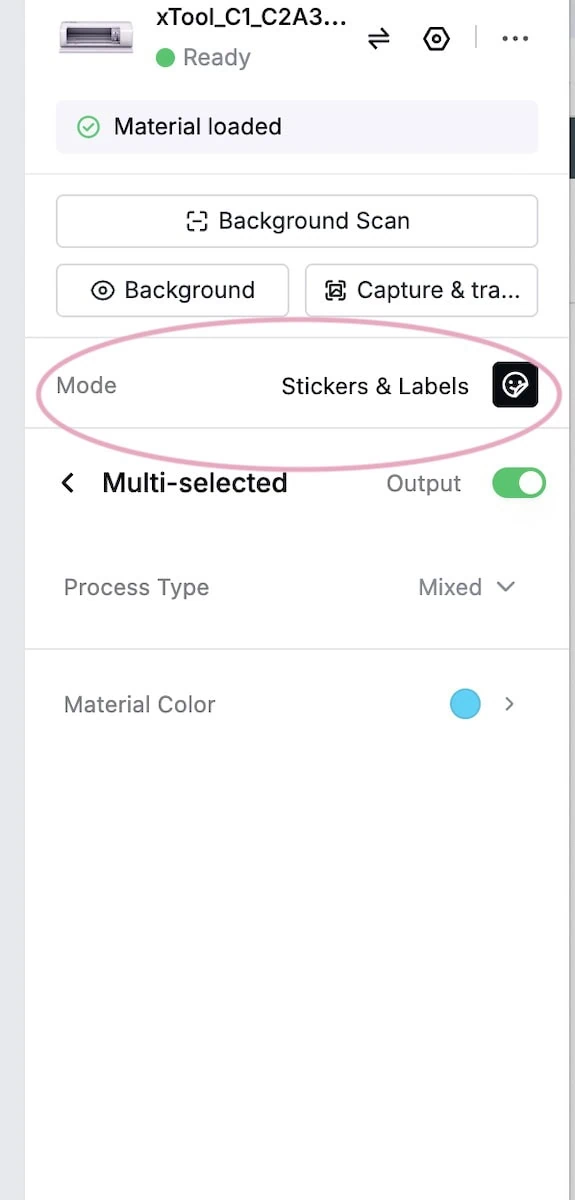
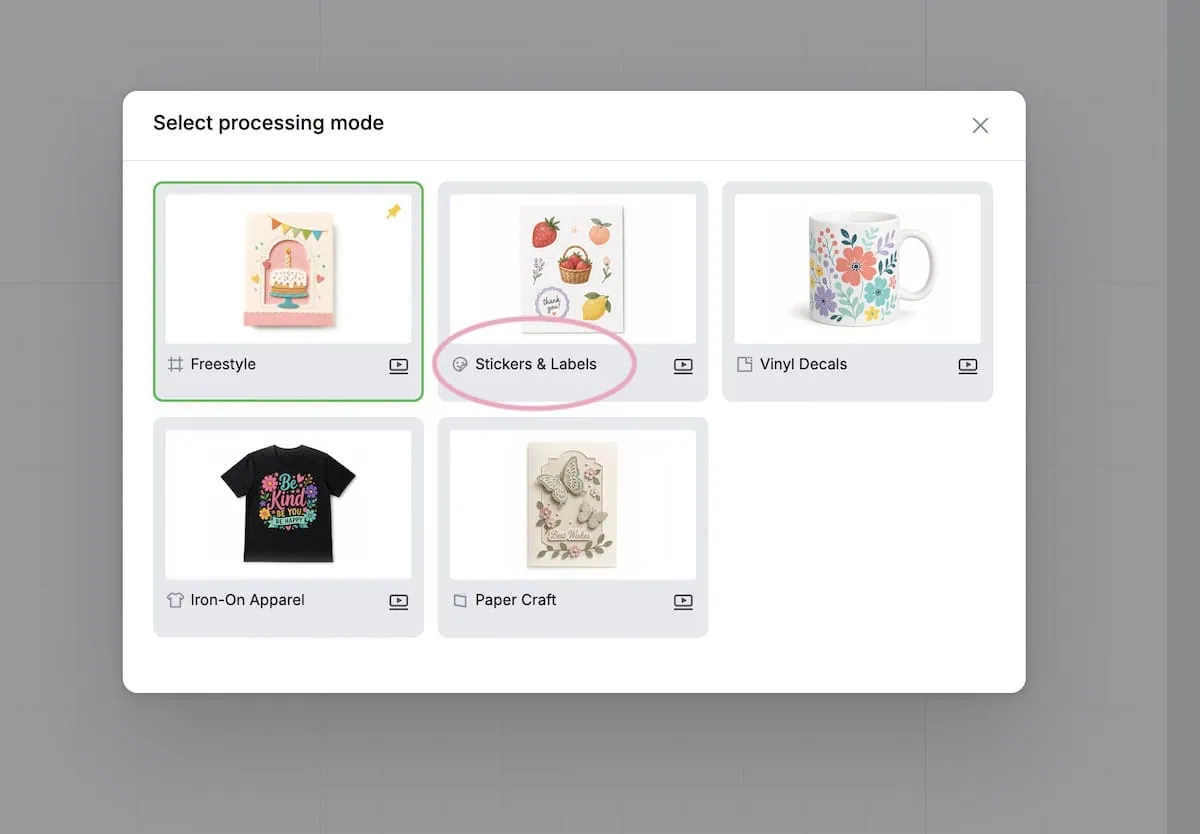
- Select your mode. Choose the stickers and labels mode.


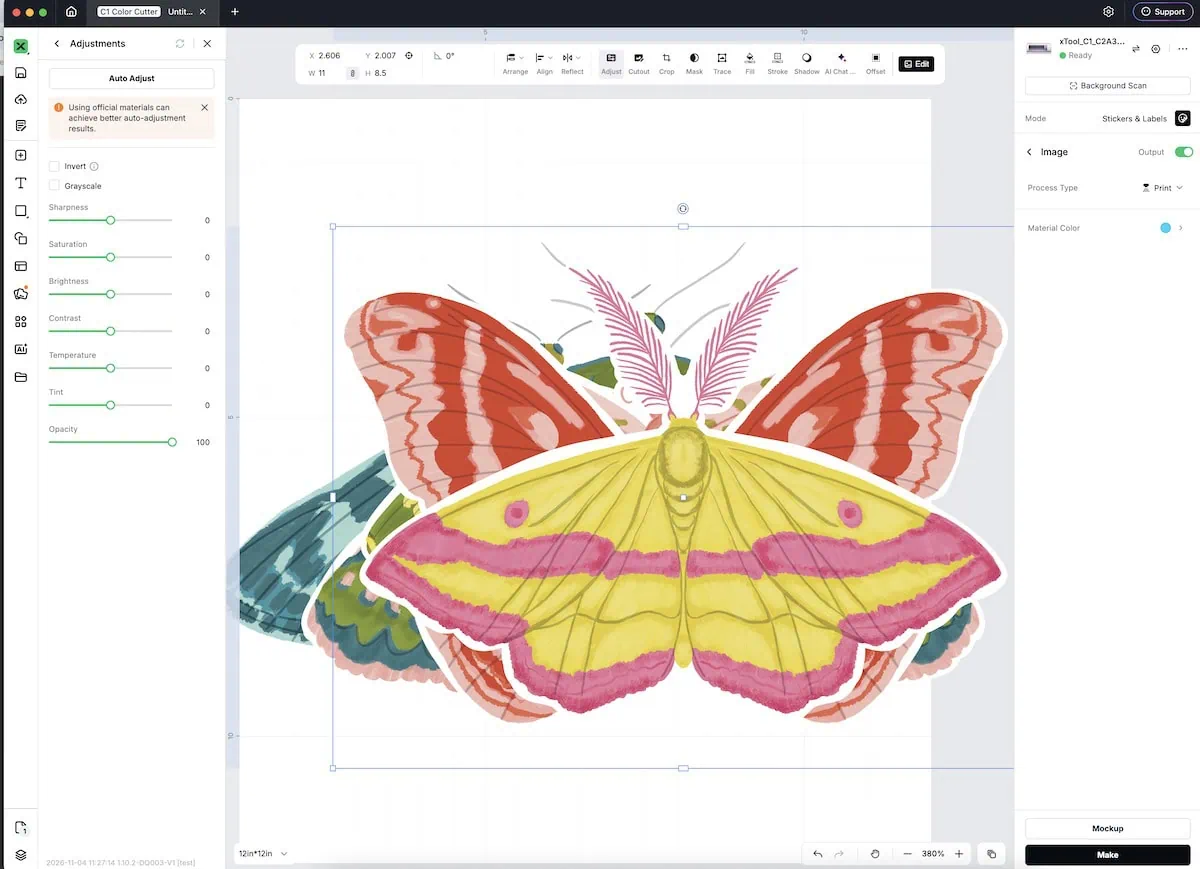
- Upload your sticker design.
- Resize as necessary. I like my die-cut stickers to be about 3- 3.5″ wide.

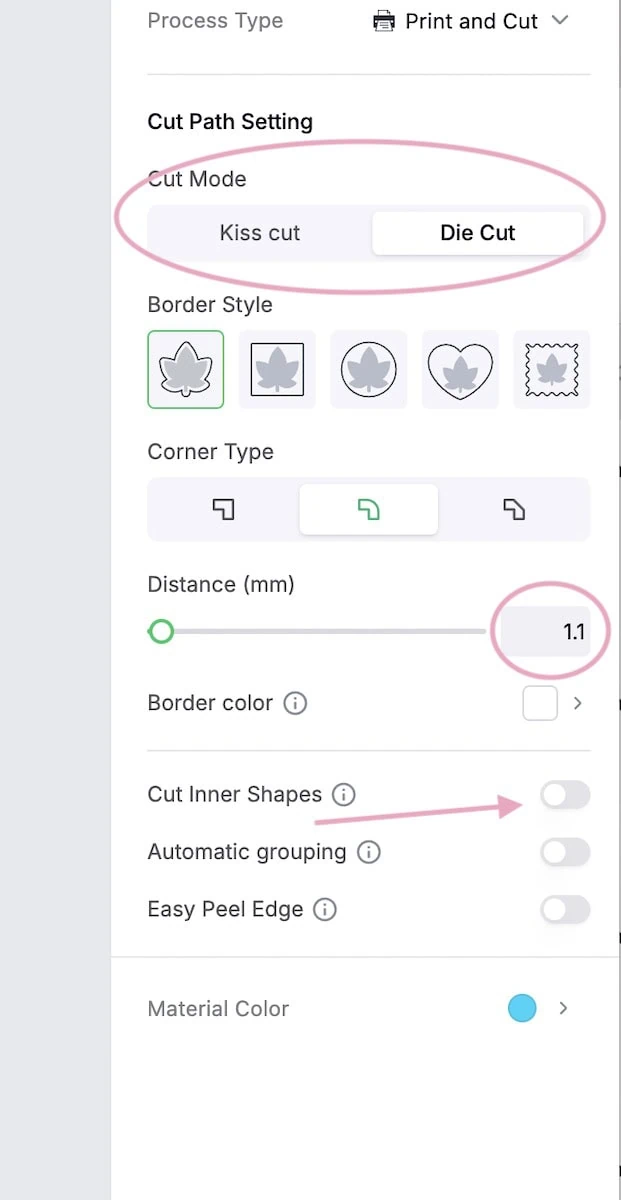
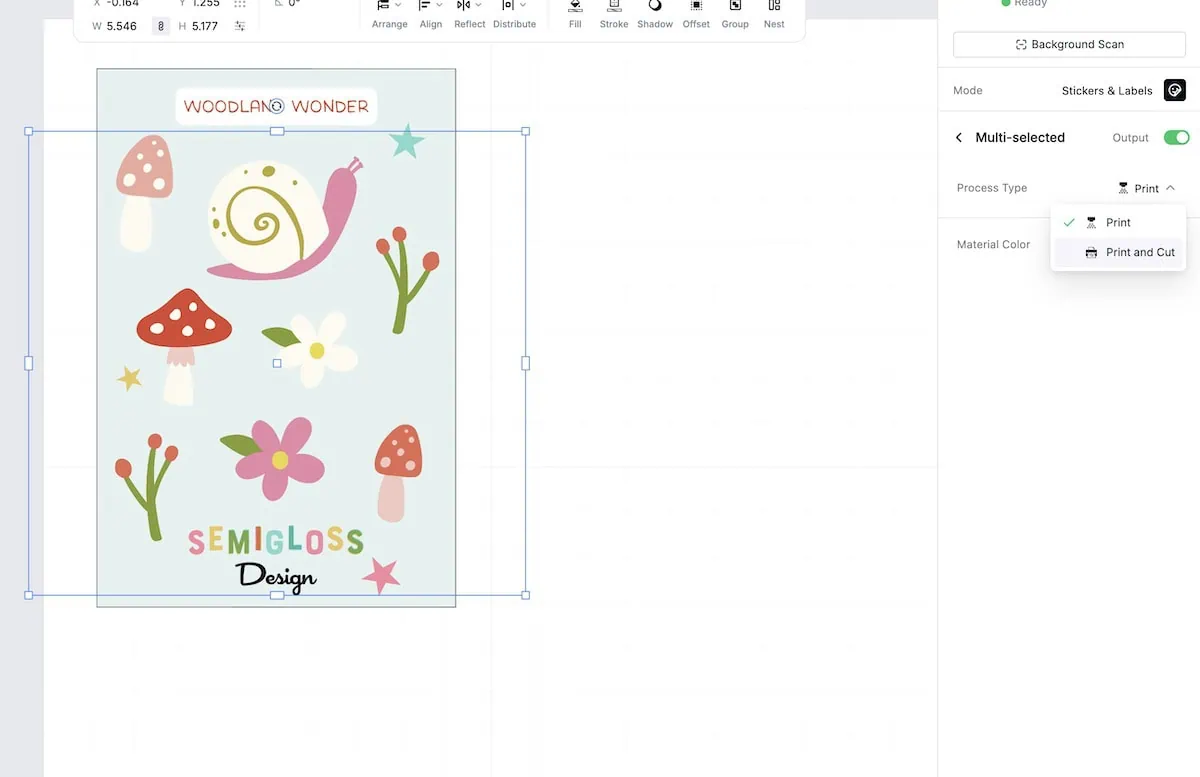
- Choose print and cut for your process type.
- Then select die-cut or kiss-cut. Die-cut is best for individual stickers, and kiss-cut is best for creating sticker sheets.

- Change the distance amount if desired. It’s set to 2mm, but I prefer about 1mm.
- If you have multiple sticker designs, set the process type and check the settings for each image.
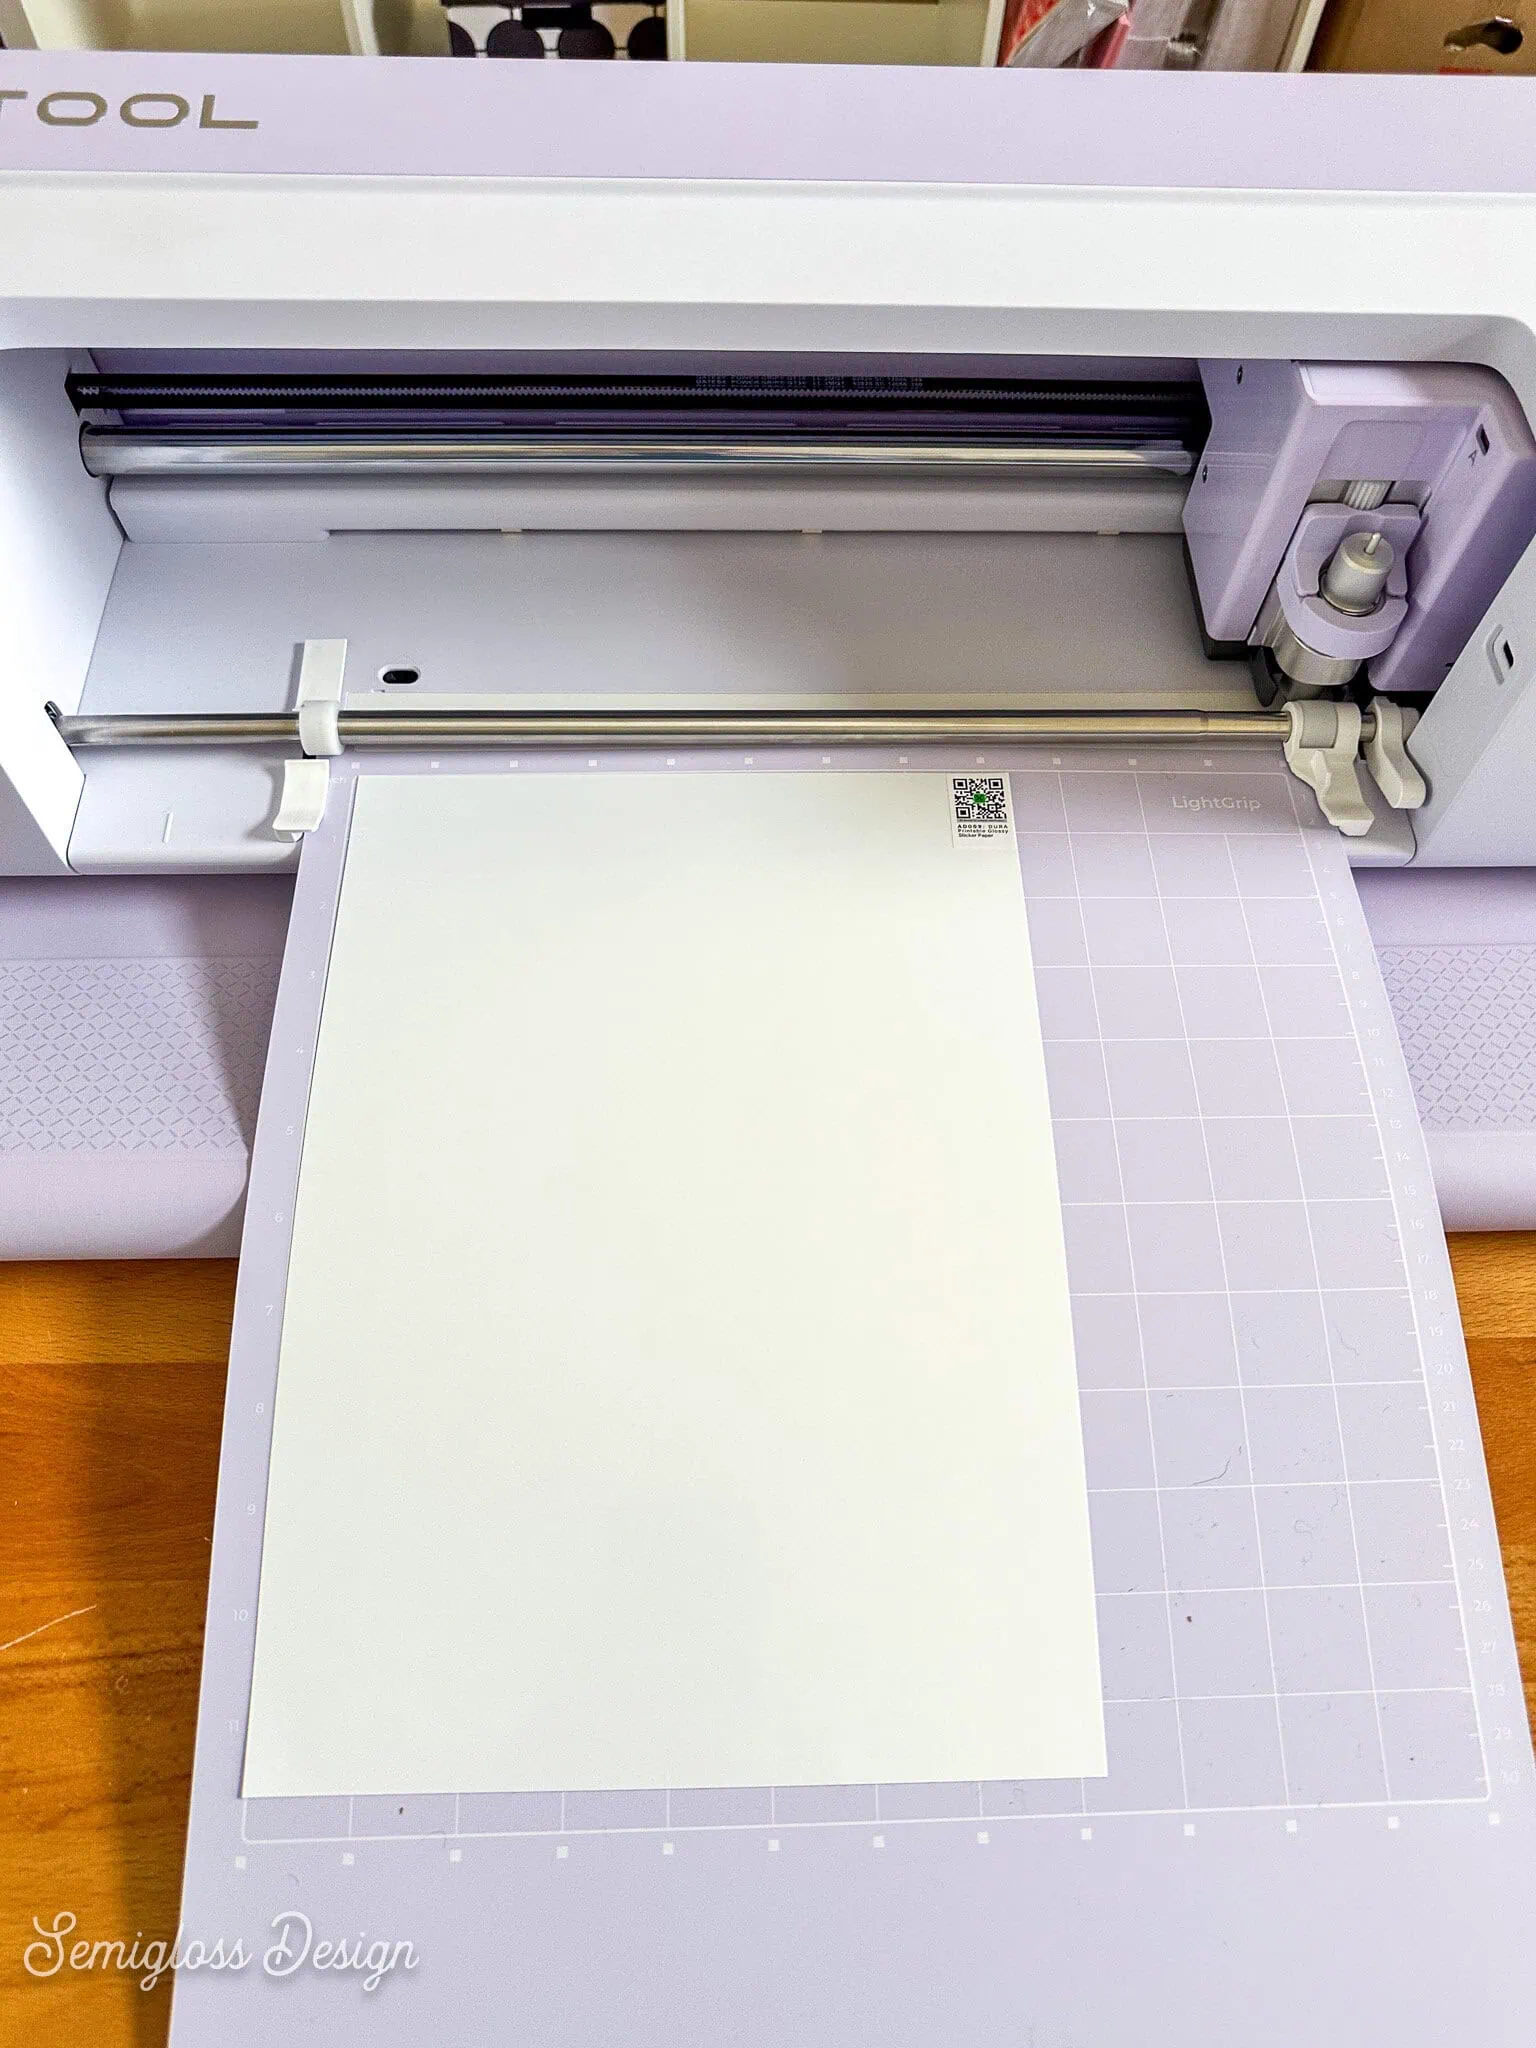
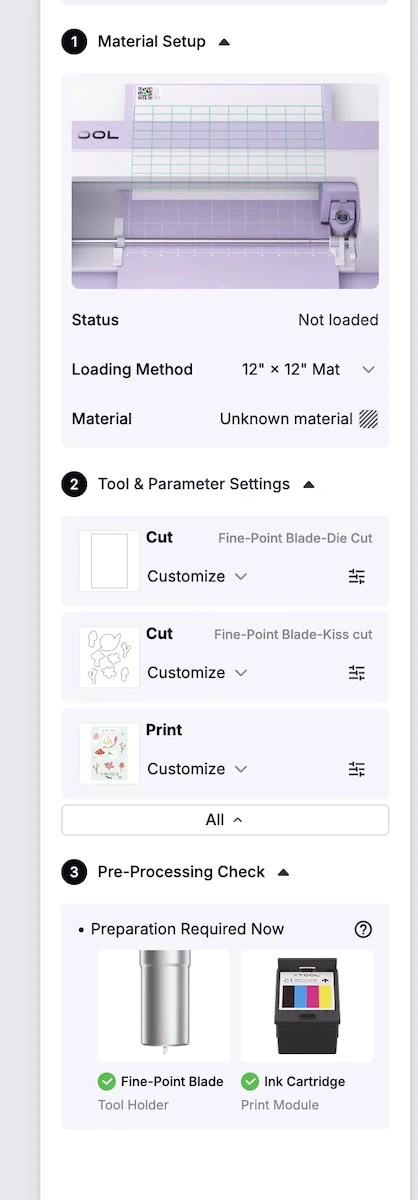
- Load the sticker paper onto the mat. It self-loads when you slide it between the slots.

- The paper will auto-scan, and you can move the images around if needed. (I like using this feature to print on scraps).
- Select Make to select the cut and print settings.
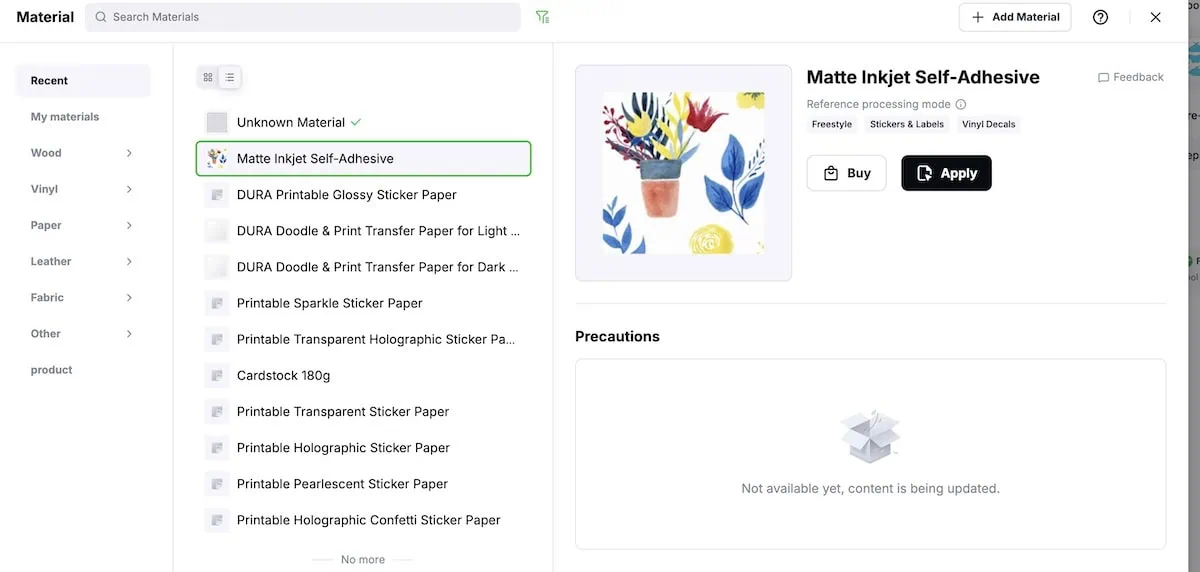
- Choose your material. If you’re using a non-xTool-branded material, select one that is the closest to it. For my matte waterproof paper, I chose matte inkjet paper.

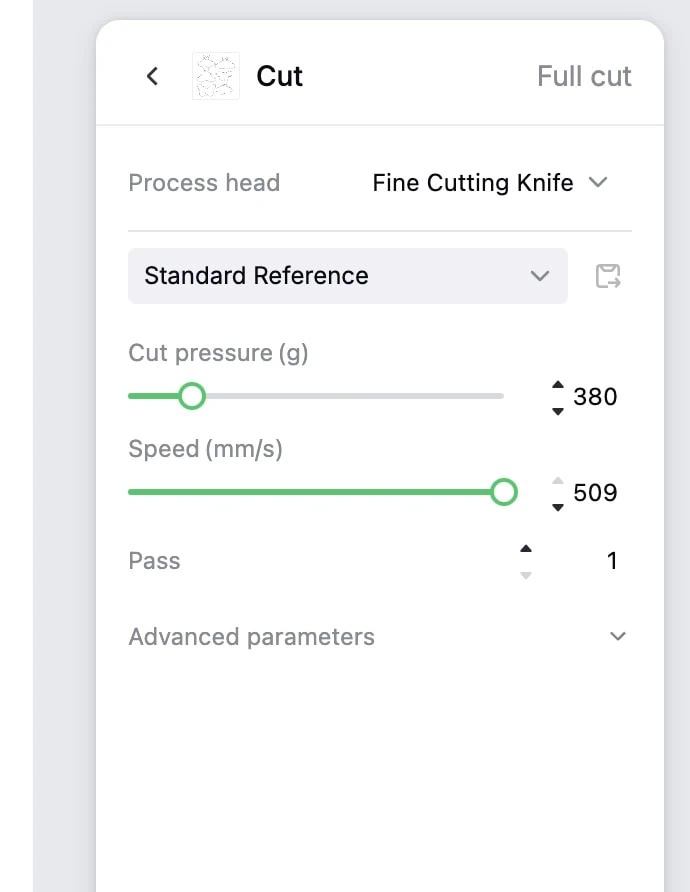
- Under Cut, click on the slider bars to change the settings. Die-cut stickers need at least 220 for the cut pressure. Lower the speed for intricate cuts.

- Under Print, you can change a few settings. This is where you change the setting from vivid to anti-bleed (which I only did for the DURA paper).
- Press Start.
- Press the button on the machine to make it start printing.
- When it’s finished, unload the mat by pressing the button.
Using the Scan and Cut Feature
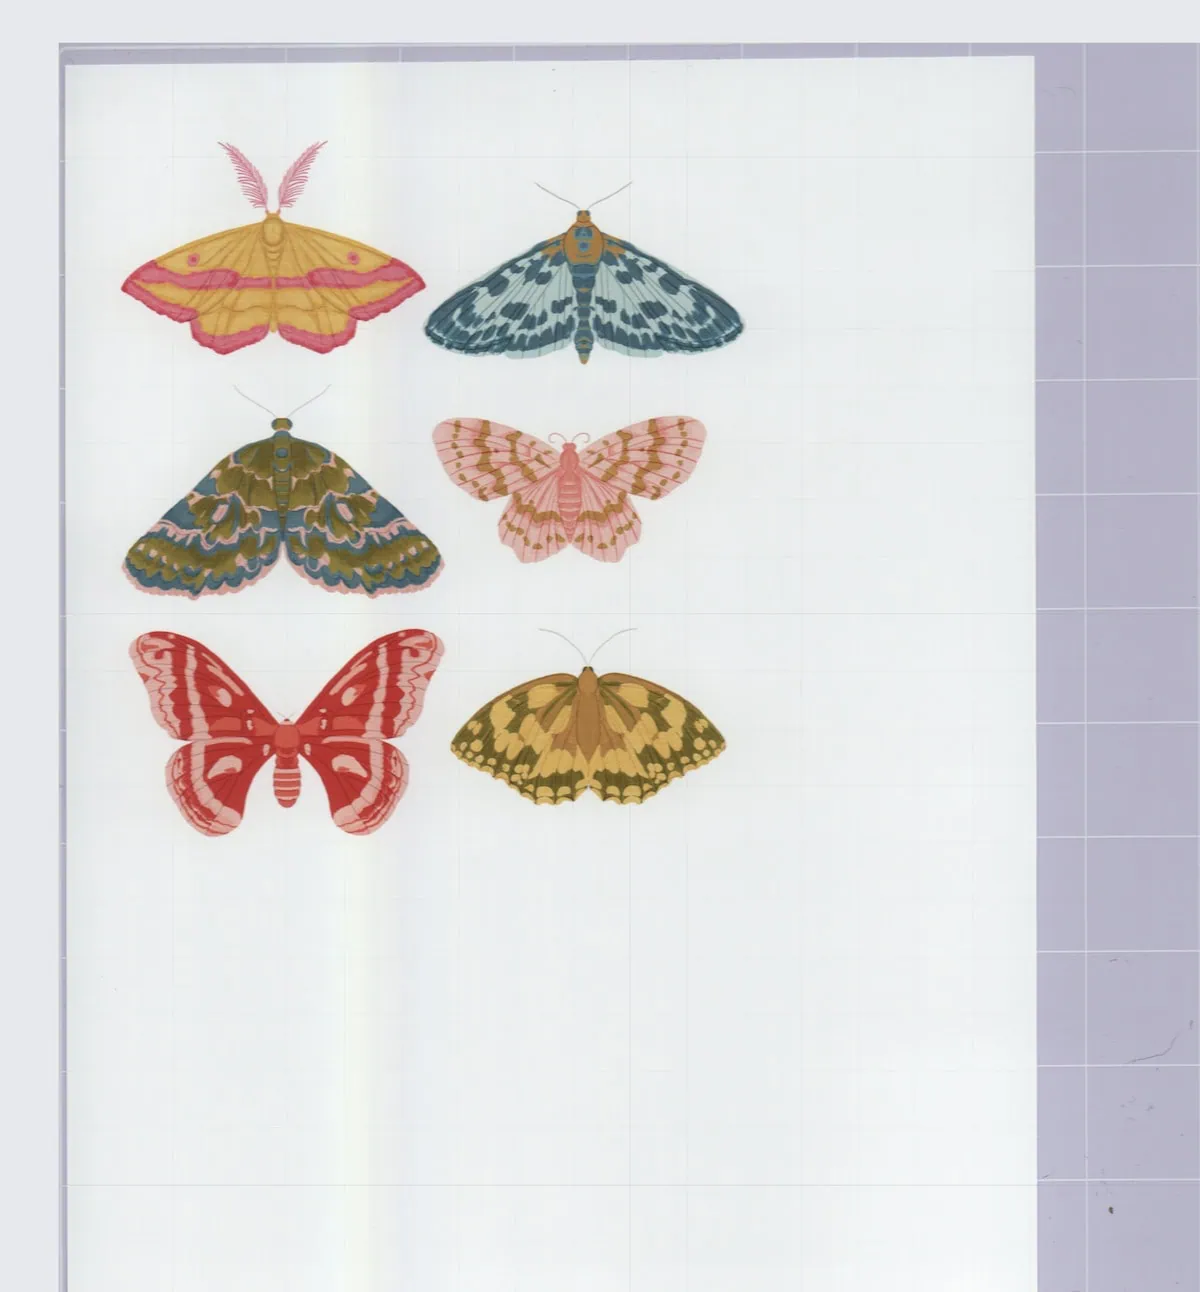
- Use your printer to print your stickers at the best quality.
- Load the paper onto the mat.
- Load the mat in the C1.
- It will auto-scan. Select Background Scan if it doesn’t.

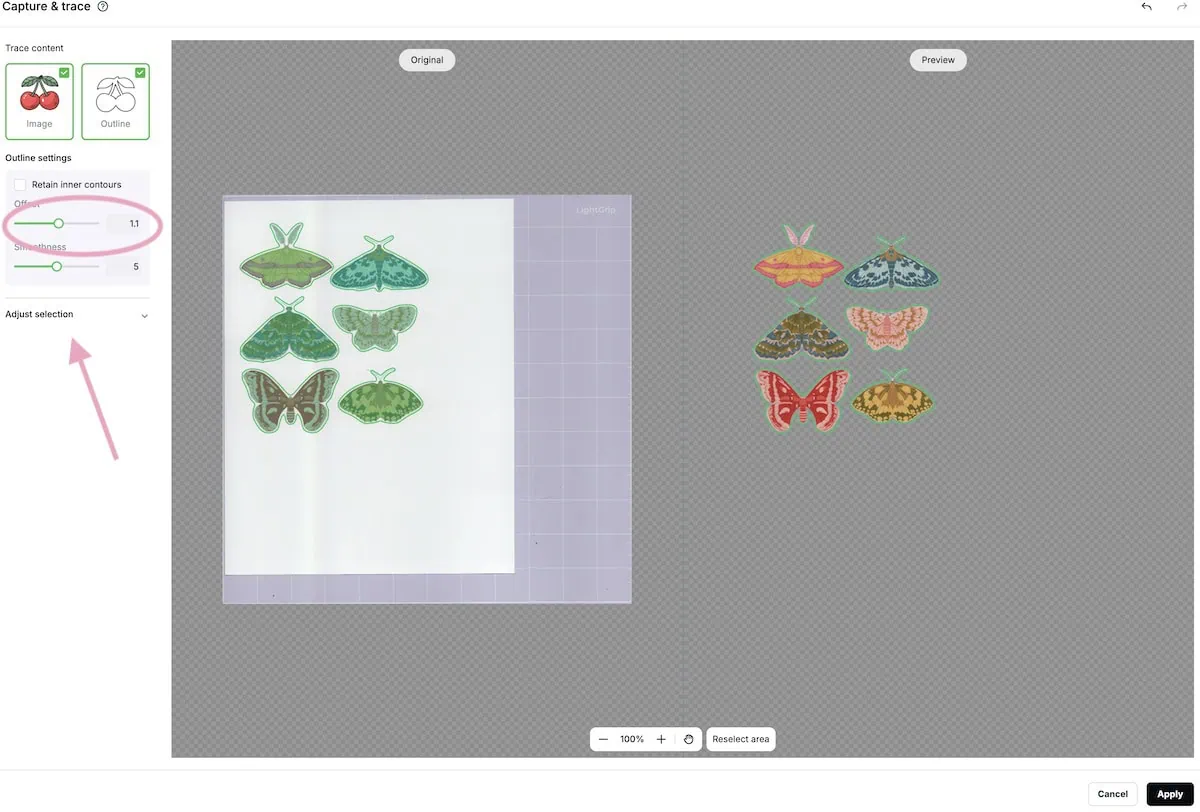
- Use Capture and Trace to find the stickers. Hit Start Tracing. Zoom in and make sure it’s selecting the entire design.

- Change the offset on this screen.
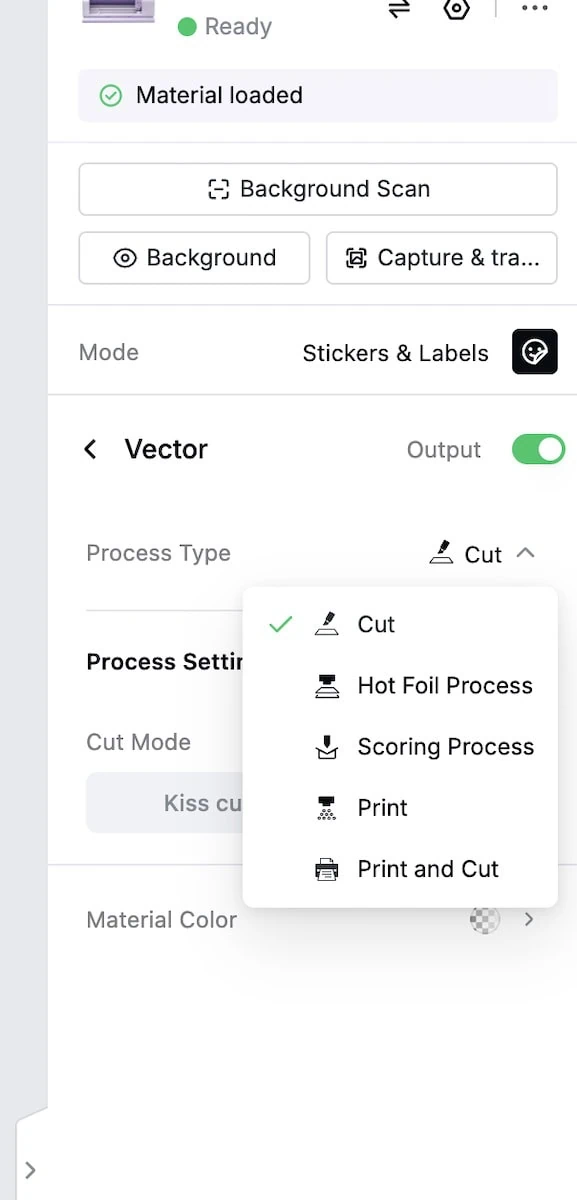
- Select Cut and make sure Output is on.

- Press the Make button.
- Select the material closest to what you’re using.
- Check the cut settings and increase the pressure if needed.
- Press Start on the screen.
- Press Start on the machine.
- Unload the machine when it’s finished.
Making Kiss Cut Sticker Sheets
- Make a new project.
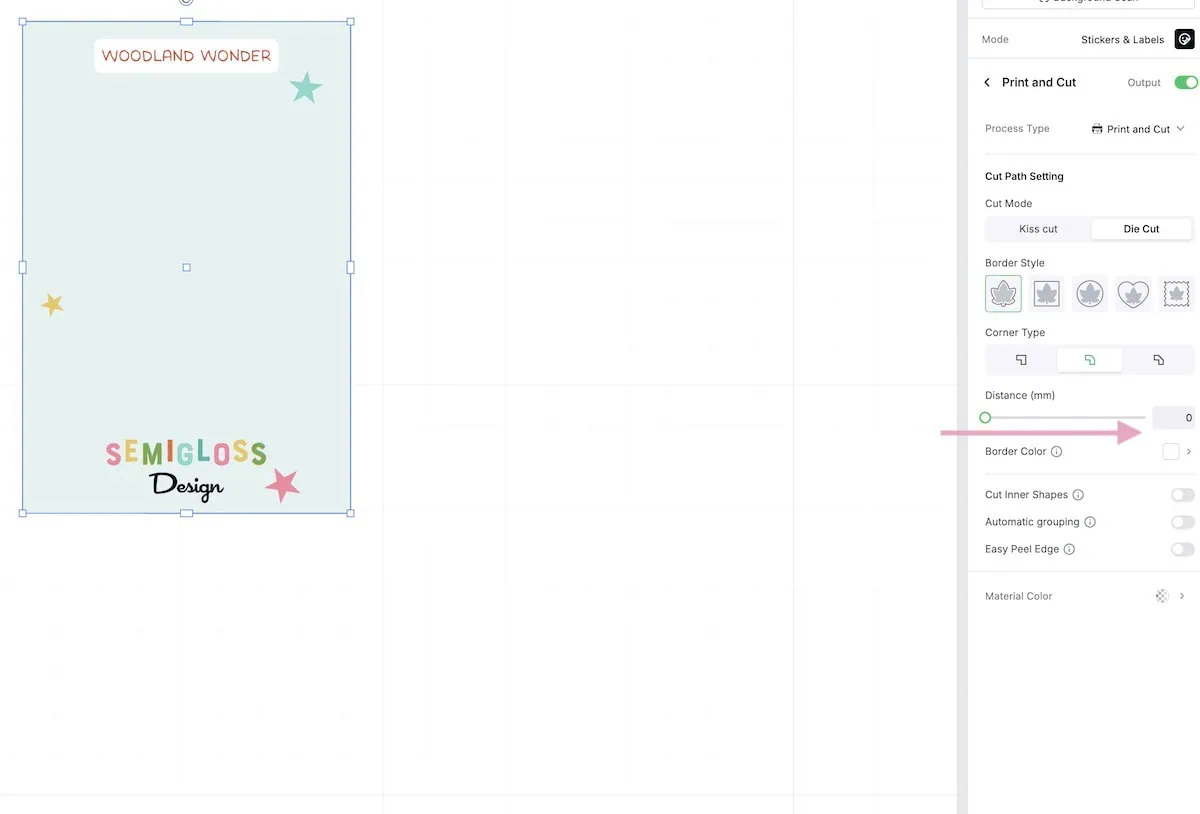
- Upload the background image. You can also make one in the software by drawing a rectangle to the desired size. I like 4×6″ sticker sheets.

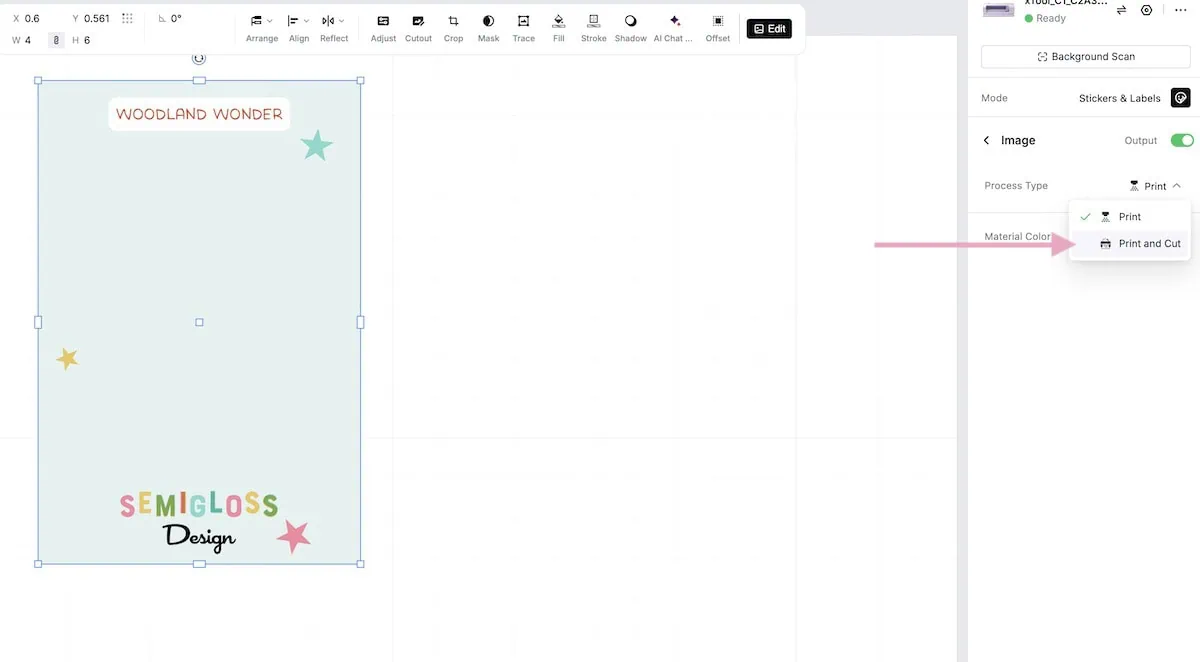
- Set the background to print and cut.
- Set it to die-cut.
- Set the distance to 0 to cut along the edge.

- Upload your stickers and resize them.
- Set them to kiss-cut with a distance of about 1mm.

- Load the mat with sticker paper.
- Press Make.
- Select the material.
- Check the cut settings for each layer.

- Press Start on the screen
- Press Start on the machine.
- Unload the mat when it’s finished.
Tips for Making Better Stickers with the C1 Color Cutter
- Test, test, and test some more. We all have preferences for paper textures and finishes.
- Work in CMYK to get better color results. Some RGB colors cannot print.
- Minimize texture in your illustrations. Solid fills print better. (I’m going to keep experimenting with this to find the best setting and paper type.)
- If your design has tiny cuts, slow the cut speed down so it doesn’t rip the paper.
- If you use the scan-and-cut feature, zoom in and check the lines to make sure everything cuts.
- Make sure there is plenty of space between your sticker images.
My Overall Thoughts So Far
Making stickers was my first project using the C1 Color Cutter. I found the process fairly easy to figure out.
The various sticker paper types are a lot of fun. I really loved the sparkle paper.
Although I had trouble with the DURA glossy paper at first, I’m pretty sure it was user error. I liked it a lot more after updating the software.
The scan-and-cut feature is my favorite. I love that it makes it easy to use my other printer if I want.
Overall, the xTool C1 Color Cutter is a fun machine to play with, and it makes me want to make stuff. That’s always a good thing in my book.
Crafters will love this machine for its versatility and ease of use.
Pin for Later!

Emy is a vintage obsessed mama of 2 DIYer who loves sharing affordable solutions for common home problems. You don’t need a giant budget to create a lovely home. Read more…