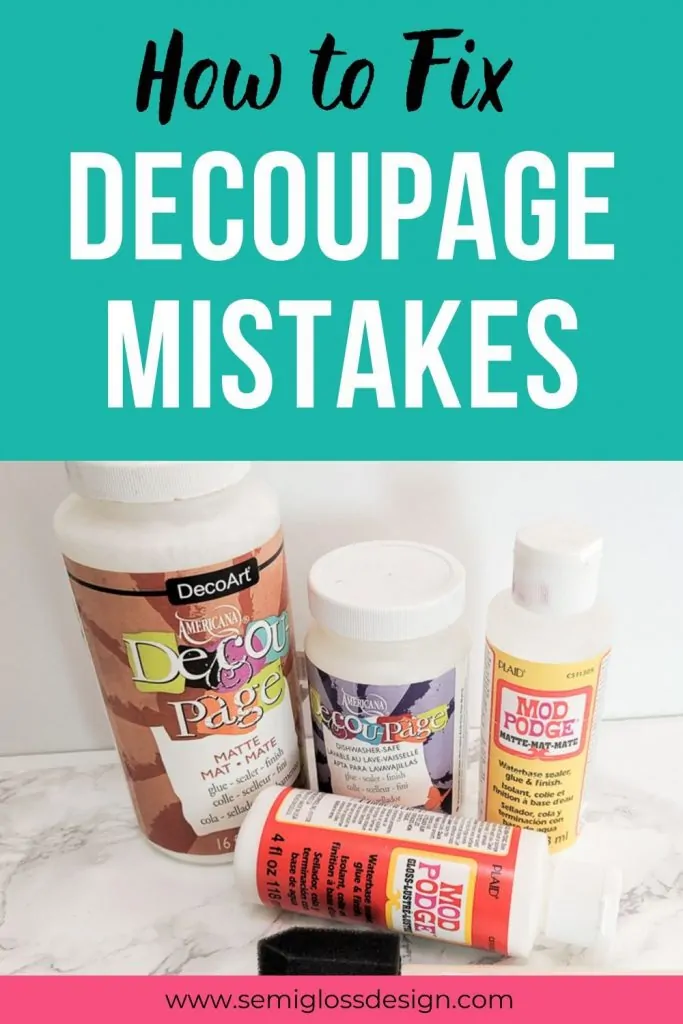
How to Fix Decoupage Problems
Learn how to fix decoupage problems.
Decoupage is one of my favorite ways to embellish furniture, but sometimes it doesn’t go as expected.
Here are some fixes to common problems with mod podge and other decoupage glues.
This post contains affiliate links. By purchasing an item through an affiliate link, I earn a small commission at no extra cost to you. As an Amazon Associate I earn from qualifying purchases.
How to Fix Decoupage Problems
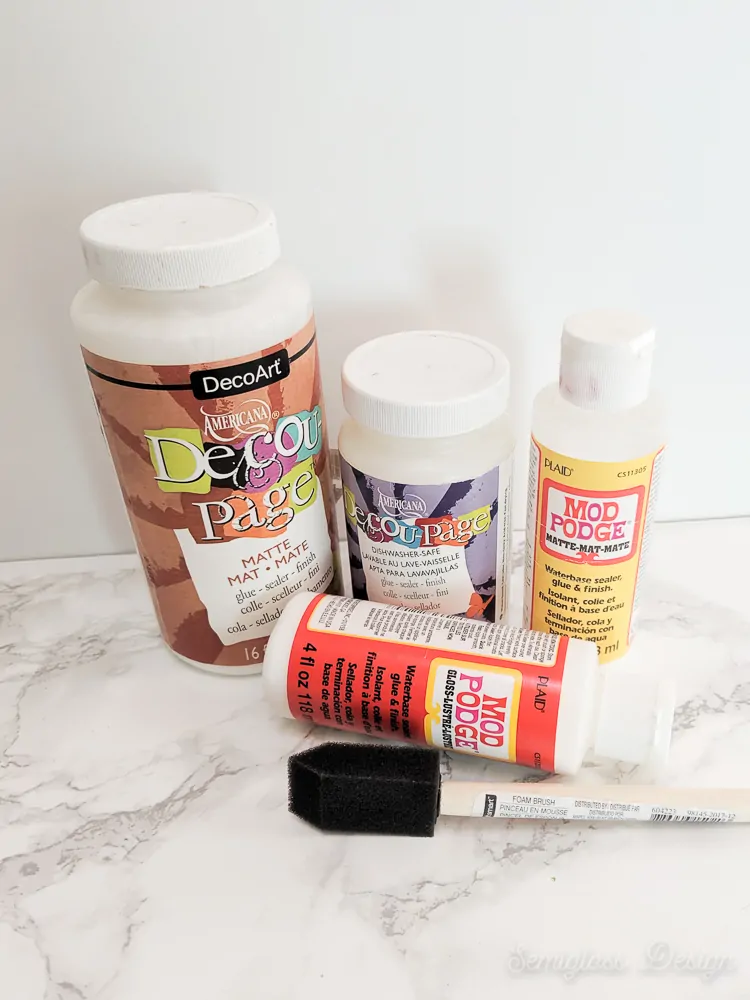
Okay, for the record, Mod Podge is not my favorite decoupage glue. And I’m not just saying that because I was given glue by a different brand.
I want to love it because it has groovy packaging that reminds me of the Brady Bunch. And the name is cool.
But I don’t. It’s too thick, prone to problems, prone to staying sticky after it dries and it gets clumpy.
So my #1 tip for fixing decoupage problems is to try a different glue.
I love Decou-page glue because it’s so much thinner and easier to work with. Even after having the same jar for 2 years, it hasn’t thickened or gotten gross.
Another option is to use watered-down white school glue. It doesn’t seal the piece, but I don’t like decoupage glue for a final sealer anyways. (I like polycrylic – spray for small projects and the paint on kind for furniture.)
My next tip is to practice on a small piece first to get the hang of how much glue to use. It’s probably less than you think!

Bubbles and Wrinkles in Decoupage
Bubbles and wrinkles in decoupage paper can feel so disheartening. But it’s a pretty common problem that’s pretty easy to fix.
Causes of Bubbles and Wrinkles in Decoupaged Paper
- Too much or too little glue. You want the paper wet, but not over-saturated.
- Humidity. High humidity or temperatures can cause the paper to dry at a different speed than the glue and it shrinks.
- Not smoothing enough as you work. Smooth the paper with your fingers as you go. You can also use a brayer, bone folder or even an old gift card.
- Some papers are prone to bubbling and wrinkling. I find thin papers the easiest to work with, but I’ve head other people say the opposite. Try different paper thicknesses to see what works best for you.
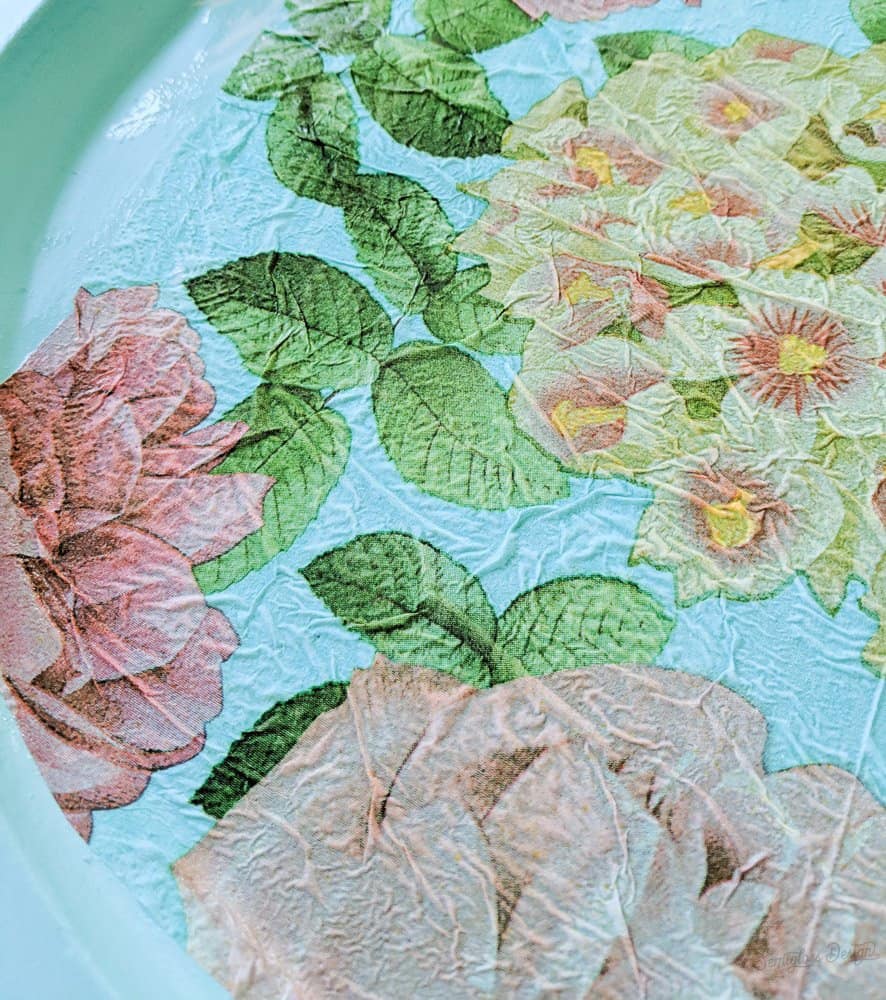
How to Fix Bubbles and Wrinkles
- Lightly spray the piece with water to moisten the paper. Then apply more glue, smoothing as you go.
- If the bubbles are larger, you can use a pin to poke holes and apply more glue (water it down a bit to make it easier to spread.) Try to saturate the bubble and smooth as you go.
- Try different paper thicknesses to see what works for you. I find thick paper extremely hard to work with.
- Give it time. Sometimes the wrinkles relax on their own as they dry more.
- Sit something heavy on it. Use wax paper so that the heavy object doesn’t adhere to the glue.
- Sanding. For wood or furniture, sanding is a good option that creates a subtle distressed look. Use a high grit sandpaper (400).
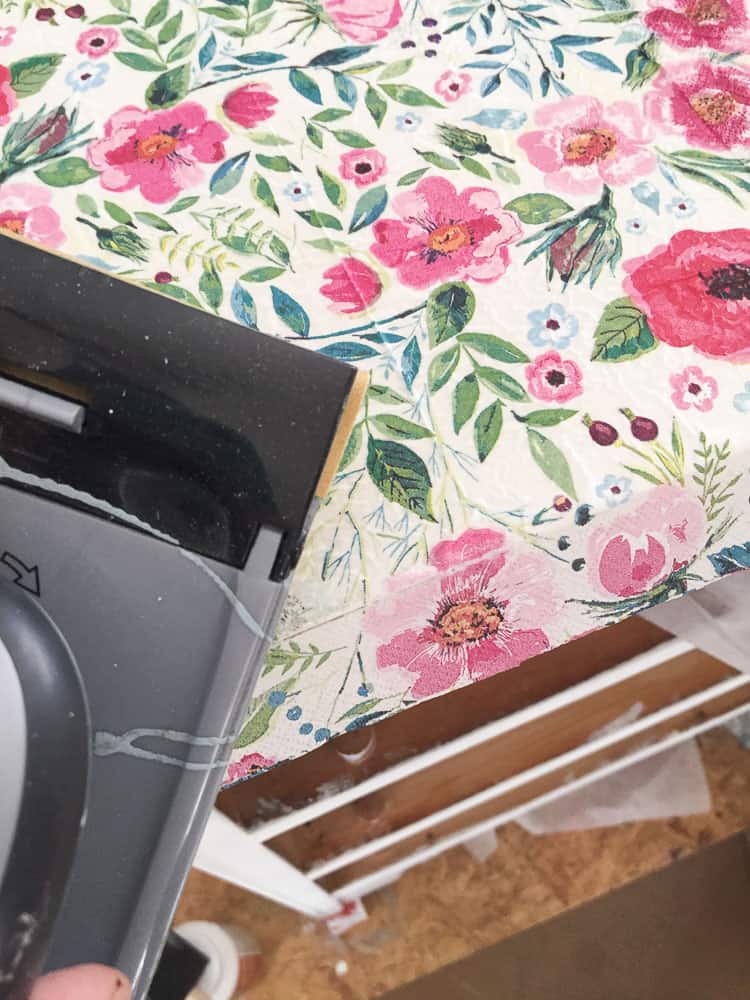
Streaks in Decoupage Glue
Don’t let streaks and brush strokes in decoupage glue ruin your decoupage project.
Causes of Streaking in Decoupage Finish
- Applying glue over almost dry glue. This pulls the dry glue away from the surface and creates streaks. In the future, let wet glue dry even if it means skipping an area. Get that area in the next coat and work quickly keeping a wet edge.
- Glossy finishes. Glossy finishes are prone to showing flaws and brush strokes more than matte finishes.
- Uneven application. It may appear streaky because some areas have thick amounts of glue and some may be missing glue.
How to Fix Streaks in Decoupage Glue
- Lightly sand the streaks with 400 grit sandpaper. This will not destroy the finish, but just polish the clear coat. (I use this same technique when sealing stain on furniture.)
- Don’t use decoupage glue as a top coat. I prefer polycrylic, which will dry to a harder, more durable finish.
- Apply several thin coats, rather than one thick coat. Water the glue down if necessary.
- Always use a matte finish. It’s more forgiving and disguises flaws like brush strokes more.
- Use a foam brush instead of a bristled brush. A foam brush is perfect for decoupage glue because it won’t leave brush strokes.
Tackiness in Dried Decoupage
It’s been days and your decoupage glue still feels sticky. This is an easy problem to fix.
Causes of Tackiness in Decoupage Finish
- Humidity. High humidity makes it harder for glue (or paint for that matter!) to dry.
- Not waiting enough time. Decoupage glue needs at least 2 days to dry completely.
- Applying a 2nd coat before the first has dried. If the first coat isn’t all the way dry, it’s harder for the 2nd coat to dry.
- Old glue. As decoupage glue gets older, it thickens. This can cause a sticky finish.
- Glossy finishes. Glossy decoupage glue is more likely to stay tacky than other sheens.
How to Fix Tackiness
- Give it time. It needs at least 2 days to dry completely.
- Move it to climate controlled work area and let it dry out some more.
- If it’s still tacky, seal it with polycrylic. This seals in the tackiness and provides a durable surface.
- Use a different sheen. I prefer matte because it’s easier to work with.
Glue Dries White
There are many reasons why decoupage glue turns white when drying.
Causes of Decoupage Glue Drying White
- Moisture issues. This could mean the piece itself is too wet or the environment is too humid.
- Old glue. Old glue can get booger-y and clump up into white lumps.
- Using too much glue. Thick coats of glue take forever to dry.
- Glue isn’t dry. The decoupage glue looks white when it’s wet.
- It can also happen on older pieces that you’ve gotten wet. (Just let it dry and it will go away on it’s own. But add a better top coat like polycrylic to prevent this in the future!)
How to Fix
- Let the piece dry out. Try working in a climate controlled environment. Use a fan if necessary.
- Re-wet the glue and try to remove the white clump.
- Let it dry for longer.
Starting Over
It’s happened to the best of us.
What you thought would be an awesome project needs to be scrapped. I once tried to apply tissue paper to a shelf with disastrous results.
So the bad news is that you need to start over.
The good news is that luckily most decoupage supplies are pretty inexpensive so at least you’re not out of money.
If possible, remove the paper while wet. If not, re-wet the paper with a wet towel until it’s saturated.
Use a plastic putty knife to scrape away as much paper as you can.
Add more water if necessary and keep scraping it until it’s gone.
Let the piece dry completely before restarting the project.
How do you clean decoupage glue from a brush?
All decoupage glue is water-based, so it’s easy to clean with water. However, I prefer using a cheap sponge brush because the glue can ruin paintbrush bristles.
Rinse the brush under cool water until the brush looks clean. If necessary wash the brush a bit more with a little bit of dish soap.
You might also like:
- How to Apply Polycrylic without Streaks
- Decoupaged Flower Pot
- Easy Decoupage Napkin Coasters
- How to Make Paint-Poured Coasters
Pin for Later!

Emy is a vintage obsessed mama of 2 DIYer who loves sharing affordable solutions for common home problems. You don’t need a giant budget to create a lovely home. Read more…

Is it possible to repair some flaws in the finish of a decoupage piece? I inadvertently rubbed something against the front and there are now superficial “scratches” which I can’t rub away. Thank you if you can give me some advice.
Sally Knox, Wheatfield, NY
It’s hard to say without seeing the damage. Are the scratches in the topcoat? If so, apply more topcoat. If the scratches are in the decoupage paper, you might need to apply tiny bits over the scratches to disguise the damage. Then seal the whole thing again.
If it is a small scratch I have used a permanent marker to fill in if you have one the same color
the glue has a white film, no clumps. Each brush stroke left the stroke while looking like milk. It’ still smooth, just not clear on the wall.
I would give it a few days to dry and see if it clears up. If it doesn’t you might want to start over with a nice fresh bottle of decoupage glue.
Some of my tissue rubbed off exposing the paint. Can I just patch the missing tissue and redecoupage
Yes, that is how I would fix it. Then seal with polycrylic to prevent it from happening again.
Miss Emily,
My daughter in love, Jessica, just discovered that her Papa’s pharmacist diploma, which was originally professionally glued to wood some how, is now peeling away. Can you please help us fix it?
Thank you,
Julie
Hi Julie,
I would try to lift up the paper and get glue under it. You might need to use a glue injector (looks like a small syringe). Then, press the paper down and squeeze out any excess glue. Wipe it away. Let it dry and add 2-3 coats of decoupage glue on top. That should fix it. Good luck!
Miss Emy, thank you for this great advice. We will try it and let you know how it works!😀
Thanks, Julie
Hi Miss Emi,
I did 24 decoupage plates with material for gifts . A few of these plates the edges lifted up some. How. CAn i fix this?
Try to get glue under the raised edges and smooth it well. You might need to use a needle to poke holes in the fabric to get glue under it.
Is there anyway to get rid of the wrinkles after using the polyacrylic spray? I thought the spray would repair everything 😩
Unfortunately, probably not. If you didn’t coat it very much, you can see if the paper is still able to get wet and maybe you can smooth it then. It might be easier to start over though. Use a very thin coat of glue next time.
Liked your comments for fixing decoupage projects. However I find decoupage paper rather expensive, so I use old magazines. Is there any way to use magazine paper without lines showing? I do year the edges for a feathered edge, but when I put the dealer in the lines still show. Any advice?
Thank you
Sorry, I don’t have any advice for this. Thicker paper can be harder to use.
Try very lightly sanding the torn edges with 400 high grit paper or “00” or “000” steel wool. You can then stipple along the sanded edges with your background paint for an even smoother looking transition IME.
My decoupage has void spot in it. Like part of the napkin color is missing. Why has this happened and how can I fix it
The napkin may have gotten too wet and disintegrated. Or it could have been a flaw in the design, to begin with. Find the same design spot on another pattern and layer it over the missing spot.
Hi,
Is Polycyclic heat resistant and waterproof. I need to find a sealant for my coasters and nothing seems to work.
Thank you
Jacqui
Sorry, I meant Polycrylic.
Polycrylic is waterproof but not heat resistant. You might want to try epoxy. I used it on my countertops and was able to sit hot pans on it all the time.
Is there anyway to correct decopauge on wood mistake I’m doing the project were you place printed pictures face down on wood then let dry and remove paper with damp rag , and I use heat gun to dry it it’s leaving white streaks on the picture
If it dries and there are still streaks, you might need to start over. It sounds like the ink from the paper prints onto the wood with that technique. If so, it will need to be sanded to remove as much of the image as possible. Then start again and don’t use a heat gun.
An easy and inexpensive way to flatten or spread the lumps and lines, is to get a handful of household clingfilm, crunch it up into a loose ball, and gently press on the bubbles etc, and slowly push them In the direction you Want. Cling film doesn’t stick to the paper. I use it on napkins as it stops them ripping. 😉
Hello everyone. Wondering if someone may be able to help. I have a 50 year old decoupage picture my mom made and it’s showing some wear. The edges are peeling up on some of the edges. Can I reseal it with something. It’s just a piece of wood (frame) that was previously sealed. Thank you for any suggestions.
You have a few options. Since it’s a sentimental piece, you might want to just add a piece of glass over it or put it in a shadow box to keep it as it is. You could also try to get more glue where the edge is coming up and then reseal it.
hi ,
I got some white fabric to cover some old wardobe cupboards.
I used way too much glue in some areas ,now the heavier areas you can see through the white fabric, like its bleeding through the fabric the glue .
How do I fix it .The fabric was very expensive.
the matte modge podge I used.
kind regards
Lisa
I would see if I can remove the fabric with water and wash out the mod podge. It sounds like the cupboard wasn’t painted white beforehand. Paint it white to avoid being able to see through it. Then replace the fabric.