How to Paint a Dresser 2 Different Ways
Learn how to paint a dresser two different ways. For more furniture makeovers, click here!
I didn’t set out to paint this dresser twice, but that’s how it happened. The couple who bought my gray washstand were looking for a dresser with the same finish. The only dresser I had in my inventory at the time was already 95% painted, but I knew that it would be perfect for their purposes. So I finished the paint job and photographed it and then I repainted the dresser for them. Keep reading for my tips on painting dressers!

Country Chic Paint provided me with paint for this project, but all thoughts and opinions are my own. I would never recommend products that I wouldn’t buy or use on my own. Your support helps me make more projects like this one!
The Dresser Before
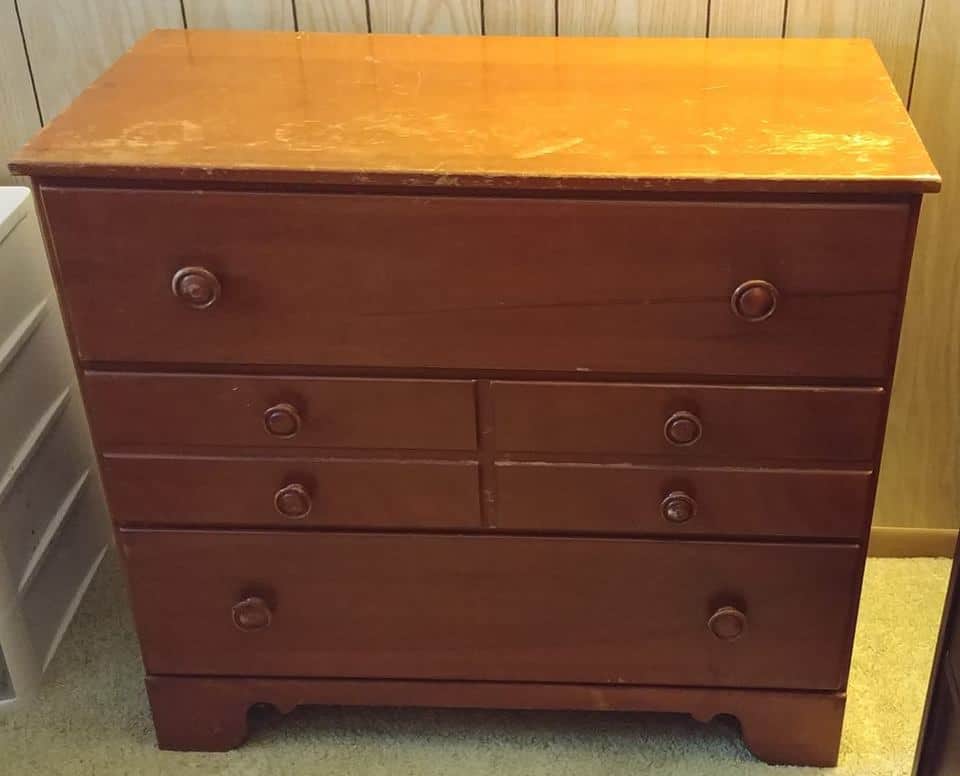
This dresser was small and surprisingly heavy! It’s solid maple, with the clean lines that I love.
How to Paint a Dresser 2 Different Ways
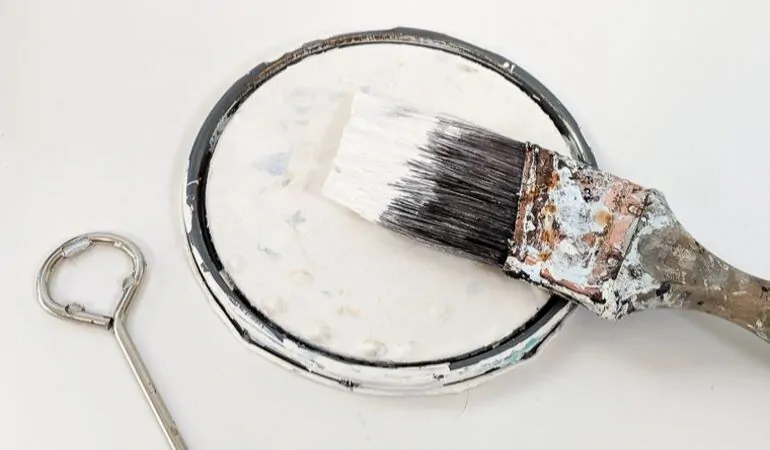
Supplies Needed
This post contains affiliate links. By purchasing an item through an affiliate link, I earn a small commission at no extra cost to you.
Look 1: Red and White
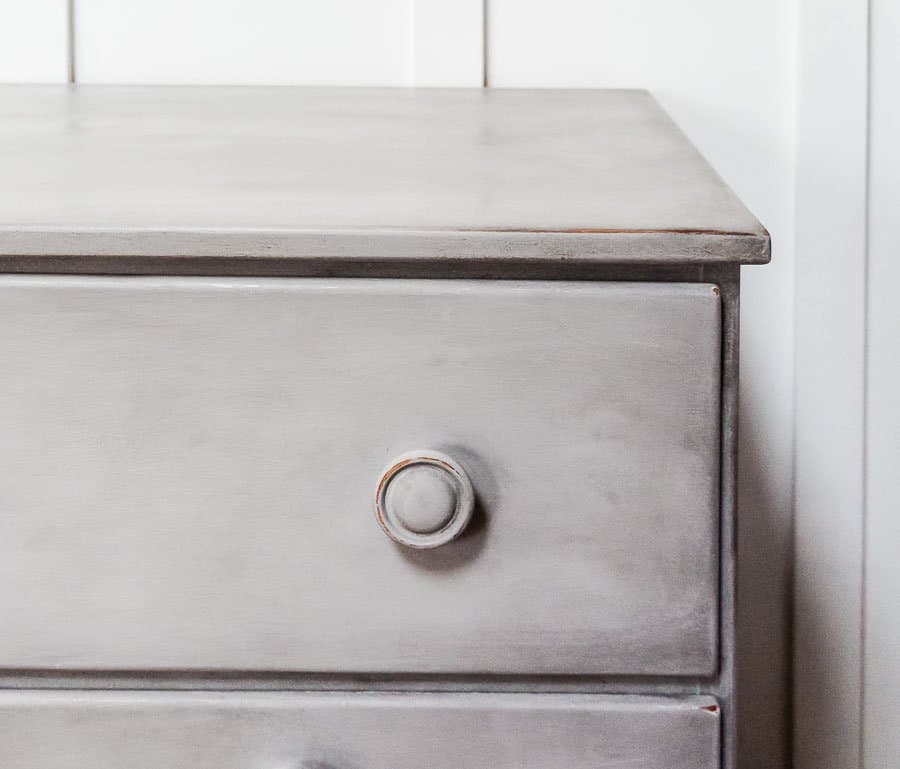
Look 2: Weathered Gray
How to Paint a Dresser: Look 1 – Red and White
- Thoroughly clean the dresser to remove any old oils and dirt. Remove any hardware and make any repairs necessary. Sand lightly if necessary.
- Red paint is notorious for being hard to work with. This is because red paint is made with a clear base that red pigment gets added to. Colors that start with a white base cover are easier. Next time I paint with red paint, I will base coat the piece in gray paint first to reduce the number of coats needed to cover the dresser.
- Remove the drawers so that you can get to the entire dresser body.

- Paint the entire dresser body with Country Chic Devotion. As I said, this color took a lot of coats of paint, but red always does. Be sure to look at it in natural light to see any spots that need touch-ups.
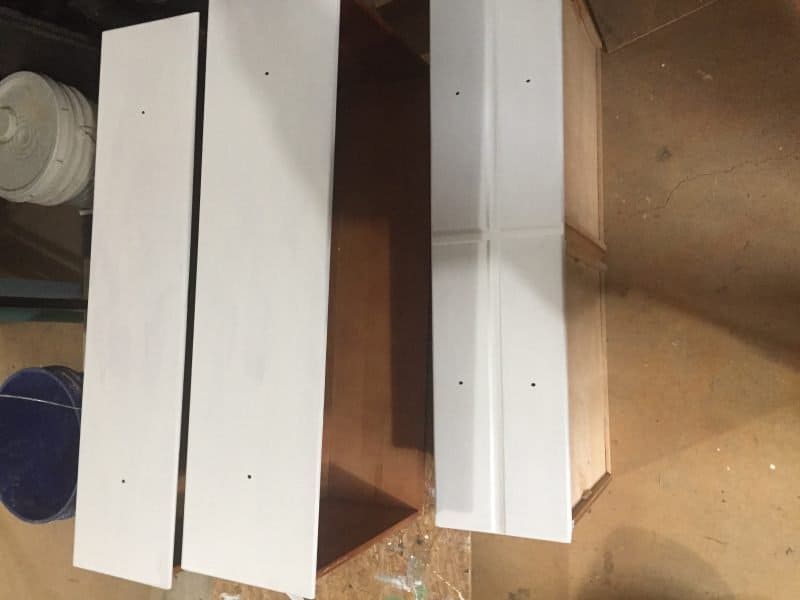
- The drawers were primed and then painted in Country Chic Simplicity. I face them up to access the entire surface. Don’t forget the edges! Primer helps white paint cover with fewer coats. Read more about painting furniture white here.

- This piece did not end up with a top coat because I sold it before it was finished. If I would have kept it like this, 2 coats of polycrylic in matte would have been my choice for the top coat.

- Once dry, I added the knobs. Changing knobs can drastically change the way a piece of furniture looks.

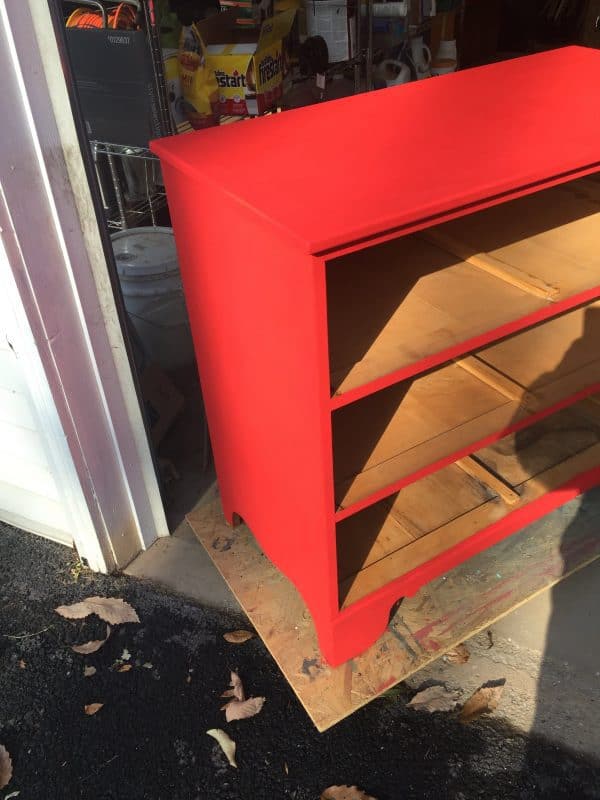
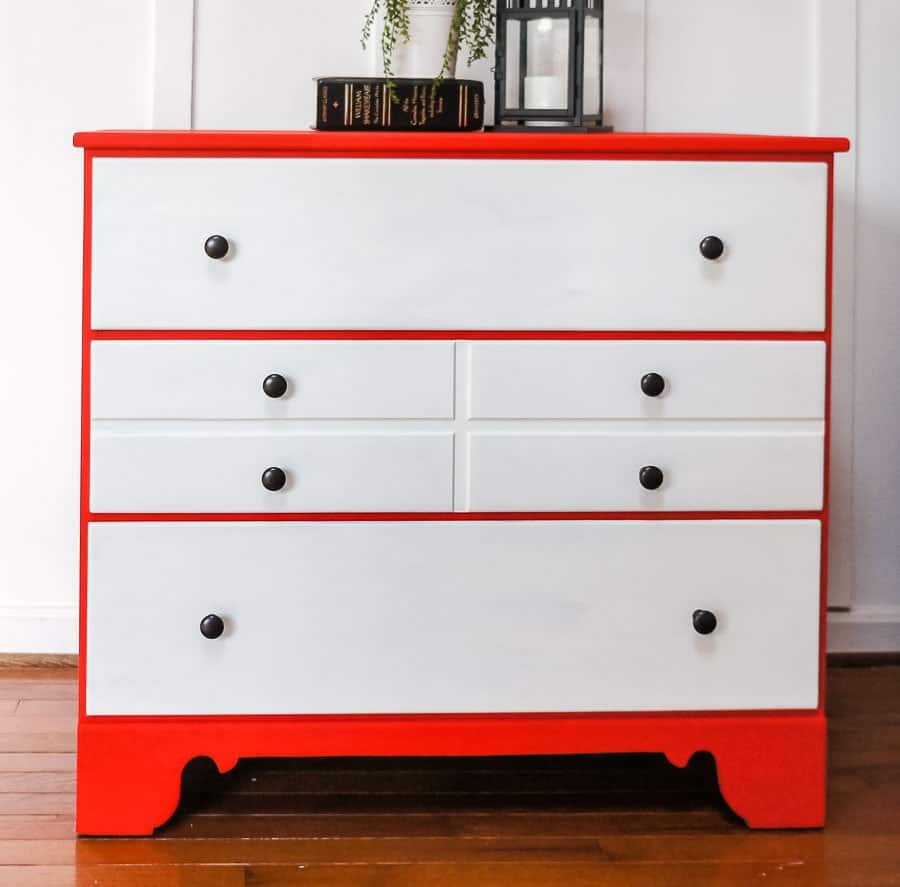
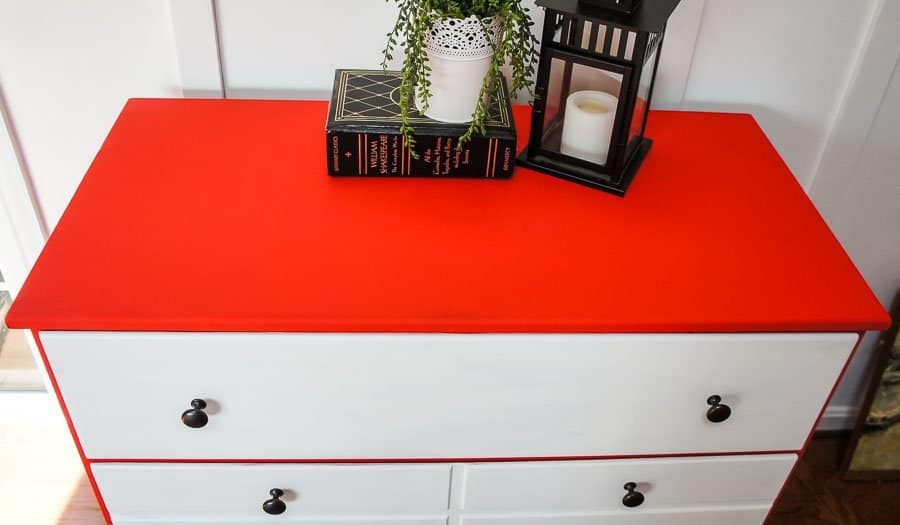
Isn’t the red pretty?
Tips for Painting Over Previously Painted Furniture
- This dresser was freshly painted and didn’t have a top coat. If your furniture has a top coat (look for a shiny finish), consider stripping it first. Stripping furniture is easier than it sounds, but a bit messy and time-consuming. I really like citristrip, which is non-toxic.
- If stripping isn’t an option, sand it. Removing the paint completely to bare wood isn’t necessary. You just need to scuff up the wood so that the new paint will stick.
- If the paint is in bad shape and peeling, try to sand those spots smoothly.
- For this dresser, I sanded the edges where I would be distressing. Another option is to paint the edges a dark brown like Dark Roast or Driftwood to mimic the look of wood under the distressed spots. Of course, some colors peeking through can look nice as well. Not in the case of red under gray, though.
How to Paint a Dresser: Look 2 – Weathered Gray
An in-depth tutorial for this look can be found in this post about black wax, but here’s a quick overview.
- Make sure the dresser is dust free before painting. The dresser was wiped down with a damp rag to remove any dust from the sanding.
- Remove the hardware.
- Start painting once the dresser is dry. Pebble Beach has excellent coverage and it only took about 2 coats with a little touch-up.
- The drawers were painted without hardware for the first coat. Then I installed the wooden knobs and painted them on the 2nd coat.
- Distress as desired. I prefer a softer distressing. For this piece, I used a combination of sanding and wet distressing for a more naturally worn look.
- Once the paint dries on the final coat, you can wax it. Always start with a clear coat of wax and thoroughly cover the surface. Using a wax brush really helps with the application and spreading the wax around.
- Buff with a clean, lint free rag. I normally do one side at a time. For example, I apply the wax to the entire left side, buff it and then move on to another section.
- Apply the black wax next. I added more in the corners and dry-brushed it into the centers. Blend well, adding more wax as needed.
- To tone down the black wax, you can apply more clear wax. If you want an even more subtle blend, you can wipe it down with mineral spirits, which blends the clear wax and the black wax together. For mineral spirits, I prefer the kind in the plastic bottle, because I can’t open the metal cans.
- Blend it until you’re happy with the results.
- Since I used mineral spirits, I added one last coat of clear wax over the entire piece to ensure that it was well protected.


A Few More Tips for Painting Dressers
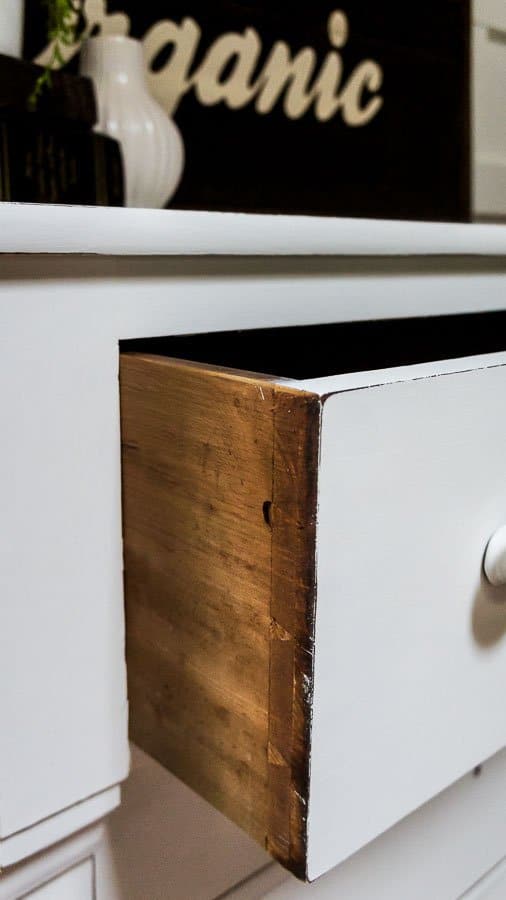
- This dresser has overlay drawers, which means that they partially cover the dresser’s body. This type of dresser is easier to paint.
- Some dressers have inset drawers which means that they fit perfectly in the dresser body openings. These are more difficult to paint because sometimes there are tiny areas on the sides that show when the dresser drawers are closed. It’s a good idea to place the drawers in their spots and make sure that those areas are painted.

- Too much paint on the sides and tops can make the dresser drawers stick. My solution is to sand those spots to bare wood where possible. Sand the dresser body on the sides too if necessary. That tiny amount of paint can make all the difference in drawers being easier to open and shut.
- For the tops of drawers, I usually sand the bottom edge instead. It usually removes enough paint to make the drawers work better. Sand wood off if you need to.
- If they still stick, my solution is waxing anywhere the wood slides against another piece of wood. In older pieces, that’s the drawer bottom edges and sides, plus the side rails in the dresser body. Apply wax with a brush and buff it off. Wooden slides can also be waxed.
- The drawers in older dressers were built for exact spots. They may look the same size, but they’re typically off by a tiny bit. Save yourself some trouble and number the drawers on the back in chalk to make putting them back easier.
For the prettiest paint colors around or just to see beautiful furniture makeovers, be sure to check out Country Chic Paint!
You might also like:
- Rustic Green Painted Dresser
- How to Decoupage a Dresser
- Ombre Painted Dresser
- How to Line Drawers in a Dresser
Pin for Later!

Emy is a vintage obsessed mama of 2 DIYer who loves sharing affordable solutions for common home problems. You don’t need a giant budget to create a lovely home. Read more…