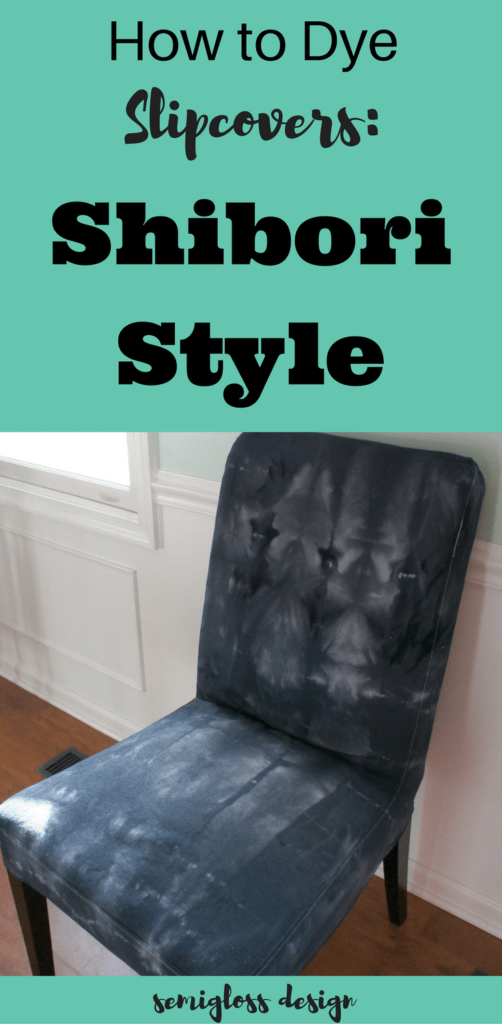
Dyeing Slipcovers: Shibori Henriksdal Hack
Dyeing slipcovers is a great way to get a custom look without spending a ton of money.
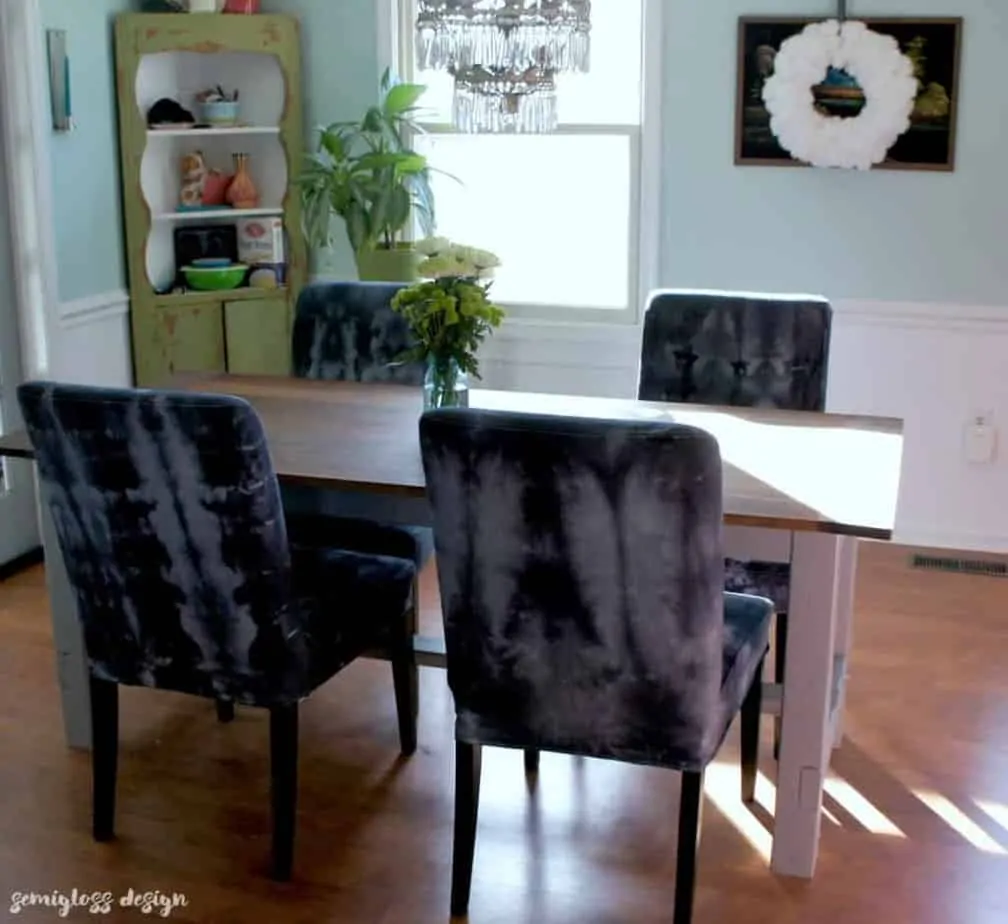
When I bought my IKEA Henriksdal chairs, I knew that white slipcovers were not a great idea, but the price was right. At less than $10 a piece, they don’t feel too precious and they’re easy to replace if we ruin them.
The real reason that I bought them was because I knew that the white base would be perfect for dye.
I love dyeing stuff because it’s an almost instant transformation. Shibori dyeing is especially fun, because it’s like tie dye for grown ups.
My last project was pillows that I did with indigo dye, but for my dining room, I didn’t want indigo. I considered fun colors like magenta or chartreuse, but I ended up with black.
Learn how to achieve this Henriksdal hack and add personality to everyone’s favorite Ikea chair. Dyeing slipcovers is a great way to add some boho style to your home.
Slipcover Dyeing FAQs
Can you dye IKEA slipcovers?
Yes, you can dye IKEA slipcovers. Make sure they are 100% cotton for best results. Other fabric types will need different types of dye.
Large slipcovers will require using your washing machine to dye the fabric. You may also be able to fit it in a large plastic container or a bathtub if you’re not sure how to make your washing machine stop mid-cycle.
Can you use Rit dye for slipcovers?
You can use Rit dye for slipcovers, but I’ve never had good results with Rit dye. It fades and even rubs off onto clothes.
I prefer Jacquard dye for problem free dyeing. The color variety is amazing and I’ve always gotten good results from their products.
What is soda ash?
Soda ash is also known as sodium carbonate. It’s used to help the dye stick to the fabric.
What is shibori dyeing?
Shibori dyeing is a Japanese dyeing method that typically uses indigo dye. Different folds or tying methods create different designs for a variety of looks.
I love the look so much that I painted my walls to look like shibori wallpaper.
Supplies for Dyeing Slipcovers
This post contains affiliate links. By purchasing an item through an affiliate link, I earn a small commission at no extra cost to you.
- Slipcovers (IKEA Henriksdal)
- 5 Gallon Bucket (or larger container if your slipcover is huge)
- Dye (Jacquard)
- Soda ash
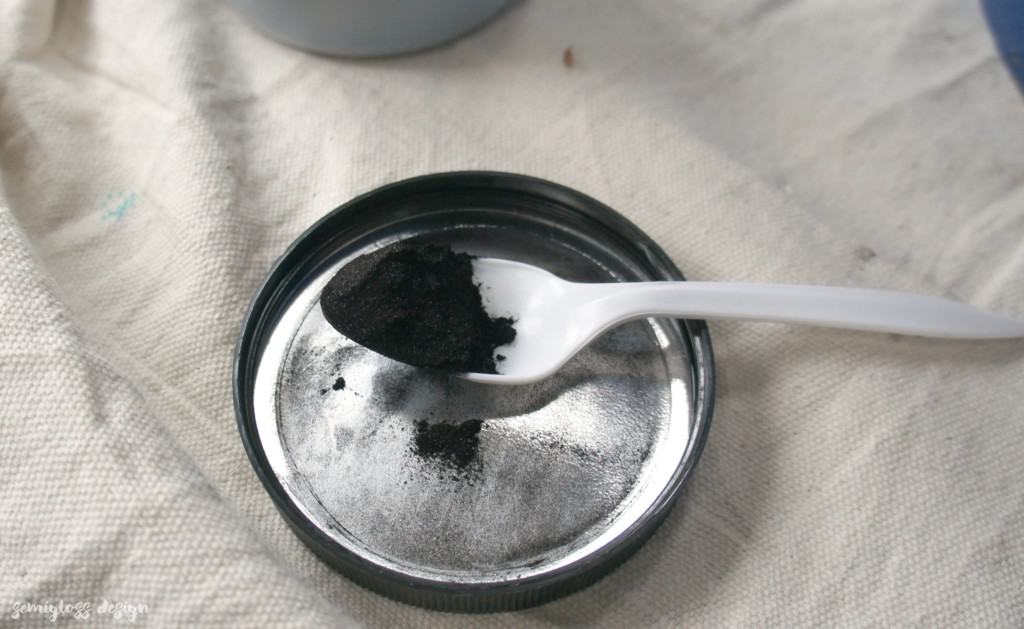
- Plastic spoon
- Salt
- Rubber Bands (I like thick ones)
- Stir stick
- Drop Cloth
- Gloves
Henriksdal Hack: How to Dye Slipcovers
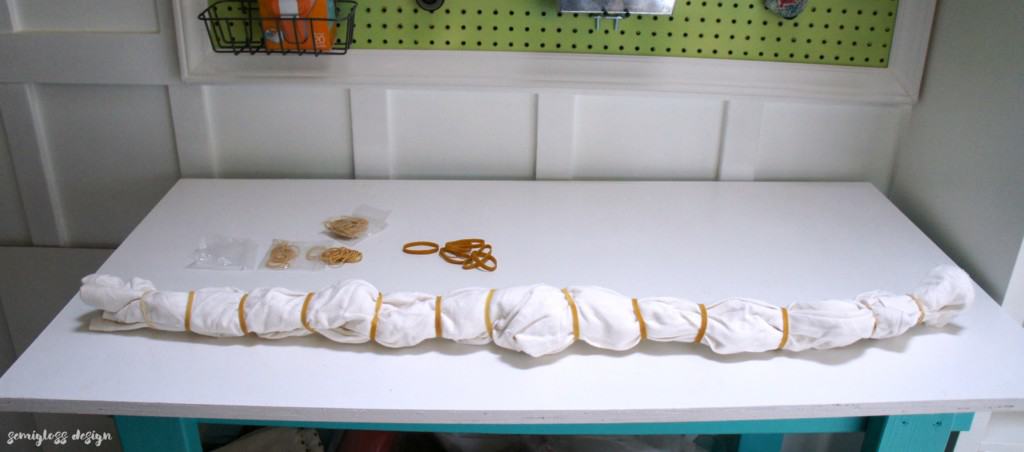
- Start with inspiration. There are so many patterns for shibori, so I looked at pinterest. However, the best source of information for me was a Skillshare video (that link gives you 3 months of free access for all kinds of creative classes. I’m in love with skillshare.) I knew that I wanted a pattern with very little white space, so my normal favorite itajime (triangles) was out. I chose the itajime accordian fold pattern instead. Lost already? It’s cool; I’m going to explain it step by step.
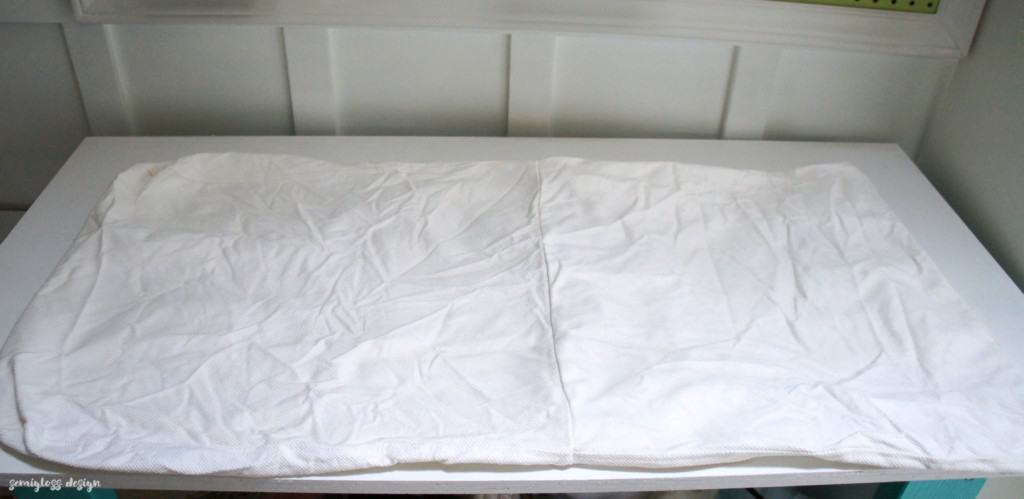
- Start with clean slipcovers. Wash them even if they’re unused. Fabric comes with chemicals on them that will effect the outcome. Let them air dry or dry them on low so they don’t shrink. The wrinkles just add to the pattern.

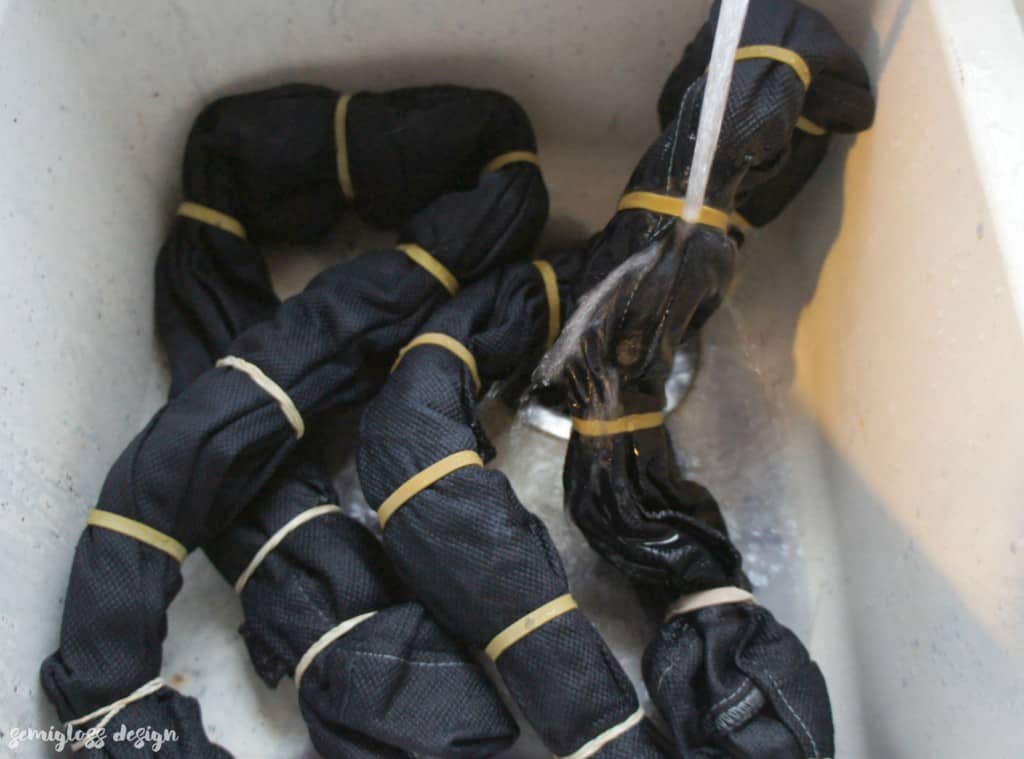
- Fold your slipcover according to your pattern. My pattern required me to accordion fold my slipcover and add rubber bands. Start at each end and work your way to the center, spacing your rubber bands as desired (mine were bout 3-4″ apart.)

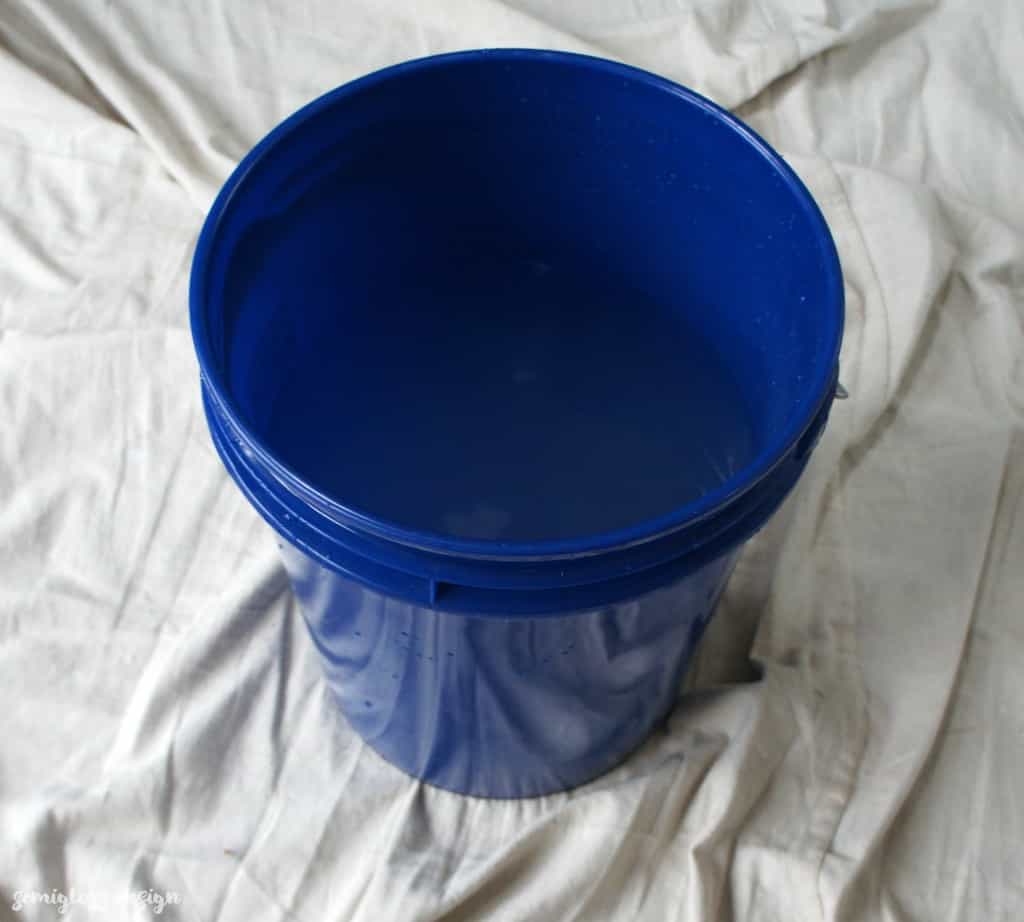
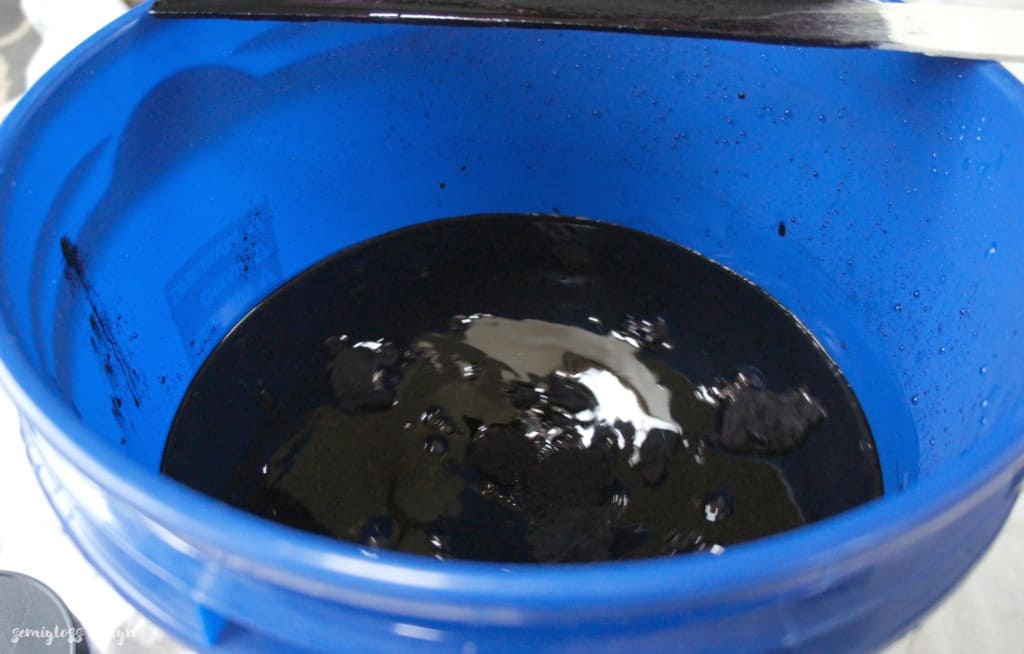
- Fill a 5 gallon bucket with 3 gallons of hot tap water. It doesn’t have to be precise. Guesstimate if you need to.
- Add salt, more for dark or vibrant colors. I added almost the entire container and stirred until dissolved.

- Add dye. I added 9 heaping plastic spoonfuls in and stirred it well. It doesn’t have to be perfect. Don’t breathe it in unless you want black boogers.

- Stir well. When you think it’s stirred well, stop the flow of the water by stirring gently in the opposite direction. There will probably be a clump of un-stirred dye at the center of your dye whirlpool. Make sure to break the clump apart and stir it well until it disappears.

- Wet slipcovers and submerge in dye. I was able to fit 2 slipcovers at a time. Make sure they are completely submerged. If you’re doing larger slipcovers, do one piece at a time.
- After about 15 minutes, I added about 1/3 cup of dissolved soda ash to the dye bath and stirred well. It’s easy to dissolve; just add hot water and stir until it’s dissolved.
- Let them sit for another 30 minutes. For really dark colors, leave it for longer. Seriously, nothing will happen if you let it sit for too long. Dye is super forgiving.
- Then pull the slipcovers out and rinse them. DON’T REMOVE THE RUBBER BANDS YET! This process was messy and took forever. I tried to rinse them until the water wasn’t pitch black anymore. It wasn’t clear either. Your sink will be a bit stained or maybe you’re lucky and aren’t stuck with a crappy white sink.

- Now you can remove the rubber bands. It might not look that great yet. Try not to pay too much attention to them.
- Throw them in the washing machine to wait for the other 2 slipcovers.
- Fold the other 2 slipcovers in the same manner as before.
- Your bucket already has dye, but a lot of it got soaked up, so add a few spoonfuls of more dye. I added about 5 and they turned out about the same color.
- Repeat steps 6-13. Yes, it’s necessary to add more soda ash as well. This activates the dye.
- Run the slipcovers through the washing machine with a little bit of laundry soap. I ran them on delicate because it’s a much shorter cycle and I was growing impatient.
- Run a cleaning cycle on your washing machine so that all excess dye disappears like magic. You don’t want to go to wash your favorite white shirt and get dye all over it. It might be a good idea to wipe the top of the machine down as well.
- When they’re done, dry them lightly. As with all IKEA slipcovers, don’t dry them all the way. They go on much easier when they’re a bit wet, plus you don’t want to shrink them.
- Bask in the glory. Don’t murder your spouse when he says they look purple. He’s color blind, therefore his opinion on color is null and void. Besides, they’re beautiful!!!

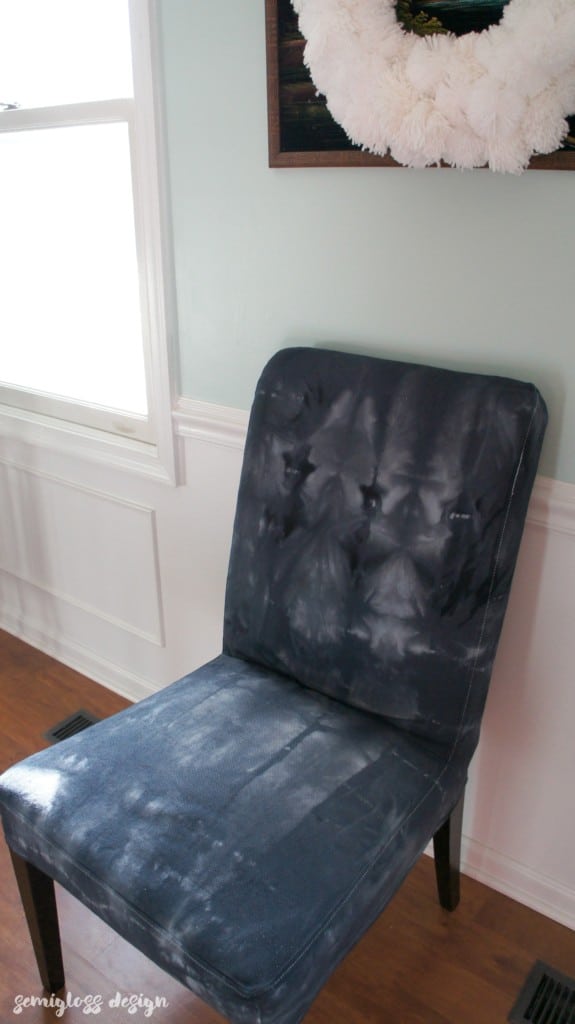
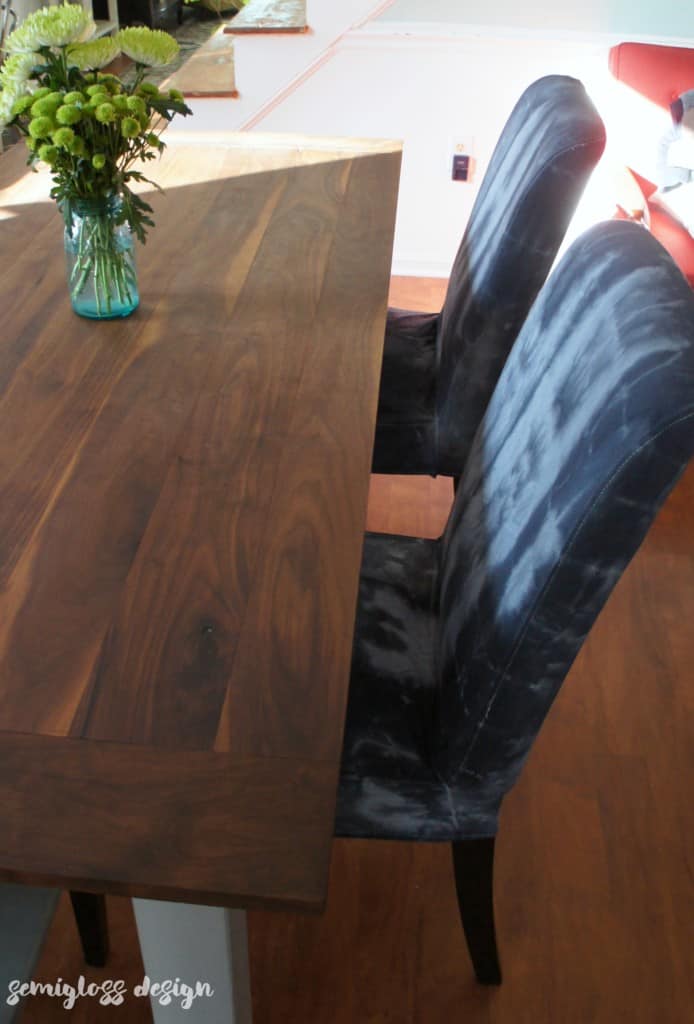
I love them so much. They make my dining room one step closer to my dreams. And although they aren’t a perfect black, they are a very lovely dark gray. When I glance at them, they remind me of velvet. All the heart eyes here.
Dyeing slipcovers is kind of like having a baby. It’s a pain in the ass, but the results are super cute.
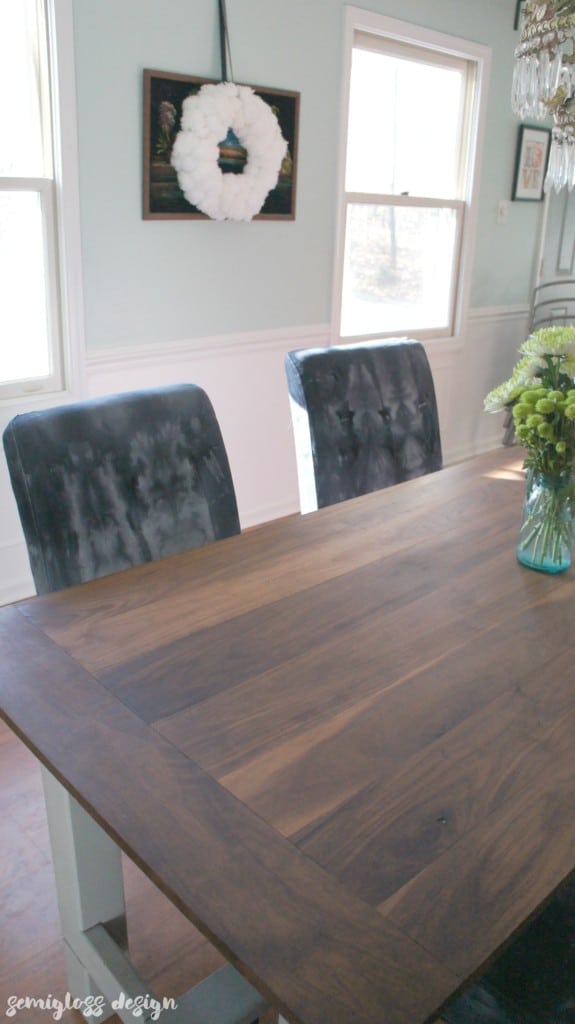
They look pretty from every angle.
So what do you think? Are they better than the unrealistic white slipcovers? Have you done any Henriksdal hacks?
Update: As of May 2018, the chairs still look fantastic. They do a great job of disguising kid and dog dirt. Since they’re slipcovers, I can easily remove them and wash them. I still love my dyed slipcovers.

Emy is a vintage obsessed mama of 2 DIYer who loves sharing affordable solutions for common home problems. You don’t need a giant budget to create a lovely home. Read more…
they turned out so great! i love the pattern and color! awesome job!
Thanks Cassie! I’m so happy with them. And now they’re kid-proof!
Gorgeous! I’ve got shibori plans for a table runner and some dish towels. And maybe some pillows. And a duvet. And and and…
Shibori all the things! I feel the same way!